#that green ‘pickle’ was just a vegetable like them that got soaked into brine to be made the way it is
Text
yk…for a long time..I thought cucumbers and pickles were two different things…like..I thought pickles were just pickles and I didn’t realise they were called “pickles” because they were literally pickled, I just thought pickles and cucumbers were cousins and I didn’t realise that pickles are actually cucumbers, but they just put them in brine and got them pickled, which is the reason why they called them pickles…😭🤦🏻♀️
#i only started to make the correlation when I realised that the turshi (pickled vegetables) that my mother likes to have with her lunch-#-is just pickles#like#i started thinking#if they can take onions carrots lemons and olives and soak them into some sort of vinegary? brine to make them the way they are#then#…#that green ‘pickle’ was just a vegetable like them that got soaked into brine to be made the way it is#so if it was a normal vegetable..#what else could it be bit a cucumber?!#i was so shocked#it was like#my whole life was a lie#i was like#so THATS the reason for the lack of cucumbers in my McDonald’s burgers! they just brine them first and and call them pickles!#which means there actually ARE cucumbers in my burger!! 😱#😂😭#i don’t know whether to laugh or cry at my younger self’s foolishness…
2 notes
·
View notes
Text
10 Pinterest Accounts To Follow About Bamboo Pickle
One regional institution in this Group showcased a absolutely free bloody mary content hour just about every Sunday. Patrons had been inspired to provide their preferred bloody mary garnishes plus the liquid was no cost for pleased hour. Folks introduced celery, cucumbers, pickles and a range of veggies. The pickles are my beloved. I've applied my house made dill pickles For many years.
I typically make pickles among two techniques, possibly fermented or processed. I decided to consider a unique system a person yr. I produced them and introduced them on the Sunday content hour and declared The brand new pickle. I'd not tasted them just before. They were the worst tasting pickles at any time. I vowed hardly ever to create them once more.
The following summer months I used to be on the lookout by means of my pantry and ran throughout a number of jars of that icky pickle. I checked out them they usually were being even now sealed. I opened a jar and was gonna dump it out but decided to taste just one. It was scrumptious. I introduced some to the delighted hour. Absolutely everyone agreed that it absolutely was the most effective pickle for a bloody mary and asked wherever I got it. I told them it had been that icky pickle from the yr just before.
Had I discarded those few jars I found I might haven't produced those pickles once again. I make them each and every year. These pickles are aged within a neat dark put for a minimum of six-months or maybe more. http://www.thefreedictionary.com/bamboo pickle Maintain them during the fridge right after opening. Here is the recipe. Slice cucumbers into 4-8 spears according to the dimensions with the cucumber. Soak in ice drinking water for 3-hrs. Drain and pack into sterile jars. leaving one-1/2 inches of head Room. Add one-teaspoon mustard seed. Generate a brine of 3-quarts distilled vinegar, 3-cups sugar and one-cup canning salt. Deliver to some boil and pour around cucumbers in jar. Place the addresses on tightly right away. Remember to label them with the day they had been produced, and do not open up for a minimum of six-months or even more.
Uncover glass pitchers at
Practically 4000 many years ago, Pickles ended up organized applying cucumbers. bamboo pickle Pickling procedure is utilized to protect foods. All those foods which run from year are preserved by pickling. The pickling system imparts mouth watering flavours for the this products. Vitamin B written content of the pickled food stuff is enhanced. Vitamin B is made by germs through the pickling approach.
For this reason, it is a common sight Within this place to find a jar crammed with this product or service. Not just in India but within the US as well as other nations too this merchandise are consumed in substantial portions every year.
youtube
This item are geared up from Uncooked mango, cucumber, carrot, chillies, etc. Among the most well-liked this products, certainly, is definitely the mango pickle. It truly is beloved by Practically Absolutely everyone and will be well prepared during the season of Uncooked mangoes. Mango pickle is eaten with lots of dishes together with parathas, stuffed bread, rice preparations, and many others.
It is frequently served with very hot rice or roti. It's designed with indigenous tomatoes. The tangy flavour blends with many of the food dishes.
The very important components from the pickle creating are salt and oil, aside from the natural and organic fruits and vegetables. Salt inhibits bacterial expansion during the pickle by absorbing dampness. Salts functions for a preservative inside the pickle. Oil retains the components moist and prevents them from drying off.
Well being Great things about Pickles:
Advantages of this item for wellbeing and system are amazing. Uncooked, lacto-fermented greens (this product) have probiotic bacteria which might be the good bacteria. These microbes inhibit The expansion of destructive microbes during the intestines. This products have a better focus of Vitamin B and C. This solution provide fantastic quantities of necessary vitamins, minerals, and antioxidants. The nutritive worth of this product is higher and it contributes to modest diabetes control, improved digestion, safety of liver, an excellent offer of probiotics. The nutrients acquired in the this item have the ability to recover ulcers. Absorption of iron from food will increase with the usage of this product or service.
The entire process of Pickling:
In the warmth with the summertime, fascinating pickle recipes is usually manufactured. The brine is ready where the vegetables or fruits are submerged. The brine is made of different substances like salt, spices, and so forth. In chemical pickling, vinegar is included, on the other hand, it ought to be famous that this sort of pickle would not comprise any probiotic germs.
In the standard system, raw fruits and vegetables are washed and Slice into items. Then, many spices are extra plus the jar is saved underneath the Solar. The pickle ought to be stored within a clean up and air limited container.
In the fashionable period, each Gentlemen and women perform to support the livelihood and ladies are generally hustled to take care of house and office get the job done. As a result, no person has Substantially time to prepare these time-consuming pickle recipes. Purchase exquisite and tempting this product from the very best pickle brands
1 note
·
View note
Text
Making Kimchi!
Two years ago, I binge-watched the K-drama Late Night Restaurant, and after I was done with episode 6, “Steamed Spareribs and Kimchi”, I had a huge craving for some kimchi despite never tasted it before. The closest thing I had to it was some packaged kimchi ramen, which I also greatly enjoyed.
I was able to find ready-to-eat kimchi at the supermarket, but then I thought “what if I make it myself? Sure it’s cheaper and can get away with more than this ridiculously small jar!”.
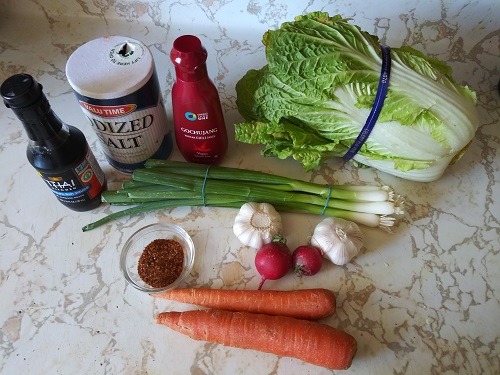
An hour later, I gathered the stuff I needed and got to work. Napa cabbage is the one traditionally used for kimchi, and the paste to season it is made with gochugaru (Korean pepper flakes, though I had so little of it that I also used gochujang), garlic, ginger (forgot to picture it!), fish sauce, and unsweetened apple juice. Carrots, daikon radish, and green onions are the veggies that complement kimchi. For my first try, I couldn’t find daikon radish so I used regular radishes, but it’s okay if you skip them or just use one or two as they have a strong taste and I fucking hate them.
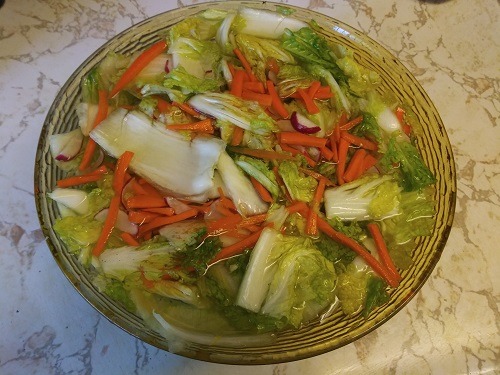
After cutting the nappa cabbage in quarts and washing them thoroughly, put them into a big bowl with the julienned carrots and radishes, and sliced green onions. Rub them with 1/4 cup of salt (preferably kosher) and let them sit for 2 hours, massaging the vegetables every 30 minutes. Then cover them with cold water and brine for another 2-4 hours or until the vegetables are slightly tender. Afterwards, drain the brine and rinse the vegetables until they are not overly salty.
While the vegetables are soaking, make the paste in a food processor. I used 5 cloves of garlic, a 1-inch piece of ginger, 1/4 cup of gochugaru, 1 peeled shredded apple, or 1/4 cup of unsweetened apple juice (you gotta feed those good bacteria!), a small piece of onion, and 2 tablespoons of fish sauce.
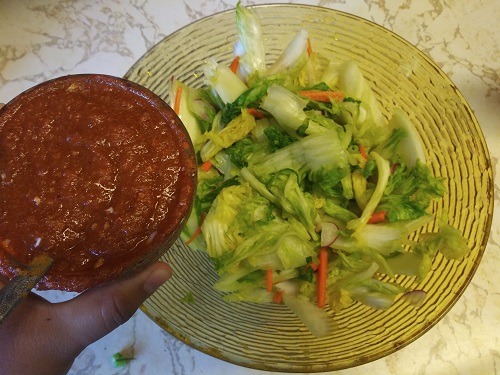
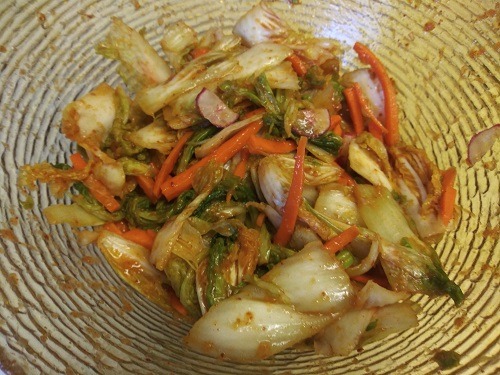
Once the paste has covered the veggies, cram them in glass jars, leaving an inch of space and pour a bit of brine to cover the vegetables. You can use plastic ones, but I prefer glass as they can be sterilized and don’t retain odors. Trust me, kimchi is odoriferous! (In lieu of jars, Ziploc bags also work!).
Cover the jars with their lids but don’t screw them tight! This thing will ferment and leak, so I recommend putting a plate underneath the jars to collect any juices that might come out. Place the jars in a dark place at room temperature, and let them ferment for 2 to 5 days. Check on them every day, pushing the cabbage down to release the bubbles and keep it submerged in that deliciously spicy juice. I prefer to wait 3 days before refrigerating.
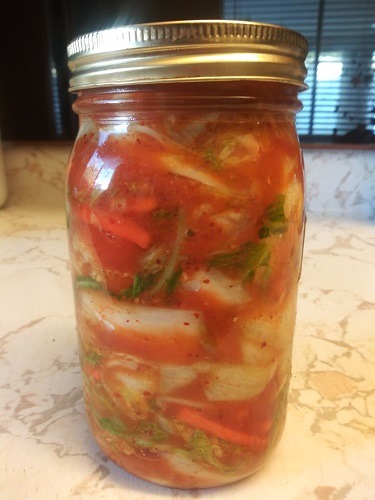
Once you let it ferment, your kimchi is ready to eat! However, if you are going to use it in recipes and not as a side dish, I’d recommend to let yout kimchi ferment in the fridge for at least a month, there the fermentation process goes at a much slower rate. The longer it ferments, the flavors deepen and the spiciness mellows with time! (though I do add a couple of chiles de árbol because I like it very hot).
You can make kimchi with a wide variety of vegetables, though I have yet to try other recipes! Next time I might be making a cucumber or green cabbage one!
Tagging @andypantsx3 and @huntersxhunted because they are both fans of this smelly pickle! Also, I dedicate this post to my late niece Fanny because she was as crazy about kimchi with pork ribs as I am (like the two fat girls from the aforementioned episode).
12 notes
·
View notes
Text
Cheap, Simple Recipes
So I’ve put together 10 of my cheapest recipes. Each one - according to my grocery costs - runs about ~$5 to feed ~6 people (or one very, very hungry fatty).
1. cabbage and sausage
>>put like half a stick of butter in a pan (this is necessary). Get in melting. Go in with a sliced onion and one of those rul cheap smoked sausage links cut into slices (I cut mine super thin so that I get more bites of sausage). When the sausage is looking brown and the onions are soft, hit it with an entire head of cabbage. You can cut the cabbage how you want to. Sometimes I slice it thin like slaw, and this only takes like 40 minutes. Other times I cut it in bite-size squares, and this takes an hour and a half. It’s up to you. Anyway throw a whole head of cabbage sans core in there. If you can barely stir the pan, you’re doing it right. Season with seasoned salt or creole seasoning (or regular salt, I guess) and let it cook covered low and slow, stirring it like every 10-15 minutes until the cabbage is all softened and buttery and your mouth is watering. I honestly make this like every two weeks cuz it’s life, so be warned, it’s addictive.
2. haluski
>>Shred an entire head of cabbage and start melting some butter in a rul big sautee pan. When the butter’s melted throw in the cabbage. You can also throw in a sliced onion if you want. Don’t forget to salt and pepper (I use creole seasoning, keep in interesting). Get that going. Heat a pot of salted water (I use creole seasoning to salt the water, too. No chill) to a boil while the cabbage is going. Add in a bag of egg noodles to the water, cook & drain them. The cabbage should be ready. Add in the egg noodles. Carefully fry them up with the cabbage, adding more butter if you need to. Once it’s getting a little crispy, take it off the heat and serve.
3. congris
>>I’m going to be honest, I have about 7 different recipes for congris and I don’t remember which one is my favorite so I’m going to give you 2 options
Option one: drain a can of black beans over a measuring cup. Get a sauce pot hot with some coconut oil, fry up a lil garlic, a small onion, and like half of a green bell pepper. Add in 2 cups rice and fry it in the oil for 3 mins (I actually set a timer cuz I’m bad at noticing when the rice is toasted). Hit it with the beans, then take your measuring cup to your water supply and fill it to the 3 cup mark (move fast don’t burn your rice). Add the water in (stand back it’s gone bubble up). Mix it. Season it with EITHER adobo seasoning OR a chicken bouillon cube (Maggi is the best ijs). Add a touch of oregano. Bring it to the boil, boil it until the water’s looking kind of evaporated and you can see the rice, then cover it, drop it to low, and let it steam for 30 minutes. You actually want the rice to be dry not sticky, and for there to be a crust on the bottom of the pan.
Option two: drain a can of black beans over a measuring cup. Get a sauce pot hot with some coconut oil and fry up like a 1/4 or a 1/3 cup of sofrito (the green one. It has a different name in the grocery store but literally everyone I know whose latinx calls them both sofrito lmao). This is not going to take long. Add in your 2 cups rice, toast it 3 minutes. Add the black beans in. Fill your bean-juice filled cup up to 3 cups, add it in. Use EITHER adobo seasoning to taste OR add a chicken cube (Maggi is best). Boil it until the extra water has evaporated off, drop it to low-low and cover it, let it cook 30 minutes until the rice is cooked by dry and there’s a crust on the bottom of the pan.
4. split pea soup
>>Heat your oil of choice in the bottom of a pot, then add in some onion, garlic, a carrot cut into pieces, and if you have any, some sweet pepper. Let it cook a little. Wash and drain 2 cups (or a 1lb bag) of split peas. Add them in. Cover in water, add in chicken bouillon for your salt, then throw in a leftover steak bone. Cook for 2-3 hours or until the peas have turned to mush. Can be eaten on its own but I like to crumble a piece of corn bread in the bottom of my bowl and then ladle the soup over it, oh ma god.
5. bacon beans
>>Cut up like half a package to a full package of bacon and fry them in your soup pot. When the fat is rendered out, add in 1-2 jalepenos diced finely with their membranes and seeds removed (you can put the seeds if you want but that’ll make this rul spicy). Wash and sort 2 cups or a 1 lb bag of dry pinto beans (no soaking required). Add them into the pot when the bacon’s looking incredible, then add enough water to cover the beans by like an inch. Add a chicken bouillon cube and about 1/3 cup of red salsa (whatever’s in your fridge is fine). Mix it up, and cook it covered (or uncovered if it looks soupy) for a few hours. It’s done when the beans are soft and tender and when your entire house smells so good you don’t even know what to do about it. Like the split pea soup, I usually serve this over a crumbled up slice of corn bread.
6. ham and peas
>>Dice up a package of fully cooked ham (you can use those precut ham chunks, you can use a ham slice, you can use ham slices for sandwiches if that’s all you have, you can also use smoked sausage cut in quarters and diced or hot dogs diced up, I won’t tell on you lol). Add a good amount of butter to a sauce pan, add some sliced garlic, put it on medium heat, go in with your ham and sautee it. When it’s starting to get brown, add in a bag of frozen peas. Let it heat through and mix around until the peas are that gorgeous bright green color they get. Then take it off the heat. This literally takes like 10 minutes.
7. pasta e ceci
>>fun fact, I got this recipe from my Italian Renaissance history professor. This dish predates the use of tomatoes in Italy and it was a staple dish among the peasants.
Put some olive oil in a pan. Slice up a few garlic cloves, put them in the cold oil, then turn the heat on. Once that’s sizzling dump in a can of chickpeas with their juices. Add a little bit more water to make sure they’re covered, change the heat to high. Add adobo seasoning (or salt, I guess) and like a half tablespoon of dried rosemary depending on how old your rosemary is. Let it boil for like 5 minutes, then mash 1/2-3/4 of the chickpeas. Add in 2 cups of a small pasta shape - elbows, shells, bowties, etc - then add enough water to cover the pasta by like an inch. Still on high heat, cook it, stirring occasionally, until the pasta is done and the chickpea sauce is thicc. This takes about 15 minutes but it also depends on how much water you add and I am a lawless hellion who doesn’t measure things so I can’t help you there. This tastes amazing asf though.
8. beans and greens
>>Soake a 1lb bag of washed/sorted white beans the night before.Day of, add garlic to a good amount of butter or olive oil in a soup pot, then heat it. Water your outdoor plants with the bean water, then add the beans to the pot and add fresh water to cover the beans by an inch or two. Add in some chicken bouillon as salt, a can of diced tomatoes, some herbs (I like italian seasoning here), a little red pepper flake, and lots of black pepper. If you have any old hard cheese rinds, add it in here, too. Cook it for like 2 hours until the white beans get rul thicc and break down. Then add some finely sliced dark, leafy greens and let them break down (if you’re using collards just add them when you add the beans, btw. But I typically use a bag of frozen kale cuz it’s already cut small asf). Also this might take a lot longer than 2 hours to cook if you have old beans, fair warning. After the greens are tender, the soup is done.
As a Next Level flavoring, if you have miso paste on hand and you mix a little in at the end it takes this soup to the next level. This is definitely optional, though.
9. john bisseti
>>This is another old family recipe from my great-grandmother during the Great Depression. One time her sister published the recipe and she didn’t talk to her for a few years. My great-grandmother passed away like 40 years ago but I don’t want to be haunted so I’ve adapted this from her original a little, it is not the recipe I use.
Brown a package of ground sausage with green pepper, onion, and celery, and cook a bag of egg noodles. Mix up a can of condensed tomato soup. Grease a 9x13 baking dish. Add half the noodles, then add half the sausage mix. Add the rest of the noodles, then add the rest of the meat. Sprinkle shredded cheese on top, then pour the soup mix over everything. Bake at 375 for 1 hour. You want the noodles at the top to be crisp and crunchy.
10. kimchi soup
>>This isn’t authentic at all but it’s friggin delicious and I highly recommend it.
Heat oil in the bottom of a soup pot. Sautee a sliced smoke sausage link and the white parts from a full bunch of green onions. If you want to splurge for mushrooms, dice some up and add those as well. Once it’s a bit brown, go in with a jar of kimchi that’s already cut up. If you don’t want this to clear your sinuses I recommend draining the brine off* first. Saute it a little bit, then add an entire head of cabbage cut in bite-size pieces (shredded, square, your choice). If it’s hard to mix, you’re doing it right. Season with adobo or creole seasoning or salt--kimchi is salty so don’t use too much, and especially if you put the brine it, you may not need to add salt at all. Let it go on low like 20 minutes, then go mix it up so your sausage doesn’t burn. Then cook the shit out of it. Low and slow for like 2-3 hours. You shouldn’t need to add any liquid beyond what cooks out of the cabbage. Just before serving add in all the green parts from your green onion bundle. This soup is the best.
PROTIP: you can reserve the kimchi brine (or the brine of any pickles you like) in a jar, add in freshly cut vegetables, put it back in the fridge, and in a few days you can enjoy refrigerator pickles.
7 notes
·
View notes
Photo
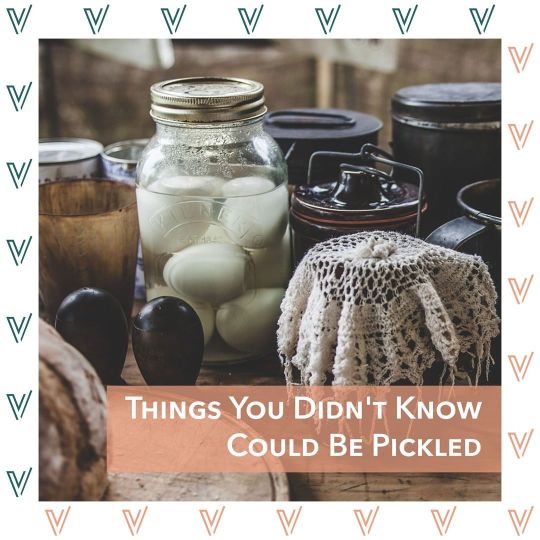
Things to Pickle That You Didn't Know Could Be Pickled⠀ ⠀ Pickling not only makes fruits and veggies taste great, but is also great for cutting down on food waste. Instead of chucking watermelon rinds or tough veggie stems, pickle them into an easy-to-eat treat.⠀ ⠀ To pickle any fruit or vegetable, all you need is water, salt, vinegar, and sometimes sugar. Add your favorite spices to your brine, soak your produce, and voilà, you’ve got pickles! And don’t limit yourself to cucumbers, try the items below:⠀ ⠀ 1. STRAWBERRIES⠀ If you love green salads topped with berries, you’re sure to love sweet and tangy pickled strawberries. Pop these into a sparkling cocktail, enjoy with cheese, or just eat them on their own.⠀ ⠀ 2. AVOCADOS⠀ Whether you’ve got an underripe avo that you’re dying to eat, or just want to mix things up, try pickling an avocado. Infusing your brine with red pepper flakes, minced garlic, and fresh cilantro sprigs turn this beloved fruit into the perfect snack.⠀ ⠀ 3. WATERMELON RIND⠀ After using a vegetable peeler to remove the tough green skin, you can make use of the white of the rind. Enjoy the rest of the melon separately, or together for a sweet and savory snack.⠀ ⠀ 4. BEETS⠀ Eat pickled beets on their own, toss them into a salad, or serve them on a charcuterie board.⠀ ⠀ 5. JALAPEÑOS⠀ Pickling jalapeños not only adds more flavor but can also help subdue the spice if needed. The more sugar you add, the less spicy.⠀ ⠀ 6. ONIONS⠀ Elevate sandwiches, salads, and tacos with pickled onions.⠀ ⠀ 7. ASPARAGUS⠀ Eat pickled asparagus as a side like you would normally, or snack on them like you would a pickle.⠀ ⠀ 8. GREEN TOMATOES⠀ Frying isn’t the only way to prepare this fruit. When you pickle green tomatoes they take on the flavors of the brine very well and can be added to a variety of meals.⠀ ⠀ 9. MANGOS⠀ Pickled mangos are sweet and tangy, and a perfect addition to salads, fish tacos, and more.⠀ ⠀ 10. EGGS⠀ If you’ve got a ton of eggs and are starting to get bored, pickling is the perfect next step. Picking eggs in beet juice is the most common, and makes the eggs take on a gorgeous fuchsia tone.⠀ ⠀ Source: http://wellandgood.com https://www.instagram.com/p/B_sXvHMDC2y/?igshid=1a6f6agtxqfxp
0 notes
Text
Culinary History (Part 36): Preserving
In medieval Europe, protein foods such as meat & dairy could only be eaten fresh during summer and autumn. In the winter and spring, they would be smoky or salty, because this was the only way to stop food from going off.
Any meat that wasn't eaten straight away after killing the animal was salted – layered up with huge amounts of salt in a large wooden cask. This expensive to do – in the late 1200's, 2d of salt was necessary to cure 5d of meat – so only good-quality meat was salted.
Pork took salt the best. The Elizabethans had bacon, ham, salt pork, and gammon (the hind leg after being dry-salted or brined). There was also souse – a pickled mixture of all the leftover bits except the squeak.
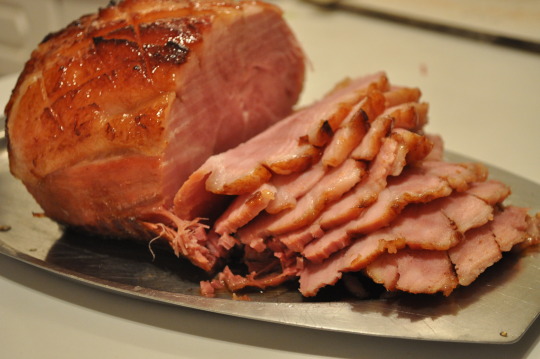
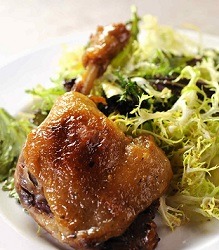
Glazed gammon.
Beef was also salted to make salt beef. One version of salt beef was Martinmas beef, prepared around the feast of Martinmas (November 11th). The beef was well-salted, then hung in the roof of a smoky house until it was well-smoked.
There is an urban myth that medieval cooks used spices to disguise the taste of gone-off meat, but this is not true. Spices were too expensive to waste on bad meat, but they were used to make the salt meat taste less harsh.
Milk was preserved as well as meat. In the East, it was curdled & fermented into yoghurty foods and sour drinks, such as the Kazakh kumis (a fermented liquor made from mare's milk, used as a drink and medicine).
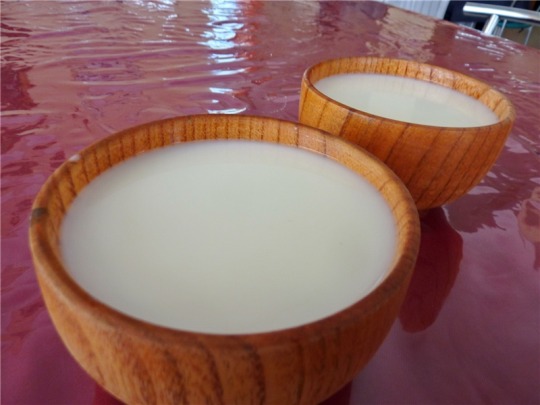
Kumis.
In the West, it was turned into cheese and butter, both highly-salted for preservation. In Aelfric's Colloquy (late 900's AD), the “salter” says that “you would lose all your butter and cheese were I not at hand to protect it for you.”
Their butter was extremely salty. Butter today has about 1-2% salt, but they had 5-10x that amount. According to a 1305 record, 1 pound of salt was needed for only 10 pounds of butter. This would be disgusting to eat, and the cooks had to spend a lot of effort washing salt out of butter to make it edible.
Fish had to be salted, too. The Scottish kipper (salted, pickled, or cold-smoked herring) was not invented until the 1800's. But before that, there was a kind of cured haddock produced near Aberdeen, smoked over peat & decayed moss. They were called Bervies (also Buckies & Smokies? or were they a different type of fish/process?)
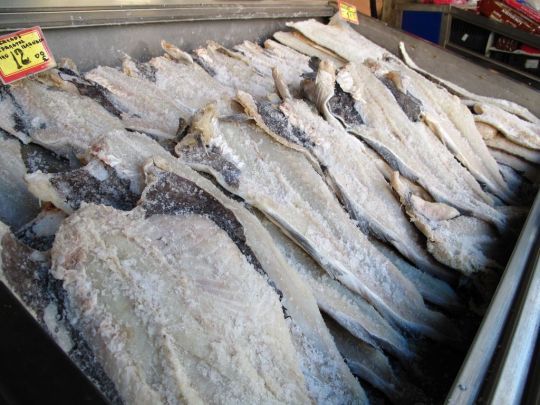
Salted cod.
Salted/pickled fish was a staple European protein food, especially on Fridays. Even before the Classical era, there had been a good trade in salted fish – first from Egypt and Spain; then from Greece and Rome. In the Middle Ages, salt herring came from the North and Baltic Seas, where it was a major industry.
Salt herring is not easy to produce, because it goes off so fast. It should be preserved within a day (preferably less). In the 1300's, the manufacturers developed techniques for salting herrings on board, and this made it a lot faster. The fish were re-packed when they got back to shore.
The Dutch were exceptional at this, which may have been one of the reasons they dominated the European market. Their herring-gutters could process two thousand fish an hour when at sea. Because they did it so fast, they accidentally left behind a part of the stomach containing trypsin (a chemical which speeds up the curing process).
Only eating fish preserved and not fresh would have been very monotonous, and there are many jokes about this. In A Pleasant Comedie, called Wily Beguilde (Anon, 1606), one character says to another, “You dried stockefish, you, out of my sight!”
A “red herring” was a rather smelly cured fish which had been double “hard-smoked” and salted. It is now a literary term.
Sweet preserved foods were much nicer to eat. In the Mediterranean, the most common way to preserve fruit & vegetables was to dry them. In this way, grapes became “raisins of the sun”, plums turned into prunes, and dates & figs shrivelled up and became sweeter. During Biblical times & earlier, juicy fruits & vegetables were either buried in hot sand, or laid out on trays or rooftops. The hot sun easily dried them out.
In Eastern Europe, the sun was less hot, so they had to develop more complicated methods. From the Middle Ages, special drying-houses were built in Moravia (CZE) and Slovakia. A drying-house was a room heated by a stove below it, with many wicker handles inside to hang the fruit on.
The English nobility had “stillrooms”, cool rooms where servants bottled fruits, candied nuts & citrus peel, distilled spirits, and made jams, marmalades (originally from quinces) and sweetmeats.
Candying had many alchemical superstitions and “secrets”. For example, walnuts should be preserved on St. John's Day (June 24th). Fruits for preserving were picked just before ripening, because they held their shape better that way. Preserving was a kind of magic, like embalming the dead, of holding back decay.
Hannah Wolley's The Queen-Like Closet (1672) gives a recipe for “The best way to preserve gooseberries green and whole”. They were soaked three times in warm water; then boiled three times in sugar syrup; and finally boiled once more in a fresh sugar syrup.
Even though people had no idea why these methods worked, they succeeded in preserving most of the time. It wasn't until the 1860's, when Louis Pasteur discovered the micro-organisms that made food & drink go off, that we found out. People believed that the reason was spontaneous generation, with mysterious invisible forces causing mould to grow. In reality, it's microbes such as bacteria, yeast and fungi that cause good fermentation for wine & cheese, and toxic fermentation when food degrades.
Drying works as a method of preservation because bacteria need moisture to grow in, and so when the fruit dehydrated, they mostly die off. Pickling in vinegar works because microbes prefer alkaline conditions, and the acid stops mold from growing.
There wasn't much innovation in preserving, because mistakes could be deadly. From the Middle Ages to the beginning of the 1800's, the only innovation was conserving meat in a layer of fat/oil – used in potted meats and duck/goose confit (salt-curing a piece of meat, and cooking it in its own fat).
Duck confit.
#book: consider the fork#history#culinary history#classics#biology#microbiology#britain#england#egypt#ancient egypt#ancient greece#ancient rome#netherlands#scotland#czech republic#moravia#slovakia#hannah wolley#louis pasteur#preserving
175 notes
·
View notes
Text
Homemade Dill Pickles
Make your own crunchy, tangy, and perfectly delicious pickles at home! Refrigerator pickles are surprisingly fast and easy to make. You can have homemade pickles in days, without any special canning supplies or skills. These Homemade Dill Pickles are perfect for snacking, for sandwiches, or on a burger or dog. The dill and black pepper essential oils amp up the flavor and work nicely with the garlic and peppers. Make them as spicy or as mild as you choose.
I have to admit, I was apprehensive the first time I made pickles. I had yet to find any store-bought pickles that really impressed me. So I did a bit of research and got the gist of the recipe down. I chopped up some cucumbers, added the brine, put the jar in the fridge and hoped for the best.
My first batch came out perfect. I was slightly shocked! The pickles were crunchy and fresh with just the right amount of acidity. A few more batches and I found a combination that was perfect for my taste buds. The Dill and Black Pepper Vitality oils intensify the flavor.
I make a few jars of refrigerator pickles every year. I am a huge pickle fan! Some get gifted to friends and neighbors, but I keep most of them for myself. I love that you can change up this homemade dill pickle recipe depending on what’s in season. They also make a thoughtful gift!
What is a Pickle?
A ‘pickle’ refers to anything that has been brined or fermented using salt and vinegar. The result is a slightly sour, crunchy vegetables with a long shelf life. The pickles we have come to associate with the term are typically made from cucumbers, but they can be made with any firm vegetables.
Pickles likely originated in India as far back as 2400 BCE. Pickling was an effective way to preserve food for long sea journeys. You will find pickling in almost all cuisines.
How to Make Homemade Pickles
There are several ways to make pickles. The flavor will vary depending on the amount of salt, the length of time to brine, and the ingredients used to enhance the flavor.
The easiest (and fastest) way to make pickles is by soaking and refrigerating them in a salt brine. You can pickle any type of vegetable in this fashion. Beets, carrots, asparagus, peppers, okra, and even green beans can be brine-pickled with great results. Any vegetable that you enjoy eating raw can be thrown in the mix and it will pickle nicely.
These types of pickles will not have the same probiotic benefits as fermented pickles, and they’ll have a shorter shelf life. Fermented pickles contain lactic acid, which preserves valuable nutrients in the vegetables. Pickles that have been fermented contain probiotics, which help support healthy digestion.
Refrigerator Pickles
A refrigerator acts as a preserver, meaning it extends the life of food by slowing down the growth of bacteria. The taste and texture of the food remain intact for an extended period of time.
In this recipe, all you need to do is slice the vegetables, boil the liquids, and let the refrigerator do the rest of the work. These pickles can be enjoyed in as little as 24 hours, but 3 days is just right for me. They will stay fresh in the refrigerator for up to 3 months.
Print
Homemade Dill Pickles
.wprm-recipe-rating .wprm-rating-star.wprm-rating-star-full svg * { fill: #343434; }
Course Appetizer
Cuisine American
Keyword pickles
Prep Time 15 minutes
Cook Time 10 minutes
Refrigerator 3 days
Total Time 3 days 25 minutes
Servings 1 jar
Equipment
16 oz mason jar
medium stockpot
Ingredients
4-6 large pickling cucumbers
8-10 sprigs dill weed
4 cloves garlic
1 1/2 tablespoons kosher salt
1 cup white vinegar
1 cup of water
2 teaspoons sugar
2 teaspoons mustard seeds
1 tsp red pepper flakes
2 drops Dill Vitality Essential Oil
1 drop Black Pepper Essential Oil
16 oz wide mouth mason jar
Instructions
Clean mason jars with warm soapy water and let them dry completely.
Wash cucumbers and cut into 4-inch spears. Peel garlic and leave whole.
Place the cucumbers in the mason jar first, packing them in tightly. Surround the cucumbers with equal amounts of garlic cloves and dill sprigs. Add more cucumbers until there is no space between the vegetables and the jar.
Add 2 teaspoons of mustard seeds and 2 teaspoons red pepper flakes to each jar.
In a saucepan, bring the vinegar, water, sugar, and salt to a roaring boil. Remove the mixture from the heat and divide the liquid equally between the two jars. Let cool to room temperature.
Once cool, add essential oils, seal the lid, and place it in the back of the fridge. After 2 days, sample a pickle from a jar. It should be crisp and slightly sour. You should be able to easily snap it in two clean pieces. If they are still kind of soggy, leave them be for another day or so before eating. Enjoy!
Notes
You can use any variety of cucumbers, depending on what is fresh and in stock. I would recommend using organic cucumbers since you will be eating the skin. If using small cucumbers, you can leave them whole, or slice them into chips.
The base of the pickling brine is salt, vinegar, and water. You can add more sugar if you want to sweeten them up. You can add or omit any of the ingredients in this recipe to your liking.
Add peppers to increase the heat like red serranos or jalapenos. You can also add bell peppers to reduce the level of spice.
The dill and black pepper essential oil should be added at the very end once the brine has cooled off a bit. Adding the oils to hot or boiling liquid will compromise the flavor.
Want a FREE Homemade Dill Pickles Label? Fill out the form below to subscribe to our email list and download a FREE PDF copy to print at home.
Once subscribed, you will receive an email confirmation with a password to access the file.
More essential oil cooking recipes you might enjoy:
Deviled Eggs
Grilling Marinades
Zesty Lemon Vinaigrette
Tarragon Dressing
The post Homemade Dill Pickles appeared first on Recipes with Essential Oils.
0 notes
Last Seen Blogs

tetsunua
Lanieer

carlangus-blog1
small-phrases

a-dream-dirty-and-bruised
Alastair Carstairs Deserves The World

audiometh
MoneyDrop Entertainment

mar-acalma
Mar Acalma