#talavera counters
Text
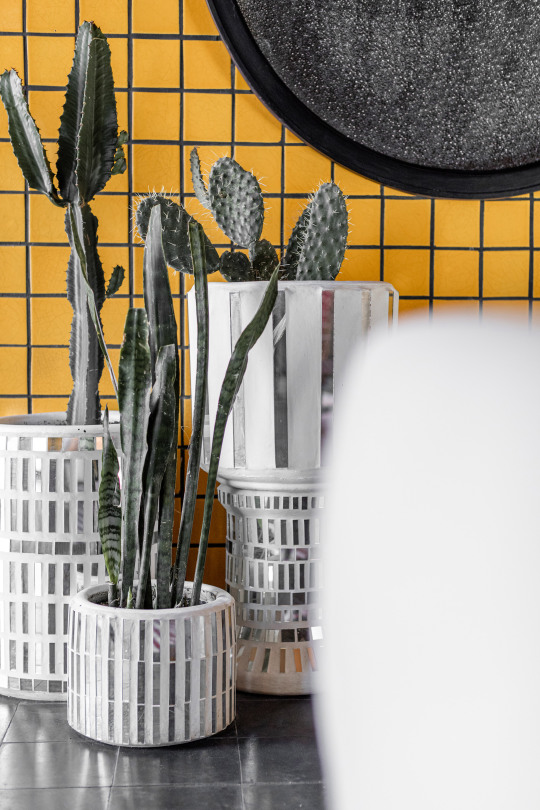
Incorporating rustic green furniture into your kitchen can create a warm, inviting atmosphere. Consider a distressed green kitchen island or a set of vintage green chairs to add a rustic charm. The worn, weathered look of rustic green furniture pairs beautifully with Talavera tiles, enhancing the overall rustic kitchen decor theme. This combination creates a harmonious blend of textures and colors, making your kitchen a cozy and welcoming space. Adding actual greenery, such as potted herbs or hanging plants, can further enhance the green theme in your kitchen. Plants like basil, mint, and parsley not only add a pop of green but also provide fresh herbs for cooking. Hanging planters or a vertical herb garden can make use of available space without cluttering your counters. This infusion of natural elements brings a sense of tranquility and liveliness to your kitchen. Going back to tiles, don’t be afraid to mix and match different shades and patterns of Mexican Talavera tiles which you can also combine with ceramic flower potters and other ceramic accessories. While focusing on green, you can incorporate other complementary colors like blue, yellow, and white to create a vibrant and eclectic look. This approach works particularly well in rustic kitchen decor, where a blend of colors and textures can create a warm, lived-in feel. Use colorful Talavera tiles on countertops, backsplashes, and even as accents on cabinet doors or walls. Adding green to your kitchen can transform it into a vibrant and refreshing space. By incorporating green Talavera tiles, rustic green furniture, and natural greenery, you can create a kitchen that is both beautiful and functional.
#mexican tiles#mymexicantile#colorful Talavera tiles#green Talavera tiles#Hand-painted Talavera tiles#kitchen counters#tiled kitchen backsplash#Mexican Talavera tiles
0 notes
Text
Counter Talavera Tiles
Hey there, fellow tile enthusiasts and kitchen connoisseurs! Get ready to embark on a colorful journey through the whimsical world of Mexican Talavera tiles. Picture this: you’re strolling through a bustling Mexican marketplace, surrounded by vibrant hues and intricate designs, when suddenly, you stumble upon a collection of Talavera tiles so enchanting, that they practically beg to be the star…

View On WordPress
#counter Talavera tiles#hand-painted Talavera tiles#kitchen decor#mexican talavera tiles#Talavera tiles for counters
0 notes
Photo

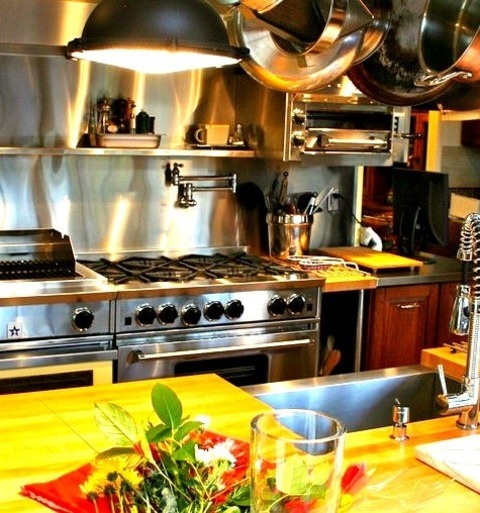
Enclosed - Mediterranean Kitchen
Inspiration for a mediterranean u-shaped enclosed kitchen remodel with a farmhouse sink, raised-panel cabinets, dark wood cabinets, wood countertops and stainless steel appliances
0 notes
Text
Mediterranean Kitchen - Enclosed
Inspiration for a Mediterranean-style, enclosed, u-shaped kitchen remodel with stainless steel appliances, a farmhouse sink, raised-panel cabinets, dark wood cabinets, and wood countertops.
#restaurant style kitchen#two sinks#kitchen#talavera tile#stainless steel hood#stainless steel counters#kitchen island
0 notes
Photo

Mediterranean Kitchen
#A picture of a Tuscan-style#enclosed#u-shaped kitchen with raised-panel cabinets#dark wood cabinets#stainless steel countertops#a metallic backsplash#and stainless steel appliances mediterranean#early century#pot rack#ceramic floor tile. talavera tile#stainless steel counters#kitchen island#professional kitchen
0 notes
Link
0 notes
Text
Countertop Makeover DIY for Impatient People that Hate to Measure
For years I have been trying to find affordable (like SUPER CHEAP) ways to disguise my ugly, laminate countertops. With a budget of practically $0, I scoured Pinterest for acceptable DIY ways to hide the ugly. I covered them in shelf paper more than once, which was less ugly, but extremely cheap looking. (You get what you pay for?)
FYI–I have linked to some pages/products for convenience, I don’t get any credit/pay for doing so.
Before – Ugly Blue Laminate
In 2018, I was gifted some talavera tile that was left-over from another project. It was about 2 boxes (200 tiles) of terracotta, and 2 boxes of cream colored 4 in tiles. While not enough to complete my kitchen, it was enough to motivate me to come up with a more permanent solution to my ugly kitchen problems. I determined I needed 3 more boxes of tiles (which actually ended up being 5 more boxes). I decided to use my tax return to begin this project which gave me a budge of approximately $1000. I had wanted to get cobalt blue talavera tiles, but after realizing they are about twice the cost of every other color I had to come up with another solution. I found that I could get mixed tiles on the cheap from eBay. Now I just needed to figure out how to make due with the selection of tiles I had available to me.
The gifted tile.
Fortunately, I was perfectly content to have my kitchen look like a Taco Cabana. I decided to order the mixed tiles (for less than $1 per tile) and use them with the solid tiles that had been gifted to me. Now I had 7 boxes of tile and no idea what to do with them. How hard could it be?
I borrowed (stole) an old book about laying tile from my parents (which through later research I found out is highly recommended when learning how to lay tile, find it here). I skimmed through and found out I probably needed to do a “wet installation” for the counters. I went to the hardware store and bought some plywood, and a bunch of .5 inch backer board (concrete board), and some mortar. I had the guy at Lowe’s cut the plywood to the width I needed, and used a circular saw to cut it to the length I needed later. Now to remove the existing countertops.
I thought this would be easy, and it wasn’t horrible, but who knew how HEAVY laminate countertops could be? Everyone? Fine, but I had no idea that they are basically 3 inches of solid glue and weigh a bazillion pounds. I had to crawl under the cabinets and use a drill to remove the screws that held them onto the cabinets. I used a pry-bar to pry off the 4 inch backsplash against the wall. Then I dragged all of them into my yard for eventual disposal. I could kinda manage the smaller counters myself, but the giant peninsula weighed about 200lbs so I had to enlist my dad’s help to drag that outside without damaging my doorways or my back. Since dad was there, I had him cut the angled pieces around the stove, and also use his jigsaw to cut the opening for the sink. Click here to see how I salvaged/cleaned my old sink.
BEST DAD EVER cuts hole for sink.
Very technical plans.
So, have I mentioned I have no credentials that qualify me for this project? My cabinets are cheap, builder grade. They have wood doors, but veneer/particle board everything else. Due to this, it was impossible for me to properly attach the new counter tops the proper way (from underneath). I ended up screwing them down from the top. DO NOT DO THIS. I’m sure anyone that knows anything about this is cringing. It worked great! Only problem is that if I, or anyone in the future, would like to remove the countertops…good luck! They would have to be demolished. Now I am stuck with some super ugly cabinets (a project for another day).
The wrong way to attach countertops.
After screwing the plywood down, it was time for the “wet installation” which basically means I had to screw some concrete board on top of them. This prevents the wood from getting wet if water seeps through the tile or the grout later. I borrowed a couple of trowels and a bucket from my dad and got to work. Basically, I slopped on some mortar, ran the slotted trowel over it, then set the backer board on top. Cutting the backer board proved messy, but easy. I used a t-square and and utility knife to score it, then it is able to be broken into the desired shape. I did buy the recommended rust proof screws to adhere the backer board. Apparently, if you get the cheap screws, they can rust and it can bleed into the color of your tile.
Concrete backer-board installed on countertops.
Finally, the fun part! Now that the new counters were prepared, it was time to lay the tile. I had laid out the pattern ahead of time, so I just stacked those tiles to the side and worked a few feet at a time. You start in the middle(ish) and not on an edge. (I hate measuring, by the way.) This is so you don’t get to the other side and realize you need a teeny tiny sliver of tile that would look weird on the edge. I put some mortar on the backer board, used the slotted trowel to score it, then added a little more mortar to the center of each tile and smeared it on like frosting. Since the tiles have a slight curve to them, the glob of mortar in the center provides strength. I also used the trowel to score the mortar on the back of each tile. Then I just pressed the tile down, repeat. Voila!
I did not use spacers for the countertop. This is why talavera tiles were an awesome and appropriate choice for me. Since the tiles are all handmade in Mexico, they are not square or even. Therefore, you do not use spacers with them, because then one line would be evenly spaced, but the other side would look like a mess of uneven edges. I just eyeballed the grout line, centering each tile according to its neighbor. This worked great for me. If you like to measure, or like precision, or like perfectly straight, modern looking lines, this is not the tile (or the method) for you. Thankfully my OCD does not extend to this area of my creative life. It did come in handy when wiping off the grout, however!
I did all the whole tiles, first, leaving the edges and any tiles that needed cut for later. You will need a wet saw/tile saw to cut tiles for the edges, by the way. I borrowed one from my uncle, but I am pretty sure you can rent one. When time came for cutting, I just took a whole tile, flipped it over, and marked it with a sharpie. No measuring! I also left enough space at the edge of the counters for the corner and edge pieces. I didn’t measure this (with a ruler) either. I just took an edge piece, placed it in its eventual position, and marked the backer board with a sharpie. That was my visual of where to start each row of tile.
After cutting and mortaring all the cut tiles in their places, it was time to do the edges. Expect edge tiles to cost about twice as much as a regular center tile, by the way. I did get the cobalt blue for the edges and corners. I applied these the same way (mortar on countertop and on back of edge piece). I made sure to apply a generous amount of mortar to the curved part of the edge piece, so that it would be supported later when I am leaning against the counters while cooking.
So, I forgot to mention I also prepped the walls where the backsplash would be by screwing on backer board (directly into the drywall/studs) before laying the tile on the counters. I used a thinner concrete backer board for the walls than I did on the countertops, I believe it was about 1/4″ thick. For the backsplash, I did use spacers, but not for their intended purpose. I used spacers only vertically, because I found that they prevented the tile from sliding slowly down the wall onto the top of the tile below it.
Tiles on backsplash with spacers.
For the backsplash, I didn’t apply mortar to the wall first. Instead, I just applied it to the back of the tiles, and scored it with the slotted trowel. This way, I could follow the vertical lines I drew on the backer board as a guide. (I relented and had to do a small amount of measuring.) I found the center, and drew vertical lines to help guide where I placed each column of tiles for the backsplash. Again, you need to start in the center and work out, so that when you get to the edges the tiles are as even as possible.
Prior to grouting tile.
After hours and hours and hours and hours of laying tile, it was finally time to do the grout. The tile does need to set for about 24 hours before it is grouted, anyway, so this allows for some time to sleep and read about grouting. Basically, I find that you don’t want to add to much water to the grout, and that you shouldn’t put grout in the joints where the counters the walls to prevent cracking. Instead, get a caulk that is matched to the grout color. This allows those joints to expand and contract with your home and prevents cracking.
I used Polyblend Sanded Grout in Nutmeg and matching Color Fast matching caulk.
Before removing excess grout from backsplash.
Grouting proved to be quite laborious, especially on the vertical parts. Girls, you know how your arms get tired from curling or braiding your hair sometimes? Multiply that by hours and hours of grouting. I purchased a rubber grouting float. It looks like a trowel except it is about an inch thick and made out of rubber. It is used to squish the grout in-between the tiles. It was a pretty effective tool, but I found it easier to just use my fingers to place grout between the edge pieces. The book said to “sponge off” excess grout. I found that a dry sponge worked much better than a wet one. You can buy a sponge for this purpose, but I used old kitchen sponges and they worked fine.
As the grout began to set, I used the float’s corner to scrape off excess grout and make the lines look nice. This took some trial and error. I can see the difference in the dried grout before and after I discovered this method. This step included lots of sponging and lots of scraping. Once I realized the damp sponge was not ideal, I just grabbed the vacuum cleaner and used it to suck up the extra grout as I dry-sponged it off. Once most of the excess grout was removed, and the lines looked nice and even, I used cheesecloth (recommended) to wipe away and shine the tiles. This took many times over each tile to complete. Fortunately, this is exactly the kind of tedious task my OCD craves. Polishing every tile to perfection 1×1. JOY!
Now it’s almost a year later, and the counters are holding up fine. (I am horrible at getting around to blogging, obviously, since it has taken 9 months to get around to posting this.) To my discerning eye, there are some parts of the grout that I want to go back and fix that dried before I discovered the best method for using the grouting tool/sponge. I have found that I can use a nail file to fix most of these areas. Maybe there is a better method, maybe not. I am pretty sure it is not noticeable to anyone other than myself (or any other meticulous-eyed designers, but I don’t often have this type of guest). Overall, I am thrilled with the results!
Before (sink area)
After (sink area)
Before
After with new stove.
This summer, the cabinets are on my to-do list. They can’t be removed/replaced, so they will be receiving a make-over. Stay tuned…maybe I will have that project posted before another year passes.
Rustic Style to me: “Do you even love me? Or do you just love the fact my aesthetic makes mistakes look intentional?”
Project Gallery:
Before
Ugly Laminate
Experimenting…
Teracotta Tile
The gifted tile.
Technical Plans
Framed Wall
False Wall
Drywall Added
Wall’s Edge
Before
Backsplash Preparation
After with new stove.
Tiles with spacers
Backsplash behind stove
Before (sink area)
Before (sink area)
Removed sink & prep
Sink area before grout
Dirty sink
After cleaning with Barkeeper’s Friend’s Friend
Grouting backsplash
After (sink area)
After (sink area)
After (sink area)
Backsplash behind stove
Coffee area
Behind stove
Counter prep
Backsplash progress
Coffee area
After (sink area)
Share: Twitter Facebook Google+
Countertop Makeover DIY for Impatient People that Hate to Measure was originally published on La Local Loca
#Albuquerque#budget counters#counter makeover#countertops#diy counters#diy tile#gallery#home improvement#kitchen makeover#la local loca#new mexico#talavera counters#talavera tile
0 notes
Photo
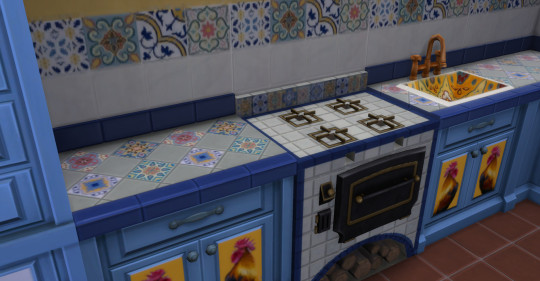
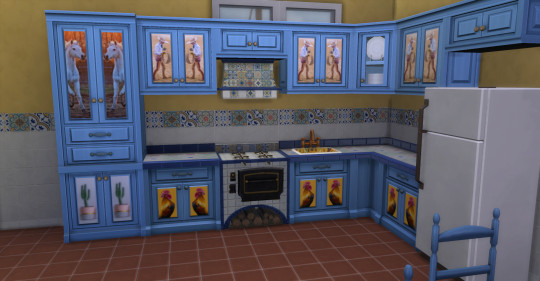
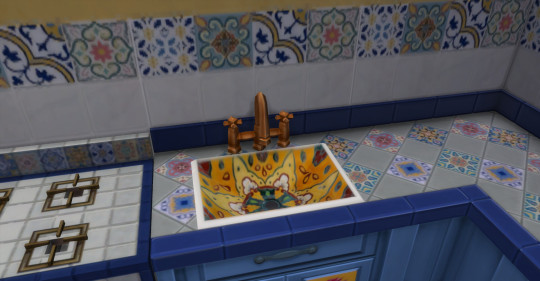
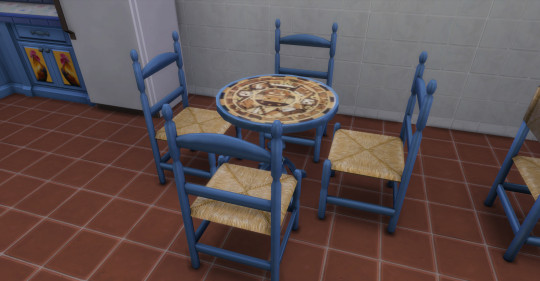
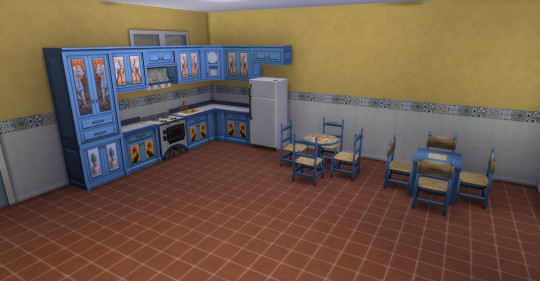
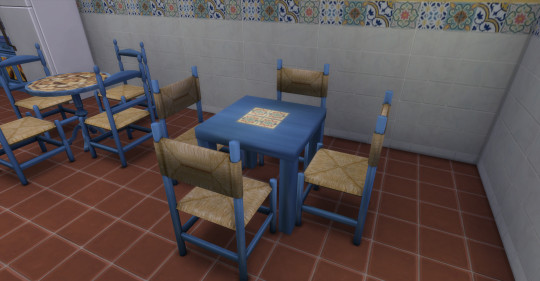
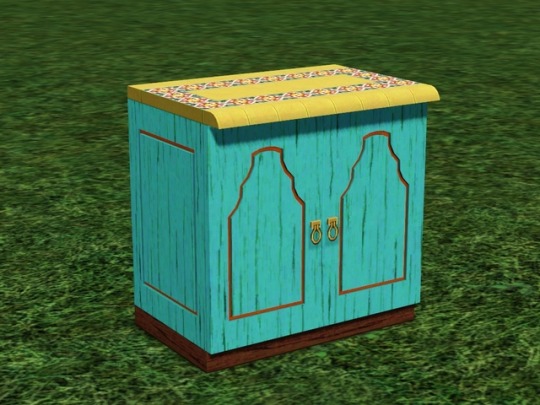
Mexican kitchen set available to public. Thanks.
Hello. The mexican kitchen set its available for public to download. It has a counter, kitchen, and sink of talavera and two sets of chairs an table. Hope you like and thanks for your patience n_n
Download free now at my patreon.
https://www.patreon.com/posts/34069370
Or here with no ads.
https://www.mediafire.com/file/w6revq54pb01yrq/necrodog-mexican_kitchen_set_%281%29.7z/file
390 notes
·
View notes
Text
15 Gifts For The Home Under $100
Mother’s Day is almost here
Giftpundits.com For Pexels
Mother’s Day is getting closer and if you haven’t seen your mother in a long time, won’t be able to see her in person this year or even if you have plans— you’re probably looking for an extra special gift right now. Not sure what to buy? You can never go wrong with something thoughtful and beautiful for the home. That also doesn’t mean you need to break the bank. Here are fifteen Mother’s Day gifts priced under $100 that will make mom feel like a million bucks. These gifts are great for all types of moms and grandmothers, whether they like to cook and entertain, or just appreciate unique home accents and decor.
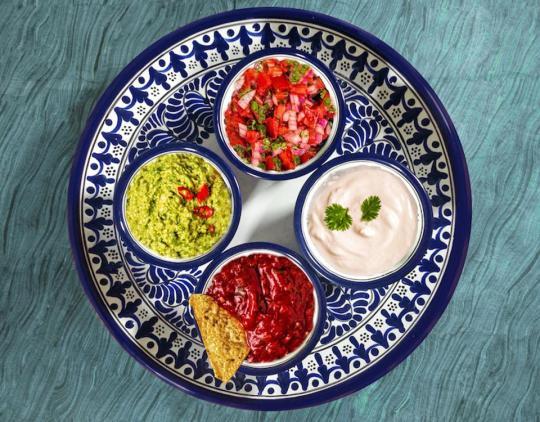
The Nopo Talavera Centerpiece Set
The Nopo Talavera Centerpiece Set
The Nopo
If mom is looking forward to a summer of seeing friends and family after being away from everyone for so long, this serving set from The Nopo couldn’t be a better gift. Made from hand-painted ceramic in Mexico, it includes a large tray and four smaller bowls ideal for hummus, dips, salsa or other nibbles. It’s a great piece to use while making new memories and reuniting.
L’Avant Collective Natural Dish Soap Hand Soap Duo
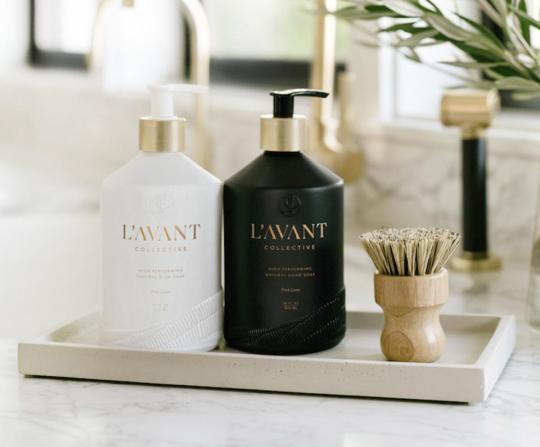
L’Avant Collective Dish Soap and Hand Soap Duo
L’Avant Collective
If mom is cooking, she probably has to clean up, so why not do it in style? The L’Avant Collective High Performing Dish & Hand Soap Duo is made with plant-based ingredients, allowing her to clean dishes thoroughly without drying out her hands. The Fresh Linen Scent smells like a five-star hotel. (Can L’Avant Collective please come out with a candle already?) Best of all, the refillable black and white glass bottles make a stylish addition to any kitchen counter. Upgrade this gift by adding refill bottles.
Society Social Rosy Tealight Candleholder
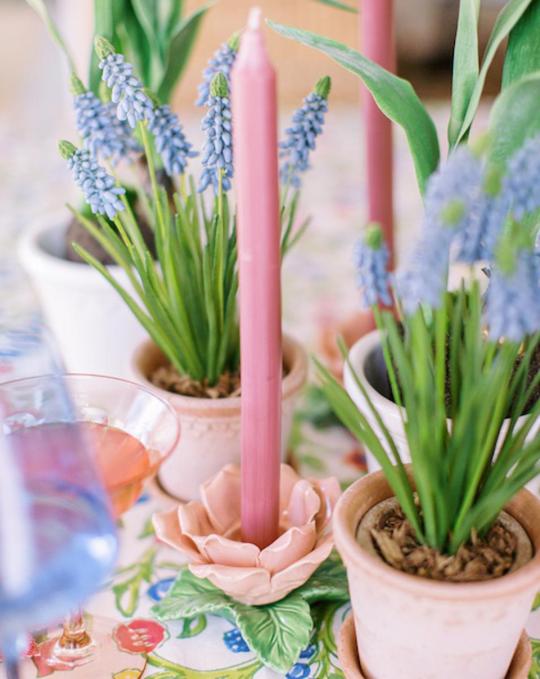
Society Social Rosy Tealight Candleholder
SocietySocial
Treat mom to these Rosy Tealight Candleholders from Society Social. Tea lights are a beautiful accent to add a dining table, vanity or even to make a bathtub feel more spa-like. Hand-carved, they fit both votives and candlesticks, so in addition to being a lovely gift, these tea lights are a versatile choice.
St. Frank Ombre Amethyst Glass Pitcher
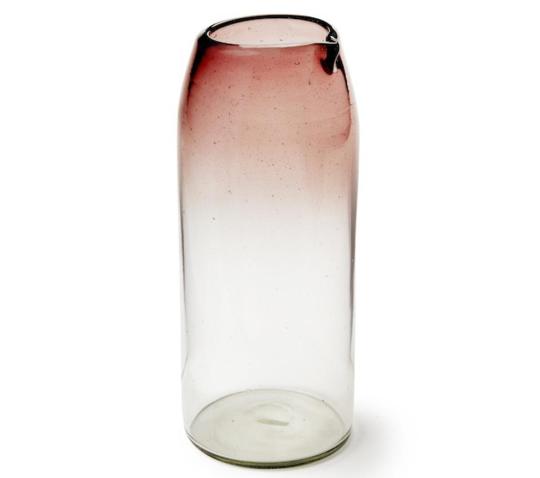
St. Frank Ombre Amethyst Glass Pitcher
BC Smithphoto
Does mom like to serve cocktails, iced tea, or perhaps fruit-infused water to guests? Then she will love this Amethyst Glass Pitcher from St. Frank. With a purple ombre finish, every piece is handmade in Mexico. So no two are the same. This gift is just as special as she is, while easily complimenting most glassware.
Riedel Gin Set
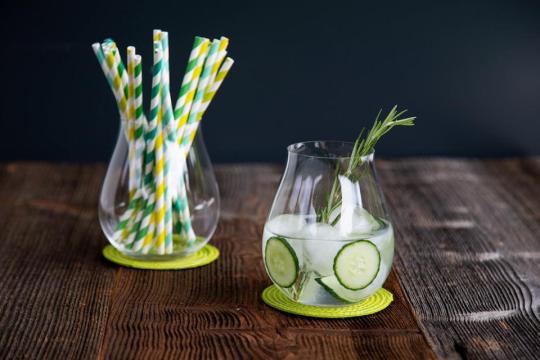
Riedel Gin Glasses
Riedel
If mom is up for a good gin and tonic at the end of the day, she will love this Riedel Gin Set. Made of fine crystal, these stemless 25-ounce glasses elevate any cocktail to a new level. They also make great bar cart accessories. Better yet, they’re dishwasher safe. Don’t forget to add a bottle of mom’s favorite gin.
Oka Zellige Mugs
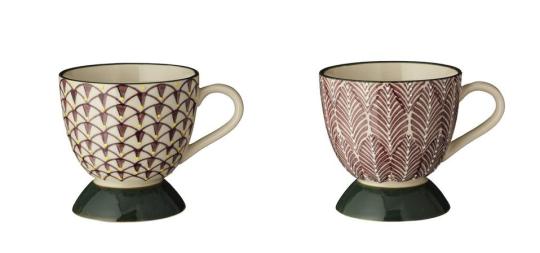
Oka Zellige Mugs
Oka
But if mom prefers coffee or tea, these Oka Zellige Mugs will add some traditional charm to her morning cup. Each piece in this set of four mugs has a slightly different purple design and features a green base. Orange and blue cups are also available. Made from porcelain, each one is hand-painted.
Jessie Rubin Studio Napkin Holder
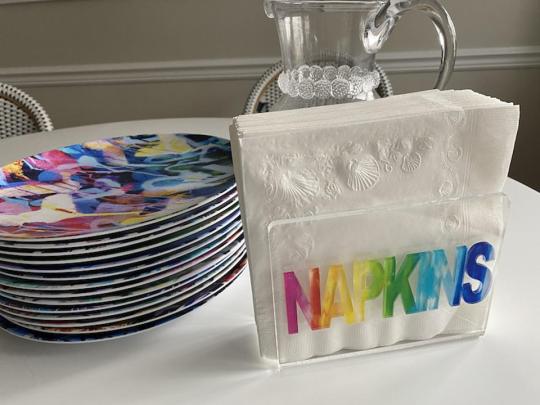
Jessie Rubin Studio Napkin Holder
Jessie Rubin Studio
“Put your napkin on your lap,” says every mom. So what mom wouldn’t love this fun and whimsical napkin holder designed by Jessie Rubin? It’s a decorative way to keep paper napkins organized and looking neat while adding a dose of whimsical fun to any kitchen or dining room. This is a gift she can use multiple times a day.
Pocono Modern Vintage Home Collection
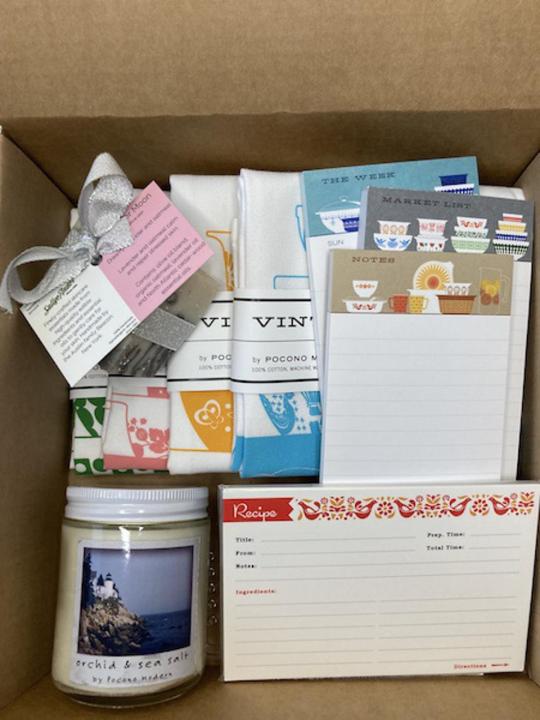
Pocono Modern Vintage Home Collection
Pocono Modern
The Pocono Modern Vintage Home Collection is a lovely gift box for a mom or perhaps a grandmother who appreciates vintage design or more specifically vintage Pyrex. This box includes four vintage Pyrex tea towels, three Pyrex printed notepads, a set of vintage Pyrex recipe cards, a candle with a vintage label, as well as antibacterial soap. Mom will smile when she opens up this box of goodies.
Swirl Boutique Aura Candle Nomad Reed Diffuser
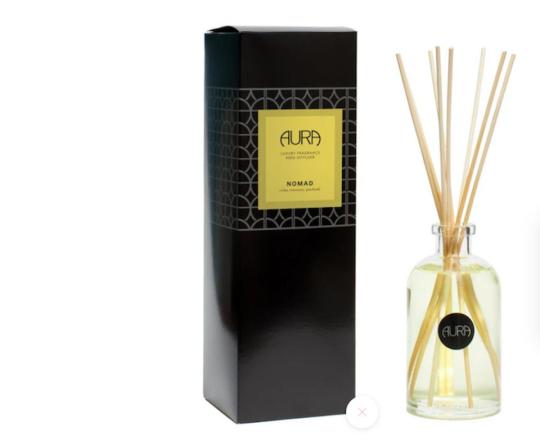
Aura Nomad Fragrance Diffuser
Swirl Boutique
Reed diffusers are a great way to keep a bedroom, bathroom, or home office smelling fresh. That’s why the Aura Candle Nomad Reed Diffuser from Swirl Boutique is such a great gift. With notes of cedar, rosemary, and patchouli, this scent was inspired by wanderlust and the outdoors. It’s also phthalate-free, so it’s safe to enjoy. The bottle easily complements any décor style.
Pura Smart Device and Floral Street Fragrances

Pura Smart Device and Floral Street refills
Pura
If mom likes both home fragrances and smart devices, then the Pura Smart Device will make the perfect gift. This Bluetooth device lets you customize fragrance intensity, set a schedule for when the fragrance will be dispersed, and even functions as an LED nightlife through the Pura app. The ethically sourced fragrances are free of harsh chemicals as well as cruelty-free. The new Floral Street refills are the ideal choice for a Mother’s Day gift.
Rifle Paper Company Butterflies Embroidered Pillow

Rifle Paper Company Butterflies Embroidered Pillow
Rifle Paper Company
If mom likes Rifle Paper Company’s stationery, planners, and desk accessories, then she will love the brand’s home decor pieces. The Butterflies Embroidered Pillow, which is part of a collaboration with Loloi, features vibrant embroidered butterflies against a dark background. You can even choose to add a polyester or down insert. This pillow looks great on a sofa, bed, or to accessorize an accent chair.
Material Kitchen The reBoard
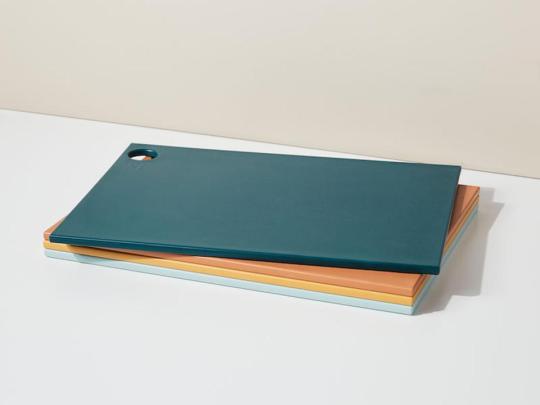
Material Kitchen The reBoard
Material Kitchen
Is mom a chef? Or simply into living a sustainable lifestyle? If so, she won’t be able to get enough of The reBoard from Material Kitchen. Made from a combination of recycled plastic (so there is zero virgin plastic used) and renewable sugarcane, these BPA-free cutting boards are durable and dishwasher-safe. Choose from six great colors including shades of pink, green, orange, and blue.
The Artisan Variety Small Onyx Mortar And Pestle

The Artisan Variety Small Onyx Mortar And Pestle
The Artisan Variety
For the mom who makes her own pesto sauce or simply wants a decorative kitchen tool to keep on a shelf or counter, the Artisan Variety Small Onyx Mortar And Pestle couldn’t be a better gift. Made in Pakistan by Dominion Traders, this set is crafted from onyx gathered from mines in Peshawar and Quetta. Each hand mortar and pestle has its own unique look. Both decorative and useful, this high-quality piece will be enjoyed for years to come.
Venus Et Fleur Le Mini Square

Venus Et Fleur Le Mini Square
Fernando Pacheco
Venus Et Fleur eternity roses are a truly special gift. Designed to last for at least a year, Le Mini Square is a box of nine roses that’s a great addition to any desk, dresser, or makeup vanity. Choose from a black or white box. Nineteen different rose colors are available with hues from Blush to Burgundy, Black, and even Lavender. You can also add a greeting card.
1800 Flowers Pastel Posy Bouquet

1800 Flowers Pastel Posy Bouquet
1800 Flowers
Flowers are the ultimate classic Mother’s Day gift, which makes the 1800 Flowers Pastel Posy Bouquet an excellent choice. Both large and small sizes are available and feature blooms in shades of pink, purple, yellow, and green arranged in a peach quartz mason jar that mom can use for years to come.
from Anisa News https://ift.tt/3nkdd75
#breaking news today
breaking news headlines
breaking news headlines today
chicago breaking news
usa
1 note
·
View note
Text
Let's start at the roots – hand-painted Talavera tiles hail from a rich tradition of Mexican craftsmanship dating back to the 16th century. Each tile is a testament to the skill and dedication of artisans who have perfected the art of hand-painting. Incorporating these tiles into your kitchen isn't just a design choice; it's a celebration of heritage and a nod to the master craftsmen who bring each tile to life. Say goodbye to the monotony of plain countertops and welcome a burst of color and pattern into your interiors. Kitchen Talavera tiles offer a kaleidoscope of possibilities, from vibrant blues and greens to warm yellows and earthy reds. Whether you prefer a subtle mosaic or a bold statement piece, these tiles allow you to customize your culinary canvas with a symphony of colors and patterns.
Every time you prepare a meal, you can be surrounded by a gallery of hand-painted tiles, each one telling a unique story. Whether it's a floral motif, geometric design, or a depiction of local culture, the kitchen becomes a space where culinary artistry meets visual storytelling. Beyond their aesthetic appeal, Mexican Talavera tiles are renowned for their durability and practicality. These handcrafted tiles are resistant to heat, stains, and scratches, making them an ideal choice for a bustling kitchen where both creativity and chaos collide. It's beauty with a purpose. Another great thing about our authentic Mexican tiles is that they are DIY-friendly! Unleash your inner artist and embark on a creative journey as you arrange and install these tiles to suit your style. It's a hands-on project that turns your kitchen into a canvas, and you into the artist. In a world where kitchens are often relegated to mere utilitarian spaces, Talavera tiles for counters emerge as a beacon of creativity. They're not just tiles; they're a testament to tradition, an explosion of color, and a canvas for culinary artistry. So, if you're ready to transform your kitchen into a feast for the eyes and a celebration of culture, consider the timeless allure of kitchen Talavera Tiles – where every meal becomes a masterpiece.
#kitchen Talavera tiles for counters#Mexican Talavera tiles#hand-painted Talavera tiles#Kitchen Talavera tiles#kitchen Talavera Tiles#mymexicantile#mexicantilestore
0 notes
Text
Moving on to the upper areas of the kitchen, let's talk wall and counter tiles as well as the handmade, rustic extractors. Transform your kitchen into a culinary haven with a copper range hood from Rustica House. These handcrafted pieces not only serve the practical purpose of ventilating your kitchen but also act as a stunning focal point. The warm tones of copper add a rustic yet sophisticated touch to your kitchen space, making a statement that reflects your taste for luxury and craftsmanship. Enhance your kitchen's visual appeal with a custom kitchen tile mural. Personalize your space by choosing from a variety of designs or creating a unique mural that reflects your personality. These tile murals can be installed as a backsplash, adding a touch of artistry to your kitchen and making it a conversation piece for anyone who enters. Lastly, create a stunning focal point in your kitchen with Mexican Talavera tiles for the backsplash. These hand-painted tiles feature intricate patterns and vivid colors that bring life to your kitchen walls. Rustica House offers a wide selection of Talavera tiles, allowing you to express your style and infuse your kitchen with the charm of Mexican craftsmanship.
#TALAVERA TILES#KITCHEN TILE MURALS#KITCHEN RUSTIC DECOR#KITCHEN DECOR#COPPER RANGE HOODS#COPPER FARMHOUSE SINKS#BRONZE FAUCETS#myrustica
0 notes
Photo
Talavera Tile Counter
17 notes
·
View notes
Text
Colourful tiles and Mexican craft feature in Casa Hoyos hotel by AG Studio

Mexico City's AG Studio has turned a colonial house in San Miguel De Allende, Mexico into a boutique hotel featuring tiled archways and yellow walls that look like a "large corn cob".
The hotel, called Casa Hoyos, occupies a former Spanish colonial manor in the city, which is home to many colourful baroque-style buildings from the mid-1700s.

AG Studio designed the 16-suite boutique hotel for the Hoyos family, who have owned the property for four generations.
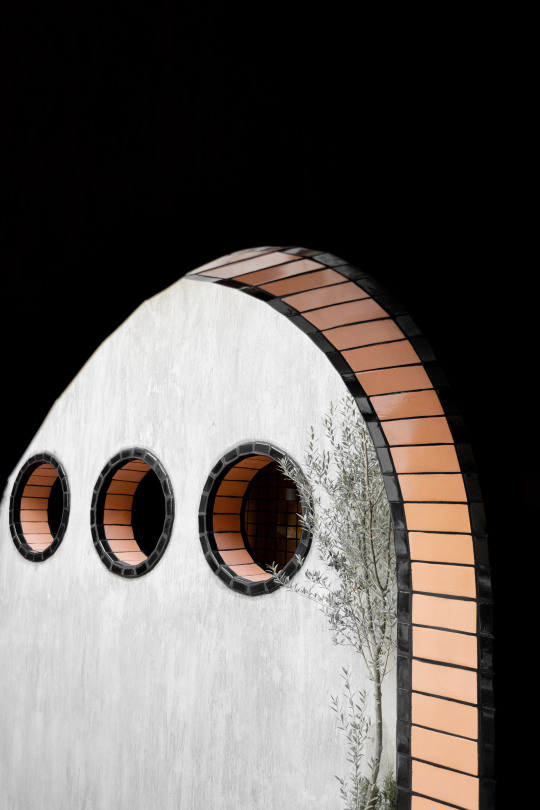
A focal point of the project is a courtyard featuring concrete walls punctured with archways lined in black- and peach-coloured tiles. The hues take cues from the symbol of the Hoyos family shield.

"The entire interior facade is a single piece of concrete that reminds us of Mexican modernism," said AG Studio founder Andres Gutierrez.
"The interior part of the arches that surround the patio, also covered in clay tile, represent the belly of the snakes that make up the Hoyos family heraldic shield."

To contrast these hues, the studio has covered the outdoor hallway that wraps around the atrium in yellow tiles. It describes the effect on the walls as resembling a "large corn cob". Dark grout is used for all of the tilework and nods to the other black accents throughout.
Placed on one wall of the hallway is a graphic of the Virgin of Loreto, the patron saint of San Miguel. Made with traditional Mexican ceramic glazed Talavera tiles, the virgin is placed above a pink console with black lamps, and is designed like an altar.

Colourful hues continue inside the hotel, where a sitting area is decorated with rounded furniture covered in red and cream textiles, as well as red woven lampshades and tapestries by artist Meli Ávila.
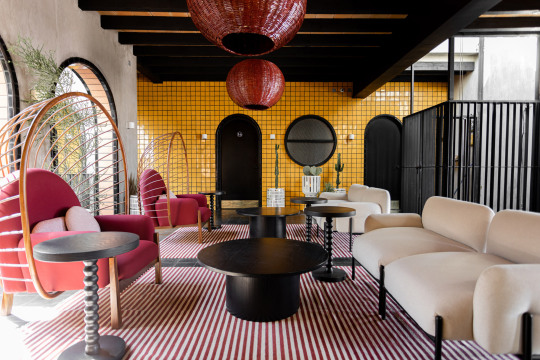
Calaca armchairs by Mexico City design studio Comité de Proyectos also feature in the lounge and are made with tropical wood from southeast Mexico.
There are also mosaic planters designed by Paloma Layseca that reference religious undertones and the building's Spanish past.
"The flowerpots made of mirror and plaster are a contemporary reinterpretation that we made of the old flowerpots that were in the house for many years," said Gutierrez.
"These traditional Mexican flowerpots have always enchanted me; they have a Moorish tint that made a lot of sense with the eclectic aesthetic of the project."

Hotel suites are decorated in the combination of pink, yellow, red and black colours. Rooms have dusty pink walls, black and rattan pieces, and furniture custom made by AG Studio. Terracotta tiles are the bathroom walls and vanity counters, while much of the hotel floors are black tiles.

Rounding out Casa Hoyos is a rooftop bar, called Bekeb, with red chaise lounges and woven chairs for watching the sunset over the city.
San Miguel de Allende is as a UNESCO World Heritage site and is home to several residences as well, including Casa Candelaria by Cherem Arquitectos, Mezquites house and Casa La Quinta.
Photography is by Diego Padilla.
The post Colourful tiles and Mexican craft feature in Casa Hoyos hotel by AG Studio appeared first on Dezeen.
Source link
Read the full article
0 notes
Photo
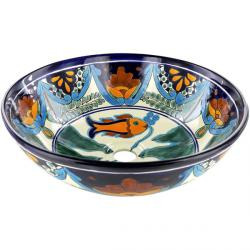
Mexican Tile – Acapulco Round Vessel Above-the-Counter Bathroom Mexican Talavera… https://ift.tt/3a6G2fQ
0 notes
Photo
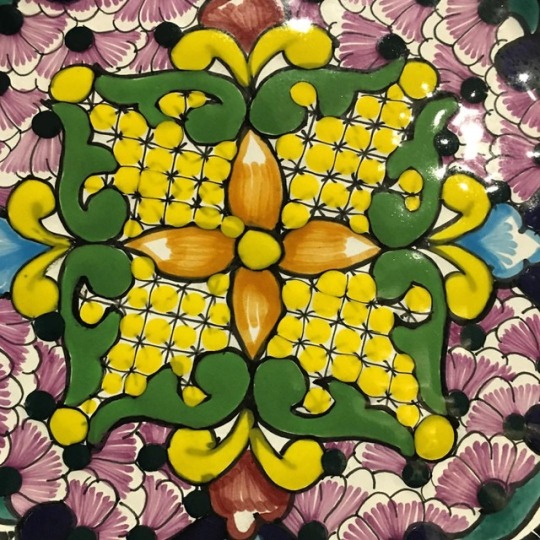
Beautiful Talavera yellow platter on my kitchen counter. #ceramics #mexicantalavera #talavera #yellow #pattern #art #amateurphotography #iphone6splus
0 notes
Link
The cobalt blue was the most expensive pigment making it a status symbol of prestige. With time, Mexican artisans had introduced other colors and patterns that are important for their culture from the per-Hispanic to their Spanish heritage. In the most classic option, there are only six permitted colors: blue, yellow, black, green, orange, and brown, and these colors are made from natural pigments. However, because we want to fulfill all our client’s requests, we can manufacture a customized project upon individual order. Finally, our customer enjoys a broad range of patterns to be able to decorate their kitchen walls, hacienda-style bathrooms, or custom kitchen backsplash.
0 notes
Last Seen Blogs

coldcashkid-blog
MOTIVATION = CASH!

larcoindia
Larco India Pvt Ltd

aspeknasdiy
ASPEKNAS-DIY

barsupervisor
HOMMDEMİRTAŞ