#survivingtheapocalypse
Photo
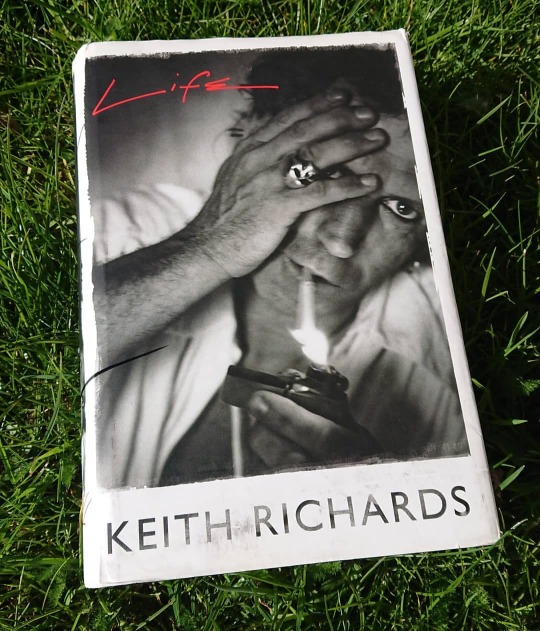
Let's see if I can pick up tips on how to survive. - #survivingtheapocalypse #survivor #keithrichards #therollingstones (at Archway, London) https://www.instagram.com/p/B-maKhHn8xI/?igshid=1ic7huiukem11
0 notes
Photo
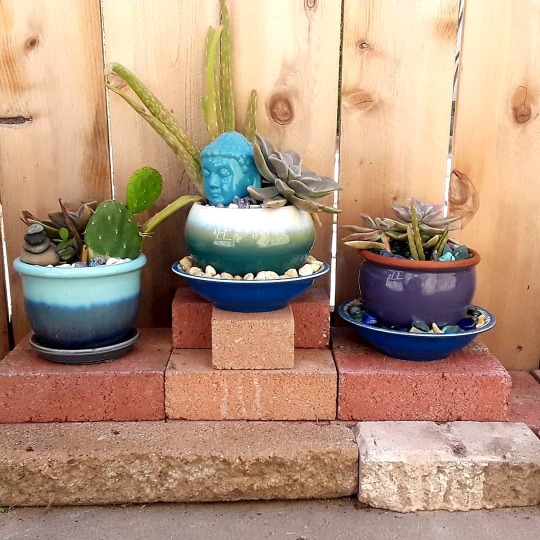
My parents had an old, dusty pile of bricks in their backyard (from a previous paving project) that was becoming a breeding ground for black widow spiders. I cleaned up the area, and rearranged the bricks into some risers that are a cheap and easy way to organize smaller plants when you’re limited on space or just looking to show off your plants! 😬🕷🕸🔜👩🌾💚🌵🏡
#apocalysecrafts #survivingtheapocalypse #stayhomemakestuff #diy #diyprojects #diycraft #pavers #paverstones #containergardening #cactus #pricklypear #aloevera #aloe #aloeveraplant #echeverialover #echeveria #gardenideas #gardens #gardeninspiration #garden #gardenbuilding #gardenlove #gardenlife #gardenbuddha #jadeplant #brick #bricks #brickpavers #brickproject #brickprojects
#apocalysecrafts#survivingtheapocalypse#stayhomemakestuff#diy#diyprojects#diycraft#pavers#paverstones#containergardening#cactus#pricklypear#aloevera#aloe#aloeveraplant#echeverialover#echeveria#gardenideas#gardens#gardeninspiration#garden#gardenbuilding#gardenlove#gardenlife#gardenbuddha#jadeplant#brick#bricks#brickpavers#brickproject#brickprojects
0 notes
Photo
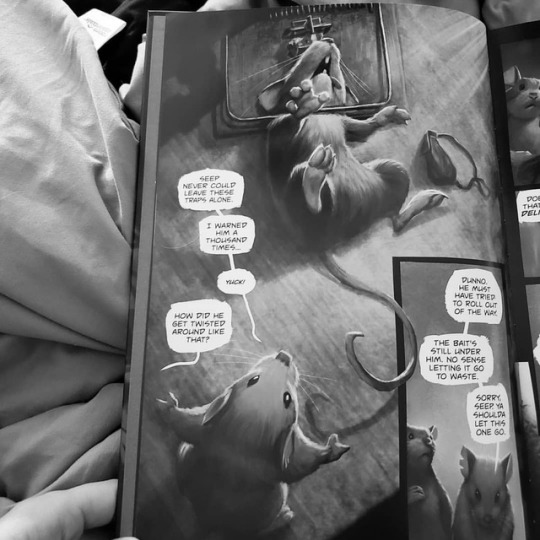
These poor mice...💔💔💔😭😭😭 #kickstarter #kickstarterbacker #kickstarterproject #kickstarterproduct #crowdfunding #crowdfunded #Scurry #EasyPrey #comic #graphicnovel #reading #miceapocalypse #survivingtheapocalypse #Survival #apocalypse #nerd #geek #femalenerd #geekgirl #nerdgirl https://www.instagram.com/p/Bs1oV-UB4ZN/?utm_source=ig_tumblr_share&igshid=yky32qdlug33
#kickstarter#kickstarterbacker#kickstarterproject#kickstarterproduct#crowdfunding#crowdfunded#scurry#easyprey#comic#graphicnovel#reading#miceapocalypse#survivingtheapocalypse#survival#apocalypse#nerd#geek#femalenerd#geekgirl#nerdgirl
0 notes
Photo

#throwbackthursday to my first apartment and first attempt at life on my own with my new piggy pet #pigsforpets #pigsforlife #piglover #oldies #cuddlemonster #swinetime #onelove #love4all #pets #pigstagram #pigtamer #selfie #guyswithpeircings #notattsyet #2k12 #endoftheworld #survivingtheapocalypse #ares
#onelove#selfie#2k12#survivingtheapocalypse#pigstagram#guyswithpeircings#throwbackthursday#oldies#swinetime#pets#pigsforpets#pigsforlife#love4all#endoftheworld#ares#piglover#cuddlemonster#notattsyet#pigtamer
0 notes
Text
Surviving The Apocalypse- A Toby Turner FanFic Ch.1 Pt.1
*Alys POV*
Todays the day they announced my worst nightmare on the news. The zombie apocalypse was finally here. I sat on the couch, face in my hands with the television on it the background. How could this happen? That shits supposed to be fake! I sat there contemplaiting what I should do, that's when I heard my phone buzz. It was Toby, telling me not to leave the house til he got there and to gather anything useful.
"Shh!" He reminded me. "We have to be quiet! Any loud noise will attract them."
"Oh, Sorry. I forgot.."
"Did you get stuff?" He looked around quickly. I nodded and grabbed the bags of food and showed them to him. "Good work. Let's get in my car, we have to get the others." I give him a questioning look and follow him out to his car carefully.
"Who else are we getting?" I asked in a partial whisper. We slowly get in the car.
"Justine, Joe, Gabe, Olga and Jack." He says as we back out of the driveway. I cringe.
"Do we have to get Olga? Can't we let the zombies eat her or something?.."
"No, Alyssa! That's terrible! What if I decided to just leave you and let you fend for your own?!" He looked at me with discust. I looked at my lap.
"You're right, I'm Sorry, I shouldn't have said that." Toby looked back at the road, focusing on getting to Joes' house in one peice.
When we got there Toby pulled out his gun and looked at me. "You ready?" I nodded, a little shocked, and pulled out my little gun also. We got out of the car and headed to the door being very careful as to not attract any unwanted visitors. Toby rang the bell and slowly looked around. Then he opened the door and looked inside.
"Hey Joe! You here, dude?" He asked stepping in slowly. I followed close behind. "Joe?!"
"Hey," Joe said as he opened the door leading to his basement. " I was just getting the guns ready." He told Toby, then glanced at me and grinned. "Hey, sexy, haven't seen you in a while." He said with a wink. I blushed.
"Shut up.."
" This is not time to hit on her, Joe. Let's get the guns and go." Toby interjected.
"Alright! Jeez, man! Follow me." Joe said, disappearing back into the basement. Toby and I followed him. When we got down there I was amazed, Joe has so many guns that no one knew about.
"Joe?! What the hell?!" I asked.
"What?! I have them in case of emergency!"
"What kind of emergency?!" "Obviously this one!" He stated.
"Let's grab them and go," Toby said. "We don't have much time." He started putting the guns in his arms. Joe and I just looked at eachother and shrugged then we started doing the same. "Great, let's go." We went back out to the car and put them in the trunk and got into the car again, this time with Joe.
I looked over at Toby who was in the drivers seat. "Toby?" I asked sheepishly.
"Yeah?" He replied.
"What are we going to do?"
"Well," he started. I think the best option is to find a boat after we get everyone. And of that isn't possible then try to find a safe place on land. This isn't going to be easy, Alyssa." He looked at me.
"I know.." I said trailing off. Joe sighed in the backseat...
What do you guys think?.. O_o Does it sound good so far?
7 notes
·
View notes
Photo
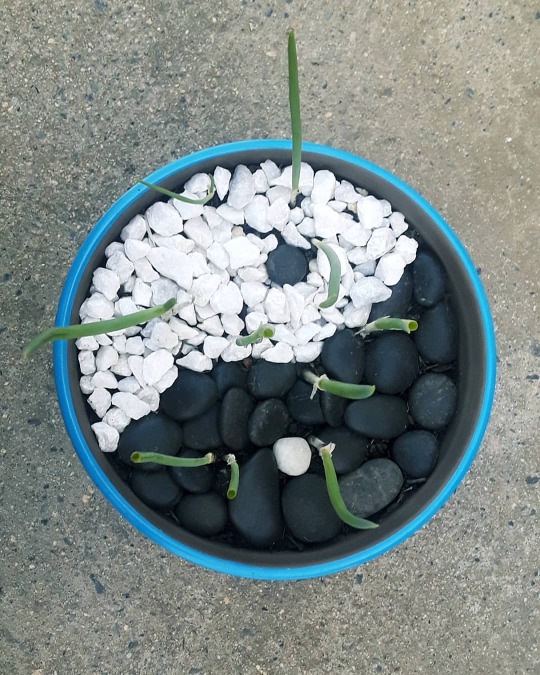
Yin-yang planter with green onions. The Tao Te Ching (The Way of the Tao) teaches us to live a balanced life, flowing in harmony with the forces of nature instead of struggling against them. Green onion is a lovely plant to cultivate, and it’s edible leaves are constantly growing toward light and health - challenging us to do the same.
This beautiful planter is easy and cheap to make, and serves as a daily reminder to cultivate a nourishing relationship with the natural world. Minus the decorative pot, this planter cost me less than $3 to make. I got the natural stones (white quartz and black river rocks) from a dollar store (still open during the pandemic!).
The green onions I got from the produce section of the grocery store and rooted in a container of water until they had roots long enough to plant. The little bit of stress the plant endures when you trim it actually encourages new growth (as long as you leave a few inches of green leaf between cuttings), and teaches us about how we can also grow through adversity.
#apocalysecrafts #survivingtheapocalypse #plants #plantsofinstagram #plantbased #plantwisdom #gardeninspiration #gardens #gardenlife #gardenideas #plantsmakepeoplehappy #plantbasedwisdom #plantwisdomgarden #containergardening #garden #foodgarden #growfromyourheart #growfood #diyprojects #diycraft #garden #greenonion #greenonions #tao #taoteching #balancedlife #balance
#apocalysecrafts#survivingtheapocalypse#plants#plantsofinstagram#plantbased#plantwisdom#gardeninspiration#gardens#gardenlife#gardenideas#plantsmakepeoplehappy#plantbasedwisdom#plantwisdomgarden#containergardening#garden#foodgarden#growfromyourheart#growfood#diyprojects#diycraft#greenonion#greenonions#tao#taoteching#balancedlife#balance
0 notes
Photo
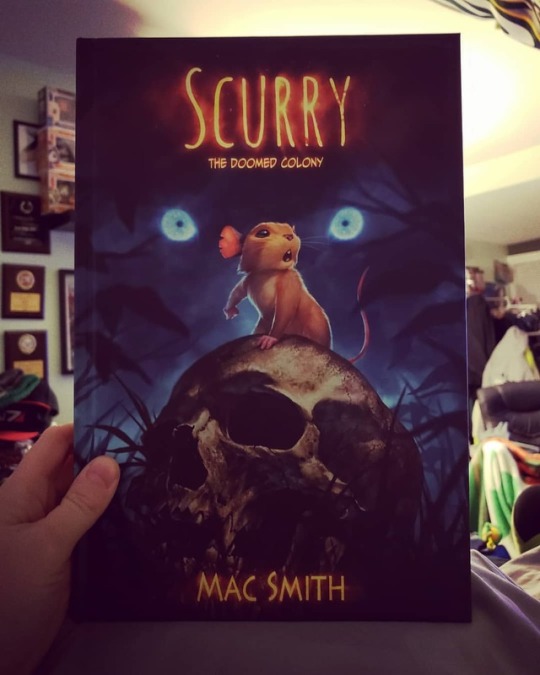
Check out this Graphic Novel my bf @antman5414 bought me ❤❤❤ #kickstarterproject #kickstarter #kickstarterbacker #Scurry #comic #graphicnovel #MacSmith #EasyPrey #Survival #apocalypse #miceapocalypse #thedoomedcolony #survivingtheapocalypse #reading #nerdgirl #geekgirl #femalenerd #bookstagram #bookreader #nerd #geek https://www.instagram.com/p/Bs1XR89hEvI/?utm_source=ig_tumblr_share&igshid=1kkpa65quxes5
#kickstarterproject#kickstarter#kickstarterbacker#scurry#comic#graphicnovel#macsmith#easyprey#survival#apocalypse#miceapocalypse#thedoomedcolony#survivingtheapocalypse#reading#nerdgirl#geekgirl#femalenerd#bookstagram#bookreader#nerd#geek
0 notes
Text
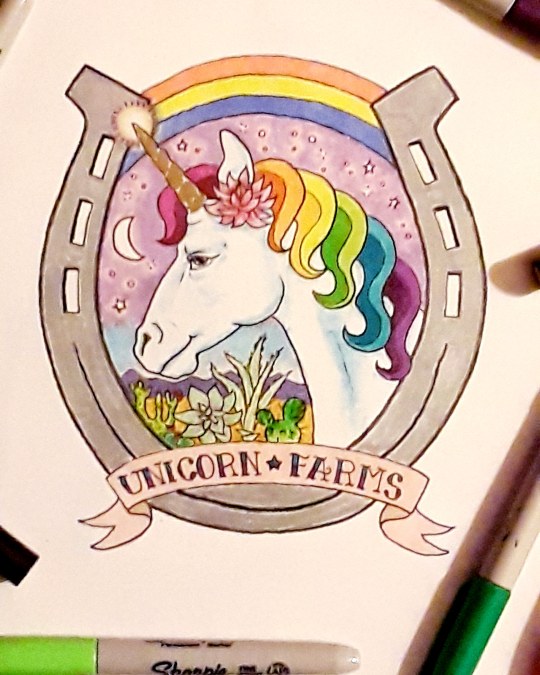
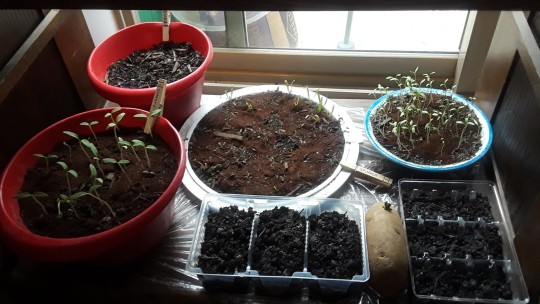
So right before all this Corona virus stuff started happening my mom and I were planning on starting a business called Unicorn Farms selling succulents and other things at the farmers' market that she helps me grow and that I turn into artful living arrangements. This is a color test I did in marker of the logo that I'm working on for us.
Currently, I don't know if the local farmers' market will be happening this year, or if I can even get the proper permits or licenses that I need to do this since everything is closed indefinitely.
Nevertheless, we're going to go ahead and start rolling out some aspects of our business - I'm still continuing to make living arrangements (I'll be posting some more pics soon!), and I've also started growing a bunch of produce (I figure food security might become an issue in the coming months). I'm starting an Etsy store for some of dry goods that I make, and soon I'll be posting some DIY tutorials on how to grow plants and make other things from stuff that you probably have in your house already. So if you want to learn how to container garden and craft along with me please stay tuned for updates! 👩🎨🌈🦄💖🌱👩🌾
#containergardening #succulents #cactus #gardening #smallbusiness #diy #diyprojects #diycrafts #diycraft #diycrafting #diyprojects #diyideas #diyproject #savetheplanet #saveseeds #apocalysecrafting #survivingtheapocalypse #gardeninspiration #gardens #gardenlife #gardenideas #garden #foodgarden
1 note
·
View note
Photo

I just had to! This couldnt be more useful to have! The #LifeStraw makes most any water drinkable! #bugoutbag #disasterprep #hikingadventures #hiking #survivingtheapocalypse #survival #gearup #waterislife #h20 #hydrate #stayhydrated #doyouevenscience #beready #neverthirsty #workhard #healthyliving
#survivingtheapocalypse#survival#hikingadventures#doyouevenscience#healthyliving#waterislife#workhard#h20#bugoutbag#beready#neverthirsty#stayhydrated#gearup#lifestraw#hydrate#disasterprep#hiking
0 notes
Text
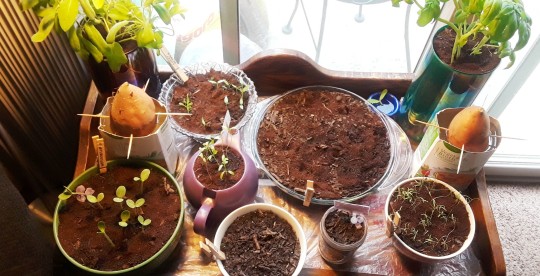
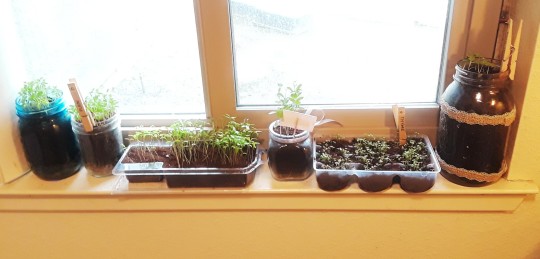
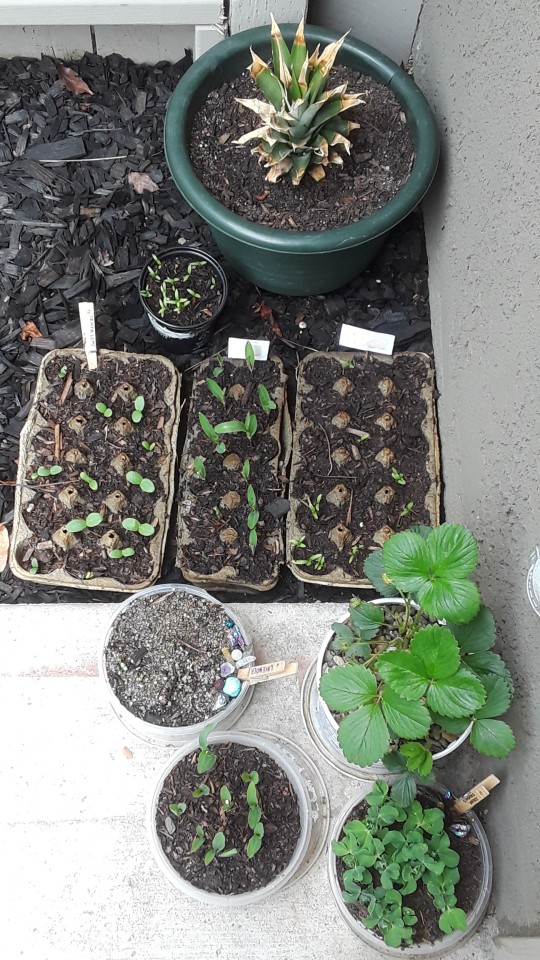
When you're a crazy plant lady you love your plants as much as other people love their pets or children, and you take baby pictures. 😍📸💞🌱🌷🌻🌺🌹🌵🌴🍇🍈🍉🍋🍌🍍🍓🍅🥑🥔🥕🌽🌶🥒
#containergardening #gardeninspiration #gardens #gardenlife #gardenideas #organicgardening #plantwisdom #growfood #growfruit #survivingtheapocalypse #apocalysecrafts #sunflower #cilantro #basil #sage #watermelon #dill #mint #tomato #corn #cantaloupe #gardenersofinstagram #beans #lavender #spinach #cucumber #stawberry #crystals
0 notes
Text
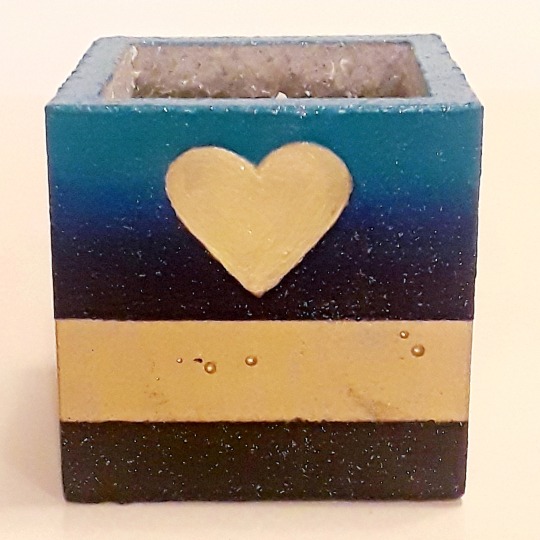
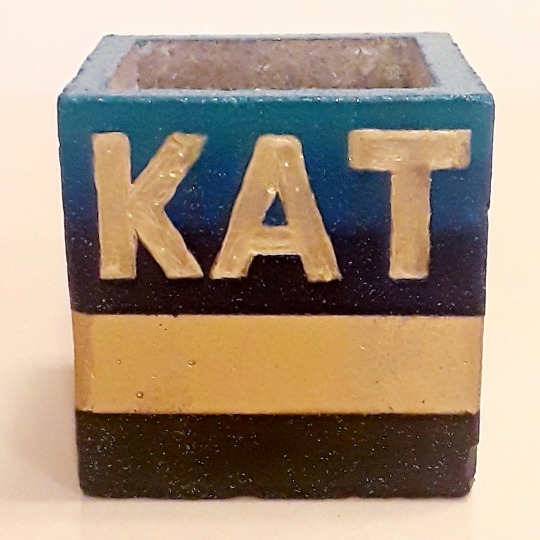

I painted this candle encased in concrete for a friend who's been depressed because of the isolation she's experiencing due to the sheltering in place order that is in effect in CA.
During this crisis, we should all be practicing good hygiene and social distancing to prevent the spread of the virus, but we still have room for human kindness! Now more than ever we need to check in with people we care about, especially those with underlying mental health issues that might be struggling with increased feelings of isolation.
We can still have face-to-face conversations (as long as we don't gather in groups of more than 10, noone is showing signs of infection like coughing, and we maintain a safe distance of 6 feet from each other), and we can still show people we care with gifts!
I read a report by Harvard that said Corona virus can only live on hard surfaces (like stainless steel and plastic) for 2 to 3 days, and those surfaces can also be disinfected with bleach products. The paints I used on this project are acrylic (which are water-based paints that often contain plastic pigments) and I coated it with an acrylic varnish which should withstand a light disinfectant like a pre-moistened bleach wipe.
You can paint on pretty much any hard, porous surface with acrylic paint (cement, plaster, terracotta, wood, stone, etc.) as long as that surface is primed (I used clear gesso that I had on hand, but any primer suited for acrylic paint will do).
Also, if you want your paint job to be permanent (and easily disinfected) you will need to seal it with some kind of clear varnish suitable for use with acrylic paint (I used Americana StarLite Varnish which has iridescent glitter mixed in).
You probably have most of the supplies that you need to do a project like this already in your home (and if not they can be easily obtained online or in the craft section of stores that are still open like Target or Wal-mart), and doing kind things for others will help take your mind off your own worldly troubles so let's get crafting everyone!
👩🎨💖🌈🖼🔜👩🎁😀
To make a custom painted object like this you will need:
- An object with a porous, paintable surface
- Paintbrushes (it helps to have a few different ones for details, wide areas, and blending)
- Palette (for putting paint on and blending colors; wax-coated paper plates work well for mixing small amounts, but for mixing large amounts of paint to a specific color consider using a disposable bowl or cup)
- Water and a container (any clean plastic or glass container such as a disposable cup or glass jar will do) and paper towels or clean cloth rags (for cleaning brushes in between colors)
- An apron or old clothes you don't care if you get paint on (once acrylic paint dries it is difficult if not impossible to get out of porous surfaces like clothing, so keep that in mind when you start priming, painting, or varnishing!)
- Primer
- Acrylic paint (craft paint or artist's paint both work fine)
- Varnish
Optional to help with your design: graphite or charcoal pencil, ruler, heavy paper or Friskit film and scissors or an Exacto knife (for cutting stencils), masking tape or painter's tape (for masking off areas you don't want to get paint on), graphite or carbon paper.
- Imagination!
Instructions for making this project:
STEP 1: Apply masks over areas that you don't want any primer or paint to go (if you're not concerned with that you can skip this step). On my project, the top half was raw concrete and the bottom half of the candle was already painted with a gold and black stripe that I wanted to leave untouched. I masked off that area and the area inside the concrete candle holder before I primed.
STEP 2: Prime all the surfaces of the object that you intend to paint. Apply multiple coats if necessary to achieve smooth, uniform coverage, but allow to dry thoroughly between primer coats and before applying other masks or paint!
STEP 3: Cut your stencil. For the heart, I folded a heavy piece of paper in half, drew half of a heart along the fold line with a pencil, and then cut out the shape I drew with scissors. When you unfold the paper you should have a symmetrical heart. I taped this over the area where I wanted to paint the heart, and traced around the outside. Pro tip: use double-sided tape (or a regular piece of tape formed into a loop and flattened) and and affix this to the back of the stencil (instead of the top) so you don't mess up your pencil lines!
For the lettering I just drew on the object freehand with a pencil, but for more complex shapes you may find it's easier to draw them on paper first and cut stencils or use graphite or carbon paper to transfer your drawing onto the painting surface.
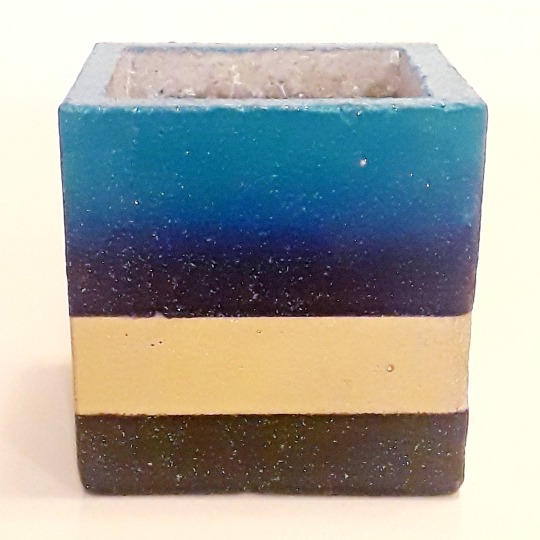
STEP 4: Paint! I like to start with backgrounds and then do the foreground details. To get the ombre effect paint stripes of the colors that you want to blend next to each other (I used acrylic craft paints in teal and pthalo blue). I use one brush for each color (a wide, flat brush works best for this), and then while the paint is still wet I use a third soft brush to blend the two colors. If the paint dries to fast to achieve a smooth blend, sometimes you can reactivate the paint by moistening your blending brush with clean water before blending. If this doesn't work try mixing the two colors your using together on your palette with your brush and blending that into the colors you already laid down previously using a little water at the edges of where the colors meet to help soften the transitions. Allow to dry completely before drawing or painting anything else on top and in between successive layers.
Pro tip: If you thin acrylic paint to the consistency of watercolor or ink you can achieve watercolor-like effects with it. This works best on flat surfaces that have been primed with fine ground white (or other light colored) gesso.
For the heart and lettering I used a small, round, pointed brush to fill in my pencils lines with metallic gold paint (if your pencil lines got messed up painting the background, you may wish to redraw them more clearly before painting this next layer). It may take multiple coats to achieve the coverage you desire (be patient and allow each coat to dry before applying the next!).
STEP 5: When you have finished painting your object to your liking and the entire thing is completely dry you can varnish it. Varnishes are typically clear and come in three finishes: matte, semi-gloss, or gloss. It will help you paint adherence by preventing flaking, fading, cracking, and scrapes that can ruin your fine painting job and give you a smooth surface to disinfect so I suggest not skipping this step - especially if it is something that may be handled a lot!
If your project is something intended for use outside, make sure the varnish you use is for the outdoors so it will protect the paint from weathering in the elements.
Finally, acrylic paint is not compatible with enamel or oil-based varnishes or polyurethane stains so keep this mind when choosing one to use! Allow the varnish to dry completely before trying to handle the object.
STEP 6: Brighten up your own home environment with your beautiful creation or give this to someone that you care about. If giving as a gift be sure to disinfect it with a bleach wipe and practice good social distancing by leaving it outside for them.
Be a light in dark places and keep shining, everyone!
#apocalysecrafts #diy #survivingtheapocalypse #candles #diycrafting #diyprojects #diyproject #giftideas #gift #gifts #crafts #humankindness
0 notes
Last Seen Blogs

the-surf-crew
The Surf Crew

giveyourselftoharmony
Aurora Aksnes

heartsdesiires
indefinite hiatus

octobersociety
The October Society
octobersociety
The October Society