#gpose tutorial
Text
Virtual Photography Guide: Composition

One of the in-game activities I enjoy the most is trying to replicate real-life photography techniques in gpose, and it’s surprising how much can be achieved. So today, let’s play around with composition!
Leading Lines
Leading lines can help guide the viewer's eye through an image. They’re visual elements that form lines, like buildings or roads, or even an area with high contrast, like the horizon line. So by aligning convergent lines to create these ‘focal zones’ you build a sense of depth and lead the viewer's gaze toward it.


Framing
You can use elements within the scene to enclose or surround your main subject. These elements could be natural, like branches or foliage, or architectural, like doorways or windows. This adds depth and context, and helps the viewers immerse themselves in the scene:

Symmetry
Symmetry creates a pleasing sense of order and balance in an image. You can do this by dividing your frame equally and positioning similar elements on either side:

Depth and Layering
Adding depth to your virtual photographs enhances the sense of immersion. By placing objects of interest in the foreground, middle ground, and background, you can create a layered effect that adds depth and dimension to your composition. DoF (Depth of Field) shaders are particularly well suited for cases like these:

Point of View
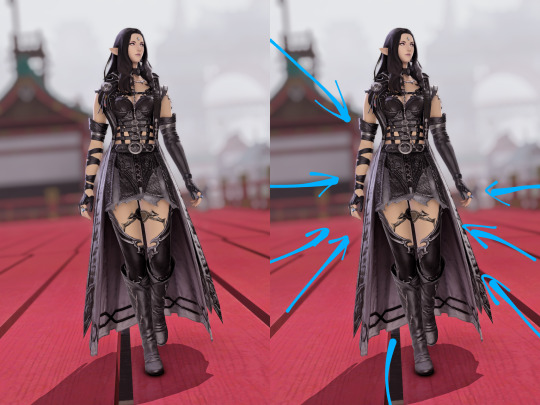
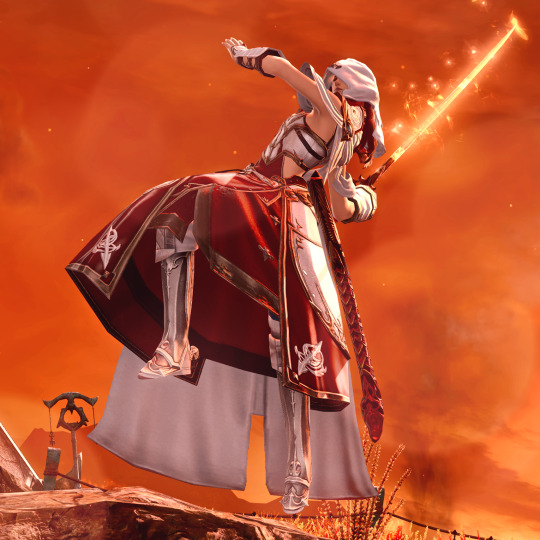
Experimenting with different and unusual camera angles and perspectives can yield surprisingly dynamic and engaging shots. For example, positioning the camera at a low angle and looking up at the character can create a very impactful composition:


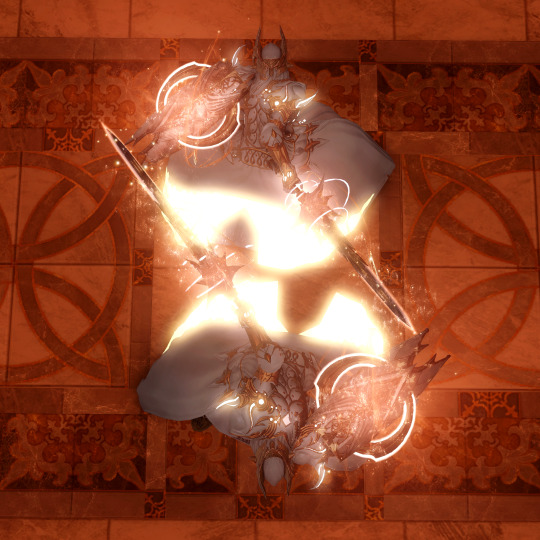
On the other hand, top-down pictures can not only give the viewer a sensation of being ‘in the scene’ but also help put elements together that would otherwise be scattered around in a horizontal shot:

Negative Space
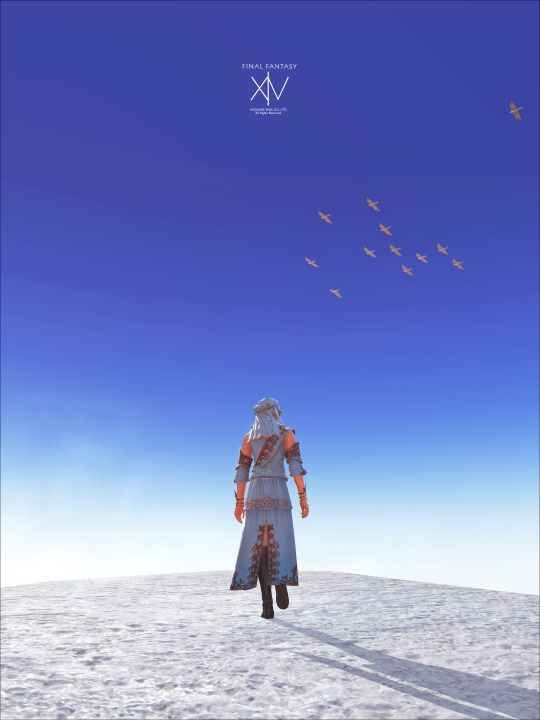
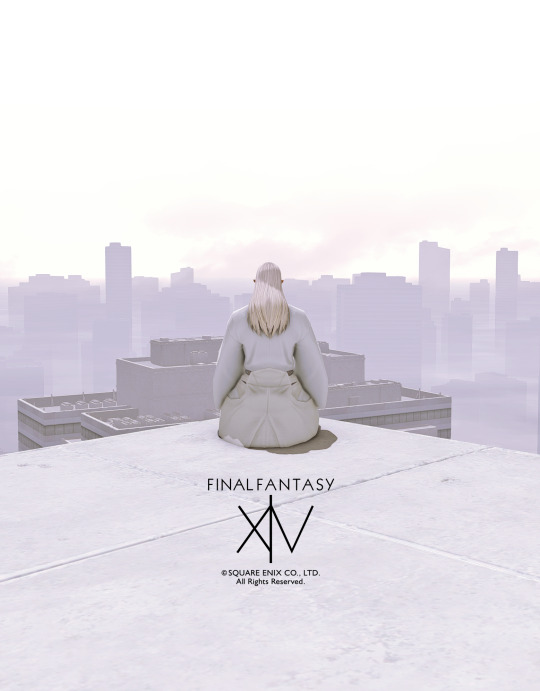
Negative space refers to the empty or minimalistic areas in your composition. It provides breathing room for your main subject and can evoke emotions, or create a sense of balance and calmness.


And let’s not forget the most important rule of all:
Break the rules
These principles serve more as guidelines than anything. Sometimes trying to force a composition into one of those categories can detract from an unusual yet powerful shot, so trust your eye and aesthetic sense.
I'll cover more composition techniques like the Rule of Thirds, Rule of Odds, Rule of Space, Golden Ratio, and others in part 2. Enjoy!
551 notes
·
View notes
Text
Taking good gposes without reshade or 3rd party tools
this post was made for like, 2 of my mutuals. full disclosure i dont entirely gaf if you do or do not use plugins or reshade- but a lot of tutorials i can find usually like to say "use shaders!" instead of showing how vanilla tools are good. this ones for you console players. It's a bit lengthy so I kept it under the cut for scrolling convenience.
My character only has cosmetic mods on for this tutorial. I did not use anything that I could not access using vanilla methods and menus, my shaders are off for this demonstration.
PART 1, some tricks in the gpose menu
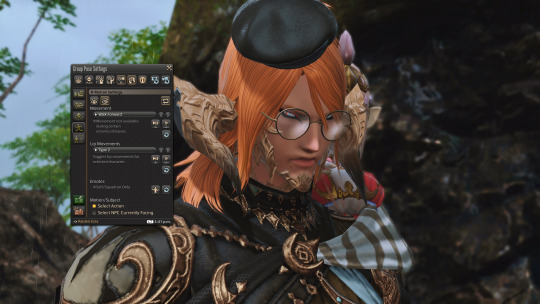
a few that I personally have picked up from poking around in the menu this is one I like to use for decent angles, minions!
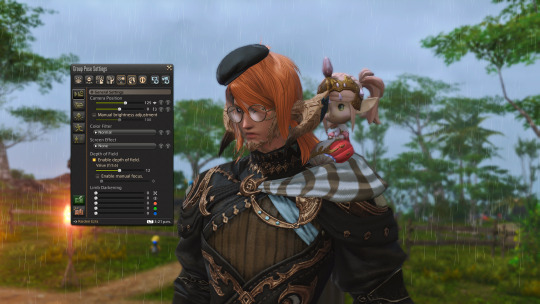
Any minion that could sit on your shoulder (head for lalas) is like a second camera. I use nanamo here as an example as she's relatively easy to get and Midgardsormr does not get on your shoulder with /beckon the way other minions do
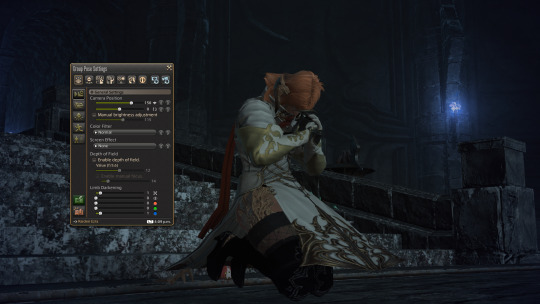
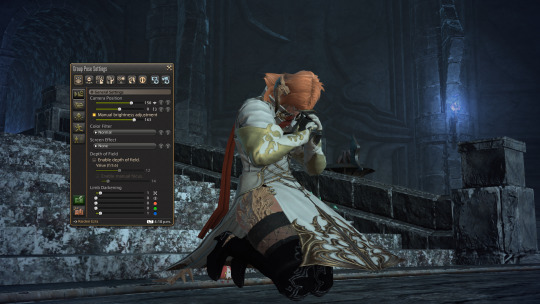
left is nanamo targeted, and right is with my character targeted. See the difference? This could give you a different variety of angles that would be difficult to achieve otherwise
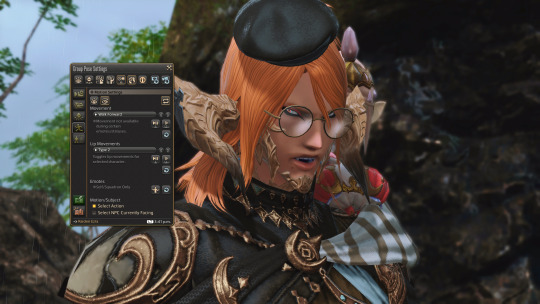
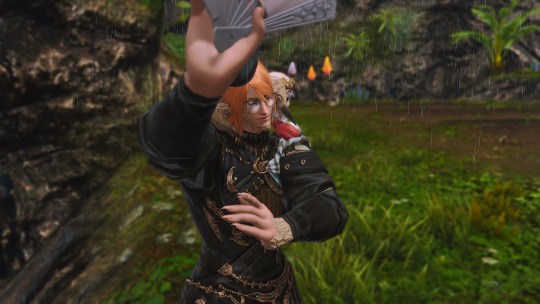
I also like using tools like the talking animations to get different types of expressions. you could achieve a D:< face like above, or a :D face if you use /smile
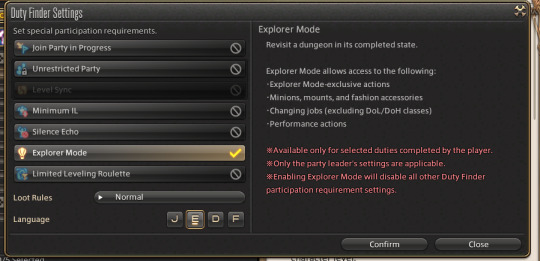
last trick and one I will be using for this tutorial is Explorer Mode accessed via duty finder, this allows you to use battle moves that could assist in a more dynamic shot, as well as letting you access cool dungeons to walk through
like this! though if the effects are bothering you you could turn it off with this button, please note that you cannot turn off battle effects for every move

Part 2, let's get gposing
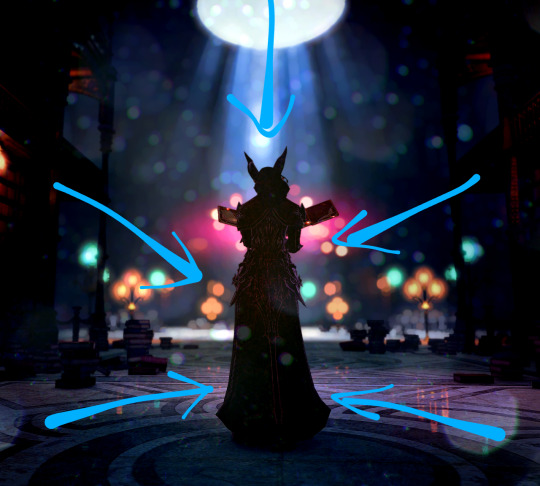
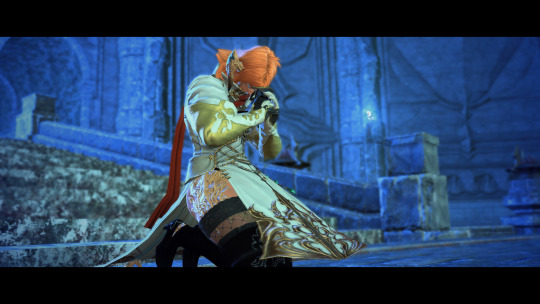
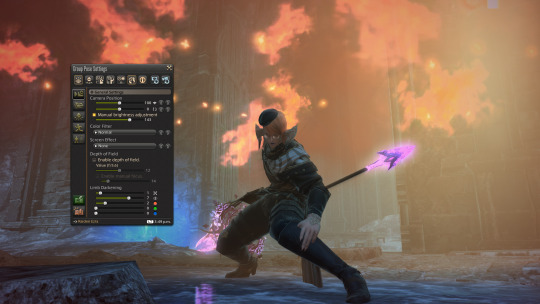
Now that you have an idea and pose (I used whm lb3 to get this) when you enter the gpose menu, the first thing that you'd notice is that it is very dark. Manual light adjustment usually remedies that

a look at what i have used, and a walk through of what every button does. I forgot to mention screen effect, which again is pretty straightforward- in the past I've used the particle effect to be more "glittery." though do feel free to play with it.
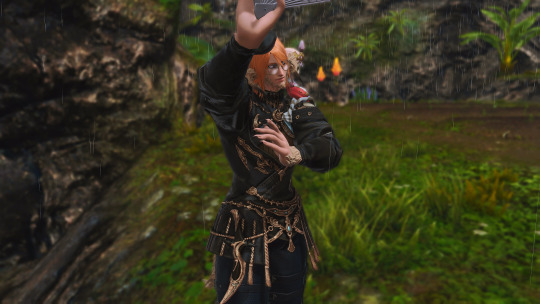
You may notice in the back of the picture, there is a blue torch. I really want that blue light to hit my character, but it's not doing that now because ffxiv's lighting engine was nerfed tremendously to help load. All I have to do to give that light to my character is move the camera in the position I want it to (i put it as far back as possible so I am as close to the torch as I can be)
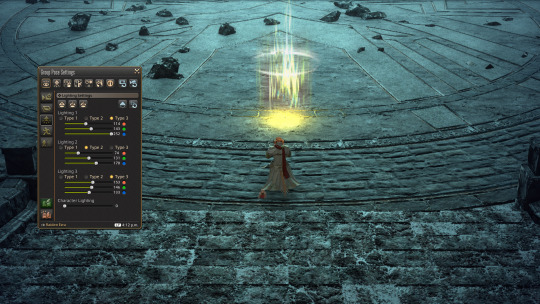
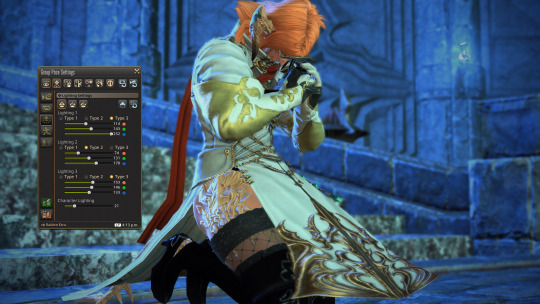
et voila, there is now blue light. The way lighting works is that you have 3 lights, and each with 3 "types" type 3 is most intense, while type 1 is the least. The sliders show which color is most intense, I just slid blue up all the way to have it be the brightest.

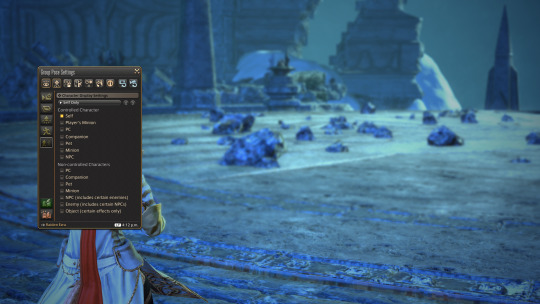
nearly forgotten about the pesky shortcut portal though. to hide this you can switch to the bottom most button in the lefthand column, and switch from "show all" to "self only" though if this is a group shot, change it to "PCs only" (i think thats the term)
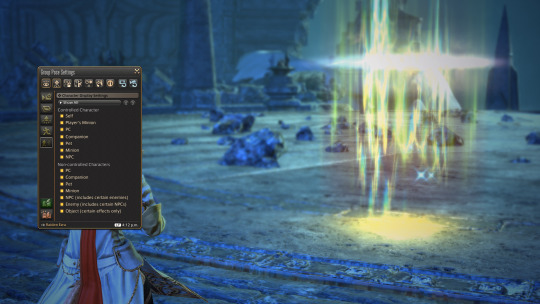
you could also see in this shot my "character lighting" slider is up, this is how intensely light affects your character- mine is relatively low here because I do not want the light to be too intense.
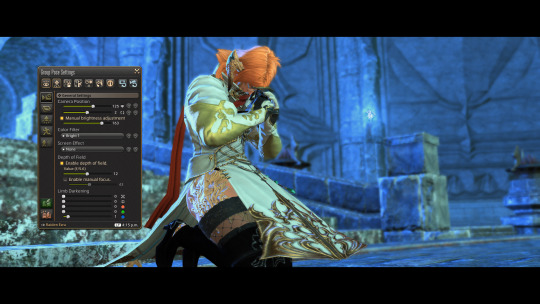
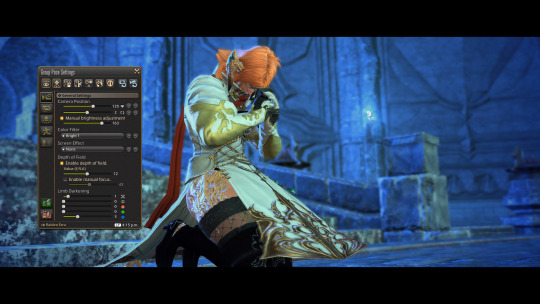
and lastly, i used limb darkening (as well as using the cinematic frame in the 2nd button lefthand column. the one not affected by camera movement. I find the frames pretty straightforward but let me know if you'd like me to talk more about them) you could tell the difference in mood. left is without, and right is with. It depends on the vibe you want, but I personally always think a teensy vignette can do a lot for a picture
and with that, this is the final result, and the one I showed at the beginning! Though not necessary, you could always take it a step further and run it through an editing program (personal recommendation if you want something free is photopea, which is an in-browser photoshop replica) or even using photography knowledge like rule of thirds & color story. but this is still much, much better than what we have started with.
how far we've come....
#ffxiv#ffxiv gposers#gpose tutorial#dunno what to tag this as. hayy#this is more of a walkthrough and me explaining the process than anything but i still hope its helpful
9 notes
·
View notes
Text


the major arcana, shuffled: 4/??
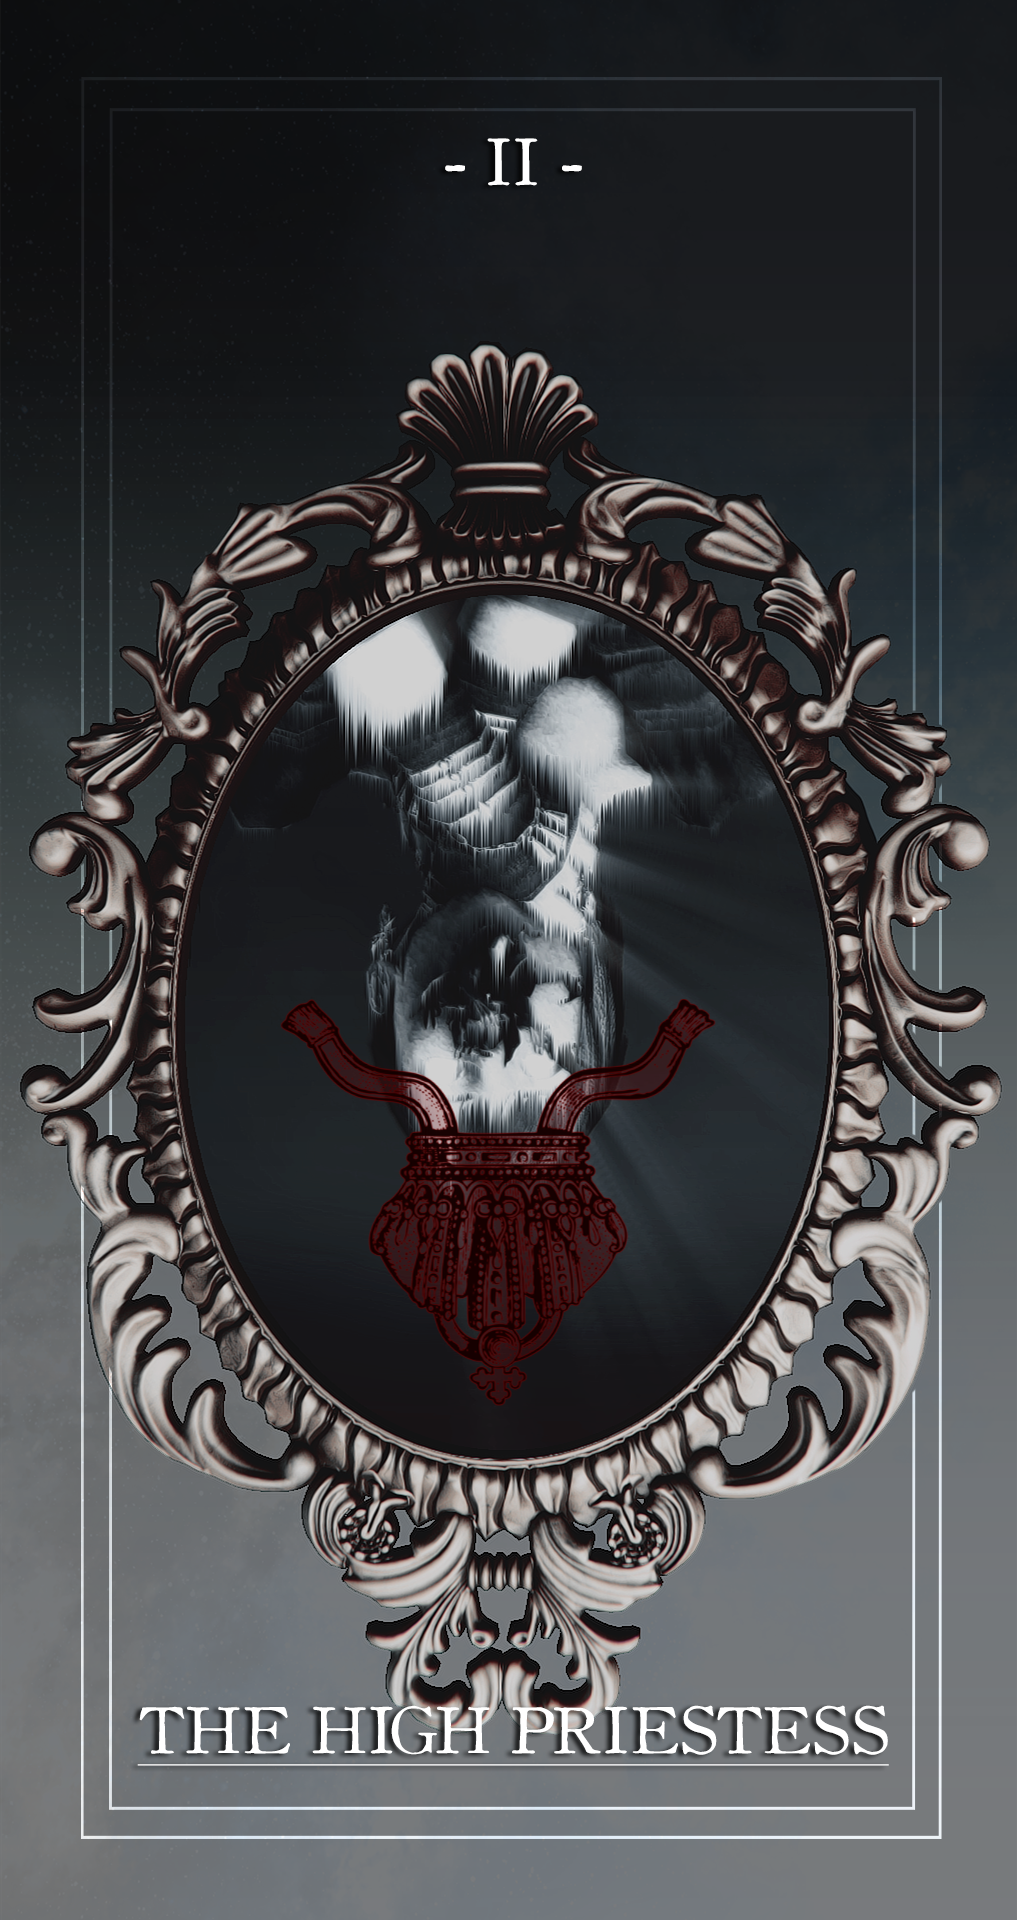
THE HIGH PRIESTESS;
⤉ spirituality, higher power, mystery, subconscious
⤈ hidden motives, secrets, repressed intuition, cognitive dissonance
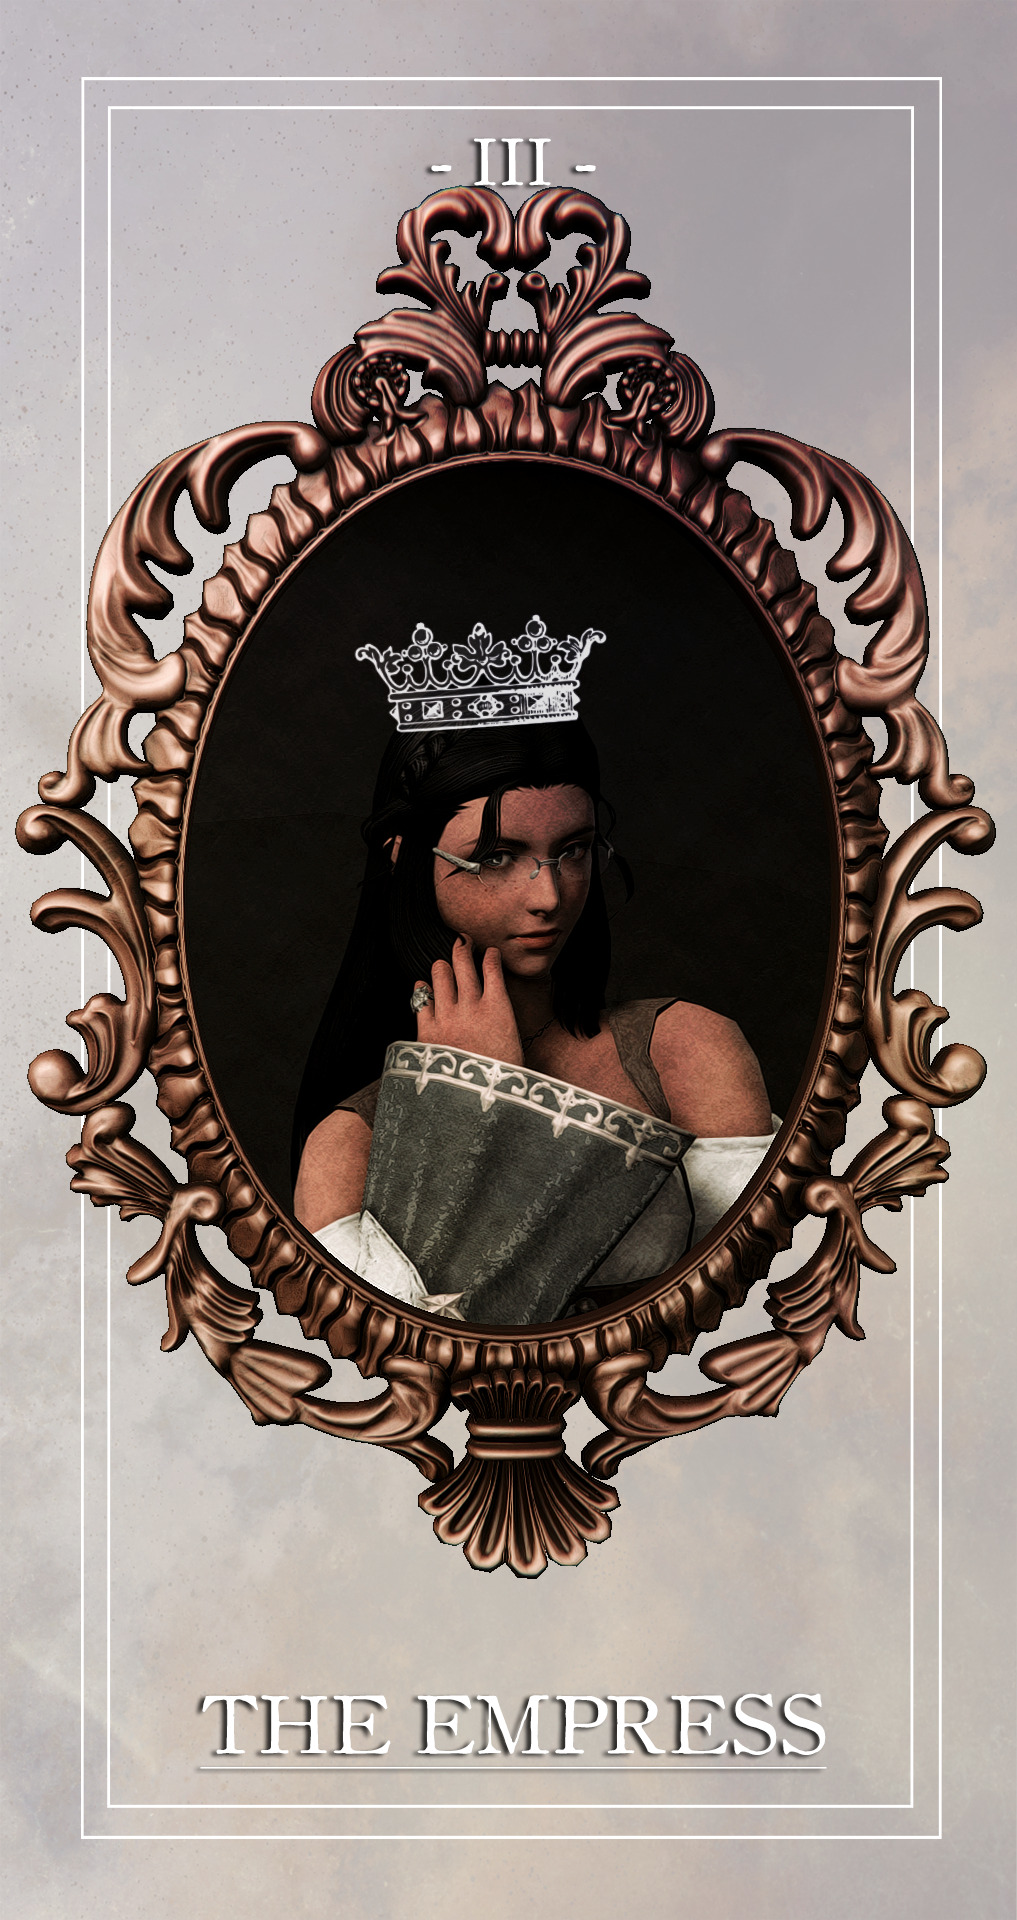
THE EMPRESS;
⤉ motherhood, femininity, nurturing, harmony
⤈ smothering, negligence, lack of growth, insecurity
THE EMPEROR;
⤉ fatherhood, structure, authority, control
⤈ tyranny, domination, recklessness, rigidity
#mypost.#ffxiv gpose#ffxiv screenshots#ffxiv oc#ffxiv:tma#oh boy a 3 for 1 deal!!!#ty to fheythfully for your portrait tutorial!! :D#my game crashed when i was making this and i was about ready to pass away#the idea for this was 'haunted family paintings' with a dash of dorian gray#i intentionally fucked up the facial expressions with crimes & used photoshop filters to achieve the decaying effect of the reverse#for the people who don't know the tatlongharis (aka paris' maternal family via andromache):#the priestess is their aunt cassandra / the empress is their grandma hecuba / the emperor is their grandad priam#paris never met their grandma because she died way before paris was born#how did she die? priam accidentally caused her death but she (and cassandra) predicted she would die b/c they have the echo#so there you go :)#also i tried to match the crowns to the card names but i don't think i got close lol#body horror cw#just in case#notice how hecuba's face is all mangled while priam's flesh is wasting away. like the rotten corpse he is#as per usual flip your phone around to see the reverse sides#🏵️
59 notes
·
View notes
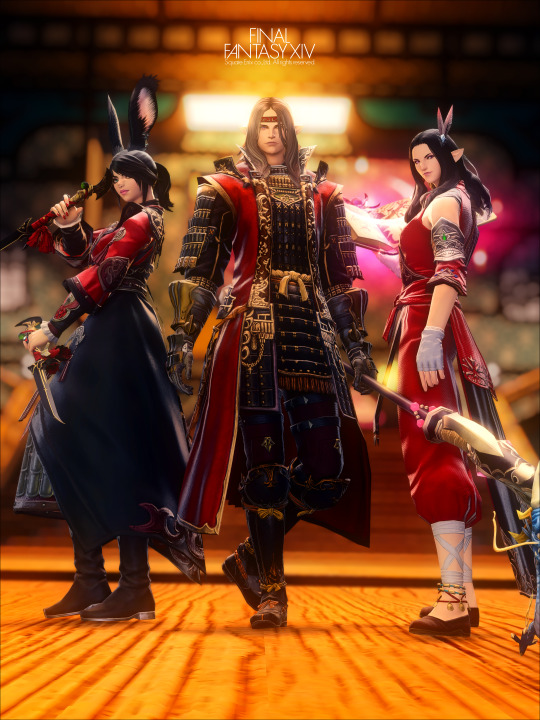
Text

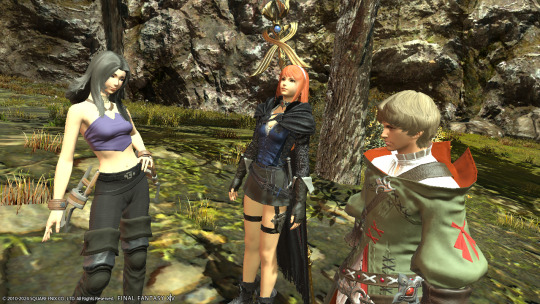
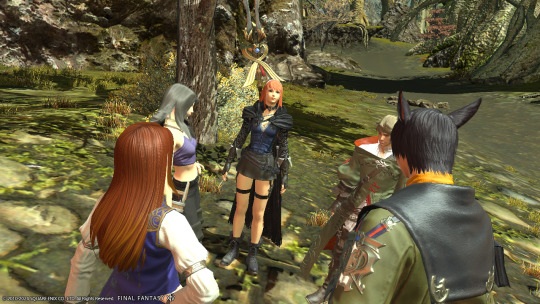


Hope spending some time with her four children while her darling and beautiful and amazing wife Josie's back home looking after the house or something (and totally not because I ran out of characters to take this poorly positioned group photo rip)
#hosie#hosie ffxiv au#THIS TOOK WAY TOO LONG FOR ME TO SET UP#i did my best to make Hope in this game#i'll try and make Josie next time#but good god I am so confused and there's not a lot of tutorials out there that can help me figure this out#eprika rambles#rika plays ffxiv#hosie fankids#ffxiv#ff14#final fantasy xiv#final fantasy 14#gpose#hyur#miqote
5 notes
·
View notes
Text
youtube
Need to install ReShade, but even with a guide it's giving you problems? Or just don't wanna deal with the complex installers? Then use Espresso Glow, a ReShade installer that does all the hard work for you!
Follow my simple video guide to get it all set up!
(Note: This installs Vanilla ReShade without GShade settings, but can be altered to use GShade presets as well.)
#Reshade#Espresso Glow#ff14#ff14 gpose#ffxiv#ffxiv gpose#final fantasy 14#final fantasy gpose#ffxiv viera#ff14 ffxiv#viera#guide#video guide#tutorial#Youtube
8 notes
·
View notes
Photo
#ffxiv wol#danya#ffxiv#ffxiv gpose#i just want everyone to look at her#made using that pride lighting tutorial from @/whitherwanderer
2 notes
·
View notes
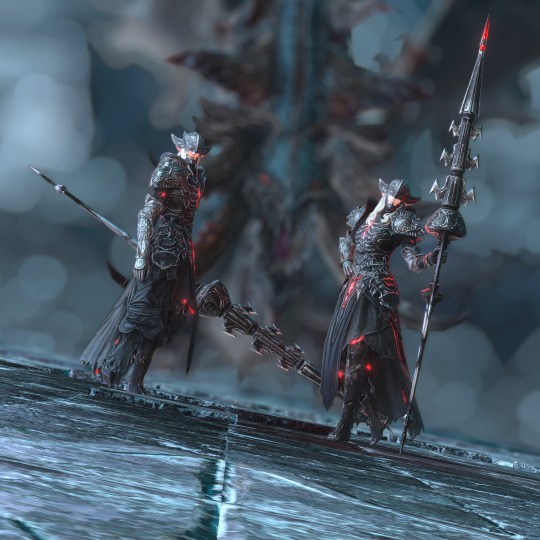
Note
I saw your AMAZING screen of Kiri v Leviathan and I was wondering if you have any tips on creating dynamic poses and screenshots like that? Specifically, what did you use to get the motion blur? Thanks!

Aaah! Thank you so much! I'm amazed and thankful for all the love that shot received! I was actually worried the blur would make it off-putting to folks!
That being said, the pose itself is an in game pose of Kiri using one of the dragoon jumps. A lot of in game movements/actions/emotes are incredibly useful and are worth trying out in various ways. Like using the Shiver emote beside railing to make it look as if your character is leaning on the rail itself. There are other elements that I use in most of my sets but trying out emotes and even job specific actions can be a fun way to find a new pose!
The motion blur I used is outside of the game however. I don't have access to photo shop itself but I use pixlr x and pixlr e for fun edits like adjusting lighting/colors and in this case, the blur. Pixlr E under filters has some fun effects that can be adjusted! I believe for the Leviathan shot I used a really low form of Zoom Blur so it didn't overwhelm the shot itself.
There's a lot of talented people in the ffxiv fandom that edit shots in art programs like photoshop that look stunning and I would definitely recommend checking out their tutorials. @/kukurubean has a lot of good tutorial posts for gpose and editing, along with @/sarenhale! I'm not the best at explanations tbh but they offer good tips and advice!
#|| Mognet - answered#i just ramble and nothing makes sense BUT THANK YOU#I hope this little bit helps???#but if not gpose tutorials are really helpful and fun to take a look through!
2 notes
·
View notes
Text
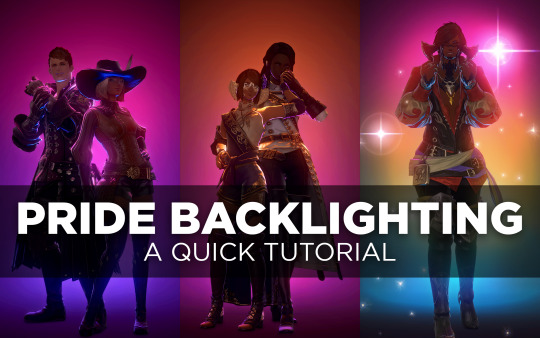
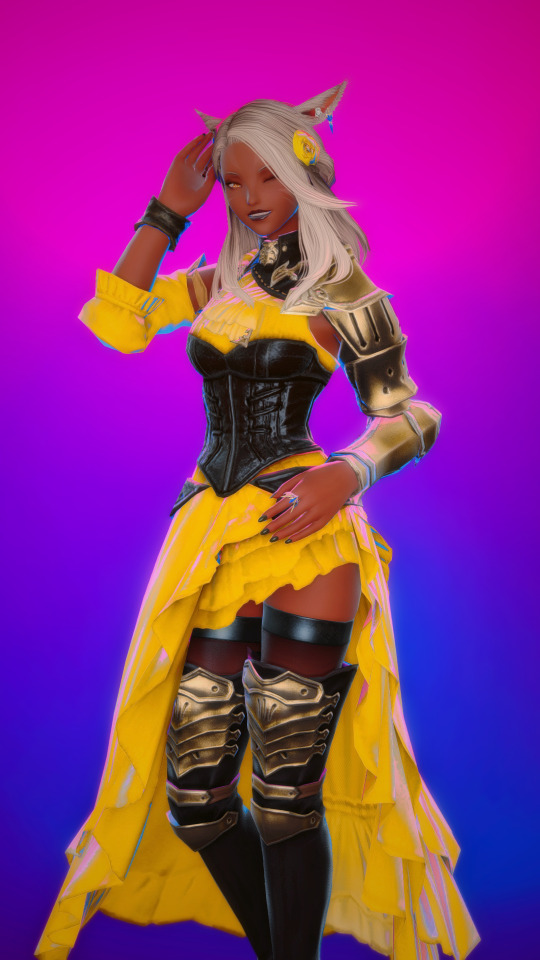
Pride Backlighting Tutorial
A few people have shown interest in replicating the pride backlighting I did, so hey, here’s a quick tutorial below the cut.
Enjoy, and happy Pride Month. 🏳️🌈
STEP 1 — SETUP
First thing you’ll want to do is find a suitably dark background to bounce the light off of. I use the White Screen housing item dyed Soot Black, available from the Housing Merchant or Apartment Merchant in any of the housing zones for 3000 gil.
I line up 2-3 of them for coverage, but one will do if you're trying to be frugal.

If you don’t have an apartment or an FC room to use, try asking friends, FC mates, or even folks you share a Discord server with. You might even find someone who already has a studio space set up and is willing to let you use it!
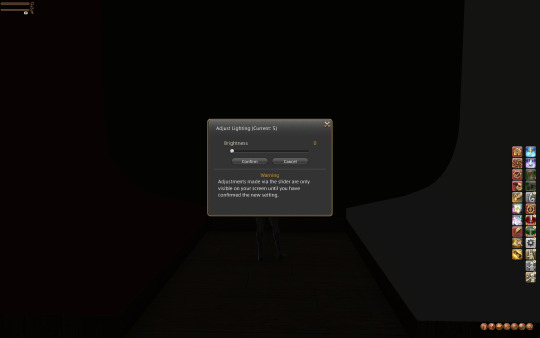
Lighting in your studio space should be 0 (though you might have success at 1 as well), so make sure to adjust that or ask the studio owner if they can make that change before you start posing.
STEP 2 — GPOSE
Position your character(s) just a little ways back from the edge of the screen. You want some space between them and the screen so that the lighting can float there without casting a weird circle on the wall.
Hop into /gpose and bump up the “Manual brightness adjustment” to about 120 or whatever level allows you to see your character well enough to pose them. Pose to your heart's content.
STEP 3 — LIGHTS
Here’s the fun part. In the Light tab of the Gpose menu, switch all of your Light sources to Type 1, which has the shortest falloff radius (meaning it doesn't reach as far as Type 2 or 3). I also set all of my lights to one strong color to differentiate them while I worked on lighting—red, green, and blue, all maxed out at 255 (for now).
Swing your camera (still on all default settings) around to your character’s back and up above their head a little ways. This is where Light 1 (red) will go.
Now pan your camera down at about mid-back height and set Light 2 (green) there.
Pan your camera down one last time until you have a nice shot of your character’s butt and set Light 3 (blue).
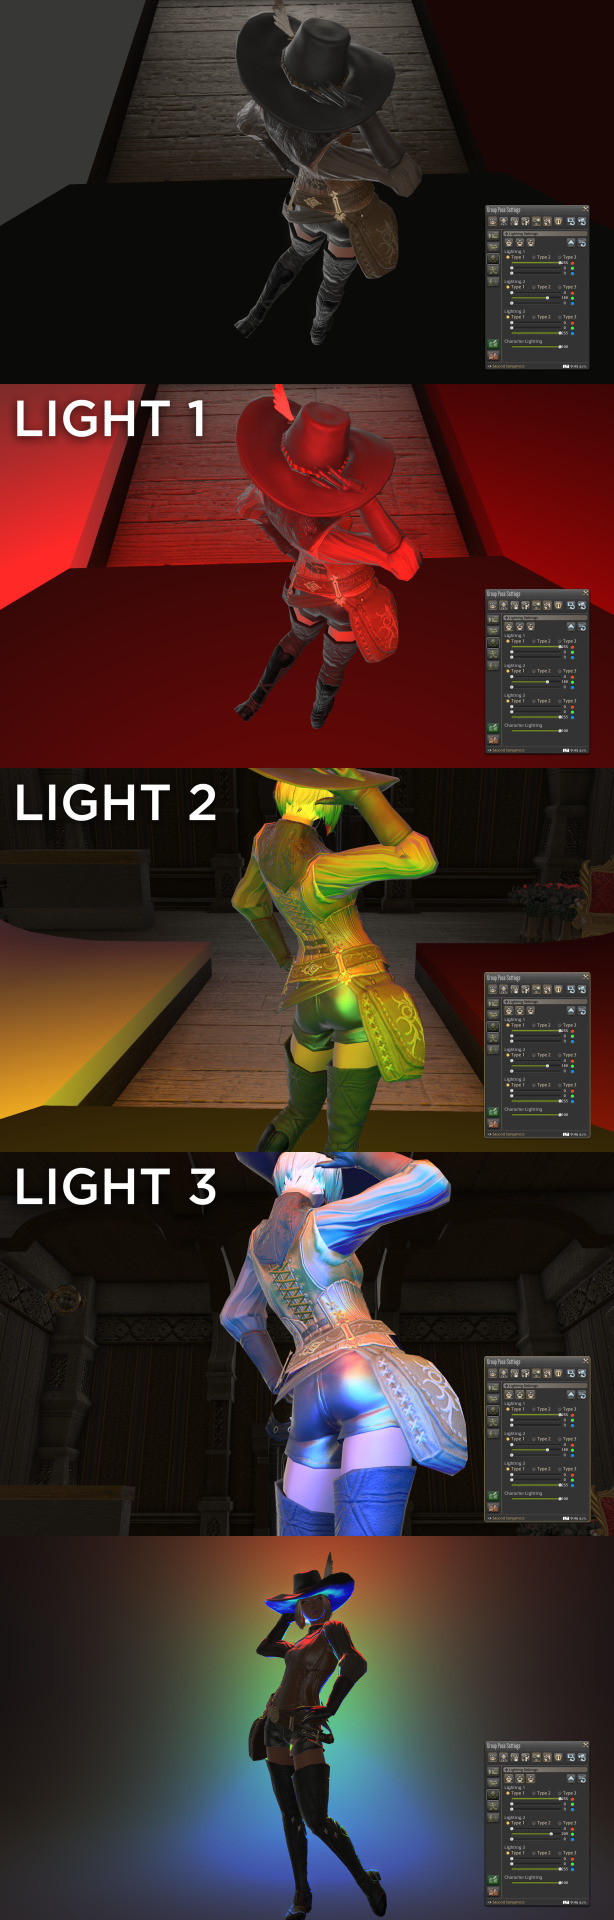
Spin your camera back around and enjoy this nice little macaw-colored gradient.
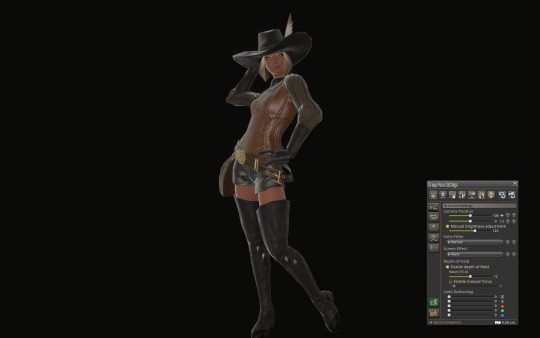
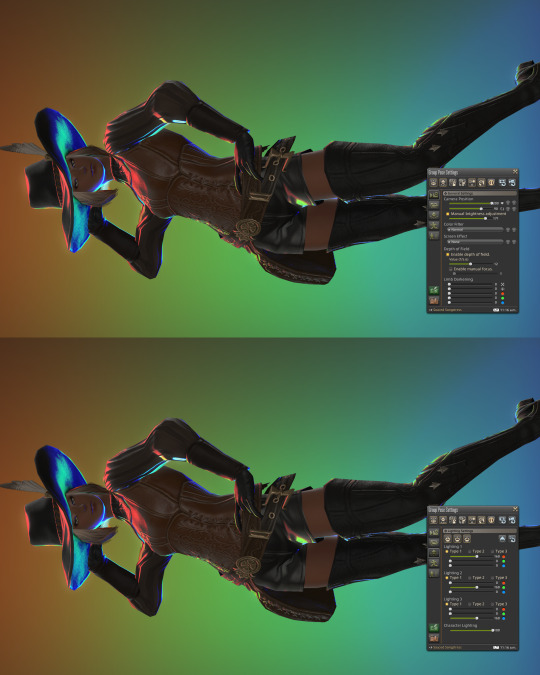
STEP 4 — CAMERA
Set your camera angle.
The way FFIXV’s lighting works is partially dependent on how much light is in a shot. It will adjust a lot like your eyes do when you’re entering a dark room from a bright room, or vice versa. Your zoom level and camera angle are going to directly affect the lighting, so set this before you start messing with light strength and color. Sometimes this means weaker lighting will actually light your character better.
I ended up bringing my lights down to around ~160 and boosted the "Manual brightness adjustment" up quite a bit to get lighting I was happier with.
For a straightforward vertical shot, I like to have my Field of View (FOV) at 200 and of course my rotation is set to 90. Zoom in or out as needed. Remember to save your camera angle if you plan to pan around and fix things!
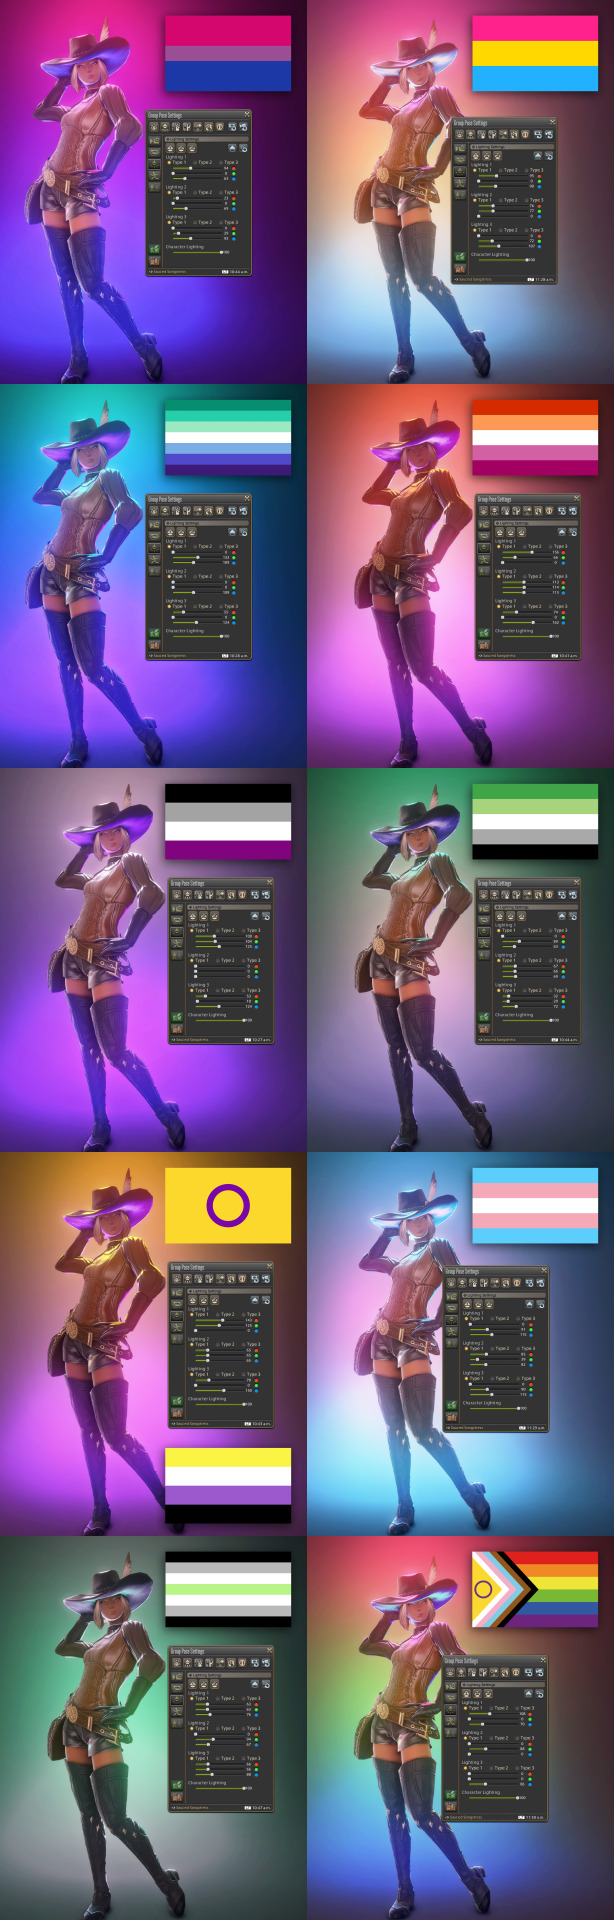
STEP 5 — COLOR
Make it ~queer~.
Take your flag of choice and pick out 2-3 “main” hues. Generally these will be the strongest hues in the flag, if not the only ones. Some flags, like the Pride/Progress/Intersex-Inclusive flag itself, are difficult to replicate for the sheer number of colors that are in it. You can loosely represent a rainbow with some adjustment to the RGB colors, if you’re determined to have a whole rainbow in there.
Shader Note: I recommend picking a shader preset that doesn’t mess too much with color so that colors are represented correctly. You may need to adjust light strength and “Manual brightness adjustment” to be compatible with your preset of choice. Bloom will also heavily affect the way your colors are showing up, so you may need to tone down the bloom FX or toggle it off entirely. This all depends on your preset, however.
If you’re not into RGB math, here are some cheat sheets! Not every flag is represented here of course, but I tried to cover as many colors as I could so that you could grab a color from another flag as needed! Please note that colors will need some adjustment for your own screenshot, presets, and preferences.
And that’s it, y’all! 🏳️🌈
(Open this image up in a new tab for more detail.)
These were taken using a heavily customized shader for that nice glowy effect.
#ffxiv#ffxiv screenshots#[ ooc ]#[ tutorials ]#i didn't actually have a tutorial tag but#now i do#enjoy ❤️
974 notes
·
View notes
Text
SEA'S COMMUNITY COMPENDIUM UPDATE
We have a massive one today! Huge thanks to a close friend of mine who sent me every single bookmark of xiv resources she had. 💖
Additionally, a good handful of these resources were sourced from a list originally created by @rinhkitty, which you can find here. I have tried to include the more recent/active of the lot, so it's not a one-for-one. Thank them for a lot of the large scale resources you'll find below! ✨
As of 04/12, I have added the following resources (in no particular order) to Sea's Community Compendium for FFXIV Creatives:
LARGE SCALE
GARLAND TOOLS — Contains XIV resources such as Garland Data, everything database, crafting lists and equipment calculators; Garland Bell, gathering timers, collectable resources and hunt windows; and FFXIV Fisher, daily fishing windows, bait paths and catch checklist. Maintained by Clorifex Ezalor of Zalera.
TEAMCRAFT — Create crafting lists and collaborate with others, set gathering alarms, simulate crafting rotations, and more!
CAT BECAME HUNGRY - FFXIV ANGLER — Contains everything and anything to know about fishing including specific fish guides, location, baits, aquarium fish and more!
FFXIV - CRAFTING AS A SERVICE — Crafting information and planning for FFXIV!
FFXIV GARDENING — The FFXIV Gardening Database is a collection of everything related to gardening in Final Fantasy XIV: A Realm Reborn. It was created to organize and visualize the results obtained from crossbreeding.
SIGHTSEEING LOG HELPER — This tool will help those trying to complete their pesky Sightseeing Log by letting them know upcoming weather patterns for each zone!
EUREKA TRACKER — For everything and anything to do with Eureka mobs, tracking and weather patterns.
FFLOGOS — for tracking of items/actions related to Eureka.
FFXIVSQUADRON — A comprehensive tool that helps you assess the success rate of various squadron missions.
FFXIV CHOCOBO COLOUR CALCULATOR — Will calculate what chocobo feed you will need to get from your current colour to your desired colour. *rng not included.
FFXIV HOUSING — A site specialising in the documentation of all housing items available in game.
HOUSING SNAP — A compilation of player-made housing designs. Can be used for inspiration or places to visit!
MISC
NPC CHAT BUBBLES — Would you like more NPC chat bubbles for edits? Say no more! Created by @alexoisxiv.
OLD TUMBLR LAYOUT BY PIXIEL — While not XIV specific I know a lot of people aren't fans of the new Tumblr layout, so this is a fix that will revert it to an as close as possible approximation of the new one. I won't tag the creator as I don't think they're in the xiv community, but it's run by @/pixiel!
HOW TO CURSE LIKE AN ISHGARDIAN — Do you want to make the church blush? Do you want to incur the wrath of Halone? @stars-and-clouds has compiled a list of appropriate curses/swear words for you!
FINAL FANTASY XIV SIDEQUEST GUIDE - HEAVENSWARD EDITION — maintained by @chatty-moogle, this guide explores interesting sidequests in Heavensward that will give you more information about the lore, titbits about locals and other interesting information!
TRUST BANNERS FOR XIV — If you have ever wondered how people mimic the Trust banners used in XIV, look no further! @locke-rinannis has a template for you.
MAKING USE OF RECOMMENDATIONS — created by @autumnslance, this guide will help you make your recommendations tab useful rather than annoying.
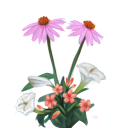
BOTANICA EORZEA — A guide to the flora of Eitherys and her reflections, including fungi and seedkin. For reference in writing and roleplaying. Maintained by @tinolqa.
GPOSE TIPS — A tutorial on how to achieve clarity and detail in your XIV screenshots! Created by @aryalaenkha.
UI MACRO MENUS — A guide on how to use macros to create small UI menus for XIV. Written by @diskwrite-ffxiv.
TYPHON GATE RESEARCH — Created by @mcstronghuge, these are the statistically best places for your character to stand for the Typhon Gate!
CHANGELOG
HYDAELYN HEALTH HAVEN has been removed at the request of the owner.
Moved THE BALANCE higher on the list to reflect alphabetical sorting, excluding names that start with The.
Misc formatting as needed.
Added some additional clarification around large-scale discords/spaces; in particular: Large-scale community discords such as the XIV Reddit Discord, Hunts, GPOSE promotions and broad-space roleplay servers that harbour a large number of people and are publicly available to all. These may not have an RP focus but will assist in other aspects of the game. Also includes well-known tools/resources that are utilised by large groups of people and assist in gameplay elements.
Added a quick-jump menu to the bottom of each of the table of contents menus to assist in navigation.
Want to submit? You can either fill out the google form here, send me an ask with the relevant information contained on the Compendium, or join my Discord at SEAFLOOR (21+ only)!
I am sure there's probably a couple of things I have missed or links/formatting that might be broken. Please don't hesitate to let me know if anything is out of place. I'm going to take a break now. I'm pretty sure that's the biggest edit that's ever going to occur on this document!
#final fantasy xiv#ffxiv#crystal rp#crystal roleplay#。・゚゚・ — sea's community compendium#。・゚゚・ — sea speaks
146 notes
·
View notes
Text
I wanted to put together a little video tutorial for my DRK mains on how to get this particular shot in gpose! it's really easy to achieve especially if you don't have any mods. also I'm sorry about my mics quality, I'm stuck using the mic in my PS5 controller for the time being ^^;
398 notes
·
View notes
Text
Duskwight Children Tutorial
I have been asked on two separate occasions how I manged to have Duskwight skin tones on children so this is how I do it on Anamnesis!
Step 1: Fully Load and Customize your Young Wildwood character as a Carbuncle or Brio Actor. (Anam does not really like Children on Player characters.) Making any customizing or gear changes will revert the skin tone, so keep that in mind.

Step Two: Load/Pull Up an Adult Duskwight with the skin tone you want your character to be (ie your WoL in game if you want to make a child version of them).
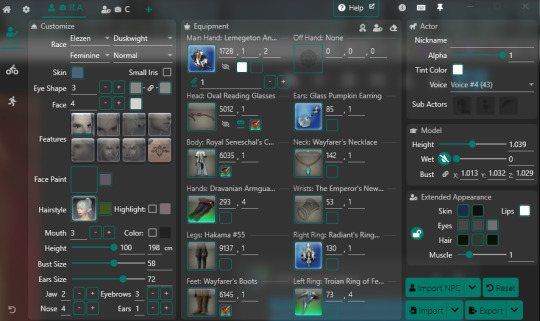
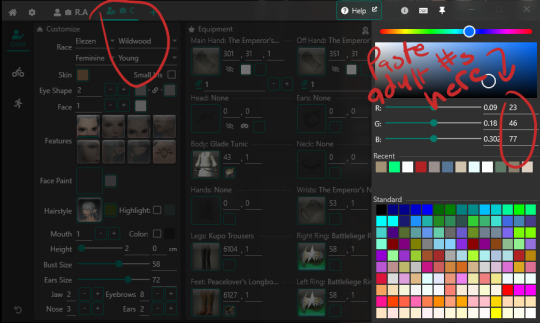
Step Three: Left Click on the Left Box next to "Skin" in the "Extended Appearance" box above the Import/Export options.
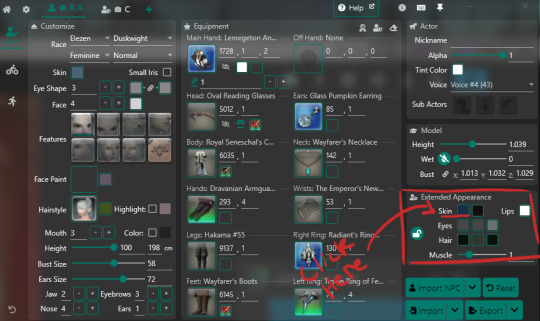
Step Four: Copy/Write Down the RGB values listed. The color may save into the "Recent" section, but I would not rely on it. You only need to copy the whole numbers, ie 23, 46, 77.

Step Five: Paste/Type in the RGB values into your Young Wildwood actor on their Extended Appearance box.
Step Six: Export your file! Anam will save Extended Appearances in the chara file, so you can reload appearances if you're making multiple outfits.
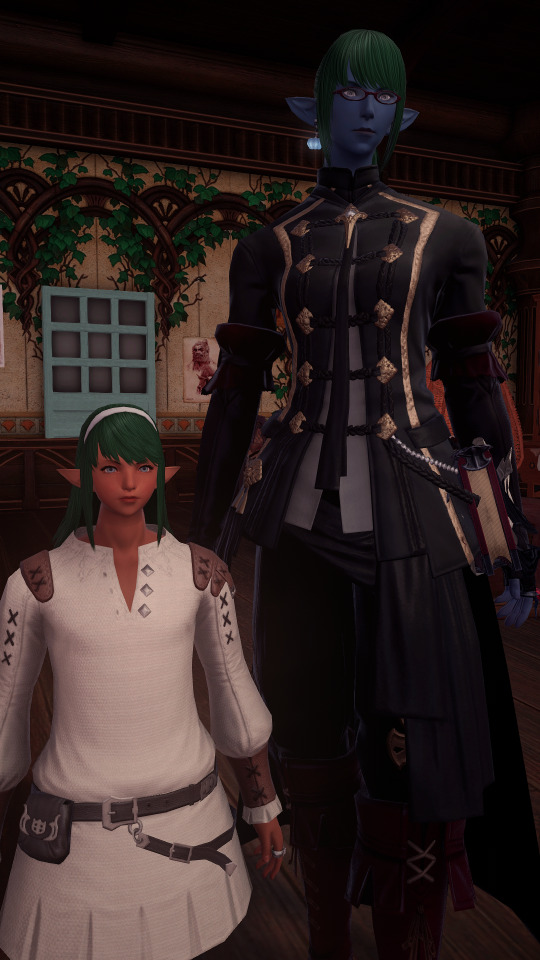

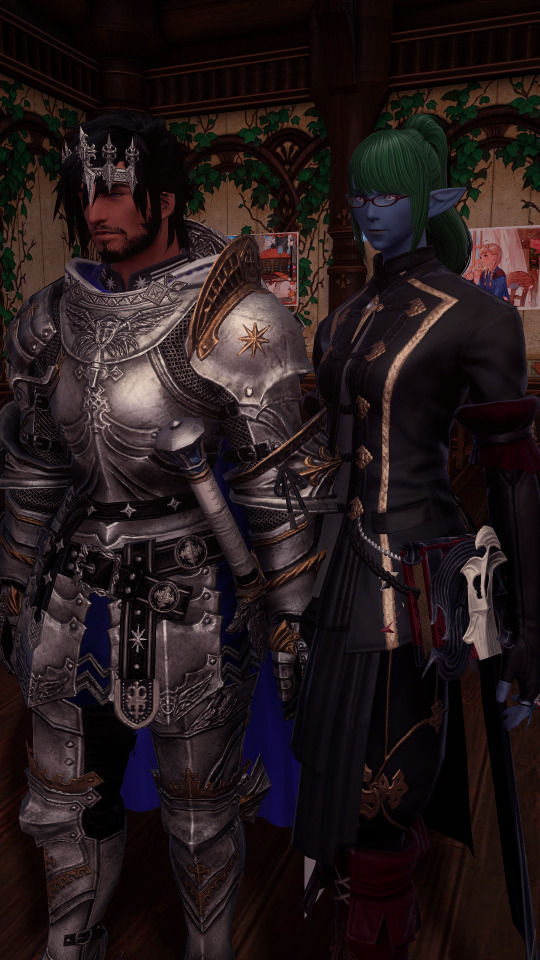
Enjoy!
Notes:
1. Anam does not like to load NPC/Child models onto Player Characters. You may get to have a child character in the overworld, but entering into GPose may revert it to an adult character. So Carby/Brio Actor is best.
2. You can also use this method to give, say, green skin onto a Hyur model to have a half Roegadyn half Hyur character.

3. Apparently extended appearance is a bit of a headache for the Anam mods. Try not to bug them about it. Remember, loading Young Appearances onto Carbies and Brio Actors will consistently work where as loading onto a Player will not.
4. I have no idea how to accomplish this with just Ktisis (or with another plugin at the same time), as I am much less familiar with that plugin. Luckily Anam and Ktisis play nicely with each other so you can set up appearances in Anam then pose in Ktisis.
#anamnesis tutorial#duskwights#duskwight children#it's not at all hard#it's just not obvious#feel free to hit me up with questions#but probably not about ktisis cuz i don't use that as much
120 notes
·
View notes
Text
How-To: Budget Studio Mk.III
We've all been there: 50M gil burning white hot in your pocket when a set of Fallen Angel Wings pop in the market board, its siren's call luring you. Now you're utterly fashionable, but regrettably with barely half a mil Gil to your name. What to do?
Well, do not give to despair, my glamorous friend! You can actually build a perfect black background studio to show off your feathery acquisition.
You'll need:
1 x FC Room, or an Apartment
3 x White Screens
1-2 x platforms of your choice
4-5 Soot Black dyes
1 - Setup
Place your White Screens in parallel, in order to completely cover a wall. (This will give you some leeway with angles and point light placement.)
Make sure you leave a considerable gap, of maybe half the length of the base of a White Screen. This is important, as you'll see very soon.
Place the objects you'll use as platforms in front and center of the white panel line, making sure it overlaps with the middle panel. This is where you'll stand: In the example below I floated two Combed Wool Rugs, but any contiguous platform will do (think tables, half-partitions, etc.)
Dye all the objects with Soot Black. No need for the expensive stuff.


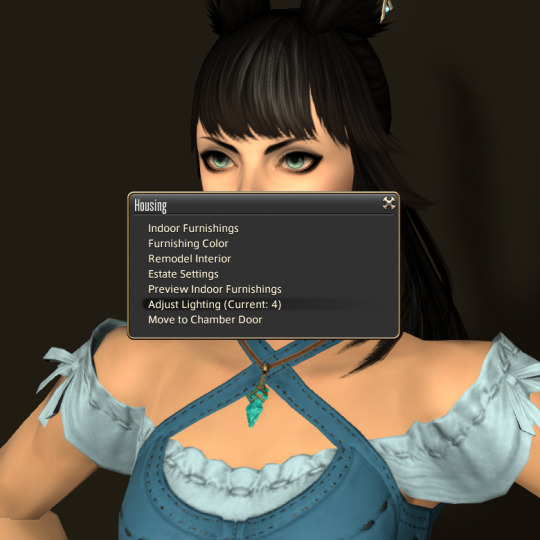
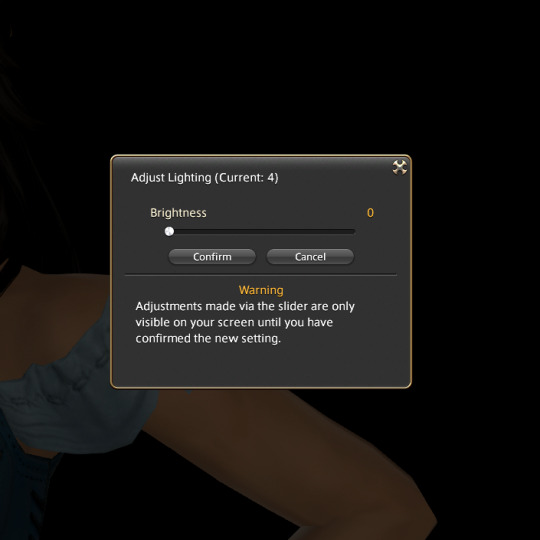
Now let's reduce the ambient light, setting it to zero; we'll use only GPose lighting for shots.
2 - What's the catch?
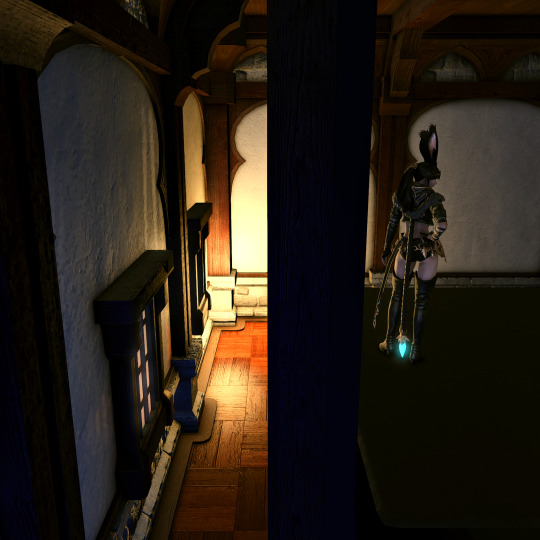
Well, you see - most partitions, like the Blank Riviera partition, have a collision box set around them. If a camera touches it, its path is altered so it doesn't go behind the partition.
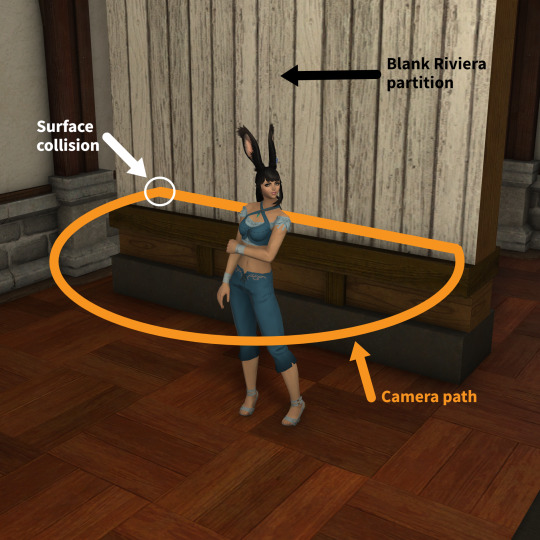
White Screens, however, do NOT have a collision box - so you can move your camera behind the partitions, and place your light sources there.
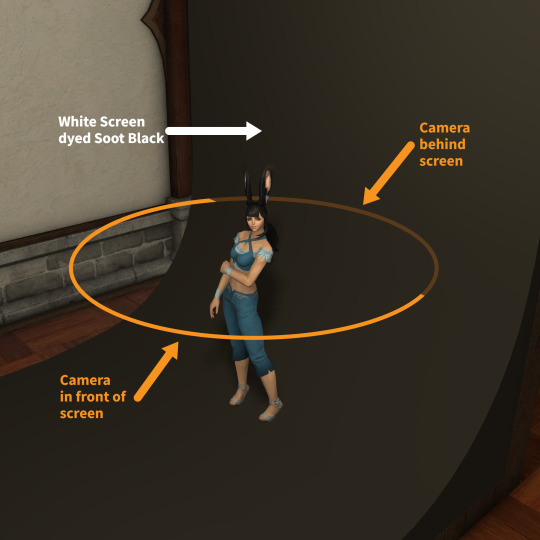
Here's how it looks in gpose - notice how the camera just goes through the partition:
Amazing, right? So the trick is to place light sources behind the panels, in the gap between the back of the panels and the wall; this way, the light won't hit the front surfaces.


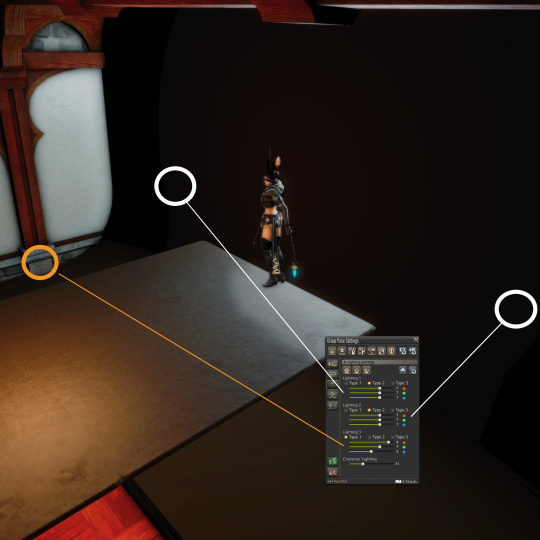
The final result is a shot with a perfect pitch-black background, where rim lights can be applied with very intense results:

You can also place Type-1 light points in front, so they offer a very gentle illumination while not hitting the background panels:
Another possible setup: move the character away from the background, and place the light sources around it.
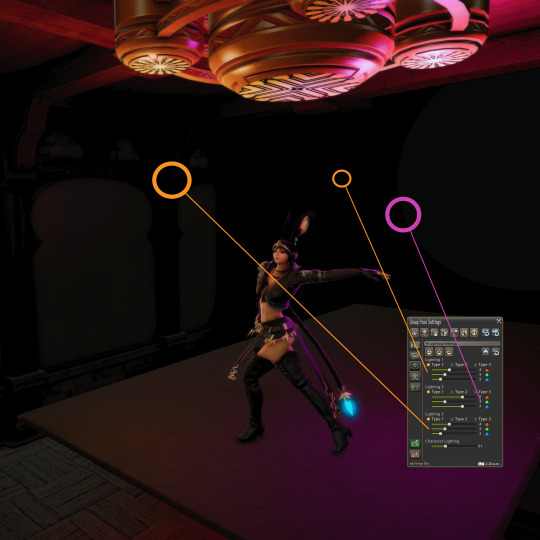
That'll result in shots like this one:
You can also place a point light between the character and the background, to create a halo effect:

The opportunities for dramatic lighting are endless.


Go on, give it a try!
983 notes
·
View notes
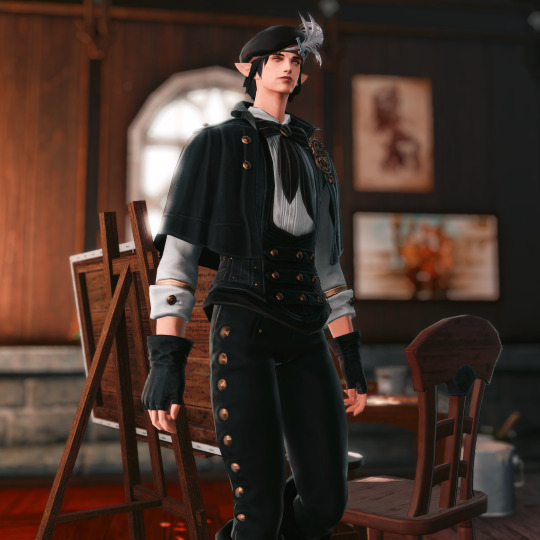
Text
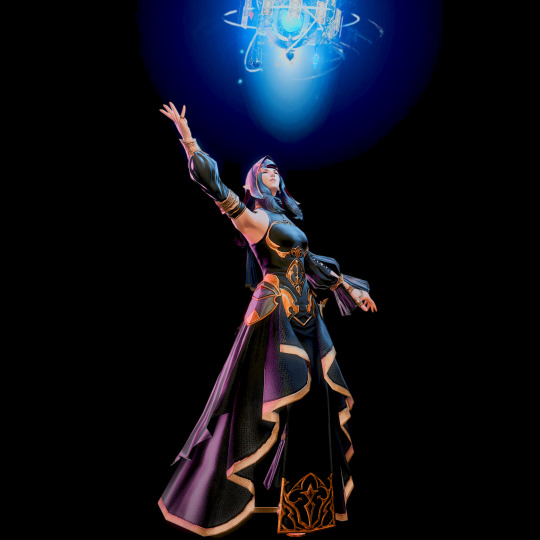
Holy crap. Final Fantasy XIV fandom.


Everyone saw my very silly post and the outpouring of positivity, commiserating, and so on is incredible. I'm touched! I got everything from positive notes, Elezen admiration, commiseration on the limitations of our tools, some helpful guides, and so on.
Gotta say, I've actually taken a lot of screenshots, but I do have pretty serious trouble making gpose sing for me; I am in awe with what other people do in baseline, whereas I usually have to do a fair amount of cleanup in post in a photo editor, but you've inspired me. New goal for the year, use those tutorials and whatnot, and see if I can't do, say, Junelezen with nothing but the in game tooling and see if I can't get some sweet lighting setups.
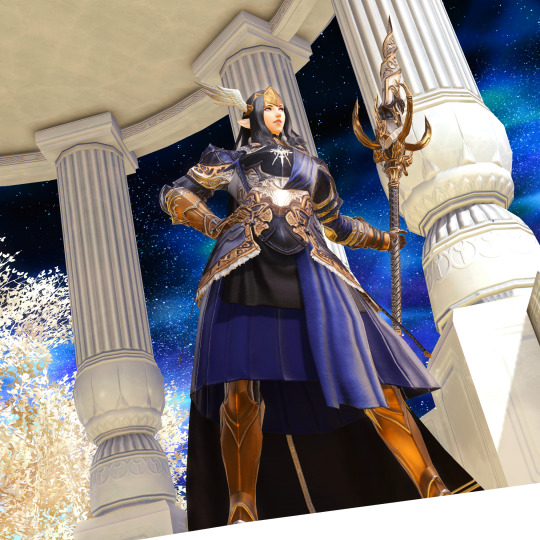
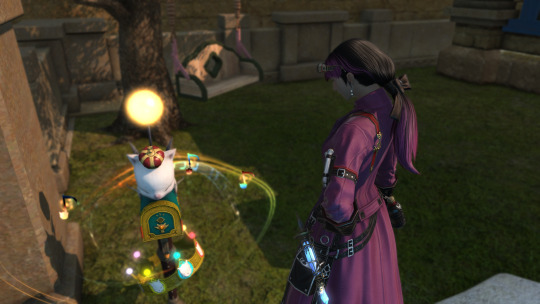
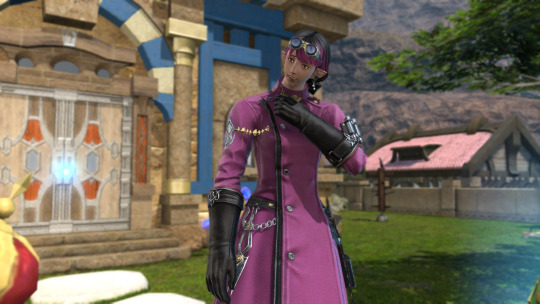
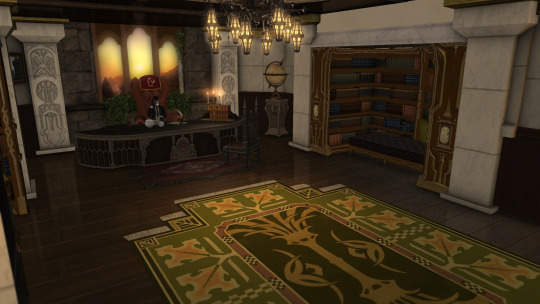
Oh and for the one person who said she looked like a lawyer and then went and verified it, that's hilarious; she actually hasn't done lawyer work IC since early last year due to a series of hilarious misfortunes, but yes, she used to be her Free Company's lawyer. (seen below: the legal offices)
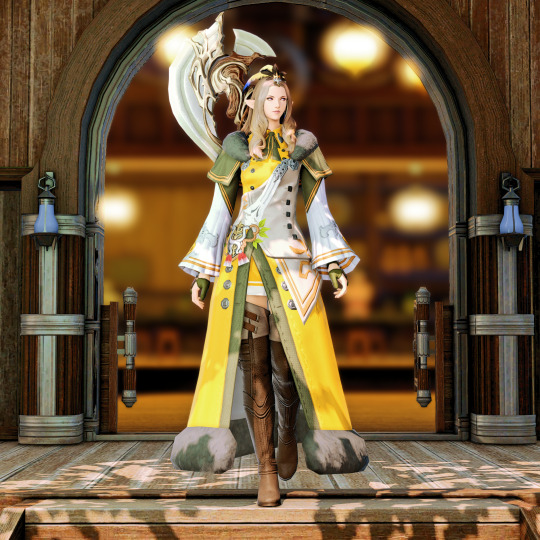
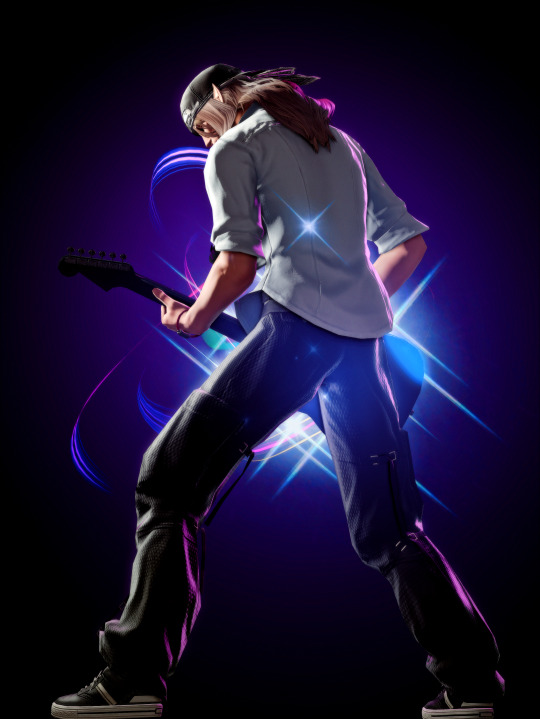
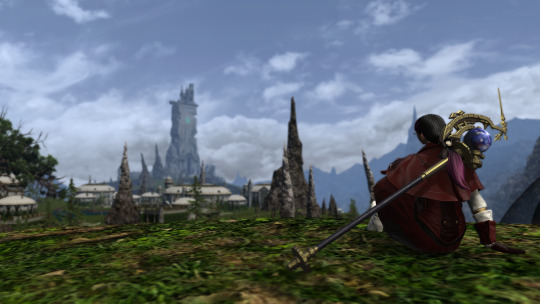
Though one of my friends says she looks more like an assassin. I'm not sure I see it. Maybe if she was, like 20%-50% cooler, like so:

(though let me be clear, I love her because she's actually an awkward nerdbaby)
Anyroad. Thank you all. Not every fandom is this positive, and I like the community we've got, and the response to my silly post was a heartwarming start to 2024.
35 notes
·
View notes
Text
So I got this ask in my inbox, and though I was going to answer it in my asks, I think a little, actual post-tutorial would be best. But first, a disclaimer, as I like to cover my bases:
By no means am I an artist; my process is very much a case-by-case basis, and I edit as I need to for each picture that I do end up editing. My method is far from perfect but it is one that works for me for -my character-, so you may have to experiment on your own using these tips to find a method that suits your wants.
This little guide is using ClipStudio Paint, but you can get the same/similar results with really any photo editing program you choose that has brushes (GIMP, PaintTool Sai, Photoshop, Photopea (which is free), etc)
I'm going to use a painted over face texture as an example (basically a face diffuse I just painted over with it's base skintone), versus a full-on gpose shot (this way I can get a good swatch/an approximate measure of what skintone I'm used to working on).
Big Tip: ALWAYS WORK IN LAYERS, this way you can adjust everything accordingly without going back a million steps.
Use a basic soft-spray brush for your base, and pick a color a few shades lighter than the skintone you're working on (use your color-picking tool, it is your best friend). Set your first work layer to "add (glow), and make a little splotch like this. You can either leave it as is or blur it out/adjust the layer opacity if you desire, but again, it all depends on the state of your gpose/where you're adding it. I often blur out the edges to help blend it into the skin more naturally, on a low setting as to not erase it completely.
Before & after adjusting blur/opacity:


Next, you'll want a basic shimmer brush; there are dozens of free ones out there, so look around and experiment! Just like before, you're gonna want to make another layer, but this time, set it to white (or gold/copper if your character has medium/darker skintones, as it flatters them more and doesn't wash them out where as white is more for fair skintones).
Unfortunately, I can't seem to find the source of the shimmer brush I use, but what works for me may not work for you so it would be best to look at what's available and what suits your tastes more.
Now, working in layers using the "add (glow)" effect, slowly build up the shimmer, first, adding a quick couple swipes, then build it up. Once you're satisfied, focus more on the center
TIP: If you want to make it look more natural, when building your layers, blur out the edges a small bit to hide any possible lines and creases.


And that's pretty much it! Adding shimmer effects is all about trial and error, and just simply adding shimmer where your character catches the light.
I'd post examples but a lot of my shimmer examples are on very much lewd gposes and I'm not trying to get tumblr staff mad at me.
And again, another disclaimer: this is not a one-size-fits-all-guide, I seriously cannot emphasize enough that the best thing for you to do is just EXPERIMENT, this is merely a guideline to give you a lil push in the right direction. Editing gposes is supposed to be fun, and the best way to get experience is to simply practice and learn your tools with your own hands.
I hope this helps, and have fun gposing!
#OOC#ffxiv gpose#Gpose Tips & Guides#Whew I am sincerely sorry for the lengthy guide#But I do hope this helps take some of the intimidating factors out of editing#Also remember I am not an artist#I am just a goth dumbass who someone trusted with a tablet and CSP#Now go and do a crime my children
44 notes
·
View notes
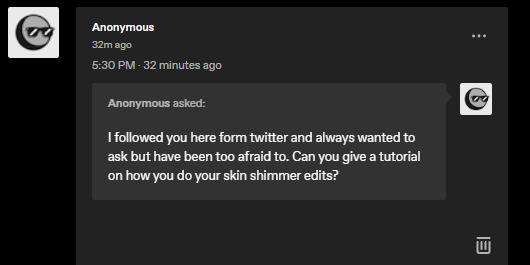
Note
terribly sorry to bother, but I've been loving your screenshots since I stumbled on your blog, and like 100% genuinely: how do you get them to look like that? Is it all done in game or is it some combo of mods & shaders? Cause every time I see a cool pose I'm just left wondering how you did it. Obviously I wouldn't ask you to make a massive tutorial just for me, but if there are any resources or general things you'd be willing to share, I'd be eternally grateful!
Hi there! Thank you for enjoying my gposes, and you're not a bother; my ask box is open to get asks after all haha
To answer your question: My gposes are not a product of the vanilla game alone. I'm slapping my explanations under a read more since it's a bit long:
Firstly, I am running reshade, an open source post-processing injector. It's a program that can (in the simplest terms) run various visual filters over a video game in real time. Most everyone I know made the jump from Gshade to reshade last year, so if you look up "reshade for ffxiv" you should be able to find a handful of tutorials. When it comes to finding presets, there are a lot of independent shader devs for ffxiv and generally a quick google search should bring you to a few. Most of the presets I use are outdated holdovers from the GShade days, and I don't know if they are available anymore; so unfortunately I can't recommend any directly, sorry!
In general, I lean towards shaders that enhance the overall brightness and vibrancy of the (imo muddy looking) default graphics. Arsay can quickly get over exposed by the in game 3 point lighting, so putting a shader that boosts the brightness overall really helps preventing that. I set up my lights in gpose at 2, put the character lighting to 100, pick a shader with a LUT that gives me the colours and brightness I want and thats usually enough. sometimes I'll hit the manual brightness in game and mess with that too. I often go into the preset of the shader and muck about with the Depth of field settings depending on what I want.
An important note regarding the use of reshade: While reshade does not directly effect in game files or gameplay and it's technically not against TOS (as far as I have read), it is still highly encouraged that screenshots taken with shaders on do not have the ffxiv screenshot watermark visible. Reshade has it's own screenshot button that you can map to any key of your liking that will capture the game and the applied shaders without any watermarks.
If you have an nvidia graphics card, I believe you should also have access to the geforce post-process correction tools, and could use that as well to enhance the game visuals. However, I am under the impression it's solely corrective settings (brightness/contrast, vibrancy, saturation, etc.) and you do not have the ability to adjust the depth of field setting, apply LUTs, mess with ambient occlusion, etc. Aka the more in depth rendering stuff that would make your graphic card fan go brrr. I've personally never tried the nvidia filter system so maybe that's incorrect information. Best to do independent research on that!
As well, on the occasion I will bring some screenshots into photoshop and do further, fine tuned, tonal corrections there. Generally this is only when I'm trying to achieve a look that I can't get in game and I try to keep it to a minimum. When I'm working on big photosets or comics, I'll end up doing more corrections just to make sure colours/tones/shading are consistent through out.
On to the second part of the question: the posing. I do all my posing with this tool. It is a tos crime, however it's client-side only and completely undetectable to other players. It gives you full access to character rigs and allows you to not only build your own poses, but export and import poses, outfits, props used by npcs or seen in cut scenes, and character data as well. Tons of people will upload pose files on the various mod archives for others to use, so even people who don't want to mess around with rigs can have fun with their characters. I personally love posing, and it's something I'm very comfortable doing since I have a background in 3D modelling and animation. I do believe in working smarter and not harder though, so what I tend to do is apply an in game animation cycle to my character in question that has a frame or key pose close enough to what I need, pause the animation, turn on posing, and start rotating bones. I never really looked up any tutorials myself tbh, I kinda just messed around with things and figured the tool out as I went along. That said, there are tutorials on youtube if you search for them. "Anamnesis ffxiv guide" or something along those lines should bring up good results.
Anam also gives you further camera control than what is available in game, allowing you to fine tune its position to the .001 degree. You can increase the FOV and zoom range past the typical amount. Bring your character and camera pretty much anywhere on the map too. And you can export your camera setting to use between gpose settings! It's a really great tool, though it has some quirks and can in specific instances crash your game (never change a character while fishing lol)
That's pretty much it! I know this wasn't really much of a guide, so sorry about that. Most of my gposes are a product of seeing a fuzzy image/concept in my head and messing around with various compositions, locations, lighting conditions, ect. until I bring that idea into clarity. It's hard to explain that process in ways beyond "fucking around and finding out (positive)"
I suppose to anyone else reading this has specific references in mind, please pass them along to sailor-artemis ! I know being told "just google it lol" isn't super helpful but I really just tend to figure things out on my own ^^;
8 notes
·
View notes
Text
I left the sights of eorzea discord server I'm just not comfortable being in a space run by someone who's blatantly pro-AI content. There are plenty of other gpose tutorial makers out there who don't champion plagiarism machines.
#deleted my post in the forum but it wouldn't get rid of the title#ether way this blog is staunchly against the use of generative AI#if you have a problem with that I have a problem with you
10 notes
·
View notes
Last Seen Blogs
volpebionda
Volpe Bionda

mandgworld-blog1
Untitled
coolclodbakerypony-blog
Ion woker

ggroomer
Windowless Soul
iotnonii
A Dear Queer