#free pattern on ravelry
Text
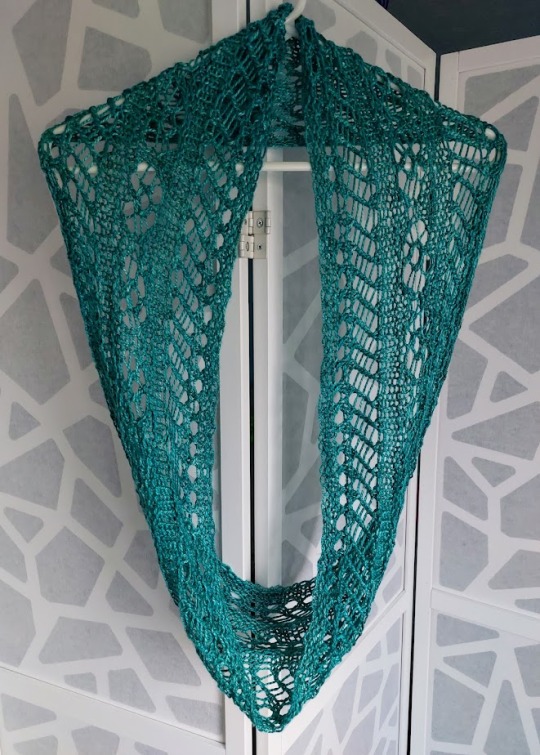
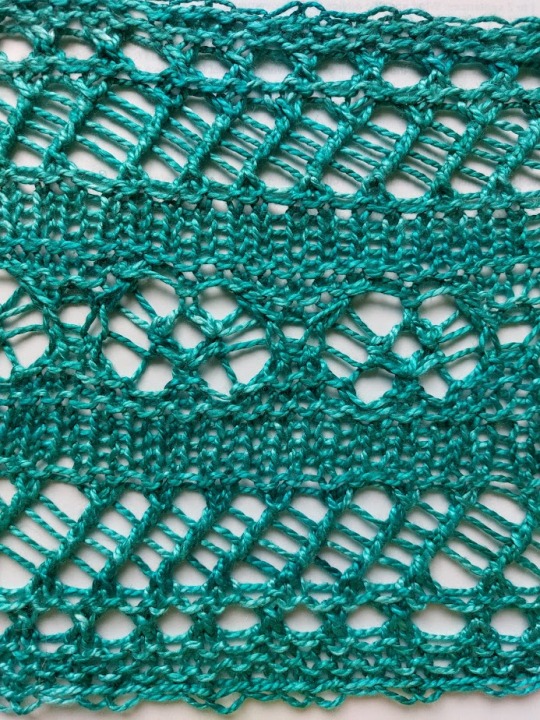
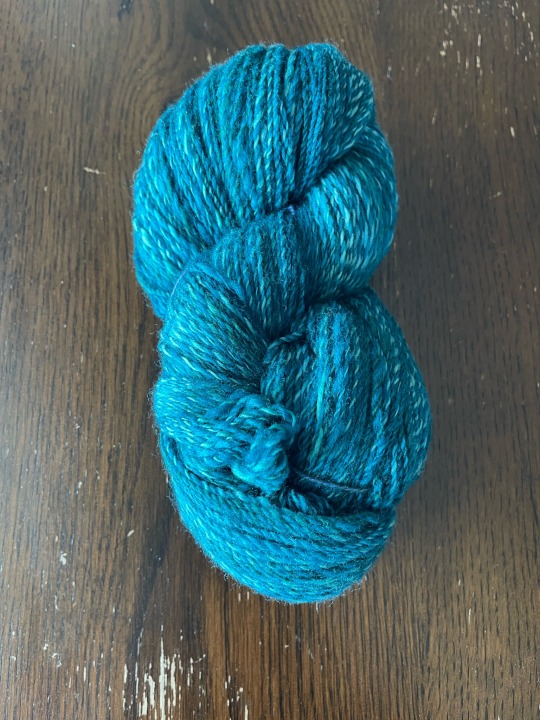
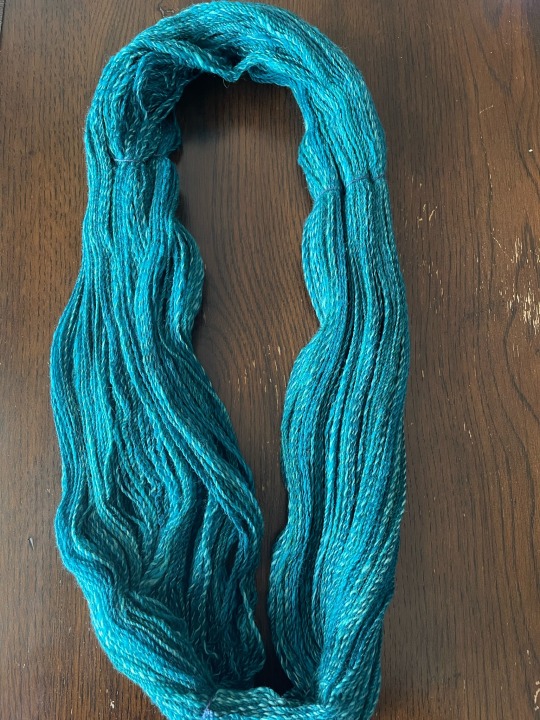
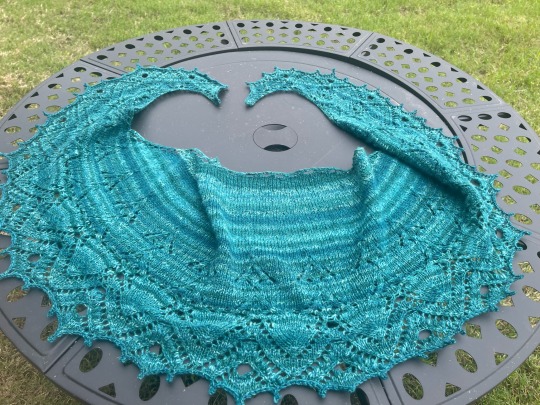
Garland Cowl by Galzanne Knits.
Made this delightful cowl for a friend's birthday using hand-painted pure mulberry silk by Araucanía Yarns (which appears to be a thing they no longer make?? We won't talk about how long I've had this stashed). The big worsted-weight lace was a lot of fun and worked up quickly once I got my gauge issues sorted out. I'd never worked with silk before! I'm a fan. Learned a new cast on for this, and I turned my bamboo knitting needles and fingers VERY blue, but I sort of like when my crafts stain my hands--it's bright evidence that I'm Out Here Making Things, y'know?
#knitting#my knitting#garland cowl#my photography#it was fun!!#it was scary to block!!#i had great interstate support for it!!!#(shout out to asexualbookbird's mom for care instructions and silk hacks)#(ez whatever would i do without you two???)#pattern is linked in the title!!#free pattern on ravelry#i did add a couple garter repeats because i figured i'd have some extra yarn to use up#(i did)#i tried this on 11s and that was a Mistake#10.5 was perfect#(and i do knit VERY tightly so like. be forewarned lmao)#great news: silk is easy to frog!!#(we won't talk about how many times i had to do that either lmao)#seriously i do love when yarn dye bleeds onto my fingers or when i get pen ink all over my hands#like yeah i'm over here and i'm creating something out of either string or NOTHING#witness meeeee
24 notes
·
View notes
Text
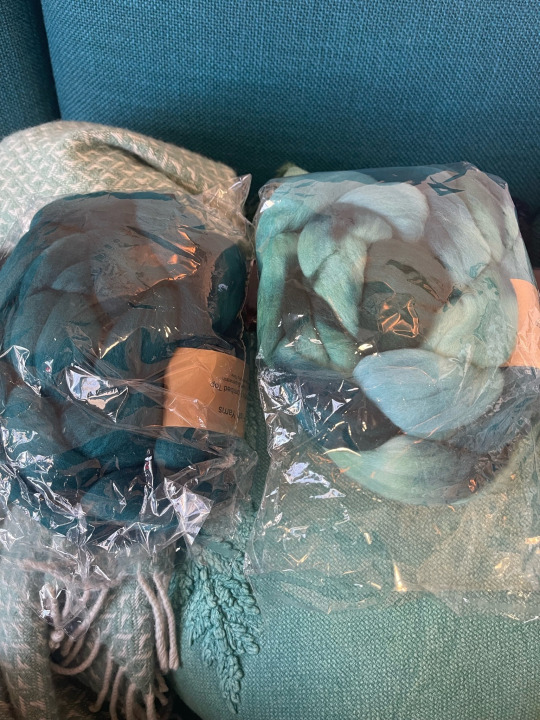

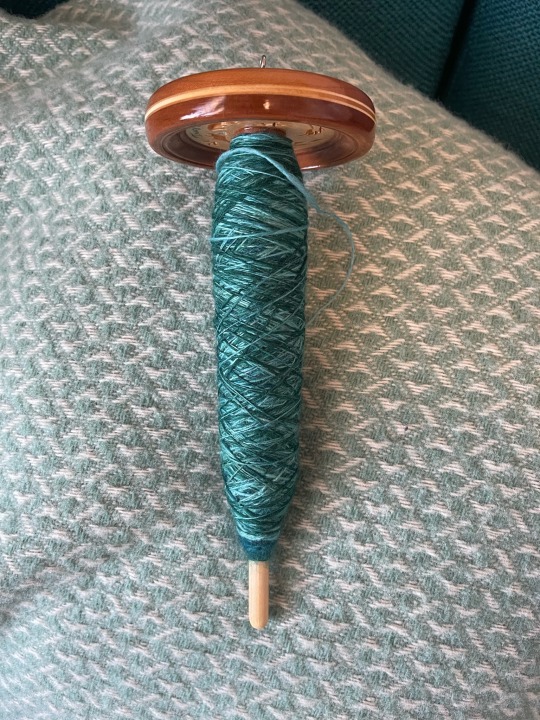
A fiber journey :))))
318 notes
·
View notes
Text
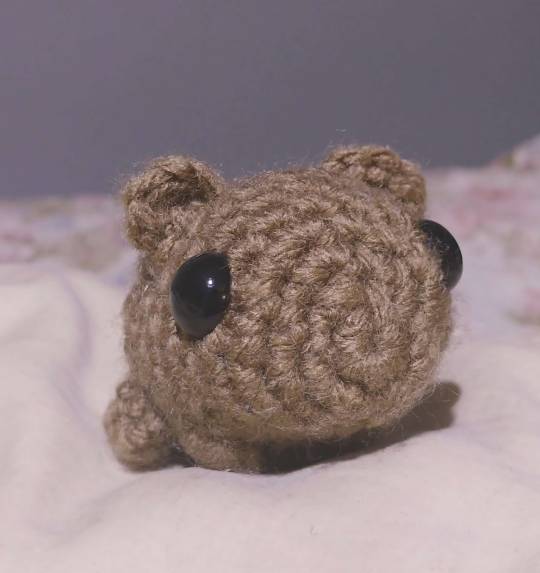
I crocheted a newborn guinea pig today
https://www.ravelry.com/patterns/library/newborn-guinea-pig
#wheek wheek#guinea pig#newborn guinea pig#rodents#rodentblr#cavyblr#crochet#amigurumi#crafts#handmade#yarn crafts#yarnblr#crochetblr#free pattern#free crochet pattern#ravelry
72 notes
·
View notes
Text

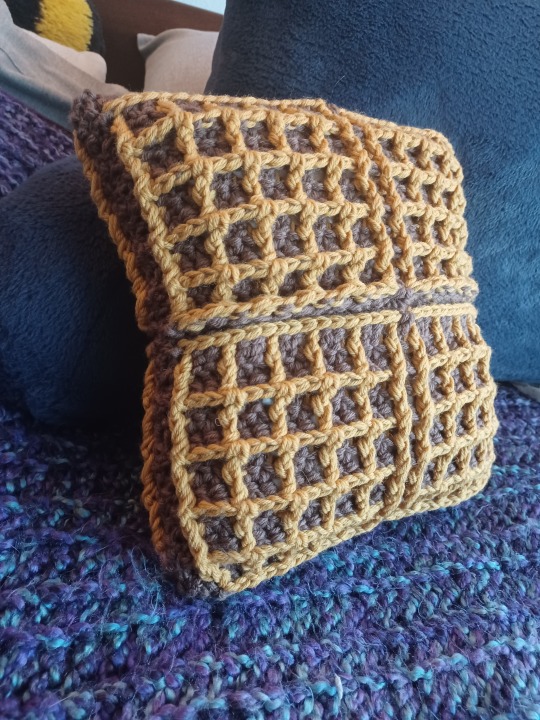
A friend requested a waffle pillow after discovering waffle stitch existed. Not just a waffle stitch pillow though: it needed to look like a real waffle, which it turns out wasn't something I could find a pattern for.
So I made one! It ended up being complex enough to warrant a full distinct pattern, and anyway long story short I just posted my very first crochet pattern on Ravelry!
You can find it here for free.
#crochet#craftblr#waffle stitch#crochet pillow#waffle pillow#ravelry#crochet pattern#free crochet pattern#lego crafts
79 notes
·
View notes
Text
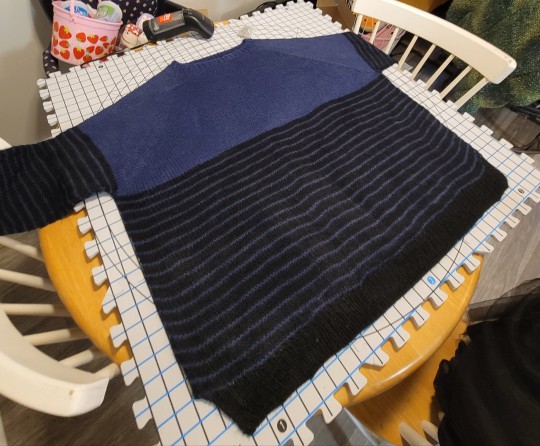


Not 100% pleased with how this one turned out, but it was always just a project to use up some left over yarn, so I don't know if I can be too mad.
This is also the first time I have used my new steam blocking set up! So far I like it WAY more than wet blocking. I can really tell a difference in the yarn after steaming it too ❤️
Used the pattern "Gingerbread Sweater"
#knitting#knit#knitted#craft#crafting#crafted#diy#do it yourself#fiber art#fiber crafts#sweater#knit sweater#handmade#sweater pattern#free pattern#pattern#Ravelry#knit pattern#knitting pattern#joy knits#yarn
37 notes
·
View notes
Text
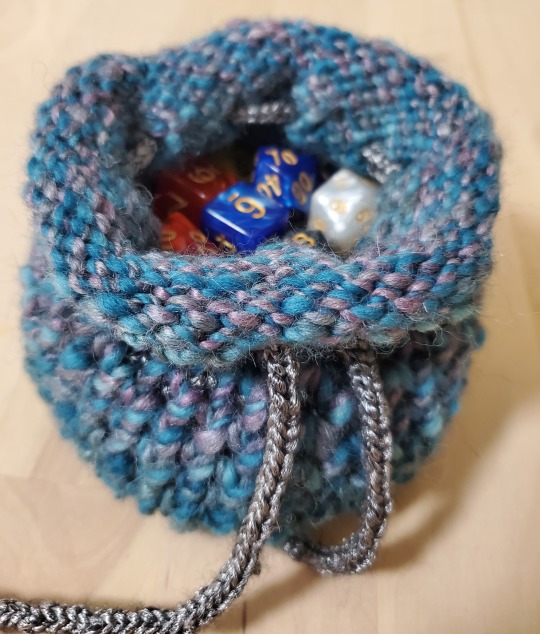
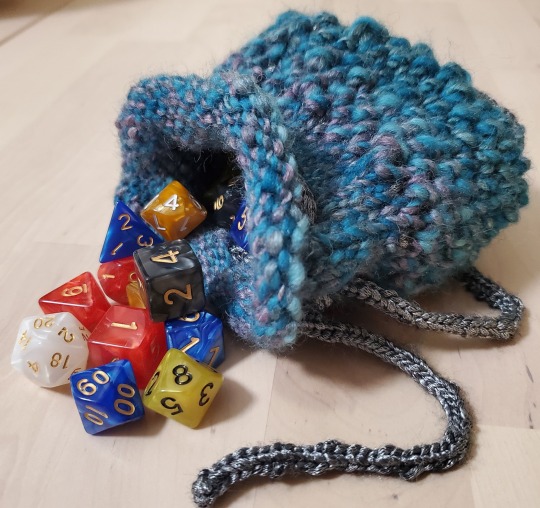
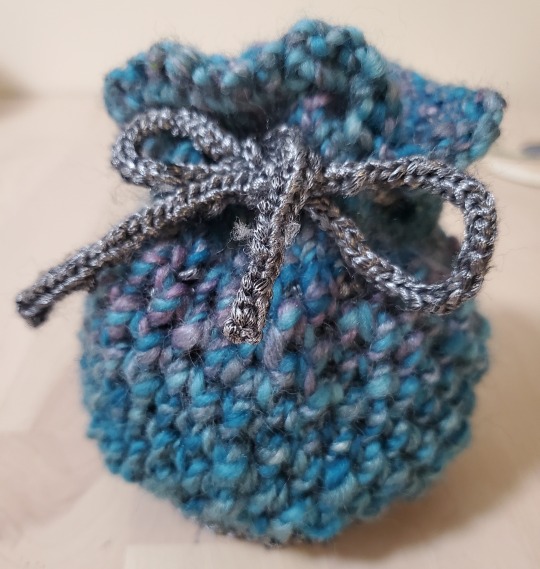
It was about time I finished another project! I tend to keep my dice separate, but I think combining a few sets to fill out this bag is a noble cause.
Pattern from Ravelry: https://ravel.me/the-dice-bag-of-minimal-magic
#knitting#fiber arts#yarn#knitting ace#ravelry#pattern#free pattern#dnd#dice#dice bag#dungeons and dragons
25 notes
·
View notes
Text

I'm basically just doodling bc im getting kinda burned out on these god damn knee socks but I'm making them to wear w these insane boots I found at goodwill and im so excited about it sooo stay tuned
#fiber arts tag#knitting#free chart for the pattern is fireflowers on ravelry#I'm riffin on it as always but the pattern is so damn cool#my fiber art#my art
59 notes
·
View notes
Text
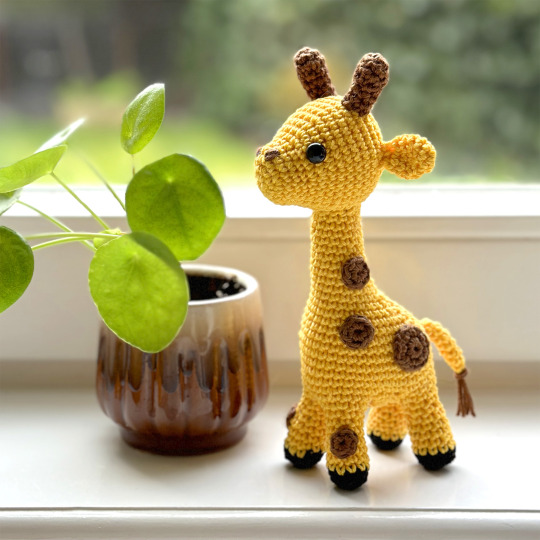
Free Giraffe Amigurumi Crochet Pattern
#amigurumi#diyfluffies#crochet#ravelry#amigurumipatterns#lovecrochet#yarn#crafts#häkeln#haken#free amigurimi pattern
22 notes
·
View notes
Video
Knitting repeat 37 out of 40 on the lace shawl for my cousin’s wedding present
#knitting#lace knitting#lace rot#wip#knitblr#in the process of trying to remove the heavy breathing sounds (because my phone was basically in my mouth to get this angle)#i went through 5 different websites and 3 audio editors#all because my cellphone doesn't let me mute videos anymore even tho it used to let me.#tag before last should've said video editing programs instead of audio editors i am eepy#the pattern i'm knitting is free btw#bamboo wedding shawl by purl soho on ravelry#i just have to rewrite all my patterns out by hand to keep track of them repeat by repeat
297 notes
·
View notes
Text
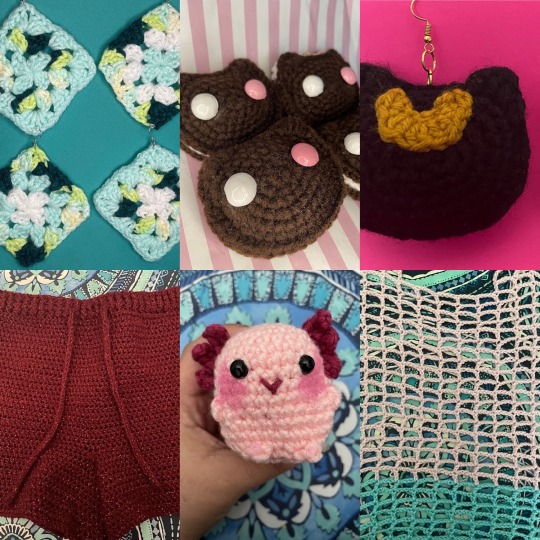

also 2023 art summary but it’s knit/crochet stuff this time :3
#some months have wips#forgot about my mesh sweater oops;; and still working on the ribbing for the hexagon cardigan cries#big crochet year from guy who swears he loves knitting#i'm not linking all the patterns here but if you want any feel free to ask or go check my ravelry (celestaerium)#knit#crochet#art summary 2023#2023 art#celestaeriumCrochet#celestaeriumKnit#knitting#double knitting#amigurumi#earrings#artists on tumblr#fiber art#fiber artist#fiber artists on tumblr#crochetblr#knitblr#scheduled post
26 notes
·
View notes
Text

Indoors photos of the new shawl.
#triangle shawl#mike shawl#garter stitch#knitting#Knit#knitblr#hand knitting#knitting pattern#pdf#Ravelry#free
42 notes
·
View notes
Text

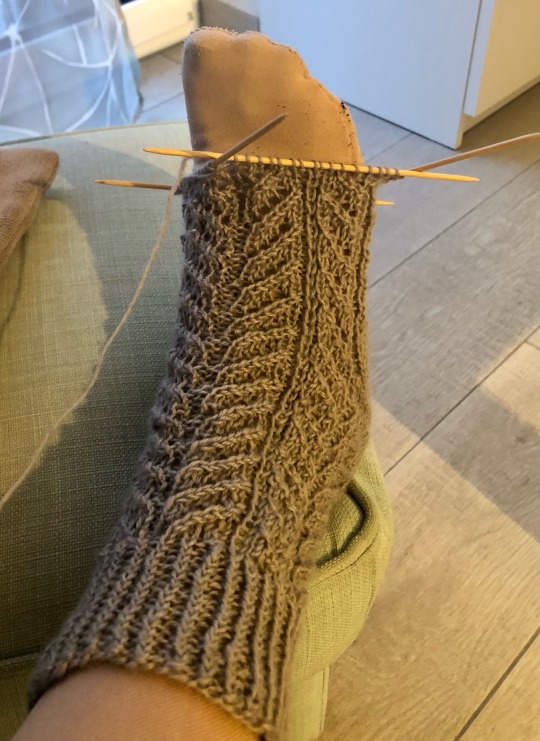
More socks!! And these were finished in just a couple days - I'm getting faster with heel turns!
#knitting#free pattern#midsummer socks on ravelry#lithuanian wool#fiber arts#cozy#altered the pattern by adding the lace pattern in the round for 1“ before the heel flap#and then about 1“ after the heel turn plain knitting 6 sts at either end of N3 for a few rows then 6 more sts to taper off the lace pattern
16 notes
·
View notes
Text
almost done with my first ever sock!
This was supposed to be just a fun on-the-go project with not a lot of expectations and very cheap yarn, because my main project rn is a bulky cardigan and also just endless stockinette that looks nice but does not provide adequate enrichment. And this pattern is doing all of those things! I thought they were going to be too loose at first, but they're doing surprisingly alright.
However, I noped out of the reinforced heel and did a very simple one instead, and, uh... I think these socks might wear through if I look at them too hard, let alone walk on them for a while. Which is a shame, because I'm actually starting to really like them. Alas, I refuse to unravel half this sock at this point. Am vaguely tempted to make the other heel stronger - but then I'd just have two mismatched socks, which probably doesn't make them any more practical. Whelp, I guess these are gonna become strictly couch-and-bed socks...
#i feel like this was the oldest mistake in the book lol#oh well#can't wait to show these off to my mum#actually i was considering giving them to her but idk it seems like a bad gift for someone who gifts PERFECT socks#still#not showing them off to her just yet in case i do decide to make them a gift#(this isn't *actually* my first sock i did a test sock a few years back but it turned out terrible and never got a mate)#knitting#the pattern is cool it's free on ravelry! it's called 'ariose socks'#but i can't super recommend it if you like a really snug fit on your socks#because it's really not very adjustable (at least not if you do the leg completely in pattern instead of half stockinette)#textile crafts
14 notes
·
View notes
Text
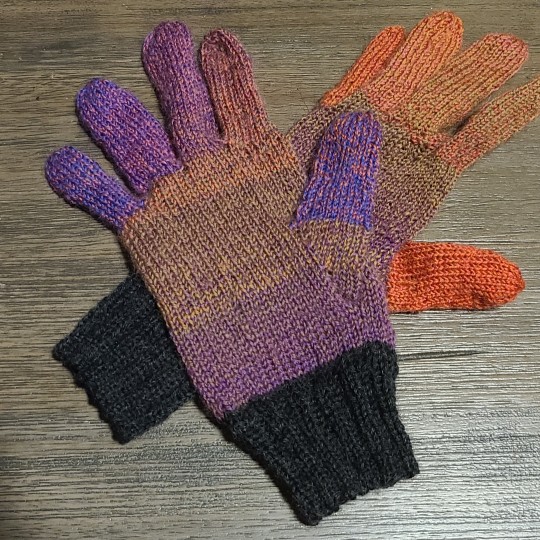
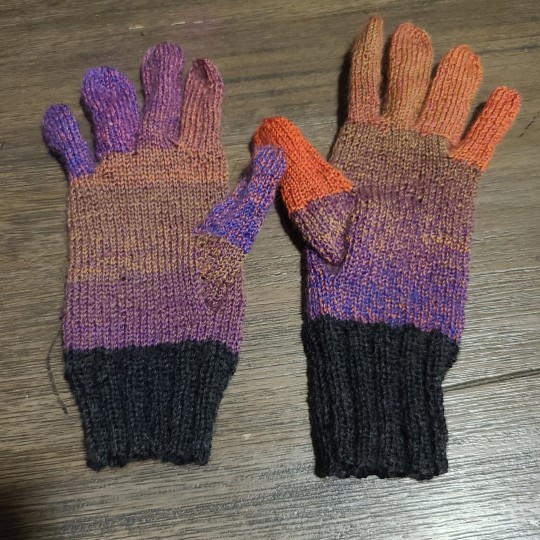

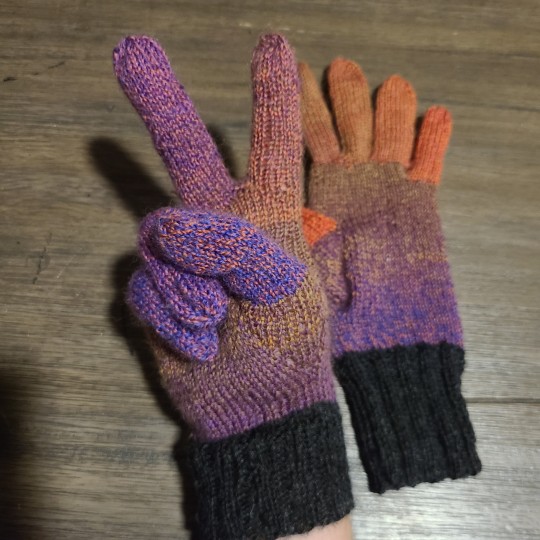
wool gloves! these are special because I'm a chronic gift giver and they're the first thing I've made 100% for myself in a long while. interested? refer to fig. 3
#variegated yarn was not my friend on these lol. but i kinda dig it anyways!!#knitting#my projects#I've made a few pairs of socks but i was amazed at how simple gloves are?? the pattern was free on ravelry but lmk if you want it.
14 notes
·
View notes
Text

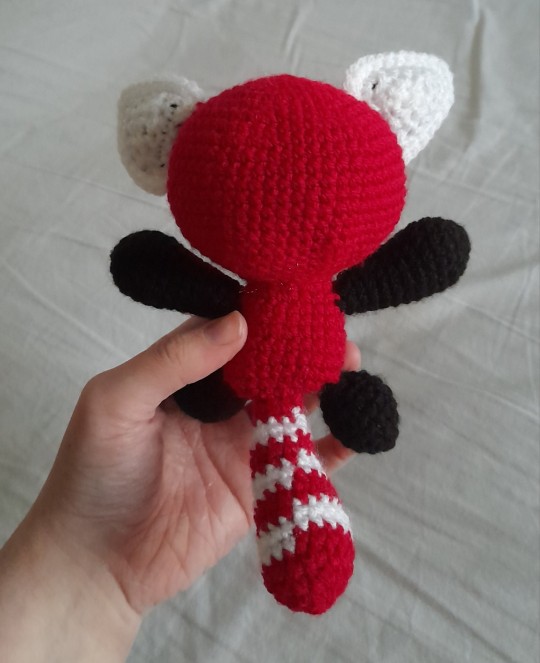
Red Panda free crochet pattern
Ravelry link -- free pdf download
My red panda pattern is no-sew and its parts are attached with single crochets. This written pattern contains photos.
Made with DK yarn and a 3.5mm hook, but can be made with any size yarn and appropriate hook.
Pattern also under the cut:
YOU WILL NEED:
DK yarn in the following colours:
- red/orange (less than half a ball/50g/150m)
- black (less than 25g)
- white (less than 25g)
3.5mm crochet hook
Stuffing
Scissors
OPTIONAL:
Stitch markers (or scraps of yarn) to mark the start of each round
If you don't like the no-sew yarn eyes, safety eyes or buttons
If desired, a darning needle for hiding yarn ends
TECHNIQUES USED:
Single crochets, increases, decreases
Single crochet through two pieces
Colour changes
The loose parts are made first, before the head and body, so that we can sc them together later.
EARS
Middle ears x2 (black)
1. Chain 6. Turn.
2. Skip 1 chain. 3sc, dec. Chain 1 and turn.
3. 2sc, dec. Chain 1 and turn.
4. 1sc, dec. Chain 1 and turn.
5. Dec. Finish off. No need to hide the ends yet.
Outer ears x2 (white)
1. Chain 6. Turn.
2. Skip 1 chain. 3sc, dec. Chain 1 and turn.
3. 2sc, dec. Chain 1 and turn.
4. 1sc, dec. Chain 1 and turn.
5. Dec. Don't break the yarn.
During the next couple rows, hide the yarn tails inside as you go, or leave them hanging and hook them inside later.
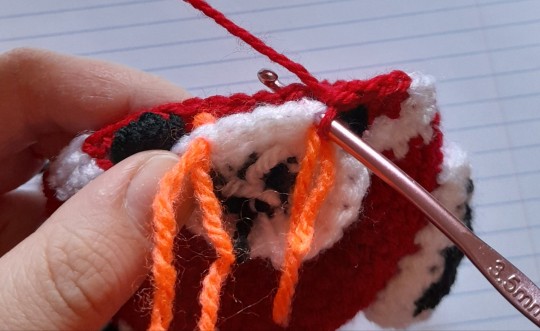
6. Line up a black triangle behind your white traingle and go into both of them. Sc them together around the whole triangle and put 3sc into every corner.
7. Sc around again just into the white stitches, putting 3sc into every corner. Finish off and pull the yarn ends inside with your hook.
You may notice there is no given stitch number. This is because it depends on how you sc around. When you get to it, continue the pattern of attaching the ears to the head onwards if you have more than 7 stitches between the corners.
EYES (black)
(Alternatively, use safety eyes, embroidery, buttons, etc.)
1. 4sc into a magic ring [4]
Tighten ring, slip stitch and finish off.
Note: knotting the yarn tails together will keep the slip stitch from loosening.
MUZZLE (start in black, have white nearby)
1. in black, 6sc into a magic ring [6]
2. in white, (inc x2, sc) x2 [10]
3. (inc x4, sc) x2 [18]
4. sc around [18]
ARMS x2 (black)
1. 6sc into a magic ring [6]
2. inc x6 [12]
3. (1sc, inc) x6 [18]
4-5. sc around (2 rounds) [18]
6. (4sc, 1dec) x3 [15]
7. sc around [15]
8. (3sc, 1dec) x3 [12]
9. sc around [12]
10. (2sc, 1dec) [9]
11-12. sc around (2 rounds) [9]
Finish off and tuck/fasten the ends inside. Stuff.
LEGS x2 (black)
1. 6sc into a magic ring [6]
2. inc x6 [12]
3. (1sc, inc) x6 [18]
4-5. sc around (2 rounds) [18]
6. (1sc, 1dec) x6 [12]
7. (2sc, 1dec) x3 [9]
8. sc around [9]
Finish off and tuck/fasten the ends inside. Stuff.
TAIL (start in red, have white nearby)
1. in red, 6sc into a magic ring [6]
2. inc x6 [12]
3. (1sc, inc) x6 [18]
4. sc around [18]
5-6. in white, sc around (2 rounds) [18]
7. in red, sc around [18]
8. (4sc, dec) x3 [15]
9. in white, sc around [15]
10. (3sc, dec) x3 [12]
11-12. in red, sc around (2 rounds) [12]
13. in white, sc around [12]
14. (2sc, dec) x3 [9]
15. in red, sc around [9]
Stuff
16. (1sc, dec) x3 [6]
Finish off and tuck/fasten end inside.
HEAD AND BODY (start in red, have white nearby)
1. 6sc into a magic ring [6]
2. inc x6 [12]
3. (1sc, inc) x6 [18]
4. 1sc, inc, (2sc, inc) x5, 1sc [24]
5. (3sc, inc) x6 [30]
6. 2sc, inc, (4sc, inc) x5, 2sc [36]
The next round will begin connecting the ears to the body along one edge of each ear. Skip the stitch right on the corner and begin with the next stitch. Ensure ears are facing inwards (first ear faces away from start of round, second ear faces opposite way). Don't worry if they twist around after the first stitch, after 2 or 3 rows they should hold straight.
7. 5sc, inc, 1sc through an ear and the body, 4sc, inc, 5sc, inc, 2sc, 1sc through an ear and the body, 2sc, inc, (5sc, inc) x2 [42]
Careful not to accidentally skip stitches while attaching parts, it can be hard to see the head stitch after you put your hook in the ear stitch. Count the stitch number after each round if you're unsure.
8. 3sc, inc, 3sc, 1sc though ear and body, 2sc, inc, 6sc, inc, 5sc, 1sc through ear and body, inc, (6sc, inc) x2, 3sc [48]
9. 7sc, inc, 1sc through ear and body, 6sc, inc, 7sc, inc, 2sc, 1sc through ear and body, 4sc, inc, (7sc, inc) x2 [54]
10-12. 9sc, 1sc through ear and body, 19sc, 1sc through ear and body, 24sc (3 rounds) [54]
13. 9sc, 1sc through ear and body, 3sc, change to white and 3sc, in red 7sc, in white 3sc, in red 3sc, 1sc through ear and body, 24sc [54]
Ears should now be completed. Remember to leave the corner stitches unworked. If you have more or fewer ear stitches, no matter. Keep attaching them in a straight line until they are connected enough.
14. 12sc, in white 3sc, in red 9sc, in white 3sc, in red 27sc [54]
The next round connects the eyes, if you're opting for yarn ones. They may be fiddly due to their size. If you're sewing/snapping on alternate eyes, replace every connecting sc with a regular sc.
15. 11sc, in white 3sc, in red 1sc, 2 stitches through an eye and the body, 5sc, 2 stitches through an eye and the body, 1sc, in white 3sc, in red 26sc [54]
16. 10sc, in white 3sc, in red 2sc, 2 stitches through eye and body, 5sc, 2 stitches through eye and body, 2sc, in white 3sc, in red 25sc [54]
Pick 5 stitches across the top of the muzzle and mark them. The muzzle is slightly wider than it is tall.

When you come to it, place the muzzle wrong-side-out against the body and sc along the marked stitches, as the photo depicts.
17. 10sc, in white 3sc, in red 4sc, 5sc through both muzzle and body, 4sc, in white 3sc, in red 25sc [54]
18. 3sc, dec, 5sc, in white 1sc, dec, in red 2sc, 2sc through muzzle and body, 5sc, 2sc through both muzzle and body, 2sc, in white dec, 1sc, in red 5sc, dec, 6sc, dec, 5sc, dec, 3sc [48]
19. 3sc, dec, 4sc, in white 2sc, in red dec, 9sc (no muzzle stitches), dec, in white 2sc, in red 4sc, dec, (5sc, dec) x2, 2sc [42]
20. 3sc, dec, 3sc, in white 1sc, in red dec, 2sc through muzzle and body, 5sc, 2sc through muzzle and body, dec, in white 1sc, in red 3sc, dec, 4sc, dec, 5sc, dec, 1sc [36]
You have now finished the white stitches. You can cut and secure your white yarn.
21. dec, 3sc, dec, 4sc. Stuff muzzle a little. 5sc through muzzle and body to complete it. 4sc, dec, 3sc, dec, 2sc, dec, 1sc, dec, 2sc [30]
22. (3sc, dec) x6 [24]
23. 1sc, dec, (2sc, dec) x5, 1sc [18]
Stuff the head.
24. (1sc, dec) x6 [12]
25. inc x12 [24]
26. 3sc, 5sc through an arm and the body, 6sc, 5sc through an arm and the body, 5sc [24]
27. 4sc, 4sc through arm and body, 7sc, 4sc through arm and body, 5sc [24]
28. (3sc, 1inc) x6 [30]
29-31. sc around (3 rounds) [30]
32. 4sc, 5sc through a leg and the body, dec x5, 5sc through a leg and the body, 4sc, dec [24]
The next round will begin attaching the tail. Angle the tail so its jog is hidden from your preferred angle.
33. sc, dec x2, 4sc through leg and body, dec, sc, dec, 4sc through leg and body, dec x2, 2sc through the tail and the body [18]
Stuff the body.
34. sc through tail and body, dec, (1sc, dec) x4, sc, 2sc through tail and body [13]
35. sc through tail and body, dec x6 [7]
Finish off. Use your hook to pull the yarn through the front loops, pull to cinch and hide the end inside.


9 notes
·
View notes
Text
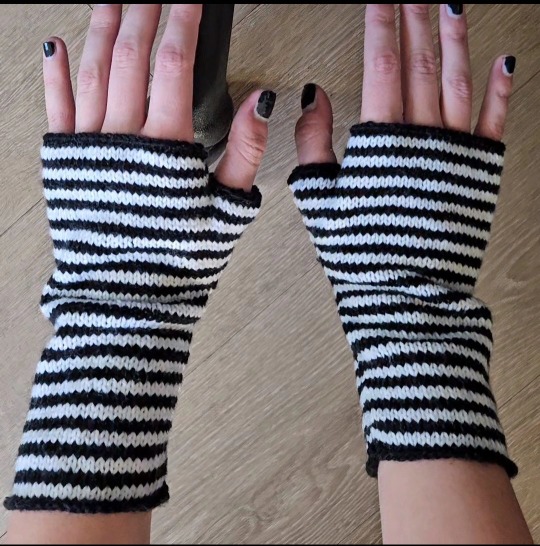
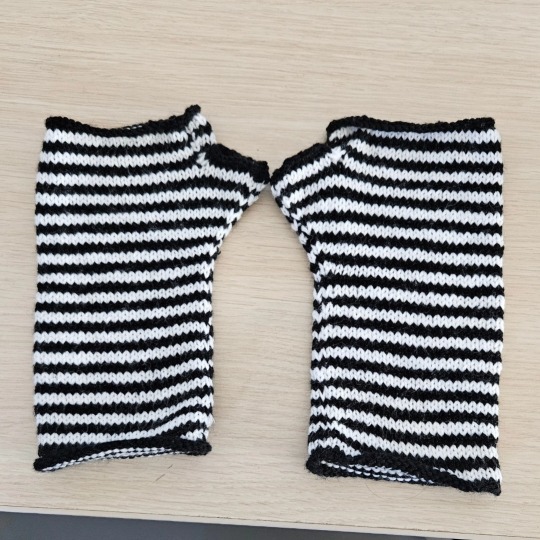
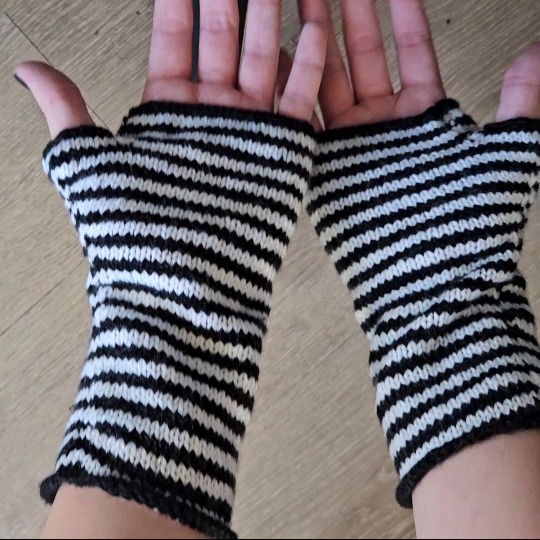
I finished my fingerless gloves! This was a quick and practical project for me because I wear fingerless gloves on my walks to class!
I wrote up a rough recipe for these since they were improv. It's also on my ravelry project page.
CO 50 sts in black
Each stripe is 2 rounds
Knit until 4.5 inches long (or desired length up to wrist)
Start increases for thumb: increase every other round for 18 rounds, 18 sts increased
Inc Round: K1, M1L, Knit until last st, M1R, K1
After all increases have been worked, take 18 sts off of needles and place on hold on scrap yarn.
CO 4 sts, replace st marker after these new sts.
Continue working in stripes until desired length
Thumb:
Put on hold sts back on needles & pick up 4 sts along edge. Knit until desired length.
Link to project page!
#handmade#yarn#fiberartist#knitting#knitblr#knitters of tumblr#finished#fiberart#improvised#free pattern#ravelry
19 notes
·
View notes
Last Seen Blogs

tihmdrayke
mutant supremacist

aniyas-weird-writing
0.15 cents

smileymaste
Secretly Rapunzel

buckyalpine
Hey Doll

creamy33
Beauty and Desire