#elementor page builder tutorial
Text
youtube
elementor tutorial,elementor pro tutorial,elementor wordpress tutorial,elementor tutorial for beginners,wordpress elementor tutorial,elementor,wordpress tutorial,elementor tutorial 2023,elementor wordpress,elementor pro,elementor flexbox tutorial,wordpress tutorial for beginners,wordpress elementor,elementor flexbox container tutorial,elementor wordpress tutorial 2023,elementor pro header tutorial,elementor page builder tutorialelementor tutorial,elementor pro tutorial,elementor wordpress tutorial,elementor tutorial for beginners,wordpress elementor tutorial,elementor,wordpress tutorial,elementor tutorial 2023,elementor wordpress,elementor pro,elementor flexbox tutorial,wordpress tutorial for beginners,wordpress elementor,elementor flexbox container tutorial,elementor wordpress tutorial 2023,elementor pro header tutorial,elementor page builder tutorial
#elementor tutorial#elementor pro tutorial#elementor wordpress tutorial#elementor tutorial for beginners#wordpress elementor tutorial#elementor#wordpress tutorial#elementor tutorial 2023#elementor wordpress#elementor pro#elementor flexbox tutorial#wordpress tutorial for beginners#wordpress elementor#elementor flexbox container tutorial#elementor wordpress tutorial 2023#elementor pro header tutorial#elementor page builder tutorial#Youtube
0 notes
Video
youtube
How To Make A Heading Title Transparent And Show An Image Behind - Eleme...
#youtube#text background#elementor#elementorpro#elementorprotutorial#wordpress#wordpresstutorial#wordpresstutorials#wordpress tutorial#wordpress tricks#divi#page builder#css#css tricks#css tutorial#html#html tutorial
0 notes
Text
In diesem 2 Teil des WordPress Tutorial für Anfänger zeige ich dir wie du deinen Blog mit dem Elementor Page Builder erstellst. Dabei verwende ich das Astra Free Theme. In diesem Video erfährst du, wie du alle Element in Elementor anpassen oder löschen kannst und eigene Template für deinen Blog speichern kannst.
0 notes
Text
7 Best Drag and Drop WordPress Page Builder
7 Best Drag and Drop WordPress Page Builder
Do you want to create a WordPress website? Or you have created a website but are looking for an easy way to customize and build your WordPress site.
If yes, then drag and drop WordPress page builder plugins can do this work very well for you. But the question is, which WordPress page builder plugin should we use to customize our website and create pages?
A WordPress page builders allows you to…

View On WordPress
#Beaver builder#Blog#Divi#Elementor page builder#Landing Page Builder#Page Builder#SeedProd#Themify builder#Visual composer website builder#Website#WordPress Page Builder#Wordpress Plugins#WordPress Tutorials#WPBakery page builder
0 notes
Text
Unleash Your Creativity with Elementor |vrankup|
Yo, what's up my peeps?
Alright, gather 'round because we're diving deep into the world of Elementor, and we're gonna do it in a way that even your grandma could understand. Yeah, I'm serious – we're gonna break it down step by step, just like your best digital marketing agency in dwarka, vrankup likes to do.

**Step 1: Kick It Off With a Bang**
So here it is , when you fire Elementor for the first time you'll feel like a kid in a candy store. you've got options, my friend. You can start with a template – it's like picking your favorite flavor – or you can go full-on DIY mode and start with a blank canvas. It's your world, baby.
**Step 2: Widgets – Your Website's BFFs**
Alright, check it. Widgets are like cool gadgets that make your website pop. We're talking text boxes, images, buttons – you name it, they got it. Just drag and drop those bad boys onto your canvas. It's like building a digital Lego set, and you're the master builder.
**Step 3: Stylin' and Profilin'**
Now, let's talk about style. You wanna keep things looking slick, right? Well, Elementor's got your back. there you customize your fonts, and colors, add pictures, use buttons, and many more but remember, keep it clean and classy.
**Step 4: Section Showdown**
Imagine your website is a stage, and you're the director. Sections are like the scenes in a movie. Divide your page into sections and start adding those widgets. It's like choreographing a dance – each move matters.
**Step 5: The Preview Party**
Time for a sneak peek, my friend. Hit that preview button and see your website come to life. Don't be shy – make those tweaks until it feels just right. It's your website's dress rehearsal, and you're the star of the show.
**Step 6: Mobile Mojo**
Ain't nobody got time for websites that look wonky on mobile. Elementor's got your back, though. Click that magic button to switch to the mobile view and make sure everything's smooth like butter. Trust me, your visitors will thank you.
**Step 7: Seal the Deal – Save and Publish**
Alright, now we're getting serious. Hit that save button like you're sealing the deal on a big contract. Then, when you're ready to go live, hit publish and let the world bask in your awesomeness. It's like dropping the mic after a killer performance.
**Step 8: Level Up Your Game**
Listen, my friend, don't be afraid to level up. Elementor's got some fancy features that can take your website from zero to hero. You're not alone in this journey – YouTube tutorials and online forums are your partners in crime.
**Step 9: Back That Thang Up**
I know, it's easy to get caught up in the excitement. but trust me if you want to back up your work, One wrong move and your masterpiece could vanish into thin air. So, save yourself the heartache and back that thang up.
**Step 10: Share the Love**
Now Share your website with friends, family, heck, even your neighbor's dog. Let the world know what you've created. Your online presence just went from zero to influencer status – all thanks to Elementor.
So there you have it, my friends. Elementor is like the secret sauce that takes your website from drab to fab. It's like having a magic wand that transforms your ideas into digital reality. So go on, unleash your creativity, and let Elementor be your trusty sidekick on this wild online adventure.
Catch you on the flip side,
Digital marketing agency in dwarka|vrankup|
#seo company#seo#website designing company in gurgaon#noida#digital marketing agency in dwarka#digital marketing#website designing services in gurgaon#digital marketing company in dwarka#vrankup#website designing company in dwarka
5 notes
·
View notes
Text
You can add numerous different types of elements to your website using WordPress widgets. In areas of your website that are widget-ready, like sidebars and footers, you can add already-existing widgets.
How do I Create a Custom Widget Area?
What if you want to add your customized widgets to your website or non-widget area of the site? This tutorial is for you. Using this method, you can add customized widgets anywhere on your website just by using a short-code.
We are using a drag-and-drop page builder to build this widget. So you don’t need to know how to code for this. Follow these step-by-step guidelines.
Install WordPress Custom Widget Plugin
You will need 2 plugins for this tutorial. These plugins must be installed before you proceed, and they are free.
The plugins "Elementor Page Builder" (Download Elementor Page Builder) and "Anywhere Elementor" (Download Anywhere Elementor) must be installed. I have already installed the Elementor Page Builder, so I am going to install the other plugin.
In your WordPress dashboard, navigate to the plugin area. Then click “Add new” and search for the “Anywhere Elementor".
WordPress Dashboard > Plugins > Add New
Install and activate the plugin. After that, you will see a new element called “AE Templates”.
How to Create Custom Widget in WordPress?
Here you can add your new customized widgets. Click the “add new” button to start designing your widget. You can name the template using any name.
Choose the template as “Elementor Full Width” and update it. After that, you can click the “Edit with Elementor” button to start.
This is a drag-and-drop page builder, so you can design whatever you want without any coding knowledge. I am going to skip the building process by speeding up the video. You can freely design your widget.
How to Display Custom Widget in WordPress?
OK, now I am finished designing. For the next step, save these changes and exit from Elementor. I will add this widget to the site's footer area.
Navigate to the "widget section" under the "Appearance" menu, copy the template's short code, and paste it there.
WordPress Dashboard > Appearance > Widgets
This short code can be added in the footer widget area using a text box. Let's see if the website displays our customized widget. You can see it successfully displayed on the site.
If you have any issue regarding this tutorial, please don't hesitate to open a thread on MineX Tuts Tech Forum.
Ask Questions
0 notes
Text
Quick & Easy Anchor Links in WordPress: Master Elementor in Minutes!

Video Tutorial link: https://youtu.be/Yh508x1z0HM
Discover the fastest way to enhance your website navigation with our must-watch tutorial, "Quick & Easy Anchor Links in WordPress: Master Elementor in Minutes!" Whether you're building a one-page website, a landing page, or just want to streamline navigation on your site, this video is packed with actionable insights to help you implement smooth, efficient anchor links using WordPress and Elementor.
Subscribe for free access to 800+ Video Tutorials: https://www.youtube.com/dcpwebdesigners
Contact me at:
Instagram: https://www.instagram.com/dcpwebdesigners/
Facebook: https://www.facebook.com/dcpwebdesigners/
Pinterest: https://www.pinterest.co.uk/dcpwebdesigners/
LinkedIn: https://www.linkedin.com/in/dcpwebdesigners/
Website:: https://www.dcpweb.co.uk
Table of contents
00:00:00 Introduction
00:00:34 Add anchor to page
00:02:12 Add a link to the anchor
00:03:05 Add a link to the anchor from another page
00:05:40 Add anchor to CSS ID
00:07:30 Add a link to the anchor from the navigation menu
WordPress 'Elementor #Tutorial
Anchor links, also known as jump links, are a vital web design feature, allowing users to jump to specific sections of a page with just a click. They not only improve user experience but also make your website content more accessible. And with Elementor, creating these links is simpler and faster than ever.
In this concise guide, we'll walk you through the process from start to finish. You'll learn how to identify sections in your Elementor layout that would benefit from anchor links, how to correctly add these anchors using Elementor's intuitive interface, and how to link text or images to these anchors for seamless navigation.
But we don't stop at the basics. You'll also get insider tips on customizing the scroll behavior to match your site's design and user expectations, ensuring that your anchor links provide a smooth, satisfying experience for all visitors. Plus, we'll show you how to troubleshoot common issues that might arise during the process.
By the end of our tutorial, you'll be equipped with the knowledge to implement effective anchor links on your WordPress site, making it more navigable and user-friendly. Whether you're a seasoned developer or a DIY website owner, our straightforward, step-by-step approach will save you time and elevate your site's functionality.
Don't forget to like, share, and subscribe for more WordPress and Elementor tips, tricks, and tutorials. Let's dive in and transform your website navigation together!
WordPress Anchor Links, Elementor Tutorial, Quick Elementor Guide, Fast Web Design Tips, Elementor Page Builder, Smooth Scroll Elementor, Website Improvement, Elementor Design Tricks, User Experience Design, Web Development, Anchor Link Setup, WordPress Website Tips, Elementor Features, Easy Website Navigation, how to create anchor links in wordpress, how to create anchor links, anchor links, anchor links in wordpress, how to create anchor links in elementor
0 notes
Text
From Pixel to Perfection: Mastering the Art of PSD to WordPress | Xchop
Introduction to PSD to WordPress Conversion
In today's digital age, having a strong online presence is essential for businesses and individuals alike. One of the most popular and powerful platforms for creating and managing websites is WordPress. With its user-friendly interface and extensive customization options, WordPress has become the go-to choice for website development. However, if you have a unique design for your website created in Photoshop (PSD) format, you need to convert it into a WordPress theme. This process is known as PSD to WordPress conversion, and it allows you to bring your design to life on the web. In this article, we will guide you through the steps involved in mastering the art of PSD to WordPress conversion.
Understanding the Benefits of Converting PSD to WordPress
Before diving into the technicalities of PSD to WordPress conversion, it's important to understand why it is a beneficial approach. Converting your PSD design to WordPress offers several advantages. Firstly, it provides you with a responsive and mobile-friendly website. With the increasing use of smartphones and tablets, having a website that adapts to different screen sizes is crucial. WordPress themes are designed to be responsive, ensuring that your website looks great on any device.
Secondly, converting PSD to WordPress allows for easy content management. With the intuitive WordPress dashboard, you can easily update and modify your website's content without any coding knowledge. This flexibility empowers you to keep your website up-to-date with fresh content, resulting in better user engagement and search engine rankings.
Step-by-Step Guide to Converting PSD to WordPress
Now that we understand the benefits, let's dive into the step-by-step process of converting PSD to WordPress. The first step is to slice your PSD design into individual image assets. This involves separating different elements like the header, footer, menus, and content sections. Once you have the images ready, you need to convert them into HTML and CSS code. This step involves coding the structure, layout, and styling of your website using web technologies like HTML, CSS, and JavaScript.
Next, you need to integrate the HTML and CSS code into a WordPress theme. This is done by converting the static HTML and CSS files into a dynamic WordPress theme structure. You will need to create PHP template files and add WordPress-specific tags and functions to make your theme compatible with WordPress.
Choosing the Right Tools and Resources for PSD to WordPress Conversion
To ensure a smooth and efficient PSD to WordPress conversion process, it is important to choose the right tools and resources. There are several tools available that can simplify the conversion process. For slicing the PSD design, you can use tools like Adobe Photoshop or Sketch. These tools allow you to export individual image assets from your design.
For coding the HTML and CSS, you can use popular text editors like Sublime Text or Visual Studio Code. These editors provide syntax highlighting, auto-completion, and other features to streamline your coding workflow. Additionally, there are online resources and tutorials available that can help you learn and understand the intricacies of PSD to WordPress conversion.
Customizing the WordPress Theme with Elementor
Once you have converted your PSD design into a WordPress theme, you can further enhance the customization options using popular page builders like Elementor. Elementor is a powerful drag-and-drop page builder that allows you to visually design your website without any coding knowledge. With its extensive library of pre-designed templates and elements, you can easily create stunning and unique layouts for your website. Elementor also offers advanced features like animation effects, responsive editing, and WooCommerce integration, making it a versatile tool for customizing your WordPress theme.
Enhancing Your WordPress Website with Divi Theme
Another popular option for customizing your WordPress theme is the Divi theme. Divi is a multipurpose WordPress theme that comes with a built-in visual page builder. With its intuitive interface and extensive customization options, Divi allows you to create stunning and professional websites. It offers a wide range of pre-designed templates, layout options, and modules that can be easily customized to match your design requirements. Divi also provides advanced features like split testing, global elements, and responsive editing, making it a powerful tool for enhancing your WordPress website.
Creating a Custom WordPress Theme from Scratch
While using pre-designed themes and page builders can be convenient, sometimes you may need a completely custom WordPress theme to meet your unique design requirements. In such cases, you can create a custom WordPress theme from scratch. This involves creating the necessary PHP files, adding the required WordPress tags and functions, and styling the theme using CSS. Although creating a custom WordPress theme requires advanced coding skills, it offers complete control over your website's design and functionality.
Utilizing WordPress with Advanced Custom Fields (ACF)
Another way to enhance your WordPress website is by using the Advanced Custom Fields (ACF) plugin. ACF allows you to add custom fields to your WordPress posts, pages, and custom post types. This gives you the flexibility to create custom content types and add additional data to your website. For example, you can add fields for testimonials, portfolios, or product specifications. ACF also provides an intuitive interface for managing and displaying the custom fields, making it a powerful tool for extending the functionality of your WordPress website.
Converting a Custom Design into a WordPress Website
In addition to converting PSD designs, you can also convert custom designs created in other design tools like Adobe XD or Sketch into a WordPress website. The process is similar to PSD to WordPress conversion, where you need to slice the design into individual assets and convert them into HTML and CSS code. Once you have the code ready, you can integrate it into a WordPress theme following the same steps mentioned earlier. This allows you to bring your custom design to life on the WordPress platform and take advantage of its powerful features and functionality.
Converting a Figma Design to WordPress
Figma is another popular design tool that allows you to create stunning web and mobile designs. If you have a design created in Figma and want to convert it into a WordPress website, the process is similar to converting PSD or custom designs. You need to export the design assets from Figma and convert them into HTML and CSS code. Once you have the code ready, you can integrate it into a WordPress theme and customize it further using WordPress plugins and page builders.
Best Practices for Successful PSD to WordPress Conversion
To ensure a successful PSD to WordPress conversion, it is important to follow best practices. Firstly, optimize your images for web by compressing them without compromising quality. This will ensure faster loading times for your website. Secondly, make your theme lightweight by removing unnecessary code and scripts. This will improve the performance and speed of your website. Thirdly, test your website on different devices and browsers to ensure compatibility and responsiveness. Finally, regularly update your WordPress theme, plugins, and core files to keep your website secure and up-to-date.
Conclusion
Mastering the art of PSD to WordPress conversion opens up a world of possibilities for creating stunning and functional websites. Whether you are a beginner or an experienced developer, the step-by-step guide provided in this article will help you navigate the complex process with ease. By understanding the benefits, choosing the right tools, and following best practices, you can convert your unique designs into fully functional WordPress websites. And if you need professional assistance, Xchop is a leading PSD to WordPress conversion service provider that can deliver high-quality custom WordPress themes tailored to your specifications. Don't miss out on the opportunities that PSD to WordPress conversion offers. Start converting your designs from pixel to perfection today!
More Info: https://www.xhtmlchop.com/
#wordpress#wordpressdesign#psd to wordpress#webdesign#figma to html#divitheme#ACF#wordpress elementor#webdevelopment#bootstrap#wordpress acf#web#website#xchop
0 notes
Text
Crafting Digital Masterpieces: A Beginner's Journey with Elementor
Introduction:
In today's digital landscape, establishing an online presence is paramount for businesses and individuals alike. A visually appealing and user-friendly website serves as the cornerstone of online success. Elementor, a leading page builder plugin for WordPress, has revolutionized website design by offering a powerful yet intuitive platform for creating stunning websites without coding expertise. In this comprehensive beginner's guide, we will delve into the intricacies of Elementor, equipping you with the knowledge and skills to become an Elementor Expert and unleash your creativity in building captivating websites effortlessly.
1. Understanding Elementor:
Overview of Elementor: Introduction to Elementor's history, features, and popularity in the WordPress ecosystem.
Key Features Deep Dive: Exploring Elementor's drag-and-drop interface, real-time editing capabilities, extensive widget library, and responsive design options.
Compatibility and Integration: Understanding Elementor's compatibility with various WordPress themes, plugins, and third-party tools.
2. Getting Started with Elementor:
Installation and Setup: Step-by-step instructions for installing and configuring Elementor on your WordPress website.
Interface Tour: A comprehensive walkthrough of Elementor's user interface, including the canvas area, toolbar, panel structure, and settings options.
Creating Your First Page: Practical guidance on creating a new page with Elementor and understanding the basic building blocks like sections, columns, and widgets.
3. Building Blocks of Elementor:
Sections and Columns: Explaining the concept of sections and columns and how to customize their layout, width, and height.
Widgets Explained: In-depth exploration of Elementor's extensive widget library, covering essential widgets for text, images, buttons, forms, and advanced elements like slideshows and testimonials.
Templates and Blocks: Leveraging Elementor's template and block library to kickstart your design process with professionally designed layouts and content blocks.
4. Designing Your Website:
Customization Techniques: Advanced customization options including typography settings, color schemes, spacing controls, and global style settings.
Responsive Design Principles: Strategies for ensuring your website looks great on all devices by optimizing responsiveness and using Elementor's device preview modes.
Animation and Effects: Incorporating animation effects, hover effects, and entrance animations to enhance user engagement and visual appeal.
5. Optimizing Performance and SEO:
Performance Optimization Strategies: Tips for improving website performance by optimizing images, minimizing CSS and JavaScript files, and leveraging caching plugins.
SEO Best Practices: Implementing SEO-friendly practices within Elementor, including optimizing page titles, meta descriptions, headings, and structured data.
6. Going Beyond the Basics:
Theme Building: Harnessing Elementor's Theme Builder functionality to design custom headers, footers, single post layouts, and archive pages.
Dynamic Content and Conditional Logic: Utilizing dynamic content widgets and conditional logic to create personalized user experiences and dynamic page layouts.
Third-Party Integrations: Exploring integrations with popular third-party services, including email marketing platforms, e-commerce solutions, and CRM systems.
7. Troubleshooting and Support:
Common Issues and Solutions: Identifying and troubleshooting common issues encountered while using Elementor, such as styling conflicts, layout discrepancies, and plugin compatibility issues.
Community Resources and Support: Accessing Elementor's extensive documentation, community forums, tutorials, and official support channels for assistance and guidance.
Conclusion:
Elementor empowers beginners and seasoned professionals alike to design visually stunning and highly functional websites with ease. By mastering Elementor's features, techniques, and best practices outlined in this comprehensive guide, you have the tools and knowledge to become an Elementor Expert and create captivating websites that resonate with your audience and achieve your online objectives. Whether you're a business owner, freelancer, or aspiring web designer, Elementor opens doors to limitless possibilities in web design and development. Embark on your journey to mastering Elementor today and elevate your web presence to new heights of success. Understanding Elementor's compatibility with various WordPress themes, plugins, and third-party tools.
0 notes
Video
youtube
Stand Out from the Crowd: Master Elementor's Hero Section Background Ima...
Welcome to our latest Elementor tutorial! In this video, we'll guide you through the process of creating an eye-catching full-width hero section with a dynamic background image zoom effect using Elementor's Call to Action (CTA) module. Whether you're a seasoned web designer or new to Elementor, this tutorial is perfect for anyone looking to enhance the visual appeal of their website's hero section. By leveraging the powerful features of the Elementor page builder, you'll learn how to create a stunning hero section that captures your audience's attention and leaves a lasting impression.
#youtube#Elementor HeroSection FullWidth BackgroundImage ZoomEffect WebDesign WebsiteEnhancement VisualEffects
0 notes
Text
WP Prodigy: Elevating Websites with WordPress Development
In today's digital age, having a strong online presence is crucial for businesses and individuals alike. A well-designed and functional website is the cornerstone of this online presence. WordPress, the world's most popular content management system (CMS), has empowered millions of users to create and manage their websites effectively. One powerful tool that takes WordPress to the next level is WP Prodigy. In this article, we will explore WP Prodigy and how it elevates websites with WordPress development.
What is WP Prodigy?
WP Prodigy is a comprehensive WordPress development framework that simplifies the process of creating feature-rich and high-performance websites. It offers a range of advanced features, tools, and functionalities, enabling developers to build sophisticated websites with ease.
Ease of Use
One of the primary advantages of WP Prodigy is its user-friendly interface. Whether you are a seasoned developer or a novice, the framework provides an intuitive and easy-to-navigate dashboard. The drag-and-drop functionality allows you to create stunning web pages without writing a single line of code. This feature alone makes WP Prodigy an excellent choice for individuals and businesses looking to build websites without the need for extensive technical knowledge.
Customization Capabilities
WP Prodigy offers extensive customization capabilities, making it possible to create unique and tailored websites. The framework provides a wide range of pre-designed templates and themes that can be easily customised to match your brand's identity. Additionally, WP Prodigy supports integration with popular page builders like Elementor and Beaver Builder, allowing you to create visually stunning pages with advanced design options.
Advanced Functionality
WP Prodigy goes beyond the basic features of WordPress and provides advanced functionalities to enhance your website. The framework offers an array of premium plugins and extensions that can be seamlessly integrated into your website. These plugins cover various aspects, including SEO optimization, security, analytics, e-commerce, and more. With WP Prodigy, you can extend the capabilities of your WordPress site and unlock a host of advanced features without the need for extensive coding.
Performance Optimization
Website performance is a critical factor in delivering a seamless user experience. WP Prodigy is designed with performance optimization in mind. It offers a range of tools and features to improve website speed and load times, such as caching, image optimization, and minification. These optimizations not only enhance user experience but also contribute to better search engine rankings.
Responsive Design
With the increasing use of mobile devices, having a responsive website is essential. WP Prodigy ensures that your website looks and functions flawlessly across all devices and screen sizes. The framework provides responsive design options, enabling you to create websites that adapt and adjust based on the user's device, resulting in an optimal browsing experience.
Security Measures
Website security is a top priority for any website owner. WP Prodigy understands this and incorporates robust security measures to protect your website from potential threats. The framework offers features such as secure login, regular backups, and protection against malware and hacking attempts. By using WP Prodigy, you can rest assured that your website is well-guarded against security vulnerabilities.
Community and Support
WP Prodigy benefits from the vast and vibrant WordPress community. The community provides extensive support, tutorials, and resources to help users make the most of the framework. Additionally, WP Prodigy offers dedicated customer support, ensuring that any issues or queries you may have are addressed promptly.
Conclusion
WP Prodigy is a powerful WordPress development framework that brings a host of advanced features and functionalities to your website. With its user-friendly interface, extensive customization options, and performance optimization tools, WP Prodigy empowers both developers and non-technical users to create stunning and high-performing websites. Whether you are a business owner looking to establish a strong online presence or a developer seeking to streamline your workflow, WP Prodigy is a game-changer in the world of WordPress development. Elevate your website and unlock its full potential with WP Prodigy.
#wordpress development company#hire wordpress developers india#wordpress developers in india#hire dedicated wordpress developer india#hire wordpress programmer india
0 notes
Text
Get Elementor Pro Free with Lifetime Activation 2023
Are you an avid website builder looking to take your designs to the next level? If so, you're probably familiar with Elementor, one of the most popular and powerful page builders for WordPress. Its intuitive drag-and-drop interface, extensive customization options, and robust features make it a top choice for professionals and beginners alike. And here's some exciting news: in 2023, you can get your hands on Elementor Pro for free with lifetime activation!
Elementor Pro is the premium version of the Elementor page builder, offering even more advanced features and functionalities to enhance your web design experience. With the Pro version, you gain access to an array of professionally designed templates, a theme builder to customize your website's header, footer, and other areas, dynamic content capabilities, WooCommerce integration, and much more.
So, how can you get Elementor Pro for free with lifetime activation in 2023? Let's delve into the details.
Keep an Eye Out for Exclusive Promotions and Deals: Elementor occasionally runs special promotions and offers, particularly during significant events like Black Friday or Cyber Monday. These limited-time offers often include discounts or bundled packages that may grant you lifetime access to Elementor Pro for free.
Participate in Giveaways and Contests: Many websites, blogs, and social media influencers run giveaways and contests where you can enter for a chance to win Elementor Pro licenses. Stay active in the web design community, follow relevant social media accounts, and keep an eye out for such opportunities.
Explore Affiliate Programs: Elementor has an affiliate program that allows you to earn commissions by promoting their products. Some affiliates offer rewards such as free Elementor Pro licenses or discounted rates for reaching specific milestones. Consider joining an affiliate program and start promoting Elementor to potentially unlock free access to Elementor Pro.
Connect with Elementor Community: Engaging with the Elementor community is a fantastic way to stay updated on the latest news, features, and opportunities. Join official Elementor forums, Facebook groups, and other community platforms. Sometimes, the Elementor team may surprise active community members with special perks, including free Elementor Pro licenses.
Explore Educational Resources: Elementor provides extensive documentation, tutorials, and webinars to help users fully utilize their page builder. Occasionally, they may offer exclusive deals or giveaways to those who actively engage with their educational resources. Stay informed and participate in their learning initiatives to increase your chances of winning free Elementor Pro.
Remember, it's always important to ensure that any offers or promotions you come across are legitimate and authorized by Elementor. Be cautious of scams or unofficial sources claiming to provide free Elementor Pro licenses, as they may be fraudulent or put your website's security at risk.
In conclusion, Elementor Pro is an exceptional page builder that can transform your website design process. With its extensive array of features, it's a valuable asset for any web designer or developer. By exploring exclusive promotions, participating in giveaways, leveraging affiliate programs, engaging with the Elementor community, and utilizing educational resources, you can increase your chances of obtaining Elementor Pro for free with lifetime activation in 2023.
Take advantage of these opportunities, and unlock the full potential of Elementor Pro to create stunning websites that leave a lasting impression on your audience. Happy designing!
0 notes
Text
Real Estate Agent Lead Generation Websites

In the dynamic world of real estate, new agents often grapple with finding effective lead-generation websites to kickstart their journey. This comprehensive guide will explore building and optimizing your online presence as a new real estate agent.
We’ll investigate why WordPress and Elementor can be advantageous for forming your real estate website and offer a step-by-step tutorial on how to achieve this. Understanding compliance guidelines for cookies and accessibility is another critical aspect we’ll cover in detail.
The role of IDX in real estate lead generation cannot be overstated. We’ll dissect what it means, its pros & cons, and how you can harness its power effectively. Furthermore, we’ll evaluate popular monthly subscription services versus hiring freelancers for your website needs.
Ultimately, our review of top-tier lead-generation platforms will guide you in selecting the most appropriate site for generating premium leads as a novice in this fiercely competitive industry.
The Crucial Role of a Strong Digital Presence in the Real Estate Industry
A robust online presence is essential for real estate agents in today’s digital age. Buyers and sellers go to find information about properties on the internet, and you need to be there to capture their attention. With over 291 million site visits per month, Zillow Premier Agent is the king of lead generation platforms, proving the power of being online.

Why You Need a Solid Online Profile:
Visibility: 90% of homebuyers start their search online. Be where they are by optimizing your presence on real estate websites and using SEO to appear in relevant searches.
Credibility: A well-designed website with quality content shows that you know your stuff and are committed to providing valuable information.
Ease-of-Access: A mobile-friendly website allows users to access information anytime, anywhere, increasing engagement.
Data Collection: Digital platforms provide tools to track user behavior and refine marketing strategies based on insights.
But it’s not just about having a website or social media profiles. Interacting with your followers, posting helpful material, and keeping current on market trends are all essential to successful lead generation in real estate. That’s how you generate real estate leads effectively.
Consider partnering with established real estate lead generation companies to supercharge your digital efforts. These experts know how to leverage organic and paid channels and advanced tech tools to capture and nurture leads into successful transactions. For example,
Zillow Premier Agent offers exclusive features like CRM integration and detailed analytics reports to track performance quickly.
Realtor.com provides advertising solutions to enhance exposure among its massive monthly user base of over 118 million.
Building Your Real Estate Website with WordPress and Elementor
In the competitive real estate industry, a killer website is a must. It’s like your digital storefront, showing off your listings to potential clients while giving them the lowdown on what you’re all about. And if you want to build a website that stands out, you can go right with WordPress and Elementor.
Why Choose WordPress and Elementor?
When it comes to website building, WordPress is the boss. With its ease of use, high level of customizability, SEO-friendliness, and affordability, WordPress is the preferred platform for more than 40% of all websites.
But wait, there’s more. Enter Elementor, the superhero of page builders. With its drag-and-drop powers, even non-techies can create stunning web pages that capture leads and turn them into loyal clients.
A Step-by-Step Guide To Building Your Website With WordPress And Elementor
Purchase Hosting: Get yourself some reliable hosting, like BlueHost. They’re WordPress-friendly and make installation a breeze.
Select A Domain Name: Choose a domain name that screams “real estate pro” so potential clients can find you easily.
Create Your Site On WordPress: Install WordPress on your server and pick a theme that suits your style. There are plenty of free and paid options to choose from.
Install And Configure Elementor: Add the Elementor plugin to your site and get it set up. It’s as easy as a few clicks.
Integrate Lead Generation Tools: Remember to add contact forms, live chat plugins, and CRM integrations to capture and manage leads like a pro.
Follow these steps to build a solid foundation for your real estate website. With some tweaking and optimization, you’ll generate high-quality leads in no time.
Understanding Compliance Guidelines for Cookies and Accessibility
In today’s digital age, it’s crucial to follow the rules for cookies and accessibility. As a real estate pro, you have to play by the book. Staying within the rules of cookies and accessibility ensures a smooth user experience.
Decoding Cookie Compliance
Cookies are like little data nuggets stored on a user’s computer. They make websites more personal and relevant. But thanks to privacy laws like GDPR, cookies are under the microscope.
When dealing with EU citizens’ data, you need explicit consent before collecting personal info through cookies. So, be clear about your cookie policies for real estate leads on your lead gen site.
Show a visible cookie banner: Let users know about cookies right away.
Give an opt-out option: Make it easy for users to say no to non-essential cookies.
Be transparent: Explain what cookies you use and why in your Privacy Policy.
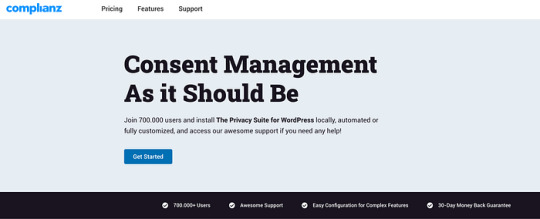
Complianz is a robust, user-friendly solution designed to handle all your website’s GDPR and CCPA compliance needs. With its comprehensive features and automated functions, Complianz makes managing legal requirements a breeze, ensuring your site stays up-to-date and fully compliant at all times.
Read More…
#Real Estate Agent Guide
#Luxury Real Estate
#Real Estate Career
0 notes
Text
Wie du mit Elementor beeindruckende WordPress-Websites erstellst
In diesem Artikel erfährst du, Wie du eine WordPress Website mit Elementor erstellst. Willst du eine ansprechende und leistungsstarke Website erstellen, hast aber keine fortgeschrittenen Kenntnisse in Webentwicklung oder Design? Keine Sorge! Mit WordPress und dem beliebten Elementor-Plugin kannst du jetzt eine professionelle Webseite erstellen, die deine Besucher beeindruckt.
Bereit, loszulegen? Erfahre jetzt, wie du mit Elementor und WordPress eine professionelle Website erstellst, ohne dass du dafür Programmierkenntnisse brauchst.
Was genau ist der Elementor Page Builder?
Elementor ist ein fortschrittlicher Webseiten-Baukasten, der speziell für die Nutzung mit WordPress entwickelt wurde. Das Plugin wurde kontinuierlich verbessert, um dir einen erweiterten Funktionsumfang und eine verbesserte Leistung zu bieten.
Der große Vorteil von Elementor liegt darin, dass du ihn selbst als Anfänger ohne Programmierkenntnisse einfach bedienen kannst. Mit diesem Tool kannst du individuelle und äußerst ansprechende Websites erstellen. Du hast die Möglichkeit, einzelne Elemente wie Überschriften, Bilder, Buttons und Texte per Drag & Drop an die gewünschte Stelle zu ziehen und pixelgenau zu positionieren. Darüber hinaus kannst du diese Elemente mit deinen eigenen Inhalten füllen.
Elementor bietet eine breite Palette an vorgefertigten Vorlagen und Design-Elementen, die den Erstellungsprozess erleichtern und beschleunigen. Dies ermöglicht es selbst unerfahrenen Nutzern, professionell aussehende Webseiten zu erstellen, ohne auf die Hilfe von Entwicklern oder Designern angewiesen zu sein.
Dank seiner intuitiven Benutzeroberfläche und der umfangreichen Funktionen ist Elementor zu einer beliebten Wahl für die Erstellung von WordPress Websites geworden. Egal, ob du eine einfache Website, einen Blog, eine Landing Page oder sogar einen Online-Shop erstellen möchtest, Elementor bietet dir die Werkzeuge, um deine kreative Vision in die Realität umzusetzen.
Warum Elementor die beste Wahl für Anfänger ist
Wenn du noch nie zuvor eine Website erstellt hast, kann die Idee, mit dem Aufbau deiner eigenen Website zu beginnen, ziemlich überwältigend sein. Aber keine Sorge, Elementor ist die perfekte Wahl für Anfänger! Mit seiner benutzerfreundlichen Drag-and-Drop-Oberfläche kannst du ganz einfach deine eigene Website erstellen und anpassen. Du musst kein Experte in HTML oder CSS sein, um eine großartige Website zu erstellen. Elementor bietet auch viele vorgefertigte Vorlagen und Widgets, die dir den Einstieg erleichtern. Außerdem gibt es viele Tutorials, falls du einmal Hilfe benötigst. Wenn du auf der Suche nach einer einfachen Möglichkeit bist, deine eigene Website zu erstellen, dann ist Elementor definitiv die beste Wahl für dich!
Schritt-für-Schritt-Anleitung zur Erstellung deiner eigenen Website mit Elementor
Wenn du noch nie zuvor eine Website erstellt hast, kann WordPress auf den ersten Blick kompliziert wirken. Aber mit Elementor ist es einfacher als je zuvor deine eigene Website zu erstellen! Mit dieser Schritt-für-Schritt-Anleitung wirst du in kürzester Zeit deine eigene Website erstellen können. Zunächst musst du dich für ein Hosting-Unternehmen entscheiden und eine Domain registrieren. Sobald das erledigt ist, kannst du WordPress installieren und Elementor hinzufügen. Dann geht es darum, eine Vorlage auszuwählen oder von Grund auf neu zu beginnen. Elementor bietet dir unzählige Optionen zur Anpassung deiner Website, von der Farbauswahl bis hin zur Schriftart und dem Layout. Es mag vielleicht etwas Überwältigendes sein, aber nimm dir einfach die Zeit, die Funktionen auszuprobieren und dich mit der Plattform vertraut zu machen. Wenn du einmal den Dreh raus hast, wirst du sehen, wie einfach es ist, deine eigene Website mit Elementor zu erstellen!
Die besten WordPress Themes für Elementor
Prinzipiell kannst du jedes Theme mit dem Elementor Pagebuilder bearbeiten das damit kompatible ist Bei Anbietern wie Themeforest steht immer dabei ob das Theme sich auch für Elementor eignet. Die Auswahl des richtigen WordPress-Themes ist ein entscheidender Schritt bei der Erstellung einer Website mit Elementor. Während Elementor bereits mit den meisten Themes kompatibel ist, gibt es bestimmte Themes, die speziell für eine nahtlose Integration mit dem Page Builder entwickelt wurden und zusätzliche Funktionen bieten.
- Astra: Astra ist ein leichtes und schnell ladendes WordPress-Theme, das perfekt mit Elementor harmoniert. Es bietet eine breite Palette an vorgefertigten Starter-Vorlagen, die du als Ausgangspunkt für deine Website verwenden kannst. Mit Astra und Elementor kannst du eine beeindruckende und maßgeschneiderte Website erstellen.
- OceanWP: OceanWP ist ein flexibles und benutzerfreundliches WordPress-Theme, das speziell für die Verwendung mit Page Buildern wie Elementor entwickelt wurde. Es bietet eine Vielzahl von Anpassungsoptionen, einschlie��lich mehrerer Demos und vorgefertigter Layouts. Mit OceanWP kannst du dein Design ganz nach deinen Vorstellungen gestalten.
- GeneratePress: GeneratePress ist ein schlankes und schnelles WordPress-Theme, das eine hervorragende Kompatibilität mit Elementor bietet. Es zeichnet sich durch sauberen Code und eine herausragende Performance aus. Mit GeneratePress kannst du eine Website mit maßgeschneidertem Design und hoher Benutzerfreundlichkeit erstellen.
- Neve: Neve ist ein modernes und vielseitiges WordPress-Theme, das speziell für die Verwendung mit Page Buildern optimiert ist. Es bietet zahlreiche anpassbare Optionen und eine breite Palette an vorgefertigten Demos. Mit Neve und Elementor kannst du eine ansprechende und leistungsstarke Website gestalten.
- Hestia: Hestia ist ein elegantes und responsives WordPress-Theme, das ideal für die Erstellung von Business-Websites geeignet ist. Es bietet eine nahtlose Integration mit Elementor und ermöglicht es dir, ein professionelles Design zu erstellen. Hestia bietet auch WooCommerce-Integration für Online-Shops. Mit dem Hestia Theme habe ich auch schon öfter geabriet ich verwende es für meinen Esoterik Blog und es gehört mit zu den besten Themes.
Bei der Auswahl eines WordPress-Themes für Elementor solltest du darauf achten, dass es regelmäßige Updates erhält, gute Bewertungen hat und eine aktive Entwickler-Community hat. Außerdem ist es wichtig, dass das Theme deinen Anforderungen und Zielen entspricht und eine hohe Benutzerfreundlichkeit sowie eine gute Performance bietet.
Mit diesen empfohlenen WordPress-Themes und dem leistungsstarken Elementor Page Builder hast du alle Tools an der Hand, um eine beeindruckende und hochfunktionale Website zu erstellen, die deine Besucher begeistert. Wähle das Theme aus, das am besten zu deinen Bedürfnissen passt, und beginne mit der Erstellung deiner einzigartigen Online-Präsenz.
Für wenn lohnt sich die Pro Version von Elementor
Eigentlich kannst du mit der kostenlosen Version von Elementor bereits herausragende Webseiten erstellen. Die Pro-Version bietet dir jedoch zusätzliche Funktionen und Vorlagen, mit denen du noch einfacher professionelle Websites erstellen kannst.
Die kostenlose Version von Elementor enthält bereits einen umfangreichen Satz an Funktionen, mit denen du ansprechende und gut gestaltete Webseiten erstellen kannst. Du hast Zugriff auf den Drag-and-Drop-Editor, verschiedene Styling-Optionen, vorgefertigte Widgets und die Möglichkeit, dein Layout zu optimieren. Mit diesen Funktionen allein kannst du eine beeindruckende Webseite gestalten.
Wenn du jedoch noch mehr aus Elementor herausholen möchtest, bietet die Pro-Version erweiterte Funktionen und Vorlagen, die dir helfen, professionelle Websites noch schneller zu erstellen. Mit der Pro-Version erhältst du Zugriff auf zusätzliche Widgets und Design-Elemente, fortgeschrittene Styling-Möglichkeiten, dynamische Inhalte, benutzerdefinierte Felder und vieles mehr.
Die Pro-Version bietet auch vorgefertigte Vorlagen und vollständige Website-Kits, die als Ausgangspunkt für deine Projekte dienen können. Diese Vorlagen sind professionell gestaltet und sparen dir wertvolle Zeit bei der Erstellung deiner Website. Du kannst sie anpassen und an deine individuellen Anforderungen anpassen.
Darüber hinaus bietet die Pro-Version von Elementor auch erweiterten Support und regelmäßige Updates, um sicherzustellen, dass deine Website immer auf dem neuesten Stand ist und reibungslos läuft.
Letztendlich hängt die Entscheidung für die kostenlose Version oder die Pro-Version von deinen individuellen Anforderungen und Zielen ab. Wenn du eine einfache Webseite erstellen möchtest, bietet die kostenlose Version bereits ausreichende Funktionen. Wenn du jedoch zusätzliche Funktionen und erweiterte Möglichkeiten wünschst, um professionelle Websites noch schneller zu erstellen, kann die Pro-Version von Elementor eine sinnvolle Investition sein.
Professionelle Websites erstellen ganz ohne Programmierkenntnisse
In der Vergangenheit erforderte die Erstellung einer Webseite umfangreiches technisches Wissen oder den Einsatz eines spezialisierten Teams. Das führte oft zu zeitaufwändigen und kostspieligen Prozessen, die Frustrationen mit sich brachten. Doch dank Elementor und anderen Page Buildern hat sich das Spiel komplett verändert.
Elementor ist ein intuitives Drag-and-Drop-Editor-Plugin für WordPress mit über fünf Millionen aktiven Installationen. Es ermöglicht dir, deine Website mithilfe einer benutzerfreundlichen Oberfläche zu gestalten, ohne dass du Programmierkenntnisse benötigst. Mit nur wenigen Klicks kannst du beeindruckende Layouts erstellen, Inhalte hinzufügen, Farben und Schriftarten anpassen und sogar interaktive Elemente integrieren.
Egal, ob du eine vollständige Website, eine Landing Page oder einen Blog erstellen möchtest, Elementor bietet dir eine Vielzahl von Funktionen und Designoptionen, um deine Ideen zum Leben zu erwecken. Und das Beste daran ist, dass du jederzeit Änderungen vornehmen kannst, um deine Webseite immer auf dem neuesten Stand zu halten. Egal, ob du ein Unternehmer, Künstler, Blogger oder Freiberufler bist, mit Elementor kannst du deine Online-Präsenz auf ein neues Level heben.
Was Elementor zu einem modernen und beliebten Pagebuilder macht
Früher, in den Pionierzeiten des Internets, war es eine Herausforderung, eine Webseite zu erstellen. Es erforderte fortgeschrittene Kenntnisse in Webentwicklung und Design oder den Zugang zu einem spezialisierten Webdesign Team. Das bedeutete, dass die Erstellung einer Webseite zeitaufwändig, oft frustrierend und potenziell kostspielig war.
Dank moderner Page Builder ist es heute jedoch möglich, auch ohne spezifisches Fachwissen eine professionell gestaltete und leistungsstarke Webseite zu erstellen. Sobald deine Webseite steht, kannst du jederzeit problemlos Inhalte hinzufügen oder das Layout ändern, ohne dass du ein Programmierer sein musst.
Es gibt verschiedene WordPress-Seitenerstellungsprogramme zur Auswahl. Unter ihnen ist das Elementor-Plugin mit über fünf Millionen aktiven Installationen besonders beliebt. Mit Elementor kannst du mithilfe eines intuitiven Drag-and-Drop-Editors alles erschaffen, angefangen von kompletten Webseiten bis hin zu einzelnen Landing Pages.
Fazit - Wie du eine WordPress Website mit Elementor erstellst
Ich habe früher oft mit dem WPBakery Page Builder gearbeitet, doch zwischen den beiden Page Buildern liegen Welten. Ich bin ein großer Fan von Elementor, auch wenn es bei verschiedenen Kundeprojekten manchmal kompliziert sein kann, bestimmte Designs umzusetzen. Trotzdem ist Elementor natürlich nicht perfekt und hat seine Stärken und Schwächen. Aber im Großen und Ganzen ist Elementor ein sehr guter Page Builder, mit dem du einfacher Websites erstellen kannst als mit dem Gutenberg Editor.
Elementor bietet eine benutzerfreundliche Drag-and-Drop-Oberfläche, die es dir ermöglicht, das Layout deiner Website mühelos anzupassen und Inhalte hinzuzufügen. Ob du eine komplette Website, eine Landing Page oder einen Blog erstellen möchtest, Elementor bietet eine Fülle von Funktionen und Designoptionen, um deine Vision umzusetzen.
Darüber hinaus ermöglicht Elementor eine einfache Aktualisierung und Anpassung deiner Webseite. Du kannst Inhalte jederzeit ändern, das Design anpassen und neue Funktionen hinzufügen, ohne auf externe Hilfe angewiesen zu sein. Das gibt dir die Flexibilität, deine Webseite kontinuierlich zu verbessern und den sich ändernden Anforderungen anzupassen.
Das könnte dich auch interessieren:
https://cboeck-websitecontent-und-mehr.de/wie-du-das-perfekte-wordpress-theme-findest
https://cboeck-websitecontent-und-mehr.de/bestes-wordpress-theme-oceanwp
Read the full article
0 notes
Last Seen Blogs

quaranmine
queen of hearts, heads, and body parts

straightandfast-blackrose
Black Rose

gia-batmm-crickle22
Bikori Gaila Felinicia's Random Blog!

em-dick
oh phantom queen!

tubanerezoglu-blog
Tuba Nerezoğlu