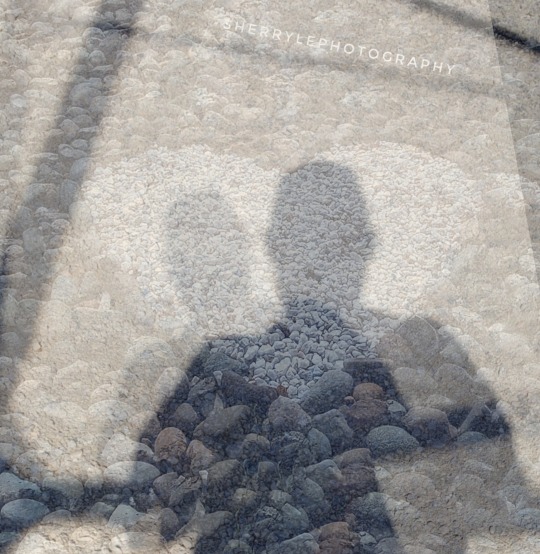
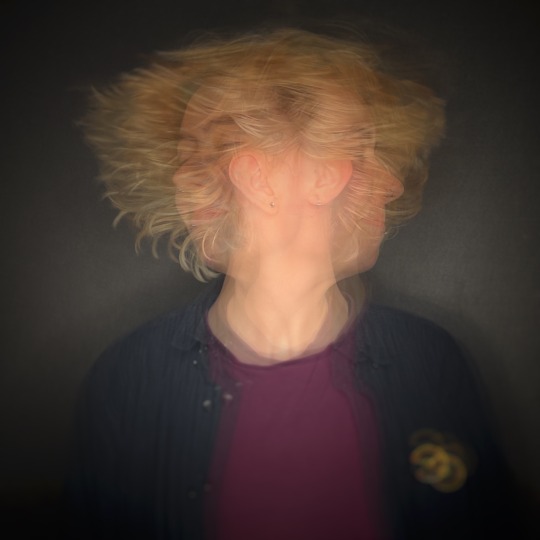
#created using snapseed
Text
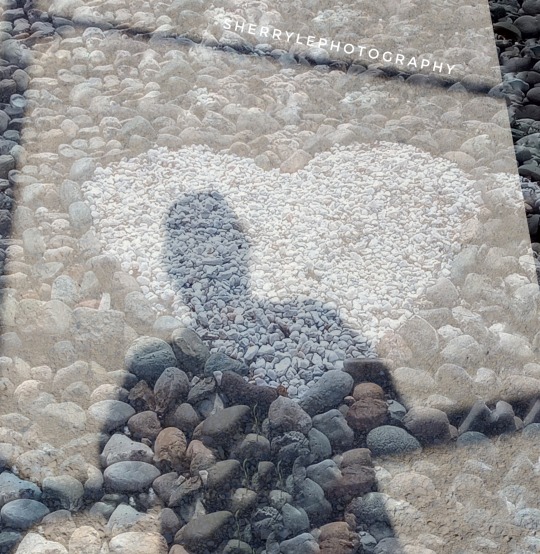
My photography @sherrylephotography
Just finished watching See you in my 19th life, a TV show I watched on Netflix
Ban Ji-eun can remember all her past lives. When her previous life is cut short by a tragic accident, she sets out to reunite with a man named Moon Seo-ha whom she met in her 18th life.
IMBd gives it 7.7
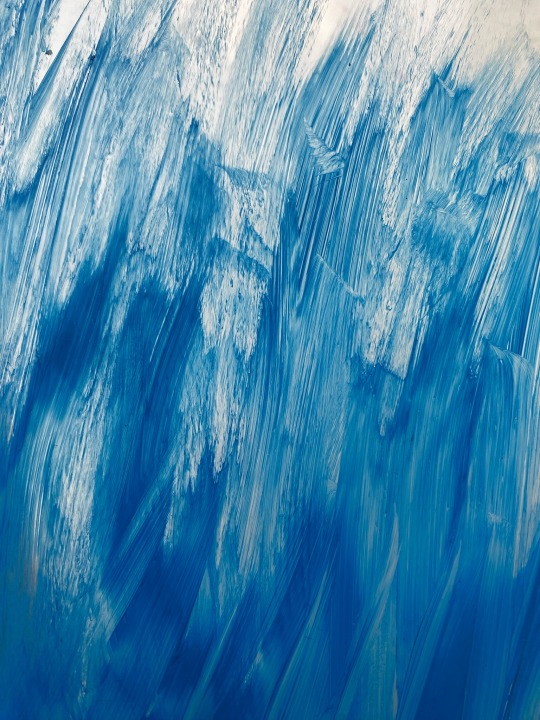
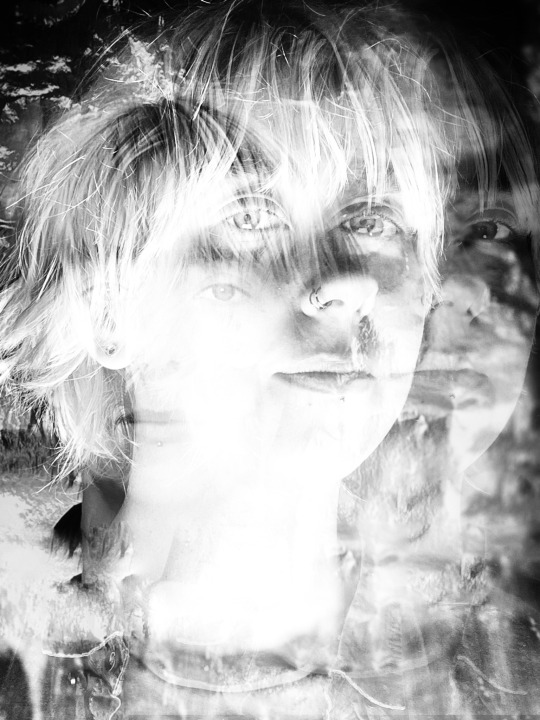
Created using snapseed double exposure.
Submitting to @abstract-challenge
Wasn't found in my kitchen but was fun to create. I miss you abstract challenge.
#abstract challenge#original photography on tumblr#abstract expressionism#created using snapseed#my digital photography abstract art
118 notes
·
View notes
Note
Hello,
Thank you for your posts. They look beautiful. How are you generating these images? What AI do you use?
Thank you! I'm using Stable Diffusion as the core AI for generating them. However, it's about more than just straightforward AI generation. I also use Inpainting and ControlNet to refine the details or change something. Occasionally, I use Photoshop and Snapseed to further enhancements or modify objects. I also use various LoRA models from Civitai, some of which I've compiled myself.
Previously I already wrote about Inpainting:
78 notes
·
View notes
Text

Happy 60th birthday to Jason Isaacs. One of the funniest and loveliest people I have met.
I do have a new piece of art in the pipeline for Jason, but, unfortunately, due to unforseen circumstances, it isn't ready. Here are two of my favourites of my older artwork. Both were created using Medibang Paint and Autodesk Sketchbook. Edited together with Pixlr and Snapseed.
#jason isaacs#lucius malfoy#actor#portrait#artist#art#digital artist#digital art#happybirthday#happy60th#my art#my ediit
16 notes
·
View notes
Text
After creating the hooded belero I took two images that I then edited in Snapseed.
Ideally I wanted to go to Deborah and use the DSLR camera, create effects and drama, but unfortunately time ran out.
So here are the two images I took trying to capture sadness. In the form of my reluctant daughter. Curled up in a posture to suggest sadness. Showing the empty space all to the left of the sofa. And how incredibly lonely sadness can be.

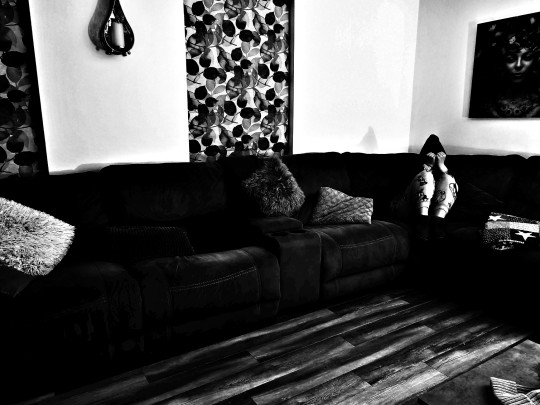
Like I said I had hoped to use the DSLR camera. The intention had been to take a series of images, with and without effects, make a video/slideshow and add music. The song I would have used was Billie Eilish- What was I made for.
youtube
2 notes
·
View notes
Text

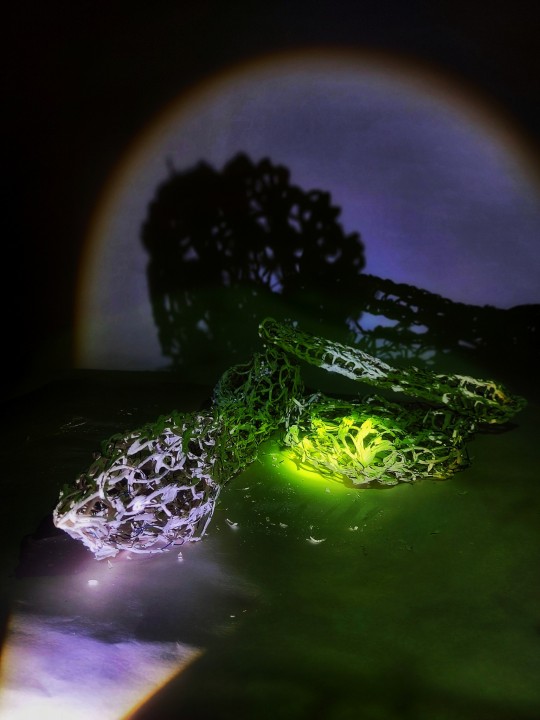

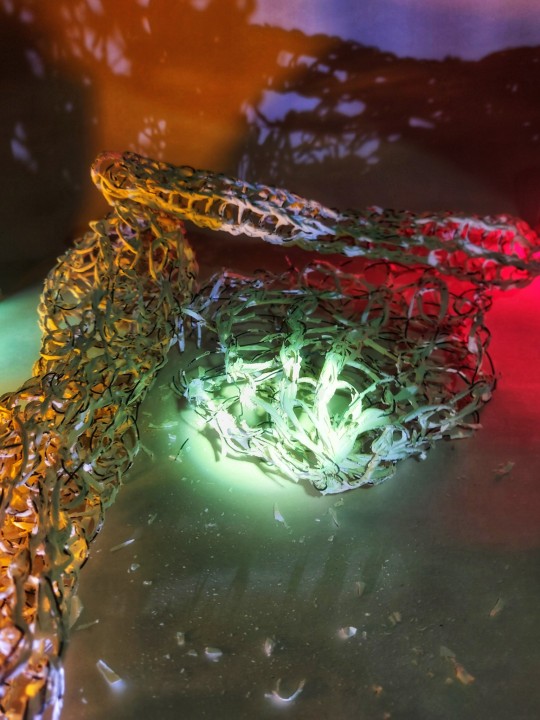


27/10/23
I photographed the clay pieces after taking them out of the kiln. I used the different coloured lights in the photography room to bring more colours into the piece. I experimented with contrast of different colours and textures around the piece. I also played around with shadows and what type of shapes the piece creates when the light is shone through it.
Later i edited the images on snapseed
6 notes
·
View notes
Text
Mastering the Art of Image Editing: Unveiling the Secrets to Stunning Visuals
In the dynamic and visually-driven digital landscape, image editing has become an indispensable tool for individuals and businesses alike. From social media influencers curating eye-catching feeds to businesses enhancing product images for e-commerce, the demand for high-quality, visually appealing content is at an all-time high. In this comprehensive guide, we delve into the world of image editing, exploring its significance, popular techniques, and the tools that empower creators to transform ordinary visuals into extraordinary masterpieces.
The Significance of Image Editing:
Images are powerful communicators, capable of conveying emotions, telling stories, and leaving a lasting impression. Image editing serves as the catalyst that elevates visuals to new heights, making them more engaging and effective. Whether you're a professional photographer, a social media enthusiast, or a business owner, the ability to enhance and optimize your images is a game-changer in today's competitive digital landscape.
Key Techniques in Image Editing:
Color Correction and Grading:
One of the fundamental aspects of image editing is adjusting and enhancing colors. Color correction ensures accurate reproduction of hues, while color grading allows for creative manipulation, setting the tone and mood of the image. Professionals use tools like Adobe Lightroom or Photoshop to fine-tune colors and achieve a visually cohesive look.
Retouching and Enhancement:
Perfecting portraits or product images involves retouching and enhancing details. Removing blemishes, smoothing skin tones, and refining textures are common techniques employed to achieve a polished and professional look. Advanced tools such as frequency separation help achieve nuanced results without sacrificing realism.
Cropping and Composition:
The right composition can transform an ordinary image into a captivating one. Image editing tools provide the flexibility to crop, resize, and reframe images to improve their overall composition. Attention to composition is crucial for creating visually pleasing and balanced visuals.
HDR Imaging:
High Dynamic Range (HDR) imaging is a technique that combines multiple exposures of a scene to capture a broader range of light and detail. This is particularly useful in landscape photography, architectural shots, and any scenario with varying light conditions. HDR enhances the overall tonal range and details in an image.
Adding Filters and Effects:
Filters and effects are powerful tools for infusing creativity into images. From vintage looks to modern aesthetics, a plethora of filters and effects are available to cater to diverse preferences. These can be applied to evoke specific emotions or align with a brand's visual identity.
Tools of the Trade:
Adobe Creative Cloud:
Adobe's suite of creative tools, including Photoshop and Lightroom, remains the industry standard for professional image editing. With a wide range of features and capabilities, these tools offer unparalleled flexibility and control.
GIMP (GNU Image Manipulation Program):
GIMP is a free, open-source alternative to proprietary image editing software. Despite being free, GIMP provides a comprehensive set of tools for tasks ranging from photo retouching to graphic design.
Canva:
Canva is a user-friendly online platform that caters to both beginners and professionals. It offers a range of templates and tools for easy image editing, making it accessible to those without extensive design experience.
Snapseed:
For mobile users, Snapseed is a powerful and intuitive photo editing app. Developed by Google, Snapseed provides a wide array of editing tools and filters, making it a favorite among smartphone photographers.
Conclusion:
In the digital age, where visuals reign supreme, mastering the art of image editing is a valuable skill. Whether you're a seasoned photographer or a social media enthusiast, understanding the significance of image editing and familiarizing yourself with the essential techniques and tools will undoubtedly elevate the quality of your visuals. So, embark on this creative journey, experiment with different editing styles, and witness the transformative power of image editing in making your visuals truly stand out in the digital realm.
2 notes
·
View notes
Text
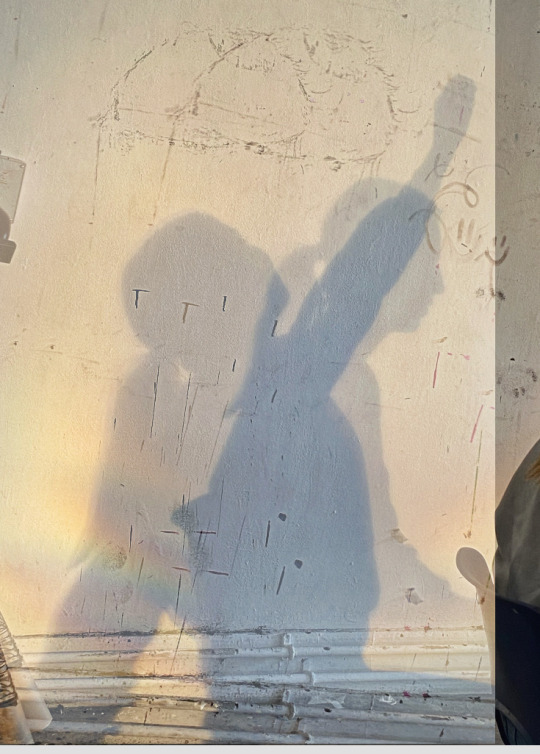
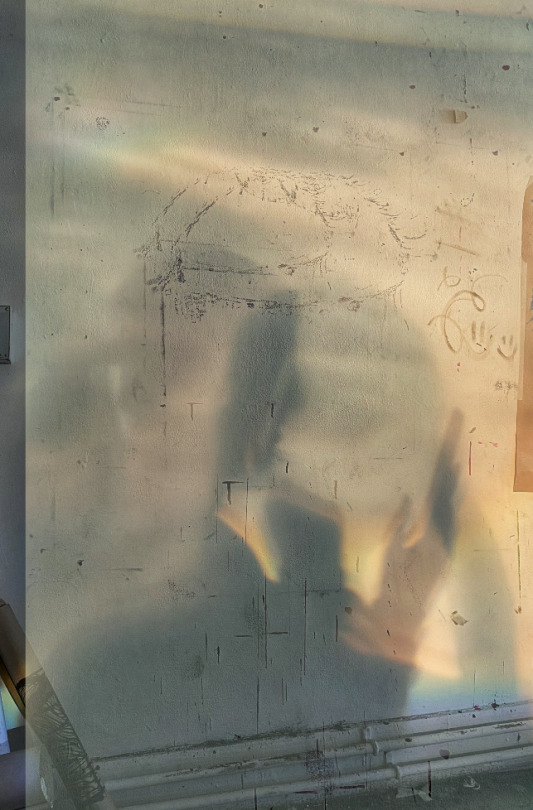
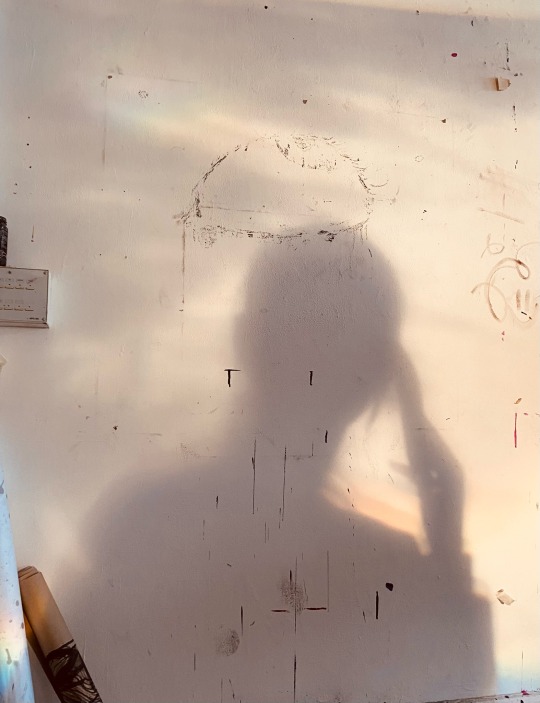
Disrupt Studio Day-9/11/23
I was researching more artists for inspiration and i came across an artist called Kumi Yamashita she is a Japanese artist based in New York , she is best known for her light and shadow sculptures constructed from everyday objects. Whilst i was researching i came across pieces she creates with light shadow figures which i will link

I thought her work was so creative and unique and i wanted to portray some shadow and light figures of my own . My idea was to replicate a memory and how it’s not completely clear as time has passed so the face becomes unclear and it might be as simple as an action or a feeling you are left with in your mind.
To do this i got a projector and used Chloe and Ella to model for me as my figures and i started taking pictures of them with the projector shining against the wall and Chloe and Ella sitting in front of the wall having a conversation .

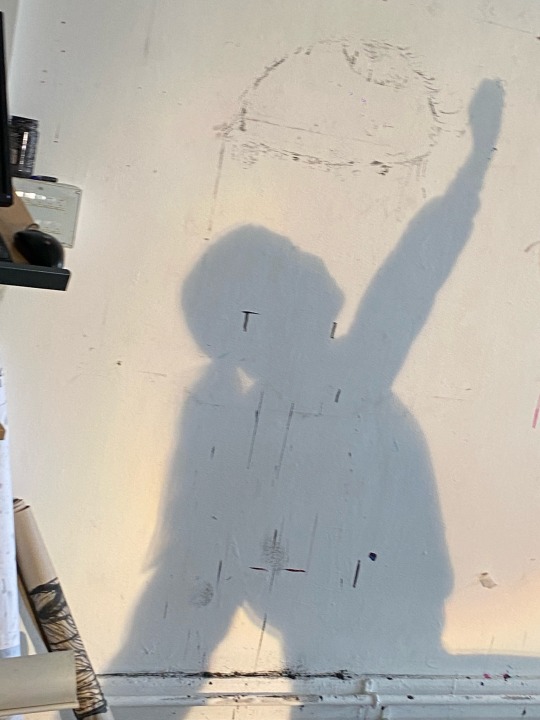
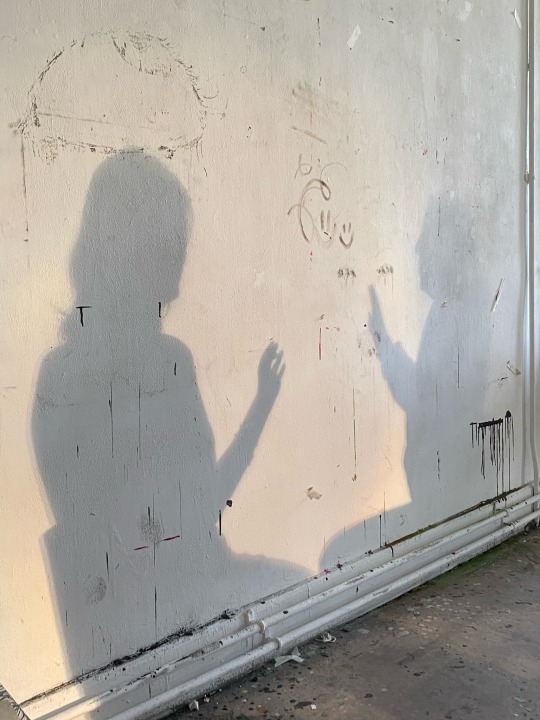
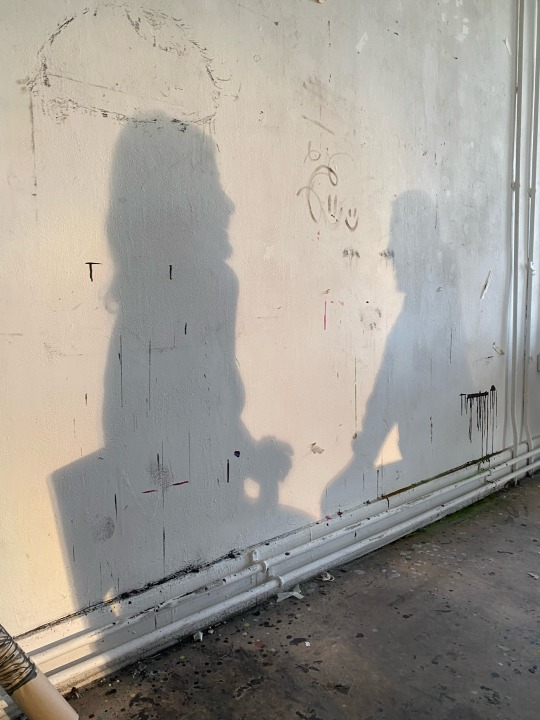
After that, i painted onto a piece of acetate just some simple brush strokes and used Chloe to model for me again and tried to create or resemble the memory with brain fog almost or just the memory becoming more unclear .
Lastly i edited some of the pictures on Snapseed and overlapped them on top of eachother and added some filters and made them almost hazy looking like a memory or a dream and i really liked how they turned out.

3 notes
·
View notes
Text

Marvel's Secret Invasion is now available to stream so I waited to post all of my current versions of Everett Ross. Of course it's not all about him, but in this house we like to remember him in all the locations he's been found.
A friend said her favorite was his red jumpsuit from Wakanda Forever and I had to agree. Why? Well, because he just has so much (more) potential...
That's kind of lowdown, but it's facts!
Now on to from one Maker to another... What can be said for picture taking tips?
Hmm... I am not an expert at all and I still struggle with lighting, especially indoors -- but I'm finding that black backgrounds are easier to work with than white ones because there's not much shadows one has to work with.
Here I just have a black foam poster board I picked up at my local Dollar Tree and one of my old black window curtains thrown over it. The photo was enhanced with some tweaking via Google's snapseed on my smartphone and the rest is history.
I can't say it enough -- you don't gotta break the bank to make Amigurumi or even photograph it. Just use what you have and put your own spin on things. All of these versions of Everett Ross were made freehand after the base was completed. That's what you do. You create a base and then you add all the details to make them unique -- to make them very much "your" creation.
Remember to have fun, check out Secret Invasion (for all reasons, not just Everett Ross), and as always -- Happy Crocheting! 🙂👍🧶
#marvel#everett ross#secret invasion#black panther#wakanda forever#agent everett ross#amigurumi#fiber artist#art#handmade#fan art#yarn#crochet#crochet addict#yarn addict#disney#mcu#marvel art#mcu art#crochet dolls
5 notes
·
View notes
Text
photography workshop
Photography
Day 4 of the tus course
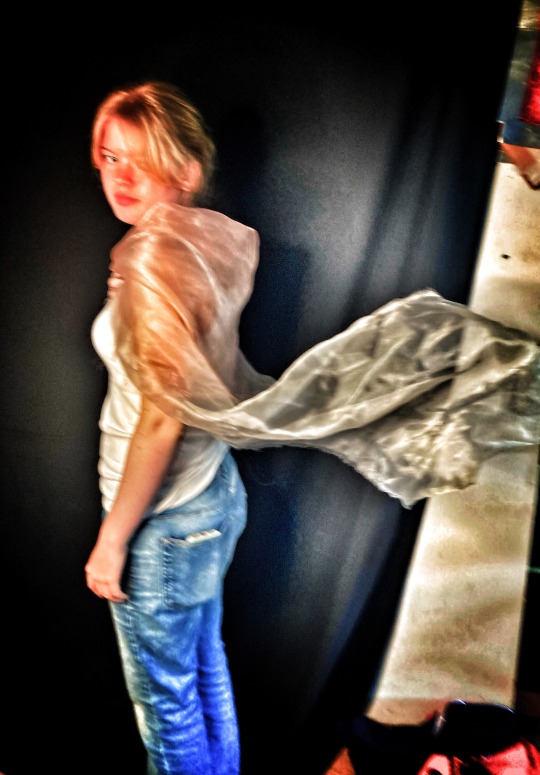
Today we completed a photography workshop.Before this workshop I had never tried out photography properly before .We were paired into groups of two so that we could photograph our partners.I found photography to be quite interesting as I was able to use lighting ,colours and angles to create artwork.I used the app Snapseed to edit the photos.These are some of the finished pieces of photography,I found the vibrant colours and shadows inspiring and I tried to show these in the photos I took.I the first photo the light hitting the cape shows the shadow really well.My favourite one is the bottom photo as I love the bright shades of pinks , reds and oranges that make the photo eye catching.
3 notes
·
View notes
Text
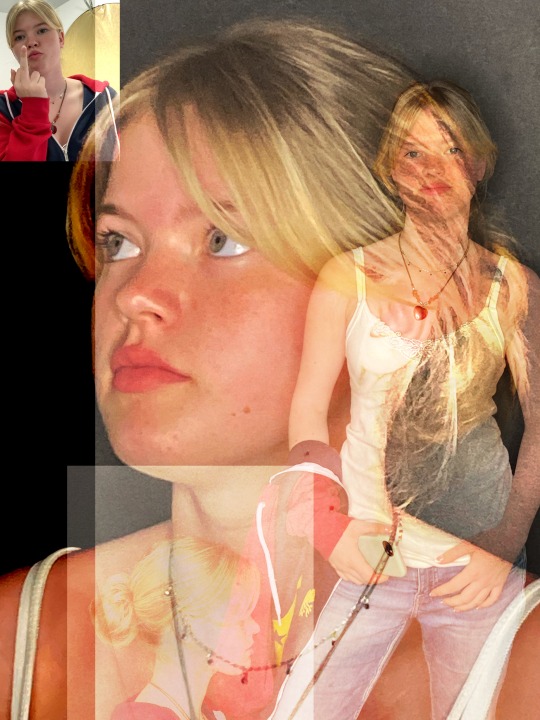
today i did photography. i used my friend L as a model.
i had a lot of fun playing around with Snapseed. it is a free app with a lot of different photo editing features.
i especially enjoyed the double exposure feature.
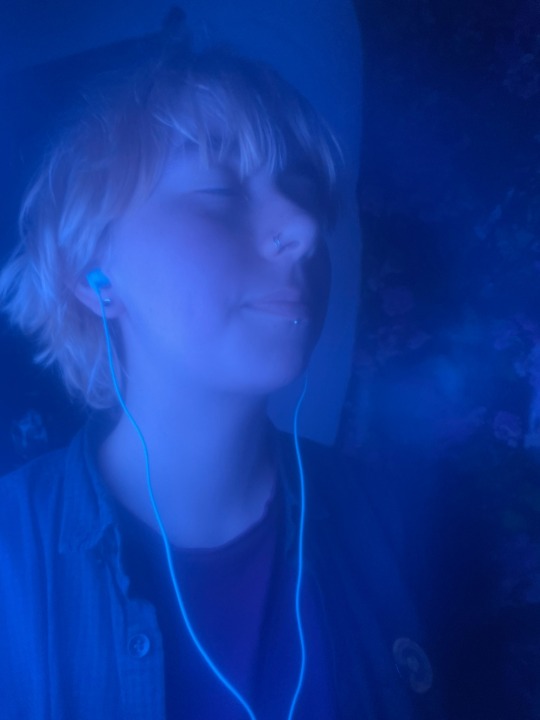
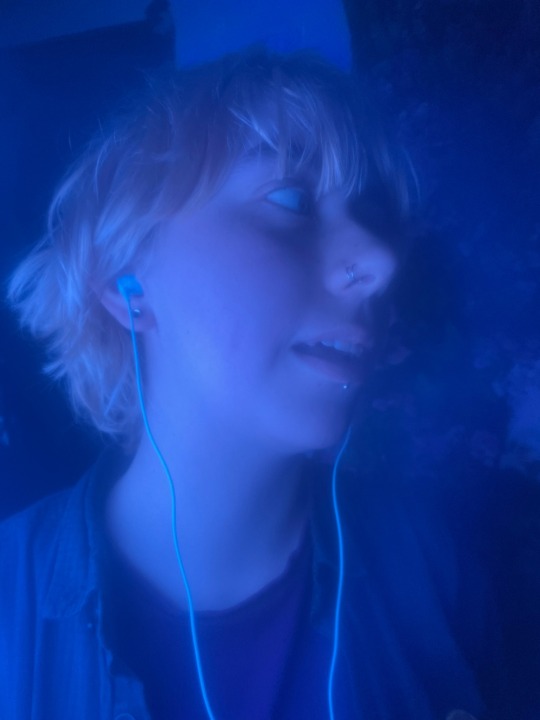
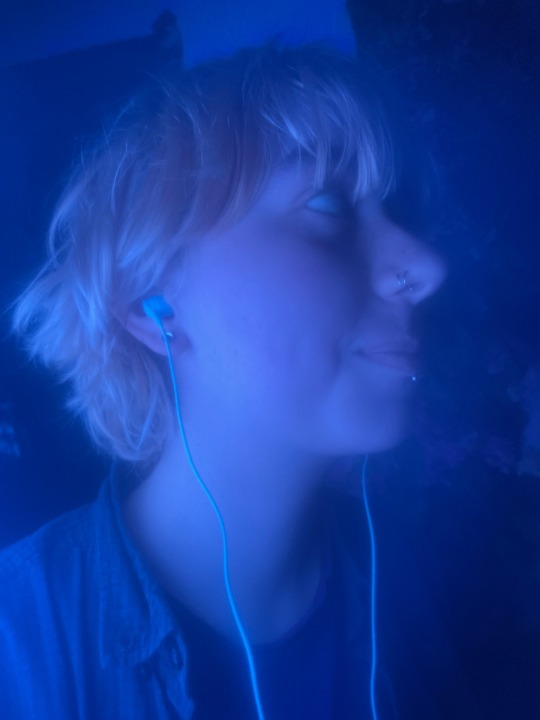

these are some of the photos i used and the final version i created from them.
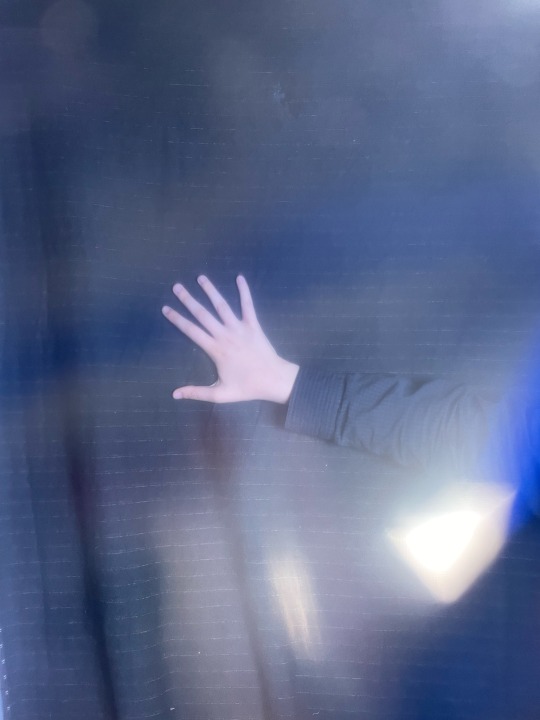
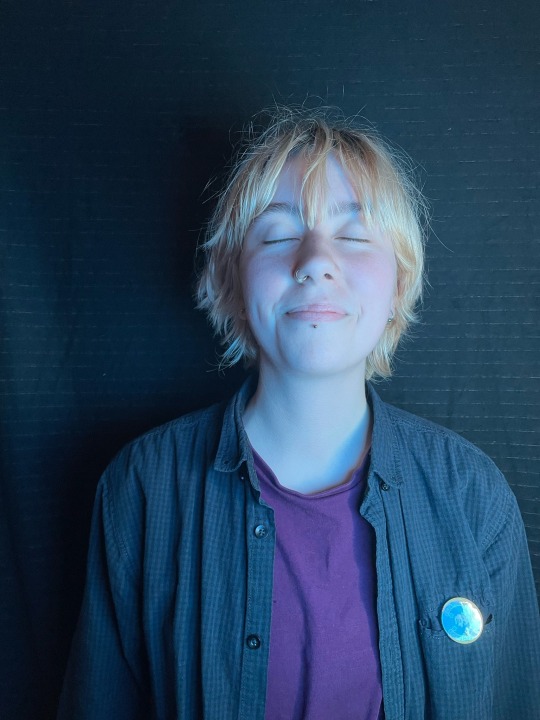

i included different colour gels while taking the photos and i am very pleased with the finished version .
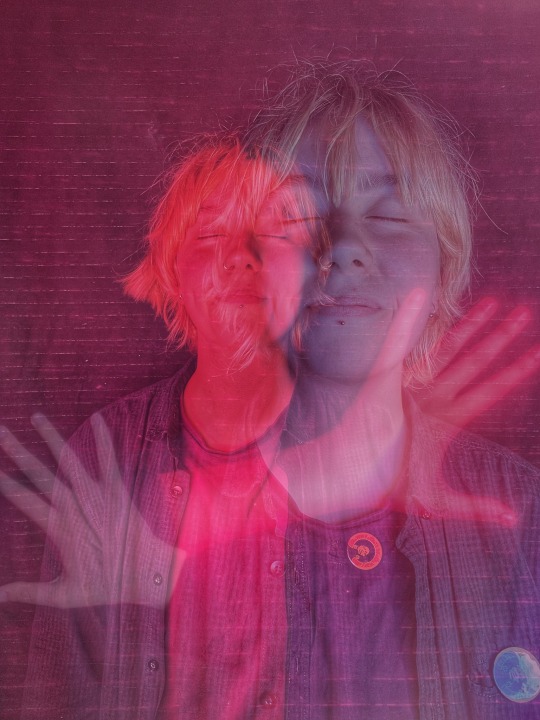
overall i really enjoyed this module and it was amazing seeing how many great images you could create using just your phone and some lighting.
3 notes
·
View notes
Text
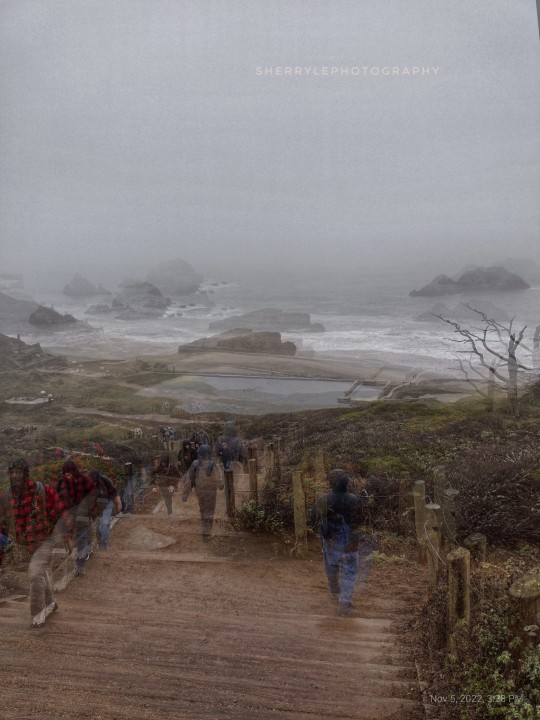
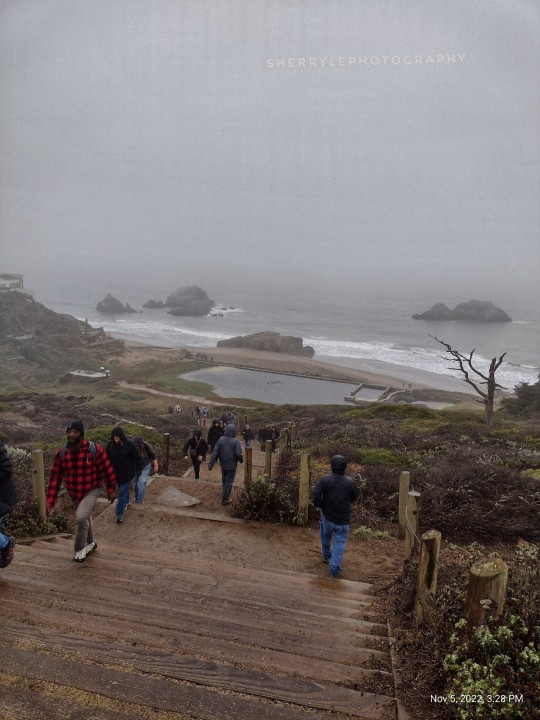
The Sutro Baths was a large, privately owned public saltwater swimming pool complex in the Lands End. Built in 1894, the Sutro Baths is now just ruins. We were here November 5, 2022 walking around the ruins. I used Snapseed double exposure about three times to create layers, just like a onion, this place has many layers.
@abstract-challenge
Challenge 64
Layers
Below is the original picture that I edited.
My photography and edit @sherrylephotography
Thank you for the fun challenge
#photographers on tumblr#abstract challenge 64#my photography#sherrylephotography#original photography on tumblr#snapseed#sutro baths#san francisco#california#usa
121 notes
·
View notes
Note
Your photography is SO COOL!
Rate mine pleaseeeee, n also a few tips? Maybe?


Hello!
THANKYOUU SO MUCH!!!😭🥺😄
I hope you're doing well.
(sorry for such a late reply, i was kinda busy with my entrance exam:)
I hardly know anything about photography and editing tbh. I just want to create that ✨️aesthetic ✨️
These pictures are really nice! Personally to me nature and skies never dissapoints. So these are beautiful. The skyyy♡. Its all aesthetic.
You've edited using which app? (snapseed?)
I used to edit on there (snapseed) but I mostly ended up making it too saturated or idk. (I don't know all the fancy words:')). It looked kinda grainy which is good ig but I want a natural look so I don't do that anymore.
Now I edit on lightroom. Haven't really unlocked how everything works on there but you might wanna try the auto edit option and then make slight changes according to you if you don't know where to start from. The product is just what pleases the eyes. For me I just play with the exposure and contrast just to enhance the details. I don't really know what most of the other options do basically.
Hope this was okay:)
Have a good day ahead!
14 notes
·
View notes
Photo


☘ introducing the main characters ☘
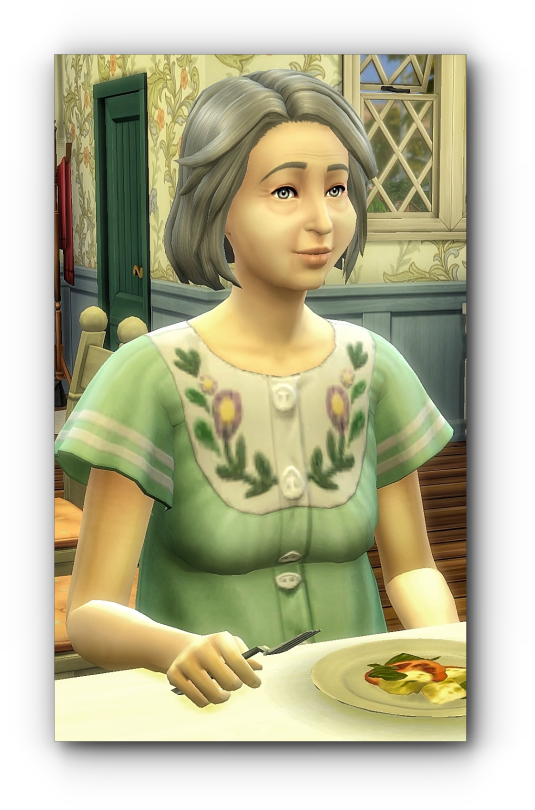
meet holland and her grandma lucille. holland grew up on lucille’s farm in newcrest, but after her father got a great job opportunity and her mom got pregnant. together they left lucille and the farm to move to san myshuno.
holland felt good in san myshuno. she loved the city life, her friends and the romances, but in her heart she always missed the farm life and being with her grandma. lucille would cook with her, show her how to raise chickens and where to find rabbits.
recently the family got the news that lucille is getting more and more sick. she is in constant back pain and just cannot handle the farm on her own. the only option was to sell the farm and get lucille to move to san myshuno as well, but holland didn’t like that at all. they just can’t sell the farm where she had so many wonderful childhood memories. so she decided to transfer to the high school in newcrest, pack all her things and move back to the farm. her parents didn’t like that idea at first but in the end they supported her.
now holland is living at the farm again. and she is happy. does she miss her family and friends? yes. but she is ready to make new memories and meet new people. she is an introvert so that might not be too easy for her but she will try her best.
Hey guys, thank you so much for reading this and showing interest in this story. I am so glad that I found my way back to Simblr. When I did my Legacy Challenge last year and the Story I had fun but after some time I felt pressured that I had to do amazing screenshots, crazy edits and felt insecure from looking at all the amazing pictures here. But that took away the fun for me and I stopped playing Sims.
Because of a friend I just got back into playing Sims and I am in love again. But this time I want to do it differently. I won’t thrive for perfection. I know I am not the best at taking screenshots or editing them. I also don’t know how to use Photoshop and I can’t install ReShade on my Mac. I asked my boyfriend for a picture editing app and that’s (VSCO and Snapseed) what I will use.
The story that I am playing right now is a weird mix between a Legacy Challenge and some rotational gameplay, because that is something I always wanted to do. But it can change in the future. I just want to have fun.
Last thing, some of the Sims are from the gallery or downloaded from various Sim Dumps. I will try my best to tag the creators, because without them I wouldn’t have so much fun playing this game. But sadly I don’t always write them down or forget who created them. If you see your Sim or CC here let me know, I will tag you. If you don’t like me using your CC or Sims for my gameplay let me know as well. But I hope that won’t happen :)
That was a lot of information. I am glad to be back and I cannot wait to follow some more people here and check our your creations, gameplays and edits.
♡
#ts4 legacy#ts4 gameplay#ts4 screenshots#sims 4 legacy#sims 4 gameplay#naturkind legacy#ts4 naturkind
3 notes
·
View notes
Text
Lens on a Budget: Affordable Wedding Photography Tips You Need to Know
Introduction:
Capturing the enchanting moments of a wedding doesn't have to drain your wallet. With strategic planning and creative thinking, you can create stunning wedding photos on a budget without compromising on quality. This comprehensive guide explores various Affordable Wedding Photographer Gold Coast tips, providing insights into making the most of your resources to immortalize the magic of the special day.

Plan and Prioritize:
Begin by understanding the couple's priorities. Identify key moments they wish to be captured, such as the ceremony, first dance, and candid interactions. Knowing these must-haves allows you to allocate resources effectively and focus on what truly matters. Collaborate closely with the couple to ensure your efforts align with their vision for the day.
DIY Engagement Shoots:
Engagement shoots are a fantastic way to practice and build rapport with the couple. Instead of hiring a professional, consider a DIY approach. Choose a meaningful location, utilize natural light, and use a smartphone or an affordable camera with a decent lens. This can result in intimate and personal photos without the hefty price tag, providing a unique touch to the wedding album.
Budget-Friendly Equipment:
You don't need to break the bank on expensive camera gear. Entry-level DSLRs or mirrorless cameras with kit lenses can produce impressive results. Look for used equipment or explore affordable rental options online for high-quality lenses on the wedding day. This approach allows you to access professional gear without a long-term investment.
Natural Light Advantage:
Harness the power of natural light to enhance your photos. Outdoor venues and daytime weddings offer beautiful, diffused light that can elevate your images. Plan shots during the golden hour – the hour before sunset – for a warm and romantic atmosphere. By relying on natural light, you reduce the need for additional lighting equipment, saving money and simplifying your setup.
Master Your Equipment:
Regardless of your camera gear, understanding its capabilities is crucial. Practice using different settings and experiment with manual mode to gain confidence in various shooting conditions. Knowing your equipment inside out empowers you to adapt to different lighting situations and capture stunning images even with more affordable gear.
Utilize Free or Low-Cost Editing Tools:
Post-processing plays a significant role in enhancing wedding photos. Instead of investing in expensive editing software, explore free or low-cost alternatives like GIMP, Lightroom Mobile, or Snapseed. These tools offer a range of editing options, including color correction, cropping, and filters, allowing you to elevate your images without breaking the bank.
Collaborate with Amateurs or Students:
Tap into the talent pool of photography enthusiasts, amateurs, or students looking to build their portfolios. Many individuals are willing to work for a lower fee or even for the experience. Collaborating with aspiring photographers can be a win-win situation, providing them with learning opportunities while helping you capture beautiful moments on a budget.
Optimize Time Management:
Efficient time management is essential during a wedding. Plan a realistic schedule, allowing enough time for each segment. This minimizes overtime costs and stress. A well-organized timeline ensures you capture all the important moments without unnecessary delays. Coordinate with the couple and other vendors to synchronize efforts seamlessly.
Maximize Candid Shots:
Genuine moments often reveal the most authentic and heartfelt narratives. Focus on capturing genuine expressions, laughter, and interactions between the couple and guests. Candid shots require minimal staging and can result in some of the most cherished photos, making them an excellent option for budget-conscious photographers. Encourage the couple to be themselves, allowing you to document their unique connection and the raw emotions of the day.
Print Strategically:
When delivering the final product, be strategic about printing costs. Opt for online printing services, compare prices, and consider bulk printing for larger orders. Additionally, digital photo albums and online galleries are cost-effective alternatives to traditional printed albums, offering flexibility without compromising quality. Discuss printing options with the couple to align with their preferences and budget constraints.
Conclusion:
Creating memorable wedding photos on a budget is not only feasible but also an opportunity for creative innovation. Thoughtful planning, mastery of equipment, and exploration of affordable alternatives are key elements to deliver stunning images that capture the essence of the special day. Affordable Wedding Photographer is not about sacrificing quality but rather finding innovative ways to achieve breathtaking results without breaking the bank.
By prioritizing key moments, collaborating with the couple, and embracing a budget-friendly mindset, you can turn your lens into a powerful tool for capturing love and joy. This comprehensive guide equips you with the knowledge and insights needed to navigate the world of affordable wedding photography, ensuring that every magical moment is preserved for a lifetime.
Building on the basics, advanced techniques, and a commitment to continuous skill development will not only make you a more proficient photographer but also position you as a sought-after professional in the realm of affordable wedding photography. As you embark on this creative journey, remember that capturing love is an art, and with the right approach, your budget-friendly wedding photos can become timeless treasures cherished by couples for years to come.
0 notes
Text
Third-Party Editing Apps Similar To Snapseed
Abstract:
The method of changing the background of a photograph has gained immense popularity in the digital era. This article goals to provide an in depth information on how to alter a photograph background to black. With easy techniques and accessible software program, anyone can accomplish this task effectively. The article contains step-by-step instructions together with recommendations on suitable photo enhancing tools.
Introduction:
Background substitute is a typical photo editing technique utilized by photographers, designers, and fanatics to reinforce the visual enchantment of a picture. The background plays a vital role in defining the general aesthetics and emphasizing the topic. Changing a photo background to black can add depth, elegance, and focus while creating a sense of drama or minimalism. By utilizing various picture modifying tools, this course of becomes easily accessible, irrespective of an individual's expertise.
Methods and Tools:
To attain a black background in a photograph, we recommend using picture enhancing software comparable to Adobe Photoshop, GIMP, or Canva. These tools present the necessary functionality to change a picture's background successfully. In this information, we'll reveal the process using Adobe Photoshop, a extensively-used and feature-rich software.
Step-by-Step Procedure:
1. Opening the Picture: Launch Adobe Photoshop and open the specified picture by navigating to File > Open. Select background props for photography out of your file directory and click on "Open."
2. Duplicating the Background Layer: To take care of the original image as a reference, duplicate the background layer. Proper-click on the background layer within the Layers panel, choose "Duplicate Layer," and click on "Ok."
3. Selecting the topic: Utilizing the appropriate choice device (e.g., Lasso Device, Quick Choice Software) carefully choose the topic. Take your time to ensure an accurate and refined selection, because it is crucial for a seamless background substitute.
4. Inverting the Choice: After deciding on the subject, invert the choice to focus on the background. Go to select > Inverse or use the shortcut Ctrl/Cmd + Shift + I. This will allow you to make changes exclusively to the background.
5. Filling the Background with Black: With the inverse selection active, fill the background with black. Go to Edit > Fill or use the shortcut Shift + F5. It will open the Fill dialog box, where you'll be able to choose "Black" below Contents. Click "Okay" to apply the adjustments.
6. Refining the Edges: To make the edges of the subject seem seamless, apply mandatory adjustments. Choose the topic layer and choose the Refine Edge option. Use the obtainable tools like the Smart Radius tool or Refine Mask brush to boost the edges and enhance the overall integration.
7. Last Adjustments: To make sure a uniform black background, consider the image and make any needed changes. Consider adjusting levels, distinction, or brightness if required. Effective-tuning these parameters can significantly enhance the visual impact of the newly utilized background.
Conclusion:
Altering the background of a photograph to black has turn into increasingly widespread on account of its ability to create a dramatic and visually appealing effect. By following the step-by-step information supplied in this article and utilizing appropriate photo editing tools like Adobe Photoshop, anyone can seamlessly obtain a black background with great precision. It is crucial to pick the suitable picture editing tool primarily based on individual preferences and skill ranges. Via apply, experimentation, and exploration, photographers and lovers can grasp this method and apply it creatively to their photos. So, embrace the ability of digital editing and unleash your imagination to boost your pictures by altering their backgrounds to black.
0 notes
Text
Snapseed APK Download
What is Snapseed and how to use it? We all have smartphones for pictures because the cost of the cameras is too much & not affordable. Besides this, it is easy to carry the phone in your pocket & multiple uses. So, we always carry it in our pocket & whenever there is a moment to be captured, you always run to your phone, not to the camera. Because it will take time to set up & can miss the moment, if we talk about the quality of the picture clicked by the phone & camera always have disaster changes. You can use those images as DP images in your social profiles.
So, for better quality images, the camera only conducts all the professional photoshoots. But it is impossible to carry the camera on your friend’s birthday at midnight to celebrate. In that case, we use mobile to click the moments. Another issue will arise while the pictures click through mobile: quality. You can use the APK on your phone called Snapseed to get a quality solution.
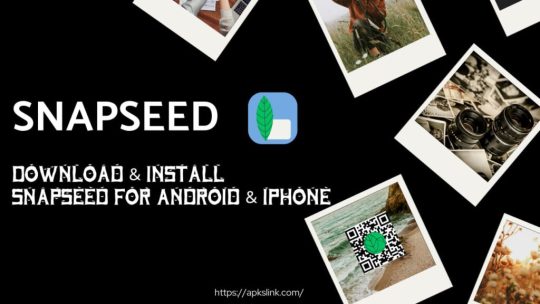
What is Snapseed?
Snapseed is a photo editing application that can also be used on Android & iPhones. Alongside, you can use the app to create a QR code for your picture. This will protect your image from being copied or stolen by others. Snapseed has 20+ editing tools, which will turn your image into HD quality, but you must be an expert in editing. By means the quality of the image will depend on the person using the app tools.
It is a very powerful application that brings all the features of a photo editing application in English. Snapseed has a very simple interface that makes the application much easier. If you are an editing expert, then this application enhances your images. The best part of the application is it is free to use & safe to use. You can use the Apple Store and Google Play Store to download applications. If any application is allowed by Google & Apple, you can imagine how safe it is. Snapseed also has the MOD version to download with an extra feature, which is free to access. The smoothness of the application is very good & real-time update also matters when you are in editing mode.
Whatever tools you will use on this application, a real-time effect will be there & it will help you know the right editing path. Now, let us talk about the tools & filters of the Snapseed Application.
Features of Snapseed APK –
RAW Develop – In mobile phones, mostly 2-3 file formats will use .png and .jpeg by 99% of phones. But through Snapseed MOD APK, you can open the files in RAW & DNG. You can convert & save the image files into .jpeg & .png.
Snapseed QR Codes – These are very useful features only provided by Snapseed to keep the discreetness of your images. You can share your image with a QR code & the receiver will scan the QR code & can see the image.
The features mentioned above are only available in Snapseed, so if you must take the benefits, you should go with Snapseed. Besides, all these 30+ tools are listed on the application & they can entirely change your picture, such as cropping, Color management, rotating, healing, enhancing the image, or Snapseed Background removal.
How to Download –
You can download the application from our website for free. The original version will be available for download on the Google Play Store & Apple Store. But the mod version of the application is only available on our website & can be used by Android users because Apple will not allow downloading applications from other sources except the Apple Store. So, you can download the version available on the Apple Store for free & enjoy the features of editing.
After downloading from our website, you can only install the application on your Android phone. It is simple to install the application from an unknown source. Click on the install button & follow the instructions provided for successful installations.
How to use Snapseed –
After the download & installation process, open the application, where you will get multiple options. First, click the open button on the top left corner of the app to add the image you want to edit in Snapseed. After that, you can select the Style, where you will get multiple presets. If you are unsatisfied with the presets, select the tools options. Around 30+ editing tools are available to us in this button for free.
The free tools are available if you want to edit the pictures independently. So, you can select your tool & edit your work on your own. You can change the frame, color, Brightness, Text, & other customizations on your desired images. Once the editing is done, you can export the file in JPG or JPEG. You can also open rare file formats such as RAW, heic& others.
HERE
#snapseedbackgroundpng#snapseedqrpresets#snapseeddownload#snapseedapk#snapseedapkdownload#snapseedapp#snapseedediting#snapseedphotoediting
0 notes
Last Seen Blogs

officer-sanchez
state of love and trust

alyssaannette
I'm Alyssa.

sephirotha
Sephirotha

techtimechronicles24
TechTime Chronicles: Electronics & Gadgets History

crepegosette
burre para cacete