#cosplay sewing tips
Text

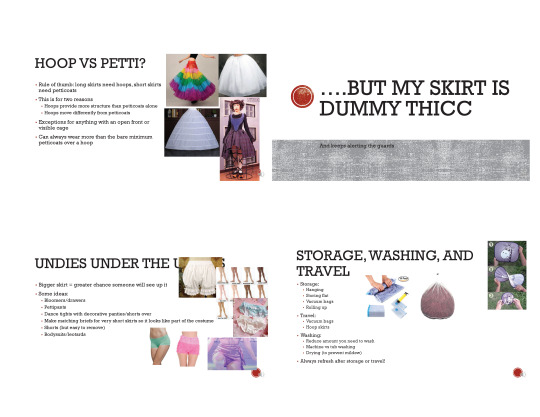

Hella Big Skirts panel
Ever wanted to make a hella skirt? Wondering how to keep your hella big skirt puffy? Join cosplayer fabrickind to learn the ins and outs of patterning, sewing, and supporting the large, fluffy skirts of your dreams!
This is just the bare bones of the panel, as many of the examples were elaborated on in-person, and it is just the slides, not any of my notes. It is not meant to be exhaustive or definitive, and is just meant for general advice and suggestion purposes only. If anyone has feedback they would like to give, feel free to do so. That said, I hope that people find this information useful.
Here is a link to a pdf of the presentation. You may download for personal use, but please do not alter the presentation, repost without permission, or do any sort of other unauthorized use. (If you have a question about how you can use this presentation, please send me a message with your question and we can work it out. I promise I’m not scary. ;]) Feel free to reblog this post as much as you want, though. I do these panels and post them because I want the information to be shared.
I hope someone finds this helpful! :]
#cosplay#cosplay help#cosplay advice#cosplay tutorials#cosplay tips#cosplay tip#skirts#hella big skirts#cosplay panel#cosplay panels#sewing#sewing skirts
439 notes
·
View notes
Text
i watched an abby cox video forever ago about how most hand sewing needles easily available in stores absolutely fucking suck and how you have to find fancier brands online that were made in england or whatever to get good ones these days, but only recently acted on it by adding some on to my order of snaps for my meryl coat.............
ohmygod. it makes such a difference. you guys, if you hate hand sewing, go buy some slightly better needles. i got some from wawak which is an online store that specializes in notions (and they're much cheaper than what you'll find at joann's), and it makes everything so silky holy crap. i'm forever changed.
#0.0#cosplay wip#sewing tips#sewing problems#hand sewing#this makes me want to hand sew more#the ones i got are actually made in france#the brand i was gonna originally get was sold out
417 notes
·
View notes
Text
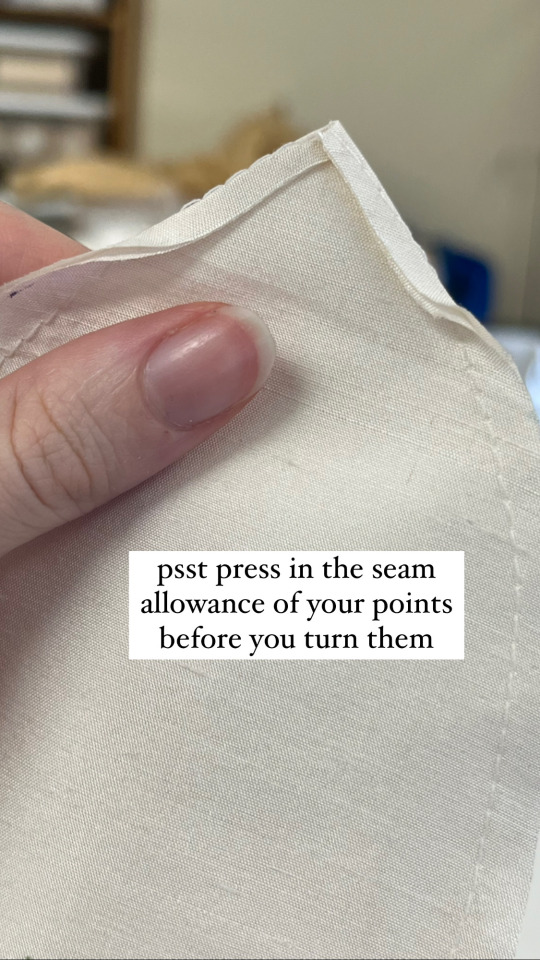
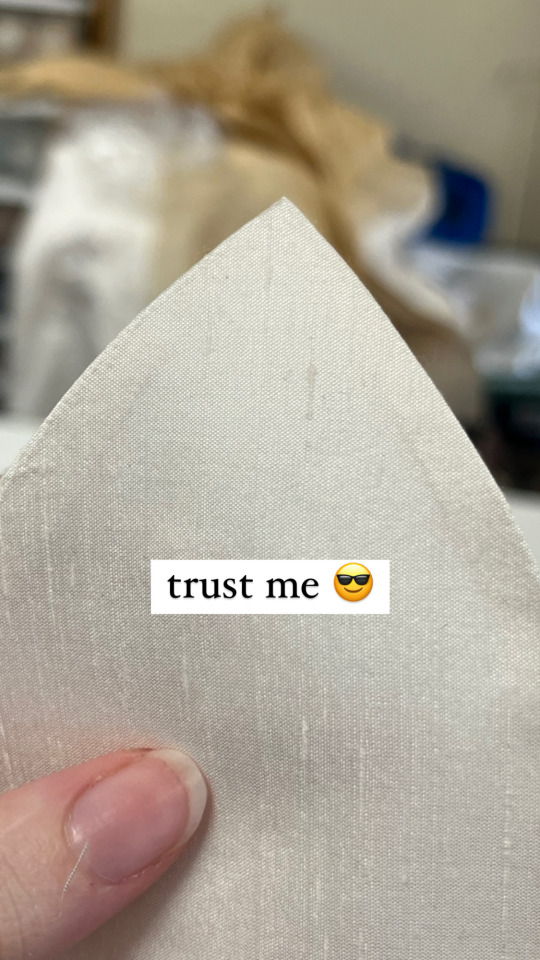
A little tip for Crisp Corners today! Press your seam allowances in before you turn the corners and it makes beautiful points! (Also means you often don’t have to trim too close to the threads!)
263 notes
·
View notes
Text
Button Gauge

Do you have a project that you have no button guidelines? Or perhaps you need to change the number of buttons or their placement? Are you bad at math? The button gauge is the tool for you!

All the button points are equidistant from each other, and when you open it the points REMAIN equidistant. It's like magic. I already have the top and bottom my button placements marked beneath the button gauge with pins.
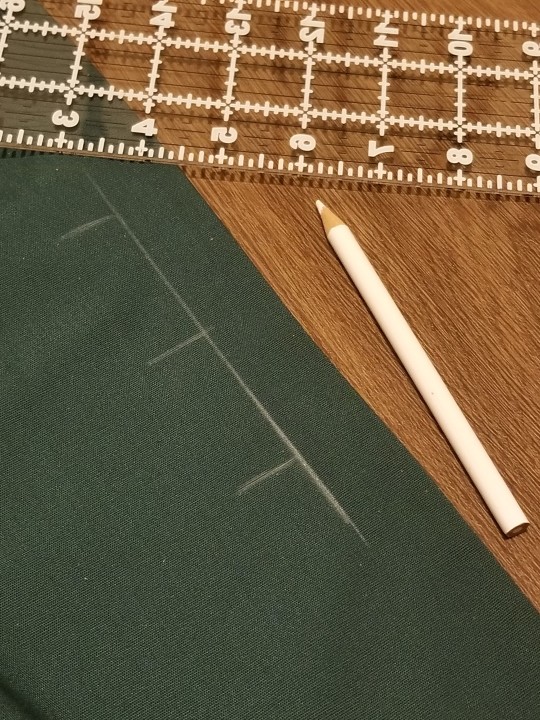
My gauge has little gaps for you to draw your buttonhole guides with a chalk pencil. I went back and drew a 1 in. guide from the edge of my garment to ensure everything would be lined up.

Then I just installed the buttonholes with the buttonhole foot that came with my machine. It's a nifty little tool that makes the task of button placement super easy! You do need to be gentle with it. Mine is cheap and flimsy, so it gets "out of sorts" if I open it too quickly and the top and bottom most points become unaligned. This is easy to fix by just closing and reopening the gauge.
#sewing#tips & tricks#cosplay#guys... im actually good at math#i am just lazy and things come out look ok ng nice and sharp if you use a gauge
1K notes
·
View notes
Text

this is your sign that if you sew your own clothes or cosplay, you should get a wooden clapper so all your pressed seams look extra crispy and professional
(first pic: top of dart with clapper used. second pic: pressing a dart. Top part has been pressed but not clapped, bottom part has been clapped.)
29 notes
·
View notes
Text
First things first, basic materials for basically any cosplay.
No need for sewing machines or even embroidery hoops, they’re pretty new in the grand scheme of things and people made insane stuff without them for millenia after all.
(I actually recommend learning hand sewing FIRST, it lets you learn how to fix your stuff in a pinch and is way easier to get into. It’s slower, sure, but it also lets you make finer, more consistent seams and if you have sensory issues tied to sound it’s FAR less likely to set you off. Plus, it’s calming and frankly impresses the hell out of people at competitions and the like and some groups (like re-enactments) do not count machine made things at all in their competitions and standards.)
All you need to sew clothing is a needle, thread, scissors, a measuring tape, a pencil and sharpener or chalk to mark things in a washable way, fabric and time.
If you aren’t totally confident in being able to track seams or keep them even, straight pins or clips helps hold stuff together. You also want these if you don’t want to transfer a pattern from paper to the fabric with drawn lines, but that’s also not exactly needed since I go off the base shapes and measurements. If you aren’t confident with holding material extremely taught while you work on embroidery or bead work and the like, a good embroidery hoop can be found second hand for pretty cheap and you can usually find a really good one for under $10 usd at a craft store with an embroidery section (with $10 being a MASSIVE one, I recommend getting a 6 inch or less unless your doing something at a standing one, which is overkill most of the time).
I’ll explain how to use the materials later, but everyone has trouble with fabric and I’ve had people balk at the cost before, so here’s where to start (or if your on a tight budget)
- broadcloth: cheap cotton, comes in a whole array of solid colors and a staple of cosplay. Be sure to make certain you don’t make something too tight with this, it isn’t the best at holding up to extreme strain. Typically about $5 usd a yard… full price.
- quilting cotton: slightly more enxpensive and usually patterned in some way broadcloth. If you go to a fabric store they will have TONS of this. Averages about $6-8 usd a yard full price, depending on the brand and store.
- old linens: a cosplay classic. Go to goodwill or Facebook marketplace or a garage sale or something and buy up a bunch of old bed sheets and stuff or some curtains and be ready to get dirty with dye, bleach, and a lot of prayers. Best to aim for solid white, makes it easier, unless you want that specific color/pattern. Upside is that these make bigger pieces easier to make. Think cloaks, super big skirts, “Aladdin” pants, things that have a high depth AND width to the piece you need. Lowers the seam count, at least.
- Muslin: I will have an unhinged rant about historical vs modern muslin later on, but this is a fabric you can get for as little as ¢50 a yard in some cases used for a pattern making method called “draping” that will also be explained at a later date. It’s thick, completely undyed/unbleached, and sturdy enough to take some abuse and doesn’t gray too bad. It’s shit compared to historical muslin, but it does its job as a cheap canvas in a pinch. Be warned: these come on VERY short bolts and often aren’t “double wide” like other fabrics, which can be an issue and lead to TONS of seams.
Again, muslin is used to make patterns usually. Will explain “draping” later but it’s pretty self explanatory based on the name.
#cosplay help#cosplay tutorial#cosplaying#ac3s tutorials#cosplay materials#fabric#beginner cosplay tips#sewing#hand sewing
34 notes
·
View notes
Text
HERE IS EVERYONES REMINDER TO THROW OUT OLD/EXPIRED COLOURED CONTACTS!!!!
25 notes
·
View notes
Text
Quick tip for Making pointy/Spiky Shoulders for your evil or fabulous cosplays
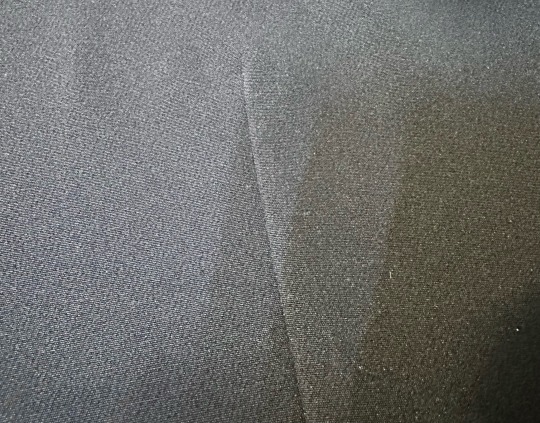
I recently learned a quick tip to make spiky epaulets for cosplay. I am working on a coat made out of a upcycled wedding dress.
You make your sleeves as your pattern asks. Then you make a semi-circle put of your main fabric (2 layers with interfacing inside) and add it on your sleeve.
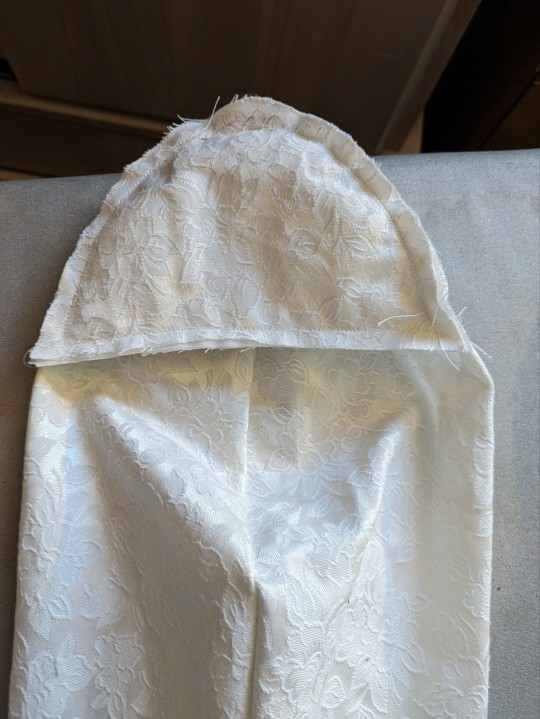
Once it is sewed on top of your sleeve, along the top curve of the sleeve, you turn the epaulet inside

The added fabric will create the "spiky effect" and now you can see it to your coat following your pattern

Here is a short video showing how I made it on this coat and what it looks like now
16 notes
·
View notes
Text
I dropped my sewing needle one too many times making this fursuit and realized I already had the best tool for this just, y'know, lying around in my wig supplies. Here a quick video of how to use a ventilating needle to pull the fur fibers out of your seams!
Video Transcript Below:
Pulling fur out of seams with a ventilating needle:
When sewing fur, fibers will often get trapped in the seams. You can brush most of it out with a pet brush, but in some cases it might not pull everything out, especially in small corners.
One common way to pull the last fibers out manually is by using a sewing needle to gently tug them out, but I find it to be slippery and uncomfortable. You can use a ventilating needle, like demonstrated here!
Slide the hook under a small section of fur, but make sure not to go too close to the fabric backing or the seam so as to not damage your work! With the fur in the hook, gently pull upwards (do not tug!) until the fibers come loose.
If you feel some resistance, do not pull to hard! You may have accidentally picked up the seam, and the needle's hook can easily cut the thread. You may also accidentally bend and damage the needle if you do so.
If the needle gets stuck or you accidentally hooked your project, slowly move the ventilating needle backwards in the same position you inserted to pull it free. Work slowly, and only take small amounts of fur at a time.
I like cleaning up the seams with this tool, as I find it easier to maneuver, and with practice you can finish a seam relatively quickly with minimal effort. The hook shape is also very versatile for all sorts of weird seam shapes.
Ventilating needles are not very expensive, and I think they're a good investment considering how tedious this process can be. Sewing needles are small and puts pressure on the fingers quickly, but the handle on this tool makes using it a breeze.
Now that the fiber is out, we can brush them out to prepare them for trimming. I hope this video can be of help to someone!
#Cosplay Tips#Fursuit Maker#Fursuit Tips#Fursuit#Cosplay#Sewing#Crafting#Original Content#This made me instantly stop hating this part of fur sewing though seriously#Now it's like... chill work instead of stress work lmao
16 notes
·
View notes
Text
hello sewing people! im about to use stretch fabric for the first time and i would love ANY tips you have <3
in specific for my project: the fabric is very thin + very stretchy (im not sure exactly what it is but its almost like knitted tights?) and in trying to calibate my machine im finding either: none of the stitches are stretchy enough OR after stretching the seam ripples (wasnt doing it before stretching)
i do own an overlocker but that wasn't my ideal choice for sewing this all if possible so if anyone has a suggestion for fixing these issues id really appreciate it!
(or just any stretch tips! id be grateful <3)
#ive tried a few variations (zigzag/lightning; wide/narrow; long/short) but if anyone has a tip that works for them id be so appreciative!!#im just making a pair of leggings so i probably dont have to worry too much but. still#also gloves too!!!! same fabric jsjskdkjd#sewing#sewing help#sewing tips#cosplay#cosplay help#cosplay tips#girl idk im just tagging shit#i also dont know if its partly tension. my girl has been. struggling recently :(
30 notes
·
View notes
Text
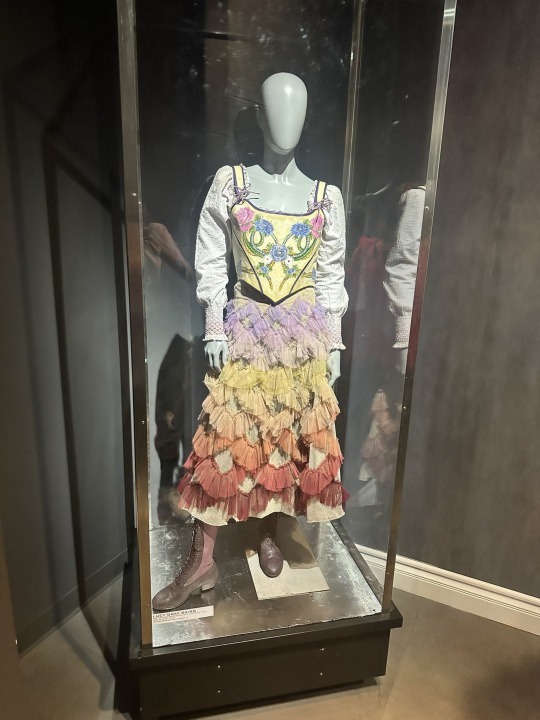
I really want to make Lucy Gray’s outfit (specifically from the movie). I want it to be an outfit for practicality-that I could wear weekly or monthly or something, but I don’t know how to sew something to last like that. Does anyone have any tips? Her dress:
#craft tips#diy craft#diy sewing#sewing#diy dress#hunger games#hunger games ballad of songbirds and snakes#cosplay#cosplay tips
9 notes
·
View notes
Note
You mentioned foam interfacing in your answer to the other anon about interfacing; what is that used for? :O
Hello there!
Foam interfacing is meant to give extra structure to items that need to hold their shape but remain flexible and soft.
It's not something that you would typically use in "normal" type garments, but it can come in handy for certain anime type designs that defy gravity.
Examples could be very stiff 1960s kind of spaceman skirts, shaped cuffs, extremely shaped sleeves, the tops of bootcovers, etc.
It's closer to very thin furniture foam than something like EVA/craft foam, and comes in both single sided and double sided fusible (so glue on one side or glue on both sides). A common brand name is Pellon Flex Foam, though there are other brands (I've used a slightly wider one I got on Amazon).
I fused foam to the backside of vinyl for the skirt and arm/leg cuffs of this cosplay

You could possibly even use this method for light armor that's covered in fabric or vinyl.
I hope that helps! It's a fun material and I want to experiment with it further in the future (Ulala Space Channel 5 remake when)
#interfacing#structure#cosplay help#cosplay advice#cosplay tips#sewing#anon#fabrickind gives unsolicited advice
40 notes
·
View notes
Text
just recieved a book on dragonology and its the exact red of the dragon from dead apple. i am THIS close to making a shibusawa cosplay do you UNDERSTAND
#hes been rotating around in my brain for DAYS now#2 seconds away from snapping and looking up sewing techniques and fashion design tips#brogdbgdsgsyj…. himbd…….#shibusawa tatsuhiko#tatsuhiko shibusawa#bsd shibusawa#bungou stray dogs#bungo stray dogs#bsd#dead apple#bsd dead apple#cosplay#bsd cosplay#bsd [rat edition]#thoughts from the depths of hell [rat edition]
45 notes
·
View notes
Text
I want to make some stuff for a cosplay, but I’ve never done any crafting stuff before, so I’m hoping someone here has some tips. I want to do a spiderwoman cosplay and add in the underarm web wing/gliders that spiderpeople sometimes have. I’m just looking to build the web gliders as I bought the spider suit. How would I go about it, what materials would be best?
#cosplay#spiderman#spiderwoman#marvel#cosplay tips#cosplay help#cosplay beginner#spider person#advice needed#sewing#crafting
10 notes
·
View notes
Text


Handmade (minus the boots and wig) Ai Hoshino Cosplay for Anime Impulse!
Didn't have a pattern, so everything was just guesswork! For the blue stars on her blouse, I would sincerely recommend trying to find something that would work for it instead of hand making them! Same with the heart. I would also recommend buying as many base materials as you can, since it often ends up being cheaper.
I got the wig from Epic Cosplay (which has nice wigs that are relatively affordable, the style of this wig is Nyx in Royal Purple), and the boots are just from Amazon lol.
#I'm a beginner but I'm learning as I go!#cosplay#ai hoshino#oshi no ko#onk#oshi no ko cosplay#cosplay tips#sewing
15 notes
·
View notes
Text
Someone send me some prayers and tips, I'm gonna be sewing a cloak out of crushed velvet when I get off work
And I've never worked with that material before, or really used a sewing machine,
So you can imagine the stress I'm under...
#cosplaying adventures#I wanted the outfit to look as accurate as possible#so I chose the correct fabric for the cloak instead of just a color match#cause I like to suffer apparently xD#any and all handy dandy sewing tips are greatly appreciated#sewing#cosplay#adventures of a bookdragon
8 notes
·
View notes
Last Seen Blogs

sundududraws
sundudu draws

182-movies
182 movies...more or less
cherrybby0923
𝒁𝒉𝒂𝒍𝒂𝒚ꨄ
kokotaro
weeb writing blog

stariightjoyy
Eri ʕっ•ᴥ•ʔっ