#amhair
Photo
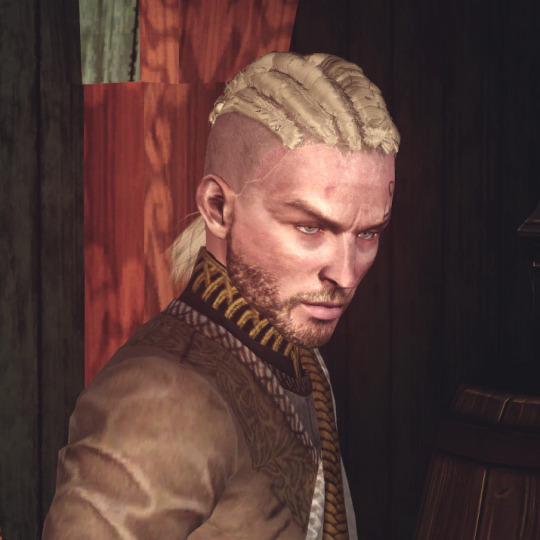

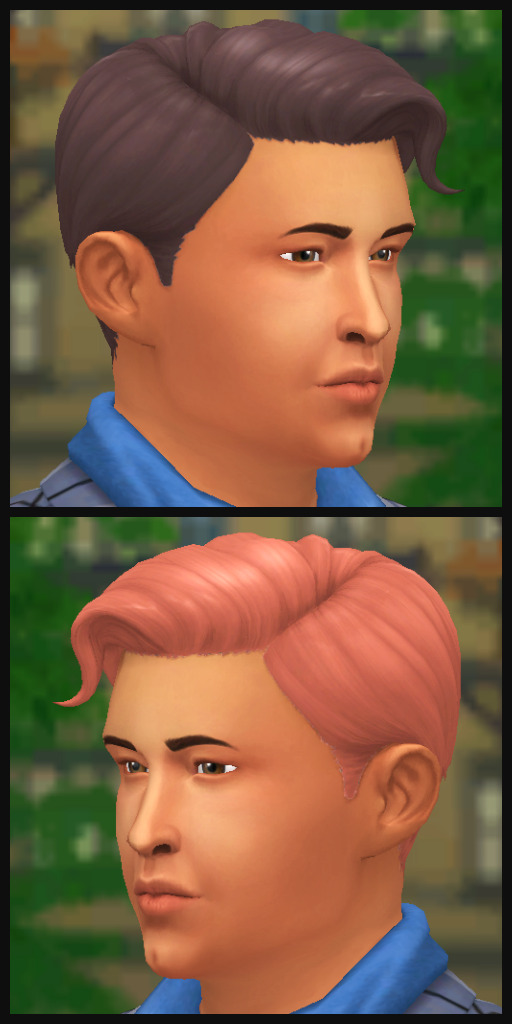
Rollo Hair - from Assassin’s Creed Valhalla
Yet another conversion from acv but this one took me way less tears time so here you go (;
> Around 21k poly, all LODs (kinda, I made them quickly but the main ones are fine so all good) Found in the ‘hair with accessories’ category.
> For males only, but feel free to convert it for females or send an ask and I’ll do it (:
> Some known issues: some bits on top look weird and the control is also a bit screwed (aka the ‘tip’ color also covers half of the top braids) but nothing too serious. // Lines around my sim’s scalp are a skin issue, actual hair scalp looks perfectly fine (here is the proof, same hair tested on another sim with less seam lines)
> Lastly, all credits for mesh and textures to Ubisoft and Assassin’s Creed Valhalla, I only extracted and converted them to ts3. [And for this, if you wish to convert this to any other sims game using this file, please credit both me and the original creators/owners and don’t put it behind paywalls (nor early access, have some decency)]
>DOWNLOAD< (patreon but free)
#s3cc#ts3cc#conversion#acv to ts3#ts3 hair#historical cc#medieval cc#viking cc#assassin's creed conversion#hair#amhair#download#male hair#sims3cc#cc#my cc
182 notes
·
View notes
Text
navigation
this blog is really just so i can track the crazy amount of cc i have but i hope you enjoy it as well :)
#afhair#tfhair#amhair#tmhair#tmtop#tmbottom#amtop#ambottom#tftop#tfbottom#aftop#afbottom#fshoes#mshoes#fOutfit#mOutfit#defaultreplacement#fAcc#mAcc#makeup#buildbuy
0 notes
Text
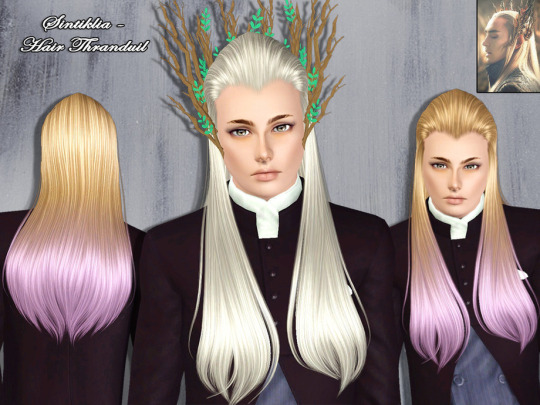
sintiklia-male-hair-thranduil
0 notes
Text
hair retexture tutorial for the sims 2
i've been asked if i could write a tutorial about how i retexture hair.
disclaimer: possible grammar mistakes and/or occasional polish words on screenshots
let begin! :>
what do we need:
bodyshop
photoshop (for this one i particularly use cs5 version)
textures
cat's hair binner program
step 1:
open bodyshop and start a new project
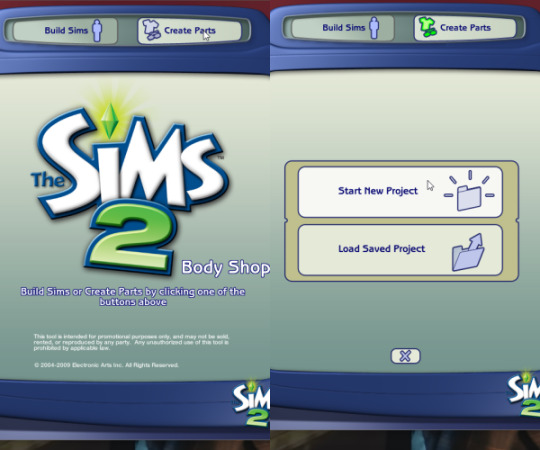
step 2:
find the hair you want to retexture and export it. name the project something you would remember, i usually name the project after name of the hair and color that i'm currently doing.
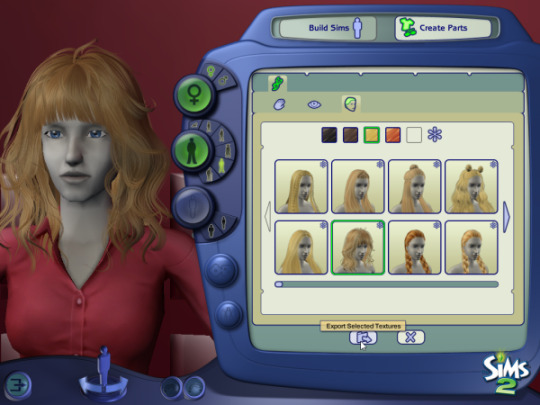
step 3:
Go to the Documents/EA Games/The Sims 2/Projects/insert here name of your project and you can see what you've exported. there are textures, alphas and bunch of black stuff but we don't care about that one.

step 4:
open your editing software and drag adult texture (it's that one that starts with afhair or amhair)
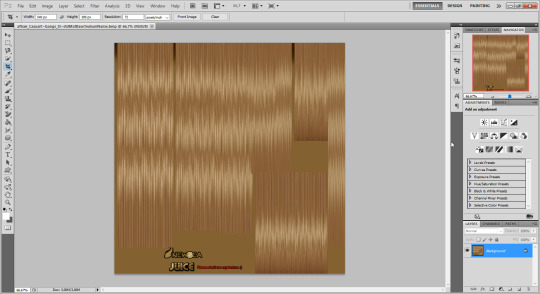
step 5:
open the texture that your going to put on the previous one
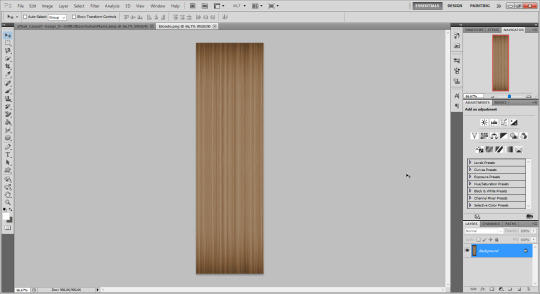
step 6:
then drag the new texture onto a old one and adjust it like so
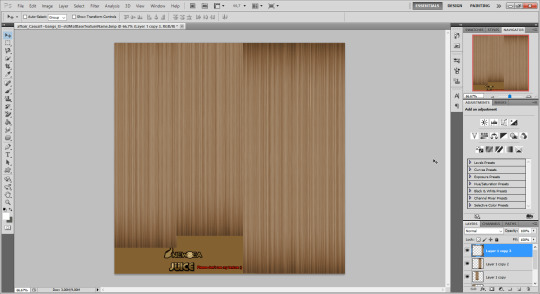
step 7:
if everything looks good then you ready to save it.
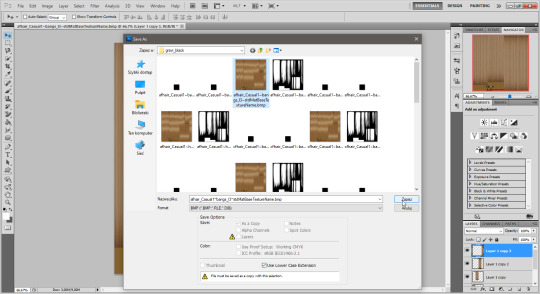
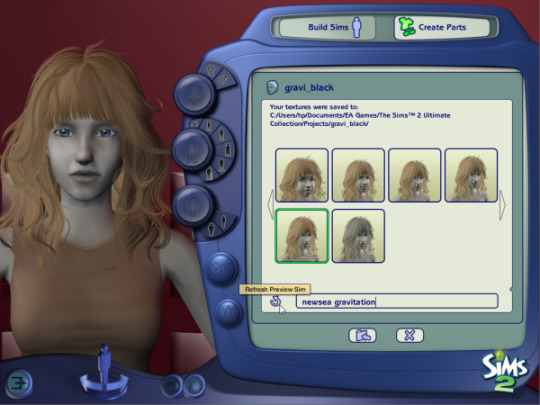
step 8:
refresh the project in bodyshop to check if everything looks okay
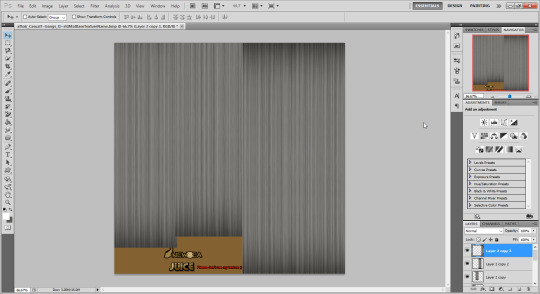
step 9:
if everything looks okay, then we can move onto next step which is making grey for elders. you simply repeat what you done before; just drag grey texture and adjust it to the original texture, save it as bmp and you're good
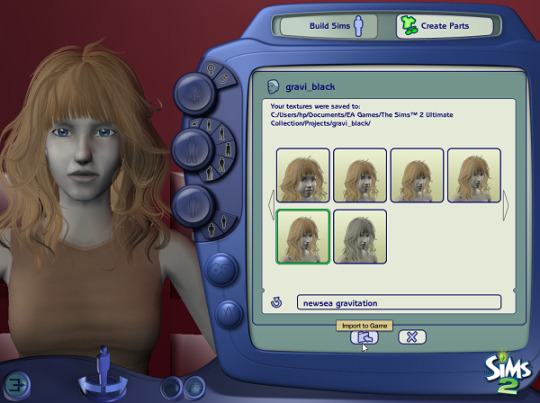
step 10:
for the last time refresh the project to see if everything looks good and if everything looks okey then go ahead and import it to the game
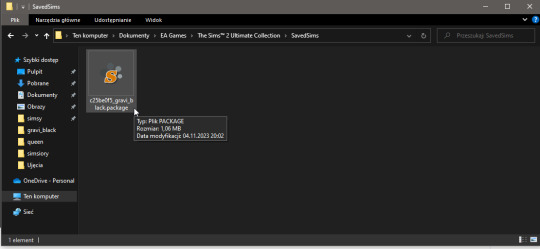
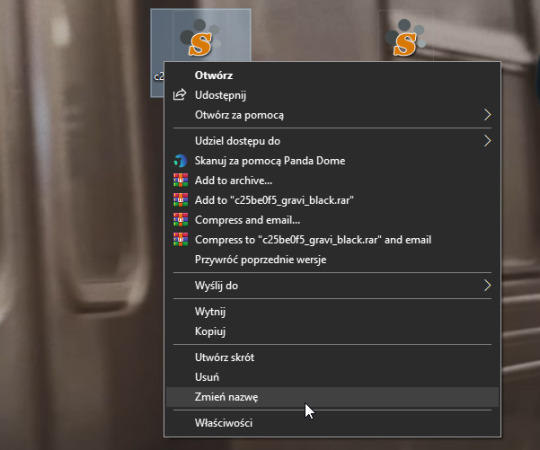
step 11:
then go to the savedsims folder and drag all of the files with the name of your project to the new folder or onto your deskop and then change the name to something more recognizable
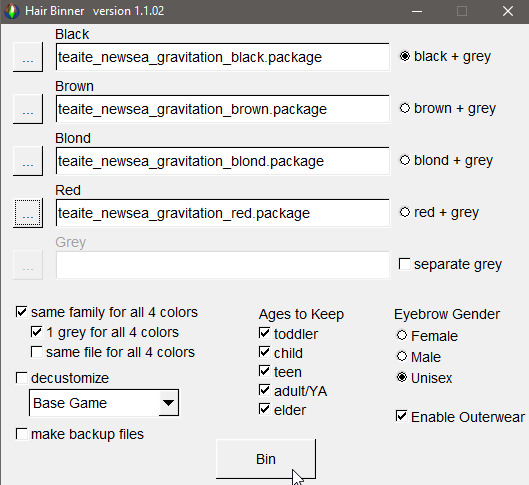
step 12:
open the hair binner program, since we have 4 hairs we'll be binning only once. also make sure to uncheck "make backup files" and check for what age groups your hair is available bc if you don't you will end up like me and you gonna do it again to fix it
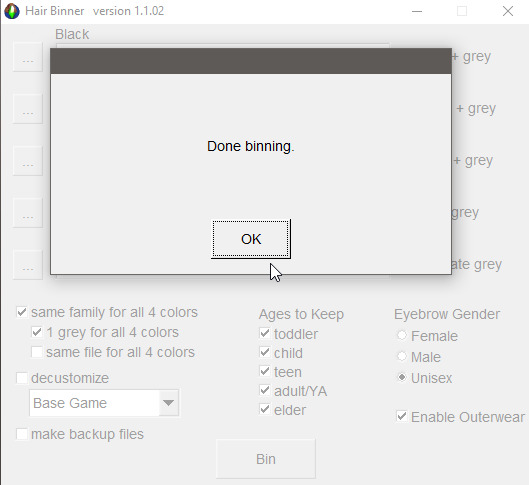
step 13:
the binning process may take a few moments so be patient. after it's done you should see this popup. just click ok
and you're done! drop your retextures to your downloads folder and enjoy new shine and properly binned hair retextures!
so that's all for now, if you have any questions feel free to ask ;>
#sims 2 tutorial#the sims 2 tutorial#the sims 2#the sims 2 pics#the sims 2 gameplay#t2 simblr#simblr
16 notes
·
View notes
Note
ur designs are so nice mwah. was thinking of gradient colour schemes like hair that's purple-blue and pink-purple-blue and greens
I CATUQLLY WANT THEIR AMHAIR TO BE PRETTY NORMAL!! qitch has a dark purple almost black hair cause.. IDK I JUST PREFER IT LMAODNDHDKD
#i think its mainly bc i already put so many colors in my art that j dont feel the need to put gradients#misha.moots
1 note
·
View note
Link
#ts4cc#tscc#ts4#mmcc#s4cc#scc#s4#simblr#cc#customcontent#sims4#cas#casaddons#hair#wmshair#afhair#amhair#chair#phair#CASSET
5 notes
·
View notes
Photo
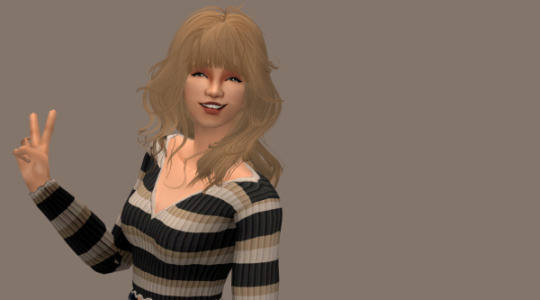
SP09 Adults Hair Recolored in the Saccharine palette.
♥Requested by @butterfly-tattoo
♥Vintage Glamour Required!!!
♥Male hairstyle included.
♥.zip file, 3 .packages.
♥All 16 Colors
♥Basic TOU, don’t reupload & tag me if you use them!
Download here; *click click* (ad-free, SFS)
#amhair#afhair#the sims 4#thesims4#the sims 4 cc#ts4cc#s4cc#maxis match cc#sims4cc#simscc#sims 4#sims 4 custom content#custom content#maxis match#the sims 4 maxis match#thesims#thesims 4#ts4#s4
29 notes
·
View notes
Photo

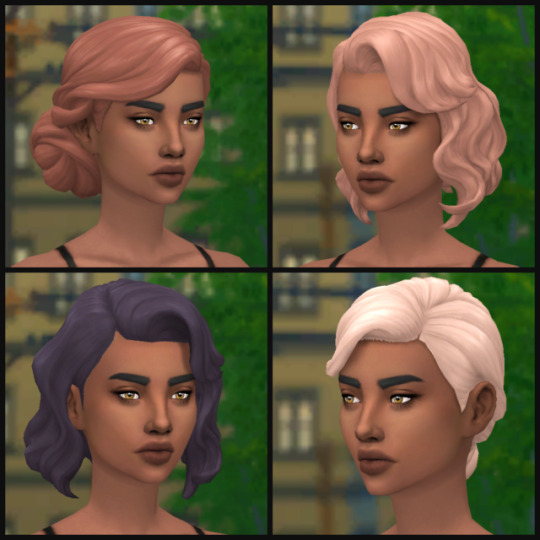
Another hair! I did this the day after the last one but i’m lazy and haven’t gathered up the energy to post till now. xD
These files are smaller this time for some reason? :L
DOWNLOAD <- Mesh included
Credits: Trapping, Rented-Space, Pooklet, Remi, Furbyq, Kiinuu, noodlecc.
33 notes
·
View notes
Photo
TSM to TS3 Conversion
This tutorial only covers the TSM specific parts. For general TS3 creation, there are plenty of tutorials out there.
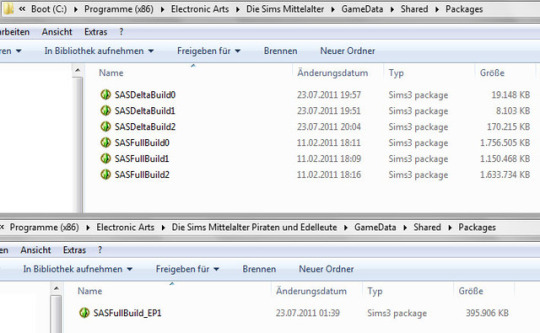
1. First you need to get working copies of the TSM content packages. They're found under: C/ Programmes (or Programmes x86)/ Electronic Arts/ The Sims Medieval/ Game Data/ Shared/ Packages
or, if you want to convert something from Pirates and Nobles, replace "The Sims Medieval" by "The Sims Medieval Pirates and Nobles" in above path.
Don't mess with the files in this directory - they're needed to run the game. Copy SASFullBuild1 and SASFullBuild2 to your working folder somewhere else on the computer. (Or, for Pirates&Nobles, copy SASFullBuild_EP1)
Close the programme files and go to your working folder. Basegame objects will be found in SASFullBuild1, basegame CAS in SASFullBuild2. All Pirates&Noble content is in SASFullBuild_EP1
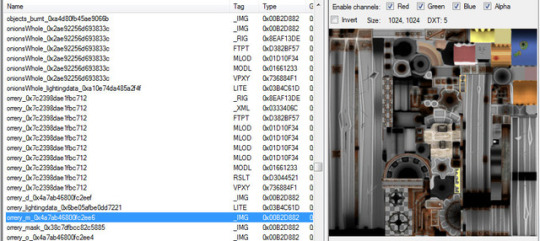
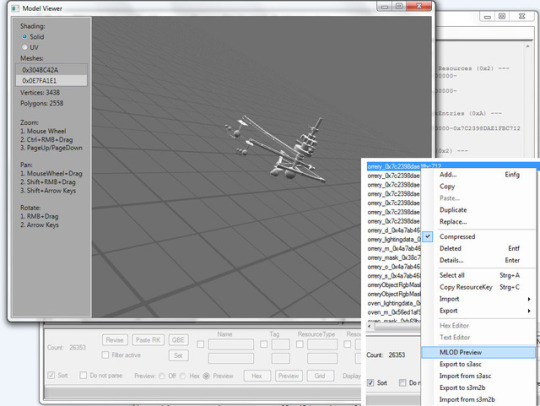
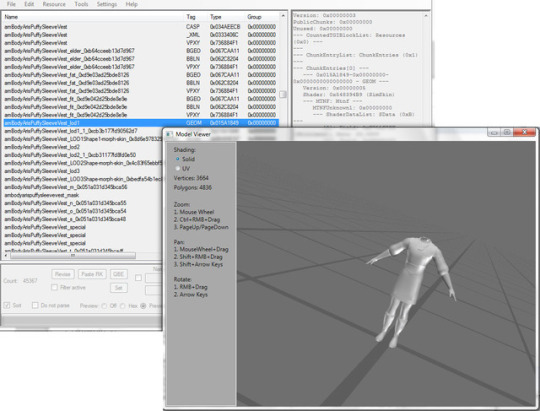
2. For Object conversion: Open SASFullBuild1. First click "Tag", then click "Name" to sort the resources by name, and within that by tag. Scroll through the long long list that will appear. There's also some non-object stuff in there; and lots of TS3 items. Just scroll past them. Most items have a fairly descriptive name. When you see something you're interested in, click at the _IMG resources, to give you a clearer idea of what it actually is. If this is unhelpful, right-click the MLOD resource that has 0x00000000 in the "Group" column and select "MLOD Preview". This gives you a 3d preview of the mesh.
I think this function is a plugin to s3pe. I hope it’s one of these:
https://code.google.com/archive/p/wrappers-for-s3pe/downloads
http://www.simlogical.com/ContentUploadsRemote/uploads/881/
When you found an item you want to convert, right-click the _IMG resources and do "Export/ To file". Be sure the .dds suffix doesn't get lost. Save the images to your working folder. Right-click the MLOD with 0x00000000 in the group (same as mentioned above) and do "Export to s3asc" (or "Export to s3m2b" if you want it in Blender) You’ll need Wes Howe’s plugin to import the s3asc to Milkshape (or cmomoney’s for s3m2b and Blender).
From there continue normal ts3 object creation, using your exported meshes and textures to create an new object. If the object has only an overlay, you can create multiplier and specular from it, by simply removing saturation, and adjusting contrast/brightness.
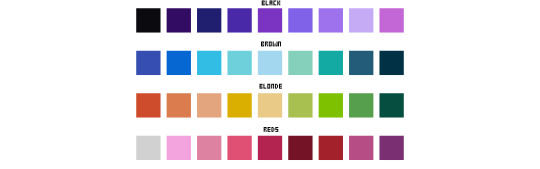
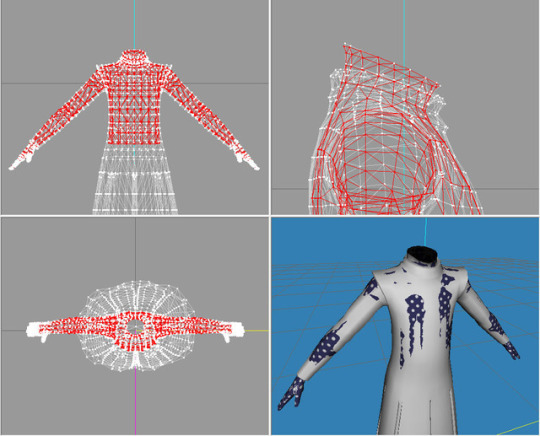
3. For Clothing conversion: Open SASFullBuild2 and sort the resources as described above. Casparts have the advantage that they sort by age, gender and type (amBody, amHair, afBody, cuBody etc) Names and often textures are not so descriptive, so it might be helpful to have a screenshot of what you're looking for. For hair I made a list of resource names, because they can be a nightmare to identify.
You can get 3d previews here too: Find the GEOM resource that has "lod_1" or "lod1_1" in the name (with "lod" in small letters, and no "elder", "teen", "fit", "fat", "thin" or "special" attached to it. Right-click it and select "GEOM Preview"
Again, for converting an item export all IMG files, and the GEOM just described. If there's one with "lod_1" and with "lod1_1" in the name, you’ll need both. Typically, those meshes will be separated into the main part and something random, like a finger, in the second part. You can put these together later on. GEOMs are simply exported "To file". Again you’ll need a Milkshape plugin by Wes Howe (another than the one for objects).
4. TSM and TS3 use similar bodies, so clothing should be pretty much in the right place. Some clipping is okay, the body under the clothing will be deleted anyway. When I converted the child clothing, it was often sufficient to align the neck and legs to the ts3 body. Easily done with the method explained in Simlicious’ tutorial (also check out her other clothing tutorials if you haven’t already!)
If tsm and ts3 body aren’t exactly congruent, it’s always saver to import a ts3 nude mesh and delete the tsm-body.
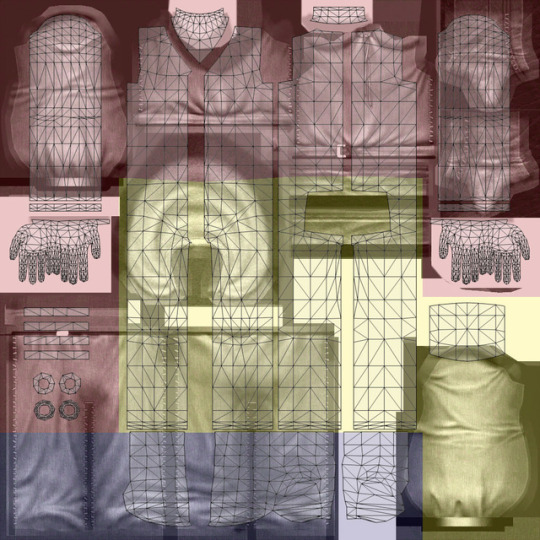
A problematic point is mapping: Since tsm doesn't use separate shoes, the outfits don't give heed to ts3 mapping conventions. On the texture image, the blue part should be left clear for shoes, but there are trouser-legs on it. That's why most tsm conversions have their shoes attached and must be worn bare-foot or with a no-feet mod in ts3.
The light pink parts are where skin will show. Here tsm has the huge advantage of using roughly the right uv-map. (I downloaded the uv map overlay somewhere, but can’t find it again right now.)
Good luck with you own project, and let me know if you need further details on a point!
14 notes
·
View notes
Last Seen Blogs
studiopolis-cafe
Studiopolis Cafe
sogkimr
sogkimr
darkmagiciangirl2500
ㅡ reality is almost always wrong.
studiopolis-cafe
Studiopolis Cafe
fullm00nfever
This Is My Sweet Escape