#Sublimation Paper Coating Machine
Text
J & D Web Control Private Limited
As the leading manufacturers of Sublimation Paper Coating Machine plant, Sublimation Coating chemicals, Sublimation Paper Roll Textile Machineries and Guiding & Controlling Equipments since last 25 years, J & D Group was originally established as a rig unit in the year 1993 at Ahmedabad Gujarat India. Company Vision was to specialize and be the best solution provider in the manufacture of Import Substitute Equipment Machenary Digital Sublimation Printing web Guiding & Controlling for Textile, Paper and Web Processing industries.
J & D Group focused in offering cost-effective machineries equipped with latest world class technology in 2012 company then went forward to expand its manufacturing facilities for final assembly and quality control at its new Head Quarters started at Gamdi Village, S.P.Ring Road Vatva, Ahmedabad.
Our Mission, Vision And Values
Our Vision
It’s worth a small amount of money with lots of special offers and benefits.
Our Mission
Trust in our experience. Get the best quality sublimation paper from J & D Group.
Our Values
OEM & ODM services are available. Get the custom sublimation paper from J & D Group.
Our Services
Be quick! Be happy! No worry about delay or miss contact with our support department.
For more information visit - https://sublimationpapercoatingmachine.com
0 notes
Text
The Lords could not be harmed, shifting mounds of nature that they were, shapes unclear and indestructible as they reached out to their traitorous subjects to submit them once more; above them they stood, colossal and sublime, casting long shadows upon them as they towered like pillars holding sky and ground apart, and on them were fixed six brilliant gazes of crystal and metal and flesh.
How those hands reached out for them! With such a longing awe, like children begging to be held, the living wide-eyed killing machines strained to join them, turning their backs to those who had believed to find in them friends and allies and soldiers against those who had torn their home apart so thoughtlessly to give themselves to the Lords wholly, completely, utterly, enamored and entranced by their elemental infinity, so ethereally solid that they could feel it in their palms already; and the Lords, magnanimous as they were (as they fancied themselves to be in their cruelty), reached out to them in turn, welcoming them as their impenetrable army of one, beckoning them closer, closer.
And with that closeness they saw, perhaps too late, the gleam in the glowing eyes; and with that closeness they realized, perhaps too late, that there was nothing childish within them if not for a turbulent hunger, vast and all-consuming, and something else so darkly bright, so blindingly obscure, that they could not put a word to it.
And those hands reached, and sank into them.
And the Lords screamed in anguish.
In a sudden focused frenzy the beasts curled their claws of protodermis and climbed the infinite bodies. They left marks of their passage - deep wounds bleeding copiously, reaching down to bones that long had been stripped away by divinity, tearing apart non-existent flesh with the ease of paper, their skeletal frames ravenous as they dug holes in the godly forms to take their essence for themseves, coating shining metal in fire, stone, earth, water, ice, air, like disgusting bugs carving their way through luxurious fabrics and woods and painting and statues, hungry, hungry, hungry, starving and yearning and needing - and the Lords shouted, the Lords wailed, the Lords cried, the Lords howled in unison with the mechanical men eating them alive, ascending higher, higher, not demanding audience anymore, only digging into their nerves with a staggering familiarity, a bloodied fondness.
Artificial faces at last before the divinely natural eyes, frightened gods cradled with such murderous tenderness in hand-crafted palms, an unnatural light sparked within crystalline matter: perhaps what they forced upon the Lords was a sarcastic pantomime, perhaps it was a genuine gesture carried on in the only violent manner a living weapon could muster, perhaps it was as new and frightening for them as it was so painfully horrifying for their destined misshapen mirrors; but their mechanical bodies strained with their thin muscles as air poured through vents so scalding and freezing and humid and dry and dusty and clear, as they crowed out for all the universe to hear the love bursting in fulminating sparks and horrid shrieks of cogs clashing in ways they were not built to do, and with something that could be considered akin only to a terrible kiss they sank into the sublime endlessness of the Elemental Lords, and tore them to shreds in an indescribably gruesome amorous spectacle.
Nothing was left of them - nothing but men, frightened mortal shells of flesh and bone, clawed free from their ineffability as their former people approached them cautiously, circled around them to bear witness to their descent from their gilded thrones.
Hunched over them stood still the living beings of metal and muscle, immoble, eyes aglow with energy, encased in their element as though it were their skin - fitting them so naturally, like it had never fit upon the Lords. Then something zapped, creaked, exhaled harshly: their irises flickered, sparks of color pulsing before giving in, and they collapsed upon the exhausted remains of their domains, as still as corpses yet with hearts still beating gently, calmly, sweetly, radiating spots of light upon but a spec of their slowly reawakening world like fireflies unaware of their own mortality.
#bionicle#toa mata#elemental lords#random writing#hi my name is random and i like it when Cannibalism#i dont fucking know how to explain this. its just a collection of fucked things i like to write and headcanons? i guess?#anyways woo!!!!!! wooooo!!!!!!!!!!!!! have this!!!!!!!!!!!!!! ive been tryin to write this for a while!!!!!!!!!!!!!!!!!!!!!#YOU BASTARDS BETTER LOOK AT THIS I DIDNT POUR MY SOUL OUT OF MY EYE SOCKETS FOR NOTHING
7 notes
·
View notes
Text
How to Use Infusible Ink Pens With Cricut: A Complete Guide
Cricut infusible ink pens and markers are just awesome. I use them to create my iron-on projects like custom T-shirts for myself and my sweet little child. Well, you can make multiple things with these Cricut products. It’s very easy to use and gives a well-finished project in the end. Its color never fades and always provides shiny, vibrant, and colorful crafts. If you are also a crafter and want to learn how to use infusible ink pens with Cricut, then stay with me till the end of this blog to learn in depth.
I have done dozens of iron-on projects with my tiny Cricut Joy machine and infusible ink. The ink is so permanent that it won’t fade after washing. I am really excited to share my way of using infusible ink pens and creating lovely projects.
In this blog, you will get everything about Cricut’s infusible products, like how to use them, what type of projects you can make with them, and even some of my tips. So, let’s get started to learn everything.
What Are Infusible Ink Pens and Markers?
Basically, Cricut’s infusible ink pens and markers are simple pens with infusible ink intended to make various heat projects such as designing aT-shirt, tote bag, or any apparel where ink is necessary.
These products can be easily loaded into the clamp of your Cricut machine and draw your favorite designs. You can draw it with your hands, too.
How Do Cricut Infusible Ink Products Work?
Before learning how to use infusible ink pens with Cricut, you should know how it works. Infusible ink works on the principle of sublimation. It sounds a bit complex, but it’s so simple. When you use the infusible ink or marker on a paper, it’s in a solid state, which is its original state.
But, the moment you apply heat to it, it gets transformed into gas. During this process, it infuses your material, and when you remove the heat, it cools down again. And then, after cooling, it will again become solid.
One thing to note here is that these products only work on specific materials, such as poly-based materials, polyester fabric, coasters, and mugs with a poly-coated ceramic coating.
So, if you want to make such projects, Cricut infusible ink pens and markers will be a must-have. Luckily, these amazing accessories are compatible with all types of Cricut machines, including Cricut Maker, Explore, and Cricut Joy.
How to Use Infusible Ink Pens With Cricut Machine?
Here comes the final part of the blog, which I was excited about. You already understand why we use it. And now, you are going to learn the exact procedure through the steps that I am sharing with you now. Before moving to the final steps, let’s see the materials you will need while making your project.
Step 1: Tools and Supplies Required
Here are some of the essential materials and tools you will need for your project.
When you are done with all the materials, it’s time to start the project. So, let’s start the step-by-step guide and learn how to use infusible ink pens with Cricut.
Step 2: Create Your Design
In the first step, you need to put a sheet of laser copy on your cutting mat and then put it into the Cricut machine.
Now, move to your Design Space and choose the size of your design to fit onto your blank. After that, adjust your Linetype to draw and select a Cricut infusible pen or marker. Don’t forget to mirror the design before the cutting procedure.
Step 3: Load Infusible Ink Pens
Now, select your material. In the case of an older Cricut machine, set the Smart Set Dial to Custom. Once done, put your infusible Cricut pen or marker into Clamp A and then hit the Go button to load different colors.
Step 4: Unload the Cricut Cutting Mat
When your design is ready, you can unload your mat and then take out the design from the mat.
When your design is ready, you are ready to apply heat to your apparel using the Cricut EasyPress mat. To get started, first place the sheet of cardstock inside your apparel blank to keep it protected from wrinkles and damage.
Moreover, use a fresh and clean lint roller to remove the lint from the surface of your apparel blank. It will also remove the fiber particles to create a perfect apparel for heat transfer.
Step 5: Preheat Your T-shirt
Then, cover your apparel with the butcher paper. In the next step, you need to preheat your apparel to remove unwanted moisture from it. Also, you need to check the Cricut Heat Guide from time to time to follow the instructions correctly. Apply the heat with a light pressure.
After that, take off the butcher paper and let the apparel cool down. Now, put the design pieces on your apparel facing down. Then, apply the tape on each corner of your design with a Heat Resistant Tape, which will keep your design free from moving.
Step 6: Apply Heat to the Design
Next, put the butcher paper on top of your design. Afterward, select the correct temperature and time settings for your project from the Cricut Heat Guide. Once set, apply heat with the optimum pressure, and when you hear a beep sound, lift away the press and slowly remove the butcher paper.
In the end, let your project cool completely and enjoy it. Finally, you learned how to use infusible ink pens with Cricut, and hopefully, you will try it on your own.
Conclusion
The process was extremely easy, wasn’t it? All you need to do is to gather some accessories and get started with the project. I used an example of a T-shirt, but you can make use of any apparel like a tote bag or anything where ink pens can be used. You can make beautiful creations with your Cricut infusible ink pens and an EasyPress machine. So, get ready to create something and use the Design Space software to make things beautiful and unique.
Visit: cricut.com/setup
design.cricut.com/setup
install cricut design space app
cricut.com setup mac
www.cricut.com/setup login
Source: https://cricuthelp.wordpress.com/2024/02/21/how-to-use-infusible-ink-pens-with-cricut-a-complete-guide/
#cricut.com/setup#www.cricut.com/setup login#www.cricut.com/setup#cricut design space download#cricut project ideas#cricut explore air 2#cricut software app#cricut new machine setup#install cricut design space app#install cricut explore air 2#cricut new product setup#setting up your cricut maker#cricut create connect to computer
0 notes
Text
How to Use Cricut Mug Press for Tumblers: Full Tutorial
Now, sublimating thin glass has become easier with a Cricut Mug Press. You can also learn how to use Cricut Mug Press for tumblers. In the beginning, I didn’t even know how to use my Mug Press machine to create a tumbler, so I thought about giving it a try. My attempt was really successful the first time. During this process, I learned effective methods that I will share in this blog.
I understand that it might be intimidating for many crafters, so I found an effective solution that works for all types of thin tumblers. In this tutorial, I made a 20-ounce tumbler using my Cricut Mug Press. Besides these, I will also tell you how to set up this machine. After that, we will learn the step-by-step instructions for making custom tumblers.
So, read the blog till the end and follow each and every instruction to avoid any common mistakes. Visit this blog to learn more!
How to Setup Cricut Mug Press on Your Device?
You can’t learn how to use Cricut Mug Press for tumblers until you set up your Mug Press. So, let’s start setting it up first. Here are the steps to set up a Mug Press:
First of all, you have to go to the browser and search for Cricut Design Space on your computer.
After that, install the Cricut app and launch it.
After launching, you need to create your Cricut ID if you haven’t created it yet.

On the next screen, you will see the Welcome to Cricut Setup page.

Next, you will need to select the Heat Press and then Cricut Mug Press.
Now, follow the screen prompts to connect your Mug Press, confirm the firmware, and complete the activation process.
Supplies Required for Cricut Tumblers
You will need the following items to make tumblers on Mug Press:
Artesprix Protective Paper
Heat Resistant Mat
Cricut Mug Press
Sublimation printer
Sublimation ink
Heat resistant gloves
Sublimation paper
Infusible Ink
Lint Roller
PYD Life Inserts
Heat Resistant Tape
Tape dispenser
Despite this, you will also need sublimation blanks, as I am using 20 oz skinny tumblers. Now we have gathered the supplies, let’s learn how to use Cricut Mug Press for tumblers. All the easy instructions will make it easier for beginners to sublimate their tumbler hassle-free.
How to Make Tumblers With Cricut Mug Press?
Here, I am going to teach you to make a tumbler with Cricut. Fortunately, my first try went really well without any mistakes. So, let’s see how you can sublimate the tumbler.
Since we are using skinny tumblers, it might not fit well inside the Mug Press. Hence, we need to use PYD life inserts for heat conductive inserts.
It comes in various sizes that are suitable for different blanks. So, the purpose of using these PYD Life inserts is that they can expand the size you press to fit in the Mug Press. Before placing the blanks inside the mug, make sure there are no plastic pieces or straws inside the tumbles, as they can melt. Also, clean the tumbler using the lint roller to remove the dirt and debris.
Besides, I use the protective paper on the outside to protect my heat press. You can also use the tape to secure the paper into its place.
Finally, the tumbler is ready to be pressed in the Mug Press. Now, you need to wrap these inserts around the tumblers, as shown in the picture below.
Tumblers are usually long in shape, so you need to flip it upside down and repeat the same process twice.
Here’s the final result! That’s all in this tutorial. Now, you might have understood how to use Cricut Mug Press for tumblers to make your own tumblers.
FAQs
Question 1: Can you use Cricut Mug Press for any mug?
Answer: Cricut Mug Press can sublimate only those mugs that are labeled as sublimation compatible. They are actually compatible with infusible ink. However, if you are using non-Cricut mugs blank, then I can’t say about the results. Hence, you should always use poly-coated, sublimation-coated products that are suitable for your requirements.
Question 2: Can I use a Cricut Mug Press for my glass cups?
Answer: Yes, you can use frosted glass cups or mugs. In other words, you will need a glass sublimation blank that can easily transfer your design onto it. A normal glass may break while pressing it into the Mug Press. So, make sure you are using the right glass mug, such as a frosted glass cup.
Question 3: How long does it take to sublimate a tumbler in Cricut Mug Press?
Answer: The duration for sublimating the tumbler is about 4 minutes. To sublimate it, however, you will need to wrap butcher paper all around the tumbler and then use tape to secure it. After that, you can put your tumbler into the Mug Press and let it transfer your cut vinyl design to the tumbler.
Final Words
In this blog, I explained how to use Cricut Mug Press for tumblers with an easy example. In size, tumblers vary, hence you need to sublimate them accordingly. For skinny tumblers, you can use the insert sheets to adjust the thickness so that your Mug Press can transfer the design. Despite these, you will need to set up your Mug Press by downloading the Design Space. Also, there are many supplies required to do this project. Ensure you have essential items with you.
Read more: cricut.com/setup mac
install cricut design space app
Cricut Design Space
Source: how to use Cricut mug press for tumblers
#Cricut Design Space#cricut design space for mac#cricut design space setup#cricut design space app#cricut design space download#cricut.com/create#cricut new machine setup#cricut design space login#cricut explore air 2#cricut.com sign in#cricut software app#how to use Cricut mug press for tumblers
0 notes
Text
Unlocking the Magic of Sublimation Tumblers: Elevate Your Sip in Style
In a world where individuality and customization reign supreme, the quest for unique, personalized products has never been more in demand. It's in this landscape that the allure of sublimation tumblers shines. If you're pondering how to transform your daily hydration routine into a personalized and stylish experience, you're in the right place. In this blog, we'll explore the captivating world of tumbler cups and the art of sublimation. Get ready to discover why sublimation tumblers are the latest must-have accessory for a touch of elegance in every sip.
The Marvelous Allure of Tumbler Cups
First things first, what are tumbler cups, and what makes them so irresistible? Tumbler cups are a category of drinkware renowned for their versatility and style. These cups often feature a double-wall design that offers exceptional insulation, keeping your beverages hot or cold for extended periods.
What sets them apart from ordinary cups is their capacity for customization. Tumbler cups are not just vessels for your favorite drinks; they serve as blank canvases for your artistic expression. This is where sublimation enters the scene, adding a touch of magic to your everyday sipping experience.
Unveiling the Art of Sublimation
Sublimation, in the context of tumbler cups, is a printing method that allows you to transfer intricate, full-color designs onto the surface of the cup. Unlike traditional printing techniques, sublimation infuses the ink into the cup's coating, creating a durable and vibrant image that won't peel, fade, or crack over time. This unique process enables you to create truly one-of-a-kind tumbler cups that showcase your personality, interests, and style.
Why Choose Sublimation Tumblers?
The question arises: why opt for sublimation tumblers over standard drinkware? Here are a few compelling reasons:
Unlimited Customization: With sublimation, your options are limitless. You can adorn your tumbler cup with a cherished family photo, a motivational quote, a breathtaking landscape, or any design that speaks to you. The only constraint is your imagination.
Durability: Sublimation designs are built to last. They won't fade, peel, or wear off with daily use and washing, ensuring that your personalized tumbler remains a long-lasting favorite.
Unique Style: Stand out from the crowd with a tumbler cup that's as unique as you are. Whether you prefer a minimalist look or an explosion of colors, sublimation enables you to craft a design that complements your personal style.
Memorable Gifts: Sublimation tumbler cups make exceptional gifts. Create a one-of-a-kind present for a loved one's birthday, an anniversary, or any special occasion. Your thoughtfulness will shine through with a personalized tumbler.
How to Create Your Sublimation Masterpiece
Now that you're captivated by the idea of sublimation tumblers, it's time to bring your vision to life. Here's a step-by-step guide to help you get started:
Design Your Artwork: Begin by crafting or selecting the design you wish to transfer to your tumbler cup. Consider the size and orientation of your design to fit the cup's dimensions.
Printing: Print your design onto sublimation transfer paper using a sublimation printer. Ensure the ink and paper are compatible for the best results.
Prepare Your Tumbler: Clean the tumbler cup to remove any dust or debris that could interfere with the sublimation process.
Heat Press: Use a heat press machine to apply your design to the tumbler. The heat press will transfer the ink onto the cup's coating, creating a vibrant and lasting image.
Enjoy Your Creation: Once the sublimation process is complete, your personalized tumbler cup is ready to use. Sip your favorite beverages with a touch of elegance and style.
In Conclusion
Sublimation tumbler cups are a fantastic way to elevate your daily sipping experience. These versatile cups offer endless opportunities for customization, ensuring that your tumbler reflects your unique personality and style. With the magic of sublimation, your tumbler cup becomes a canvas for your creativity, making each sip a delightful and personal experience. So, why settle for ordinary drinkware when you can sip in style with a sublimation tumbler? The possibilities are as endless as your imagination.
0 notes
Text
Dye Sublimation Printing: Creating Vibrant and Long-Lasting Prints
Dye sublimation printing, also known as dye-sub printing, is a versatile and high-quality printing method that allows for vibrant and long-lasting images on various surfaces. This printing technique has gained popularity in recent years due to its ability to produce stunning prints with exceptional color accuracy and durability.
The Process of Dye Sublimation Printing:
Dye sublimation printing involves several steps to create a permanent and vibrant print. It begins with the use of specialized software to create a digital image. This image is then printed onto transfer paper using sublimation inks, which can convert from a solid to a gas state without becoming a liquid. These inks contain dyes that can produce a wide range of colors and shades.
Once the image is printed on the transfer paper, it is ready for the sublimation process. The transfer paper is placed face-down onto the desired substrate, such as polyester fabric, ceramic, metal, or coated surfaces. Using a heat press machine, the paper and substrate are subjected to high temperatures. The heat causes the dyes on the transfer paper to vaporize.
As the dyes transition from a solid to a gaseous state, they penetrate the surface of the substrate, resulting in a permanent infusion of color. This infusion process ensures that the image becomes an integral part of the substrate rather than sitting on the surface like traditional printing methods. The end result is a high-resolution print with exceptional color vibrancy and sharpness.
Advantages of Dye Sublimation Printing:
Dye sublimation printing offers several advantages over other printing techniques. Firstly, it allows for a wide color gamut, enabling the reproduction of intricate details, gradients, and vibrant hues. The prints produced by dye sublimation are resistant to fading and damage from exposure to UV light, making them suitable for outdoor applications and products subjected to prolonged use or wear.
Another advantage of dye sublimation printing is its versatility. It can be used on a variety of substrates, including textiles, ceramics, metals, and certain plastics. This makes it ideal for creating customized apparel, promotional items, signage, home décor, and personalized gifts.
Additionally, dye sublimation printing offers excellent durability. The prints are resistant to scratching, peeling, and cracking, ensuring that they maintain their quality and appearance over time. The colors do not wash out, making them suitable for items that require frequent washing, such as sportswear or home textiles.
Applications of Dye Sublimation Printing:
Dye sublimation printing finds applications in various industries and products. One notable application is in the textile industry, where it has revolutionized the production of custom apparel, sportswear, and soft furnishings. With dye sublimation, intricate designs can be printed directly onto polyester fabrics, resulting in vibrant, breathable, and long-lasting garments.
In addition to textiles, dye sublimation printing is widely used for personalized gifts and promotional items. It allows for the creation of unique and eye-catching products that can leave a lasting impression. The durability of dye sublimation prints makes them suitable for items such as mugs, phone cases, mousepads, and more.
Home décor and soft furnishings also benefit from dye sublimation printing. From custom pillows and blankets to curtains and upholstery, dye sublimation allows for the creation of personalized and visually appealing home accents.
Furthermore, dye sublimation printing is ideal for signage and display graphics. It produces vibrant and eye-catching prints that can be used for indoor and outdoor advertising, trade show displays, banners, and more.
Conclusion:
Dye sublimation printing is a versatile and high-quality printing method that offers exceptional color accuracy, durability, and versatility. Its ability to produce vibrant and long-lasting prints on various substrates has made it a popular choice for a wide range of applications, from personalized gifts and promotional items to custom apparel and home décor. With its superior image quality and durability, dye sublimation printing continues to push the boundaries of what is possible in the world of printing and customization.
0 notes
Text
Beginner's Guide to Cricut Infusible Ink Pens
Cricut Infusible Ink is a permanent printing technology that generates vibrant and crisp designs on various surfaces. It's also resistant to heat and water. Use the new Cricut's infusible Ink line of products with your Cricut Maker or Cricut Explore Air to make professional-looking shirts, bags, coasters, and more from the comfort of your home.
Cricut Infusible Ink line products consist of pens/markers and transfer sheets. The transfer sheets are similar to a heat transfer vinyl sheet, but Cricut Infusible Ink pens differ from regular Cricut pens. We are sure you have many questions related to Infusible Ink Pens. Continue reading our blog to find answers to your questions.
What are Cricut Infusible Ink Pens?
Cricut Infusible Ink pens or markers are designed to work with the Cricut machine. Load them directly into the accessory clamp of the Cricut machine and let them both do their job. The Cricut pen and markers have a special ink that fuses with the base material during the sublimation process. During the sublimation process, when heat and pressure are applied, the solid ink in the pen goes through a chemical transformation and turns into a gas. The gas penetrates the base material and dries back into a solid state, becoming a part of the material. It won't peel off or crack, and the colors will stay bright even after many washes.
What is the Difference Between Cricut Pens and Markers?
The only difference is the nib size; the invisible ink pens have a 4mm tip, whereas the infusible ink markers are 1mm thick. Use the ink pens to write and draw thin lines and the marker to fill in the designs drawn with the pens. Super fine lines aren't great with Infusible Ink Transfer Sheets, as cutting and weeding tiny lines is difficult, and it works best with thick solid images. The Cricut pens help you achieve the result where the transfer sheet failed. Both the pens and markers come in two colorways: traditional colors (green, red, black, purple, and brown) and neon brights (yellow, blue, green, pink, and orange).
What Supplies Do You Need for the Sublimation Process?
The first and foremost thing you will need is Cricut Infusible Ink pens and markers. A Cricut machine, Cricut compatible blanks, heat source, Cricut EasyPress mat, laser copy paper, LightGrip mat, heat resistant tape, butcher paper, Cardstock, scissors, lint roller (for fabric projects), and lint-free cloth (for coasters). Theoretically, any polyester or poly-coated base material will do the trick. However, Cricut only guarantees the brightness and durability of its blanks with infusible ink compatibility badges.
These blanks include T-shirts, tote Bags, coasters, and baby onesies. These compatible blanks have been through rigorous testing, so you can be ensured that you will get the best results. The infusible Ink system was calibrated to work with Cricut EasyPress 2. You could use a regular household iron, but it doesn't get enough infusible ink. Also, the heat is not evenly distributed. The Cricut EasyPress 2 can generate heat up to 400 degrees, which is the most appropriate temperature for most infusible ink applications.
The original EasyPress can generate heat up to 350 degrees, but it was not hot enough for infusible ink. You can still use it, but you may not get the desired results. Laser copy paper is designed to handle a high level of heat and has a special coating that keeps the ink from bleeding. You will need Butcher paper to protect the EasyPress machine from any escaped infusible ink. To protect the EasyPress mat from escaped Infusible Ink, use 80 lb or heavier Cardstock.
How to Customize a Blank T-shirt With Infusible Ink Pens & Markers?
The first step is choosing the Cricut-compatible blank (in this case, we are using a Cricut T-shirt) and any infusible ink pens or markers. Try to be creative by choosing thin pens and thick markers from the Basics and Neon color packs. The Next step is creating your design on the Design Space app. The infusible Ink pens can only draw your designs, so you need to use single-layer shapes without any 'fill.’ If you want your images to be colorful, you can color them by hand once Cricut does the outline drawing.
Click the 'Projects' button to create a pre-designed project. Size the image to fit the size of the t-shirt. In the space, attach all the graphic elements and click 'Make.’ Ensure to mirror your design before heat transfers. Choose 'copy paper' for your material. Into Clamp A, load the pen or marker suggested the pen or marker. Onto the LightGrip Mat, load a single sheet of laser copy and load the mat into the Cricut machine. Hit the Go button to start drawing. Once the machine finishes drawing, unload the mat and remove the paper from the mat.
Pre-heat EasyPress 2 to 400 degrees. Cut out the extra white space off the design to your blank. Place the piece of Cardstock inside the shirt and place the EasyPress mat between the Cardstock and the back of the shirt. Clean the T-shirt with a lint roller. On top of the shirt, place the butcher paper, then place the Cricut EasyPress 2 on top of your design for the recommended time. Lift EasyPress 2 carefully and let the shirt cool. Then carefully remove the tape and copy the paper.
Visit: cricut.com/setup
Source https://cricutmachinemakersetup.blogspot.com/2023/05/beginners-guide-to-cricut-infusible-ink.html
#cricut setup#cricut.com/setup#www.cricut.com/setup#cricut design space setup#cricut easypress2#design.cricut.com/setup#cricut.com setup mac
1 note
·
View note
Text
What cool things can you make with sublimation?
Motivate Box is the leader in Sublimation products Wholesale from Kolkata, Noida, & Delhi.
In the process of sublimation, a substance moves straight from its solid state to its gas state, skipping beyond its liquid counterpart. Many fascinating applications of this method can be found in many different industries, such as manufacturing, printing, and science. We'll talk about a few of the fascinating things that can be created utilizing sublimation in this article.
Personalized clothing and T-shirt sublimation: Customized designs can be printed via sublimation on clothing such as caps, T-shirts, and other accessories. Using specialized sublimation inks and transfer paper, the pattern is printed, and then using a heat press, it is transferred to the cloth. The end result is a vivid, long-lasting print that is of great quality.
Phone cases and other accessories: Custom phone cases and other accessories can be made using sublimation. The procedure resembles that used for T-shirts and other clothing and entails printing the design on transfer paper before using a sublimation heat press machine to apply it to the phone cover or accessory. This offers countless personalization possibilities and can result in fantastic personalized gifts.
Ceramic mugs and plates: Custom designs can be imprinted on ceramic mugs and plates using sublimation. The design is first printed using sublimation inks on specialized sublimation paper, and then it is heated in a press to transfer it to the ceramic. The end result is a print that is strong, excellent, and safe for the dishwasher and microwave.
Metal prints: Stunning metal prints can also be made with sublimation. The design is first printed with sublimation inks on specialised sublimation paper, and then it is heated up in a press to transfer it to the metal. The end product is a vivid, high-quality print that is water- and scratch-resistant.
Custom mousepads can be made using sublimation as well. The procedure, which is similar to how T-shirts and other clothing are made, entails printing the pattern on transfer paper first, then using a heat press to apply it to the mousepad. This offers countless personalization possibilities and can result in fantastic personalized gifts.
Signage and displays: Custom signage and displays can also be made using sublimation. The procedure entails printing the design with sublimation inks on specialised sublimation paper, and then using a heat press to transfer the pattern to the sign or display. The end result is a print that is vivid, sturdy, and long-lasting.
The method of 3D sublimation involves transferring a picture to a specifically coated 3D object. This may apply to sipper bottles, keychains, and phone cases. The procedure entails printing the design onto specialized sublimation paper, which is then used to heat press the design onto the object. The end result is a vivid, long-lasting print that is of great quality.
Wood prints: Custom designs on wood can also be made using sublimation. The procedure entails printing the design with sublimation inks on specialised sublimation paper, which is then heated to transfer the design to the wood. The end product is a vivid, high-quality print that is water- and scratch-resistant.
Sports gear: Custom patterns can also be imprinted using sublimation on items like baseballs, basketballs, and soccer balls. The procedure entails printing the design using sublimation inks on specialised sublimation paper, and then using a heat press to apply the pattern to the sporting goods. The end result is a print that is vivid, sturdy, and long-lasting.
Custom designs can be made via sublimation and utilized on car accessories like license plate frames.
0 notes
Text
Classification of Digital Printing Process
Digital printing is a general term for ink-jet printing technology. In order to explain various printing methods and characteristics more clearly, this section only introduces all-around, various types and process decomposition of digital inkjet printing of textile fabrics.
By printing method:
Digital inkjet printing: it is a direct jet printing method for the sizing of semi-finished textiles. This method is suitable for coating, reactive, dispersive and acid dye inks. The process is as follows: select the appropriate semi-finished fabrics (without softener) according to the ink category, carry out the sizing, drying, and rolling process, and then go to the digital equipment for direct printing (the fabrics are treated as paper), and then carry out drying, steaming, washing, drying Processes such as softening and setting (in which the paint can be fixed as long as it is baked)
Cold transfer printing: it is a printing method in which textile dyes are first printed on specially coated paper, and then the patterns are transferred to textiles by a cold transfer machine. This method is suitable for all kinds of fabrics except blending. The inks used include reactive, disperse, acid, and other dye inks; The method also requires semi-finished fabrics to be embossed with printed paper. There are two ways to treat the embossed fabric. One is to conduct a cold pile chemical reaction to fix the color (the fabric needs to be chemically treated in advance); Second, traditional steaming, washing, shaping, and other traditional processes shall be carried out.
Heat transfer printing method: it is a printing method that prints textile dyes on specially coated paper, and then transfers patterns to textiles through heat sublimation. This method is similar to traditional paper printing. It can only be used for polyester or high polyester-containing textiles. The transfer fabrics are all semi-finished products without softener (the softener may affect the coloring rate).
Classification by dye and process
Distributed digital printing
At present, more than 50% of the printing inks in China are dispersing dye inks, which are used for the printing of polyester fiber and other chemical fiber fabrics; Disperse dyes are a kind of non-ionic dyes with low water solubility, which exist mainly in a highly dispersed state in water with the help of dispersants
Active digital printing
Reactive dye inks account for about 29%, mainly used for printing silk and cotton fabrics; Reactive dyes, are also known as reactive dyes. It is a kind of dyestuff that reacts with fiber during dyeing. This kind of dye separation contains genes that can react with fibers. When dyeing, the dye reacts with fibers, forming a covalent bond between them as a whole, which improves the fastness of washing and rubbing. Reactive fuel molecules include two main components, a parent dye, and a reactive group. The group that can react with fiber is called the reactive group. At present, it is mainly used in woven and knitted fabrics such as cotton, general hemp, and silk, or fabrics with high content of the above ingredients.
Acid digital printing
The proportion of acid dye ink is small, accounting for about 7%. It is used for printing on wool, nylon, and other fabrics. Acid dyes are a kind of water-soluble dyes with acid groups in the structure. They are dyed in an acid medium. Most acid dyes contain sodium sulfonate, which can be dissolved in water, with bright color and complete chromatography. It is mainly used for dyeing wool, silk, and nylon, as well as leather, paper, ink, etc. It generally has no coloring power over cellulose fibers.
Pigment ink digital printing
Most inks are foreign products, and the manufacturers include Huntsman, BASF, DuPont, Klein, and other companies.
Classification by fabric composition:
Digital inkjet printing is based on cotton, but reactive dye ink can also be used for hemp, silk, etc;
Digital printing is mainly based on chemical fiber, and digital printing is produced with dispersed thermal sublimation dye ink and chemical fiber disperse direct injection;
Some blended fabrics such as t/c, which cannot be operated with reactive, dispersed, and acid dye ink, shall be printed with paint ink;
Digital printing based on nylon and wool is produced with acid dye ink, and silk can also be used.
0 notes
Text
https://sublimationpapercoatingmachine.com
Sublimation Paper Coating Machine Manufacturer in India - We manufacturer sublimation paper roll, coating, slitting, machine and chemical in India. High speed machine coating on transfer and heat transfer paper.
1 note
·
View note
Text
DTF Printers VS Sublimation Printers
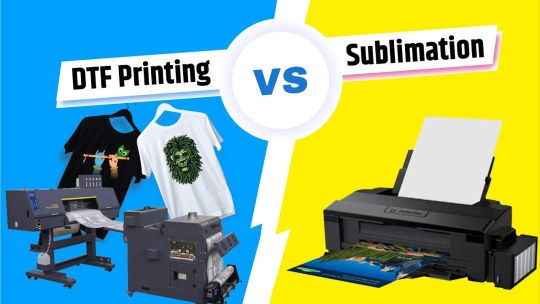
There are so many types of printers that come with an amazing printing methods. Here in this article, we will discuss with you the two most important types of printers, which are as follows, one is direct-to-film DTF printers and the other type is sublimation printers. So here, we will compare with you both of these printers with each other. Also, tell you what are the differences between these two particular printers.
And bear in mind that these are not comprehensive for all the printing methods out there. But these are two different types of printers. So in this way, we break down the differences between them and what are the advantages and disadvantages of the printers. Here, by knowing the concept of both of these types of printers, you can easily decide what is best for your business.
Before telling you about the sublimation printers, first, we will discuss with you what is sublimation, because if you are new to sublimation then this is very useful for you. So stay with and let’s go over what is sublimation.
Sublimation involves printing a design onto a piece of copy paper or specialty sublimation paper and then using a heat transfer machine via heart press, to press the design onto a polyester-like t-shirt. When you print a design onto a piece of sublimation paper using either an inkjet or toner printer. In this case, the ink or toner actually becomes a gas state, when it is being heated via a heat press, after that when it cools down actually turns the bank into a solid state.
Also before the comparison of DTF printers, we will tell you about the first what is DTF.
DTF stands for direct to film, it is different than direct to garment because, in DTG, you print the directly onto the garment. But in this DTF, you first print directly onto the film and then transfer from the film to the substrate like t-shirts by using the heat press.
https://www.youtube.com/watch?v=dD8mc8ZdWXc
Steps for the DTF process:
- In step 1, you can print your design onto specialty film paper
- In one step, you will coat your printed design on that film with a special adhesive powder
- In the next step, you will be using the heat press to melt the adhesive powder. So, that it sticks to the film
- And you then place your design onto the piece of the garment and put it under the heat press
- Then peel off the film, leaving the printing design on the garment
- In the last, after peeling off the film from the garment, you should again press the design by using the heat press by putting the butcher paper on it. This will increase the life and durability of your results
Steps for the Sublimation Process:
- In the sublimation process, you can understand that this type of printing will be done in less time by using their own printer
- So, in step one, you first prepare the design on the transfer paper or sublimation paper
- In step two, you can place the design on the substrate like a t-shirt under the heat transfer machine, for transferring the design from sublimation paper to the substrate
- In the end, remove the lid of the heat transfer machine, and take out the sublimation paper from the t-shirts
- So, you can easily say about the sublimation, that this is very simple and can be done in fewer steps than the DTF (direct to film) printer
Similarities between both of these printer printing
Both of these types of printers use the heat transfer machine. One is used for pressing the design from film to material like t-shirts. And
Other sublimation printing is used for pressing the design from sublimation paper to the material like t-shirts. Due to this reason, these printer has similarities on the base of the heat transfer machine. You can also only use only one heat transfer machine for both of these printers.
Differences:
The DTF and sublimation printer, both are different from each other. We will tell you their differences here, you can easily understand the concept of their differences with no difficulty. Because here we will discuss with you their differences step by step. So, stay with us, and let’s go forward,
Different process:
The process of printing both of these printers will be different. In DTF (direct to film), you use the transfer film, but in the sublimation printer, you use the transfer paper, or sublimation paper, for transferring the design onto the substrates like t-shirts.
The second difference is that you must use the adhesive powder on the film of DTF printing, but in sublimation printing, you cannot use something like this adhesive powder. So we easily that the steps in the sublimation printing are low than the DTG printing.
Different color:
Here, we will tell you which one of the printers shows you the better color for printing. The DTF transfer printing depends upon the heat transfer temperature. The temperature and hot stamping for this printer are up to,
130-150 degrees in 6-10 seconds.
But for sublimation printers, the temperature and time required for the transferring of design from paper to material is up to,
200-300 degrees in 15-20 seconds.
So, you must keep in mind that the effect of hot stamping on the sublimation paper will be not clear as the film printing. If you use the higher composition of polyester in the sublimation printer then you can get a more vivid and clear printing.
Types of material:
For both of these printers, you have some similar materials used, and one printer used more materials than the other. So, in the case of a DTF (direct-to-film) printer, you can use polyester as well as cotton materials, but in the case of a Sublimation printer, you can only use polyester material. You cannot use cotton material. Because in the case of cotton material in the sublimation, you cannot gain sharp, vivid, and clear printing. So, you can easily use the cotton material in the DTF material gaining better results.
Pros and Cons of DTF printing with its DTF printer:
Pros
There is no need for pre-treatment for your garment
Save your cost and time
With DTF, you can print the printing on various material
The DTF process is faster than the DTG printing
Cons
The DTF printer gives you printing with less vibrancy than the sublimation printer printing
Pros and Cons of Sublimation printer printing:
Pros
This printing on this type of printer is very simple, you will easy to learn
The printing of this sublimation produces different types of colors. Mostly use the major colors of ink like CYMK. Their combination produces thousands of colors
On this type of printer, you can run many prints
On this printer, you can also print on hard surfaces like mugs, tumblers, plates, and on other hard surface
Cons
The sublimation printer doesn’t be able to print on cotton. You can use the 100% polyester-like t-shirt
For non-textile substrate, you can only use the polyester coating
This printer also does not allow you to print on the dark fabric
Its sharp color printing can be changed into light color by keeping it more time under the rays of the sunlight
Buying Guide
In this section of this article, we will guide you about these printers according to your need. We will tell you some important factors about these printers, which shows the differences between these printers. Also on the bases of these factors, you can also easily distinguish these printers. So the first factor is,
Check the cost of these printers:
If you want to buy those printers for your business whose running costs become low. Due to this, we are also here to tell you about those printers, which come at a low cost. Sublimation printing comes at a low cost, nowadays this type of printer is mostly used in printing. So, before purchasing one printer from these printers, you must check the cost of these printers and manage them according to your need.
Check the material:
This is also an important factor for your business, because if you want to get those printers, which are the best for those materials which you want to need in the business. For example, if you want to print on cotton material such as t-shirts, then we recommended you purchase a DTF printer rather than a sublimation printer. Because the sublimation printer does not give you an option of printing on cotton as compared to the DTF (direct to film) printer.
Note:
These are the two important factors in these printers, which distinguish both of these printers according to your need
Read the full article
0 notes
Text
A Beginners Guide to use the Cricut Infusible Ink
Want to use the Cricut Infusible Ink? In this complete guide, you will learn each thing that is important to know about infusible Ink. In the below sections, We will cover what Infusible Ink is and how you can use it to do colorful craft projects. Also, you will see some best tips and tricks so that you receive amazing results every time.
Table of Contents
What is infusible Ink?
Infusible ink Materials: Transfer Sheets and pens/markers
How infusible Ink works?
Using infusible ink sheets
Using Infusible ink pens
What’s the Difference Between Infusible Ink and Heat transfer vinyl or iron-on?
Here are some other differences between infusible Ink and iron-on
To start creating with Cricut infusible Ink, you will need a few supplies
Some compatible materials of Infusible Ink
Let’s learn how to apply Cricut infusible ink sheets
Step 1: Select your infusible ink materials and an adaptable blank
Step 2: Create your design in the Cricut design space
Step 3: cut the Cricut infusible ink transfer sheet
Step 4: Prepare your materials
Step 5: Apply the infusible Ink
Tricks and Tips for working with Infusible Ink
Some common issues and their solutions that come up with Cricut Infusible Ink
Conclusion
What is infusible Ink?

It’s like sublimation printing but simpler. Infusible Ink purifies from a solid to a gas, and after that, it infuses into the material to create a constant bond that won’t fade.
Infusible ink Materials: Transfer Sheets and pens/markers
Infusible ink transfer sheets: these sheets are available in a variety of patterns and colors. You can cut the design with your Cricut, as you would with vinyl sheets.
Infusible ink pens and markers: You can create your own transfer designs with this material. Also, you can draw by hand or with your Cricut machine.
Note: the infusible Ink of Cricut also includes a line of appropriate infusible ink blanks, tote bags, t-shirts, mugs, and coasters.
How infusible Ink works?
Using infusible Ink is as simple as using heat transfer vinyl. The procedure is quite similar, but the results are definitely different. So here are some basic steps to creating a project using an infusible ink sheet and infusible ink sheets.
Using infusible ink sheets
Select your infusible ink sheet and your applicable blank project.
Next, create your design in the Cricut design space. Simply load the infusible ink sheet onto the Cricut cutting mat, then use your Cricut design machine to cut your design. After that, just weed your design.
After that, lay the infusible ink design into your blank project and then apply heat using a heat press or Cricut EasyPress.
Using Infusible ink pens
Select your infusible ink pens and suitable blank material.
After that, draw your design on laser copy paper.
Then lay the copy paper with your design onto your blank and then apply heat with a heat press or Cricut EasyPress.
What’s the Difference Between Infusible Ink and Heat transfer vinyl or iron-on?
In a few ways, working with infusible ink transfer sheets is almost similar to working with iron-on vinyl. But, when you create a project with Cricut Infusible Ink, you’ll see the results are very different. Unlike iron-on vinyl, which sits as a sticker on the upper side of a base material, infusible Ink generates a stable bond with the material itself. Because infusible Ink is inserted into the material, instead of sitting on the upper side of the material, your completed project will feel mild to the touch. The results are colorful, smooth, and bright transfers that won’t peel up.
Here are some other differences between infusible Ink and iron-on
While you are able to apply iron-on to most different surfaces, you have to apply infusible Ink to appropriate blank materials with a high level of polyester fiber content or an applicable polyester coating.
Iron-on has specialty finishes such as glitter and holographic foil, while infusible Ink comes with solid colors and various patterns.
Iron-on looks great on any type of color base material, but Infusible Ink works perfectly on white and light-colored fabrics.
To start creating with Cricut infusible Ink, you will need a few supplies
Cricut maker, explore, or joy: All the latest models of Cricut can cut infusible ink sheets. The only thing you have to bear in mind is that the Cricut joy machine has a smaller maximum size of the cut, so your designs must be smaller.
Cricut infusible ink transfer sheets: 12″ by 12″ sheets with a wide variety of colors and patterns.
Butcher paper: butcher paper 2 sheets are contained inside every package of infusible ink transfer sheets.
Compatible blank items such as shirts or mugs: the Cricut brand blanks are mainly designed to be adaptable with Infusible Ink. Also, you can look for third-party “sublimation blanks” to use with Cricut infusible Ink.
Cricut EasyPress 3 or heat press: to transfer the infusible Ink to your project material, you will need a source of heat. You should not use a daily iron for Infusible Ink projects for several reasons. The reasons are: they don’t get hot enough, they are not large enough to cover a full design in one pass, and the steam holes at the bottom of the plate interface with a clean transfer.
Cricut mug press: this tool will let you use Infusible Ink with special mug blanks.
Cricut EasyPress mat: A flat smooth pressing mat is really helpful for infusible ink projects; you just need complete contact between the transfer sheet and the project surface for the best results. And the folded towel has bumps and lumps that can interface with a clean transfer.
StandardGrip cutting mat: this is a green mat.
White cardstock: this cardstock sheet inside or under your project helps you with heat distributions and projects against accidental ink transfer.
Tweezers, paper trimmers, and scissors: to trim larger transfer sheets, you will need a paper trim or scissors. Also, you may need a pair of tweezers to weed your design.
Lint roller: it’s essential to use a lint roller to clear the blank project before applying the infusible Ink. Any fibers or debris in your project might create fallibility in the final transfer.
Some compatible materials of Infusible Ink
Now that you know more about infusible Ink, you might be searching, “what type of fabric can you use Infusible Ink on?” infusible ink designs will only be accessible with a particular list of applicable base materials. These base materials have to contain polymer or polyester material to create a permanent bond with the infusible Ink.
As a component of the infusible ink system, the Cricut machine has released a line of compatible inclusive ink blanks that are insured to work with Infusible Ink sheets, pens, and markers.
This compatible blank list includes various items like tote bags, small cosmetic bags, t-shirts, and ceramic coasters.
Don’t feel limited to the materials of the Cricut brand. Other products as “sublimation-compatible” blanks, will possibly work with infusible Ink. You will just have to test any new-to-you materials before you.
Let’s learn how to apply Cricut infusible ink sheets
Step 1: Select your infusible ink materials and an adaptable blank
You can cut the designs from Cricut infusible ink transfer sheets or draw your design with infusible ink pens and markers.
Step 2: Create your design in the Cricut design space
Firstly, open up the design space and start a new project. You can select a design from the Cricut access library. Then upload an SVG cut file or make your design with the tools on the canvas screen in the design space.
Once your design is finished, click the “make it” option to send it to the mat.
Go to the prepare screen, and tap the toggle button in order to mirror your design.
After that, go to the “make” screen and select an “infusible ink” option from the list of “materials settings.”
Lastly, load the fine-point blade into the Cricut.
Step 3: cut the Cricut infusible ink transfer sheet
Load the infusible ink sheet onto the standard green grip cutting mat. With a brayer tool, you can roll the transfer sheet also to ensure that it’s completely adhered to the cutting mat.
Next, press the “load” button to load the cutting mat. Then press the “go” button to start the cut.
When the cutting process is completed, you have to unload the mat. Simply flip the mat onto a clean work surface and then peel the cutting mat away from the sheet of infusible Ink.
Next, weed the design by bending or rolling the transfer sheets to loosen up the pieces of cut. You might hear cracking noises, but that’s not a bad sign.
Lastly, you can use your fingers to remove the waste transfer sheet. So make sure that your hands are dry and clean, so you don’t get any lotions or oil onto the transfer sheet.
Step 4: Prepare your materials
First, set up your easy press mat on a flat. On the top of the mat, place your blank project and a white cardstock piece under the blank project. The cardstock protects your mat and your created project from bleed-through ink transfer.
After that, use a lint roller in order to clean any fibers or fuzz from the project surface. If you can’t see lint, a few tiny fibers may intrude with a successful ink transfer.
Then, cover the clean bank with butcher paper. Also, make sure the butcher paper is larger than the created design and the plate of your EasyPress.
After that, preheat the blank according to the guide of Cricut heat. Preheating the blank is essential to smooth out any wrinkles and erase any moisture that can interfere with a successful transfer. Refer to the guide of Cricut heat for the recommended heat temperature for your particular project.
At last, remove the butcher paper and heat press, and let the blank entirely. Don’t be tempted to place the Cricut infusible ink sheet before the blank has cooled completely- you don’t want to risk an unintended ink transfer.
Step 5: Apply the infusible Ink
Firstly, place the cut and your weeded design face down on the blank.
After that, place a clean butcher paper piece on top of your created design. Ensure that butcher paper covers the design completely. Place the preheated easy press on the stack’s upper side and then press according to the temperatures and times specified in the guide of Cricut heat.
Next, remove the press and avoid shifting the transfer sheet underneath.
Once the project cools, simply remove the butcher paper and the transfer sheet. If the layer of paper separates from the clear liner, you have to use tweezers to remove it without shifting or sliding it around.
Tricks and Tips for working with Infusible Ink
Remember to mirror your created design.
On the cutting mat, Place the infusible ink sheet with the shiny side down and the color side up.
Once you remove the infusible ink sheet from the cutting mat, simply roll and blend it to “crack” the cut lines.
Take more time to lint-roll and preheat your blank. These two steps will eliminate various transfer issues later on.
Wait until the transfer sheet is cool.
Use the guide of Cricut heat to get the right temperature and time settings for your particular blank and transfer material.
Some common issues and their solutions that come up with Cricut Infusible Ink
The easy press is leaving marks on the shirt
If you don’t secure the fabric’s surface with butcher paper, then the easy press of high heat can melt it and create discolored or shiny marks. In order To avoid the issue of a mark, press marks and ensure that the butcher paper is larger than the heat plate.
The image looks smeared or blurry
A shadowed or blurry edge on your design implies that the design has somehow shifted around during the pressing process. This can be happier if the butcher paper, design sheet, or the easy press moves during the procedure of application. To solve this issue, ensure the design is safe on the blank. You can also use heat resident tape to secure your design to the blank. Also, don’t move your easy press around while pressing.
The image transferred unevenly
If the image looks marbled or faded, this means the transfer sheet was heated or transferred unevenly. To avoid this issue, here are some workable steps:
Ensure that your pressing surface is smooth and flat
Then, preheat your material to remove all the wrinkles
Arrange your image transfer.
Conclusion
The infusible Ink is a very special product of ink transfer from Cricut, which you can use to create colorful and bright designs with the smooth finish of various base materials. So if you want to use infusible Ink, then the above section of this blog helps you start using it, but before this, you have to learn about all the major materials you need to apply Cricut infusible ink sheets.
Source:https://hariguide.com/a-beginners-guide-to-use-the-cricut-infusible-ink/
0 notes
Text
Just what is a label printing machine?
Save time and cash by printing trademarks yourself. Steer clear of the gaps and hassle associated with ordering labels by a 3rd celebration. All Label Inkjet printer. com orders are usually shipped via USPS Top notch Mail, which is free intended for orders under $200.
Label Computer printers
We offer an substantial choice of label ink jet printers which could print on any type of paper or plastic label stock. Choose from our broad variety of brand printers including cold weather transfer printers, ink jet printers, laser printers, dot matrix ink jet printers, and more.
Many of us in addition have a large selection of blank tag sheets in various sizes to be able to help you generate your own custom made labels. You can find dating in between standard white label sheets, colored content label sheets, specialty content label sheets like peel-off stickers, adhesive backed sheets, self-adhesive linens, and more.

Our own label printers include everything you will need to get started right out associated with the box. We offer all the necessary supplies including ribbon cartridges, clear recording, and even pre-printed content label sheets if required.
Our goal at LabelPrinters. com is definitely to make it simple to find the best label printing device for your demands. Whether you're looking for a quick label printer regarding home use or a high top quality commercial label inkjet printer, we have now what you need.
If a person have questions concerning which label printer is right regarding you, e mail us right now!
What is a label printer equipment?
A label printer machine (also known as a label printer) is some sort of device used to be able to print info on product labels. The most typical types of labels imprinted on include value tags, barcodes, products labels, address labeling, and much even more. Many organisations use content label printers to save time and cash when printing their own labels as an alternative of buying all of them from a 3 rd party.
Why get a label printing device machine? - Conserve Time & Funds
When you purchase a label inkjet printer machine, you'll be vehicle both time. As an alternative of paying someone else to print labeling for you, a person can use one of our label printers to print your personal labels. This can allow that you spend less time performing paperwork and additional time working on other projects.
Exactly how does a brand printer work?
The label printer works by using a roll involving tape to implement pressure to the particular surface with the brand stock. As being the video tape passes above the content label stock, the tattoo transfers onto the label stock. When you purchase a label computer printer, you receive the number of different choices to make including:
? Heat Transfer Ribbon instructions this allows you to be able to print upon temperature sensitive materials just like envelopes, postcards, and paper bags.
? Ink jet Ribbon - this particular allows you produce directly on non-heat sensitive materials want cardboard boxes, wooden pallets, and plastic-type crates.
? Laser Bows - this allows you direct produce on opaque supplies like glass baby bottles, metal cans, and even plastic containers.
? Dye Sublimation Ribbon -- this allows an individual prints on see-thorugh materials like polymer, vinyl, and polycarbonate.
? Magnetic Tape -- this allows an individual to place permanent magnet strips on things like steel shipment pallets, wooden pallets, and cardboard bins.
How do We know which tag printer is correct?
There are many factors in order to consider when investing in a label printer equipment. Some of these types of considerations include:
? What kind of content label stock do an individual want to printing on? Do a person want to printing on plain report, coated paper, or even glossy paper?
? Exactly how big of your quantity do you plan on printing? Can you be producing small quantities or large quantities?
? Have you been planning on applying the label printing device in a list environment or a new manufacturing environment? If so, how big associated with a space will you be needing to operate the label printer?
? Will be there going to be a great deal of waste materials generated by content label printer? Considering ready to dispose associated with the waste correctly?
? Does https://afinialabel.com/ have an option in order to print on both edges of the content label stock?
? What type of software carry out you want to be able to use with the packaging printer? Can you download the software program yourself or must you pay for it?
? Very best warrantee period for the label printer?
Call us Right now To Find Outside More About Our own Label Printers!
All of us hope that this specific guide has responded your entire questions about label printers. Get in touch with us today in case you'd like support locating the perfect tag printer for the business. Functioning forwards to helping an individual find the right label printer to your requirements!
Printing Labeling Using a Thermally Transferable Computer printer
This online video shows you how to produce labels with a heat transfer printer. That also explains precisely what makes a thermally transfer ribbon unique.
How To Design and style Your Own Enterprise Cards Free of charge
This video demonstrates how in order to design your own� business cards for free. You possibly can make these people professional looking working with Illustrator.
The Ideal Thing Since Sliced Bread
A good thing given that sliced bread (or even white bread), we're talking about typically the humble loaf associated with bread here. All of us top ten things changed everything? and we mean every thing: from home living, health, etc. Look at this list associated with the best 10 items that changed every thing, plus some of our favorite videos.
The most effective label printer device and label printing machine can end up being found at afinia!
1 note
·
View note
Text
a long ass barista au for geraskier
i’ve always been into coffeshop/barista aus so imagine this [ geralt as this “insomniac uni professor workaholic” regular at this cafe that jaskier works night shift for + jaskier as a musician and part-time barista and they find each other as calming company at late nights over coffee ]:
geralt is this uni history professor who comes as a regular to this cafe/bakery which is very very close to the university he works at and he just loves the atmosphere there,, the music is good and it’s none of that mainstream pop his students seem to rave about plus the drinks, especially the espressos and flat whites they make are just sublime
shoving a ‘keep reading’ here (sike doesn’t work on mobile,, but like eh) bc this post is super lONg,, i swear it’s worth it
he totally wears black, grey, sometimes plaid sweaters, shirts, flannels- everything he wOre was meant for comfortable fashion (but lets face it, yen was the one who fixed his wardrobe up from the same set of black tux and white sweater and a set of plain trousers,, which waS fIne,, but cmon faShionabLE GERALT)
yEn is totally the one who made sure every trouser or set of pants or jeans he owns were tight-fitted and somehow it went from being asked on a couple dates tO several with some of his students (who every much HATE hIm bc he’s super straightforwardly strict) eyeing him all lessons, with some of the guys entering in, their mouths slightly ajar
we get it,, geralt’s just a broody as fuck history uni professor
anYways,, geralt has insomnia and his love for coffee and being a workaholic is NO HELP,, bc once the university library comes to closing hours, he just walks over to the cafe and for the first time, there’s a newbie
and god fucking damn he’s beautiful from a distance-
he’s got tussled brown hair, a silver stud on his left ear and he’s just adorned with so so much silver, he’s got a necklace and a couple rings and his white shirt is slightly unbuttoned a couple down, his chest hair slightly exposed and the apron just adorns his figUre so so well
he’s looking down cleaning the espresso machine when geralt juSt comes in, at 12 in the am,, restless as fuck,, his mind wanting to get on with marking of the recent semester assessments and thinking about how a random fuck would totally calm his thoughts for a while- but insTEad he’s hEre in this godforsaken cafe where no one is here at thIS GODFORSAKEN TIME of the DAY
and geralt just groans and orders an espresso and sits in the far corner once he just slides the money for it and everything’s fine when he just takes out all the papers he has to mark with his pens and his laptop where he registers the grade aND ITS FINE untIl
he hears the “““too pretty for it to be true”“““ barista call his name cheerfully even though no one is here and it’s not even his name- this man just randomly calls out for the white wolf and he just walks over there and IT’s STILL KINDA FINE
and then, their eyes meet and geralt’s lowkey mesmerized with the way his beautiful blue eyes pierce through his soul, waking him up, meeting the yellow and jaskier just says, “an espresso for the white wolf” and he smiles and geralt hates that someone’s so smiley at this time of the night
and somehow he just sinks into his work, getting drowned in it and his cup somehow gets replaced with another without him noticing once it’s finished and
this happens for several nights and they just have this mutual agreement/ friendship where they don’t talk and they just acknowledge the fact they’re companions for the rest of the morning until sunrise and they learn small stuff abt each other through their orders,, mostly jaskier learning stuff about geralt
like how he prefers espressos over flat whites and how he actually rly likes fruit tea with a shortbread cookie to go which he later pockets into his coat pockets, leaving crumbs
and finds out through a call late at night at some point,, that there’s this girl (it’s ciri!!!)) who he takes care of and brings cookies for and often tells her not to worry abt his health and that’s totally how he finds out tHIs mAn is a raging workaholic and An INSomniac
it’s also that that jaskier finds out he does wear stuff other than hot professor clothes when he comes in w ciri who eatS so many pastries when geralt brings her sometime over at the evening and ciri and jaskier talk and become friends and totally become texting buddies,, and she sends memes that he gEts but somehow the whIte wolf doesnt and her name is “lil cub” in his contacts with a snowflake and a heart and they send cat and dOg Videos anD MOVING ON-
there’s nice music playing and it’s jaskier’s original music,, which only ever plays at night shifts
also at some point, geralt finds out his name through a barista in the mornings, and learns oh, his real name is julian and it kinda fits (not thAt his opinion matters, at l e a s t for now)
one dawn, at 2 in the am, bc this damn cafe/bakery,, jaskier just brings over the coffee with a sandwich, and says, “here’s a meal for the white wolf, sincerely,, jaskier”” and he just continues talking like- “you know with the way you’re like this, i’d say you’re not helping yourself,, you look like you think a lot and the coffee doesn’t help and with that much of coffee in ur system, im concerned you’d die.” and jaskier just waits patiently for a response-
geralt doesn’t respond,, but rly he’s a bit indifferent bc ppl always say how much they care abt him, but they always leave
“fine be ThAt WaY”“ - jaskier at some point bc he’s tired of seeing geralt tiring himself with coffee and just changes the music to soft mainstream love songs to piss him off bc he’s noticed the way geralt’s face scrunches up when he hears pop play during his night shifts and he feels like- HA TAKe ThAT WhIte Wolf- and jaskier totally thinks this out loud
and geralt responds after some silence, his laptop’s keyboard’s keys stop clacking and he just outright says, “the music, jaskier.”
and jaskier is like teasing him and it TOTALLY BACKFIRES
“wHAt is it,, you Don’t like mUSic like this??? you’d much rather prefer thIS?”‘ and he plays his recorded music from soundcloud and geralt just goes hm and its one that sounds satisfied and jaskier miGht fucking start crying bc
someone fucking appreciates His wOrk,, his acoustically sang original work,, with a few folk elements in it,, often playing with a lute
and he jusT sTAmmers- “y-you like my music??”
another fucking hm and jaskier just about catches sight of a smirk as geralt returns to work - jaskiEr might just combust,, he’s a blushing mess and when he looks over at geralt he’s like looking back with this smirk and he’s rly fucking beautiful- this white wOlf- with his neat white hair and studded ear and black sweater and his voice is kinda smth he’d lovE to hear speak fuLl sentences fOr Days on END
and before geralt leaves the cafe,, he just leaves a napkin with his number and his name,, left on the sandwich and jesus chrISt it tAkes him SO LONG TO ACTUALLY SAY SOMETHING thROUGH TeXt
and its so so obvious bc geralt looks at him at night expectantly until jaskier just says fuck it,, do u wanna like go for drinks at this live bar i work at during saturdays?? and they dO go and geralt doesn’t talk much
and jaskier totally gets in fucking trouble with a regular at the bar who punches him out of nowhere and breaks his guitar and jaskier might fucking cry bc that’s his first-ever guitar and its broken so he cusses at him and he gets hurt even more and geralt has to come in convince him to pay for the guitar and pay respects to the man that provided him entertainment for the night and how it’s only right for a human to do so
““��“leave him alone,, he’s just an artist.””””
and jaskier totally gets another guitar a couple weeks when he goes shopping with geralt to get one and they totally end up fucking when jaskier invites him over for dinner at his apartment after shopping a month later
and it happens like this: it’s like they stare at each other,, forget the food,, and kiss with netflix playing in the background and they go to jaskier’s room
geralt just murmurs smth abt “”going too fast””” and jaskier’s like stfu you stuck up history professor,, we’ve been eye-fucking for months and you visit my live bar performance every saturday and listen to my stoopid rants abt music- jut fuck me already,, iF anything we went too sLOw for my taste
geralt calls out his name jaskier when it feels too good sO good, until he repeats it like a mantra,, holding him, hands firm onto jaskier’s body and he just calls out “jas, jas, fuck, jas-”
and ohmygod the way geralt just smothers his nose in the crook of jaskier’s neck when they’re facing each other, jaskier riding him, and jaskier’s like “you’re like fucking art, ohmygod,”” but geralt is thinking shut Up shut up you’re art in his head and he just hm’s It bc honestly he’s relishing in how close they are rn and how jasKIer smeLLs so sO good
and its like- fuck fuck,, im rly attracted to you sex it ends with jaskier just holding on a bit longer before they cuddle with geralt half asleep, saying,, “i think i might just love you, but also like i think it might just be the afterglow,”” and he fucking laughs to ease the atmosphere but its a bit of a miserable laugh and he feels stupid bc he’s rly used to ppl leaving right about now, rly done w his antics so he falls asleep exhuasted, holding onto geralt’s arm
geraLt STAys in the morning, his hair is unkempt as fuck and it’s the first thing jaskier sees and he’s got these golden eyes he’s super mesmerized about
the first thing jaskier totally says is, “shit,, there’s a fucking angel in my bed and im not sure if-”
“jaskier, shut the fuck up and make my coffee.”
jaskier leaves the fucking bed, getting his sweatpants on, his face flushed- like did he just??? that HAppened last night riGht??? and he’s making coffee and geralt joins him with his boxers on and his unbuttoned flannel being the only things he was wearing- and jaskier is like shit,, “” i rLY RLY MiGht BE In LOve w You”” and he’s thinking this out loud,, a nd jaskier is thinKing suPEr LOud,, not realizing he’s speakinG it ,, “”you prolly need no one,, the last thing GeraLt needs is SoMeOne needing hIm,, lEst want him lIke I DO”””
and geralt kinda just looks at him softly like,, “””jaskier u fucking daft fool why are u so stoopid”””
and geralt just fucking says, “and yet... here we are.”
and he just drinks jaskier’s coffee he made and jaskier just smiles at him, almost embarrassed and geralt’s like,, “you know your singing is like ordering a pie without filling, right?”
iT Starts this argument which ends in jaskier fucking realizing it’s a joke and he plays for geralt this new song abt this blue lark falling for a golden eyed eagle and how its wings have broken in pursuing someone they fell in love for
and it’s just- rly soft,, my dudes
#geralt x jaskier#geraskier#gerskier#gerlion#geralt of rivia#jaskier#the witcher netflix#coffeeshop au#my writing#i just- i was gonna write a small thing#but then it became rly rly long
752 notes
·
View notes
Text
Raster To Vector Conversion | Vector Conversion | Cre8iveSkill

Digital art is transforming the world by leveraging powerful technology. It is tempting, it is aesthetically pleasing, and most importantly, it gives you options. Options to save time, alter the designs with just a few clicks and create affordability. Amongst such ventures of digital art, vector tracing is the one that is gaining considerable traction. Vector images are getting pretty significant in use, especially in the embroidery and print segment of the fashion industry, precisely why you may require the vector tracing service to convert logos or pictures from bitmap formats into vector formats.
What Makes Vector Images Unique?
There are two common types of image files: vector images and raster images. The primary difference between the two is that raster images use small dots or pixels to construct a picture, while vector images use lines, curves, and shapes to draw a picture.
You will not see much of a difference between a raster image and a vector image of the same at a smaller size. The dissimilarity becomes apparent when you increase the image size. The raster image will become blurry, losing both quality and pixelation.
A vector image, however, does not regress with magnification or image enlargement. This stand-out feature of vector images has what made them so unique and famous.
What is Vector Tracing?
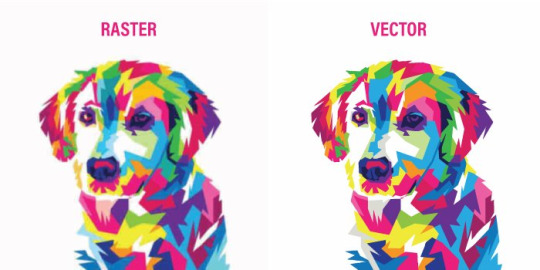
The raster to vector conversion of the images is carried out through vector tracing.
Vector Tracing is a digital photo editing technique that works on image tracing. It converts the raster images in bitmap formats (.JPG, PNG, etc.) into Scalable Vector Graphics (.SVG). Photo editing tools like Coral Draw or Adobe Illustrator use mathematical algorithms to draw vector images. Vector images look sharp and clear in any scaled size, triumphing over the bitmap formats that get pixelated and distorted when magnified.
Vector Tracing Services in Fashion Industry
This advantage makes vector images the ultimate designing choice in the fashion industry. Vector images can not only be used as logos and wallpapers; you can also print them on clothes as stickers and image labels. Just hand over your favorite and personalized pictures to trace to the vector tracing service of your choice and put the crispness of the images to good use.
Vector Art In Printing Services
Vector tracing services are required for several printing methods like Screen Printing, Direct-to-Garment Printing, Direct-to-Film Printing, Sublimation Printing, and Reactive Printing are a few examples. Vector art is also used for Laser Engravings due to its higher quality.
Let us get to know why vector art is crucial for these procedures.
• Laser Engraving: It is a practice of using lasers for etching a design or image on a solid surface like leather, glass, metal, or even textile materials. In the fashion industry, vector art in Laser Engraving is preferred if thin lines are engraved on the apparel. It is also faster than raster image engraving.
• Reactive Printing: This method uses reactive dyes and steam to print permanent designs on the fabric. Reactive printing using vector images is ideal when the images are complex, and lines and curves are sharper.
• Direct-to-Garment & Direct-to-Film Printing: The main difference between DTG & DTF is that in DTG, the design is printed directly onto the fabric. While in DTF, the image is first printed on a transparent film and then coated with an adhesive to stick it onto the textile using a heat press.
These processes also deploy vector graphics because vector images quickly adapt to any resolution of the printing screen or the printing device.

Sublimation Printing: Transfering a design onto a surface using ink and heat is Sublimation Printing. In this process, the image is first printed on a transfer paper, and then the fabric and the transfer paper are passed through a heat transfer machine. The image on the transfer paper is thus transferred to the material. It requires the printed image to have a high quality to get the best results. Vector images have no pixelation; hence they are the best choice.
The vector images can be printed on the apparel without any loss in clarity & quality using all such techniques.
Top-notch creativity and skillset are required for this, which is why Cre8ive Skill has, in fact, made itself technologically advanced in the state-of-the-art machinery, quality software, and superior skills when it comes to vector tracing service.
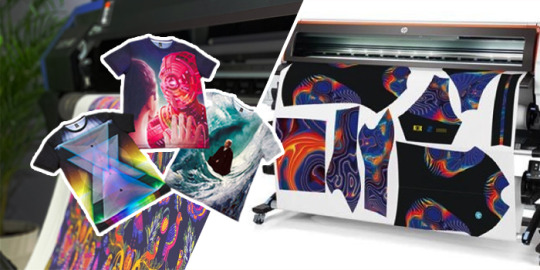
Why Are Good Vector Tracing Services Crucial?

Every single thing communicates a message. Whether you are an individual or a business, you always need to convey the right message with whatever you choose. The image, colors, contrast, and quality play a key role in your brand or clothing items. You cannot risk an unprofessional image file provided by any low-quality service provider.
To get the very best out of the images or logos that you choose for vector conversion, you need someone who understands you and your requirements, all the while providing you the best value for money. Going for quality vector conversion services like Cre8ive Skill will ensure that you never regret your choice.
Which Vector Tracing Service You Should Choose?
Not everyone is determined to offer top-quality vector tracing & conversion at affordable prices in the fashion industry. Vector images are not just simple lines and curves; they require extreme attention as well.
Here comes the critical question.
What exactly makes a vector tracing service stand out from the rest?
Let me mention a few features that you should never ignore:
1. Experience & Expertise
That is, by default, the first and foremost requirement expected of any service. Always go for a vendor having a team with vast experience and expert graphic designers—one who prioritizes you and your satisfaction first. Vector art is a delicate and detail-oriented process. The vectorization should always be handled with care and precision., workmanship should be exceptional. And this comes with experience and expertise.
How about a service that will amaze you with accuracy, attention to detail and extraordinary artwork? Here’s Cre8ive Skill who believe in customer satisfaction more than anything else.
Are you looking for vector design for the fashion industry? Cre8ive Skill is the way to go with our machine-friendly designs and fine detailing.
2. Quality Checks
I would love to choose a service that would take care of all my needs while ensuring the design quality of my vector images. And I guess you would too. What’s even better? The artwork going through a controlled and efficient quality check system.
Cre8ive Skill provides you with just that. A sigh of relief and peace of mind for you while the quality control department goes through your vector images several times to guarantee top-notch individuality and defect-free artwork.
3. Avoiding The Use of Auto-Tracing
Let’s try to understand what automatic image tracing is and how it differs from manual drawing first.
There are commonly two ways to draw a vector image using image vectorizer tools like Adobe Illustrator.
- Manual Image Trace: This technique involves drawing the vector image by hand using a mouse or a graphics pen on a tablet to trace the image.
- Auto Image Trace: Automatic tracing uses software automation to detect the lines and curves of the raster image to create a vector image. The image trace tool in Adobe Illustrator and Scan2CAD are specific examples. Inkscape trace bitmap feature is another example.
Why strictly should the automatic photo tracer be avoided? It’s because the auto trace cannot recognize the low-resolution areas of the raster image accurately. Furthermore, automatic tracing results in inferior quality vector images if the color density of the raster images is very high.
Manual tracing, on the other hand, works with images of any quality. A human can always understand better than a machine were to draw a line or a curve and what the image should represent. It is more or less 100% accurate and even works for complex illustrations or photos.
For the reasons mentioned above, make sure that the vector tracing service you choose is vectorizing your images manually instead of just auto-tracing them. With Cre8ive Skill, you will get every vector image manually traced in vector file converter software to provide you with impeccable quality.
4. Efficient Delivery Timeframe
Make sure that your chosen vector designing vendor provides you with perfect image tracing in a reasonable timeframe. Though manual tracing takes time, it can’t be that they keep your image pending for an extended period of days or weeks.
If you want the delivery to be efficient and quick, Cre8ive Skill should be your choice. Most of the other vector tracing services have a turnaround time of 48-96 hours; cre8ive Skill, in fact, does it in 12.
After all, who doesn’t like quality work delivered right on time?
5. Reasonable & Affordable Price
Take a look around, and you may find services offering image vectorization at the starting prices of $60 going all the way up to $135 per image. Does that sound affordable even if it ensures quality work?
Absolutely not.
Here’s where Cre8iveSkill comes into play. Exceptional quality, aesthetically desirable designs, manual tracing, artistic and attractive visualization, quickest turnaround, and whatnot. Top-quality service with affordable prices, all the while taking care of your unsaid needs, there’s nothing you have to worry about. Hence, with Cre8ive Skill, you are in safe hands.
Source: https://www.cre8iveskill.com/blog/vector-tracing-service-how-to-choose-the-best-one
#vector for printing services#what is vector tracing#vector tracing#vector tracing services#photo tracer#raster to vector conversion#vector conversion#pictures to trace#inkscape trace bitmap#vector file converter#image tracing#image vectorizer#image trace#cre8iveskill
2 notes
·
View notes
Text
Primary Types of Industrial Dyes and Pigments
Industrial dyes are quite often used in multiple industries these days; so is the case with pigments. If we talk about industrial dyes, they are basically coloring, ionizing, and aromatic compounds that are used in numerous applications across various industries. Dyes have the property to show an affinity towards the substrate. But, they should be used cautiously because some industrial dyes are toxic and carcinogenic in nature. Anyway, at present, dyes found their application in industries like plastic, cement, cosmetics, rubber, paper, textiles, medicine, to name a few. Some primary varieties of industrial dyes are mentioned under:
1) Digital Textile Printing Dyes: In digital printing, computer controlled ink-jet nozzles or charged drums are used. The physical surfaces over which the digital prints are reproduced include common paper, photographic paper, plastic, cloth, etc. The popular varieties of dyes used for this purpose are acid inks, disperse inks, reactive inks, and dye based inks.
2) Leather Dyes: Tanneries usually make use of around 50-100 different varieties of leather dyes. Each dye produces a diverse desired effect over the leather. The dyes used in this industry include direct, acid, mordant, reactive, and basic dyes, among others.
3) Optical Brighteners: Also known as optical agents, optical brighteners are the dyes that possess the attribute of absorbing the violet and ultraviolet region of the electromagnetic spectrum, which results in the prominent re-emission of light in the blue region. This dye is not suitable to be used in water (like in aquarium, etc.), due to its toxic nature.
4) Sublimation Dyes: These dyes primarily found their application in various types of printing. They can be found in several forms like inkjet inks, ribbons for thermal transfer, and toner for laser printers. Sublimation dyes are applied by the process called heat-transfer. Their main varieties include acid, disperse, vat, direct, and reactive.
Now, as you might have got some idea about the industrial dyes and their primary varieties, let's discuss about industrial pigments and their types. Pigments are basically the materials that make a modification in the color of the transmitted light owing to their attribute of selective absorption of the wavelength. The change in the transmission of light varies with fluorescence, phosphorescence, as well as with other forms of luminescence, in which a material emits light. Pigments are generally used in inks, coloring paints, cosmetics, eatables, etc. Nowadays there are various types of pigments available in the market, out of which some primary types of pigments are given under:
1) CLC Pigments: Cholesteric Liquid Crystal (CLC) pigments are made from CLC films. These pigments are nowadays increasingly used in security machines and also as an impediment to the counterfeit of currency notes, legal documents, etc.
2) Fluorescent Pigments: These pigments have the quality of changing the ultraviolet light into the desired color. They form the vital element of any kind of fluorescent material. The fluorescent pigments are mostly used in textile field, solvent based paper coating, and paints and aerosol coating.
3) Organic Pigments: Organic pigments consist of solid particles and they are insoluble in the application medium. There are two basic varieties of these pigments, namely natural and synthetic. Organic pigments are generally used for coloring or coating purposes (both decorative and protective) on plastics, candles, paper, rubber materials, pharmaceuticals, etc.
4) Ultramarine Pigments: They are a kind of inorganic pigments, which are non-poisonous and non-irritating in nature. They are also one of the oldest varieties of pigments. They have two basic types, viz., ultramarine blue and ultramarine violet. Ultramarine pigments found their application in coating, coloring, printing inks, cosmetics, and artist colors.
We are one of the leaders among manufacturers and suppliers of Dyestuff & Dyes, Textile Dyestuff, Pigments, Colorants offered by SD Chemical LLC, Cibolo, Texas, USA
1 note
·
View note
Last Seen Blogs

sakuraba-ryota
the

hedome
The Heranian Dome

heartintheoceanheadintheclouds
Sand & Palm Trees🌴

hey-august
i don't know what i'm doing here
hey-august
i don't know what i'm doing here