#Product Category Builder Template
Text
Greeting Xi Jinping Lee Hsien Loong Joe Tsai,
How to Build a Workout
Template
Self Analysis
Scrimmage Plus/Minus System (Starters vs Bench)
SWOT
Strengths
What you Are Good At
Weakness
What you Are Not Good At
Opportunities
Improve, Expand, and Grow
Threats
What can Keep You off the Court
Eisenhower Matrix
Urgent/Important (Threats)
Urgent/Not Important (Weaknesses)
Not Urgent/Important (Opportunities)
Not Urgent/Not Important (Strength)
Skillset Package
When Building Your Style, Group the Following
2K My Player Builder
Playing Style
Playmaking Shot Creator: Playmaking, Shot Creating - Similar to the Scoring Machine build, the Playmaking Shot Creator requires an emphasis on Finishing and Scoring, but passing accuracy and ball handling will be what set you apart. While you’ll have the ability to score in the lane, your primary focus will be setting up your teammates and getting them involved. Spend the majority of your attribute points on shooting and playmaking, then spread the rest across finishing and defense.
Badges
The badges are broken down into four categories: Finishing, Shooting, Playmaking, and Defense/Rebounds, and which ones are available to you will vary based on your MyPLAYER's position and build.
Fitness
Fascia and Plasticity Scrimmage
Cardiorespiratory fitness (CRF) refers to the capacity of the circulatory and respiratory systems to supply oxygen to skeletal muscle mitochondria for energy production needed during physical activity. CRF is an important marker of physical and mental health and academic achievement in youth.
Cardiorespiratory endurance involves the heart, blood vessels, and lungs, while cardiovascular endurance just includes the heart and blood vessels
Fascia training describes sports activities and movement exercises that attempt to improve the functional properties of the muscular connective tissues in the human body, such as tendons, ligaments, joint capsules and muscular envelopes: Oscillating Continuous Sub-Maximal Load Repetitious; Hopping Exercises, Plyometrics, Resistance Sprinting
The Central Pattern Generator is also neuroplastic. That is, its timing, sequence and control of your movement patterns can be changed, refined and perfected but this takes time. 75% intensity for 2-4 weeks
Equipment
10-15lb Rucking Bag
Regards,
Adrian Blake-Trotman
3 notes
·
View notes
Text
Enhancing Customer Engagement and Streamlining Communication with Shopify Contact Form Builder
Shopify, celebrated for its intuitive e-commerce solutions, provides a suite of tools and features designed to seamlessly integrate customizable contact forms into your website. Let's explore how harnessing a Shopify contact form builder can markedly enhance customer interactions and propel business growth.
Establishing direct communication channels with customers is instrumental in addressing inquiries, gathering feedback, and resolving issues promptly. Shopify's contact form builder offers a user-friendly interface that enables businesses to effortlessly embed and customize contact forms across their website. This integration ensures a cohesive and streamlined user experience, enhancing accessibility and engagement for visitors.

Customizability lies at the core of Shopify's contact form builder, allowing businesses to tailor forms to align with their brand identity. From adjusting colors and fonts to configuring specific form fields, such as order numbers or product inquiries, businesses can capture relevant information efficiently. This customization not only reinforces brand consistency but also empowers support teams to deliver personalized and effective responses.
Moreover, Shopify's contact form builder facilitates automated responses and notifications, enabling businesses to acknowledge customer inquiries promptly. By leveraging automation, businesses can optimize response times and ensure customers feel valued and attended to. Additionally, the collection of data through contact form submissions provides valuable insights into customer preferences, pain points, and emerging trends, guiding informed business decisions and strategies.
Importance of Effective Customer Communication
In today's competitive market, customers value convenience, responsiveness, and personalized experiences. A well-designed contact form serves as a direct line of communication between you and your customers, enabling them to reach out with inquiries, feedback, or support requests effortlessly. By providing this avenue for engagement, you demonstrate a commitment to customer satisfaction, which ultimately fosters trust and loyalty.
Key Benefits of Using a Shopify Contact Form Builder
Seamless Integration:
Shopify's contact form builder seamlessly integrates with your existing store infrastructure, whether you're using Shopify's native themes or custom designs. This integration allows you to effortlessly embed and customize contact forms on any page of your website. By maintaining a consistent look and feel across your site, you provide customers with a cohesive and intuitive user experience.
Customizability and Brand Consistency:
Tailoring contact forms to reflect your brand's identity is essential for reinforcing brand consistency and credibility. Shopify provides a range of customizable templates and design options, enabling you to align your contact forms with your website's overall aesthetic. From choosing colors and fonts to adding logos and custom fields, you can create forms that resonate with your brand and leave a lasting impression on visitors.
Capture Relevant Information:
One of the key advantages of using a Shopify contact form builder is the ability to customize form fields to gather specific information from customers. Whether you need to collect order numbers, product inquiries, or feedback categories, tailored form fields empower your support team to address inquiries promptly and accurately. This level of customization streamlines customer interactions and ensures that each inquiry is handled efficiently.
Automated Responses and Notifications:
Integrating Shopify apps with your contact forms enables you to automate responses to common inquiries or send instant notifications upon form submissions. This automation not only saves time but also enhances customer satisfaction by providing timely acknowledgments of their messages. Automated responses can set expectations and reassure customers that their inquiries are being addressed.
Data Collection and Analysis:
Every contact form submission represents an opportunity to gather valuable customer insights. Analyzing this data can reveal patterns, preferences, and pain points among your customer base. By leveraging these insights, you can make informed business decisions, refine your marketing strategies, and enhance product offerings to better meet customer needs. The data collected from contact forms serves as a valuable resource for driving continuous improvement and optimizing your e-commerce operations.
How to Implement a Shopify Contact Form
1. Choose a Shopify App:
Start by browsing the Shopify App Store to find a contact form builder app that aligns with your requirements. Look for popular options such as "Form Builder with File Upload" or "Contact Us Form Builder." Consider factors like user reviews, features, and pricing to make an informed decision.
2. Customize Your Form:
Once you've selected an app, use its interface to design and customize your contact form. Begin by configuring form fields based on the specific information you want to collect from customers. Common fields include name, email, phone number, subject, message, order number, and more.
Next, customize the styling of your form to match your brand's visual identity. Choose colors, fonts, and layouts that resonate with your website's design. Some apps also offer advanced customization options like adding logos, background images, or custom CSS to further personalize the form.
Additionally, configure settings such as required fields, validation rules, and error messages to ensure a smooth user experience.
3. Embed the Form:
After customizing your contact form, it's time to embed it into your Shopify store. Most contact form builder apps provide simple methods to integrate forms into your desired web pages. Common locations for embedding contact forms include:
- Contact Page: Create a dedicated contact page on your Shopify store where customers can easily find and use the form.
-Product Pages: Allow customers to inquire about specific products by embedding a contact form directly on product pages.
- Checkout Process: Offer customers the option to ask questions or provide feedback during the checkout process, enhancing user engagement.
Simply copy the generated embed code or use the app's built-in integration tools to place the form where you want it to appear within your Shopify store.
4. Test and Optimize:
Once the contact form is embedded, thoroughly test its functionality to ensure it works seamlessly on different devices and browsers. Submit test inquiries to verify that you receive notifications and responses correctly.
Regularly monitor form submissions and user feedback to identify areas for improvement. Use analytics provided by the app (if available) or Shopify's built-in reporting tools to track form performance, such as submission rates and conversion metrics.
Optimize your contact form over time based on user interactions and feedback. Consider tweaking form fields, design elements, or response automation to enhance user experience and maximize the effectiveness of your contact form.
By following these steps, you can successfully implement a contact form on your Shopify store and leverage it as a powerful tool for improving customer communication and driving business growth.
Conclusion
In conclusion, integrating a Shopify contact form builder into your e-commerce store is a strategic investment in customer engagement and satisfaction. By offering a user-friendly means for customers to connect with your business, you demonstrate responsiveness and commitment to their needs. This proactive approach not only builds trust but also contributes to increased sales and long-term customer loyalty.
Frequently Asked Questions (FAQs)
Q1: Can I customize the appearance of my contact form to match my brand's style?
A: Yes, Shopify contact form builders provide customization options, allowing you to adjust colors, fonts, and layouts to align with your brand identity.
Q2: Are Shopify contact forms mobile-friendly?
A: Absolutely. Shopify ensures that contact forms are responsive and optimized for various devices, providing a seamless user experience across desktop and mobile platforms.
Q3: How can I manage and respond to form submissions efficiently?
A: Utilize Shopify's integrated apps or email notifications to streamline form submission management. Automated responses and instant notifications help you respond promptly to customer inquiries.
0 notes
Text
10 Elementor Template Kits That Will Save You Hours And Boost Conversions!
Are you tired of spending countless hours designing your website from scratch? Do you wish you had a way to create a beautiful and high-converting website in a fraction of the time?
If so, then Elementor template kits are the perfect solution for you! Elementor is a powerful WordPress page builder that allows you to create stunning websites without any coding knowledge. And Elementor template kits are pre-designed templates that you can easily import into your Elementor project.
In this article, we will share 10 Elementor template kits that will save you hours of design time and help you boost your website's conversions.
1. Essential Marketing Kit
This all-in-one kit includes everything you need to create a high-converting marketing website, including landing pages, product pages, and contact forms.
2. Law Firm Kit
The Law Firm Kit is perfect for lawyers and attorneys who want to create a professional and trustworthy website. This kit includes templates for your homepage, about us page, practice areas pages, and more.
3. Creative Agency Kit
Showcase your creativity and impress your clients with the Creative Agency Kit. This kit includes templates for your portfolio, services page, team page, and contact form.
4. Consulting Kit
The Consulting Kit is perfect for consultants, coaches, and freelancers who want to establish themselves as experts in their field. This kit includes templates for your homepage, about us page, services page, and case studies page.
5. E-commerce Kit
Take your online store to the next level with the E-commerce Kit. This kit includes templates for your product pages, category pages, shopping cart, and checkout page.
6. App Landing Page Kit
Generate buzz for your new app with the App Landing Page Kit. This kit includes a stunning template to showcase your app's features and benefits, and capture leads.
7. Restaurant Kit
Make your restaurant's website mouth-watering with the Restaurant Kit. This kit includes templates for your menu, reservations page, location page, and gallery.
8. Fitness Studio Kit
Get people moving with the Fitness Studio Kit. This kit includes templates for your class schedule, pricing page, testimonials page, and contact form.
9. Spa Kit
Create a relaxing and inviting website for your spa with the Spa Kit. This kit includes templates for your services page, about us page, gallery, and booking form.
10. Online Course Kit
Share your knowledge and expertise with the world with the Online Course Kit. This kit includes templates for your course landing page, curriculum page, pricing page, and student portal.
Ready to boost your conversions and save time?
Head over to Garudeya.com and explore their collection of Elementor Template Kits today!
With their wide variety of templates to choose from and Affordable prices, you're sure to find the perfect kit to create a beautiful and high-converting website for your business. So what are you waiting for? Start creating your dream website today with Elementor template kits from Garudeya.com
#elementor#wordpress website#web hosting#wordpress development#web designing#website optimization#wordpress#website#ecommerce#template kit#elementor pro#elementor template kit#websites#site
1 note
·
View note
Text
SiteFlow AI Review – Create a Website In Unlimited Niches In Just Few Seconds
Welcome to my SiteFlow AI Review Post. This is a real user-based SiteFlow AI review where I will focus on the features, upgrades, demo, pricing and bonus, how SiteFlow AI can help you, and my opinion. Transforms Your Ideas, Keywords And Voice Command Prompts Into Stunning Websites In Any Niche & Language In Under 60 Seconds!

>> Click Here to Get SiteFlow AI + My $20000 Special Bonus Bundle to Boost Up Your Earnings More Traffic, Leads & Commissions >>
SiteFlow AI Review: What Is It?
SiteFlow AI is a groundbreaking website builder that leverages the power of artificial intelligence to simplify the website creation process. Unlike traditional website builders that require coding knowledge or design expertise, SiteFlow AI empowers users of all skill levels to build stunning and functional websites in minutes.
With its user-friendly interface, drag-and-drop editor, built-in SEO tools, and e-commerce functionalities, SiteFlow AI offers a comprehensive solution for building professional websites with ease. Whether you’re an entrepreneur, blogger, or simply looking to establish an online presence, SiteFlow AI holds the potential to revolutionize your website creation experience.

SiteFlow AI Review: Overview
Creator: Akshat Gupta
Product: SiteFlow AI
Date Of Launch: 2024-Feb-17
Time Of Launch: 11:00 EST
Front-End Price: $17
Official Website: Click Here
Product Type: Software (Online)
Support: Effective Response
Discount: >> Get The Best Discount Right Now <<
Coupon Code: “SITEFLOW3” $3 Off
Recommended: Highly Recommended
Skill Level Required: All Levels
Refund: YES, 30 Days Money-Back Guarantee
SiteFlow AI Review: Key Features
Create Hack-Proof AI Websites Using Your Voice Command Prompts & Keywords.
Transform Your Idea Into World-Class Sites In Any Niche & Language In 60 Secs.
Built-In Anti-Threat Cybersecurity Protection Technology: Secures Your Websites From Cyber Attacks & Malware.
Add Unlimited Custom Domains & Subdomains Without Any Restrictions.
Unlimited Website Hosting On Ultra-Blazing Fast Servers With 100% Uptime Guarantee.
Done-For-You 1000+ Jaw-Dropping Website Templates Across Various Categories.
Done-For-You 250+ Stylish Fonts & Text Styles For Better Visual Experience.
Done-For-You 500+ Stunning Theme Templates.
1-Click Ai Content Generation: Create & Add Jaw-Dropping AI-generated images, Videos, Music, And More To Your Websites!
Built-In Copywriter: Generate High-Converting Sales Copies, Blog Posts, And Articles For Your Websites.
Built-In 5 Million+ Ai Stock Library Lets You Search & Discover Your Desired Content.
Add Mind-Blowing Animations To Your Website Elements for Better Engagement.
Built In 1-Click Image & Video Optimisation Tool — 10X Your Website Loading Speed.
Collect Unlimited Leads With Mind-Blowing Forms & Popups.
AI-Driven SEO Tools — Rank Your Websites On The First Page Of Google, Yahoo & Bing.
Built-In AI Client Finder Tech — Find Potential Clients That Need Website & Threat Protection Services & Charge Any Amount.
Built-In Autoresponder — Send Unlimited Emails To Your Website Customers.
Built-In Automatic Device Responsiveness.
Built-In Analytics Tool Lets You Track The Website Performance.
Built-in free SSL certificate Integration For Secure Data Transmission.
Ai-Driven Live Chat Support For Real-Time Assistance.
Fire All Your Expensive Tools & Services.
Say Goodbye To Monthly Fees.
Commercial License Included — Create & Sell as Many Assets As You Like To Your Clients.
Newbie Friendly, Easy-To-Use Dashboard.
Iron-clad 30-Day Money-Back Guarantee.
>> Click Here to Get SiteFlow AI + My $20000 Special Bonus Bundle to Boost Up Your Earnings More Traffic, Leads & Commissions >>
SiteFlow AI Review: How Does It Work?

SiteFlow AI Review: Cab Do For You
One-time investment gives you access to this fully Drag-N-Drop AI Website Builder.
Craft Stunning AI websites in Many Niches.
Generate Websites In Any Language.
Add AI Assets To Your Websites Like Images, Videos.
Send Unlimited Messages To Your Websites Subscribers.
Stop paying third-party Website builders.
Create Websites in just 2 minutes flat.
Create & Upload Websites on 20+ different website stores.
Start your very own Websites Agency.
Built-in drag-drop features.
Built-in stunning 1000+ different templates.
Get started now, no prior tech skills are needed.
30 days money-back guarantee.
89% Early bird discount available.
SiteFlow AI Review: Verify User Feedback

SiteFlow AI Review: Who Should Use It?
Website Owners
eCommerce Store Owners
Bloggers
Freelancers
Agencies
Small Business Owners
Content Creators
Influencers
Translators
YouTubers
Advertisers
Podcasters
Marketers
Coaches
Vloggers
Authors
SiteFlow AI Review: OTO And Pricing
Front End Price: SiteFlow AI ($17)
OTO 1: Unlimited ($67)
OTO 2: SiteFlow AI DFY ($197)
OTO 3: Web Hosting Edition ($67)
OTO 4: Templates Gallery ($37)
OTO 5: SiteFlow AI Funnels Edition ($297)
OTO 6: DFY Traffic ($47)
OTO 7: 1st Page Ranker ($47)
OTO 8: Web Secure Edition ($37)
OTO 9: Agency ($67)
OTO 10: Reseller ($97)
OTO 11: $150K Live Workshop ($27)
OTO 12: Whitelabel Edition ($197)
>> Click Here to Get SiteFlow AI + My $20000 Special Bonus Bundle to Boost Up Your Earnings More Traffic, Leads & Commissions >>
SiteFlow AI Review: My Special Bonus Bundle
SiteFlow AI Review: Money Back Guarantee
You’re In Safe Hands With Our 100% Risk-FREE, Iron-Clad 30 Day Money Back Guarantee!
Our policy is that we will not accept your money if you buy SiteFlow AI and believe you are not receiving value for your money. Our goal is to produce a high-quality product with zero dissatisfied clients. Also, we don’t deserve your money if we fail in any manner. Let us know within 30 days if we don’t live up to your expectations, and you’ll get a complete refund. Heck, we’ll even send you some extra software as a kind gesture to help you grow your business and sales like never before. In any case, you only benefit.
SiteFlow AI Review: Conclusion
SiteFlow AI stands as a revolutionary force in website creation, leveraging AI to empower users of all technical backgrounds. Its intuitive interface, extensive features, and AI-powered content generation capabilities offer a compelling solution for building professional websites quickly and efficiently. However, potential limitations in customization and pricing require careful consideration before making a decision. By thoroughly evaluating its features, customer support, integrations, and free trial, you can determine if SiteFlow AI aligns with your specific needs and empowers you to establish a strong online presence.
Frequently Asked Questions (FAQs)
Q. What exactly is SiteFlow AI?
A Revolutionary 2024 AI Tech That Transforms Your Ideas, Keywords, And Voice Command Prompts Into Stunning Websites In Any Niche & Language In Under 60 Seconds!
Q. Do I need some prior skills or experience to get started?
SiteFlow AI is 100% newbie-friendly with an easy-to-use dashboard.
Q. What happens if I don’t see results?
We’ve got you covered. If you don’t see your desired results with SiteFlow AI just let us know within the next 30 days and we’ll refund you every penny.
Q. What if I get confused along the way?
Don’t worry we have exclusive detailed video training for you that shows all the required steps.
Q. What if I get confused along the way?
Don’t worry we have exclusive detailed video training for you that shows all the required steps.
Q. Is This Compatible with both PC, Mac, Android, And iOS?
It works on any device.
Q. How Do I Lock-In My Discount?
Click the button below to get the SiteFlow AI at the lowest price.
>> Click Here to Get SiteFlow AI + My $20000 Special Bonus Bundle to Boost Up Your Earnings More Traffic, Leads & Commissions >>
See my other reviews: InsightHub AI Review, Nova App Review, Anonymous AI Review, WebBookAI Studio Review, VoiceGenesis AI Review, Visionize Ai Review, Stealth AI Review, Mail Mate Review.
Thank for reading my SiteFlow AI Review till the end. Hope it will help you to make purchase decision perfectly.
Note: Yes, this is a paid tool, however the one-time fee is $17 for lifetime
#SiteFlow AI#SiteFlow AI Upgrades#SiteFlow AI Overview#SiteFlow AI Review#SiteFlow AI Features#SiteFlow AI Works#What Is SiteFlow AI#Buy SiteFlow AI#SiteFlow AI Price#SiteFlow AI Demo#SiteFlow AI Discount#SiteFlow AI Honest Review#SiteFlow AI Pricing#SiteFlow AI FE#SiteFlow AI Software Review#SiteFlow AI Pros#SiteFlow AI OTO#SiteFlow AI Preview#SiteFlow AI Scam#SiteFlow AI Software#Get SiteFlow AI#SiteFlow AI Reviews#Purchase SiteFlow AI#SiteFlow AI legal#SiteFlow AI By Akshat Gupta#Artificial Intelligence#AI#SiteFlow AI Benefits#SiteFlow AI Bonus#SiteFlow AI Bonuses
0 notes
Text
IBM Watson AI To Enhance Grammy Awards Ceremony 2023

IBM Watsonx GRAMMY Awards
How the Recording Academy improves the Grammy Awards fan experience with IBM Watsonx
The Recording Academy aims to preserve music’s permanent place in our society by recognizing excellence in the recording arts and sciences via the GRAMMYs. IBM will be there once again as the biggest recorded artists in the world walk the red carpet at the 66th Annual GRAMMY Awards.
Like other renowned cultural sports and entertainment events, the GRAMMYs faced a similar commercial dilemma this year, in today’s increasingly fragmented media world, producing cultural impact entails delivering appealing content across numerous digital platforms. It’s a difficult assignment to honor the accomplishments and life stories of over a thousand candidates in around 100 categories.
IBM collaborated to create GRAMMY Awards
For this reason, the Recording Academy and IBM collaborated to create a content supply chain that would allow for simple review and creative flexibility while saving hundreds of hours of research, writing, and production time. Utilizing IBM Watsonx’s creative powers, the system offers fascinating insights into the personal histories and professional achievements of well-known GRAMMY nominees.
A content engine powered by generative AI and reliable data
The watsonx.ai component of watsonx is home to a potent large language model (LLM), which is used in this year’s solution. The model was trained using trusted, private data from the Recording Academy, which included brand rules and artist bios and tales from the GRAMMYs website and archives.
The Recording Academy may create a broad range of material using natural language prompts using an AI material Builder dashboard. This content can subsequently be posted on social media or uploaded to the Grammy.com website.
Automating social asset generation using intelligence in GRAMMY Awards
In order to engage with fans and publicize the event throughout the run-up to the GRAMMY Awards and on the night of the show, the Recording Academy had to increase the scope of their social media presence. However, content creation was very manual and time-consuming up to this point. Watsonx AI Stories is the answer. The editorial staff can quickly and simply build rich materials to be shared in Facebook reels, Instagram stories, and Tik Tok videos using the AI Content Builder dashboard.
Editorial team members may choose templates including nominees or categories with different layouts and branding using the AI Stories interface. These templates use authorized pictures from the Recording Academy’s asset bank. Next, they decide which artist or award category to highlight, the content of the piece (biographical details, GRAMMY accomplishments, charitable causes, etc.) and which subjects not to include in the final product.
When a user hits the “generate” button, the true magic begins. AI stories are written using headlines, bullet points, one-liners, questions, and calls to action as the wrap-up elements. Any of these outputs may be readily modified manually and regenerated to provide other phrasings. After selecting “publish,” the text is converted into a video file and made ready for download and publication.
Improving the online experience in real time on GRAMMY Awards presentation
Beyond the network broadcast, the GRAMMY Awards presentation is an impressive spectacle. Global fans will also be watching a range of livestreams on grammy.com, including as the Premiere Ceremony (where most category winners are announced),GRAMMY Awards Live From The Red Carpet, backstage moments captured behind the scenes, celebrities pulling up in a “limo cam,” and more.
This year, underneath the livestream, there will be a widget called “AI Stories with IBM Watsonx” that will provide educational textual material about the artists and categories that are being recognized. The editorial team uses the same interface as for creating social assets to produce these insights via the AI Content Builder dashboard. The widget’s default display consists of brief headlines and interesting facts, but users may click through to learn more.
Tyler Sidell, Technical Program Director of IBM Sports and Entertainment Partnerships, adds, “This year the widget lets fans dive much deeper and read more about their favorites. In previous years, they provided one or two insights per artist.”
The benefit of IBM: Skilled direction and execution
There’s more to responsibly using a game-changing technology like generative AI than merely typing some code. Complete proficiency is needed, from preparation to implementation. over this reason, the Recording Academy and IBM Consulting have been working together over the last seven years to use the IBM Garage Methodology to kickstart technological projects.
Working with the customer, this outcome-first, human-centered methodology is used to design, implement, and manage processes. The procedure fosters techniques, tools, and talent to quickly translate ideas into company value while also accelerating digital transformation and facilitating innovation.
IBM Consulting worked with a number of Recording Academy stakeholders throughout the GRAMMY preparation process, often meeting with teams from the digital, marketing, and IT departments. Additionally, IBM will be present on-site on the big night as a production and editing team extension.
With the help of IBM Consulting, IBM Garage, IBM Watsonx, and the Recording Academy digital team, over 5 million music lovers across the globe are treated to an immersive digital experience.
Read more on Govindhtech.com
0 notes
Text
Website for pet shop

Empower Your Business: A Step-by-Step Guide to Get a Free Website for Your Shop and Sell Local Products Online
In today's digital era, having a strong online presence is crucial for the success of any business, including local shops. With the growing trend of e-commerce, creating a website for your shop not only expands your reach but also allows you to sell your products online. In this comprehensive guide, we'll walk you through the process of getting a free website for your shop, making it live, and effectively selling your local products online.
1. Getting Started: Choosing the Right Platform
To get a free website for your shop, start by choosing a reliable website-building platform. Platforms like Wix, Weebly, and WordPress offer user-friendly interfaces, making it easy for even beginners to create a professional-looking website. Sign up for an account and explore the available features.
2. Selecting a Domain: Your Shop's Digital Address
During the sign-up process, you'll need to choose a domain name for your website. This is your digital address, and it should ideally reflect your shop's name or the type of products you sell. Keep it short, memorable, and easy to spell. Most website builders also offer free domain options.
3. Designing Your Shop's Digital Storefront
Now comes the exciting part – designing your website. Choose a template that aligns with your shop's aesthetics and branding. Customize the layout, colors, and fonts to create a cohesive and visually appealing digital storefront. Upload high-quality images of your products and create engaging content to capture visitors' attention.
4. Adding Product Pages: Showcase Your Local Products
To make a website for your shop truly effective, create dedicated product pages. Organize your products into categories and provide detailed descriptions, pricing information, and captivating images. Make it easy for visitors to browse through your offerings and find what they're looking for.
5. Setting Up Your Online Store: Turning Visitors into Customers
If your goal is to sell local products online, you need to set up an online store on your website. Most website builders offer built-in e-commerce features that allow you to add a shopping cart, secure checkout options, and various payment gateways. Ensure a smooth and secure online shopping experience for your customers.
6. Making Your Website Live: Ready, Set, Launch!
Once you've designed your website and added your products, it's time to make it live. Follow the platform's instructions to publish your site. This may involve connecting your domain, setting up security measures, and choosing whether you want your site to be public or private. With a few clicks, your shop is now accessible to the world.
7. Promoting Your Online Store: Spread the Word
Simply having a website is not enough – you need to drive traffic to it. Leverage social media platforms, email marketing, and other digital marketing strategies to promote your online store. Consider running promotions, discounts, or exclusive online offers to entice customers.
8. Selling Local: Connecting with Your Community
To sell local shop products online successfully, emphasize your connection to the local community. Highlight the uniqueness of your products, share stories about your shop, and engage with your customers through social media. Consider offering local delivery options or curbside pickup to enhance the convenience for your community.
9. Making Your Shop Website Live: Ensuring Smooth Operations
To make your shop website live is not just a one-time event – it's an ongoing process. Regularly update your website with new products, promotions, and any changes in your business. Keep an eye on website analytics to understand visitor behavior and identify areas for improvement.
10. Embracing E-commerce Opportunities: Additional Features
Explore additional features offered by your chosen website-building platform. This may include email marketing integration, analytics tools, and customer relationship management (CRM) capabilities. These features can help you streamline your online business operations and enhance customer experience.
Conclusion: A Thriving Digital Presence for Your Local Shop
In conclusion, getting a free website for your shop and selling local products online is a powerful way to expand your business. Follow the steps outlined in this guide to create a compelling digital storefront, connect with your community, and tap into the vast opportunities those e-commerce offers. With a well-designed website and effective online strategies, your local shop can thrive in the digital marketplace.
Visit here: https://ownezzy.com/
0 notes
Text
How to create a website with Odoo?
Odoo, a comprehensive and versatile open-source business management software, is a leading solution for organizations seeking to streamline their operations, enhance efficiency, and optimize overall productivity.
With its modular structure, Odoo offers a vast array of integrated applications spanning across various corporate functions, such as customer relationship management (CRM), sales, inventory management, human resources, finance, and more. Its user-friendly interface, customizable nature, and robust features make it a suitable choice for businesses of all sizes, from small enterprises to large corporations.
Thus, by centralizing key processes and fostering seamless communication, Odoo empowers companies to achieve greater cohesion, data-driven decision-making, and sustainable growth.
In this article, we will delve into the step-by-step process of creating a website using Odoo, ensuring an engaging online presence for your brand.
Understanding Odoo’s Website Builder
Odoo’s website builder is an intuitive tool that allows users to create and customize websites without the need for extensive coding knowledge. One of its defining features is its user-friendly drag-and-drop interface.
Such an interface permits users to easily add and arrange various elements on their website pages, such as text blocks, images, videos, forms, buttons, and more. This eliminates the need for coding skills, making it accessible to a wider range of users.
Setting Up Odoo’s Environment
Setting up Odoo’s environment involves selecting a suitable server or hosting provider, in view of factors like performance and scalability. Next, you have to choose the version of Odoo that aligns with your business needs.
Subsequently, install the required dependencies, such as Python and PostgreSQL. Also, configure your server's firewall settings and domain to enable secure access, and obtain an SSL certificate for encryption.
Once these preparations are complete, proceed with downloading and installing Odoo, creating a PostgreSQL database, and configuring the Odoo configuration file with essential parameters like database connection details and security settings.
Accessing the Website Builder
Access the Odoo’s dashboard by entering the appropriate URL in your web browser and logging in with your credentials.
In the Odoo’s dashboard, find and select the "Website Builder" app. This is where you can create and manage your website using the website builder.
Depending on your requirements, you can either create a new website or edit an existing one. If creating a new website, you'll likely be guided through a setup process where you can choose a template, customize the design, and configure the website's settings.
Choosing a theme
Odoo provides a variety of pre-designed website themes catering to different industries and styles.
Select a theme that aligns with your brand identity and business objectives. The themes are customizable, so you can tweak colors, fonts, and layouts to match your vision.
Adding Pages and Content
Start building your website by adding the required pages. Common pages include Home, About Us, Services, Products, Contact, and Blogs.
Also, use the drag-and-drop editor to arrange page elements such as text, images, videos, and buttons. You can customize each element to suit your branding.
Integrating Ecommerce
If your website requires ecommerce functionality, you can seamlessly incorporate Odoo’s integrated ecommerce module.
It allows you to set up product categories, listings, and payment gateways to enable online shopping for your customers.
Enriching with Widgets
Odoo’s website builder comes with a range of widgets that enhance the user experience. These include image sliders, call-to-action (CTA) buttons, social media feeds, forms, and more.
Utilize these widgets strategically in your website to engage visitors and encourage interactions.
Search Engine Optimization (SEO)
Optimizing your website in search engines for vital for visibility. Odoo allows you to customize meta titles, description, and URLs for each page.
Therefore, ensure your content includes relevant keywords and follows best practices for on-page SEO.
Mobile responsiveness
mobile responsiveness is crucial With a growing number of users accessing websites through mobile devices.
Odoo’s website builder automatically adjusts your site’s layout to provide an optimal experience on different screen sizes.
Testing and Preview
Before publishing your website, thoroughly test its functionality and design.
Odoo provides a preview mode that allows you to view your website as visitors would see it. You can make necessary adjustments based on your testing results.
Going Live
Once you are satisfied with the design, content, and functionality of your website, you can publish it on the web.
Odoo offers seamless integration with hosting services, making the process of going live relatively easy.
Wrap Up
Odoo stands as a versatile and comprehensive business management solution that offers a wide range of integrated applications. By streamlining processes, enhancing collaboration, and centralizing data, Odoo empowers organizations to optimize their operations and make informed decisions.
As Odoo continues to evolve, its commitment towards innovation and user satisfaction solidifies its position as a leading choice for businesses to manage their resources and drive growth.
So, embrace the capabilities of Odoo and embark on your journey towards a captivating digital presence.
Visit us for odoo expert guide
0 notes
Text
Best Elementor WordPress Plugins
In today's fast-paced digital landscape, creating a visually stunning and highly functional website is essential for businesses and individuals alike. WordPress has long been a popular platform for building websites, and the Elementor page builder plugin has gained tremendous popularity for its ease of use and versatility. To make the most of Elementor's potential, you need the right set of plugins that can enhance its capabilities. In this article, we'll explore the best Elementor WordPress plugins to take your website design to the next level.
Introduction
Elementor is a drag-and-drop page builder that has revolutionized website design for WordPress users. However, to unlock its full potential, you need to complement it with the right plugins. In this article, we'll explore the best Elementor WordPress plugins across various categories to help you build a website that is not only visually appealing but also highly functional.
Get Any Elementor WordPress Plugins for Free
Essential Elementor Plugins
Elementor Pro
Elementor Pro is the premium version of Elementor and a must-have for serious web designers. It offers advanced features like theme builder, popup builder, and dynamic content capabilities. With Elementor Pro, you can design your entire website, including headers and footers, without any coding skills.
Essential Addons for Elementor
Essential Addons for Elementor is a collection of 80+ elements and extensions that supercharge your Elementor page building experience. It includes widgets like post
grids, pricing tables, and interactive banners, making it a versatile addition to your toolkit.
Happy Addons for Elementor
Happy Addons for Elementor is known for its unique features such as cross-domain copy-paste and live copy. It also provides creative widgets like timeline, skill bars, and data tables, making your website more engaging and interactive.
Design Enhancement Plugins
Ultimate Addons for Elementor
Ultimate Addons for Elementor comes with a range of design enhancements and content widgets that can take your website to the next level. It includes a dual-color headline, price list, and advanced heading widgets.
Dynamic Content for Elementor
Dynamic Content for Elementor allows you to create templates with dynamic content that automatically updates when you change the source content. It's a game-changer for creating post grids, archives, and more.
Performance Optimization Plugins
WP Rocket
WP Rocket is a premium caching plugin that can significantly boost your website's performance. It offers page caching, database optimization, and lazy loading, ensuring your site loads quickly and efficiently.
Smush Image Compression and Optimization
Smush is a top-notch image compression and optimization plugin that helps in reducing the size of images without compromising quality. Faster loading images can improve user experience and SEO rankings.
SEO-Focused Plugins
Rank Math SEO
Rank Math SEO is a comprehensive SEO plugin that offers features like advanced schema support, SEO analysis, and an easy-to-use interface. It's a powerful tool to improve your website's search engine rankings.
SEOPress
SEOPress is another SEO plugin that covers all the essential aspects of on-page SEO. It provides features like XML sitemaps, meta titles, and descriptions, ensuring your website is search engine friendly.
E-commerce Plugins
WooCommerce
WooCommerce is the go-to plugin for creating online stores. It seamlessly integrates with Elementor, allowing you to design product pages and manage your online shop with ease.
WooLentor - WooCommerce Elementor Addons
WooLentor enhances your WooCommerce store's capabilities by offering additional widgets and customization options. You can design unique product pages and category pages effortlessly.
Customization and Styling Plugins
Customify
Customify is a versatile customization plugin that allows you to tweak the appearance of your website. It offers advanced typography options, color settings, and layout controls.
AnyWhere Elementor
AnyWhere Elementor is perfect for creating global templates for headers, footers, and sidebars. It ensures a consistent look and feel across your website.
Analytics and Reporting Plugins
MonsterInsights
MonsterInsights is a user-friendly Google Analytics plugin that provides essential insights about your website's performance. You can track user behavior, monitor traffic, and make data-driven decisions.
Analytify
Analytify simplifies Google Analytics data by presenting it directly in your WordPress dashboard. It's an excellent choice for those who want an easy-to-understand overview of their website's performance.
Security Plugins
Wordfence Security
Wordfence Security is a robust security plugin that safeguards your website from malware, hacking attempts, and other security threats. It includes a firewall, login security, and malware scanning.
Sucuri Security
Sucuri Security is a cloud-based security solution that offers real-time security alerts, website monitoring, and a web application firewall. It's a proactive approach to website security.
Social Media Plugins
Social Snap
Social Snap is a comprehensive social sharing plugin that lets you add attractive social sharing buttons to your content. It includes features like click-to-tweet, social login, and social auto-posting.
Easy Social Share Buttons
Easy Social Share Buttons provides a wide range of options for social sharing, follow, and subscribe. It also offers social proof notifications and social media feeds.
Backup and Restore Plugins
UpdraftPlus
UpdraftPlus is a reliable backup and restore plugin that automates the process of safeguarding your website. It offers scheduled backups and easy restoration options.
BlogVault
BlogVault is a premium backup and security solution that also provides website staging and migration features. It's a comprehensive tool for website management.
Contact Form Plugins
WPForms
WPForms is a user-friendly contact form plugin that allows you to create custom forms for your website. It includes features like drag-and-drop builder, email notifications, and spam protection.
Happy Forms
Happy Forms is a free form builder that offers a straightforward way to create and manage forms.
Get Any Elementor WordPress Plugins for Free
1 note
·
View note
Text
How do I make a free makeup portfolio?

Creating a free Makeup Academy in Chandigarh portfolio can be done online without the need for significant financial investment. Here are steps to help you make a free makeup portfolio:
Choose a Free Website Builder
Many website builders offer free plans that allow you to create and host your portfolio. Popular options include Wix, Weebly, WordPress.com, Blogger, and Behance. Choose one that suits your needs and is user-friendly.
Sign Up for an Account
Register for an account on your chosen website builder platform if you don't already have one. Follow the platform's instructions to create your account.
Select a Template
Browse the available templates and choose one that aligns with your style and showcases your makeup work effectively. Most website builders offer a variety of templates, and you can often customize them to your liking.
Customize Your Portfolio
Use the template as a starting point and customize it to create your makeup portfolio. Add your logo, change colors to match your brand, and personalize the layout. Typically, these website builders offer drag-and-drop editors, making it easy to add and arrange content.
Upload High-Quality Photos
Gather high-quality photos of your makeup looks. Ensure that the images are well-lit, clear, and showcase your skills. Organize them into different categories or sections, such as "Bridal," "Editorial," or "Special Effects."
Write Descriptions and Captions
For each makeup look or category, write captions or descriptions that provide context and details about the makeup application, products used, and any unique aspects of the look.
Create a Contact Page
Include a contact page with your email address or a contact form for potential clients to reach out to you. Make it easy for visitors to inquire about your services.
Consider a Blog Section
If you enjoy writing about makeup, consider adding a blog section to your portfolio where you can share makeup tips, tutorials, and insights. This can help engage your audience and showcase your expertise.
0 notes
Text
How to Customize Your WordPress Theme with Elementor 🎨
WordPress is the most popular and powerful website platform in the world, powering over 40% of all websites on the internet. WordPress offers many benefits for website owners, such as:
Free and easy to use
SEO friendly
Scalable and secure
Flexible and versatile
Compatible and integrable
However, WordPress also has some limitations when it comes to customizing your website’s design and appearance. WordPress themes are collections of templates that define the visual aspect of your website, but they are not always easy to modify or customize according to your preferences.
That’s where Elementor comes in. Elementor is a powerful and popular WordPress plugin that lets you create beautiful and dynamic websites with drag-and-drop tools and widgets. Elementor gives you full control over your website’s design, layout, content, and functionality.
With Elementor, you can customize any WordPress theme without coding or hiring a developer. You can change colors, fonts, backgrounds, images, buttons, forms, and much more. You can also create your own templates and sections and reuse them across your website.
In this article, I will show you how to customize your WordPress theme with Elementor in four easy steps:
1. Install Elementor
The first step to customize your WordPress theme with Elementor is to install Elementor on your WordPress website. Elementor is a free plugin that you can download from the WordPress repository or from the Elementor website.
To install Elementor, go to your WordPress dashboard and click on “Plugins” > “Add New”. Search for “Elementor” and click on the “Install Now” button. Then, activate the plugin.
Elementor also has a premium version that offers more features and widgets, such as:
Theme Builder - Create custom headers, footers, single posts, archives, etc.
Popup Builder - Create popups for lead generation, announcements, promotions, etc.
WooCommerce Builder - Create custom product pages, shop pages, cart pages, etc.
Motion Effects - Add animations and interactions to your website elements
Dynamic Content - Add dynamic data from custom fields, ACF, Toolset, etc.
Form Builder - Create advanced forms with integrations and conditional logic
Custom Fonts - Upload and use any font on your website
Support from Elementor experts
The premium version costs $49 per year for one site.
2. Edit a page with Elementor
The second step to customize your WordPress theme with Elementor is to edit a page with Elementor. You can edit any existing page or create a new one.
To edit a page with Elementor, go to your WordPress dashboard and click on “Pages” > “All Pages”. Hover over the page title and click on the “Edit with Elementor” link.
Alternatively, you can create a new page by clicking on “Pages” > “Add New”. Enter a page title and click on the “Edit with Elementor” button.
This will open the Elementor editor where you can start customizing your page.
3. Insert an Elementor template
The third step to customize your WordPress theme with Elementor is to insert an Elementor template. An Elementor template is a pre-designed layout that you can use as a starting point for your page.
Elementor offers hundreds of templates for different niches and purposes, such as:
Landing pages
Homepages
About pages
Contact pages
Services pages
Portfolio pages
Blog pages
E-commerce pages
And more!
To insert an Elementor template, click on the folder icon at the bottom of the Elementor panel. This will open the template library where you can browse and search for templates.
You can filter templates by category or keyword or use the tabs to switch between free and premium templates.
To preview a template, hover over it and click on the magnifying glass icon. To insert a template, hover over it and click on the “Insert” button.
This will add the template to your page where you can start editing it.
4. Customize the template
The fourth and final step to customize your WordPress theme with Elementor is to customize the template. You can change anything on the template according to your needs and preferences.
To customize the template, you can use two main tools: widgets and settings.
Widgets are elements that you can add to your page, such as:
Text
Image
Button
Icon
Heading
Video
Spacer
Divider
Counter
Testimonial
And more!
To add a widget, drag and drop it from the Elementor panel to the page. You can also search for widgets by name or use the categories to filter them.
To edit a widget, click on it and use the options in the Elementor panel. You can change the content, style, and advanced settings of each widget.
Settings are options that you can use to customize your page as a whole, such as:
Layout - Change the page width, height, margin, padding, etc.
Style - Change the page background, color, typography, etc.
Advanced - Change the page responsiveness, custom CSS, motion effects, etc.
To access the settings, click on the gear icon at the bottom of the Elementor panel. You can also access the settings of each section and column by clicking on their icons.
When you are done customizing your page, click on the “Update” button at the bottom of the Elementor panel to save your changes.
You can also preview your page by clicking on the “Preview Changes” button or exit the Elementor editor by clicking on the “Exit to Dashboard” button.
Conclusion
Elementor is a powerful and easy way to customize your WordPress theme without coding or hiring a developer. You can create stunning and unique websites with Elementor by using templates and widgets and changing settings.
By doing so, you can improve your website’s design, usability, and functionality and provide a better user experience for your visitors.
If you found this article helpful, please share it with your friends and colleagues. And if you have any questions or feedback, please leave a comment below. I would love to hear from you. 💬
#WordPress #Elementor #Theme #Customize #Website
0 notes
Text
DesignSuite AI Review - Full OTO Details + Bonuses

DesignSuite AI Review – Product Overview
Product Name: Design Suite Al
Creator: Firas Alameh
Release Date: September 17, 2023
Release Time: 11:00 AM EDT
Price: $47
Product Category: Niche Software
Customer Support: Exceptional Support
Guarantee: 30-Day Money-Back Guarantee
Official Website: Click Here

DesignSuite AI Review – What is DesignSuite AI?
Design Suite Al represents a revolutionary leap in digital content creation, harnessing the power of artificial intelligence to redefine the way we produce captivating informational products like eBooks, reports, and flipbooks. This cloud-based platform introduces an array of cutting-edge features designed to cater to users across diverse niches, facilitating the generation of top-tier content in record time.
Revealed: The Secret “AI-Powered”(AI-Enhanced Performance) Digital Content Creation Suite That Crafts Jaw-Dropping Info Products – Ebooks, Reports, & Flipbooks From Just ONE Keyword or Phrase… and in Record Time!
It’s not just another tool, it’s a revolution in content creation. DesignSuiteAI is a game-changing, cloud-based “AI-Powered” Design & Content Creation Suite that crafts mesmerizing eBooks, interactive flipbooks, info guides, and comprehensive reports.
Whether your interest lies in health, technology, finance, or crafts, DesignSuiteAI crafts the perfect eBook for you… in record time.
Our revolutionary Dual content creation and design engines are at the cutting edge of technology, built for the smart 21st-century entrepreneur, ensuring unmatched speed and quality.
How Does DesignSuite AI Work?
STEP 1
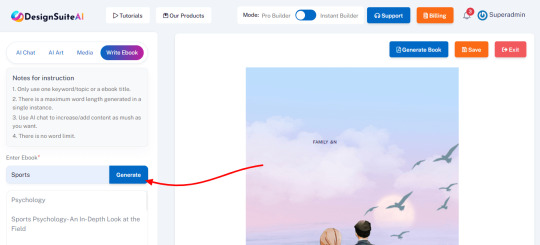
STEP 2
STEP 3
STEP 4
Features and Benefits Of DesignSuite AI
Features
Dual Builder Engines:
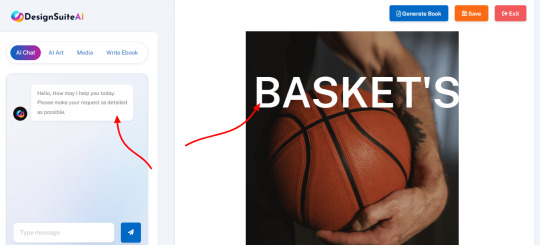
DesignSuiteAI integrates two powerhouse engines, the InstantBuilder and ProBuilder. Both are intuitively designed to make the creation of ebooks, flipbooks, and reports a seamless experience. Whether you’re looking for instant results with a single keyword or wish to take full control of your design process, these engines have got you covered.
Chat-based Chat GPT AI Writer:
Interact in real-time with an advanced AI writer, making content creation feel like a conversation.
Table of Contents:
Automatically generate a structured and clickable table of contents for easy navigation in your e-books.
Page Numbering:
Ensure every page is clearly labeled for swift referencing.
Built-In e-book Editor:
Seamless in-app editing capability lets you make changes and tweaks on-the-fly.
Done For You E-Book:
Jumpstart your content journey with pre-made, professionally crafted e-books tailored for various niches.
E-Cover Designer:
Craft compelling e-covers that grab attention and boost perceived value.
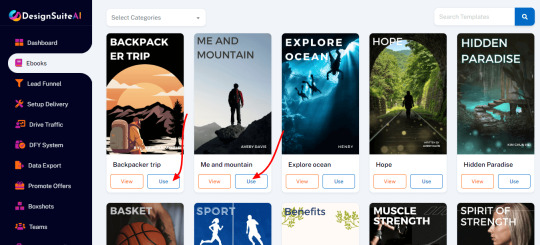
200+ DFY Design Templates:
Get started instantly with over 200 professionally designed, ready-to-use templates.
Unlimited Pages:
No constraints! Create e-books, flip-books and report as comprehensive as you need.
Built-in Image Library:
Access a plethora of quality images right within the app.
Upload Your Own Media:
Personalize your content by uploading custom images, graphics, and more.
Millions of Stock Images:
Elevate your design with a vast collection of premium stock images.
AI Generated Images:
Leverage AI-created imagery tailored to your content.
E-Book Categories:
Organize and sort your e-books into relevant categories for easy management.
Saved E-Books:
Conveniently access and manage your saved projects.
Multiple Publishing Options:
Flexibility to export in various formats including PDF, Word, Presentation, Images, HTML, and XML.
Password Protect Your PDF:
Secure sensitive information by adding password protection.
Add Watermark to Your PDF:
Brand and protect your content with custom watermarks.
Tons of Free PLR Content:
Access a wealth of ready-to-use content across various niches.
Landing Page Templates:
Kickstart your promotions with three unique high-converting landing page templates.
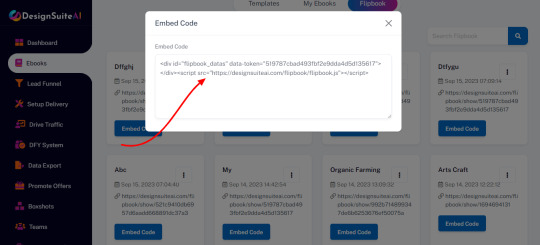
Instant Flip Books Generator:
Transform any PDF, Webpage, or Word Doc into a stunning flip-book in just 30 seconds. Mobile-friendly with HTML5 support.
Security & Permissions:
Ensure your content remains secure and decide who gets access with robust permission settings.
Who Can Use DesignSuite AI?
Content Creators and Bloggers: Ideal for writers, bloggers, and content creators looking to simplify the creation of engaging and informative content. It enables the crafting of eBooks, reports, and flipbooks on a variety of subjects, expanding digital content offerings.
Digital Marketers: A valuable tool for creating visually appealing and informative content for marketing campaigns. From crafting lead magnets to informative guides and product catalogs, Design Suite Al helps marketers effectively engage their audience.
Entrepreneurs and Small Business Owners: Entrepreneurs and small business owners can enhance their online presence and branding by developing digital products. This includes creating authoritative reports within their niche or designing product catalogs to showcase offerings.
Educators and Trainers: Valuable for educators and trainers, Design Suite Al facilitates the creation of educational workbooks, how-to guides, and interactive materials that enhance the learning and training process.
Publishers and Authors: Publishers and authors benefit from the expedited eBook creation process, efficiently generating eBooks and digital magazines for distribution on various platforms.
Digital Agencies: Digital marketing agencies and design firms can expand their service offerings, from content creation to design, without the need for additional hires. Design Suite Al enables a wider range of services for their clients.
Business Consultants: Business consultants can utilize Design Suite Al to craft detailed reports and informational materials, providing valuable insights and recommendations to their clients.
E-learning Professionals: Professionals in the e-learning industry can develop interactive educational materials, workbooks, and course content to enhance the learning experience.
Marketing Agencies: Marketing agencies can offer comprehensive content creation services to their clients, including eBooks, reports, and interactive materials that support their marketing strategies.
Anyone Seeking to Monetize Digital Products: Design Suite Al’s commercial license provides individuals and businesses the opportunity to monetize their creations by selling them to clients or on digital marketplaces, making it a viable income-generating tool.
How Does DesignSuite AI Help You in Your Business?
Efficient Content Creation: DesignSuite AI streamlines the content creation process, enabling you to produce high-quality materials like eBooks, reports, and flipbooks in less time. This efficiency can save you valuable resources and accelerate your content marketing efforts.
Professional Quality: The platform provides access to professionally designed templates, AI-generated imagery, and intuitive editing tools, ensuring that the content you create maintains a high standard of quality. This professionalism can enhance your brand’s credibility and reputation.
Customization: While AI assists in content creation, you retain the ability to customize and tailor the content to align with your unique branding and vision. This customization ensures that the content reflects your brand identity.
Broad Niche Coverage: DesignSuite AI can generate content across various niches, allowing you to cater to a diverse audience and expand your reach into different industries or topics.
Monetization Opportunities: The commercial license provided by DesignSuite AI enables you to monetize your creations by selling them to clients or on digital marketplaces. This can serve as an additional revenue stream for your business.
Engagement and Conversion: The platform’s interactive features, high-quality visuals, and engaging content help keep your audience interested and increase the likelihood of converting leads into customers. This can positively impact your sales and marketing efforts.
Versatility: DesignSuite AI is a versatile tool suitable for various content types, including eBooks, reports, flipbooks, infographics, digital magazines, product catalogs, educational workbooks, travel brochures, and recipe books. This versatility allows you to diversify your content offerings.
User-Friendly: The platform is designed with ease of use in mind, making it accessible even to individuals without technical or design skills. This user-friendliness ensures that your team can quickly adapt to and utilize the tool effectively.
Future-Proof: By harnessing cutting-edge AI technology, you can stay ahead in the content creation landscape, ensuring that your content remains relevant and competitive in an ever-evolving digital world.
DesignSuite AI OTO And My Special Bonuses
Personal License$37 One Time
Create 5 e-books
Create 5 Flipbooks
Collection Creator
10 eBook Templates
5 Niche Template Categories
Commercial License$47 One Time
Create Unlimited e-books
Create Unlimited Flipbooks
Collection Creator
200+ eBook Templates
50+ Niche Template Categories
Create Unlimited Reports
Chat GPT – AI Writer
(Write a complete ebook with just a single keyword)
PRO PDF Tools
Export PDF to – 5 Formats
(Word, PPT, HTML, XML, Flipbook)
BoxShot Designer
AI generated Images
Millions of Royalty Free Images
Watermarks to PDF
Compress PDF
Password Protect eBOOK
Commercial License
Bonus #1 – SiteAnalyzer
Bonus #2 – SiteClone Machine
Bonus #3 – Viral Soci Sharer & Locker
Bonus #4 – WP WebTransformer
Bonus #5 – FaceZon Store Builder
BONUS #1
SiteAnalyzer:
In-depth SEO analyzer, Side-by-side domain’s comparisons, Whitelabeled pdf report generation, Quick and easy installation, Outstanding admin panel dashboard, Multilingual support, Multilingual SEO friendly URLs, Bootstrap responsive front end, Ninja Website Reviewer helps to identify your SEO mistakes and optimize your web page contents for a better search engine ranking. It also offers side-by-side SEO comparisons with your competitors. Analysis reports also be downloaded as PDF file for offline usage.
BONUS #2
SiteClone Machine
SiteClone Machine is a PHP script which allows you to make copies, clones or archives of any website. It does not matter whether this website is made with regular HTML files or was built using a CMS like WordPress or Joomla; SiteClones clones them all!
BONUS #3
Viral Soci Sharer & Locker
This is the only plugin on the market where the share buttons actually work very well. There are 44 share options and You can control how your Sharing Buttons will show up, using a specific Template, horizontal/vertical position, with or without Network name or Social Counts.
BONUS #4
WP WebTransformer
This is the all-in-one WordPress Popup plugin that transforms your website into a lead generation powerhouse. Build your email list, bigger, faster and more targeted than ever before. You can create beautiful pop ups in minutes & start converting your website visitors into subscribers, social followers & customers.
BONUS #5
FaceZon Store Builder
This app will create a new tab “Amazon Store” on the fb fan page to list down your store products!
*Complies with all Facebook terms and conditions
*100% responsive and works on every mobile devices
*Supports multi languages
*Custom headers can be added with store
DesignSuite AI Review – Frequently Asked Questions On DesignSuite AI
Is there a money-back guarantee?
YES! If you are not satisfied for any reason, you can contact us at [email protected] and ask for a refund.
Does This Work On Both Mac & PC?
Yes. DesignSuiteAI is 100% cloud-based and works on any device with an internet connection. You can access this sophisticated technology using any operating software.
How Many Ebooks, Reports or Flipbooks Can I Create?
You can create UNLIMITED ebooks, reports and flipbooks! Never spend money on a designer again.
How Many Templates Are Included?
You get instant access to 200+ stunning templates spread across 50+ popular niche categories to use immediately!
Can I Sell The Ebooks, Reports and Flipbooks I Create With DesignSuiteAI?
YES! You can monetize your creations, offer it as a service to your clients or sell them on marketplaces. However, this is only available with the commercial license.
Is There Any Training Included?
Absolutely, our detailed and step-by-step training videos are available for you and would help you get started instantly & become an expert in no time.
Do You Charge Any Monthly Fees?
DesignSuiteAI is currently available for the LOWEST one-time cost. However, this offer will not last for too long. After which, we will be charging a monthly fee.
What File Types Does It Export?
DesignSuiteAI offers Multiple export options Including: PDF, Word, Presentation, Images, HTML, and XML.
How Do I Get Support?
Our dedicated support team is always available to help with all your concerns, ensuring you’re never left alone. Get in touch with us at [email protected]
This site is not a part of the Facebook website or Facebook INC. Additio

Grab DesignSuite AI
#socialmedia#technonogy#earnmoney#health#software#job#jobs#money#ebook#apps#make money from home#make money online#making#earn money online
0 notes
Text
What is blogging and how can I start my own blog?

What is blogging and how can I start my own blog?
What is blogging and how can I start my own blog?
What is Blogging and How to Start Your Own Blog
Blogging and how can I start my own blog - In the digital age, blogging has emerged as a powerful medium of self-expression, communication, and even business. Whether you're passionate about sharing your thoughts, experiences, expertise, or promoting a product or service, blogging provides an accessible platform to connect with a global audience. This article will guide you through the basics of what blogging is and how you can start your own blog.
Understanding Blogging
Blogging Defined: At its core, a blog is an online journal or informational website that displays content in reverse chronological order, with the latest posts appearing first. These posts, often referred to as "blog posts," can cover a wide range of topics, such as personal stories, how-to guides, reviews, news commentary, and much more.
Key Elements of a Blog:
Posts: These are the articles or entries you write and publish on your blog. Each post typically focuses on a specific topic or theme.
Comments: Readers can interact with your posts by leaving comments, allowing for conversations and discussions to take place.
Archives: A blog's archives organize posts by date, making it easy for visitors to explore past content.
Categories and Tags: These help organize and categorize your content, making it more accessible and searchable for readers.
Design and Layout: The design of your blog influences its appearance and user experience. Themes and templates determine the overall look and feel.
Widgets and Plugins: These tools add functionality to your blog, such as social media integration, email subscription forms, and more.
Starting Your Own Blog
1. Choose Your Blogging Platform:
The first step in starting your own blog is selecting a blogging platform. Some popular options include:
WordPress: A versatile and widely-used platform with numerous themes and plugins. You can choose between WordPress.com (hosted by WordPress) or WordPress.org (self-hosted).
Blogger: A user-friendly platform owned by Google, suitable for beginners.
Wix, Weebly, Squarespace: These platforms offer easy drag-and-drop website builders, making them great for those without technical skills.
2. Pick a Domain Name and Hosting:
Your domain name is your blog's web address (e.g., www.yourblogname.com). Choose a name that reflects your blog's topic and is easy to remember. Next, you'll need a web hosting service to store your blog's files and make it accessible on the internet.
3. Customize Your Blog:
Once you've chosen a platform and set up hosting, it's time to customize your blog's design. Select a theme that suits your content and customize it to match your branding. Ensure that your blog is visually appealing and easy to navigate.
4. Create Compelling Content:
Quality content is the heart of a successful blog. Identify your niche and target audience. Plan and write engaging, informative, and well-researched blog posts. Use a clear and engaging writing style, and consider adding images, videos, or infographics to enhance your content.
5. Promote Your Blog:
Creating great content is only half the battle; you also need to promote your blog to attract readers. Utilize social media platforms, email marketing, and SEO (search engine optimization) techniques to increase your blog's visibility.
6. Engage with Your Audience:
Interact with your readers by responding to comments, asking for feedback, and encouraging discussions. Building a sense of community around your blog can lead to loyal followers.
7. Monetization (Optional):
If you're interested in turning your blog into a source of income, you can explore various monetization options, such as affiliate marketing, sponsored posts, selling digital products, or running ads.
Conclusion
Blogging is a dynamic and rewarding endeavor that allows you to share your ideas, connect with like-minded individuals, and potentially earn income. By following the steps outlined in this article, you can start your own blog and embark on a journey of creativity, self-expression, and online engagement. Remember, consistency, passion, and dedication are key to building a successful and impactful blog.
NEXT TO >>>
0 notes
Text
Unlock the Full Potential of Elementor Pro with a License Key from Srmehranclub.com
When it comes to designing a website, creativity, functionality, and user experience play vital roles in making it successful. Elementor Pro, a popular page builder plugin for WordPress, has been a game-changer in this regard. It offers an intuitive, drag-and-drop interface that empowers users to create stunning websites without any coding knowledge. However, to fully access the plethora of advanced features and tools, one needs to acquire a valid Elementor Pro license key. Srmehranclub.com is the go-to platform for obtaining this license, taking your website design to new heights with the best features, support, and tools in the industry.
Elementor Pro: A Brief Overview
Elementor is a widely acclaimed page builder plugin for WordPress that has taken the web design community by storm. With its free version, users can already enjoy a remarkable set of features and customization options. However, the true potential of Elementor lies within its premium version - Elementor Pro. This upgrade unlocks an array of advanced tools and functionalities that elevate website design to an entirely new level.
Why Choose Elementor Pro?
Advanced Widgets: Elementor Pro offers a comprehensive library of advanced widgets that cater to every aspect of web design. These widgets allow users to add dynamic elements such as sliders, forms, countdown timers, pricing tables, and more, enabling them to create highly interactive and engaging pages.
Theme Builder: With Elementor Pro, you gain access to a powerful Theme Builder, allowing you to create custom headers, footers, single post templates, and archive pages. This level of customization ensures that your website's design remains consistent throughout and aligns perfectly with your brand.
WooCommerce Support: For those running an online store on WordPress with WooCommerce, Elementor Pro seamlessly integrates with it. This integration empowers you to create stunning product pages and category layouts to enhance the shopping experience for your customers.
Pop-Up Builder: Engaging pop-ups are an effective way to capture user attention and drive conversions. Elementor Pro's Pop-Up Builder allows you to design eye-catching pop-ups with ease, enabling you to promote offers, grow your email list, and more.
Support and Updates: With an Elementor Pro license key from Srmehranclub.com, you get access to timely updates and dedicated customer support. This ensures that your website remains compatible with the latest WordPress versions and that any issues you encounter are resolved promptly.
Unlocking the Power of Elementor Pro with Srmehranclub.com
Srmehranclub.com is a reputable platform that specializes in providing premium WordPress themes, plugins, and extensions at affordable prices.
By obtaining your Elementor Pro license key from Srmehranclub.com, you gain several advantages:
Genuine License: Srmehranclub.com offers authentic and legitimate Elementor Pro licenses, ensuring that you receive all the benefits and updates directly from the official source.
Cost-Effective: Srmehranclub.com provides Elementor Pro licenses at a discounted rate, allowing you to enjoy significant cost savings compared to purchasing directly from Elementor's website.
Immediate Access: Upon acquiring the license key, you can swiftly activate Elementor Pro on your website and start using its advanced features instantly.
Conclusion
If you want to take your website design to the next level, Elementor Pro is the way to go. By obtaining a license key from Srmehranclub.com, you can unlock a world of advanced features, widgets, and tools that will transform your website into a captivating online presence. Embrace the power of Elementor Pro and witness your web design dreams turn into reality!
0 notes
Text
How a Magento 2 Mobile App Can Transform Your Apparel Business

The apparel industry has always been at the forefront of style, self-expression, and cultural trends. From fashion giants to niche boutique brands, the apparel business remains an ever-changing landscape of customer preferences.
One more thing that you must consider while considering customer preferences is the mode of purchase. Customers enjoy purchasing from mobile apps.
Let us understand the importance of mobile commerce in the apparel industry and how MageMob App Builder can help you with it.
The Rise of Mobile Commerce in the Apparel Industry
Mobile commerce has experienced exponential growth in recent years, revolutionizing the way consumers shop for clothing.
With the convenience of mobile devices, consumers can browse and purchase apparel products anytime and anywhere.
To hold the space in this competitive market, businesses must embrace the power of mobile commerce and adapt to changing consumer preferences.
Seamless Shopping Experience for Shoppers
Mobile apps offer a seamless and user-friendly shopping experience for customers seeking to purchase clothing products.
The app’s intuitive interface provides an enhanced browsing experience, allowing customers to effortlessly explore catalogs, filter products based on preferences, and access detailed product information.
Mobile apps make it easier for customers to navigate the app and explore all the collections. This is exactly what you get when you build the app using the Magento 2 App Builder, an attractive and easy-to-navigate UI.
You can choose from the multiple templates that match your store theme and category.
Personalized Recommendations and Enhanced Engagement
With a mobile app, businesses can send personalized recommendations to enhance customer engagement and drive sales.
By analyzing customer behavior, preferences, and purchase history, the app can offer the following:
Tailored product suggestions
Showcase items that align with each customer’s unique style and preferences
Personalized recommendations not only improve the shopping experience but also increase the likelihood of cross-selling and upselling. Additionally, you would observe higher average order values.
Push Notifications: Real-Time Engagement and Promotions
Push notifications enable you to send personalized messages, such as flash sale alerts, exclusive offers, and new product releases, directly to customers.
These timely and targeted notifications help build brand awareness, drive traffic to the app, and encourage customers to make purchases.
It is the best way to inform customers about special promotions and limited-time offers. It can significantly boost sales and foster brand loyalty.
The apps built with the App Builder also comes with this feature so that you can increase customer engagement, a mandatory thing when it comes to building a loyal customer army.
Simplified Checkout Process and Secure Payments
A single-page checkout process offers a streamlined user experience, reducing friction and distractions. With fewer steps and page loads, it improves conversion rates and minimizes cart abandonment.
The checkout process should be simple and straightforward so that no customer abandons the cart because they find the process too complex. Especially payments!
Payment is the most crucial part of checkout. A secure payment gateway builds trust and confidence in customers. It protects sensitive payment information, utilizing encryption and advanced fraud detection mechanisms.
Mobile app built using our App Builder offers secure payment gateway options and customization as per your need.
Seamless Integration with Magento 2 Store
A Magento 2 mobile app seamlessly integrates with your existing Magento 2 store, ensuring that inventory, pricing, and product information remain consistent across all channels.
This integration eliminates the need for manual data synchronization, streamlining inventory management and enhancing operational efficiency.
By keeping your app and website in sync, you can offer the following:
real-time stock availability
prevent overselling
provide customers with accurate product information
Conclusion
Embracing mobile commerce is essential for the success and growth of clothing businesses. A Magento 2 mobile app can empower your apparel brands to unlock the full potential of mobile commerce.
You can offer a seamless shopping experience, personalized recommendations, real-time engagement through push notifications, simplified checkout processes, and seamless integration with your Magento store.
Book your demo with us and learn more about our MageMob App Builder!
Book your demo
All product and company names are trademarks™, registered® or copyright© trademarks of their respective holders. Use of them does not imply any affiliation with or endorsement by them.
This Article is originally published on:
https://www.appjetty.com/blog/magento2-mobile-app-builder/
0 notes
Text
“Top Tips for Customizing Wix Templates for Your Web Store”
Building an online store is an exciting undertaking, and you can simply establish a professional web store with Wix's user-friendly platform. Wix offers a variety of customisable templates that allow you to create a one-of-a-kind and visually appealing online presence. In this blog, we'll provide the best Wix template customization tips to help you design a great web store that stands out from the crowd.
1. Introduction
Wix is a popular website builder that offers pre-designed templates for various industries, including web stores. These templates provide a solid foundation for your online store, but customizing them to align with your brand and optimize the user experience is key to achieving success.
2. Choose the Right Wix Template for Your Web Store
Selecting the appropriate Wix template sets the tone for your web store. Consider factors like industry, style, and layout when choosing a template. Look for features and design elements that complement your products and brand identity.
3. Customize Your Website's Branding
Branding plays a crucial role in establishing a unique identity for your web store. Customize the template by uploading your logo, choosing relevant fonts, and selecting a color palette that reflects your brand. Consistent branding across your web store instills trust and recognition in your visitors.
Building an online store is an exciting undertaking, and you can simply establish a professional web store with Wix's user-friendly platform. Wix offers a variety of customizable templates that allow you to create a one-of-a-kind and visually appealing online presence. In this blog, we'll provide the best Wix template customization tips to help you design a great web store that stands out from the crowd.
4. Personalize the Layout and Structure
Make the template your own by customizing the layout and structure. Rearrange sections, add or remove elements, and modify the design to match your vision. Consider your target audience and their browsing habits when optimizing the layout for ease of navigation and intuitive user experience.
5. Optimize Product Pages and Categories
Your product pages are the heart of your web store. Showcase your products effectively by using high-quality images, detailed descriptions, and clear pricing. Create organized categories and subcategories to help visitors navigate and find products easily. Use Wix's product gallery and filtering options to enhance the browsing experience.
6. Enhance User Experience with Navigation
Smooth and intuitive navigation is essential for a positive user experience. Customize the navigation menu, ensuring it is easy to find and use. Add a search bar for quick product searches. Utilize drop-down menus and breadcrumbs to help users navigate through different sections of your web store effortlessly.
7. Utilize Wix Apps and Integrations
Wix offers a range of apps and integrations to enhance the functionality of your web store. Incorporate features like customer reviews, live chat, social media integration, and payment gateways to provide a seamless shopping experience. Explore Wix's app marketplace for additional functionalities specific to your business needs.
8. Test and Optimize Your Web Store
Regularly test your web store across different devices and browsers to ensure it is fully responsive and functions optimally. Pay attention to page loading speed, mobile responsiveness, and checkout process. Collect user feedback and analyze website analytics to identify areas for improvement and optimize the user experience.
you can tailor your Wix template to align with your brand, optimize product presentation, and enhance user experience. Start building your professional web store with A SimpleWebStore templates today!
#asimplewebstore#wixtemplates#WebStore#CustomizationTips#BrandIdentity#UserExperience#WixApps#Optimization#OnlinePresence
0 notes
Text
What is best way to open online store?

The best way to open an online store is depend on various factors such as your business goals, target market, budget, and level of technical expertise. However, there are many ecommerce platforms that includes Shopify, QPe and Woo-Commerce etc where you can open the best online store.
To open an online store, it does not require much capital, with minimum investment you can start your online store. You need to find list of products to sell and also requires you to know about managing payment, delivery and much more. The ecommerce platform allows ecommerce businesses, small business owners, and entrepreneurs to start building an online store using templates and themes.
Before starting an online store, below there are some things you have to consider such as:-
Develop a business plan
Find your Ecommerce Platform
Choose a Business Name
Decide your Business Structure
Design your Online Store
Pick the Right Products and start building categories
Establish Payments Options
Develop and implement your marketing strategies.
The saas-based no-code ecommerce platform QPe allows users to create an online store within seconds and start products easily without commission. The best way to open an online store is, you can create a store without technical knowledge, expertise, and coding skills experience:-
Go to https://www.goqpe.com/ or download QPe App from Play Store, and signup with your phone number using OTP sent to your phone. Once signed up you can insert your business or store details, business or store name, and upload your business logo.
You can start uploading products manually or using an advanced catalog builder etc.
It is the best online store builder that makes it easy for anyone to create a professional-looking website. It includes all the tools you need to build a store that will help you accept orders, and manage social media marketing and automation with all-in-one dashboard.
Source:- https://www.goqpe.com/
1 note
·
View note
Last Seen Blogs

arsmistic
Dische

ppposhy
PPPOSHY

stuffilove99
Dreamer

harrysfluff
Sunflower My Eyes

paulwilliamsinc
Paul Williams, DDS