#Internet explorer download for windows 10
Text
Internet explorer download for windows 10

Many of the new features of Edge are also available in some form with Chrome and Firefox, but usually with a third-party extension or add-on you'll need to enable separately. Click on Cortana's circle to see what she found. This isn't available everywhere, but Cortana will let you know if she has the extra information automatically by telling you in the address bar. If Cortana doesn't find the result you want, you can start a Bing search with a single click to go deeper.įinally, on websites for select restaurants and bars, Cortana will show maps, directions, reviews, phone numbers and other business information. She'll show definitions of the word or information from Wikipedia in a menu on the right side, so you don't have leave the webpage. If you highlight a word or phrase on a webpage and right click with your mouse, you can Ask Cortana for more information. Type an equation and the solution will show up just below the address bar. Try typing "weather" and the current conditions in your area will appear. When using the address bar, Bing will show search results as you type for general queries like weather reports, stock performance, math equations and flight statuses. Click to enlarge.īing and Cortana play a big role in Edge, both giving you extra information at your fingertips. To use it, just click or tap the star icon in the address bar and select Reading list and follow the prompts.Īpple's browser Safari has a reading list feature that works very closely to Edge's, and on Firefox and Chrome you can use a third-party service like Pocket, Readability or Instapaper to save articles for later.Ĭortana helps you get more info about a restaurant or bar. It's great for when you find articles throughout your workday that you don't have time to read until after you leave the office. The other tool aimed at anyone who likes reading online is Reading list, a place where you can save an article to read later offline. You can tell if a webpage is compatible with Reading view by looking at the book icon in the address bar if it's grayed out, Reading view isn't available, if it's black, you can use it. What makes Edge special is that this feature is built in, ready to use on most any website. Reading view is very similar to Evernote's Clearly extension, available for Chrome and Firefox, which also strips out extra parts of a website for reading, though Clearly gives you a few customization options where Edge does not. It's a smart tool for when you don't want distractions, or don't particularly like a website's layout. Reading view is a tool that strips out extra parts of a website - like ads and design elements - to give you a clean, focused view with only text, photos and video. Click to enlarge.Įdge comes with two tools to make reading online a bit easier. The Reading view feature strips out everything on a webpage except photos, text and video. (And yes, the same functionality exists in other browsers via extensions and plug-ins, but it's nice to have it here by default.) At work, it's also helpful tool for creating visual aids for projects and presentations. Web Note is a fantastic for students doing online research, since you can save and highlight text and images. Or, you can share the finished mockup via email. When you're done sketching and adding comments, you can save the entire mocked-up webpage to OneNote, your Favorites menu in Edge or your Reading list (more on that later). There's also an option to add typed comments and select and clip part of the screen, if you only want to save a small portion of the website. Using the pen, highlighter and eraser options, which are controlled with a mouse or your finger on a touchscreen, you can draw and sketch all over the page. It's better than any screenshot tool I've ever used because it captures the entire webpage, not just the portion visible on the screen. Web Note is a mockup tool that lets you capture an image of a website, add notes and sketches, and save it or share it. The best thing about Edge is that it's not "Internet Explorer 12 " it's a complete reboot, with some nice modern tools and worthy additions, the best of which are highlighted below. The good news is that you'll actually want to give it a try.
0 notes
Text
YouTube Downloads through VLC: Step by Step
So this guide to easily downloading off YouTube is super helpful, but there's enough important information hidden in the reblogs that (with the permission of OP @queriesntheories ) I'm doing a more step-by-step version.
Please note: these downloads will be in YouTube quality. My test video download is coming through at 360p, even though the video I'm starting from is set to 720p. They're legible, but they won't look great on a TV. For high visual quality, you'll want to seek out other methods.
This guide is written for Windows 10, since that's what I can test on. It's been tested on Firefox, Chrome, and Edge (which is a Chromium browser, so the method should work in other Chromium browsers too). So far, I haven't tracked down a way to use this download method on mobile.
BASIC KNOWLEDGE:
I'll try to make this pretty beginner-friendly, but I am going to assume that you know how to right-click, double-click, navigate right-click menus, click-and-drag, use keyboard shortcuts that are given to you (for example, how to use Ctrl+A), and get the URL for any YouTube video you want to download.
You'll also need to download and install one or more programs off the internet using .exe files, if you don't have these programs already. Please make sure you know how to use your firewall and antivirus to keep your computer safe, and google any names you don't recognize before allowing permission for each file. You can also hover your mouse over each link in this post to make sure it goes where I'm saying it will go.
YOU WILL NEED:
A computer where you have admin permissions. This is usually a computer you own or have the main login on. Sadly, a shared computer like the ones at universities and libraries will not work for this.
Enough space on your computer to install the programs listed below, if you don't have them already, and some space to save your downloaded files to. The files are pretty small because of the low video quality.
A simple text editing program. Notepad is the one that usually comes with Windows. If it lets you change fonts, it's too fancy. A notepad designed specifically to edit program code without messing it up is Notepad++, which you can download here.
A web browser. I use Firefox, which you can get here. Chrome or other Chrome-based browsers should also work. I haven't tested in Safari.
An Internet connection fast enough to load YouTube. A little buffering is fine. The downloads will happen much faster than streaming the entire video, unless your internet is very slow.
VLC Media Player, which you can get here. It's a free player for music and videos, available on Windows, Android, and iOS, and it can play almost any format of video or audio file that exists. We'll be using it for one of the central steps in this process.
If you want just the audio from a YouTube video, you'll need to download the video and then use a different program to copy the audio into its own file. At the end of this post, I'll have instructions for that, using a free sound editor called Audacity.
SETUP TO DOWNLOAD:
The first time you do this, you'll need to set VLC up so it can do what you want. This is where we need Notepad and admin permissions. You shouldn't need to repeat this process unless you're reinstalling VLC.
If VLC is open, close it.
In your computer's file system (File Explorer on Windows), go to C:\Program Files\VideoLAN\VLC\lua\playlist
If you're not familiar with File Explorer, you'll start by clicking where the left side shows (C:). Then in the big main window, you'll double-click each folder that you see in the file path, in order - so in this case, when you're in C: you need to look for Program Files. (There will be two of them. You want the one without the x86 at the end.) Then inside Program Files you're looking for VideoLAN, and so forth through the whole path.
Once you're inside the "playlist" folder, you'll see a lot of files ending in .luac - they're in alphabetical order. The one you want to edit is youtube.luac which is probably at the bottom.
You can't edit youtube.luac while it's in this folder. Click and drag it out of the playlist folder to somewhere else you can find it - your desktop, for instance. Your computer will ask for admin permission to move the file. Click the "Continue" button with the blue and yellow shield.
Now that the file is moved, double-click on it. The Microsoft Store will want you to search for a program to open the .luac file type with. Don't go to the Microsoft Store, just click on the blue "More apps" below that option, and you'll get a list that should include your notepad program. Click on it and click OK.
The file that opens up will be absolutely full of gibberish-looking code. That's fine. Use Ctrl+A to select everything inside the file, then Backspace or Delete to delete it. Don't close the file yet.
In your web browser, go to https://github.com/videolan/vlc/blob/master/share/lua/playlist/youtube.lua
Click in the part of the Github page that has a bunch of mostly blue code in it. Use Ctrl+A to select all of that code, Ctrl+C to copy it, then come back into your empty youtube.luac file and use Ctrl+P to paste the whole chunk of code into the file.
Save the youtube.luac file (Ctrl+S or File > Save in the upper left corner of the notepad program), then close the notepad program.
Drag youtube.luac back into the folder it came from. The computer will ask for admin permission again. Give it permission.
Now you can close Github and Notepad. You're ready to start downloading!
HOW TO DOWNLOAD:
First, get your YouTube link. It should look something like this: https://www.youtube.com/watch?v=abc123DEF45 If it's longer, you can delete any extra stuff after that first set of letters and numbers, but you don't have to.
Now open VLC. Go to Media > Open Network Stream and paste your YouTube link into the box that comes up. Click Play. Wait until the video starts to play, then you can pause it if you want so it's not distracting you during the next part.
(If nothing happens, you probably forgot to put youtube.luac back. coughs)
In VLC, go to Tools > Codec Information. At the bottom of the pop-up box you'll see a long string of gibberish in a box labeled Location. Click in the Location box. It won't look like it clicked properly, but when you press Ctrl+A, it should select all. Use Ctrl+C to copy it.
In your web browser, paste the entire string of gibberish and hit Enter. Your same YouTube video should come up, but without any of the YouTube interface around it. This is where the video actually lives on YouTube's servers. YouTube really, really doesn't like to show this address to humans, which is why we needed VLC to be like "hi I'm just a little video player" and get it for us.
Because, if you're looking at the place where the video actually lives, you can just right-click-download it, and YouTube can't stop you.
Right-click on your video. Choose "Save Video As". Choose where to save it to - I use my computer's built-in Music or Videos folders.
Give it a name other than "videoplayback" so you can tell it apart from your other downloads.
The "Save As Type" dropdown under the Name field will probably default to MP4. This is a good versatile video format that most video players can read. If you need a different format, you can convert the download later. (That's a whole other post topic.)
Click Save, and your video will start downloading! It may take a few minutes to fully download, depending on your video length and internet speed. Once the download finishes, congratulations! You have successfully downloaded a YouTube video!
If you'd like to convert your video into a (usually smaller) audio file, so you can put it on a music player, it's time to install and set up Audacity.
INSTALLING AUDACITY (first time setup for audio file conversion):
You can get Audacity here. If you're following along on Windows 10, choose the "64-bit installer (recommended)". Run the installer, but don't open Audacity at the end, or if it does open, close it again.
On that same Audacity download page, scroll down past the installers to the "Additional resources". You'll see a box with a "Link to FFmpeg library". This is where you'll get the add-on program that will let Audacity open your downloaded YouTube video, so you can tell it to make an audio-only file. The link will take you to this page on the Audacity support wiki, which will always have the most up-to-date information on how to install the file you need here.
From that wiki page, follow the link to the actual FFmpeg library. If you're not using an adblocker, be careful not to click on any of the ads showing you download buttons. The link you want is bold blue text under "FFmpeg Installer for Audacity 3.2 and later", and looks something like this: "FFmpeg_5.0.0_for_Audacity_on_Windows_x86.exe". Download and install it. Without this, Audacity won't be able to open MP4 files downloaded from YouTube.
CONVERTING TO AUDIO:
Make sure you know where to find your downloaded MP4 video file. This file won't go away when you "convert" it - you'll just be copying the audio into a different file.
Open up Audacity.
Go to File > Open and choose your video file.
You'll get one of those soundwave file displays you see in recording booths and so forth. Audacity is a good solid choice if you want to teach yourself to edit soundwave files, but that's not what we're here for right now.
Go to File > Export Audio. The File Name will populate to match the video's filename, but you can edit it if you want.
Click the Browse button next to the Folder box, and choose where to save your new audio file to. I use my computer's Music folder.
You can click on the Format dropdown and choose an audio file type. If you're not sure which one you want, MP3 is the most common and versatile.
If you'd like your music player to know the artist, album, and so forth for your audio track, you can edit that later in File Manager, or you can put the information in with the Edit Metadata button here. You can leave any of the slots blank, for instance if you don't have a track number because it's a YouTube video.
Once everything is set up, click Export, and your new audio file will be created. Go forth and listen!
#reference#vlc media player#youtube downloader#youtube#uh what other tags should i use idk#how to internet#long post
27 notes
·
View notes
Text
what your desktop browser of choice says about you
google chrome: you either started using it due to its popularity or your first device was a chromebook/android phone. you've thought about switching a few times but it sounds like a pain. you don't think about this browser thing much at all
microsoft edge: why should you download something else? it works fine. might've been a bit weird at first, but you've gotten used to it. a browser's a browser.
safari: same as edge, but you buy apple products. who hurt you? did you get peer pressured into the apple ecosystem? or do you have more money than sense?
firefox: you read some posts about how firefox is better and actually made the switch. it wasn't that hard. every night you pray to the ublock origin devs.
internet explorer: you hate change. you haven't even upgraded to windows 10. nobody's taking what you're used to away from you.
opera: you saw some ads for an alternative browser and actually made the switch. it looks nice, you guess. you don't care much about the whole security privacy mumbo jumbo firefox fans talk about, you just think it's neat.
brave: you care about the privacy stuff, but firefox wasn't cool and hip enough for you. chromium isn't a dealbreaker. you might be a cryptobro or a libertarian.
vivaldi: you will design the perfect browser from scratch. you will assemble the perfect aesthetic experience to maximize your enjoyment and productivity. the gods will weep once your masterpiece is finished.
a browser not listed here: well aren't you a little hipster. you love fucking around with your computer to make it just right. you haven't gotten an update in 2 years.
opera gx: Do not interact with me.
14 notes
·
View notes
Text
Cricut Computer Setup: Full Guide for Windows and Mac

Ever since I started doing the Cricut computer setup, the excitement of setting up a new Cricut machine is still as fresh as it ever was. But do you know how to setup a Cricut machine on a computer? If your answer is no, then chillax! You have already opened the right page, so you will definitely find something helpful.
So, what do we need to do before setting up a Cricut? Well, the only thing you will need to know is to establish a connection between your Cricut and computer. But the next question is—HOW? And by which method? There are two methods: USB or Bluetooth. We can do it easily by following some easy ways. Want to know? Let’s check out this blog to learn more!
Lastly, you must complete the machine setup, and this process is the same for both Mac and Windows. Let’s get started!
Cricut Computer Setup for Windows and Mac
Setup is easy if you will do it once. But even if you are a beginner, it is going to be a breeze. Just trust me and follow the steps that I have given below. Remember the below-mentioned steps are the same for both Mac and Windows computers:
Here’s the Cricut setup on computer (Windows and Mac):
First, launch an internet browser and head to the cricut.com/setup website.
Now, you will need to download and install the Cricut software on your computer.
Next, follow the steps given to your display and create your new Cricut account accordingly.
If you already have an account, you should sign in to your Cricut ID using your username and password.
Then, select your Cricut machine model for the setup procedure.
Now, switch on the Cricut by inserting the power cable into its power outlet.
Hit the power button on your Cricut machine.
Next, establish a connection between the Cricut and your device, either using a USB cord or Bluetooth (To learn how to connect it properly, you should navigate to the next section given below).
Afterward, you should register your Cricut cutting machine.
Finally, your Cricut setup on computer is done, and you will be prompted to test the cut.
Now, you might have learned the Cricut computer setup. Below, I have explained how to connect your Cricut to your computer via Bluetooth. Let’s delve into it!
How to Connect Cricut Machine to Computer via Bluetooth?
Here, I want to focus on the steps to connect Cricut to a computer. Many crafters, especially beginners, can face difficulties while connecting. So, I’ve made it easier for you.
Below are the steps to connect Cricut to a Mac and Windows using a Bluetooth wireless connection:
Windows
The first thing you need to do is keep your machine at an adequate distance, about 10-15 feet from your computer. If you are using Explore models, you should insert the wireless Bluetooth adapter.
Now, check whether you have enabled Bluetooth. To do this, go to Settings and then move to the Devices option.
Then, you can enable Bluetooth by clicking on the toggle button.
Next, click on the Add Bluetooth or other device.
So, you will have to wait until your Bluetooth finds your Cricut machine.
Afterward, select the machine from the available list.
Finally, you have successfully paired the machine.
Mac
The first step would be the same as the above.
Then, you have to hit the Apple menu and select the System Preferences option from the given options.
Look for the Bluetooth option and check whether it is enabled or off. If it is off, you should turn it on.
Now, you will see your Mac Bluetooth is looking for an available device, such as your Cricut machine.
Once your Cricut machine appears in the list, you must select it to pair with your computer.
Once the pairing is done with your Mac, you are ready to setup your machine further.
Once you complete your Cricut computer setup, you can start making your projects hassle-free.
FAQs
How is the Cricut app crucial for machine setup?
The Cricut app, Cricut Design Space, plays a pivotal role in machine setup. It helps you connect your Cricut machine setup and allows your computer to communicate with your Cricut cutting machine. Whether it is a computer or mobile device, the Cricut software is compatible with all four platforms: Mac, Windows, iOS, and Android. However, you will be prompted to download the app during machine setup. Thus, it is a crucial part of the Cricut machine setup. Without this software, your setup is incomplete.
What are the system requirements for using Cricut software on Mac?
The minimum system requirements for using the Cricut Design app on a Mac computer are as follows:
macOS 11 or later
USB port or Bluetooth
1.83 GHz CPU
Minimum 2 to 3 Mbps download speed and 1 to 2 Mbps upload speed
4 GB RAM
2 GB free disk space
Minimum display screen resolution of 1024px x 768px
Can I setup my Cricut machine using my Samsung Galaxy?
Yes, you can setup your Cricut machine using your Samsung Galaxy device. To setup on an Android phone, you have to follow the steps below:
First, connect the Cricut’s power cord to the wall outlet.
You need to pair your device and the Cricut via Bluetooth.
Then, you have to download the Cricut app from the Google Play Store.
Open the software and start signing in or creating a Cricut ID.
Choose the model, and your setup will be completed.
Final Thoughts
In a nutshell, I have explained the Cricut computer setup procedure in easy steps for both Mac and Windows users. The setup process given in this blog is based on the setup that I performed recently. It doesn’t matter whether you are a Mac or Windows computer. For any Cricut users, the setup is a must to get started! Without this, you will not be able to make a single cut.
For more information visit: cricut design space download
design.cricut.com
cricut.com/create
Source: Cricut setup on computer
#Cricut setup on computer#Cricut computer setup#cricut new machine setup#cricut machine setup#cricut design space download#cricut design space software#cricut design space app#cricut design space login
2 notes
·
View notes
Text
An Ultimate Guide for Cricut Design Space Download

Cricut Design Space is a free and easy-to-learn app. This app will help you enhance your design skills with endless possibilities. With Design Space, you can create your design using the Cricut library, or you can upload your design to it. It is not required to have design experience to create a design using Design Space because it can be learned while using it. There is no need for an internet connection to design because it works offline as well and can be designed at any time and anywhere. All you need to do is Cricut Design Space download and connect it to your computer. In this blog, you will be able to learn how to download Cricut Design Space on your computer.
System Requirements for Using Design Space
Before downloading and installing the Cricut app on your Windows and Mac computers, you need to know about the minimum systems requirements for using Design Space.
For Windows
Operating System
Windows 10 or later
CPU: Intel Dual-Core or equivalent AMD processor
RAM: 4GB
2 GB free disk space
An available USB port or Bluetooth connection
Display : Minimum 1024px * 768px resolutions
Internet
Broadband connection: minimum 2-3 Mbps download and 1-2 Mbps upload speed
Standards rate may apply
Offline
Available for Design Space for Desktop
Memory needs may vary on usage
For Mac
Operating System
macOS 11 or later
CPU 1.83 GHz
RAM: 4GB
2 GB free disk space
An available USB port or Bluetooth connection
Display: Minimum 1024px * 768px resolutions
Internet
Broadband connection: minimum 2-3 Mbps download and 1-2 Mbps upload speed
Standards rate may apply
Offline
Available for Design Space for Desktop
Memory needs may vary on usage
Steps for Cricut Design Space Download on Your Computer
Design Space can be downloaded on any Windows or Mac computer or your iOS or Android device.
For Windows
First, open a browser window and navigate to design.cricut.com.
After that, you need to click on the Download button. During the downloading process, the screen will change. The process will be a little different for different browsers. (The image below is an example of how it will look in Google Chrome.)
When the downloading process is complete, you have to double-click the downloaded file, which can be accessed through the internet browser or the Downloads folder of your file explorer.
When double-clicking on the file, a popup window may open to ask if the user trusts the app; tap on the Yes option.
Next, a setup screen will appear during the installation process.
After successful installation, you can log in with your Cricut account ID.
A Desktop icon is automatically added for Design Space to the Desktop screen.
Right-click on the Desktop icon for the app and select Pin to Taskbar, or drag the icon to the Taskbar to create a shortcut.
You are all set up; you can start your journey with Design Space.
These are the necessary steps for the Cricut Design Space download on Windows.
For Mac
As your initial step, open a web browser and go to design.cricut.com.
Select Download. During the downloading process, the screen will change. The process will be different for each browser.
Once completed, you will have to double-click the downloaded .dmg file, which can be accessed through your browser or the Downloads folder of your File Explorer.
To start the installation process, drag the Cricut icon to the Applications folder. Design Space for Desktop is automatically added to the Applications folder.
Click twice on Cricut Design Space in your Applications folder to launch it.
A Mac notice will appear to ask for permission to open the application. Select Open to continue.
Now, you can log in with your Cricut ID and Password.
After a successful login, you are all set up to start your journey with Design Space.
These are the necessary steps for the Cricut Design Space download on Mac.
Conclusion
This blog consists of all the steps for Cricut Design Space download, install, and setup. By following the instructions carefully and successfully downloading the Cricut app, you will be able to use it without any hassle. If the Design Space is not properly installed, then you might face an error while trying to access the app. If you face any error and need any assistance in setting up Design Space, it’s best to communicate with the customer support team at cricut.com/setup.
Frequently Asked Questions
What is Cricut Design Space and its features?
Design Space is an application that is used to design at any time and anywhere, so it can be used even if the device is not connected to the internet. You can design, edit and cut projects without any internet connection. It’s one of the companion apps provided by Cricut to create designs. It supports multiple devices, so you can create unique DIY projects that can be done at the same time.
Can Design Space work on multiple devices?
A cloud-based Design Space can work on multiple devices. So, you can start a project from one device and finish it on another device without any hassle. By using Design Space, you can access the resources required from one device to another. There is no need to transfer your resources from the device used to start the project to the device used to finish the project, as you can access those resources.
How do you access projects and their resources offline?
You can access the projects only if the project is saved on the computer as well. So, when you are working online and choose to save the project, then choose to save projects to the cloud and computer as well. Through this, you will be able to access the project and resources offline, even when you are not connected to the internet or offline.
Source: Cricut Design Space Download
For more information visit: Cricut Design Space Login
Cricut New Machine Setup
Cricut.com setup windows
#Cricut Design Space Download#Cricut Design Space Login#Cricut.com/setup#design.cricut.com#Cricut New Machine Setup#Cricut.com setup mac#cricut design space for mac
2 notes
·
View notes
Text
Capturing the ambience of Knights of the Old Republic
Star Wars KoTOR offers countless interesting locations across planets, in space, and even under water.

Fast traveling
There are segmented game-save archives around for download which allow you to replay desired levels.

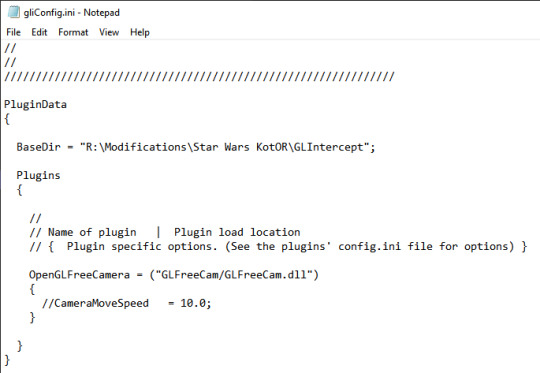
You can also jump around, even more efficiently, by using console commands. First, open swkotor.ini and add EnableCheats=1 under [Game Options]. Now, when you start the game, you’ll be able to use the developer console by pressing the tilde (aka grave) key. For our purposes, the most relevant cheats are warp <area ID> and turbo, which respectively allow you to load a specific area and run faster.
Capturing footage
The draw calls used by KoTOR are capatible with the GLIntercept library. Enter first-person mode to hide the HUD, and then use GLIntercept’s freecam plugin to manipulate the camera as desired.
Note that certain effects, like halos around suns or underwater bubbles, are relative to your player-character rather than the camera. This limits how much you can move the camera if you’d like to capture these.
You should also be mindful of our view frustum as all polygons outside of it will be culled.

Extracting audio
Main ambient streams are files named like al_* found in the streammusic directory of the game’s files. However their packaging is quite unconventional - despite their WAV file extension, they are actually MP3s. Furthermore, their headers are replicated for some reason.
We can get working MP3s by trimming some bytes off these headers:
@echo off
set /p byteno="Please enter the number of bytes to trim from the header: "
for %%F in (*.wav) do dd if=%%~nF.wav of=%%~nF.mp3 bs=1 skip=%byteno%
pause
Provided we have DD in the same directory. Use an offset of 470 bytes [1] [2].
Supposedly the process is easier with Miles Sound Tools, but I had trouble running this on Windows 10. If you want to go this route, note that you may need to use the Internet Archive to locate a working download.
Determining sounds
Kotor Tool allows us to read specifics on global and positional sounds effects for each map. Opening a map‘s Dynamic Area Info git file shows the AreaProperities we’re interested in: AmbientSndDay. The index value maps to the ambientsound.2da visible inside BIFs -> 2da.bif. Note that this array is sparse, so the index values may be off-by-some rather than a direct mapping.

We can look at the SoundList to get specifics on sounds placed in the map. We can also information on any randomized pitch/volume variation by clicking into the corresponding uts file.
To match sounds to map locations, we can use the whereami console command to print player-character coordinates for reference. We can also delete files from streammusic before running the game if we’d like to hear positional sounds only.
We can also use Kotor Tool to explore reverb settings for a given room.
Putting it all together
You’ll need to fix the loop points in your trimmed streammusic files - they shipped as broken for some reason. This is usually pretty easy - just delete any junk samples at the ends of the stream in your favorite editor (e.g. Audacity).
From there, drop in the BIFF and streamsounds sound effects we identified using Kotor Tool, varying the pitch, volume, and reverb as desired. Once we have a soundscape we’re happy with, we can mux it with the video we captured.
2 notes
·
View notes
Text
does windows make a vpn
🔒🌍✨ Get 3 Months FREE VPN - Secure & Private Internet Access Worldwide! Click Here ✨🌍🔒
does windows make a vpn
VPN setup on Windows
Setting up a VPN on your Windows device is a straightforward process that can provide you with enhanced security and privacy while browsing the internet.
To begin, you will need to choose a reliable VPN service provider and sign up for an account. Once you have selected a VPN service, download and install the VPN client software on your Windows device.
After the installation is complete, launch the VPN application and log in using your account credentials. You will then be able to choose a server location from a list provided by the VPN service. Select a server that is closest to your physical location for optimal performance.
Once connected to the VPN server, your internet traffic will be encrypted, providing you with a secure connection to the internet. This encryption helps to protect your data from potential hackers and other malicious entities.
If you encounter any issues during the setup process, most VPN service providers offer customer support to assist with troubleshooting.
In conclusion, setting up a VPN on your Windows device is a simple way to enhance your online security and privacy. By following these steps, you can enjoy a more secure browsing experience and peace of mind knowing that your data is protected.
Windows VPN functionality
A Virtual Private Network (VPN) is a service that allows users to securely access and transmit data over the internet. When it comes to using a VPN on Windows operating systems, there are several functionalities that users should be aware of.
One of the key functionalities of a Windows VPN is the ability to encrypt data. Encryption helps protect sensitive information such as login credentials, personal details, and browsing history from potential cyber threats. By using a VPN, Windows users can ensure that their online activities remain private and secure.
Another important functionality of a Windows VPN is the ability to bypass geo-restrictions. By connecting to a VPN server in a different location, users can access content that may be blocked in their region. This is particularly useful for streaming services, websites, and online platforms that have region-specific restrictions.
Additionally, Windows VPNs offer features such as IP address masking and anonymous browsing. By hiding their true IP address and routing their internet traffic through a secure server, users can maintain anonymity online and prevent third parties from tracking their online activities.
Furthermore, Windows VPNs provide users with the option to choose from various protocols, including OpenVPN, L2TP/IPsec, and SSTP. These protocols offer different levels of security and speed, allowing users to customize their VPN connection based on their specific needs.
In conclusion, the Windows VPN functionality offers users enhanced security, privacy, and access to geo-blocked content. By utilizing a VPN service on their Windows device, users can enjoy a safer and more unrestricted online experience.
Windows VPN compatibility
Title: Exploring Windows VPN Compatibility: A Comprehensive Guide
In today's digital landscape, maintaining privacy and security online is paramount. Virtual Private Networks (VPNs) have emerged as essential tools for safeguarding one's digital presence, enabling users to encrypt their internet connection and conceal their IP address. For Windows users, ensuring compatibility between their operating system and VPN services is crucial for seamless and secure browsing experiences.
Windows VPN compatibility refers to the ability of VPN software to effectively integrate with the Windows operating system, ensuring smooth functionality and optimal performance. Fortunately, the majority of reputable VPN providers offer dedicated applications specifically designed for Windows, ensuring compatibility across various versions, including Windows 10, Windows 8, and Windows 7.
When assessing VPN compatibility on Windows, several key factors should be considered:
Supported Protocols: Ensure that the VPN service supports protocols compatible with Windows, such as OpenVPN, IKEv2, L2TP/IPsec, and PPTP.
Ease of Installation: Look for VPN providers that offer user-friendly installation processes, including step-by-step guides or intuitive setup wizards for Windows users.
Performance and Stability: Assess user reviews and performance benchmarks to gauge the reliability and stability of the VPN service on Windows platforms.
Feature Set: Consider the features offered by the VPN client, such as kill switch functionality, split tunneling, and DNS leak protection, to ensure comprehensive security and privacy protection on Windows devices.
Customer Support: Opt for VPN providers that offer responsive customer support channels, including live chat, email, or dedicated support forums, to address any compatibility issues or technical concerns promptly.
By prioritizing compatibility when selecting a VPN service for Windows, users can enjoy enhanced privacy, security, and anonymity while browsing the internet, whether for personal use, remote work, or accessing geo-restricted content. With a wide range of VPN options available, Windows users can find a suitable solution that meets their specific needs and preferences, ensuring a seamless and protected online experience.
VPN performance on Windows
When it comes to VPN performance on Windows, there are a few key factors to consider to ensure a smooth and secure browsing experience.
One of the most important aspects of VPN performance on Windows is the speed of the connection. A VPN that slows down your internet speed significantly can be frustrating, especially when streaming videos or downloading large files. Choosing a VPN provider with high-speed servers and reliable performance is crucial to maintaining fast and seamless connectivity.
Another factor to consider is the encryption protocol used by the VPN service. Strong encryption protocols like OpenVPN or IKEv2 provide enhanced security for your data, but they can also impact the overall speed of your connection. Finding the right balance between security and performance is essential when selecting a VPN for Windows.
Additionally, the location of the VPN servers can also impact performance on Windows. Connecting to a server that is far away from your actual location can result in slower speeds and higher latency. Opting for a VPN provider with a wide range of server locations can help you find a server that offers the best performance for your needs.
In conclusion, VPN performance on Windows is influenced by factors such as connection speed, encryption protocol, and server location. By choosing a reliable VPN provider that prioritizes performance, you can enjoy a secure and efficient browsing experience on your Windows device.
Windows VPN configuration
Title: A Comprehensive Guide to Configuring VPN on Windows
In today's digital landscape, where online privacy and security are of paramount importance, setting up a Virtual Private Network (VPN) on your Windows operating system is essential. Whether you're working remotely, accessing sensitive data, or simply browsing the web, a VPN ensures your connection is encrypted and your identity remains anonymous. Here's a step-by-step guide to configuring a VPN on Windows:
Choose a VPN Provider: Start by selecting a reputable VPN provider that offers reliable service and strong encryption protocols. Research different providers, read reviews, and compare features to find the best fit for your needs.
Download and Install VPN Software: Once you've chosen a provider, download the VPN client software from their website. Follow the installation instructions, then launch the application on your Windows device.
Log in or Sign Up: If you're a new user, sign up for an account with your chosen VPN provider. If you already have an account, log in using your credentials.
Select a Server Location: Most VPN applications allow you to choose from a list of server locations around the world. Select a server that is geographically close to you for optimal speed and performance, or choose a server in a different country to bypass geo-restrictions.
Connect to the VPN: Once you've selected a server location, click the "Connect" button within the VPN application to establish a secure connection. You may be prompted to enter your login credentials again at this stage.
Verify Connection: Once connected, verify that your VPN is active by checking your IP address and ensuring that your internet traffic is encrypted. You can use online tools or visit websites like whatismyip.com to confirm your VPN connection.
Customize Settings (Optional): Depending on your preferences and requirements, you may want to customize additional settings within the VPN application, such as enabling kill switch protection or configuring split tunneling.
By following these steps, you can easily configure a VPN on your Windows device, ensuring that your online activities are secure and private. Remember to regularly update your VPN software and choose strong, unique passwords for added security.
0 notes
Text
How to Get Started With Cricut Design Space Log In
Hello to all DIY makers! I am an experienced Cricut crafter who has been in the crafting business for a long time. At the beginning of my journey, I used to create some wonderful DIY projects with the help of my Cricut machine and the software. I found it a little difficult to start a project with Cricut and its application at the beginning. Also, I have seen many DIY makers looking for the Cricut Design Space log in process. Thus, I thought of writing a blog post that covers the quick and easy steps of using the Cricut software.
By reading this guide, you will learn how to download the Cricut application on Windows and MacBook. No matter whether you have a Cricut Explore, Cricut Maker, or Cricut Joy machine, log in to the Cricut app and craft the project you think of gifting to someone or want to keep for yourself.
Download and Install Cricut Design Space on Windows
If you want to start the login process, you will need to begin with the Cricut Design Space download for Windows 10. Here are some easy-to-follow instructions that Windows users can follow.
Start the Cricut software download process by launching your favorite browser.
When a new screen appears, start opening Cricut Design Space for Windows.
Then, move to the Download button.

Next, your job is to wait a few times till the downloading process completes.
Following the download process, go to the bottom side of your screen.
After that, find the file and double-click on it.
Or, move to the Downloads folder on your Windows computer.
In the next step, you will need to answer some questions given on the screen.
Further, you will see a Window showing the progress of the installation.
After you execute the above steps, you will need to create an account or do the Cricut Design Space log in process directly on your system. In this post, We will discuss them, but let’s first learn the methods to download and install the Cricut application on a Macbook.
Download and Install Cricut Design Space on Mac
Do you have a Mac computer? If yes, here are a few instructions that you can follow to download, install, and open the Cricut Design app on your system.
In the first step of the download and install process, open your internet browser.
Now, agree to the Terms of Use of Cricut and Privacy Policy.
Next, click on the Download button to get the application.
Your software will then start downloading on your Mac device.
Then, you will have two options to get the app on your computer.
The first one is to double-click on the .dmg file.
Another one is to move to the Downloads folder.
Afterward, drag the downloaded application file to the Applications folder.
Following this, navigate to your Applications folder.
Double-click on the application.
After that, read the Mac instructions.
Tick mark the Open option and continue with the next step.
After you do the Cricut Design Space download and then install it on your system, you need to move next to create a Cricut account. New users must create an account, but old users can log in to the software directly. To learn how to create an account and log in to the app, read the next section of this blog.
How to Create a Cricut Design Space Account?
Have you recently purchased a new Cricut machine? You must download its software plus create an account to use it.
Start by opening the search engine.
After that, go to the official Cricut page.
Next, you need to tickmark the Create Cricut ID option.
Following this, type in the email and password.
Also, enter your first and second name, plus your country.

Further, go to the left side of the Terms and Conditions box.
Moving forward, tick the I Agree box.
Go to the bottom of your page and press the Create Cricut ID option.
After you complete the above steps, you will get a message regarding the completion of the process.
Finally, enter all the details and use your Cricut account ID.
These are the steps to create a Cricut ID efficiently. One thing you will need to keep in mind is to follow these steps properly.
Cricut Design Space Log In Using Simple Steps
The next process after creating the account is logging into the Cricut app. This process is easy; thus, you can do it without much effort.
At the start of the login process, move to the Cricut Design Space Account main page.
Now, look for the Sign In box on the page.
Next, click on the Sign in button.
Further, type in your Cricut ID and password.

Thereafter, look in the middle of your page and choose the Sign In button.
Following these steps, you will connect directly to your Cricut account.
Finally, you can use the tools and library to create your design.
Conclusion
Cricut Design Space is a great software that gives crafters the freedom to create limitless projects from several materials such as paper, wood, cardstock, fabric, etc. For this, first, you will need to have a Cricut machine and a system (Windows, Mac, and others) to download and install this Cricut app. Later, start with the Cricut Design Space log in steps to start with the application.
Frequently Asked Questions
What Steps Do I Need to Follow to Get Cricut Software on Android?
Those with Cricut machines and Android phones can download the Cricut Design app on their systems and craft it in an easy way. Follow these steps and get the app.
Open the Play Store on your Android phone.
Now, search for the Cricut Design Space app on your device.
Hit on the Install button to start installing the application.
How Can I Create a Cricut Account?
A computer or mobile device user needs to create a Cricut account. Only then can they begin with the Cricut Design Space log in procedure.Go through the steps given below.
First, move to the office website of Cricut.
Enter all the details.
Now, agree to the terms of use of Cricut.
Answer questions and install a plugin.
Then, switch on your Cricut machine.
In the end, use Cricut ID to sign in to the app.
What Amount Do I Need to Pay for Cricut Design Space?
If you are using a free version of the Cricut software, you will not have to pay any amount. The free version also allows Cricut users to use several images and fonts, plus designs in the library. However, if you want to move a step further and give your crafting process a next-level experience, go with the paid version. You will have to pay for some accounts to use Cricut Access free, Standard, or Premium versions.
Source :- https://cricutsetupprocess.online/how-to-get-started-with-cricut-design-space-log-in/
0 notes
Text
Cricut Design Software Download: Full Installation Guide
Welcome to this complete guide on the Cricut Design software download! Whether you’re a Mac or Windows user, I will walk you through the basic steps to download the Cricut software. All you need is a little patience and a willingness to follow along.
Ever since I got my Cricut machine, I have downloaded the Cricut Design Space software to use it. But earlier, I was using a Chromebook, and later, I found out that I can’t use it on a Chromebook. For this, I had to visit Cricut’s official website, and then I came to know about the system requirements. Luckily, I had an old Dell laptop with Windows 10 installed, which I am currently using.
As a crafting expert, I would like to teach you how to download Cricut Design Space. This software allows you to create, edit, modify, and much more. However, this is the software that will enable you to control or operate your Cricut machine. Let’s get started!
Minimum System Requirements to Download Cricut Design Software
Checking system requirements before the Cricut Design software download is important. You can’t just jump to Cricut’s site and download the app onto your desktop. This is not the right way as it can lead to error, resulting in performance issues, system inability, and other related issues. I check it every time before installing any software, be it the Cricut app or others. Hence, I suggest you check the following needs of your desktop that I have desired below for both Mac & Windows:
For Mac
Operating System — Windows 10 or later (64-bit)
Disk — 2 GB free
A USB port or Bluetooth is required
RAM — Minimum 4 GB
CPU — Intel Dual Core or equivalent to AMD processor
Display — Minimum 1024px x 768px screen resolution
For Windows
Operating System — macOS 11 or later
CPU — 1.83 GHz
A USB port or Bluetooth is required
Disk — 2 GB
RAM — Minimum 4 GB
Display — Minimum 1024px x 768px screen resolution
Cricut Design Software Download on a Computer
I have used both computers, so I know how to download Cricut Design Space on Mac & Windows. So, if you are a Windows user or Mac, you can simply learn to download the software by following the steps below:
For Windows
In the beginning, start with turning on the Cricut machine.
Then, plug its power cable into the wall outlet.
Now, navigate to any compatible browser — Google Chrome.
On your browser, visit the URL design.cricut.com.
Next, you will be moved to a new page where you have to select a checkbox.

You need to accept the T&C, go forward, and click the Download button.
Here, click on the Download tab to begin the Cricut download.
As the downloading begins, you have to wait until it is fully downloaded.
Afterward, you should head to the folder in your file explorer where you have downloaded it or not.
In your file explorer, go to your Downloads folder and verify it for downloaded files.
Double-click on the file you have downloaded and start the installation.
For your Cricut installation, you will have to follow the illustrated screen prompts.
For Mac
To get started, switch on your computer.
After that, you need to use an internet browser on a Mac.
Next, you have to use the URL design.cricut.com on the search bar.
Follow the simple-to-understand related instructions on the display and get the app.
When you have finally downloaded the Cricut Design Space, navigate to the folder where you downloaded your .dmg file. By default, it will be saved to your Downloads folder.
Following this, you need to double-click on the .dmg file to install it.
In the end, drag a Cricut icon to the Applications folder. It will eventually download your Cricut software to your Applications folder.

Finally, you have learned Cricut Design software download on Windows or Mac. Before that, I also showed you the minimum system requirements for downloading the app.
FAQs
Question 1: Do I need internet access to download the Cricut app?
Answer: Yes, you need the internet to download the Cricut software. To do this, you have to go to an internet browser. As you know, an internet browser requires an internet connection to open a website. In short, you will need internet access to download the software on your computer or phone.
Question 2: Why do I need to download the Cricut application?
Answer: There are many benefits to downloading the Cricut software, such as the ability to create designs from scratch or use a pre-made project. The software is also used to set up your Cricut cutting machine. Using this software, we can easily update the machine’s firmware, and the timely update of software keeps it up to date with new or latest features, ensuring a seamless design experience.
Question 3: Do I need a computer for the Cricut Design software download?
Answer: Not necessarily! Computers can be used to download files, but it is not always necessary. For example, if you want to use your Cricut on your Android mobile phone, you can navigate to your Play Store to install the app. Similarly, if you are an iOS user, just go to the App Store to install the same Cricut Design app.
Source: Cricut Design software download
Visit here For More Information: Cricut.com/setup
Cricut Explore Air 2
0 notes
Text
does microsoft windows 10 come with a vpn
🔒🌍✨ Get 3 Months FREE VPN - Secure & Private Internet Access Worldwide! Click Here ✨🌍🔒
does microsoft windows 10 come with a vpn
Microsoft Windows 10 VPN feature
Title: Exploring the VPN Feature in Microsoft Windows 10: A Comprehensive Guide
In today's digitally connected world, ensuring online privacy and security is paramount. Microsoft Windows 10, one of the most widely used operating systems globally, comes equipped with a built-in VPN (Virtual Private Network) feature, offering users an additional layer of protection and anonymity while browsing the internet.
The VPN feature in Windows 10 enables users to establish a secure connection to a private network over the internet. This functionality is particularly useful when accessing sensitive information or when connecting to public Wi-Fi networks, which are often vulnerable to cyber threats.
Setting up and using the VPN feature in Windows 10 is relatively straightforward. Users can access it through the system settings menu, where they can configure various parameters such as the VPN server address, authentication method, and encryption protocol. Once configured, users can easily toggle the VPN on or off with just a few clicks, providing instant privacy and security whenever needed.
One of the primary benefits of using the VPN feature in Windows 10 is its ability to mask the user's IP address, effectively hiding their online identity and location from prying eyes. This not only safeguards against potential surveillance and tracking but also allows users to bypass geographical restrictions and access region-locked content.
Moreover, the VPN feature in Windows 10 employs robust encryption algorithms to secure data transmission, ensuring that sensitive information remains protected from unauthorized access or interception.
Overall, the VPN feature in Microsoft Windows 10 is a valuable tool for enhancing online privacy and security. Whether you're browsing the web, accessing corporate networks remotely, or simply want to maintain anonymity online, leveraging this built-in functionality can provide peace of mind and a safer browsing experience.
Setting up VPN on Windows 10
Setting up a VPN on Windows 10 is a straightforward process that can provide you with enhanced online privacy and security. A Virtual Private Network, or VPN, creates a secure connection between your device and the internet, encrypting your data and hiding your IP address. This can help protect your sensitive information from cyber threats and prevent third parties from monitoring your online activities.
To set up a VPN on Windows 10, you can follow these simple steps:
Choose a reputable VPN service provider and sign up for an account.
Download and install the VPN app provided by your chosen provider.
Launch the app and log in using your credentials.
Select a server location from the list of available options.
Click on the connect button to establish a secure connection.
Once connected, your internet traffic will be encrypted, and your online identity will be masked, providing you with anonymity and ensuring your data remains secure. You can also customize your VPN settings to suit your preferences, such as enabling features like kill switch or split tunneling.
Remember to disconnect from the VPN when you no longer need it to ensure optimal performance and internet speed. By setting up a VPN on Windows 10, you can enjoy a safer and more private online experience while browsing, streaming, or accessing sensitive information.
Third-party VPN services for Windows 10
Using a third-party VPN service for Windows 10 can enhance your online security and privacy by encrypting your internet connection and hiding your IP address. With numerous options available, selecting the right VPN for your Windows 10 device is crucial for ensuring reliable performance and robust protection.
One popular choice among users is NordVPN, known for its strong encryption protocols and extensive server network. NordVPN offers user-friendly apps for Windows 10, making it easy to connect and navigate its features. Additionally, it boasts advanced security features like double VPN and CyberSec, which block ads and malicious websites.
ExpressVPN is another top contender, offering lightning-fast speeds and a wide range of server locations globally. Its Windows 10 app is intuitive and user-friendly, making it suitable for both beginners and experienced users. ExpressVPN also prioritizes privacy with its strict no-logs policy, ensuring your online activities remain private.
For those concerned about affordability, Surfshark is an excellent choice. Despite its budget-friendly pricing, Surfshark doesn't compromise on features or security. Its Windows 10 app includes features like CleanWeb, which blocks ads and malware, and MultiHop, which routes your connection through multiple servers for added security.
Users who prioritize anonymity may prefer ProtonVPN, known for its strong focus on privacy. ProtonVPN's Windows 10 app offers a user-friendly interface and utilizes high-level encryption to protect your data. With its Secure Core feature, ProtonVPN routes your traffic through multiple servers, making it even harder for third parties to track your online activities.
Ultimately, the best third-party VPN service for Windows 10 depends on your specific needs and preferences. Whether you prioritize speed, security, or affordability, there's a VPN out there to suit your requirements and provide peace of mind while browsing the internet.
Benefits of using a VPN on Windows 10
Using a Virtual Private Network (VPN) on Windows 10 offers a multitude of benefits for both individual users and businesses. VPNs increase online security and privacy by encrypting all internet traffic, making it difficult for third parties to monitor or intercept data. This is particularly important when using public Wi-Fi networks, as VPNs shield sensitive information such as passwords, banking details, and personal communications from potential hackers.
Another advantage of using a VPN on Windows 10 is the ability to bypass geo-restrictions and access region-locked content. By connecting to servers in different countries, users can unlock websites, streaming services, and online platforms that would otherwise be unavailable in their location. This not only enhances entertainment options but also enables access to important resources for research or work purposes.
Moreover, VPNs can improve internet performance by reducing latency and speeding up connection speeds. This is achieved by routing traffic through servers optimized for efficient data transmission, resulting in a smoother online experience for users. Additionally, some VPN services offer ad and malware blocking features that further enhance browsing security and speed.
In summary, utilizing a VPN on Windows 10 enhances online security, privacy, and accessibility while also potentially improving internet performance. Whether for personal use or business operations, the benefits of using a VPN on Windows 10 make it a valuable tool for safeguarding digital presence and maximizing online capabilities.
Privacy and security on Windows 10 with a VPN
Windows 10 is a popular operating system used by millions of people worldwide. However, many users are concerned about privacy and security while using the internet on their devices. One way to enhance privacy and security on Windows 10 is by using a Virtual Private Network (VPN).
A VPN creates a secure connection between your device and the internet, encrypting your data and masking your IP address. This helps protect your online activity from prying eyes, such as hackers, governments, or even your Internet Service Provider (ISP). When using a VPN on Windows 10, your online communications are encrypted, making it difficult for anyone to intercept and read your data.
By using a VPN on Windows 10, you can also access geo-restricted content and websites that may be blocked in your region. This is particularly helpful for users who want to browse the internet freely and securely without any restrictions.
It is essential to choose a reliable and trustworthy VPN provider to ensure maximum privacy and security on Windows 10. Look for VPNs that offer strong encryption protocols, a no-logs policy, and have a good reputation in the industry.
In conclusion, using a VPN on Windows 10 is a practical and effective way to enhance privacy and security while browsing the internet. By encrypting your data and hiding your IP address, a VPN ensures that your online activity remains private and secure from potential threats.
0 notes
Text
do you need to configure vpn on windows 10
🔒🌍✨ Get 3 Months FREE VPN - Secure & Private Internet Access Worldwide! Click Here ✨🌍🔒
do you need to configure vpn on windows 10
VPN setup on Windows 10
Setting up a VPN on Windows 10 is a straightforward process that can greatly enhance your online privacy and security. Whether you're looking to protect your data while browsing the internet or access geo-restricted content, a VPN can be a valuable tool. Here's how to set up a VPN on your Windows 10 device:
Choose a VPN Provider: Start by selecting a reliable VPN provider that meets your needs in terms of security, speed, and server locations. There are many options available, both free and paid, so be sure to research and choose one that suits you best.
Download and Install the VPN Software: Once you've chosen a provider, visit their website and download the appropriate software for Windows 10. Follow the installation instructions to set up the VPN on your device.
Launch the VPN Application: After installation, launch the VPN application on your Windows 10 device. You may need to sign in with your account credentials provided by the VPN provider.
Connect to a VPN Server: Once the VPN application is running, you'll typically be presented with a list of server locations to choose from. Select a server location based on your preferences, such as proximity or specific content access.
Establish Connection: Click the connect button to establish a connection to the chosen VPN server. Once connected, your internet traffic will be encrypted and routed through the VPN server, protecting your data from prying eyes.
Verify Connection: After connecting to the VPN server, you can verify your connection by visiting a website like whatismyip.com to confirm that your IP address has changed to reflect the VPN server location.
Adjust Settings (Optional): Depending on your preferences, you may want to explore the settings of the VPN application to customize your experience further. This may include options such as auto-connect on startup or a kill switch feature for added security.
By following these steps, you can easily set up a VPN on your Windows 10 device and enjoy a more secure and private online experience.
Windows 10 VPN configuration
Title: A Step-by-Step Guide to Setting Up a VPN on Windows 10
In today's digital age, safeguarding your online privacy and security is paramount. One effective way to achieve this is by using a Virtual Private Network (VPN). Fortunately, configuring a VPN on your Windows 10 device is a straightforward process. Here's a step-by-step guide to help you get started:
Select a VPN Provider: Before you begin, choose a reputable VPN provider that suits your needs. Look for features such as strong encryption, a wide server network, and user-friendly applications.
Subscribe and Download: Sign up for a subscription plan with your chosen VPN provider and download their Windows 10 application from their official website.
Install and Launch the Application: Once the download is complete, install the VPN application on your Windows 10 device. Launch the application and log in using your credentials.
Connect to a Server: After logging in, you'll be presented with a list of servers. Choose a server location from the list and click the "Connect" button to establish a secure connection.
Adjust Settings (Optional): Most VPN applications offer customizable settings to enhance your browsing experience. You can adjust parameters such as protocol selection, auto-connect preferences, and kill switch functionality according to your preferences.
Verify Connection: Once connected, verify that your VPN is active by visiting a website that displays your IP address. You should see the IP address of the VPN server you're connected to, ensuring that your online activities are encrypted and anonymous.
Disconnect When Not in Use: When you're finished browsing securely, remember to disconnect from the VPN to restore your regular internet connection.
By following these simple steps, you can configure a VPN on your Windows 10 device and enjoy enhanced privacy and security while browsing the web. Remember to choose a reliable VPN provider and regularly update your VPN application for optimal performance and protection. Stay safe online!
Virtual Private Network guide for Windows 10
Title: A Comprehensive Guide to Virtual Private Networks (VPNs) for Windows 10
In today's digital age, safeguarding your online privacy and security is paramount. One effective tool for achieving this is a Virtual Private Network (VPN). For Windows 10 users, setting up and utilizing a VPN is straightforward and can provide numerous benefits.
Firstly, what exactly is a VPN? Essentially, it's a service that creates a secure, encrypted connection over a less secure network, such as the internet. By connecting to a VPN server, your internet traffic is routed through this encrypted tunnel, ensuring that your data remains private and protected from prying eyes.
Setting up a VPN on Windows 10 is relatively simple. Begin by selecting a reputable VPN provider and signing up for their service. Once you've subscribed, download and install the VPN client software provided by the provider. Follow the installation prompts, and once installed, launch the VPN client.
Within the VPN client, you'll typically find a list of servers located in various regions around the world. Choose a server location based on your preferences, such as privacy laws and server speed. Click connect, and within moments, your Windows 10 device will be securely connected to the VPN server.
Once connected, all of your internet traffic will be encrypted, protecting your data from hackers, ISPs, and other malicious entities. Additionally, a VPN allows you to bypass geo-restrictions, accessing region-locked content such as streaming services and websites.
In conclusion, utilizing a VPN on Windows 10 is an effective way to enhance your online security and privacy. By following these simple steps, you can enjoy a safer and more unrestricted internet browsing experience. Stay protected and surf the web with peace of mind by implementing a VPN on your Windows 10 device today.
How to configure VPN on Windows 10
Configuring a Virtual Private Network (VPN) on your Windows 10 device can enhance your online security and privacy while allowing you to access geo-restricted content. Setting up a VPN on Windows 10 is a straightforward process that can be completed in a few simple steps.
To configure a VPN on Windows 10, start by opening the Settings menu and selecting the "Network & Internet" option. From there, choose the "VPN" tab on the left-hand side of the screen and click on "Add a VPN connection" on the right. This will prompt you to fill in the necessary information for your VPN connection, including the VPN provider, connection name, server name or address, VPN type, and sign-in credentials.
Once you have entered all the required details, you can save the VPN connection and return to the main Settings menu. To connect to the VPN, go back to the "Network & Internet" section, select the VPN connection you just created, and click on the "Connect" button. You will be prompted to enter your username and password, and once you do, your Windows 10 device will establish a secure VPN connection.
Remember to configure the VPN settings according to your specific VPN provider's instructions to ensure a successful connection. By following these steps, you can configure a VPN on your Windows 10 device and enjoy a more secure and private online experience.
Windows 10 VPN settings tutorial
Windows 10 VPN Settings Tutorial:
Setting up a Virtual Private Network (VPN) on your Windows 10 computer can help enhance your online privacy and security. Whether you want to access region-restricted content or protect your data on public Wi-Fi networks, configuring a VPN on Windows 10 is a straightforward process.
To begin, navigate to the Start menu and select "Settings." From there, click on "Network & Internet" and then choose "VPN" from the left sidebar. Next, click on "Add a VPN connection."
You will need to provide the necessary information to set up your VPN connection, including the VPN provider, connection name, server address, and VPN type. Your VPN provider will supply you with these details, so make sure to have them handy.
After entering the required information, click "Save" to create the VPN connection. You can now connect to the VPN by clicking on the network icon in the system tray, selecting your VPN connection, and clicking "Connect."
Once connected, your internet traffic will be encrypted, providing you with a secure connection to the internet. You can manage your VPN settings by going back to the "VPN" section in the Settings menu, where you can edit or remove existing connections.
By following this Windows 10 VPN settings tutorial, you can easily set up a VPN on your computer and enjoy a safer and more private online experience. Whether you're browsing the web or accessing sensitive information, using a VPN can help protect your data and privacy.
0 notes
Text
do you need a special vpn for windows
🔒🌍✨ Get 3 Months FREE VPN - Secure & Private Internet Access Worldwide! Click Here ✨🌍🔒
do you need a special vpn for windows
Windows-specific VPNs
A Windows-specific VPN is a virtual private network service tailored to work seamlessly with Windows operating systems. VPNs are essential tools for enhancing online security, privacy, and accessibility. By encrypting users' internet traffic and routing it through a secure server, VPNs shield personal data from prying eyes and protect users from cyber threats.
Windows-specific VPNs are specifically designed to integrate effectively with Windows OS, ensuring a user-friendly experience for Windows users. These VPNs offer dedicated apps for Windows devices, simplifying the installation and setup process. Users can easily connect to the VPN server with just a few clicks, enhancing their online security within minutes.
One of the key advantages of a Windows-specific VPN is the ability to bypass geo-restrictions and access region-locked content. By connecting to a VPN server located in a different country, users can unblock websites, streaming services, and online platforms that may be restricted in their region. This feature is particularly useful for Windows users who want to access international content or maintain access to their favorite websites while traveling.
In addition to providing online security and access benefits, Windows-specific VPNs also offer advanced features such as split tunneling, kill switch, and DNS leak protection. These features further enhance users' privacy and security while ensuring a seamless browsing experience on Windows devices.
Overall, a Windows-specific VPN is a valuable tool for Windows users looking to safeguard their online activities, access global content, and enjoy a secure internet experience. By choosing a reliable VPN service tailored to Windows OS, users can enjoy peace of mind knowing their online presence is protected.
VPN compatibility with Windows
A VPN, or Virtual Private Network, is a tool that enables users to protect their online activities by establishing a secure and encrypted connection to the internet. When it comes to VPN compatibility with Windows, users will be pleased to know that most reputable VPN providers offer dedicated applications that are fully compatible with Windows operating systems.
Whether you are using Windows 7, 8, or 10, you can easily set up and use a VPN on your device. Installing a VPN on your Windows system is a straightforward process that typically involves downloading the VPN application from the provider's website, installing it on your computer, and then launching the app to connect to a VPN server.
Once connected, a VPN encrypts your internet traffic and hides your IP address, providing you with enhanced online privacy and security. This is particularly important when using public Wi-Fi networks, as it protects your data from potential hackers and snoopers.
Moreover, using a VPN on Windows allows you to bypass geo-restrictions and access region-locked content on streaming platforms like Netflix, Hulu, and BBC iPlayer. By connecting to a VPN server in a different country, you can mask your real location and access content that may not be available in your region.
In conclusion, VPN compatibility with Windows offers users a convenient way to enhance their online security, privacy, and access to geo-restricted content. With easy setup and user-friendly applications, using a VPN on Windows is a valuable tool for internet users looking to safeguard their digital presence.
Specialized VPNs for Windows users
Title: Exploring Specialized VPNs Tailored for Windows Users
In today's digital age, safeguarding your online activities is paramount, especially for Windows users who often find themselves vulnerable to various cyber threats. Virtual Private Networks (VPNs) serve as indispensable tools for enhancing privacy, security, and access to restricted content. For Windows users seeking specialized VPN solutions, several options cater specifically to their operating system's requirements.
One standout choice is NordVPN, renowned for its user-friendly interface and robust security features. With dedicated Windows apps, NordVPN offers seamless integration, ensuring hassle-free protection for browsing sessions, streaming activities, and file downloads. Its advanced encryption protocols and no-logs policy assure users of utmost privacy and anonymity online.
Another notable option is ExpressVPN, which excels in providing lightning-fast connection speeds and reliable performance on Windows devices. Its intuitive Windows client offers one-click connectivity, allowing users to instantly secure their internet traffic and bypass geo-restrictions with ease. ExpressVPN's extensive server network ensures optimal performance and accessibility across various online platforms.
For Windows users prioritizing affordability without compromising on quality, CyberGhost VPN presents an attractive solution. Its specialized Windows app features a simplified interface, making it ideal for novice users. CyberGhost VPN boasts robust security features, including malware and ad blocking, alongside optimized servers for streaming and torrenting activities.
Furthermore, Surfshark stands out as a budget-friendly option offering unlimited simultaneous connections on Windows devices. With a focus on user privacy and security, Surfshark employs industry-standard encryption protocols and a strict no-logs policy. Its Windows app includes additional features like CleanWeb for ad and malware blocking, enhancing the overall browsing experience.
In conclusion, specialized VPNs tailored for Windows users provide an indispensable layer of protection and versatility for safeguarding online activities. Whether prioritizing speed, affordability, or user-friendliness, there are numerous options available to cater to the diverse needs of Windows users in today's digital landscape.
VPN features tailored for Windows
Title: Enhance Your Windows Experience with These VPN Features
In today's digital age, ensuring online privacy and security is paramount, especially when using Windows devices. Fortunately, VPNs (Virtual Private Networks) offer a range of features specifically designed to enhance the user experience on Windows platforms. Here are some key features tailored for Windows users:
Compatibility with Windows OS: Leading VPN providers offer seamless compatibility with various versions of Windows, including Windows 10, 8, and 7. Whether you're using a desktop, laptop, or tablet running Windows, you can easily install and configure the VPN client to safeguard your online activities.
Kill Switch: A Kill Switch is a crucial feature for Windows users, particularly for those concerned about sudden VPN disconnections. This feature automatically shuts down internet access if the VPN connection drops, preventing any data leaks or exposure of your real IP address.
DNS Leak Protection: DNS (Domain Name System) leaks can compromise your privacy by revealing your browsing history to third parties. VPNs with built-in DNS leak protection ensure that all DNS requests are encrypted and routed through the VPN server, preventing any leaks that could potentially expose your online activities.
Split Tunneling: Windows users often have the need to access both local and foreign content simultaneously. Split tunneling allows you to route specific traffic through the VPN while directing other traffic through your regular internet connection. This feature provides flexibility and efficiency, especially when using applications that may not function properly when connected to a VPN.
Stealth Mode: Windows users in restrictive regions or those facing censorship may benefit from VPNs offering a Stealth Mode feature. This feature disguises VPN traffic as regular HTTPS traffic, making it harder for network administrators or ISPs to detect and block VPN usage.
By leveraging these tailored VPN features, Windows users can enjoy enhanced privacy, security, and accessibility while navigating the digital landscape with confidence. Whether you're browsing, streaming, or conducting sensitive transactions online, a reliable VPN can be your ally in safeguarding your digital footprint on Windows devices.
Optimal VPN solutions for Windows OS
When it comes to ensuring online security and privacy on your Windows operating system, utilizing a Virtual Private Network (VPN) is crucial. VPNs work by encrypting your internet connection, making it more secure and anonymous, thus preventing third parties from tracking your online activities. For Windows OS users, finding the optimal VPN solution is essential for a seamless and protected browsing experience.
One popular VPN option for Windows users is ExpressVPN. This provider offers a user-friendly interface and high-speed connections, making it ideal for streaming, gaming, and general browsing. With servers in numerous locations worldwide, ExpressVPN allows users to access geo-restricted content and websites with ease.
Another reliable choice for Windows OS is NordVPN. Known for its strong encryption protocols and advanced security features, NordVPN offers a Double VPN feature for an extra layer of privacy. Additionally, NordVPN provides specialized servers for activities such as P2P file sharing and streaming, ensuring a smooth and secure online experience.
For those seeking a budget-friendly VPN solution for Windows, CyberGhost is a popular option. Offering strong security features, including an automatic kill switch and malware blocker, CyberGhost ensures that your online activities remain private and protected. With dedicated servers for streaming and torrenting, CyberGhost is a versatile choice for Windows users.
In conclusion, safeguarding your online privacy and security on a Windows OS is simplified with the use of a VPN. Whether choosing ExpressVPN for speed, NordVPN for advanced security features, or CyberGhost for affordability, selecting the optimal VPN solution will enhance your browsing experience while keeping your data safe from prying eyes.
0 notes
Text
Cricut Design Space Download for Laptop: Easy Guide

Hey, have you just bought a new Cricut machine and want to set it up? First of all, congratulations on getting your first new crafting machine. I am sure you will rock it. Also, you are smart enough to open the right blog, where I have explained about the Cricut Design Space download for laptop, including Windows or Mac.
I have taught many people how to set up their Cricut machines, including downloading the Cricut software on a computer and adding Cricut to their devices. As an experienced crafter, I am adept at making intricate projects and can troubleshoot any errors that occur with your Cricut machine.
Despite this, I want to teach you how to download the Cricut app on your laptop. I will explain both Windows and Mac computers individually. But before that, let’s look at the system requirements.
System Requirements for Using Cricut Design Space on Laptop
Before I explain the Cricut Design Space download for laptop, let’s discuss your computer’s requirements to run this software. Check the system needs before you download Cricut software. Below, I have explained the system requirements for Mac and Windows computers separately. So, don’t worry if you are using any of them. Let’s dive in without further delay.
Here are the system needs for Windows users:
Operating System: Windows 10 or later (64-bit)
CPU: Intel Dual Core or equivalent to AMD processor
Display: Minimum 1024px x 768px screen resolution
Connection: A USB port or Bluetooth
RAM: Minimum 4 GB
Disk: 2 GB free
Here are the system needs for Mac users:
Operating System: macOS 11 or later
CPU: 1.83 GHz
Display: Minimum 1024px x 768px screen resolution
Connection: A USB port or Bluetooth
RAM: Minimum 4 GB
Disk: 2 GB free
Now that we have a clear idea of the system requirements for computer users, let’s learn how to download the Cricut app.
Cricut Design Space Download for Laptop (Windows)
If you are a Windows user, you can easily download your Cricut Design app in simple steps. You have to use a browser such as MS Edge, Firefox, or Chrome to download the software. In the example below, I will use Google Chrome. The screen may change slightly for different browsers, but the steps will be the same. Let’s start.
Here are the steps to Cricut Design Space download for Windows 10:
Navigate to Cricut’s official site, design.cricut.com, using any browser you use.
As you reach the site, hit the checkbox to accept Cricut’s Terms & Policy.
After that, you will notice the Download button is clickable now. Hence, you can click on it to download the software.
As you finish downloading, you need to ensure which folder your file is in. It is likely in your Downloads folder under File Explorer.
Look for the downloaded file and double-click on it to start installing your Cricut app.
During this time, your computer will ask for your confirmation, such as whether you should allow the software to make some changes to a PC. If you want, click Yes and proceed.
After you finish the installation, register for a Cricut account. Use Cricut ID and password for it.
Finally, you have downloaded your Cricut software on your Windows computer.
Cricut Design Space Download for Laptop (Mac)
Even downloading a Mac’s Cricut Design Space app is not a big deal. You can simply download it by visiting the site from any internet browser. The first few steps are similar to Windows computers. Further, there is something you will find different. Let’s get into this:
Here is how to download Cricut Design Space on Mac:
Open an internet browser on your Mac.
On the search bar, enter cricut.com/setup.
Once you are on the website, you must click on the box to accept “I agree to Cricut’s Terms & Conditions.”
Here, you will move to a screen where you will want to choose the file location to save your software file.
Post this; the download will start.
Then, head to the Downloads folder and look for the .dmg file.
Once you find the .dmg file, you will need to double-clickon it to begin the installation.
During installation, you have to drag the Cricut app icon to the Applications folder.
Finally, it will add your Cricut Design app to your folder.
Now, double-click the app icon to launch it and start setting up your machine quickly.
Conclusion
Above, I have clearly explained the Cricut Design Space download for laptop, including Mac and Windows computers. Now, you can easily start setting up your machine quickly. Observe the steps presented above and start using your Cricut without any trouble. However, the foremost important thing is that you check your system requirements to ensure the smooth functioning of your software. So, ensure everything I have mentioned in this write-up. All the best!
FAQs
Can I get Cricut Design Space for free?
Absolutely, yes; Cricut Design Space is a free software offered by Cricut. This companion app is used to create intricate designs in no time. This is a very easy-to-use software. However, you might need to pay if you want to access many of its resources. For example, if you buy a Cricut Access plan, you must pay for it.
How to add my Cricut to my computer?
To add the Cricut to your computer, you have two options: USB cable or Bluetooth. To add this to your Windows computer, you have to follow the steps below:
Navigate to your computer Settings.
Then, go to the Devices option.
Check if you have turned on your Bluetooth.
Now, tap on Add Bluetooth or other device.
Click on Bluetooth and let your computer look for your Cricut.
If found, click on it to add.
Are all Cricut machines compatible with the Cricut app?
Certainly, yes! All models of Cricut machines, including Cricut Maker, Cricut Explore, Joy, and Venture, work with the app. Without this app, you will not be able to use the machine. Besides, you need to check the system requirements of the computer and mobile device on which you are going to download the app. Checking system requirements will ensure the smooth functioning of your Cricut software on your computer.
Source: Cricut Design Space Download for Laptop
#cricut design space download#cricut design space app#cricut design space login#cricut design space software#cricut machine setup#cricut account login
1 note
·
View note
Text
How to Connect Cricut to iPhone: Ultimate Guide for Beginners
Hey, crafting folks? Are you here to learn how to connect Cricut to iPhone? If yes, then you are in the right place. The following guide will show you how to connect your Cricut machine to your iPhone.
The best thing about Cricut is that it offers offline features for iPhone users, which is why I chose the iPhone instead of the iPad. Besides, Cricut feels easier to use with a convenient mobile phone than it does on a computer. Also, machine setup is easy, and I don’t have to spend hours connecting to my Cricut.
The idea behind writing this post is to explain it to all the beginner crafters who are new to Cricut. In addition, if they don’t know how to connect their Cricut to an iPhone. I have made the steps really easy so anyone can connect their Cricut in one go. Let’s delve into this blog and explore it deeply.
Minimum System Requirements to Connect Cricut to iPhone
Before you learn how to connect Cricut to iPhone, you first need to check its system requirements so that it would be clear for all of you to see whether your device is compatible with your machine or not. It will also help you run the Cricut software smoothly on iPhone devices.
Here are the system requirements for iPhone users:
Operating System
iOS 17
iOS 16
iOS 15
Internet Speed
Minimum 2 – 3 Download Mbps
Minimum 1 – 2 Mbps Upload
Offline Feature
The offline feature is available for iOS devices but not iPad users.
I think I have explained everything you need to connect Cricut to an iPhone. Let’s move to the next section, where I have answered a question asked by one of my commenters: How to connect my Cricut to my iPhone?
Which Cricut Machines Are Compatible With iPhones?
The same question came to mind when I wanted to use my Cricut with my iPhone. Since I had all the Cricut models available, I tried all of them. And I found that almost all Cricut machines, including the Explore Air 2, Explore 3, Maker, Maker 3, Joy, and Joy Xtra, are compatible with iPhones.
You will need a companion app, Cricut Design Space, to connect these machines to your iPhone. However, the iPhone, iPad, Mac, Android, and Windows applications are available. Since you are using an iPhone, Bluetooth is the only way to connect Cricut to an iPhone. In addition, Cricut Joy can never be connected using a USB cable as there are no USB ports.
Overall, you can connect all the Cricut machines to your iOS devices. So, chillax and begin exploring your endless possibilities with Cricut. Now, let’s move to the second option, to connect Cricut to the iPhone.
How to Connect Cricut to iPhone for the First Time?
Whenever you are going to connect your Cricut to any device, you must ensure the distance. Distance is a big factor only when you have to connect your Cricut wirelessly. So, check and verify whether there is a 10 to 15-ft gap present between your computer and Cricut. If everything seems okay, then follow the steps below:
Go to your iPhone smartphone and then launch the Settings app.
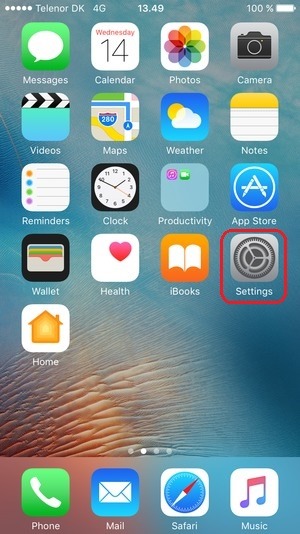
Afterward, go to the Bluetooth section and turn it on if it is not already on.
Ensure your Cricut product is turned on before proceeding to the next step.
Now, your Bluetooth will start searching for nearby devices. Be patient and let your iPhone find your Cricut model.
When you see the Cricut model number, then you should tap on it to pair it.
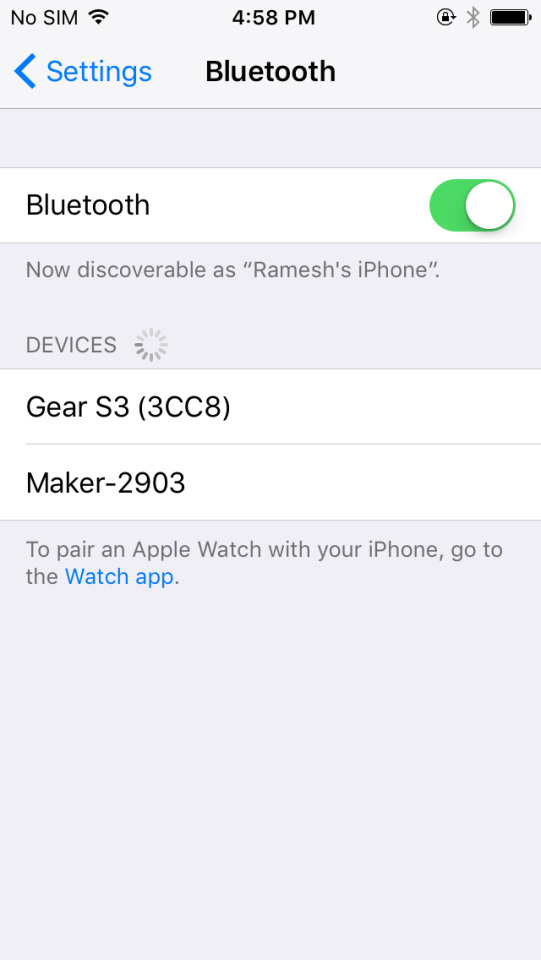
If four digits of PIN are needed, you have to enter 0000.
Lastly, you just need to click on the Pair button.

As you might have understood how to connect Cricut to iPhone, you will have easy access in your hand to control your Cricut machine.
FAQs
Question 1: Which Cricut machine will work with my iPhone?
Answer: Almost all Cricut models are compatible with iOS devices. Whether you use your iPhone or iPad, you can work on your Cricut machine easily without any problem. Also, if I mention Cricut Joy, you will wonder if there is no hardware to control it. It is completely controlled by using the Cricut Design Space, and hence, you can use your iPhone to control your Cricut Joy uninterruptedly.
Question 2: Will I get all the features of the Cricut app on my iPhone?
Answer: Almost all the features are available for iPhone users so that they can use it without any problem. Below are the important feathers that I have mentioned. It will help you figure out what things are available on the Cricut app if you use it on an iPhone:
Knife blade cutting
Link physical cartridges
Machine setup
Contour
Flatten to print
Curve Text
Cut & write in one step
Attach
Bluetooth compatible
Image upload
Question 3: Does Cricut cost anything to connect Cricut to my iPhone?
Answer: No, not at all. Cricut never charges for anything except if you are interested in buying its Cricut Access Subscription. Whether you are setting up or downloading Cricut software, you will not need to pay a single penny. In fact, you will find many free resources on the Cricut app, such as images, fonts, and ready-made projects.
Question 4: Why should I connect my Cricut to my iPhone?
Answer: Connecting Cricut to an iPhone is required when you have your new Cricut machine and want to set it up. However, while setting up your machine, you should add it to your device. In order to connect your desktop or phone, you have to use a USB cable or Bluetooth.
Let’s Recap
Finally, you have learned how to connect Cricut to iPhone. Once you have connected your Cricut to your compatible phone device, you will just need to proceed with setting up your Cricut. As you complete the setup, the machine will be ready to use in no time. However, never forget to check the system needs for the application to function better. Eventually, you can start exploring the endless possibilities with our Cricut machine—and that with a single touch of your iPhone!
#How to connect cricut to iPhone#how to connect my cricut to my iPhone#cricut.com/setup mac#cricut.com/setup pc#cricut.com/setup windows#cricut.com/setup#cricut design space
0 notes
Text
Are you looking for a convenient way to stream IPTV on your Microsoft devices? Look no further than MyIPTV Player. With its seamless streaming capabilities and user-friendly setup, MyIPTV Player is the perfect solution for enjoying IPTV channels on your Windows Phone, Windows 10, and Xbox One devices. But how exactly does it work? Let's find out.
Key Takeaways:
MyIPTV Player allows users to play IPTV channels on their Microsoft devices, including Windows Phone, Windows 10, and Xbox One.The app can be easily downloaded from the Microsoft store and offers a seamless streaming experience.Setting up MyIPTV Player involves adding a playlist and selecting the desired channels for playback.MyIPTV Player offers a wide range of features, such as channel grouping, recording options, favorites management, and channel filtering.Optimizing IPTV streaming on MyIPTV Player involves adjusting settings, ensuring a stable internet connection, and using supported formats and codecs.
How to Set Up MyIPTV Player for IPTV on Xbox and Windows
Setting up MyIPTV Player on your Xbox or Windows device is a straightforward process. By following these simple steps, you'll be able to enjoy your favorite IPTV channels in no time.Download MyIPTV Player from the Microsoft Store: Begin by downloading the MyIPTV Player app from the Microsoft Store on your Xbox or Windows device. Simply search for "MyIPTV Player" and click on the app to start the download.Open the MyIPTV Player app and go to settings: Once the app is downloaded and installed, open it and navigate to the settings menu.Add a new playlist and EPG source: In the “Remote Channel List section“ select "Add new playlist and EPG source." Here, you'll need to enter the necessary details, including the playlist name and the M3U playlist URL.Select the playlist: After adding the playlist, go back to the settings menu and select the playlist you just added under the "Select channel playlist" section.Start watching: Once you've completed the setup process, you can start watching the added channels on MyIPTV Player. Simply click on the "Channels" tab to access and stream your IPTV channels.
With MyIPTV Player set up on your Xbox or Windows device, you'll have a seamless and convenient way to enjoy IPTV streaming. Now you can sit back, relax, and enjoy your favorite channels at your fingertips!
Why Choose MyIPTV Player?
By choosing MyIPTV Player, you gain access to a wide range of IPTV channels and a seamless streaming experience. Its user-friendly interface and customization options make it a preferred choice for many users. Plus, with its availability on the Microsoft Store, downloading and setting up MyIPTV Player on your Xbox or Windows device is a breeze.
Adding IPTV Channels to MyIPTV Player on Microsoft Devices
In order to enjoy a wide range of IPTV channels on the MyIPTV Player app, you need to add them to your playlist. Follow these simple steps to add IPTV channels to the app: Open the MyIPTV Player app on your device and navigate to the settings. Select "Add new playlist and EPG source" to create a new playlist. Enter a name for the playlist, such as "My Channels". In the "Remote Channel List" section, enter the M3U playlist URL provided by your IPTV provider. Click on "Add remote list" to add the playlist to MyIPTV Player. Go back to the settings and select the newly added playlist under the "Select channel playlist" section.Once you have completed these steps, all the added channels will be available for you to enjoy under the "Channels" tab on the app.
Example:
Let's say you have subscribed to an IPTV service that provides you with a remote playlist. The IPTV provider has given you an M3U playlist URL. To add the channels from this playlist to MyIPTV Player, follow the steps mentioned above. This will allow you to access all the channels provided by your IPTV service directly through the MyIPTV Player app.StepDescription1Open the MyIPTV Player app on your device.
2Navigate to the settings.3Select "Add new playlist and EPG source".4Enter a name for the playlist.5Enter the M3U playlist URL provided by your IPTV provider in the "Remote Channel List" section.6Click on "Add remote list".7Go back to the settings.8Select the playlist under the "Select channel playlist" section.With these simple steps, you can easily add IPTV channels to MyIPTV Player and start enjoying your favorite content.
MyIPTV Player Features and Benefits
MyIPTV Player offers a range of features that enhance the IPTV viewing experience. Whether you're streaming live TV or catching up on your favorite shows, MyIPTV Player has you covered with its powerful capabilities.
1. HTTP Live Streaming (HLS) and MPEG TS Support
With MyIPTV Player, you can enjoy seamless streaming with support for both HTTP Live Streaming (HLS) and MPEG TS formats. This ensures that you can watch your IPTV channels without any buffering or playback issues.
2. Automatic Channel Grouping
MyIPTV Player automatically groups channels based on their channel data, making it easier for you to navigate and find your favorite content. Say goodbye to scrolling through a long list of channels!
3. Built-in EPG Support
Electronic Program Guide (EPG) is built right into MyIPTV Player, allowing you to see detailed program information for each channel. Plan your TV sessions more efficiently with this handy feature.
4. Recording Option for Channels
Never miss a moment of your favorite shows or sports events. MyIPTV Player lets you record your preferred channels, so you can watch them later at your convenience.
5. Favorites Management
Keep all your go-to channels in one place with the favorites management feature. Easily mark your favorite channels and access them quickly for a personalized viewing experience.
6. Multiple Channel Playlist Support
MyIPTV Player supports multiple channel playlists, allowing you to have different playlists for various categories or preferences. Switching between playlists is simple and seamless.
7. Download Center for VOD Files
Enjoy video-on-demand (VOD) files. MyIPTV Player has a download center where you can easily access and manage your downloaded VOD files, keeping everything organized.
8. Channel Filtering Options
Find the channels you want quickly and efficiently with the channel filtering options available in MyIPTV Player. Filter channels by category, genre, or language to streamline your viewing experience.These features make MyIPTV Player a versatile and user-friendly IPTV player that caters to your unique preferences and needs.
Now that we've explored the exciting features of MyIPTV Player, let's move on to troubleshooting common issues that users may encounter and how to optimize IPTV streaming on this incredible app. But before that, let's take a look at the supported formats and codecs in the next section.
Troubleshooting MyIPTV Player on Microsoft Devices
While using MyIPTV Player on Microsoft devices, generally, provides a smooth IPTV experience, some users may encounter common issues that can hinder playback and cause app crashes. Fortunately, these problems can often be resolved through simple troubleshooting steps.An essential troubleshooting step is to ensure that the VLC Player is installed on the device and selected as the default media player in the MyIPTV Player settings. VLC Player is widely compatible with various video formats and codecs, making it a recommended choice for optimal playback performance.Another crucial consideration is the stability of your internet connection. A weak or intermittent connection can lead to buffering issues and interruptions in the IPTV stream. Verify that your internet connection is stable and, if necessary, try connecting to a more robust network to enhance the viewing experience.Updating the MyIPTV Player app to the latest version is another troubleshooting step that can address potential bugs and improve overall performance.
Developers routinely release updates to address known issues and introduce new features, so keeping the app up to date is highly recommended.If playback issues or app crashes persist after implementing these troubleshooting steps, seeking assistance from the MyIPTV Player community can provide valuable insights and solutions. Online forums and user communities often offer helpful advice and guidance based on their own experiences.Pro Tip: To ensure a seamless IPTV experience, always stay up to date with the latest MyIPTV Player app version, use a stable internet connection, and explore the troubleshooting resources available in the MyIPTV Player community.If you're still unable to address the playback issues or app crashes, contacting the MyIPTV Player app developer directly can provide expert support and assistance tailored to your specific situation. Developers are usually well-equipped to handle technical issues and can offer personalized solutions to enhance your MyIPTV Player experience on Microsoft devices.
Common Issues with MyIPTV Player
Here are some of the common issues that users may encounter when using MyIPTV Player on Microsoft devices:Playback stuttering or freezingApp crashing or becoming unresponsiveMissing or distorted audioChannel buffering or loading issuesDifficulty adding or managing playlistsBy following the troubleshooting steps outlined above and seeking assistance from the MyIPTV Player community or app developer when necessary, users can resolve these issues and enjoy uninterrupted IPTV streaming on their Microsoft devices.Stay tuned for the next section where we explore how to optimize IPTV streaming on MyIPTV Player.
Optimizing IPTV Streaming on MyIPTV Player
Users can optimize IPTV streaming on MyIPTV Player by adjusting certain settings. In the app settings, users can choose between the VLC library and Windows 10 media player for media playback. Additionally, users can enable PIN protection for added security. Optimizing streaming also involves ensuring a stable internet connection and using supported formats and codecs. By optimizing these aspects, users can enjoy smooth and high-quality IPTV streaming on MyIPTV Player.
Choosing the Media Player
To optimize IPTV streaming on MyIPTV Player, users can select their preferred media player in the app settings. Both the VLC library and Windows 10 media player offer reliable playback options, but users may have personal preferences. By choosing the media player that suits their needs, users can enhance their streaming experience on MyIPTV Player. Media Player Advantages VLC Library ✔️ Wide range of supported formats and codecs
✔️ Advanced playback features
✔️ Customizable settings Windows 10 Media Player ✔️ Seamlessly integrated with Windows 10
✔️ Familiar interface for Windows users
✔️ Smooth playback performance
Enabling PIN Protection
For added security, users can enable PIN protection in the MyIPTV Player settings. This feature restricts unauthorized access to the app and ensures that only authorized users can use MyIPTV Player on their Microsoft devices. By enabling PIN protection, users can have peace of mind while enjoying their IPTV streaming experience.
Stable Internet Connection
A stable internet connection is crucial for optimizing IPTV streaming on MyIPTV Player. Buffering and interruptions can negatively impact the viewing experience. To ensure a stable connection, users should connect their Microsoft device to a reliable and high-speed network. Additionally, minimizing other bandwidth-intensive activities, such as downloads or streaming on other devices, can help maintain a smooth IPTV streaming experience on MyIPTV Player.
Supported Formats and Codecs
Using supported formats and codecs is essential for optimal IPTV streaming on MyIPTV Player. By utilizing compatible formats and codecs, users can ensure smooth playback and minimize compatibility issues. MyIPTV
Player supports formats like HTTP Live Streaming (HLS) and MPEG TS, while also handling codecs such as H.264, H.265, MPEG-2, and AAC. By using supported formats and codecs, users can enjoy their IPTV channels without interruptions.
MyIPTV Player Supported Formats and Codecs
MyIPTV Player supports a wide range of formats and codecs, ensuring seamless playback of IPTV channels. It is compatible with the commonly used HTTP Live streaming (HLS) and MPEG TS formats, ensuring that users can easily stream their favorite content. Moreover, MyIPTV Player can handle various codecs, including H.264, H.265, MPEG-2, and AAC. This extensive codec support allows for the smooth transmission of audio and video data, enhancing the overall IPTV streaming experience.Below is a comprehensive table showcasing the supported formats and codecs for MyIPTV Player: Supported Formats Supported Codecs HTTP Live streaming (HLS) H.264 MPEG TS H.265 MPEG-2 AAC
With support for these formats and codecs, MyIPTV Player ensures optimal compatibility and seamless playback of IPTV channels on Microsoft devices. Users can enjoy their favorite content without worrying about compatibility issues, resulting in an enhanced viewing experience.
Comparing MyIPTV Player with Other IPTV Players for Microsoft Devices
When it comes to IPTV players for Microsoft devices, MyIPTV Player stands out as a feature-rich and reliable option. Compared to other players, MyIPTV offers a user-friendly interface, built-in EPG support, channel grouping, recording options, and more. While other players like VLC Media Player also offer IPTV playback, MyIPTV Player is specifically designed for IPTV streaming and provides a seamless experience within the Microsoft ecosystem.
Features Comparison:
Player User-Friendly Interface Built-in EPG Support Channel Grouping Recording Options MyIPTV Player ✅ ✅ ✅ ✅ VLC Media Player ✅ ❌ ❌ ❌ Player X ✅ ✅ ❌ ❌ Player Y ✅ ✅ ✅ ❌ As seen in the comparison table, MyIPTV Player offers a comprehensive set of features that cater specifically to IPTV streaming on Microsoft devices. Its user-friendly interface makes it easy for users to navigate and access their favorite channels. The built-in EPG support ensures accurate program information, enhancing the viewing experience. Channel grouping allows users to organize their channels for quicker access, while recording options provide the flexibility to record and watch content at their convenience.MyIPTV Player provides a seamless experience within the Microsoft ecosystem.While other players like VLC Media Player may offer IPTV playback, they lack the specialized features and seamless integration that MyIPTV Player provides. MyIPTV Player is optimized for Microsoft devices, ensuring compatibility and optimal performance across the Windows and Xbox platforms. Whether it's streaming live TV, sports, or movies, MyIPTV Player delivers a superior IPTV experience.With MyIPTV Player, Microsoft device users can enjoy high-quality IPTV streaming with an intuitive interface, advanced features, and seamless integration. Experience the best IPTV player for Xbox and Windows devices and elevate your IPTV viewing experience with MyIPTV Player.
Xbox Streaming with MyIPTV Player
With MyIPTV Player's compatibility with Xbox One, users can now enjoy the convenience of streaming IPTV channels directly on their gaming console. By downloading and setting up MyIPTV Player on Xbox, users can unlock a whole new level of entertainment on the big screen.The seamless integration of MyIPTV Player with Xbox One offers a user-friendly interface that makes navigating through channels and content a breeze. Whether you're exploring live TV channels, catching up on missed episodes, or immersing yourself in the latest movies, MyIPTV Player ensures a smooth and enjoyable streaming experience.
MyIPTV Player enhances the gaming and entertainment experience on Xbox by providing advanced features such as channel filtering, favorites management, and the capability to record IPTV content. Users can easily customize their viewing preferences and access their favorite channels with just a few clicks.The compatibility of MyIPTV Player with Xbox One provides a seamless transition between gaming and streaming, keeping all your digital entertainment needs in one place. Whether you're taking a break from gaming or looking to relax after an intense gaming session, MyIPTV Player on Xbox adds diversity and convenience to your entertainment options.By leveraging MyIPTV Player on Xbox, users can enjoy the flexibility and versatility of IPTV streaming on their gaming console. The combination of gaming and entertainment in one device makes the Xbox a powerhouse for all your digital content needs.
Windows IPTV Setup with MyIPTV Player
MyIPTV Player is a versatile media player that is compatible with various Windows devices, including Windows 10 and Windows Phone. With MyIPTV Player, Windows users can easily set up and enjoy IPTV streaming on their preferred devices.
Setting Up MyIPTV Player on Windows Devices
Start by downloading the MyIPTV Player app from the Microsoft store. Simply search for "MyIPTV Player" and click on the download button to install the app. Once the app is downloaded and installed, open it on your Windows device. In the app settings, you will find options to add a playlist and EPG (Electronic Program Guide) source. Click on "Add new playlist and EPG source" to proceed. Enter a name for your playlist in the provided field. This can be any name that helps you easily identify the playlist. In the "Remote Channel List" section, enter the M3U playlist URL provided by your IPTV provider. This URL contains the list of IPTV channels you wish to stream using MyIPTV Player. After entering the playlist URL, click on "Add remote list" to add the playlist to MyIPTV Player. Go back to the app settings and select the playlist you added under the "Select channel playlist" section. Once you have selected the playlist, you can start playback of the IPTV channels by clicking on the "Channels" tab in the app.That's it! You have successfully set up MyIPTV Player on your Windows device. Now you can enjoy IPTV streaming and watch your favorite channels using the app.
Benefits of MyIPTV Player on Windows Devices
Setting up MyIPTV Player on Windows devices offers several benefits: Compatibility: MyIPTV Player is compatible with Windows 10 and Windows Phone devices, ensuring a seamless experience across different Windows platforms. User-Friendly Interface: The app provides a user-friendly interface that is easy to navigate, allowing users to quickly access their IPTV channels and settings. Customization Options: MyIPTV Player offers various customization options, such as channel grouping, favorites management, and channel filtering, allowing users to personalize their IPTV viewing experience. Stable Streaming: The app supports HTTP Live streaming (HLS) and offers advanced playback features, ensuring stable and uninterrupted streaming of IPTV channels on Windows devices.With MyIPTV Player on your Windows device, you can transform it into a powerful IPTV streaming platform and enjoy a wide range of digital content.
MyIPTV Player: A Complete Solution for Digital Content on Microsoft Devices
MyIPTV Player is the ultimate solution for accessing and streaming digital content on Microsoft devices. With its powerful features and user-friendly interface, MyIPTV Player revolutionizes the way you watch your favorite TV shows, movies, and live events on Xbox and Windows devices.One of the standout features of MyIPTV Player is its support for IPTV channels. This allows you to stream a wide range of digital content directly on your Microsoft devices. Whether you want to catch up on the latest TV series, watch popular movies, or enjoy live sports events, MyIPTV Player has you covered.
With its compatibility with the Microsoft ecosystem, MyIPTV Player seamlessly integrates with Xbox and Windows devices. This means you can enjoy uninterrupted streaming on your preferred Microsoft device, whether it's your Xbox gaming console or your Windows laptop or PC.A highlight of MyIPTV Player is its intuitive user interface, which ensures a smooth and enjoyable streaming experience. The app is easy to navigate, and you can easily browse through channels, access your favorite content, and customize your viewing preferences. MyIPTV Player's simple yet powerful interface puts you in control of your digital content.Additionally, MyIPTV Player offers advanced features that enhance your streaming experience. You can take advantage of features like channel grouping, favorites management, and channel filtering to personalize your content and access it with ease. Whether you're a casual viewer or an avid entertainment enthusiast, MyIPTV Player provides the flexibility you need. Key Features of MyIPTV Player: Support for IPTV channels User-friendly interface Compatibility with Xbox and Windows devices Channel grouping Favorites management Channel filtering MyIPTV Player ensures that your digital content needs are met with its comprehensive features and smooth streaming options on Microsoft devices. Stream your favorite TV shows, movies, and live events with ease and convenience using MyIPTV Player.
Conclusion
In conclusion, MyIPTV Player is the go-to IPTV player for Microsoft devices. Its impressive features and easy setup make it a reliable choice for IPTV enthusiasts. With MyIPTV Player, users can effortlessly stream their favorite IPTV channels on Xbox and Windows devices, enhancing their digital content experience.One of the key strengths of MyIPTV Player is its user-friendly interface, allowing even novice users to navigate and enjoy their IPTV channels seamlessly. The app's optimization options ensure smooth streaming performance, while the wide range of supported formats and codecs guarantees compatibility with various IPTV providers.Whether you're using a Windows Phone, Windows 10 PC, or Xbox One, MyIPTV Player offers a versatile solution to access and enjoy your favorite TV shows, movies, and live events. With its intuitive setup process and convenient features like channel filtering and favorites management, MyIPTV Player truly stands out as a top-notch IPTV player for Microsoft devices.If you're looking to enhance your IPTV streaming experience on Microsoft devices, look no further than MyIPTV Player. Download the app from the Microsoft store and start enjoying the world of IPTV right at your fingertips. Empower your digital entertainment with MyIPTV Player and take your IPTV viewing to new heights.Check out other helpful resources:Setting Up IPTV in VLC Media Player: A Simple TutorialIntegrate IPTV with Kodi: A Stalker Client Installation GuideHow to Install IPTV Smarters Pro on FirestickFAQHow do I set up MyIPTV Player for IPTV on Xbox and Windows?To set up MyIPTV Player, download the app from the Microsoft store. Open the app, go to settings, select "Add new playlist and EPG source," and enter the necessary details. Then, go back to settings, choose the playlist under "Select channel playlist," and start watching the added channels on MyIPTV Player.How can I add IPTV channels to the MyIPTV Player app?To add IPTV channels, open the app, go to settings, select "Add new playlist and EPG source" and enter a name for the playlist. Enter the M3U playlist URL in the "Remote Channel List" section and click on "Add remote list." Then, go back to settings, select the playlist under "Select channel playlist," and the added channels will be available under the "Channels" tab.What are the features and benefits of MyIPTV Player?MyIPTV Player offers HTTP Live streaming (HLS) and MPEG TS support, automatic grouping of channels, built-in EPG support, recording options, favorites
management, multiple channel playlist support, a download center for VOD files, and channel filtering options.What should I do if I encounter issues with MyIPTV Player on my Microsoft device?Common troubleshooting steps include ensuring VLC Player is installed and selected as the media player in MyIPTV Player settings, checking the internet connection, and updating the app. If issues persist, seek support from the MyIPTV Player community or contact the app developer.How can I optimize IPTV streaming on MyIPTV Player?You can optimize streaming by adjusting settings in the app, such as choosing between VLC library and Windows 10 media player for media playback, enabling PIN protection, ensuring a stable internet connection, and using supported formats and codecs.Which formats and codecs does MyIPTV Player support?MyIPTV Player supports HTTP Live streaming (HLS) and MPEG TS formats, and it can handle various codecs including H.264, H.265, MPEG-2, and AAC.How does MyIPTV Player compare to other IPTV players for Microsoft devices?Compared to other players, MyIPTV Player offers a user-friendly interface, built-in EPG support, channel grouping, recording options, and more. It is specifically designed for IPTV streaming and provides a seamless experience within the Microsoft ecosystem.Can I stream IPTV channels on my Xbox using MyIPTV Player?Yes, MyIPTV Player is fully compatible with Xbox One, allowing users to stream IPTV channels on their gaming console. Simply download and set up MyIPTV Player on Xbox to enjoy IPTV channels on the big screen.Can I use MyIPTV Player on Windows devices?Yes, MyIPTV Player is compatible with various Windows devices, including Windows 10 and Windows Phone. You can easily set up MyIPTV Player by downloading the app from the Microsoft store and following the setup process.What makes MyIPTV Player a complete solution for digital content on Microsoft devices?MyIPTV Player offers a comprehensive solution for accessing and streaming digital content on Microsoft devices. With its support for IPTV channels, users can watch their favorite TV shows, movies, and live events, enhancing their digital content experience.
0 notes
Last Seen Blogs

firmwoodcncrouter-blog
cnc router

yazarurfa
Urfa Yazar

theagelesswisdom
The Ageless Wisdom

zioness2020
Untitled

sentient-forest
a sentient forest