#I forgot what brush I used 4 the lineart here but it’s nice
Text

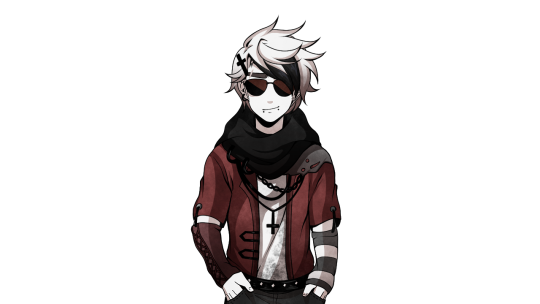
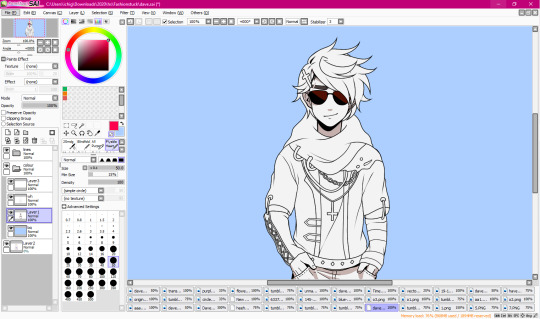
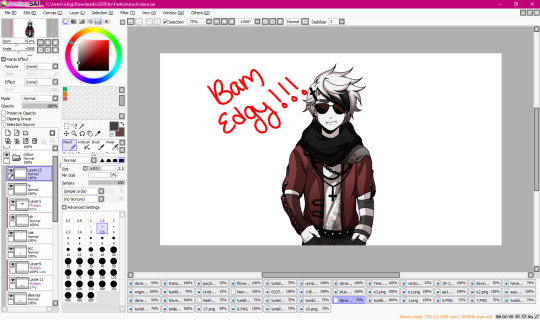
dame mammon wip + first time drawing in clip studio paint
#hmmm. I do like using a bigger screen and having a brush I prefer? the one I use in procreate is nice but it’s not like. idk#I forgot what brush I used 4 the lineart here but it’s nice#I still prefer procreate atm bc it’s simpler for my simple brain + I’m still trying to figure out how csp works and what all the buttons do#I got stuck trying to find out where I can put a hex code#and color picking from a ref did not give me accurate colors?? so I gotta adjust that somehow#but I do rlly like it.. it’s fun. I’m also too fucking excited to use the globe effect or whatever it’s called#glow*#line art is finally finished after like 3/4+ hours and my shoulder HURTS#from sitting in the same position for so long. lol#devilishdelights
9 notes
·
View notes
Note
Hi! I really love the way you paint ecto on your sona. Would it be too much trouble to ask for art tips or a tutorial?

I don’t mind giving a teensy tutorial! For clarity’s sake, i’ll be explaining in text here! I’ll also be using clip studio paint for this tutorial, but you should be able to use whatever program you’d like!
before that though, i do have two older tutorials! a simpler one, and an old one using medibang. yaya! I also don't have a set way on how I draw hair, since i do like to mess around with different styles. But here's one is for when I really wanna give it a nice finished look!
Step one!
First you gotta get a head (with or without a body is up to you) and draw the hair and fill it with the base color on a separate layer, here’s what i usually use for my skelesona!
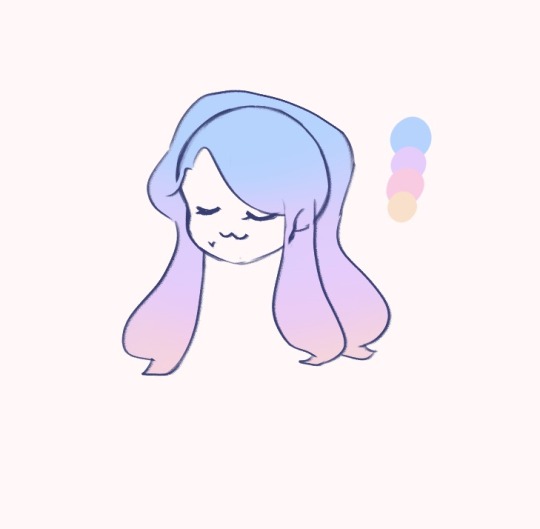
Step two!
In a separate layer set to multiply, add in the shadows! I usually clip this on top of the coloring layer so it’s easier for me to stay in the lines lolol
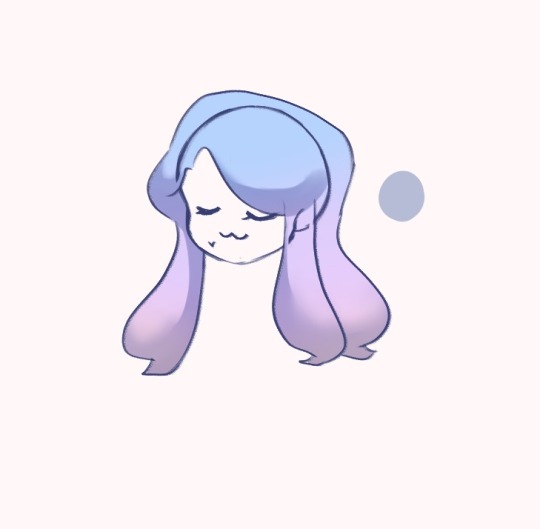
Step three!
On the same layer, add more shading! Here’s how i do mine but feel free to go wild
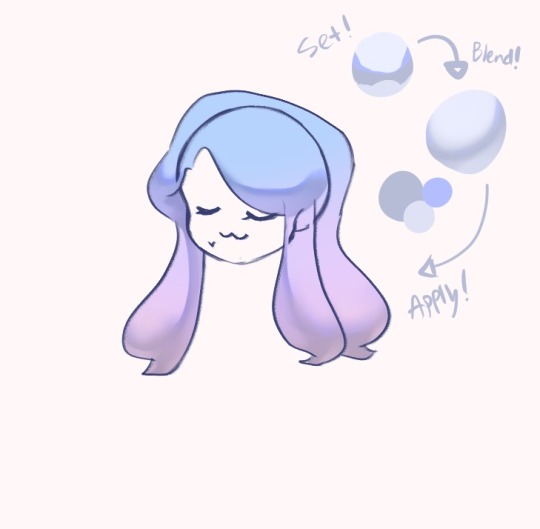
Step 4!
lighting time! Make a new layer and set it to a type of luminosity layer, put it under the Multiply layer! . I personally like to use Glow Dodge or Add(glow) for this! using a brush made of shapes like triangles and smaller circles, draw the patterns onto her hair! feel free to tweak with the opacity as you see fit! I'll save how to make custom brushes for a different time kek

Step 5! i think
new layer again! set it to glow dodge/add(glow)/etc. this one's for highlights! i also like to add sparkles because they're pretty. i use a darker color because the layer's blending mode tends to make brighter colors too shiny. This layer goes on top of the multiply layer!

Step 5.5
I almost forgot but I like to add some color to the lineart under the hair to match the base colors too! a bit darker though so it doesn't just become invisible

From here you can go wild and add whatever details you like!!
and Voila!!
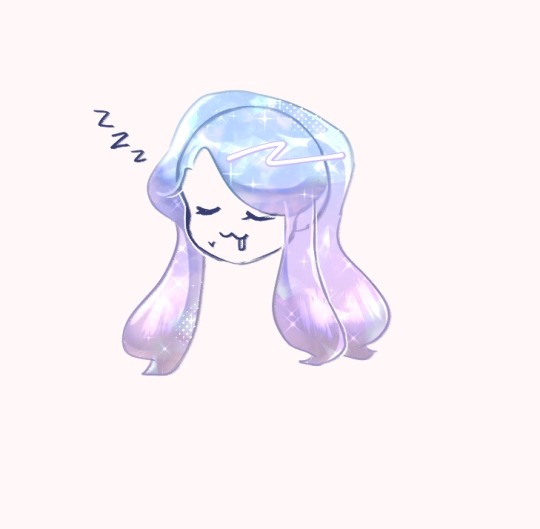
magic hair finish!! I hope this helped!! Feel free to ask me if you got lost somewhere in between, or for anything really! If you try out this tutorial please do let me see how it turned out!!
#bluechocowitz#bluechocoart#hair tutorial#ecto tutorial#magic hair#ask#art reply#skelesona#blue#i hope you found this helpful!#long post#my art#what other stuff should i put here#anonymous#drawing magic hair is always fun!!#i hope to share that with you guys!!
80 notes
·
View notes
Text
woah a pq sprite edit tutorial ft. mod kk (paint tool SAI)
MOD KK....: SO UH. this is primarily to help a pal of mine, but like i thought it’d be good to make a post / tutorial in general, so here’s a tutorial which features the process of how i did this dave
since i use sai, this is a tutorial mainly for sai, but you can follow along easily on other art programs since functions are similar and etc. the link to the sai i use can be found here.
tutorial starts under the read more:
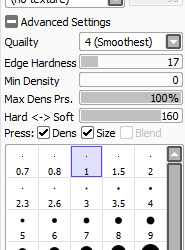
BEFORE WE START, any sai users, here are my brush settings regarding lineart / linking, and in general, these are the settings I use for all my art and edits. Size wise, I usually draw with 1, but for line width, I’ll change between 1, 0.8, and 1.5.
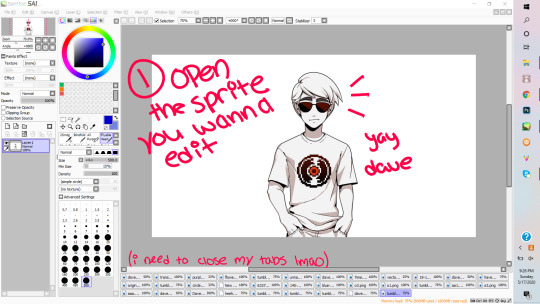
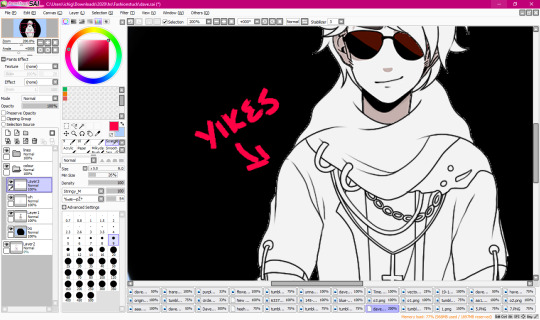
1. So first and foremost (wow, look the way I’m typing got more formal), you want to open the sprite you want to edit on. Here I have Dave. A good resource for sprites / assets from PQ is from this blog, in case any one needs it.
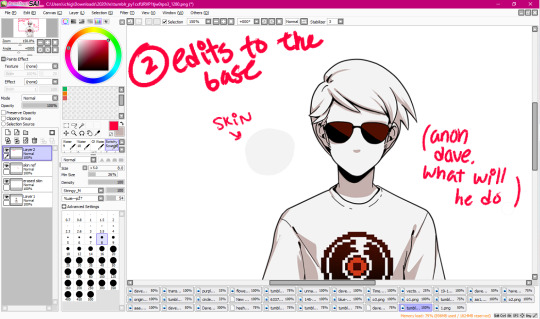
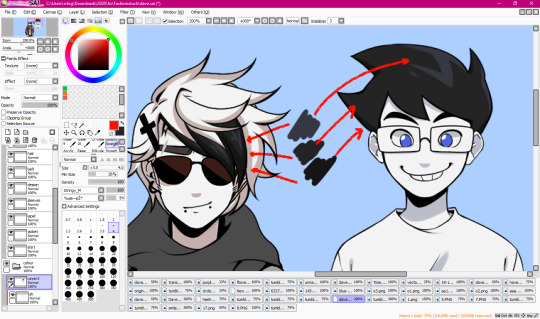
2. If you need to, make edits to the base. Usually, if not the hair, I’ll make an edit to the character’s shading colour or their face. In this instance, it’s going to be the latter. So in this picture, what you want to do is colour pick from his skin, make a new layer and on that layer, you’ll ‘erase’ (draw over) his expression.
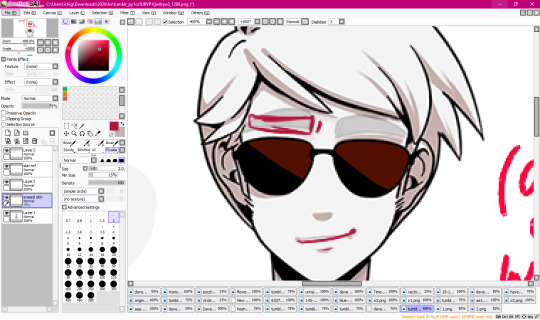
2.1. Lower the opacity on the coloured over layer so that you can see his original expression- mainly I do this so I can see the proper placement of his facial features and such. Here, I’ll sketch the change I want.
2.2. After it’s sketched out, I’ll line it proper and fill it in, and now he’s like smug (shame that it gets covered up by his bangs in the finished edit).

3. Now we’re to the fun part! Well, onto the more fun parts. Here is where we’ll start our sketching. Sketching isn’t mandatory, especially on smaller, minor edits such as changing shirt colours or adding small accessories, but if you want do things like drastically change their haircut, or to give them a new outfit entirely, sketching is probably a good idea. Anyways, lower the base’s opacity, and then decide what kind of outfit you want to sketch on your base, and do it.

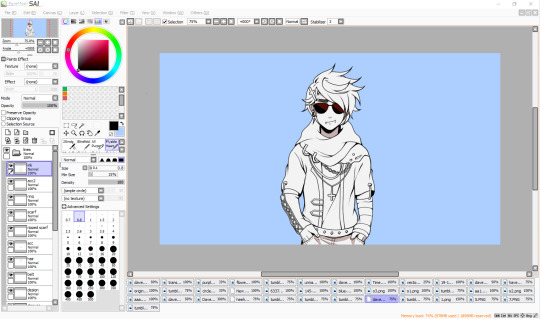
4. After sketching, you’re gonna line! Lower the opacity on both the base and the sketch- though that’s probably a given. Completely optional, but I tend to put my layers in a folder set for organisation purposes. Also, please name your layers, it’ll help you good (OKAY SO LMAO. I forgot to take the screenshot of me mid lining, so I eyeballed all my finished lines out to make it look like it was incomplete.)

4.1: Anyways, yay! The lining’s complete. I know this is supposed to be a tutorial, but process photos are fun too.
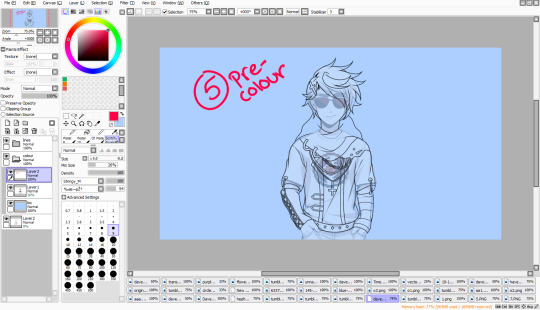
5. Now we’re onto pre colouring. I say pre colouring because this is like setting the base for colouring? Yeah. Anyways, I’ve made another folder set for colouring, pulled the base sprite into it, and then set a coloured background under the base for transparency and etc- I usually go with a colour which will contrast the piece’s main palette, which in this case, is blacks and shades of red.

5.1. Now we’re going to put the base colour into the newly created lineart. What we’ll do here is turn the transparency on the base sprite down till it’s completely gone, and then we select every inside of the lineart.
5.2: With the base ‘white’ (the greyish white) colour from Dave’s original sprite, we’ll fill the lineart.
5.3 However, after this, you’re going to want to check your transparency because it won’t always be perfect- actually, it won’t be perfect. Usually, you’ll get that small, shitty white outline which overall imo ruins the piece when it’s transparent.
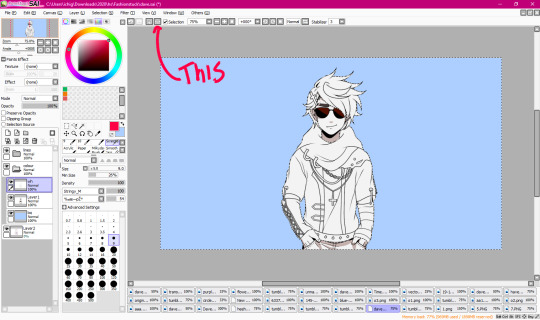
5.4. What you’re going to want to do to rid of this, is- going back to 5.2, after you’ve filled it, and you still have the selection on, you’re going to reverse the selection (arrow pointing to it, ‘pologies for non sai users because I don’t know the equivalent), and then erase. It’ll seem like you’re just erasing the background, but I swear it’s worth it.
5.5 See? Now it’s clean. Yay!!!
5.6 After that’s figured out, you’re going to want to redirect your attention back to the base sprite, and then erase all the shit that’s leftover from it, such as Dave’s sleeve which is poking out from the side, as shown in the pic.
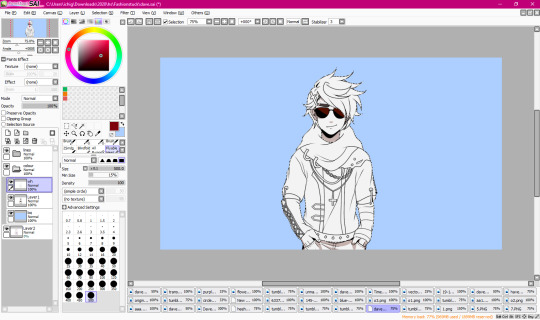
5.7 Bam. And now he’s all cleaned up proper and ready to roll.
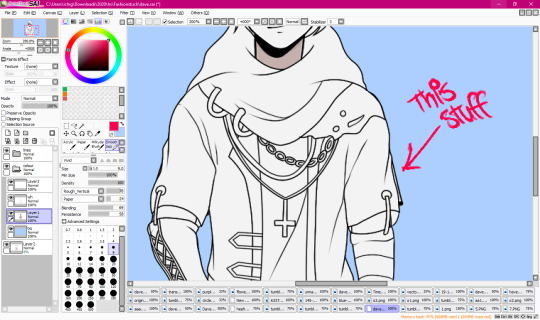
5.8 A completely optional step, but my favourite since I love lining. What I usually do, so that the lines look smooth(er), and more precise with the style, is that I ink it a bit to create line width variation in certain parts of the sprite, and also to create shadows.

6. Finally on colouring- I’m probably numbering all this shit wrong, but you know what, I sucked at math. Anyways, colouring- figure out your palette, and basically base colour parts of your sprite. The blackish part on the shirt is an airbrush texture.
6.1. Tip: If you’re using dark greys or blacks, I’d recommend just picking the exact shades from other PQ sprites so they’re all??? Idk, the same? To put it simply??? Yeah.
6.2. Shading is- another probably basic thing, but I’m explaining my particular process, but how I go about shading is by making a clipping layer over the layer I’m currently shading on to ensure that it only colours on that part. Then, I put it on multiply, and then toggle around till I get a good mid shade. To each their own, however, these are just my tips and tricks that I use personally.
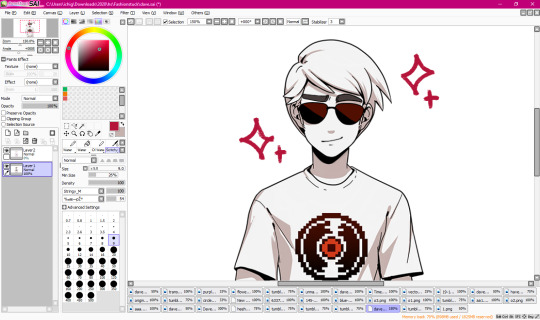
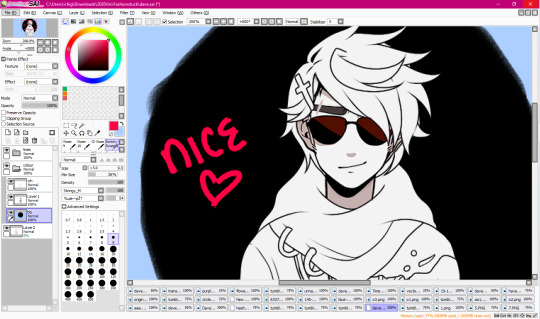
6.3. And after you’ve shaded your entire piece, you’re done! Yay, he’s edgy now!

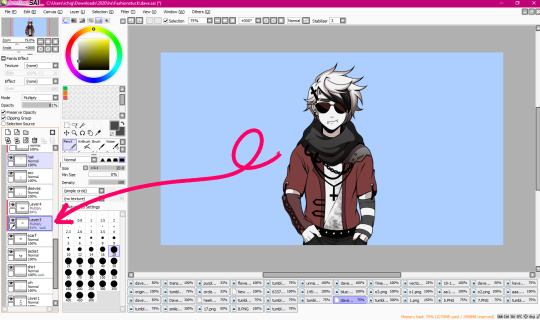
6.4. Though I did make my end sprite with a texture, and for SAI users, it’s relatively easy. Just open the png file of your sprite so that all your layers are in one and it’s a happy pic, and then go to to the textures drop down menu and select your texture. For this, I decide to use the grunge texture. I also used this texture on my Derse Prince edit, and I used a TV screen texture on one of my Hal edits. I don’t know if texture packs come with other art programs, but if they do, just experiment and see what you like! It’s not obligatory, but it’s a nice touch for some edits.
Other than that! We’re finished! I hope you enjoyed- apologies if anything said was over complicated haha ;;.
#mod karkat#kk edits#sprite tutorial#homestuck sprite edit#homestuck sprite edits#pesterquest sprite edit#pesterquest sprite edits#homestuck sprite tutorial#pesterquest sprite tutorial#homestuck edit#pesterquest edit#dave strider#im not mass tagging this im lazy;;;;;#also that carpel tunnel is kicking in lmao
178 notes
·
View notes
Text
A totally self indulgent compilation of my favorite works on this blog of the year June 13, 2019 - June 13, 2020
I wanted to do this for the blog's first anniversary but then completely forgot about it lol.
The following lists are all in chronological order according to the date each post was first published.
Top 10 panel edits:

#1: Don and Gilda - Chapter 138: Demon serch (1)
Date: Jun 14th, 2019
Time: ~ 1:30 h
My very first redraw from my very first edit posted here, so it deserves an honorable mention. Back then I was young and inexperienced, I didn't even apply a gray filter (lmao I was so unskilled I even unintentionally scratched the picture, I hadn't realized until today). I'm actually very happy my first redraw was of Don, boy deserves all the love.

#2: Emma and Ray - Chapter 140: I’m Here!
Date: Jun 28th, 2019
Time: ~ 1 h
Back then this looked like so much work to me!!! And to this day, I think it turned out pretty well. I'm particularly proud of how the bow turned out. This is one I was really proud of right after having finished it; it gave me the confidence to try redrawing bigger areas. Also, the edit were I first applied the opacity of layer / opacity of brush for the gray filter that would have stuck with me.

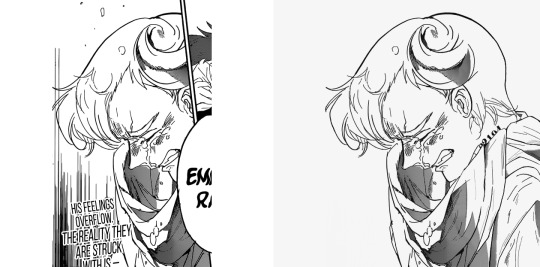
#3: Krone's birthday edit
Date: Jul 15th, 2019
Time: 15 mins
I don't know I just really like how Krone's hair vanish to a more sketch-like style here– and consequently, how I managed to replicate such effect. I think Krone's beautiful.
#4: Emma, Norman and Ray - Chapter 153: Coward
Date: Oct 4th, 2019
Time: 4:07 h (and 67 layers lmao)
Probably the single panel redraw I'm the most proud of. That Norman panel was beautiful and very poignant at the end of a chapter I adored, so I believe it deserved all the time I've spent working on it. It's far from being perfect - the back of his head is too plain, and the difference between my brushes and the original brushes is pretty visible - but I still like it very much and am extremely attached to it. The horn looks kinda big but I honestly believe it to be more of an issue with the original than with what I had redrawn lol. Funny enough, the whole picture didn't make it to the final edit and had to be trimmed.

#5: Full Score Trio - Chapter 154: A Breakthrough
Date: Oct 11th, 2019
Time: 29 mins
I don't have a particular reason for this I just think Emma's hair turned out amazing. It took just half an hour and I didn't even use references like. Wow. @Redrawing skills where did you go please come back
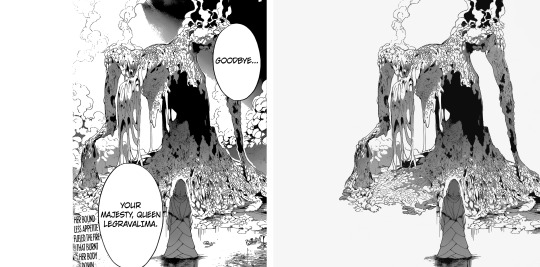
#6: Mujika and Queen Legravalima - Chapter 158: The Reason I Was Born
Date: Nov 17th, 2019
Time: 2:09 h
Sis I love this so freaking much. The shift from redrawing almost exclusively people and clothes to redrawing this mess was so fun and refreshing. Even though it's a mess I think it turned out very clean and overall it looks beautiful? I remember after finishing this I felt so powerful, like now that I had redrawn this thing I would have been able to redraw anything I set my mind on lol.
#7: Emma - Chapter 161: Never Be Alone
Date: Dec 13th, 2019
Time: 57 mins
Again no particular reason except this is a very cute Emma and I think the redraw turned out pretty well. There's this big lock on the left that doesn't make a lot of sense but overall I really like it. Cute Emma is cute, and I love her determination.
#8: Emma - Chapter 166: Going Back Home
Date: Mar 9th, 2020
Time: 3:45 h
I'M SO FREAKING PROUD OF THAT RIFFLE I have not the slightlest idea why this took so damn long BUT I'M SO PROUD OF IT
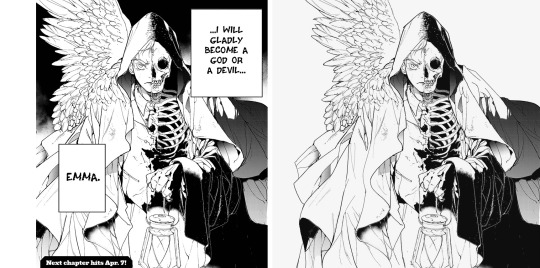
#9: Norman's birthday edit
Date: Mar 21st, 2020
Time: 1:04 h
This is cool! I didn't know I could manage to draw this, but I did it! The feathers were particularly hard to clean but I think they turned out fine.
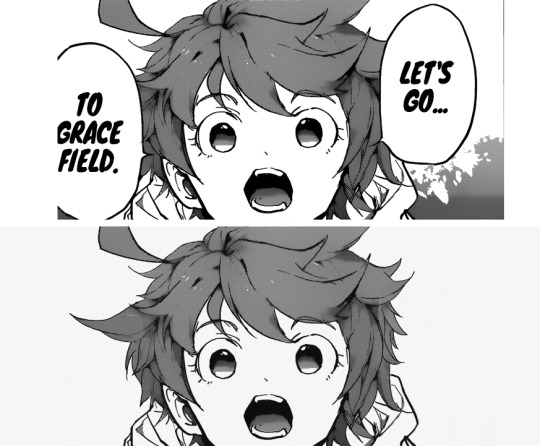
#10: Full Score Trio - Chapter 174: A New World (part 1)
Date: Apr 6th, 2020
Time: 2:11 h
I just think they're very pretty? I can't understand if I like Ray's face a lot, or not at all, but I think overall there was a lot to redraw and it turned out pretty cute! Sorry Gillian.
(Also insert pretty much every panel from the chapter 177 Isabella edit– I've spent so many hours on basically every panel there's no way I could choose only one).
Top 5 edits as whole:
#1: Emma and Ray - Chapter 140: I’m Here!
Date: Jun 29th, 2019
Complessive time: 2:57+ h
The very first edit I'm actually proud of; I'm really attached to it. It's the first edit I had put all of my effort into, and I remember feeling anxious people would have left it without notes. It kinda feels weird to think about it now, because I really don't care about notes anymore; yet, it somehow makes me happy to think that past-me wasn't let down. Thank you @neverlandstrio for your support, you may not remember but it really meant a lot to me back then! And it still makes me smile. You're the best!!!!!!
#2: Mujika and Queen Legravalima - Chapter 158: The Reason I Was Born
Date: Nov 20th, 2019
Complessive time: 7:12+ hours
This whole edit was an hella wild ride. It's midnight before a school day, when I think: "Mh, it's been a while since I last made an edit, why not make one about Musica and the queen from the last chapter?" And seven hours after this was born. I'm particularly proud of the queen's redraws on the 3rd, 7th and 9th picture (ofc), the areas which have been redrawn are pretty huge yet I think the difference with the original is almost impossible to notice?? @Redrawing skills where did you go please come back (part 2)
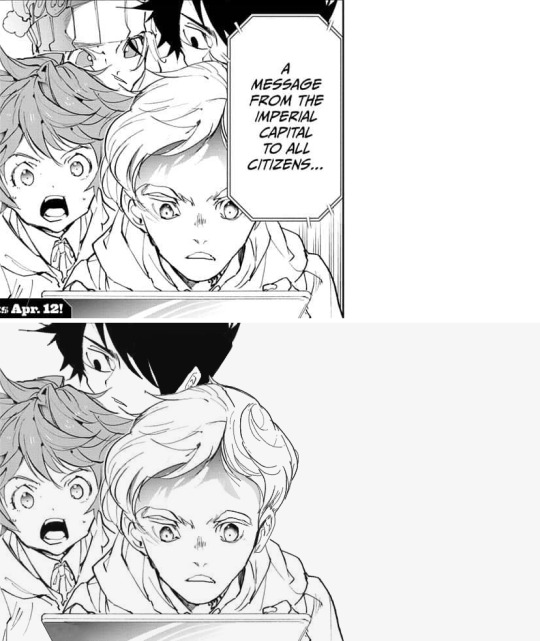
#3: Emma - Chapter 174: A New World (part 1)
Date: Apr 12th, 2020
Complessive time: 6:53+ h
I think the panels that were selected work very well together, especially considering the close-up / full body alternation. I love Emma, and I've always been kinda sad noticing that edits that focus one her take the less notes... She deserves all the love. Also, fun fact: for the last but one panel, I had redrawn Emma's whole left ear before remembering she doesn't have one, so I had to redraw the panel from the start. Besides from the error with the ear, the reason why this (and all the others after) took so long is because official panel take way longer to clean.
#4: Isabella and her children - Chapter 177: Mother
Date: May 22nd, 2020
Complessive time: 13:41+ h (ahah.)
Lmao tbh I can't understand how this has so few notes it's like. Technically speaking, probably the best edit I've ever done. I don't even like Isabella that much, I haven't got the slightlest idea why I decided to spend so many hours on this. Anyway, I find the composition (full body on the left / headshots on the right) really good looking in this as well! And I think the redraws turned out fine, especially Isabella's.
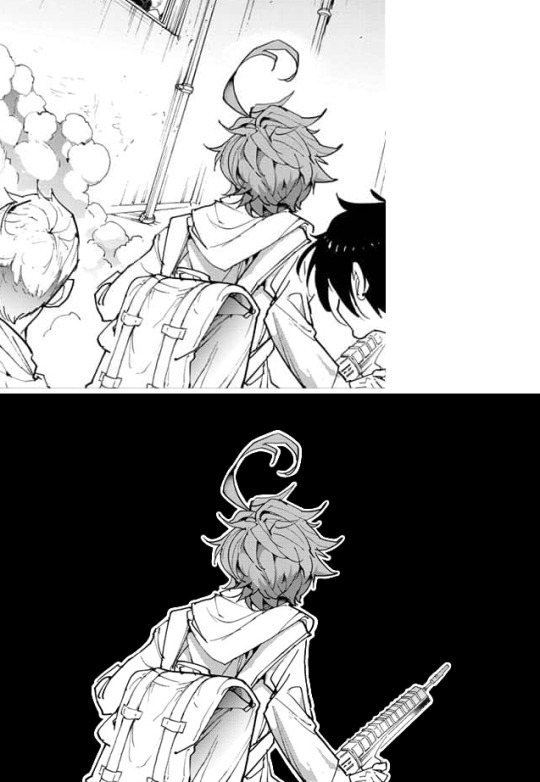
#5: The Promised Neverland manga ending countdown→ 1/7 chapters: chapter 1 - Grace Field House
Date: Jun 9th, 2020
Complessive time: 1:59+ h
I don't know how I came up with that idea for the composition but I find it really beautiful??? I think it does a pretty good job conveying the sudden, terrific shift of atmosphere from the first chapter, and I think that sharp bridge is very nice. I'm very, very proud of this.
Honorable mention #1: Full Score Trio - Chapter 154: A Breakthrough
Date: Oct 13th, 2019
Complessive time: 3:44+ h (+ 1:13 h of working on a panel that ultimately didn't make it to the final edit)
A very good chapter, and the edit turned out surprisingly amazing??? All the redraws look great and make it almost impossible to distinguish them from the original; honestly I feel like I'll never be able to redraw so neatly again lol.
Honorable mention #2: Don and Gilda (+ Norman) - Chapter 160: Shackles
Date: Dec 11th, 2019
Complessive time: 3:14+ h
That one is really one of my favorite scenes; I'm telling you peoples, Gilda and Don are a blessing to the earth. I think I've never mentioned it, but Gilda's hair is a nightmare to redraw??? More specifically, it takes me h o u r s to fill the texture without making it look too weird, it's the worst.
Honorable mention #3: Norman and Ray - Chapter 179: Compensation
Date: Jun 6th, 2020
Complessive time: 4:16+ h
I was so glad to finally be able to make a Norman / Ray edit, and it turned out it was just in time before the series' finale. I like how it turned out and I'm pretty satisfied with the redraws (even though my sister helped me with the lineart of some panels - it was exams time and I really couldn't afford to spend more time on it), too bad we didn't have more chapters that focused on the boys. Ray sweetie one day I'll fix your ear it's just today's not that day.
Btw, I justed realized I have never done an Emma / Norman centered edit? I'll have to make one eventually. I remember considering focusing on them alone for the chapter 154 one, but then I thought "even if the manga is gonna ignore Ray, I will chose to do not" lol.
Top 5 long posts:
#1: Reconstruction of how the Grace Field children were settled in the three bedrooms
Date: Aug 28th, 2019
I just had really a lot of fun doing it. I love putting all the little things to their own place, it's so calming to do and that's why I love making this kind of things. Also, loved how @temporoom contributed to the post! It was so nice of them to add what they had noticed to come up with more exact conclusions, that's one of the things I love the most about the internet.
#2: A study of how many times the characters of The Promised Neverland call each other through the first season of the anime
Date: Sep 10th, 2019
I REALLY LOVE IT! I mean it *was* kinda stressing to note everything, but it was very also very satisfying to see everything methodically divided and organized! And it's not just that– it's also the fact that it looks good. That's one post I have fun rereading because it's actually pretty! Also, even though it can be very stressing to learn to use new programs and sites, it's always very satisfying to look at the final result. Again, I really adore compiling these tiny little details! I would love to make more posts of that kind if i had the time.
#3: The Promised Neverland musicals headcanons
Date: Oct 27th, 2019
I mean it's literally. Putting my two favorite fandoms together how could I not love it. This is another one I really enjoy rereading, I find all the musical / character associations so fitting! I really want to make a second part, I hope to find some time to do it.
#4: Considerations on the reward / eventual series' finales (and Emma's sacrifice)
Date: May 7th, 2020
It's always nice to put down all your thoughts regarding a particular matter. It can take a lot of time (at least for me it does because... I need time to think about things), but it's so satisfying to see all of them there once you're done. Bonus points when, like in this case, it was something asked by someone else because “Wow! Somebody wants to hear my opinion on this subject! I'm flattered (◍•ᴗ•◍)”
#5: Some other considerations on the series' finale and Emma sacrificing herself
Date: Jun 13th, 2020
Pretty much the same as above. It's like some kind of clarity when the post is done and signed. Another fun fact, I had to censore the post a lot; the first version was extremely sharp and harsh, but I believe it's right to express your opinions calmly and politely.
Bonus: A thread of what the tpn characters would wear at the Oscars
Date: Feb 9th, 2020
Imagining all the children in those pretty dresses makes me so incredibly happy (╥﹏╥) I go back to look at that post a lot. I really love red carpets, I love looking at pretty dresses!!!!!
Lmao it's so funny how the post of mine I like the most are also the ones with the less notes
Anyway this was just a personal report! You don't have to read it all (or any of it actually). But it was indeed fun making it! Here's to many more months in the fandom!!!
#This was supposed to be posted on July 13th as one year and one month since I made the blog#but Tumblr decided to be a jerk and deleted all of it 😊#So here we are#tpn#tpn manga spoilers#long post#Again this is just a personal report don't stress over reading all of it#But it was fun to make!#To the people I tagged: sorry for tagging you in this long post but also it would have felt weird not to do so? I hope you don't mind#It felt like... Giving credits foe something you've done y'know
40 notes
·
View notes
Text
Coloring/Shading Tutorial
Someone reminded me that I promised to make a tutorial on my coloring/shading process. I'm so sorry it took so long, I completely forgot. This tutorial probably looks like crap, but I hope it's helpful for those who asked for it. If you have any questions, feel free to ask.
My coloring process is extremely simple.
I dont really have a strict process, I usually just experiment and go with
what looks nice. But this is the basis of how I color pretty much everything.
I dont use any special brushes. It's just a pencil, airbrush and eraser.
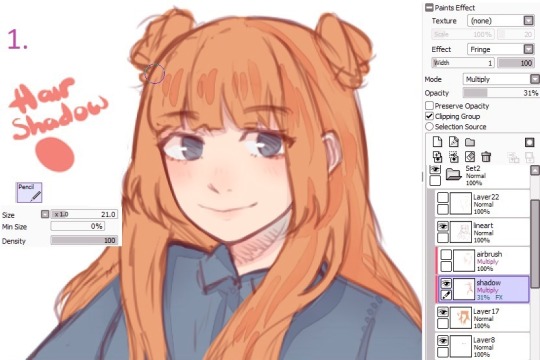
1. Put the layer above the base layer on multiply and lower the opacity to how you like it, so the shadow layer doesn’t look too dark. Sometimes I use the exact same color as the object I'm coloring, but often I move the wheel to a cooler/warmer tone, depending on what I want. Click on the fringe effect - it gives the shadows a dark edge. (I dont always use it, if I want the shadows to look softer, like on the skin, I'll just leave it deault).

2. Move the density on the eraser way down, so you can gently erase the harsh edges of the shadows.
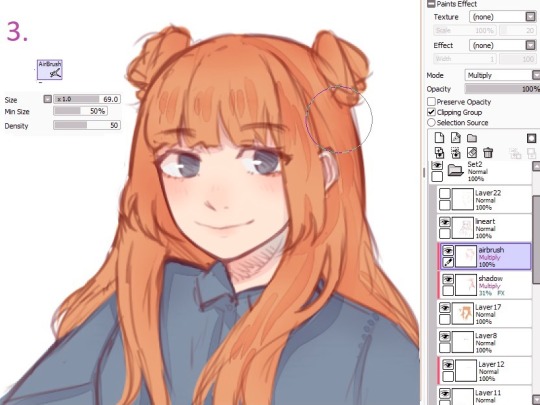
3. On a separate layer (multiply again), with the same color as for the shadows, use the airbrush to add more depth to the parts you think should be darker.

4. On a layer above the lineart, add some strands with a pencil. That's it! These are the steps I take 99% of the time.

5. From here everything is optional and experimental. You can add more layers with more color, add overlay layers, more multiply layers, or whatever ideas you come up with.
7 notes
·
View notes
Last Seen Blogs

delightfulartdiyrascal
제목 없음

zaynnnmalik
Zayn
celinenilsson
Higher dreams.

caramelthick850
CaramelThick850