#I don’t know how to code a custom layout for a blog. or the person who called me ‘a spicy straight’
Text
every time that “don’t use AI chat to talk to your favorite characters, find an RP partner!” post rolls around my dash I have to laugh bc like I agree in theory but I am always reminded that my one (1) attempt to get into the tumblr RP community years and years ago was the single most unpleasant online experience I think I’ve ever had. literally how do so many self-centered, cliquey, outrageously rude people exist in one place.
#I know there are likely folks who don’t suck but my god. never forget that person who said unironically that I couldn’t write with them bc#I don’t know how to code a custom layout for a blog. or the person who called me ‘a spicy straight’#OR the person who actually sent me (off anon) a ‘WELL ACKSUALLY’ style ask informing me that the character I was writing#couldn’t technically exist via the laws of canon and demanded an explanation as to how I ‘justified’ my presence in the community#absolutely unhinged people who exist in an echo chamber and could 150% use a nice long power outage that forced them to interact w reality
7 notes
·
View notes
Text

I posted 111 times in 2022
35 posts created (32%)
76 posts reblogged (68%)
Blogs I reblogged the most:
@altindie
@wordbite
@supportcontentcreators
@acuite
@southcodes
I tagged 109 of my posts in 2022
Only 2% of my posts had no tags
#blog - 97 posts
#theme rec - 44 posts
#1c - 40 posts
#sidebar - 38 posts
#responsive - 37 posts
#fave - 33 posts
#minimal - 31 posts
#header - 25 posts
#page rec - 18 posts
#dark mode - 17 posts
Longest Tag: 30 characters
#pantone color of the year 2023
My Top Posts in 2022:
#5


Farbenfroh
Page 1 Revamp
A responsive page for displaying colors (or other elements) with standard Isotope filtering and a smart dark mode.
Preview | Code: here or here
Key Features: Isotope filtering. Masonry layout. Responsive. Sidebar layout. Smart dark mode.
For information in regards to resources and customization, please read the page guide here.
19 notes - Posted June 28, 2022
#4
While it’s not yet clear what Adobe will do with Figma, and while the Figma CEO has claimed that Figma will operate autonomously, here’s a free alternative just in case.
22 notes - Posted September 15, 2022
#3
See the full post
41 notes - Posted January 8, 2022
#2
hi! sorry to bother but i was wondering if you know some resources at how can i learn to make themes? im already learning html/css but im finding hard to find good resources to learn how to make themes :( btw: love your work!
Hello! Thank you for the compliment and your interest in making themes.
Since you’re already learning HTML and CSS, I don’t think I need to tell you about w3schools or stackoverflow – you probably came across them yourself already. :)
The best way to understand tumblr themes is to look at the official guide for creating custom themes. There, all of the (necessary) variables are listed and their purpose is described as well.
Base codes can be very helpful to see how these elements look when they are put together, plus the HTML works already so you can focus on manipulating elements with CSS.
@buildthemes is an entire blog dedicated to teaching people how to code themes. You have to view the blog in its own tab to access the different chapters.
@theme-hunter also has a neat list of tutorials you can use for creating amazing themes.
I hope these resources are helpful!
110 notes - Posted January 8, 2022
My #1 post of 2022
Adobe Alternatives
This post on instagram lists free and paid alternatives to adobe’s creative cloud … well, I’m going to provide you with the links to the free versions. Please refrain from commenting your personal opinions on the CC or any of these free alternatives.
Ae – After Effects
Blender | DaVinci Resolve
Ai – Illustrator
Boxy SVG | Inkscape | Krita | Vectr (new, old)
An – Animate
Blender | Pencil2D | Spline (3D tool)
Au – Audition
Audacity | Garageband (iOS, Mac, Windows) | LMMS | Tracktion Waveform Free
Dw – Dreamweaver
Atom | Brackets | Sublime | VS Code
Id – InDesign
Canva | Krita | Scribus
Ps – Photoshop
Darktable | GIMP | Krita | Paint.NET | Photopea
Xd – Experience Design
Figma | Framer | Invision
From Julia to You
Three personal faves which I use regularly:
Projector (Canva alternative).
Lunapic (similar to GIMP but online).
FireAlpaca (painting tool).
Crello (Canva alternative).
200 notes - Posted January 1, 2022
Get your Tumblr 2022 Year in Review →
5 notes
·
View notes
Text
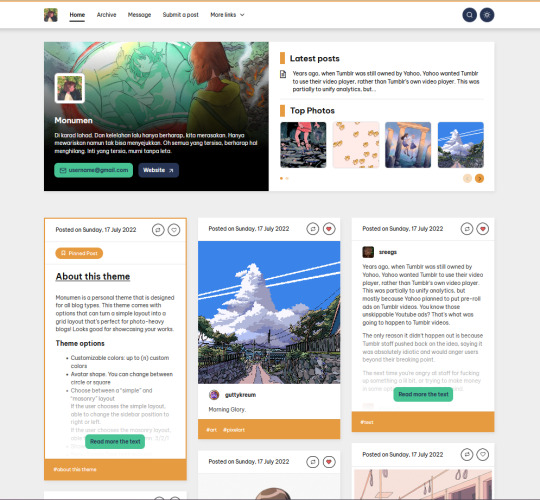
About this theme
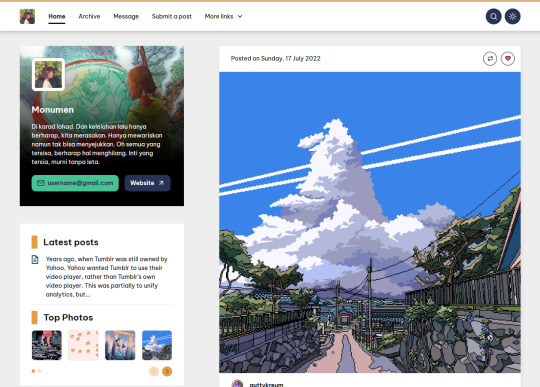
Monumen is a personal theme that is designed for all blog types. This theme comes with options that can turn a simple layout into a grid layout that’s perfect for photo-heavy blogs! Looks good for showcasing your works.
Theme options
Customizable colors: up to 10 custom colors
Avatar shape. You can change between a circle or a square
Choose between a "simple" and "masonry" layout; If the user chooses the simple layout, able to change the sidebar position to right or left. If the user selects the masonry layout, able to change the post column: 3 or 2 columns
Show Tags or not
Show Toggle Dark button or not
Show Featured Photos or not
Show Latest Posts or not
Show Twitter Widget or not
Disqus Shortname
And many more!
Features
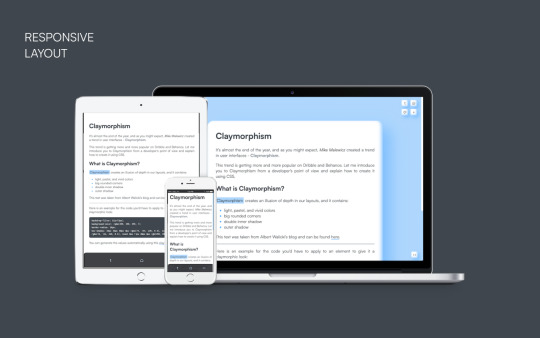
Responsive layout and looks good on the mobile screen, dashboard-like reblog chain posts, support NPF posts, unlimited custom links as you want through Tumblr pages, dark mode, Disqus, and highlighted photos.
How to add a custom link to this theme?
You can add as many custom links as you want through Tumblr pages, and the process is very simple, here’s how:
Go to Customize page
Scroll down until you find ‘+Add a page’
Enable ‘Show a link to this page’
Select “Link” from the dropdown menu (for custom links) and if you want to make a custom page (for example, an ‘about’ page), just don’t change anything from the dropdown menu and leave the ‘Standard layout’
Add the URL, page title, and page body text as you wish and save
What’s the difference between the Header Image and the Hero Top Section on the theme options?
It’s totally a different thing! Hero Top Section is used as a big hero image section for your blog while the Hero Image is set on your sidebar.
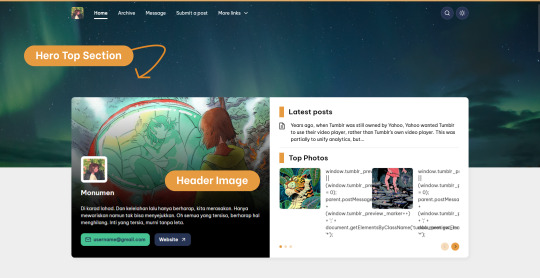
You can show/hide either of these things. For Header Top Section especially, the height can be adjusted! The default height is 450px. Min is 0px and max is whatever value you want.
What's the difference between "simple" and "masonry" layouts?
Simple layout
The layout is shown as a regular layout. It is shown as a one-column post featuring the sidebar info instead of the header one.
If the user chooses the simple layout, they are able to change the sidebar position to the right or left.
Masonry layout
The layout is a grid layout based on columns, but unlike other fixed grid layouts, the images do not have fixed height posts.
This layout is perfect for the portfolio blog or those who have photo-heavy blogs.
How do I install this theme?
The theme has been uploaded on Tumblr theme garden which means you don’t have to manually copy-and-paste the code on the customization panel, just go to this link and click the ‘Purchase’ button and your blog automatically will be changed.
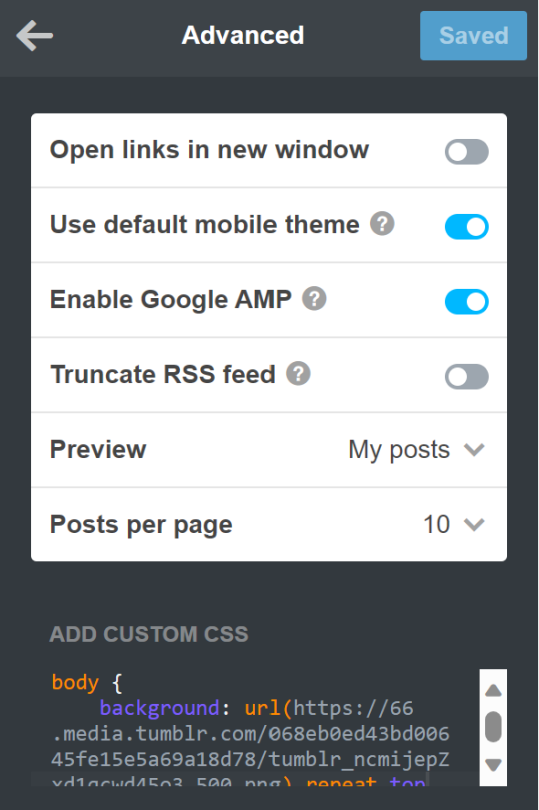
You said that this theme is mobile-friendly, but it shows the default theme provided by Tumblr! How do I disable it?
Easy! Just go customize, scroll down until you find ‘Advanced options’ → disable ‘Use default mobile theme’ → Save
For more information and a theme guide, please visit the link below:
https://monumen-theme.tumblr.com/customization-guide
And let me know if you happen to experience the issue or confusion.
Thank you.
5 notes
·
View notes
Text
Rules
Patience is key. I do this on my own free time for you guys. I understand not everyone knows how to use photoshop bor how to code. So, we editors are happy to help you with that. However, we aren't here to be your slave.
We do have lives outside of here and I'm sure most of us have roleplay pages where we write. So,as said above patience is a virtue. Also, do not befriend me to get edits. I've had this happen the past and honestly, it sucks having someone claim to be a friend just to get what they want out of the deal. I do not mind editing for friends but when I tell someone the muse is not there
and they stop talking to me that tells me something. I do not mind making friends through this page if it's for the right reasons.
Do not edit over my creations. If there is something specific you want please let me know. I don't mind you tagging on your own. But that's all that you are allowed to do to my edits. However, do not ask another editor to tag my edits for you. I also will not tag edits that are in the premade section. They are there for everyone. That's why it's in that section. If you want a personalized edit tagged
then you will have to put in a personal request, (If they are open at the time.)
I do offer both free and paid custom work.. I accept payment through cashapp and paypal.
Free Custom work will only be granted once per month to give everyone a chance to get one in. ( I will only be doing free custom work on edits.) You can request from multiple pages more than once a month. However, only once that month from the same page. Due to real-life being so busy at times it may take me a bit to get to your requests. Please let me know if you change anything about your request or character details you filled out the form with. If you do this after I have completed and/ or sent your edit then I will not make the changes. If you send multiple requests during a month time period from the same account, your request will be denied.
If I send your request and there's something wrong please don't hesitate to let me know. If it's my mistake I will fix it with no problem.
Do not claim edits, layouts, etc as your own. Also comment on everything you take,
if you have not commented the blog and using something you will be messaged asking to give proper credit. You must have us added to use my content, on the page you are using it on. I don't care if you liked/ reblogged on tumblr and decided to use it here. The rules are simply that if you're using my content on this site you must have us added, and if you’re in the server let me know what you’re using. No Exceptions! While we are on the subject, leave my premades
and personal requests that are made for you on public with a credit in the caption. I do not care how you credit me as long as you do it.
Also, do not merge my coding with coding of other editors, you can merge my coding from different layouts of mine. However, do not remove the credit. It's still my coding and layout. Just because you switched it around to make it look different does not make it yours.
I do take suggestions. However, I do not take free requests for layouts. I will take suggestions for layouts. If you want a custom layout you'll have to order custom work from me.
I will only edit faceclaims with high-quality pictures. I will rarely do Instagram models or faceclaims that only have an Instagram for the sake of pictures. I will do them if I can make the pictures work. However, if I can't then I will refuse to do so.
With Custom work, I will accept payment once your order is completed. I will send you a sample/ preview and once things are confirmed by you that it's to your liking I will then ask for payment before I send you the finished product. Once I receive your payment your order will be sent to you in its
entirety. Once you confirm your order is to your liking and you are satisfied with it no refundswill be given. In fact, refunds aren't even a subject of conversation considering I don't ask for payment until after you confirm you're satisfied with your order so there should be no reason that you are asking for once in the first place.
2 notes
·
View notes
Note
ph anon !! do you sjip will x kym ? from your posts i can guess lauren x kieran, but some other posts make me think you ship dylan x kieran, and if you do id love to know the thought process. also off topic, what tumblr layput / skin is your blog in ? i love it nd might use it for mine
Hi! Thanks for the ask :)
Kywi is a very marginal ship for me. Don’t really have anything against it, I think they are both fun characters, it just never captured my imagination all that much. Though I do occasionally draw Kywi when an idea strikes me (like this piece)!
There are two AU story ideas that kinda got me on board with Dylan x Kieran. First, what if Dylan somehow became a doctor for the Phantom Scythe and he and Kieran met off-screen. Could be that he survived the Allendale explosion, went on to study medicine and got in debt to the wrong person; or he got kidnapped and apprenticed to a PS medic. Either way, I love the angst of him fulfilling his childhood dreams in the worst way possible, saving killers instead of regular citizens - which is where Kieran comes in. I think their dynamic in this context could be interesting, as both of them would be varying degrees of guilt-ridden but burying it very deeply, except maybe for some occasional flashes of innate good conscience that only they would notice in each other. Then there's the second story idea, invented by a friend of mine (pre-EP75 but still dear to my heart): what if Dylan and Kieran both somehow ended up with the circus, Dylan as the pianist Apollo and Kieran as a fellow aerialist with Zephyr (sth sth cue the Greek myth romantic tragedy about Apollo, Zephyr and the hunter Hyacinth ensues). Yeah, don't know how well that explains my thought process, but that's how I got to the ship ^ ^
I have the regular Tumblr background, but I use a bit of custom code and a tile design by the amazingly talented vetiverfox (formerly cryptovolans). You can take a look at their designs too, just make sure to pick one that includes permission for use in blog layouts :) I put a short tutorial how to add the code to your Tumblr below the cut. Don't know how well it would interact with any custom themes/skins, so be careful about that.
First, click Edit Appearance for your blog:

Then find the Advanced Options section

And add this bit of code with a link to the image file of your chosen background tile (didn't fit in one screenshot so it's in two):

Hope that helps, thanks again for the ask! :)
0 notes
Note
Hi! You’d mentioned you hadn’t heard anything about accessibility issues with the new layout, so as someone who does actually enjoy the new layout but only reverts it because I can’t adjust it code-wise the way I’d like to make it fully accessible for my needs, here’s a few ways it’s not accessible!
OVERSTIMULATION: Compared to the previous layout, the dashboard feels very cluttered. Everything is squished together in the middle (and I’m saying this as someone running on a 1920x1080 resolution, so not a small screen). I personally had to Stylus in some extra spacing between the dashboard and the two sidebars, for example, and make the left labels slightly smaller text-wise and icon-wise so that they felt a little more spaced out. It just opened up the dashboard a bit more and made it a little bit less overwhelming.
TOO MUCH CONTENT: In addition to the above, there’s just a lot going on on the new dashboard, at least compared to the old one. Previously, with the old icon labels there wasn’t a lot of visual stimulation from those, whereas the new layout adds that. When you add in the mix of the recommended blogs, the What’s New carousel, Tumblr Live, and necessities that I use regularly from other addons (ex. xKit Tag Tracking+) it becomes A LOT. I actually had to hide a bunch of icons that I don’t use (ex. Live, Domains, TumblrMart, etc) in order to declutter the shit out of the dashboard so it wasn’t so horribly overwhelmed.
DRAFTS AND QUEUE NOT EASILY ACCESSIBLE: This I think is a big one. We as the RPC are attached at the hip to our drafts and queue, are we not?! When they had the account subnav in the left bar, I LOVED how accessible that felt; I loved how it just felt more easily accessible because I could keep it open and access it from any page in the left bar. But… then they removed it. This is probably my biggest gripe, because I just want the links to at least my drafts, queue, and blog settings back! Personally, I think in order to combat the redundancy, they should have removed the jump that was in the right menu when you’d gone to your blog’s view, not remove it from the left menu. That, or find a way to better organize/condense that blog jump so it’s not so crazy.
Personally, I think the first two are really problematic for those on the neurodivergent spectrum (which includes myself), and as someone who was in school for UI design and works in a field that involves customer feedback (I work in market research), I do feel that Tumblr’s method of sourcing feedback from users is incredibly poor. Whether that’s a monetary issue or not, I’m not sure. Thus far, it feels like support tickets go unanswered, and that Staff seems to pretty heavily handwave it as “not a big deal” rather than finding proper ways to source community feedback. That in general is the crux of the issue, I think, and forcing users to rely on external codes to retain their accessibility is a poor method to go about things.
Hey! Thanks for this, this is a good explanation. I am not entirely sure I agree on all of these points but I appreciate the input.
I do agree that the layout feels a bit too squished -- the sidebars should really be all the way to the side rather than right up next to the dash. I'm not really sure I get the "too much content" one, though. All the same content is on the dash as before, it's just arranged differently. In fact, I actually prefer that the main links now actually say what they are instead of just the icons, and I know I'm not alone in that. It seems to be one of those things that some people find better, some people find worse, and there is no one-size-fits-all solution.
I absolutely agree on drafts and queue being so hard to get to -- I noticed that the other day. It takes quite a few clicks to get to them when they were previously available right from the main page.
And the biggest agree on Tumblr's feedback sourcing being terrible. I really don't begrudge staff for this -- they have to appease the upper management who are pushing changes without really understanding things, all the while dealing with a userbase who will flip the absolute fuck out over literally any change to the site. And staff has generally been much more communicative about changes than I've ever experienced. But it would be nice to feel like feedback is actually going somewhere other than the void.
Anyway, the ideal would be having a simplified layout that you could opt into via settings, but I doubt that'll ever happen.
1 note
·
View note
Text
How to Create a FREE Mobile App for Your Business Without Any Coding In 2023
A mobile app for your company is now essential in the current fast-paced digital era. You may improve customer satisfaction, increase brand awareness, and engage with customers by using a mobile app. However, the idea of developing a mobile app often seems daunting, requiring coding skills and a significant investment. But what if I told you that you can create a mobile app for your business without any coding knowledge, and the best part is, it won’t cost you a dime?
My Best Recommended & Proven Way to Make $100 Daily — Watch THIS FREE Training to START >>

This article on a blog, we will unveil the secrets of creating a free mobile app for your business without writing a single line of code. Thanks to technological advancements and user-friendly platforms, you no longer need to be a tech guru to bring your app idea to life. Whether you’re a small business owner, an entrepreneur, or simply someone with a brilliant app concept, this guide will provide you with the step-by-step process to transform your vision into a reality.
So, if you’re ready to unlock the potential of mobile technology for your business, let’s dive into the world of app creation and discover how you can create a powerful, functional, and visually stunning mobile app for free, without any coding expertise.
I. Knowing the Fundamentals of Mobile Apps
The fundamentals of mobile apps are essential before delving into their creation. A mobile app is a software application designed specifically for mobile devices such as smartphones and tablets. It provides users with a dedicated platform to access information, products, or services conveniently and efficiently. Mobile apps leverage the capabilities of mobile devices, including GPS, camera, and push notifications, to deliver personalized experiences and enhance user engagement. By comprehending these basics, you’ll be better equipped to make informed decisions throughout the app development process.
II. Exploring No-Code App Development Platforms
If you lack coding skills, don’t worry! No-code app development platforms have revolutionized the app creation process. These platforms provide intuitive interfaces and drag-and-drop functionality, allowing you to design and build your app visually, without writing a single line of code. With a wide range of templates, pre-built components, and customization options, these platforms empower entrepreneurs and businesses to bring their app ideas to life effortlessly. By exploring these no-code app development platforms, you can unleash your creativity and create a professional-looking mobile app that perfectly aligns with your brand and objectives.
III. Setting Goals and Planning for Your App
Before embarking on your app development journey, it’s crucial to set clear goals and plan strategically. Start by defining the purpose of your app and identifying the target audience it will cater to. Determine the key features and functionalities that align with your business objectives. Create a roadmap outlining the development stages, milestones, and timelines. By setting goals and planning ahead, you’ll have a solid foundation to guide you through the app creation process and ensure the end result meets your expectations.
IV. Choosing the Right Templates and Customization Options
Choosing the right templates and customization options is a crucial step in creating your app. No-code app development platforms offer a wide array of templates tailored to various industries and app types. Carefully select a template that suits your business’s aesthetics and functionality requirements. Additionally, explore the customization options available, such as color schemes, fonts, and layout adjustments. This allows you to personalize your app’s appearance and ensure it reflects your brand identity while providing a seamless user experience.
V. Building the App Structure and Navigation
Building the app structure and navigation is a pivotal aspect of creating a user-friendly and intuitive mobile app. Start by designing a logical and organized structure, grouping related features and content together. Focus on creating a smooth navigation flow, enabling users to effortlessly navigate through the app and access desired information or functions. Incorporate intuitive icons, menus, and gestures to enhance usability and ensure a seamless user experience from start to finish.
VI. Testing and Debugging Your App
Testing and debugging your app is a critical phase to ensure its functionality and user satisfaction. Conduct thorough testing on different devices and operating systems to identify any bugs, glitches, or performance issues. Pay attention to user feedback and conduct usability testing to improve the app’s overall user experience. By addressing and resolving any issues, you can ensure a polished and reliable app that meets the expectations of your target audience.
VII. Publishing and Distributing Your App
Once you’ve perfected your app, it’s time to share it with the world. Publishing and distributing your app involves submitting it to the relevant app stores, such as the Apple App Store or Google Play Store. Each platform has its guidelines and submission process, including app descriptions, screenshots, and necessary assets. Once approved, your app will be available for download, reaching a vast audience and potentially increasing your business’s visibility and customer base. Stay proactive by promoting your app through various channels to maximize its reach and impact.
VIII. Maintaining and Updating Your App
Maintaining and updating your app is crucial for its long-term success. Regularly monitor user feedback and analytics to identify areas for improvement. Address bugs, performance issues, and compatibility problems promptly. Additionally, stay up-to-date with the latest operating system updates and industry trends. Continuously add new features, enhancements, and security updates to keep your app relevant, engaging, and secure, ensuring a positive user experience and retaining customer satisfaction.
My Best Recommended & Proven Way to Make $100 Daily — Watch THIS FREE Training to START >>
Knowing the Fundamentals of Mobile Apps
Mobile apps have become an integral part of our daily lives. From ordering food and managing finances to booking travel and connecting with friends, mobile apps offer convenience and functionality at our fingertips. However, understanding the fundamentals of mobile apps is essential to navigate this dynamic realm effectively. Whether you’re an aspiring app developer or a business owner looking to leverage the power of mobile technology, here are some key tips to help you master the basics.
Define your app’s purpose: Before diving into app development, clearly define the purpose of your app. Is it for entertainment, productivity, or e-commerce? Understanding your app’s purpose will shape its design, features, and target audience.
Consider your target audience: Identify your target audience and their needs. Research their preferences, behaviors, and pain points to ensure your app provides value and meets their expectations.
User experience is paramount: Focus on delivering a seamless and intuitive user experience. Design an app with a user-friendly interface, easy navigation, and responsive performance to engage and retain users.
Leverage mobile device capabilities: Take advantage of the unique capabilities of mobile devices, such as GPS, camera, and push notifications. Incorporate these features strategically to enhance the functionality and user experience of your app.
Test rigorously: Thoroughly test your app on multiple devices and operating systems to ensure it works seamlessly across various platforms. User feedback and beta testing can help identify and address any bugs or issues before the app’s official launch.
By understanding and implementing these fundamental tips, you’ll be well-equipped to embark on your mobile app journey with confidence. Whether you’re creating an app for personal use or to propel your business forward, mastering the basics sets the stage for success in the ever-evolving world of mobile apps.
Exploring No-Code App Development Platforms
Gone are the days when coding knowledge was a prerequisite for building mobile apps. With the advent of no-code app development platforms, creating an app has become more accessible and empowering than ever before. These platforms offer intuitive interfaces and drag-and-drop functionality, allowing individuals without coding expertise to bring their app ideas to life. If you’re ready to embark on your app creation journey, here are some key tips to help you navigate the world of no-code app development platforms effectively.
Research and choose the right platform: Begin by researching and selecting a reputable no-code app development platform that suits your needs. Consider factors such as ease of use, available features, templates, customization options, and scalability to find the platform that aligns with your app vision.
Understand the platform’s capabilities: Take the time to familiarize yourself with the features and functionalities offered by the chosen platform. Explore the available tools, components, and integrations to ensure they align with your app’s requirements.
Start with a clear app concept: Before diving into the platform, have a clear concept of your app in mind. Define the key features, functionalities, and design elements you want to incorporate. Having a solid vision will streamline the development process and help you make informed decisions while utilizing the platform’s capabilities.
Leverage pre-built templates and components: No-code platforms often provide a range of pre-built templates and components that can serve as a starting point for your app. Utilize these resources to accelerate your development process and customize them to suit your app’s branding and functionality.
Test and iterate: As you build your app, continuously test and iterate to refine its performance and user experience. Seek feedback from beta testers or potential users to identify areas for improvement and make necessary adjustments.
By following these key tips, you can leverage the potential of no-code app development platforms to simplify the creation process and bring your app idea to life with ease. Embrace the power of technology and unlock your creativity without the barriers of coding expertise.
Setting Goals and Planning for Your App
Setting clear goals and planning ahead are crucial steps in the successful development and launch of any app. Whether you’re creating a mobile app, a web application, or a software product, having a well-defined roadmap can significantly increase your chances of achieving your desired outcomes. This article will provide you with key tips on setting goals and planning effectively for your app development journey.
Define the purpose of your app: Start by clearly defining the purpose of your app. Is it meant to provide a specific service, solve a problem, or enhance user experience? Understanding the core purpose of your app will guide all subsequent decisions, from design to features and marketing strategies.
Identify your target audience: Identify your target audience and their needs. Research their demographics, preferences, and pain points to ensure your app addresses their specific requirements. Tailoring your app to the target audience’s preferences will significantly improve its reception and success.
Outline key features and functionalities: Determine the key features and functionalities your app will offer. Make a list of the essential functionalities required to fulfill your app’s purpose and prioritize them accordingly. Keep in mind that simplicity and ease of use are crucial factors for user adoption.
Create a development roadmap: Develop a clear roadmap outlining the different stages of app development, including design, development, testing, and launch. Break down each stage into smaller milestones and assign realistic timelines to ensure a smooth development process.
Consider scalability and future updates: Anticipate the future growth of your app and consider its scalability. Plan for the possibility of incorporating additional features and accommodating a growing user base. Additionally, allocate time for regular updates and improvements based on user feedback and evolving market trends.
Budget and resources: Determine your budget and available resources for app development. Consider factors such as development costs, marketing expenses, and ongoing maintenance. Be mindful of striking a balance between investing in quality app development and managing your financial resources effectively.
By following these key tips, you can set clear goals and plan effectively for your app’s development. A well-defined plan will guide your decision-making process, streamline development efforts, and increase the likelihood of creating a successful and impactful app that meets the needs of your target audience.
Choosing the Right Templates and Customization Options
Choosing the right templates and customization options is essential for achieving the desired aesthetic and functionality. Templates provide a foundation for your design, while customization options allow you to tailor the project to your specific needs. This article will provide you with key tips to consider when selecting templates and customization options to ensure a successful and personalized digital creation.
Understand Your Project Requirements: Begin by understanding the requirements of your project. Determine the purpose, target audience, and goals of your website or digital project. Consider the type of content you’ll be showcasing and any specific features or functionalities you need. Having a clear understanding of your project’s requirements will guide you in selecting templates and customization options that align with your vision.
Research Template Options: Conduct thorough research on available templates. Explore different platforms, such as website builders, content management systems (CMS), or theme marketplaces, to find templates that suit your project. Look for templates that are visually appealing, user-friendly, and compatible with your chosen platform. Consider factors such as responsiveness, browser compatibility, and overall performance.
Evaluate Customization Flexibility: Assess the level of customization flexibility offered by the templates you’re considering. Look for templates that allow you to easily modify colors, fonts, layouts, and other design elements. The more customizable a template is, the better you’ll be able to align it with your branding and project requirements. Consider whether the templates support advanced customization options like adding custom code or integrating third-party plugins.
Consider User Experience (UX): User experience plays a crucial role in the success of your digital project. Choose templates that prioritize usability and intuitive navigation. Look for clean and organized layouts that guide users through your content seamlessly. Consider factors like readability, accessibility, and mobile responsiveness to ensure a positive user experience across different devices and screen sizes.
Look for Scalability: Keep future growth and scalability in mind when selecting templates. Your project may evolve over time, requiring additional pages, sections, or functionalities. Choose templates that are easily expandable and adaptable to accommodate future needs. Scalable templates save you the hassle of redesigning your entire project as it grows.
Check for Support and Updates: Templates and customization options should come with reliable support and regular updates. Ensure that the template provider offers documentation, tutorials, or a support team to assist you in case of any issues or questions. Additionally, check if the templates receive regular updates to maintain compatibility with the latest web standards and security practices.
By understanding your project requirements, researching template options, evaluating customization flexibility, considering user experience, looking for scalability, and checking for support and updates, you can make informed decisions that align with your vision and goals. Remember, the right combination of templates and customization options can bring your digital project to life and provide a unique and personalized user experience.
My Best Recommended & Proven Way to Make $100 Daily — Watch THIS FREE Training to START >>
Building the App Structure and Navigation
Building a solid app structure and navigation system is crucial for creating a seamless user experience. The structure and navigation of your app determine how users interact with its content and features, ultimately impacting user engagement and satisfaction. This article will provide you with key tips to consider when building the app structure and navigation to ensure an intuitive and user-friendly experience.
Define User Flows: Start by defining user flows and mapping out how users will navigate through your app. Consider the main tasks or actions users are likely to perform and determine the most logical and efficient paths to accomplish them. Understanding the user’s journey within your app will help you create a structured and intuitive navigation system.
Keep it Simple and Intuitive: Strive for simplicity and intuitiveness in your app’s structure and navigation. Avoid overwhelming users with too many options or complex menu structures. Opt for a minimalist approach by organizing content and features into clear categories or sections. Make sure that navigation elements, such as menus, buttons, and icons, are easily recognizable and accessible to users.
Prioritize Content Hierarchy: Establish a clear hierarchy for your app’s content. Identify the most important and frequently accessed content and give it prominent placement within the app’s structure. Use visual cues, such as font size, color, or positioning, to guide users’ attention and highlight key elements. A well-defined content hierarchy helps users quickly find what they’re looking for and enhances the overall user experience.
Implement Consistent Navigation Patterns: Consistency in navigation is essential for ensuring a smooth and familiar user experience. Use consistent navigation patterns across your app, such as placing the navigation menu in a standard location or using recognizable icons for common actions. Consistency helps users build mental models of your app’s structure, making it easier for them to navigate and interact with the interface.
Provide Search and Filtering Options: If your app contains a large amount of content or offers advanced functionality, consider implementing search and filtering options. A search feature allows users to quickly find specific information or items, while filters help them narrow down results based on specific criteria. These features enhance the usability of your app, especially for users who prefer to search or have specific needs.
Test and Iterate: Once you’ve built the initial app structure and navigation, conduct usability testing with representative users. Observe how they interact with the interface, identify any pain points or confusion, and gather feedback on the overall navigation experience. Based on the insights gained, iterate and refine your app’s structure and navigation to address any issues and improve user satisfaction.
By defining user flows, keeping it simple and intuitive, prioritizing content hierarchy, implementing consistent navigation patterns, providing search and filtering options, and testing and iterating on your design, you can ensure that users can easily navigate and engage with your app. Remember, a user-friendly app structure and navigation not only enhance user satisfaction but also contribute to the success and adoption of your app.
Testing and Debugging Your App
Testing and debugging are crucial stages in the app development process that ensure the quality, functionality, and stability of your application. By thoroughly testing and effectively debugging your app, you can identify and fix issues, improve performance, and provide a seamless user experience. This article will provide you with key tips to consider when testing and debugging your app, helping you deliver a polished and reliable product to your users.
Create a Testing Plan: Start by creating a comprehensive testing plan that outlines the different types of tests you need to perform. Consider functional testing to validate the core features and functionalities of your app, usability testing to assess user experience, performance testing to measure response times and resource usage, compatibility testing to ensure compatibility across various devices and platforms, and security testing to identify vulnerabilities. A well-structured testing plan helps you cover all critical aspects of your app.
Test Early and Continuously: Begin testing your app as early as possible in the development cycle. This allows you to catch and address issues promptly, minimizing their impact on the overall project timeline. Adopt a continuous testing approach, performing tests at each development milestone or iteration. Regular testing helps you identify and fix issues incrementally, leading to a more stable and reliable app.
Use Test Automation: Leverage test automation tools and frameworks to streamline and accelerate your testing efforts. Automation allows you to perform repetitive tests, regression tests, and stress tests more efficiently. By automating routine tests, you can save time and resources, while also improving the accuracy and consistency of your testing processes. However, it’s important to balance automated testing with manual testing to cover scenarios that require human judgment.
Debugging with Logging and Error Handling: Implement comprehensive logging and error handling mechanisms in your app. Logging helps you capture relevant information, such as error messages, user actions, and system events, which can assist in diagnosing issues during the debugging process. Proper error handling ensures that your app gracefully handles unexpected situations, preventing crashes and providing meaningful error messages to users.
Gather User Feedback: Incorporate user feedback into your testing and debugging efforts. Conduct beta testing or release early versions of your app to a select group of users and encourage them to provide feedback on their experience. User feedback can uncover usability issues, identify edge cases, and highlight bugs that may have been missed during internal testing. Consider using feedback channels such as surveys, user forums, or dedicated feedback forms to collect and analyze user insights.
Test on Real Devices and Environments: Ensure that your testing includes real devices and various operating systems, browsers, and network conditions. Testing on real devices allows you to assess the app’s performance and compatibility accurately. Emulators and simulators can be useful for initial testing, but real devices provide more accurate results and help uncover device-specific issues. Additionally, testing in different environments and network conditions helps validate the app’s behavior under varying circumstances.
By creating a testing plan, testing early and continuously, using test automation, implementing logging and error handling, gathering user feedback, and testing on real devices and environments, you can effectively identify and resolve issues in your app. Remember, thorough testing and effective debugging practices significantly contribute to the overall success and user satisfaction of your app.
Publishing and Distributing Your App
After investing time and effort into developing an app, the next crucial step is to publish and distribute it to your target audience. Successfully launching your app to the market requires careful planning, adherence to platform guidelines, and effective distribution strategies. This article will provide you with key tips to consider when publishing and distributing your app, helping you maximize its visibility, reach, and user adoption.
Understand Platform Guidelines: Familiarize yourself with the guidelines and requirements of the platforms you intend to publish your app on, such as the Apple App Store, Google Play Store, or other relevant app marketplaces. Each platform has its own set of rules and standards regarding app content, design, functionality, and security. Adhering to these guidelines is essential for a smooth approval process and avoiding rejections or delays.
Optimize Your App Store Listing: Pay attention to your app store listing as it plays a crucial role in attracting potential users. Craft a compelling app description that clearly communicates the value proposition and features of your app. Use eye-catching visuals, such as high-quality screenshots and an appealing app icon. Optimize your app’s metadata, including relevant keywords, to improve its discoverability in app store searches.
Test and Optimize for Different Devices: Ensure that your app works seamlessly across various devices and screen sizes. Test your app thoroughly on different smartphones, tablets, and operating systems to ensure compatibility and responsive design. Consider user experience on both iOS and Android platforms, making necessary adjustments and optimizations for each.
Build a Marketing Strategy: Develop a comprehensive marketing strategy to generate awareness and promote your app. Leverage various marketing channels, including social media, content marketing, influencer partnerships, and app review websites, to reach your target audience. Utilize app store optimization (ASO) techniques to improve your app’s visibility within the app stores. Consider running targeted advertising campaigns to increase app downloads and user engagement.
Gather and Respond to User Feedback: Encourage users to provide feedback and ratings on your app. Actively monitor user reviews and ratings on the app stores, as well as feedback received through other channels, such as social media or support emails. Respond to user feedback promptly, addressing concerns, fixing bugs, and continuously improving your app based on user insights. Positive reviews and responsive support contribute to the app’s reputation and user satisfaction.
Plan for Updates and Maintenance: App development doesn’t stop at the initial release. Continuously plan for updates and maintenance to address user feedback, introduce new features, and fix any issues that arise. Regular updates not only enhance the functionality and performance of your app but also signal to users that your app is actively supported and improved over time.
By understanding platform guidelines, optimizing your app store listing, testing and optimizing for different devices, building a marketing strategy, gathering and responding to user feedback, and planning for updates and maintenance, you can maximize the visibility and adoption of your app. Remember, effective publishing and distribution strategies are key to the success of your app and its long-term growth in the competitive app market.
Maintaining and Updating Your App
Developing a successful mobile app or web application is not a one-time endeavor. Once your app is launched, it requires ongoing maintenance and regular updates to ensure its optimal performance, usability, and security. Maintenance and updates play a crucial role in keeping your app relevant, meeting user expectations, and addressing emerging challenges. This article will provide you with key tips to consider when maintaining and updating your app, enabling you to provide a seamless and engaging experience to your users.
Monitor Performance and User Feedback: Continuously monitor the performance of your app to identify any issues or areas for improvement. Track metrics such as app crashes, response times, and user engagement to gain insights into your app’s performance. Additionally, pay close attention to user feedback, including app store reviews, customer support inquiries, and social media mentions. User feedback can provide valuable insights into user satisfaction, pain points, and feature requests.
Bug Fixes and Issue Resolution: Actively address bugs and issues reported by users or identified through your monitoring efforts. Prioritize bug fixes based on their impact on user experience and app functionality. Establish an efficient process for collecting bug reports, triaging them, and resolving them in a timely manner. Regularly release updates that include bug fixes to maintain a stable and reliable app.
Enhance User Experience: Regularly update your app to enhance user experience and introduce new features. Analyze user feedback and conduct user research to understand user needs and expectations. Use this information to prioritize feature enhancements or additions that align with your app’s purpose and target audience. Continuously improving user experience through updates helps retain existing users and attract new ones.
Security Updates: Security should be a top priority when maintaining your app. Stay informed about the latest security threats, vulnerabilities, and best practices. Regularly update your app’s security measures to address potential risks and protect user data. Implement secure coding practices, encryption protocols, and authentication mechanisms to safeguard user information and maintain user trust.
Platform and Device Compatibility: Stay up to date with changes in operating systems, devices, and platform guidelines. Regularly test and ensure that your app remains compatible with the latest versions of major platforms, such as iOS and Android. Address any compatibility issues promptly to provide a consistent experience for your users across different devices and platforms.
Plan for Regular Updates: Establish a roadmap for regular updates and maintenance cycles. Determine the frequency and scope of updates based on user feedback, market trends, and your app’s development roadmap. Regular updates demonstrate your commitment to improving your app and engaging with your user base. Communicate update plans and release notes to keep your users informed about new features and improvements.
By monitoring performance and user feedback, addressing bugs and issues, enhancing user experience, ensuring security updates, maintaining platform compatibility, and planning for regular updates, you can provide a reliable and engaging experience to your users. Remember, ongoing maintenance and updates are crucial for keeping your app relevant, meeting user expectations, and staying ahead in the competitive app market.
Conclusion
And there you have it, my intrepid entrepreneurs! We’ve reached the end of our journey into the realm of creating a FREE mobile app for your business without any coding skills required. From the moment we shattered the myth that app development is exclusively for tech geniuses, we’ve explored the wonderful world of user-friendly platforms and tools that make app creation accessible to all.
With a dash of humor and a sprinkle of creativity, you now possess the knowledge and confidence to embark on this exciting adventure. Remember, the app market is teeming with opportunities to showcase your business, engage with customers, and propel your success to new heights.
By choosing the right app builder, customizing your app’s look and feel to match your brand’s personality, and successfully publishing it to the app stores, you’re well on your way to making a splash in the digital landscape. So, don’t let the fear of coding complexities hold you back; seize the opportunity to bring your business into the palms of your customers’ hands.
Now, go forth, my fellow app creators, armed with the power of simplicity and the conviction that you, too, can conquer the app market. Embrace this era of limitless possibilities and let your creativity soar as you build a mobile app that captures the essence of your business.
Remember, this is just the beginning of your app development journey. As technology evolves and your business grows, continue to explore new features, gather user feedback, and iterate on your app to ensure its ongoing success. The world is waiting for your business to make its mark, so go ahead and make waves in the digital ocean of opportunities. Good luck, and may your app journey be filled with laughter, success, and a touch of coding-free brilliance!
My Best Recommended & Proven Way to Make $100 Daily — Watch THIS FREE Training to START >>
Affiliate Disclaimer :
Some of the links in this article may be affiliate links, which means I receive a small commission at NO ADDITIONAL cost to you if you decide to purchase something. While we receive affiliate compensation for reviews / promotions on this article, we always offer honest opinions, users experiences and real views related to the product or service itself. Our goal is to help readers make the best purchasing decisions, however, the testimonies and opinions expressed are ours only. As always you should do your own thoughts to verify any claims, results and stats before making any kind of purchase. Clicking links or purchasing products recommended in this article may generate income for this product from affiliate commissions and you should assume we are compensated for any purchases you make. We review products and services you might find interesting. If you purchase them, we might get a share of the commission from the sale from our partners. This does not drive our decision as to whether or not a product is featured or recommended.
Source : How to Create a FREE Mobile App for Your Business Without Any Coding In 2023
Thanks for reading my article on “How to Create a FREE Mobile App for Your Business Without Any Coding In 2023“, hope it will help!
#Howtomakemoneyonline#makemoneyonline#makemoneyonline2023#makemoneyfast#affiliatemarketing#cpamarketing#blogging#dropshipping#ecommerce#makemoneytutorials#methodsandtutorials#internetmarketing#digitalmarketing#clickbankaffiliatemarketing#affiliatemarketingtraining#cpamarketingtraining#cpa#blog#makemoney#makemoneyonlineguide#freelancingtraining#emailmarketing#makemoneyonlinewithblogging#amazonaffiliatemarketing
0 notes
Text
THE BEST WAY TO HIRE A WEB DEVELOPER FOR YOUR BUSINESS
WHAT IS A WEB DEVELOPER?

Web developers are professionals who design, develop, and manage websites. They create and maintain the content on a website, work with search engine optimization (SEO), and create elegant user experiences.
Web developers come in many different backgrounds and training, but all share one common goal: to make your websites as effective as possible.
If you want to hire a Web developer for your business, here are some things to keep in mind:
– First, think about what your needs are. Do you need a developer who can build a new website from scratch or do you need someone who can help you update an existing website?
– Second, consider the skills your ideal developer must have. Do you need someone who is skilled in coding languages like HTML or CSS? Or do you need someone who can design and develop user interfaces (UI)?
DO I NEED A WEB DEVELOPER?
If you have a web-based business, then you likely need a web developer. Web developers create and maintain websites and applications using web technologies like HTML, CSS, JavaScript, and PHP. They can also help you design your website’s layout and graphics, and they may be able to create custom plugins or extensions for your website.
If your business only needs a small amount of web development help, then you can probably get by with a freelance web developer. Freelancers typically charge per project, rather than per hour, so the cost of their services will depend on the size and complexity of your project. You can also outsource your entire web development project to a specialized development company if you have more complex requirements or want to avoid dealing with freelancers.
There’s no single right answer when it comes to hiring a web developer for your business. However, if you don’t have any experience or knowledge of web development yourself, it’s best to start off by consulting with a professional before investing in any additional software or services.
WHY HIRE A WEB DEVELOPER
If you are looking for a way to improve your website or business, then hiring a web developer is the best option for you. A web developer can help you with everything from creating a new website to fixing existing content. If you are not sure what kind of development work a web developer can do for your business, read on for some reasons why hiring one is the best decision you can make.
In today’s world, websites are an essential part of businesses. Whether you are a small business or an online retailer, having a website is essential. Websites allow customers to find and buy products, learn more about your company, and contact you easily. In addition to serving as an online presence, websites can also be used to promote your business in other ways. For example, if you have a blog, you can use it to promote your products and services.
Hiring a web developer is the best way to get started with website development. Web developers have years of experience creating websites and know how to make them look professional. They can also develop custom websites or add features to an existing website. In addition, web developers can help you with all types of website development work – from designing the site layout to developing imeain.com, helping you to make the information on your site more useful and easy to use.
HOW DO I FIND A GOOD DEVELOPER?
Finding a good developer can be difficult, but there are a few things you can do to help. First, ask around. Friends, family, and business associates may all have recommendations for developers they know. Second, use online resources. Searching for “web developers” or “web design” on Google will give you a list of websites with recommended businesses and individuals. Finally, take the time to interview potential developers. Meet with them in person to get a sense of their skills and personality, and ask about their experience working with web projects.
WHAT ARE TYPICAL RATES FOR DEVELOPERS?
The average rate for a web developer is around $75-$150 per hour. The most important factors to consider when hiring a developer are the skills needed and experience of the candidate.
CONCLUSION
When it comes to hiring a web developer for your business, there are a number of things you need to consider. In this article, we will outline some of the key considerations you should make when looking to hire a web developer and provide some tips on how to find the right candidate. By following these steps, you can ensure that you are getting the best possible service from your web developer and that your business is leveraged to its fullest potential.
TAGS:
Hire A Web Developer
CATEGORIES:Web Design
0 notes
Text
Simple css tumblr themes

#Simple css tumblr themes how to
#Simple css tumblr themes free
“Enhance” specific posts with rainbow Comic Sans, intentionally make entire personal posts black and unreadable… The possibilities are nearly limitless. Inside that CSS, you can do whatever you want. You’re not limited to just hiding your posts, either. Try looking through the CSS to see which words you cannot use. Now the post is classed twice and it has a padding of 20px. You’ll be presented with a text editor that will show the. In the next screen, click the Edit HTML link. This means that if you tag your posts with common things such as “post” or “text”, they may be affected by the CSS.Įxample: Text posts are classed with “text” and are given a padding of 10px. Applying the Theme to Tumblr Visit your Tumblr dashboard, select a blog, and click Customize. Remember that we now have EVERY post classed with EVERY tag you put on it. This means that a display value of “none” only happens on index pages, and your post will still show on a page. Learning time! So in addition to using standard HTML and CSS for blog themes, tumblr uses some things called BLOCKS and VARIABLES.Ī block looks like this: Follow these steps to successfully customize your theme: 1) When youre signed in to Tumblr, head to your customization page at /customize. Save a copy of your theme before trying this. You don’t necessarily need to be an expert, but you might accidentally screw everything up.
#Simple css tumblr themes how to
I’m going to show you how to prevent them from appearing.īeware: I would really recommend that you know a bit of HTML and CSS. Maybe it’s a giveaway post or something that ruins your aesthetic. Sometimes you just don’t wanna show some certain posts on your blog. Masonry (cascading grid layout library) by David DeSandro.Tabby (lightweight, accessible vanilla JS toggle tabs) by cferdinandi.Expanded Tumblr localization by codematurgy spiritedawaythemes: ya it’s nothing hard like not some shit html it’s really simple.no.js photosets by annasthms and espoirthemes.Sticky Note Widget and Music Widget (optional).Unlimited custom links as you want through Tumblr pages.Support dark mode (the toggle button can be hidden/shown).Responsive layout and looks good on mobile screen.This can be configured on the customization page. Easily choose among “simple” layout, “notion” layout, or masonry layout.
#Simple css tumblr themes free
A redesign of the previous version made in 2016, was re-coded from scratch and supports all blog types. Portfolio Responsive Tumblr Theme 32 Mirrorless Tumblr Theme 5 Responsive Portfolio Theme For Tumblr 29 Free Bright Day Tumblr Theme Free Simple Tumblr. Banda Neira is a minimal theme with a slick design that is similar to a notion page or macOS settings page.
0 notes
Text
Electro Theme Review
Electro Electronics Store WooCommerce Theme is a powerful and popular WordPress theme that enables you to create an online store or Woo-Commerce website. Electro Electronics Store WooCommerce Theme is packed with features and options that help you to easily set up and manage your website. Electro-Theme-review
With the Electro Electronics Store WooCommerce Theme, you can showcase your products in a beautiful and responsive layout and sell them online using the WooCommerce plugin. The theme also includes several premade designs that you can use to get started quickly, or you can create your own custom design using the drag-and-drop page builder. The best part about Electro Theme is that it’s extremely easy to use, even if you’re not a tech-savvy person.
The design of this theme is clean, modern, and highly customizable – perfect for any type of Woocommerce website. We highly recommend checking out Electro Electronics Store WooCommerce Theme.
Electro Theme Features
electro theme features
Easy To Install and Setup
1 Click Demo importer
Responsive Megamenu
Multiple drag and drop page builder
WPML compatible
Advanced Products Live Search
Advanced Review
Advanced Specification Tab
Accessorise for products (like amazon)
Catalog mode available
Shop Page jumbotron
Custom Product comparison page
Product Carousel
Brand Carousel
Theme Demo:
Electro Electronics Store WooCommerce Theme has a built-in number of demos.electro
The customer can import the demo according to his choice. Click here to view Electro theme demo. If you want to build a directory listing website, contact us, we build world-class websites at a low cost.
How Do I Update My Electro Theme?
If you’re using the Electro WordPress theme, there are a few different ways that you can update it to the latest version. First, you can use the built-in WordPress updater. To do this, simply go to your WordPress Dashboard and navigate to Updates.
If there is an update available for Electro, it will show up here, and you can click Update Automatically. Another option is to manually update Electro by downloading the latest version from our website and uploading it to your server via FTP. Finally, if you’ve made any customizations to your current version of Electro, we recommend creating a child theme before updating.
This way, your customizations will not be lost when you update to the new version. Updating your theme is easy and only takes a few minutes – no matter which method you choose!
Electro Theme Documentation
If you want to create a stunning website with an electro theme, then you need to check out this documentation. It provides everything you need to know about setting up and using the electro theme, including how to customize it to suit your own needs. This documentation is well organized and easy to follow, making it perfect for those who are new to web design or don’t have a lot of experience with coding.
Even if you’re an experienced web developer, you’ll find that this documentation makes creating an electro-themed website a breeze. Some of the topics covered in this documentation include: • Installing the Electro Theme.
• Customizing the Header and Footer Sections • Creating Electro Pages (for Products, Blog Posts, etc.).If you want to build a Woo-commerce website, contact us, we build world-class websites at a low cost.
Electro Theme Support
If you’re looking for support with the Electro theme, you’ve come to the right place. In this Electro Theme Review, we’ll provide detailed information on where to find support, how to get started, and what to do if you encounter any problems. The first thing you should do when looking for support is to check out the documentation.
The documentation contains detailed information about how to use the theme and can answer many of your questions. If you can’t find what you’re looking for in the documentation, or if you have any trouble following the instructions, feel free to post in the forums. Before posting in the forums, take a look at existing threads to see if your question has already been answered.Electro Theme support
Use the search function to find threads that are relevant to your problem or question. Once you’ve found a thread that looks promising, read through it carefully and see if it provides a solution for your issue. If not, reply to the thread asking for help.
Be sure to include as much detail as possible so that other users can understand your problem and provide helpful advice. In addition to posting in the forums, you can also contact customer support directly. The support staff is available Monday-Friday from 9 am-5 pm EST (GMT -5).
You can reach customer support by emailing or by using the contact form on our website.
Electro Theme Alternative
Are you looking for an alternative to the Electro WordPress theme? Here are some great options that you can consider:
1. Divi: Divi is a popular WordPress theme that allows you to create custom layouts for your website using a drag-and-drop editor. It comes with a library of pre-built modules that you can use to build your pages, and it also includes support for WooCommerce so you can create an online store.Electro Theme Altranative
2. Avada: Avada is another popular option that includes a drag-and-drop page builder tool. It comes with over 60 pre-built website designs that you can use as a starting point, and it includes eCommerce support so you can sell products and services online.
3. BeTheme: BeTheme is a comprehensive WordPress theme that includes over 650+ pre-built websites. It has a powerful page builder tool, and it also supports WooCommerce so you can create an online store. In addition, it includes features like parallax scrolling and video backgrounds to help make your website stand out from the crowd.
Why Might Someone Want to Use an Alternative Theme to Electro
There are many reasons someone might want to use an alternative theme to Electro. Perhaps they feel that the default theme is too bland or basic, or they want something with more features or a different look. Maybe they need a specific feature that is not available in Electro.
Whatever the reason, there are plenty of great themes out there to choose from.
Electro Theme Support Multivendor?
Yes, Electro Theme Support Multivendor
How Much Does Electro Theme Cost
If you’re looking for a great WordPress theme with a modern design, then you’ll want to check out Electro. This theme is perfect for online stores and features a clean and responsive layout. Plus, it’s easy to customize and comes with plenty of options for colors, fonts, and other elements.
So how much does Electro Theme cost? The regular price for this theme is $69.
Is Electro Theme Easy to Use
Yes, Electro is a very easy-to-use WordPress theme. It is designed to be user-friendly and customizable, so you can create a website that looks exactly how you want it to. There are lots of features included in the theme, such as a drag-and-drop page builder, WooCommerce integration, and an advanced options panel.
You can also find plenty of documentation and support online if you need any help setting up your website.
Does Electro Theme Come With Support
Yes, Electro theme comes with support. You can find support documentation and contact information on the theme’s website.
Electro Theme Review – Conclusion
The Electro theme is a great choice for anyone looking for a simple, clean, and modern WordPress Woo-commerce theme. It’s perfect for creating a professional Electronic Store Website. The theme comes with all the features you need to get started, including a custom header, footer, and sidebar.
Electro also includes an options panel where you can customize your website to fit your needs. Overall, the Electro theme is an excellent choice for anyone looking for an easy-to-use WordPress theme.
0 notes
Photo

How do I make a great website without writing a single line of code myself?
Having a website is vital for any business owner these days. If you want to make your brand stand out or drive more traffic to your business, a website is absolutely essential to attract customers. You don't have to be tech-savvy to build a website or spend thousands of dollars on a web developer. There are many software service providers available to help you develop a simple business website.
POD Studio lets you build a website from scratch without writing any code. POD Studio offers intuitive website creation tools so you don't have to worry about coding. With a fully hosted integration solution and a patented mix-and-match feature, you can create a professional and immersive website with just a few clicks. All you have to do is look at the hundreds of available templates and customize them to suit your needs. The user-friendly platform controls the structure and allows you to build your website in minutes.
Wix is a website builder, which means you can "drag and drop" content virtually anywhere on the screen without using HTML or any other programming language. It's easy to use and the huge library of beautiful page templates makes it easy to get started. In fact, you can start building a one-page website in the next few minutes and get it up and running in under 20 minutes. While Wix is easy to use, it is a non-open source platform that limits your ability to customize your website and add more advanced features.
You can create a Wix website for free. However, with the free plan, you don't get a custom domain name and Wix will display ads on your website. To get rid of the ads and get your own domain name, you'll have to pay for a plan upgrade.
Pros:
It's easy to use.
It's economical.
You don't need to know HTML or any other programming language to build your website.
You can build a site in a day.
They offer hundreds of wonderful website templates for you to choose from.
You can link third-party applications to your site.
Cons:
You do not have full control over the look and functionality of your website.
If your website has thousands of simultaneous visitors, your website may be slow to load.
Once you've selected a website template, you can't edit it.
Weebly is an easy-to-use website developer. Similar to Wix, Weebly includes a drag-and-drop builder that makes it easy to choose the layout and design of your website. Weebly also offers a variety of stylish responsive page templates. The free version of Weebly allows you to build a website with very basic functionality. Upgrading allows you to remove the Weebly branding and gain access to additional features.
Pros:
Don't need to code.
Easy-to-use drag-and-drop website builder.
More design flexibility than the Wix.
You're building an ecommerce site.
Cons
You cannot access the source code to customize your backend site.
You cannot have full control over how your website looks and works.
It's difficult to migrate your website.
WordPress is one of the most used website platforms today. over 60 million people use it to manage their websites. It's a content management system (CMS) that makes it more powerful than Wix and Weebly. In Wordpress you have plenty of options when it comes to which theme or plugin to use. With over 2,600 public WordPress themes and over 31,000 plugins, you have plenty of plug-and-play options to customize the look and functionality of your website. Additionally, WordPress is known to have one of the most useful online communities, which makes it ideal for beginners who need a little help. If you don't know how to do something, you can search the WordPress community for an answer.
As a business owner, you need to keep scalability in mind when choosing your website platform because change takes time. If you have WordPress, you may never have to switch platforms.
Pros:
Create any type of website: an e-commerce or membership page, a blog, a personal portfolio, etc.
Use a website platform for the life of your business - if you see huge business growth, your WordPress site can handle it.
Customize your website however you want (some coding may be required).
Easily find answers to your questions in the WordPress online community.
Cons:
You need to significantly customize your website.
You need to learn the basics of WordPress.
WordPress is a website platform that grows with your business. Even though there is a slight learning curve, it's worth the time invested. If you're not tech-savvy and don't have a programmer, use Wix or Weebly.
2 notes
·
View notes
Note
Hello I've been wanting to ask you a couple of things. How do you design a blog (your blog is awesome!) and what is your advice for starting one?

Hullo hello. IDK if you have come to the right guy for these questions but let’s see--
Firstly I didn’t design my blog completely from scratch-- I mean what you see on the surface is mine, but under the hood a lot of that credit is owed to @octomoosey whose themes are some of the cleanest code out there!! If you know the basics of HTML and CSS, a blog theme should be a cakewalk to customize. Just get you a well organized theme and you can basically make it look however you want with very little effort.
Honestly, I think messing about with tumblr theme code is a great way to start learning how to code website layouts. As long as the creator of the theme doesn’t mind you customizing it. And remember to keep the credits intact!
If you’re less familiar with code, I recommend browsing @theme-hunter for something you like. There’s a lot out there.

And now, here is Vervain’s cool advice for starting a RP blog:
1. Bring a friend if you can. If you bring a friend with you then you’ll have someone to roleplay with while you get established. If you’re new to the platform I think its especially helpful to have someone there with you.
2. Don’t take things personally, and don’t take shit. I don’t care what other people say, roleplay is a selfish hobby. You’re here to have a good time writing, first and foremost. If people are lame at you, don’t feel bad about distancing yourself for your comfort. It’s a them problem.
3. It’s not a popularity contest. Sure some blogs have like 10,000 followers, but are they really gonna roleplay with that many people? Nobody has enough time for that! Quality over quantity. Trust me, 1 great partner is worth 1000 faceless followers.
That’s all I can think of. Have fun~.
#im the wrong person to ask this kind of stuff#im rather jaded#but i'm polished jade at least#Audience Member
20 notes
·
View notes
Text
Best WordPress Themes Review for Amazon Affiliates And E-Commerce Site
You just know that WordPress Themes is a popular CMS and that most content marketers love it for their business or for their blog. There are bloggers out there who earn thousands of dollars monthly using the Amazon Associates program alone. WordPress actually makes it much easier to create and maintain an efficient affiliate marketing website. The question remains:
How do you choose a free WordPress theme that fits best when there are many out there?
When you start blogging professionally, one of the crazy activities will kill your productivity in exploring new themes. You won’t find the right one for your productivity.
But Force blogger is helping you to find out better now. The fact is that you need to find one of the most responsive WordPress themes for your personal blog.
WordPress Themes
WordPress is the best beginner-friendly website builder on the market. Affiliate marketers use WordPress because it’s so flexible and straightforward to use.
There are 2 kinds of WordPress. There is WordPress.com, which may be a hosting solution, and WordPress.org, which may be a self-hosted platform. For your affiliate marketing website, you will need to use self-hosted WordPress.
To create your website, you’ll need a website name and web hosting. Your name is your website’s address on the web. Your web hosting company stores all of your website files and makes them available 24/7. After signing up for hosting, you’re now able to install WordPress. Then, simply follow our instructions on the way to make an internet site.
This will allow you to create your affiliate site easily and quickly. Now you have to find and install Plugins and Themes for your site. Most of the time, beginners can’t find the best themes for their sites.
This time Force blogger helping you to find out some best themes for your Word press site. These themes are SEO-based, so anybody can search and find your site or products easily.
1. GeneratePress lightweight and Customize WP Themes
3,204,966+Downloads,1168+ 5Star Review, 300,000+Active websites,70,000+Happy customers.
GeneratePress may be a lightweight WordPress theme built with attention to speed and usefulness.
Performance is vital to them, which is why a fresh GeneratePress install adds but 10kb (gzipped) to your page size.
GeneratePress takes full advantage of the new block editor (Gutenberg), which provides you with more control over creating your content. If you employ page builders, GeneratePress is the right theme for you.
GeneratePress completely compatible with all major page builders, including Beaver Builder and Elementor.
Because of their emphasis on WordPress coding standards, GeneratePress will boast full compatibility with all well-coded plugins, including WooCommerce.
GeneratePress is fully responsive, uses valid HTML/CSS, and is translated into over 25 languages by our amazing community users.
A couple of our many features include microdata integration, 9 widget areas, 5 navigation locations, 5 sidebar layouts, dropdown menus (click or hover) and navigation colour presets.
GeneratePress focuses on SPEED and usefulness. They provide a Free and Premium version. GeneratePress is a very lightweight, well structured, and SEO-optimized theme.
Features of GeneratePress
Mobile-Friendly & AMP Compatible
Default Webpage Size is Less than 30Kb
Accessibility-ready Theme
Secure and Stable (Reviewed by Leaders in WordPress Community)
Top-Tier Speeds
SEO Optimized
Page Builder Friendly
Customize any Colors & Typography
Schema Integrated
Customize Site Layout
No more render-blocking issues.
Things I like: I extremely like their super-fast loading speeds.
Things I don’t like: They have no one-time plan. You will get updates and support for one year. However, they are offering a 40% renewal discount.
Downloader: 3,204,966+
Active websites300,000+
Ratings: 5-star based on 1168 reviews
Price: $49.95/Regularly
1 note
·
View note
Text
How do I activate my cash APP card?
Cash app helps its users in making all the transactions simple and quick. Using this application, people can easily send urgent money to anyone. With the advancement in technology, everyone is enjoying mobile based payment apps for complete security. Cash app card is one amazing feature of cash app through which it becomes easy for the users to shop at different places, withdraw money from ATM and so on. But, the first thing that you need to do is to activate cash app card for making use of all its features. For any reason, you’re not able to activate it then you can seek quick technical guidance from the professionals of the cash app team. For help from the experts, you’ll just have to get in touch with the techies at any hour of the day.
It would be easy to connect with the technical team of the cash app for reliable assistance. Also, you’ll get quick technical aid without any delay so feel free to ask your queries. Experts of the cash app helpdesk team are available all day night for your help. Here are some cash app card activation related queries that one needs to understand.
Do I have to activate my cash APP card?
With every cash app account, users will get to order the cash app card. A cash card needs to get ordered before using it. Once you get the card, make sure to activate the cash card by phone or by website whatever is suitable to you. So, it is important to activate the card for using various benefits of the cash app.
How to activate a cash app card?
By using a QR code, it’s simple to activate the cash card. Sometimes, students forget the QR code while activating the card. If you already have a QR code then these instructions are helpful for you:
· At first, open the Cash App on your mobile device.
· In this step, you need to click on the icon of Cash Card that is available at the bottom of the screen.
· After that, all that you need to do is to tap on the “Activate” Card.
· Here, make use of your mobile camera to scan the QR Code. This code is printed on the Cash Card that you will receive.
· Focus the camera properly on the QR code to scan the code. After scanning is done, your Cash app card is ready to use.
Why can’t I activate my cash APP card?
Do you face problems activating the card? Don’t know anything about the process of cash app activation card? When the cash app user doesn’t have a verified account then there will be an issue with the card activation. So, you will need to first verify the account to enjoy this feature of the cash app.
How do I activate my cash APP card?
Sometimes, users encounter some problems in activating the card without a QR code. But, there’s a way to activate the cash app card without the code.
· First of all, just start the Cash App on your mobile.
· In this step, make sure to click on the icon of Cash Card from the bottom of the screen.
· After that, the user needs to tap on the “activate Cash card” link to start the activation.
· Make sure to tap on the “missing QR code” option
· Here, the user needs to select “Use CVV instead” from the options.
· Now, just enter your CVV code and the expiry date of the Cash card. After entering all the details, your Cash card is ready to use anywhere.
Read More Blogs:
Why didn’t I receive the Cash App referral bonus money?
How to Enable Benefits Cash App Direct Deposit, pending, failed [New Layout for 2021]
How to Enable Benefits Cash App Direct Deposit, pending, failed [New Layout for 2021]
How Do I Fix A Cash Transfer Failed App?
Understand the principal reason behind a cash app transfer failed error
What Are Different Ways To Add Money To Cash App Card
What Are Different Ways To Add Money To Cash App Card
How can I activate my cash app card?
Learn the stepwise procedure to activate a cash app card
Follow easy steps to get a cash app refund quickly
How Do I Get My Money Back From a Cash App Successfully?
Cash App Bonus Info: Simple Steps to Invite Friend & Get $5
Why can’t I add money to my cash app?
Can I load my cash app card at Walmart?
Where can I load my cash app card
Where Can I Load My Cash App Card
Can you load a cash APP card at Walmart?
How to Add Money to Cash App Card?
How to Add Cash On Cash App Card
WHY CASH APP TRANSFER FAILED?
WHY TRANSFER FAILED ISSUE ON CASH APP?
WHY SQUARE CASH APP TRANSFER FAILED?
WHY TRANSFER FAILED ON CASH APP?
HOW TO CHECK CASH APP CARD BALANCE?
WHY IS CASH APP TRANSFER FAILED - PAYMENT FAILED RECOVERY
HOW TO REFUND PAYMENT ON YOUR CASH APP ACCOUNT?
HOW TO SOLUTIONS CASH APP ISSUES CASH APP PROBLEMS, CASH APP HELP, CASH APP ERRORS
Why is my Cash App Transfer Failed [Solution 2021]? (855) 439-4243
Why is my Cash App Transfer Failed [Solution 2021]?
Cash Out Failed: How to fix it, If the cash app cash out failed & pending due to some reason?
CASH APP CASH OUT FAILED: HOW TO CASH OUT ON CASH APP?
How to get access old Cash App Account
What is the process of accessing an old Cash App account?
What to do if the Cash App closed my account?
How to access a Cash App account if you forgot the password?
Can I access my old Cash App account?
How to Activate Cash App Card With and Without QR Code:
How to Activate your new Cash Card - Cash App
How to use your Cash Card after you sign up for and activate it in the Cash App
HOW TO GET THE TAX REFUND, STIMULUS CHECK AND UNEMPLOYMENT DEPOSIT ON CASH APP
STEPS BY STEPS TO CHECK STIMULUS ON CASH APP IMMEDIATELY
WHAT DOES PENDING MEAN ON CASH APP? LEARN ALL ABOUT THE CASH APP PENDING STATUS HERE
THE NEXT U.S. STIMULUS COULD ARRIVE SOON. HERE'S WHAT TO CONSIDER BEFORE YOU SPEND IT
CASH APP STIMULUS CHECK Q&A: WHAT HAPPENS IF PAYMENTS GO FROM $600 TO $2,000?
855 233 1940: Why is My Cash App Deposit Pending [Direct Deposit Time]
855 233 1940: How to increase the Cash App limit?
How to Delete Your Cash App Account – Things to Do before Deleting Account
Activate Cash App Card by Phone: Important Questions Answers
Cash App Mobile Check Deposit: Read Important Details
How to Unlock Closed Cash App Account Due to Violation?
How to get Cash App refund in Few Minutes
Cash App Refund Process and Policy
How to get a Cash App refund – Get your money back from Cash App
How to Cancel Cash App Payment? Get Cash App Refund
What Does Cash Out Mean On Cash App? Complete Guide
How to Check Cash App Card Balance: 4 Easy Ways to Check Balance
How to Check Cash App Card Balance in Simple Steps
Cash App Direct Deposit Failed or Pending - Steps to Fix It
How Do I Get a Refund on Cash App? Explain Policy and Time
How to Activate my Cash App card without QR Code?
Best ways to Enable Benefits Cash App Direct Deposit, pending, failed [New Layout for 2021]
How to Set Up Direct Deposit on Cash App - Failed/Pending [Updated 2021]
CAN I LOAD MY CASH APP CARD AT CVS?
Activate Cash App Card
How to activate a Cash App Card?
Cash App Direct Deposit | Benefits, Pending, Time and How to Set-up
How to Fix Cash App Transfer Failed in Simple Steps
How to Cash App Refund- How to Get Your Money Back
Cash App Direct Deposit - Benefits, Time And How To Set-up
Cash App Unemployment Direct Deposit: Get Instant Benefits
Cash App Direct Deposit Unemployment 2021
How long does Cash app direct deposit take?
How to set up a direct deposit on the Cash app?
A Simple Unemployment Benefits of cash app
Activate Cash App Card
How to activate Cash App card using the QR code ?
KNOW about More How to Enable Cash App Quick Deposit?
How to Fix Cash App Direct Deposit Failed ?
How to Fix Cash App Direct Deposit Failed ?
Cash App Review [2021]: Is it a Safe Way to Send and Receive Money?
Why is my direct deposit pending on the cash app?
How long does Cash App direct deposit take? The time that direct deposit hit?
How can I prevent cash app failure payment issue?[SOLUTION]
Cash App Transfer Failed?[SOLUTION]
How can I prevent cash app failure payment issue?[SOLUTION]
Cash App Failed Transfer: Steps to Resolve Transfer Failed On Cash App
Guidelines to Annihilate Cash App Server down Problems
Quick Questions with Answers for Cash App Transfer Failed
Why my Cash App transfer failed?
Why cash app refund refused?
Want to know how to refund payment on your Cash App account?
Steps to Resolve Transfer Failed On Cash App
Cash App Failed: Steps to Resolve Transfer Failed On Cash App
How can I call my Cash app card?
Why do you need to learn about the refund process over the cash app?
How to resolve the common issues in cash app login
How to Activate a Cash App Card? Read the Quick Direction
Read All about Cash App Direct Deposit
Get Instant Benefits: Cash App Unemployment Direct Deposit
How to Activate Cash App Card Smoothly
Add Money to Cash App Card at Walgreens and Dollar General
How can I call my Cash app card?
Your Stolen Money Back From Cash App
How do I activate my cash app card?
How To Get A Refund On Cash App If Sent To The Wrong Person?
Discuss How to Get a Cash Card and Activate Your Cash App Card
How do I fix my cash app failed for my Payment?
How do you contact Cash App customer service?
How do you know if your Cash App card is activated?
What Should Users Do If Any Problems Take Place While On Cash App?
Reason and Solution for Cash App Payment Pending
FAQ for Load Cash App Card
Get your money from Cash App
[Fix] Cash-out failed on Cash App
How to empower direct store on Cash App?
Can I Load my Cash App Card at Dollar General? [Full Guide]
I Want To Know Why My Cash App Payment Failed
Why won’t my cash App send money?
I Want to know how to Cash App money transfer?
How can I prevent cash app failure payment issue?
Purposes for Why a Cash App Payment Failed
How to prevent Cash app transfer failed
Cash app Failed For My Protection Solution
How to fix transfer failed on cash app problem?
Why Does My Cash App Transfer Keep Failing
How do I fix my Cash App failed for my protection?
Target keywords
cash app account closed violation of terms of service | cash app closed my account due to violation | cash app closed due to violation | cash app violation of terms of service | why did my cash app account get closed | why was my cash app closed | my cash app is closed | why is my cash app closed | how do you close your cash app account | this transfer failed cash app | how to fix cash app transfer failed | how to fix transfer failed on cash app | cash card transfer failed | cash app this transfer failed fix | Cash app transfer failed 2021
#activate cash app card#activate your cash card#cash app activate card#cash app activation number#cash app card activate#cash app card activation#how to activate cash app card
2 notes
·
View notes
Note
hello! how did you add the members page to your desktop theme on your network? im trying to add a characters page to mine but it keeps messing up :(
ahhh i'm not the best at explaining things but i've put some steps under the cut. i don't know what exactly you're struggling with (like if it's just the coding or if it's making a new page), so i've kind of included as much as i can. i hope this helps! lmk if you have more questions <3
first, scroll down your "edit theme" bar all the way to the bottom and click on "add a page".
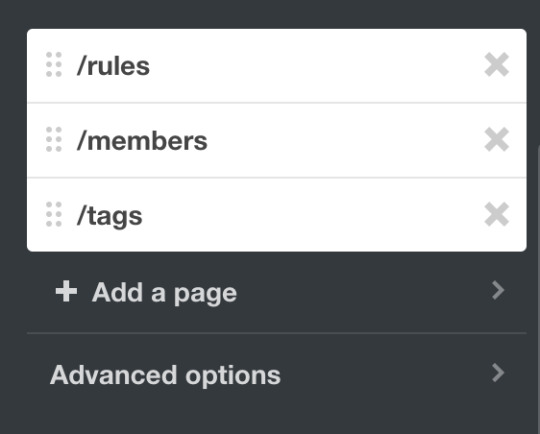
you should be directed to this. click the top left that says "standard layout". it should pop up with a dropdown menu of 3 options and you should click "custom layout".
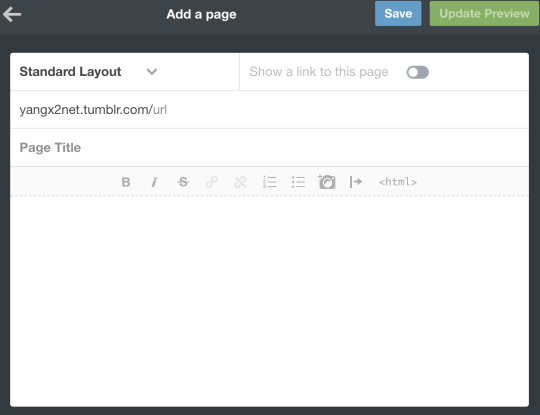
this is where you should throw in the HTML codes for your members/characters page! (for example, this is what mine looks like).
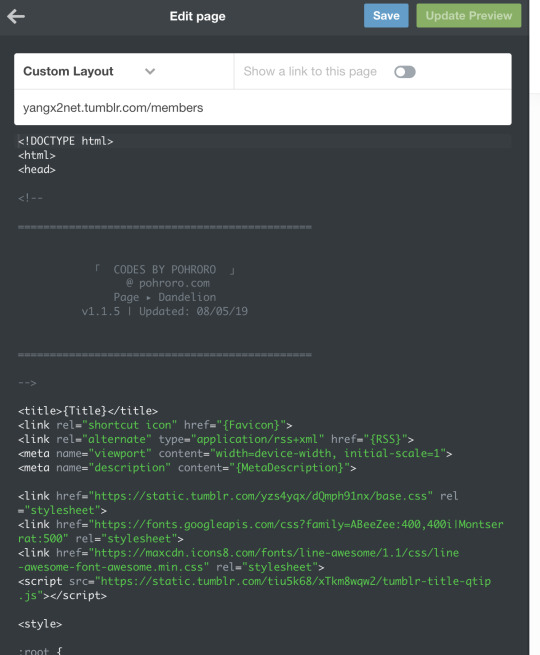
if you don't have a code and would like to look for one, you can just go through my personal/network theme pages and click on the watermarks that the creators have left :) or you can google!
codes are super confusing to go through tbh! most creators will have instructions writer in grey to tell you what to do :)
to make sure the page turns up on your main blog theme, make sure to put a link there somewhere! you can do this on the side bar like so:
1 note
·
View note
Note
hi, i just went on your blog from my computer and i was AMAZED with how clean and pretty your layout is, like the "love letters" and "search" on the left. is there a template / programming you used? and if so, where can i find one? i wanna learn how to do it like u did 💖
hey, honey bee! 💞 omg thank you so much for liking my blog layout!!! 💗 i changed up the links to say “love letters” and such because they were originally home, ask, archive, etc. but i used a blog theme code for it! to change your theme, you have to do it all on desktop. i did a little messy tutorial below:
you can check out the creator of the theme i used by going to my blog page and clicking the little credit mark in the bottom left corner as shown in the picture below; it’s the k! each theme creator will have their own credit mark somewhere in the theme, and that’s where the one i used is found.
one. you can browse through the themes that the person who created mine did by going to their blog through that credit mark! on their blog, they should have a link somewhere that brings you to all their themes and you can choose one to use! make sure to like or reblog if you use their theme! 💓 another tumblr blog that compiles lots of themes for you to browse through is theme-hunter. the theme i used is this one! i have a screenshot of it below, but you click the word “code” to get the theme code.
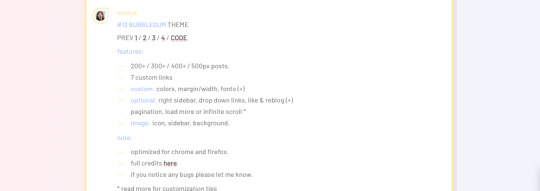
two. you’ll get a pastebin tab from there, and then click on “clone”! not all theme creators use pastebin, but it’ll be a similar site, like github, where they will store the theme code. copy the entire code by putting your indicator/cursor in the box with the code and do ctrl +a and ctrl + c (or command instead if you have a macbook!).
three. and then, go to “edit appearance” for the blog you want to add the theme to. you can find it if you click the person icon in the top ribbon on your tumblr dashboard.
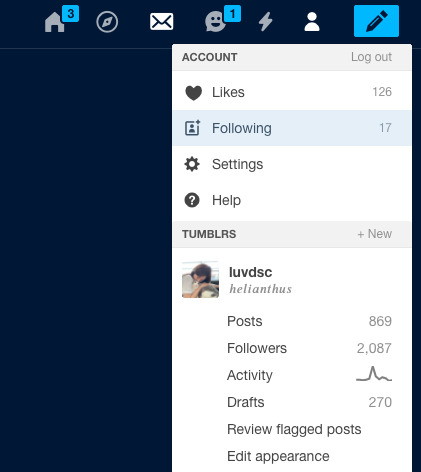
four. once you’re there, click on “edit theme” next to the website theme section as seen in the screenshot below!
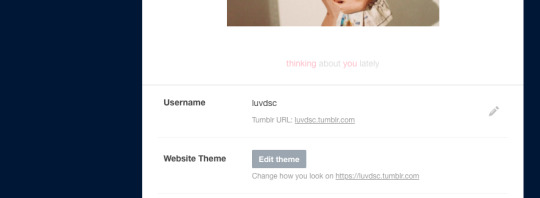
five. after that page loads, click on “edit html” which is under the words “Custom theme” as shown in the screenshot below!
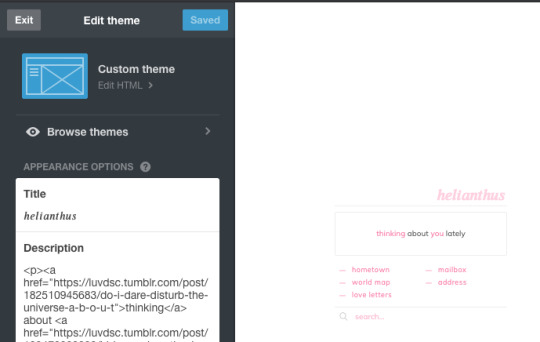
six. delete any code that is already there under the “Edit HTML” section and then paste (ctrl + v) the code that you copied earlier into that empty box. it should look similar to the screenshot below. click “Update Preview” to see if the theme shows up correctly! some theme codes might show up with an html error, so to fix that, here’s this post that explains it better than i can!
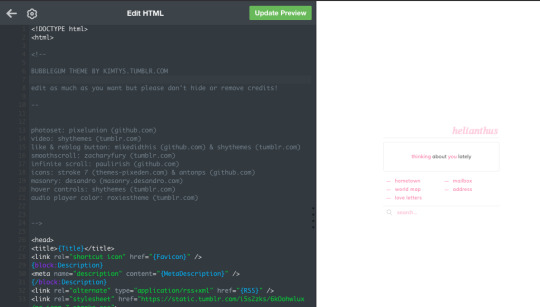
eight. a “save” button should show up once you click “update preview” as seen in the screenshot below. make sure to save before you click the back button (←) and lose all progress!
nine. there’s a ton of options on the left “Edit theme” bar to customize your desktop theme! if you scroll down, you can toggle with the various options and see what they do. you can’t see it in the screenshot below, but this is also where you can add in your links. make sure when you put links in that you have “https://” before any link (i.e. https://luvdsc.tumblr.com) or else it won’t work (click here for more info on links in bio and desktop theme). also, i know my theme preview looks a little wonky, but that’s because it’s being shown in a smaller space than the entire page if that makes sense? save and check what your blog looks like in another tab!

i think that’s the basics on how to add a theme to your blog, but if you have any questions or need clarification, please don’t hesitate to shoot me another ask, lovebug! i hope this was helpful for you 💞
29 notes
·
View notes
Last Seen Blogs

aroui
pine

amplifyaura
☾ *AMPLIFY ☽

howtoearn22222
howtoearn22222

nobodybutalex-blog
NobodybutAlex

sunlightremedy
The realm of the remedy