#ArtProjects
Text
Just set up a new shop if yall wanna check it out! MalarkeyByMellennia.etsy.com
3 notes
·
View notes
Photo

Last #drawing of 2022, a page full of #patterns to get inspired for future drawings #inspiration #squares #hobby #art #kunst #artprojects #zeitvertreib #doodlesofinstagram #doodling #sketchbook #sketchbookdrawing https://www.instagram.com/p/CnAaQUar4-f/?igshid=NGJjMDIxMWI=
#drawing#patterns#inspiration#squares#hobby#art#kunst#artprojects#zeitvertreib#doodlesofinstagram#doodling#sketchbook#sketchbookdrawing
5 notes
·
View notes
Photo

Klimt inspired necklace, available in my shop #claycessories_ #jannabaranovska #klimtnecklace #klimtjewelry #klimt #klimtart #wearableart #artprojects #artjewellery #artjewelry #artnecklace #thrtreeoflife #symbolism #symbolnecklace #modernart https://www.instagram.com/p/CkIKAzVjqc-/?igshid=NGJjMDIxMWI=
#claycessories_#jannabaranovska#klimtnecklace#klimtjewelry#klimt#klimtart#wearableart#artprojects#artjewellery#artjewelry#artnecklace#thrtreeoflife#symbolism#symbolnecklace#modernart
2 notes
·
View notes
Text


Digital Imaging - November 2023 Final gifs
Done in Photoshop
0 notes
Text
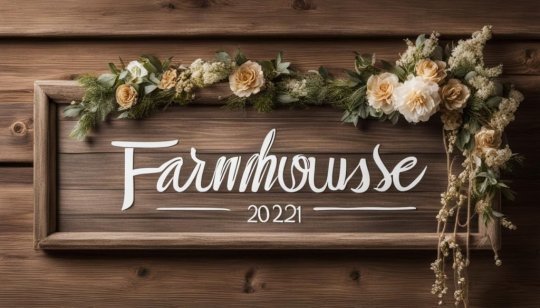
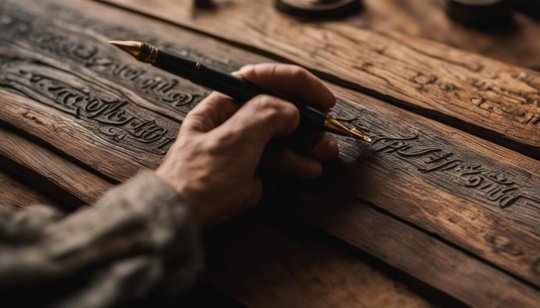
Calligraphy on Wood Projects: Rustic Art Charm
Calligraphy on Wood Projects: Unleash Your Inner Artist with Rustic Charm!
Calligraphy on wood projects adds a rustic charm to any space. With the right techniques and materials, you can easily create your own farmhouse-inspired signs and decorations. In this article, we will explore various methods of transferring calligraphy onto wood and provide inspiration for your next woodworking project.
Key Takeaways:
- Calligraphy on wood projects brings a touch of rustic art charm to any space.
- There are various techniques and methods you can use, such as stenciling and wood burning.
- Rustic wood signs and reclaimed wood are popular choices for calligraphy projects.
- Embellishments and proper sealing can enhance the visual appeal and durability of your wood calligraphy projects.
- Start your calligraphy on wood project today and embrace the rustic charm it brings to your home or gift-giving.
DIY Faux Calligraphy Stencil Tutorial
If you're looking to incorporate calligraphy onto wood in a simple and affordable way, the DIY Faux Calligraphy Stencil Tutorial is the perfect method for you. This technique allows you to transfer your hand-lettered designs onto wood using everyday materials. Let's dive into the step-by-step process:
Materials Needed:
- Regular white printer paper
- A printed design or phrase in calligraphy style
- A ball-point pen
- A chalk or graphite pencil
- A fine-tipped paint marker
Step-by-Step Instructions:
- Print your chosen calligraphy design onto regular white printer paper.
- On the back of the printed design, cover the entire surface with chalk or graphite using a pencil.
- Place the printed design onto the wood surface, with the chalk or graphite side facing down.
- Use a ball-point pen to trace over the design, applying pressure to transfer the chalk or graphite onto the wood.
- Remove the printed design and you will see the outline of the calligraphy on the wood.
- Fill in the outline with a fine-tipped paint marker, following the design's strokes.
This tutorial also provides tips for adding embellishments and sealing the finished piece. With this DIY Faux Calligraphy Stencil Tutorial, you can easily create stunning calligraphy on wood projects that will impress everyone with your artistic skills.
Rustic Wood Sign Ideas
When it comes to calligraphy on wood projects, rustic wood signs are a popular choice for adding a touch of charm to your space. Whether you're looking to create custom signs for your home decor or personalized gifts for loved ones, there are endless inspiration and ideas to explore.
One idea for rustic wood signs is to incorporate calligraphy onto slatted boards. This design creates a farmhouse-inspired look and allows for the wood grain to show through, adding a natural and organic element to the sign. You can choose to paint the boards in a neutral color or leave them unfinished for a more rustic feel.
Another idea is to combine calligraphy with floral motifs on reclaimed wood. This creates a beautiful contrast between the elegant lettering and the weathered texture of the wood. You can add painted flowers, leaves, or vines to enhance the overall design and create a unique and eye-catching piece of art.
Table: Rustic Wood Sign Ideas
Design
Materials
Inspiration
Slatted Summer Sign
Wooden slats, paint, calligraphy markers
Create a sign with summer-themed quotes and phrases
Paper Flower Sign
Reclaimed wood, paper flowers, glue, calligraphy pens
Add a whimsical touch with handcrafted paper flowers
Seasonal Welcome Sign
Wooden plank, stain, letter stencils, paint
Design a sign to welcome each new season
Remember, the beauty of rustic wood signs lies in their simplicity and authenticity. Let your creativity guide you as you explore different design ideas and experiment with various techniques. Whether you're a beginner or an experienced calligrapher, embracing the rustic charm of wood can add a unique and personal touch to your calligraphy projects.
Step-by-Step Guide to Making a DIY Farmhouse Sign
Creating a DIY farmhouse sign is a fun and rewarding project that allows you to showcase your creativity while adding a rustic touch to your home decor. Follow this step-by-step guide to learn how to make your own farmhouse sign using chippy paint and reclaimed wood.
Gather Materials
Before getting started, gather the following materials:
- Cabinet-grade plywood
- Wood glue
- Miter saw
- Reclaimed wood
- Brad nails
Measure and Cut
Begin by measuring and cutting the plywood to your desired sign size. Use a miter saw to achieve clean and precise cuts. Sand the edges of the plywood to ensure a smooth finish.
Arrange and Nail the Reclaimed Wood
Arrange the reclaimed wood pieces on top of the plywood in a pattern or design of your choice. Once you are satisfied with the arrangement, apply wood glue to the back of each piece and press them onto the plywood. Secure the pieces in place by nailing them with brad nails.
Apply Chippy Paint Finish
For a distressed farmhouse look, apply a chippy paint finish to the sign. Start by painting a base coat using a latex paint color of your choice. Once the base coat is dry, apply a layer of petroleum jelly or a specialized crackle medium to areas where you want the paint to crackle. Finally, paint a top coat in a contrasting color. As the paint dries, it will crackle and create a weathered appearance.
Your DIY farmhouse sign is now complete! Hang it on your wall or use it as a centerpiece to add a touch of rustic charm to your home.
Materials
Tools
Cabinet-grade plywood
Miter saw
Wood glue
Brad nailer
Reclaimed wood
Sandpaper
Paintbrush
Latex paint
Petroleum jelly or crackle medium
"Making your own DIY farmhouse sign is a great way to add personalized charm to your home. With a few simple materials and some creativity, you can create a unique piece of rustic decor that reflects your style." - DIY Home Decor Enthusiast
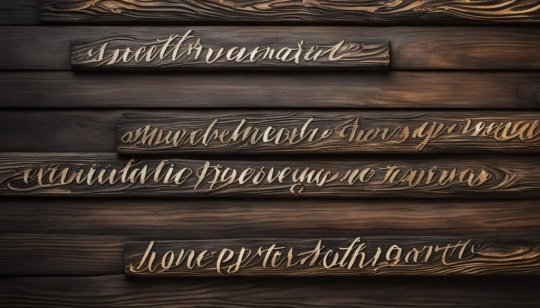
Tips and Tricks for Wood Burning Calligraphy
Wood burning calligraphy is a unique and artistic technique for incorporating calligraphy onto wood projects. It allows you to create beautiful lettering and designs that have a rustic and natural look. Whether you're a beginner or have some experience with wood burning, these tips and tricks will help you achieve stunning results.
Choosing the Right Type of Wood
Not all types of wood are suitable for wood burning calligraphy. Softer woods like pine and basswood are easier to work with and provide a smoother surface for burning. Hardwoods like oak and birch can be more challenging to burn but offer a rich and distinct effect. Consider the grain and texture of the wood as well, as it can add depth and character to your calligraphy.
Preparing the Surface
Before you begin the wood burning process, it's important to prepare the surface properly. Sand the wood to ensure it's smooth and free from any bumps or imperfections. This will give you a clean canvas for your calligraphy and prevent any unwanted marks or disruptions in the burn lines.
Selecting the Appropriate Wood Burning Tips
Wood burning tools come with a variety of interchangeable tips, each designed for different effects. When doing calligraphy, a fine point or rounded tip is ideal for achieving thin, delicate lines. Experiment with different tip shapes and sizes to find the one that best suits your style and the intricacy of your design.
Remember to always practice on a scrap piece of wood before working on your final project. This will allow you to get a feel for the heat and how the wood burns, ensuring you have better control over the final result.
Benefits of Wood Burning Calligraphy
Challenges of Wood Burning Calligraphy
- Creates a unique and rustic look
- Allows for precise and intricate designs
- Provides a long-lasting and durable finish
- Can be done on various wood surfaces
- Offers a personalized touch to your projects
- Requires practice to master the technique
- Can be time-consuming for complex designs
- May produce a smoky odor during the burning process
- Requires proper ventilation and safety precautions
Wood burning calligraphy is a rewarding and satisfying art form that allows you to combine the beauty of calligraphy with the natural warmth of wood. With the right techniques and practice, you can create stunning pieces that will be admired for years to come.
Creating Calligraphy Crafts on Reclaimed Wood
When it comes to incorporating calligraphy into your woodworking projects, there's nothing quite like the rustic charm of creating calligraphy crafts on reclaimed wood. Not only does it add a unique and nostalgic touch to your creations, but it also helps to repurpose materials and promote sustainability. In this section, we'll explore different ways you can use reclaimed wood to bring your calligraphy projects to life.
Inspiration from Nature
One of the best things about working with reclaimed wood is its natural beauty and character. You can enhance this aspect by incorporating elements of nature into your calligraphy crafts. Consider adding hand-painted floral motifs, leaf patterns, or even small branches to complement your calligraphy. These natural embellishments will not only add visual interest but also create a harmonious blend of organic elements.
Transferring Calligraphy onto Reclaimed Wood
Transferring your calligraphy design onto reclaimed wood requires careful preparation of the surface. Start by sanding the wood to remove any rough edges or imperfections. Next, you can use transfer paper or pencil tracing techniques to outline your calligraphy onto the wood. Once the outline is transferred, you can use a fine-tip paint marker or wood burning tool to fill in the letters. The rough texture of reclaimed wood adds an extra level of character to your calligraphy, making it truly stand out.
Enhance your calligraphy crafts by incorporating elements of nature and repurposing reclaimed wood. The combination of rustic charm and artistic creativity will result in unique and captivating pieces that showcase your love for both woodworking and calligraphy.
Materials Needed for Creating Calligraphy Crafts on Reclaimed Wood
Description
Reclaimed wood
Choose wood with interesting textures and grains for added character.
Sanding tools
Smooth out rough edges and create a clean surface for your calligraphy.
Transfer paper or pencil
Use these tools to transfer your calligraphy design onto the wood surface.
Fine-tip paint marker
Fill in the letters of your calligraphy design with a paint marker for bold and defined lines.
Wood burning tool (optional)
If you prefer a more rustic and textured look, you can use a wood burning tool to etch your calligraphy into the wood.
With these techniques and materials, you can create stunning calligraphy crafts on reclaimed wood that capture the essence of rustic charm and environmental consciousness. Let your creativity flow and explore the endless possibilities of combining calligraphy with reclaimed wood to make truly one-of-a-kind pieces.
Tips for Calligraphy Design on Woodworking
Incorporating calligraphy into your woodworking projects requires careful consideration of design elements. By paying attention to the right calligraphy style, lettering size, and placement, you can create visually appealing and professional-looking pieces. Here are some tips to help you achieve the best results:
- Choose the right calligraphy style: Consider the overall theme of your project and select a calligraphy style that complements it. Whether you prefer a traditional or modern look, there are various calligraphy styles to choose from, such as brush lettering, script, or gothic.
- Select appropriate lettering size: Consider the size of your wood piece and the visibility of the calligraphy. Larger pieces may require bigger lettering to ensure readability, while smaller pieces can accommodate more intricate and delicate lettering.
- Plan your layout: Before starting the calligraphy, experiment with different layouts by sketching on paper or using digital design tools. This will help you find the best placement for your calligraphy, ensuring it fits harmoniously with other design elements.
- Use the right tools and materials: Depending on the calligraphy style and the type of wood you're working with, different tools may be required. Experiment with different pens, brushes, or wood burning tools to achieve the desired effect.
- Practice and refine: Calligraphy on wood requires practice to achieve clean and consistent lettering. Before working directly on your wood piece, practice on scraps or practice boards to refine your technique.
By following these tips, you can create visually stunning calligraphy designs on your woodworking projects. Remember that practice makes perfect, so don't be afraid to experiment and refine your skills. With time and dedication, you'll be able to create beautiful and personalized calligraphy on wood.
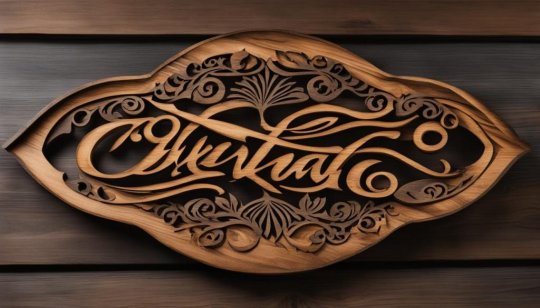
Example of Calligraphy Design on Woodworking
"The beauty of calligraphy on wood is in the artful fusion of lettering and the natural textures and grains of the wood itself. By carefully incorporating calligraphy into your woodworking projects, you can create unique and personalized pieces that showcase both craftsmanship and creativity." - Woodworking enthusiast
Comparison Table: Different Calligraphy Styles on Wood
Calligraphy Style
Characteristics
Best Suited For
Brush Lettering
Fluid and dynamic strokes, suitable for larger-scale projects
Signage, wall art
Script
Elegant and flowing, adds a touch of sophistication
Wedding decor, personalized gifts
Gothic
Bold and intricate, creates a strong visual impact
Framed artwork, statement pieces
Inspirational Ideas for Wooden Signs with Calligraphy
Wooden signs with calligraphy offer a charming and personal touch to any space. Whether you're decorating your home or looking for a unique gift idea, incorporating calligraphy onto wooden signs is a wonderful way to infuse rustic art charm into your surroundings. Here are some inspirational ideas to spark your creativity:
Creative Quotes and Sayings
Add a touch of inspiration to your space with wooden signs featuring meaningful quotes and sayings. From motivational words to sentimental messages, there's a wide range of calligraphy styles and fonts to choose from. Whether you opt for a classic handwritten cursive or a bold and modern lettering, let your chosen quote shine on a beautifully crafted wooden sign.
Personalized Names and Monograms
Customize your wooden sign by incorporating personalized names and monograms. Whether it's a family name, a special date, or initials, calligraphy adds an elegant and personalized touch to your sign. Consider combining different calligraphy styles, such as a decorative script for the names and a classic serif font for the monogram, to create a visually appealing design.
Themed Signs for Special Occasions
Wooden signs with calligraphy are a perfect way to celebrate special occasions such as weddings, birthdays, or holidays. Consider creating signs that feature festive greetings, seasonal quotes, or personalized messages for your loved ones. Incorporate decorative elements like flowers, wreaths, or other symbols to enhance the theme of your sign.
"Wooden signs with calligraphy offer a charming and personal touch to any space."
No matter what type of wooden sign with calligraphy you choose to create, remember to select high-quality wood and use the appropriate tools and materials. Experiment with different color schemes, textures, and finishes to achieve the desired rustic and artistic look. Let your imagination run wild and have fun bringing your vision to life!
Enhancing Wood Calligraphy Projects with Embellishments
https://www.youtube.com/watch?v=onZaSlTONpg
Adding embellishments to your wood calligraphy projects can take them to the next level, adding visual interest and capturing attention. Whether you're creating a rustic farmhouse sign or a delicate wall art piece, incorporating embellishments can elevate the overall design and make it truly unique.
There are various ways you can enhance your wood calligraphy projects with embellishments. One popular option is to incorporate floral motifs. You can use dried or artificial flowers and attach them to your wood piece using hot glue or wire. This adds a touch of natural beauty and brings a whimsical element to your calligraphy.
"Incorporating flowers into my wood calligraphy projects has been a game-changer. It adds a pop of color and makes the design more eye-catching." - Sarah
Another option is to add painted accents. This can be done by using acrylic paints to create small details or to add a splash of color to your calligraphy. For example, you can paint delicate leaves or swirls around your lettering to give it a more artistic and dimensional look.
Embellishment
How to Add
Floral motifs
Attach dried or artificial flowers using glue or wire
Painted accents
Use acrylic paints to add details or color
Ribbons and bows
Tie ribbons or bows around the edges of your wood piece
Lastly, you can incorporate ribbons and bows to add a touch of elegance and sweetness. Simply tie ribbons or bows around the edges or corners of your wood piece, creating a charming and decorative accent.
Remember, the key is to choose embellishments that complement your calligraphy and overall design. Whether you prefer a minimalist or a more ornate look, adding embellishments can make your wood calligraphy projects truly captivating.
Preserving and Sealing Calligraphy on Wood
Preserving and sealing calligraphy on wood is crucial for ensuring its longevity and durability. By taking the necessary steps to protect your calligraphy on wood projects, you can enjoy their beauty for years to come. Here are some methods and products that you can use to seal your calligraphy on wood:
Acrylic Spray Sealers
Acrylic spray sealers are commonly used to protect calligraphy on wood.
Read the full article
0 notes
Photo
Easy Painting Ideas for Kids: Entertainment For Hours! https://rntozen.com/blog/diy-and-craft/easy-painting-ideas-for-the-kids-at-home/?utm_source=tumblr&utm_medium=RN+To+Zen+Social+Media&utm_campaign=RN+To+Zen+Posts
0 notes
Text

🚀 Unleash Your Inner Genius with vanagART Bloggy Blog! 🚀
Hey, Online Surfers! 🌊 Tired of boring blogs that put you to sleep faster than a lullaby? Dive into the ocean of awesome with vanagART Bloggy Blog – where information meets entertainment with a splash of humour! 🌟
Top 3 Reasons Why You NEED vanagART Bloggy Blog in Your Life:
🧠 Useful Information Galore: We're not just another blog; we're your one-stop brain gym! From life hacks to mind-blowing facts, we've got the scoop on everything you never knew you needed. Get ready to impress your friends at the next trivia night!
🎶 Royalty Free Music for Your Soul: Boring blogs be like elevator music. But not us! We've got the tunes that make your brain cells dance. Download our royalty-free music and turn your reading experience into a jam session. Break into spontaneous air guitar solos – we won't judge!
📸 Royalty Free Images to Spice Things Up: Sick of the same old stock photos? So are we! Our blog is a visual feast with eye-catching, royalty-free images that'll make your eyes thank you. Download, share, and make your social media look like a million bucks (without spending a dime)!
🚀 Call-to-Action Time! 🚀
Read. Download. Use it. Enjoy. Your adventure with vanagART Bloggy Blog starts NOW! Click, explore, and brace yourself for a tidal wave of awesomeness. 🌊💻
#digitalart#lifehacks#royaltyfreemusic#royaltyfreeimages#artprojects#usefulinformation#downloadmp3#freeimagesdownload
0 notes
Text

"Explore a world of creativity and inspiration as you shop the best arts and crafts kits online. Our store offers a carefully curated selection of high-quality craft kits, perfect for artists of all ages and skill levels. Unleash your imagination with our diverse range of projects, from painting and drawing to DIY crafts and more. Whether you're a seasoned crafter or a budding artist, our arts and crafts kits provide everything you need to embark on your creative journey. Elevate your crafting experience and bring your artistic visions to life with our top-notch supplies. Discover the joy of crafting and shop our selection of arts and crafts kits online today!"
#ArtsAndCraftsKits#OnlineCraftStore#CraftingSupplies#CreativeKits#ArtisticJourney#CraftingInspiration#DIYCraftKits#CraftersParadise#ArtKitsForAllAges#CraftingCommunity#ArtisticExpression#CraftyCreations#CraftingFun#ArtProjects#CraftingPassion#DIYArtKits#CraftingMadeEasy#ArtsAndCraftsOnline#CreativeOutlet#CraftingEssentials
0 notes
Video
youtube
Learn How to Make a Beautiful Origami Tie with This Easy Tutorial
Are you a fan of origami? Do you enjoy creating unique paper designs that showcase your folding skills? If so, then you'll love this tutorial on how to make an elegant origami tie.
Designed by @EduArtPaper, this origami model is suitable for intermediate-level folders, making it a great addition to school activities or a fun project to try at home. While the model may be challenging for beginners, don't be discouraged - the tutorial breaks down the folding process into easy-to-follow steps, so you can create a beautiful and unique paper tie that showcases your skills.
It's important to note that this origami tie is purely for decorative purposes and cannot be used as a real accessory. However, it's perfect for showcasing your creativity and adding a touch of elegance to any space.
So why not give it a try? Follow along with the tutorial, which includes step-by-step instructions and clear visuals, to create your own origami tie. And if you're looking for more origami inspiration, be sure to check out the playlists linked in the video description for more models suitable for both beginners and intermediate-level folders.
Don't forget to use the hashtags #origami #origamitie #schoolactivities #intermediatemodel #artprojects #eduartpaper when sharing your creations on social media, and share this tutorial with your friends who love origami too.
Happy folding!
0 notes
Photo
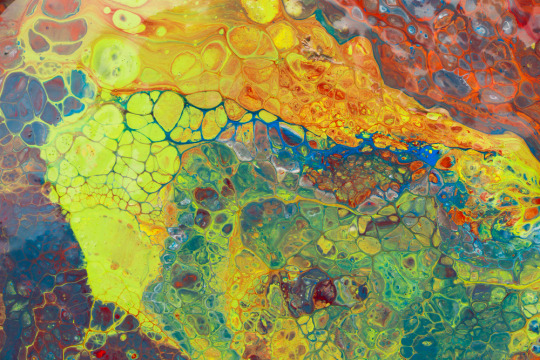
Cool Kids' Art Projects: Bubbly Painting. Bubbly painting is a fun and easy way for kids to create an abstract painting. All you need are some basic supplies like paint, paper, and a straw.
#BubblyPainting#ArtProjects#ArtProjectBenefits#BubblyPaintingMaterials#StepByStepInstructions#TipsAndTricks
0 notes
Photo

Quel meilleur jour que le 31 décembre pour se livrer à un petit inventaire ? #art #artprojects #projects #projets #bd #comics #roman #novel #litterature #creation #jeudesociete #boardgame #litteraturejeunesse #kidlit #illustration https://www.instagram.com/p/Cm1HvI9KFk4/?igshid=NGJjMDIxMWI=
#art#artprojects#projects#projets#bd#comics#roman#novel#litterature#creation#jeudesociete#boardgame#litteraturejeunesse#kidlit#illustration
0 notes
Photo
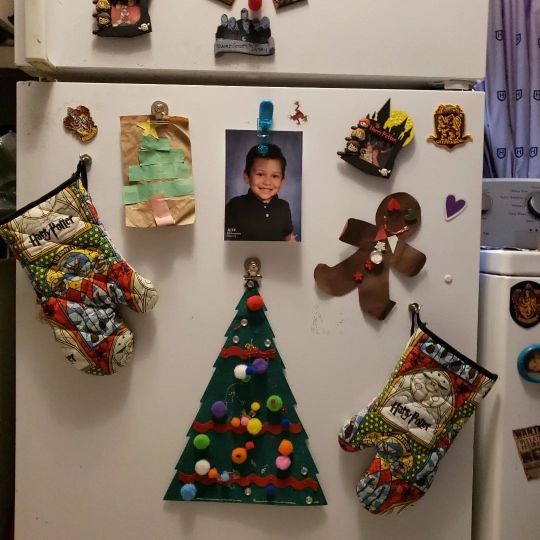
Time to pull out #mylilwizard school art projects. #christmasdecor #christmas #christmas2022 #harrypotter #harrypottermerch #potholders #gryffindor #artprojects https://www.instagram.com/p/ClRO51OpW7U/?igshid=NGJjMDIxMWI=
#mylilwizard#christmasdecor#christmas#christmas2022#harrypotter#harrypottermerch#potholders#gryffindor#artprojects
1 note
·
View note
Photo
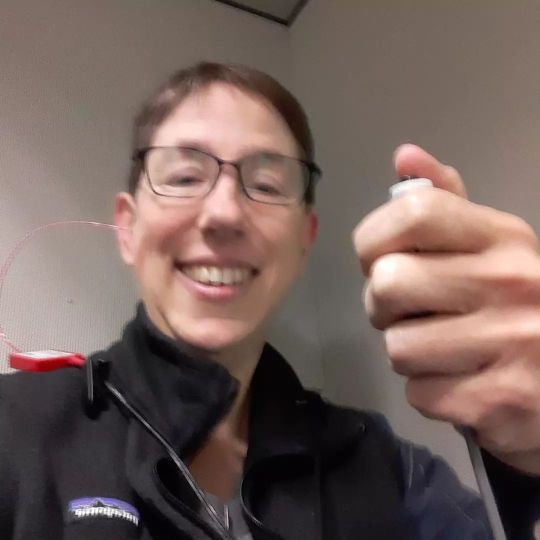
Had a #hearingtest for new #hearingaids at the Vancouver Hearing Aid Center- very nice people there! https://vancouverhearingaidcenter.com/hearing-aid-fitting-vancouver-wa/ I'm still profoundly Deaf just like when I was 8 years old. But the hearing test procedure has vastly improved since I was a kid - a click button! a window! ear mold making material that isn't as cold as ice!- and the people giving the test are much nicer - plus nowadays I'm old enough to #drink #bourbon !! Wowza!!! Whether or not I actually have the bourbon I'll spend the rest of the evening with the consolation of #reading #books - it'll be 3 weeks until I get my new #hearingaids - so, after I read a chapter or two today I'll resume my regularly scheduled #artprojects Happy hearing if you've got it. Happy silence if you don't! #deaf #hearing #acreativelife (at Vancouver Hearing Aid Center) https://www.instagram.com/p/CkHUCkXvaX1/?igshid=NGJjMDIxMWI=
0 notes
Photo

Golden Tears pendant, available in my shop #claycessories_ #jannabaranovska #goldentears #goldtears #klimtnecklace #klimtjewelry #freya #freyastears #statementnecklace #artprojects #artdecojewelry #artnecklace #wearableart https://www.instagram.com/p/CkIJf6nD6_v/?igshid=NGJjMDIxMWI=
#claycessories_#jannabaranovska#goldentears#goldtears#klimtnecklace#klimtjewelry#freya#freyastears#statementnecklace#artprojects#artdecojewelry#artnecklace#wearableart
2 notes
·
View notes
Photo

🔴SOLD !! High rise found a new home this week too. Ok so I have big plans for this week. I’m taking a week off from riding cause my trainer is away, so I thought I would take this opportunity to repaint my gallery wall and the ceiling, hang my new lights and reorganize the studio. My plan is to try and have an open studio one weekend before the new year is over. It will all depend on how long it takes me to complete the tasks I have listed. If I do decide I can manage it, I’ll announce it here and on my Facebook. #smallart #largeart #passioncolorjoy #originalartforsale #originalpainting #colorcrushcreative #colorfulartwork #newpainting #forsalebyartist #colorcompanion #paintbrushes #artprojects #mixedmedium #workingartist #artforsalebyartist #artforyourhome #carveouttimeforart #acryliconcanvas #buyart (at Town of Almonte, Ontario) https://www.instagram.com/p/CkGB7l4OxcY/?igshid=NGJjMDIxMWI=
#smallart#largeart#passioncolorjoy#originalartforsale#originalpainting#colorcrushcreative#colorfulartwork#newpainting#forsalebyartist#colorcompanion#paintbrushes#artprojects#mixedmedium#workingartist#artforsalebyartist#artforyourhome#carveouttimeforart#acryliconcanvas#buyart
0 notes
Last Seen Blogs

anneplus
ANNE+
domingosenvocalo-blog
#DomingosenVocalo 91.1FM Chicago

sappysims
make em' sappy
neo-xolotl
broiler

penissirius
Crack Central