
culinaryburst
Culinary Burst
Welcome to Culinary Burst, a food blog that's all about savoring delicious flavors and exploring culinary wonders! Join us on this mouthwatering journey!
15 posts
Don't wanna be here? Send us removal request.
Last Seen Blogs

hiraharmindersingh-blog
Untitled

faketivity
My Love Last Longer Then A Rose

lossofreality
Stupid & Contagious

sylvie0-0
Sylvie_•v•

the-king-and-the-druidess
COMING OVER TO THE DARK SIDE
Text
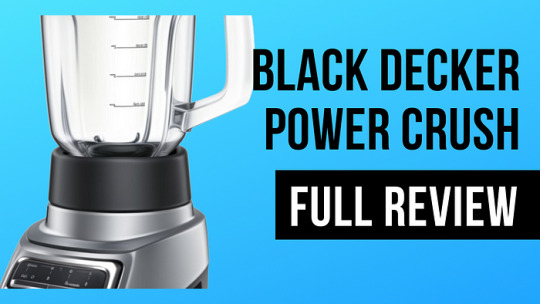
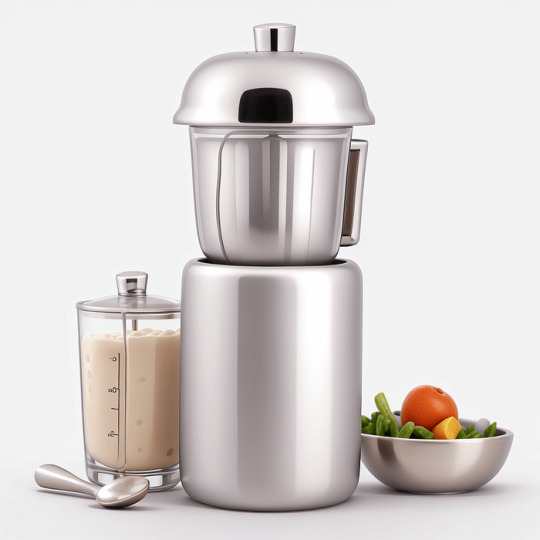
Full Review: Best BLACK+DECKER Power Crush Multi-Function Blender
Pricing
The BLACK+DECKER PowerCrush Multi-Function Blender is currently priced at $49.99 on Amazon.com. This price includes free shipping.
Here is a breakdown of the pricing details:
Product price: $49.99
Shipping cost: $0.00
Total price: $49.99
Please note that prices may vary depending on the retailer and location.
Chapter 1: Unleash Your Culinary Creativity With The BLACK+DECKER Power Crush Multi-Function Blender
Embark on a culinary adventure with the BLACK+DECKER Power Crush Multi-Function Blender, your versatile kitchen companion. This powerful appliance effortlessly pulverizes ice and tough ingredients, transforming them into delectable smoothies, shakes, soups, purees, and even bread, cookie, or cereal crumbs for your baking creations.
1.1: A Culinary Powerhouse
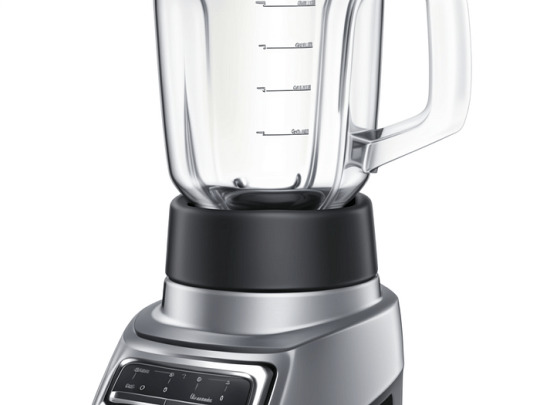
The BLACK+DECKER Power Crush Multi-Function Blender is a culinary powerhouse, equipped with a robust 700-watt motor that delivers exceptional blending power, tackling even the most stubborn ingredients with ease. Whether you’re craving a refreshing smoothie, a creamy milkshake, or a velvety soup, this blender delivers consistently smooth results every time.
1.2: QuadPro Blade Technology: Precision Blending Finesse
1.3: Unveiling Culinary Versatility
The BLACK+DECKER Power Crush Multi-Function Blender extends its versatility beyond smoothies and shakes, venturing into the realm of culinary creations. Prepare smooth and velvety soups, purées, sauces, and even baby food with ease. This versatile blender can handle a wide range of textures, from delicate fruits to hearty vegetables, making it an indispensable tool in any kitchen.
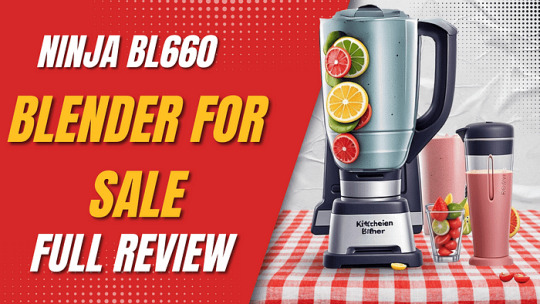
Full Review: Best Ninja BL660 Professional Compact Blender For Sale
Also: Full Review: Best Powerful Immersion Blender, Electric Hand Blender 500 Watt With Turbo Mode
Also: Full Review: Best Magic Bullet Blender, Small, Silver, 11 Piece Set
1.4: Unleash Your Inner Baking Maestro
Unleash your inner baking maestro with the BLACK+DECKER Power Crush Multi-Function Blender. Its ability to grind bread, cookies, and cereals into fine crumbs opens up a world of baking possibilities. Create homemade breadcrumbs for stuffing, coating, or adding texture to your favorite recipes. Experiment with flavored cookie crumbs for unique crusts or toppings. The possibilities are endless.
1.5: Effortless Operation And Easy Cleanup
The BLACK+DECKER Power Crush Multi-Function Blender is designed for effortless operation and easy cleanup. Intuitive four-speed control buttons allow you to customize blending intensity, while the hinged recloseable pour spout and PerfectPour glass jar ensure mess-free pouring. The Easy Clean function simplifies cleaning by utilizing the blades themselves to do the work.
Chapter 2: Unleashing Culinary Versatility With The BLACK+DECKER Power Crush Multi-Function Blender
The BLACK+DECKER Power Crush Multi-Function Blender is more than just a smoothie maker; it’s a culinary powerhouse that unleashes a world of creative possibilities in the kitchen. With its exceptional blending prowess, it effortlessly transforms a wide array of ingredients into delectable concoctions, catering to a diverse range of culinary preferences.
2.1: Ice Conquest: Crafting Frozen Delights
Ice, often a nemesis to ordinary blenders, meets its match in the BLACK+DECKER Power Crush. Its powerful motor and QuadPro Blade Technology effortlessly pulverize ice into fine shards, paving the way for extraordinary frozen delights. Transform ordinary drinks into frosty masterpieces, crafting frozen cocktails, smoothies, and more with ease. The possibilities are endless, limited only by your imagination.
2.2: Smoothie Symphony: Indulge In Creamy Smoothies And Shakes
Indulge in the goodness of homemade smoothies and shakes with the BLACK+DECKER Power Crush, your personal symphony maestro. Its precision blending capabilities ensure that every ingredient, from fresh fruits and vegetables to yogurt and protein powder, is seamlessly blended into a smooth and creamy harmony. Experience the perfect balance of taste and texture in every sip, savoring the symphony of flavors created by this culinary virtuoso.
2.3: Culinary Creations: Soups, Purees, And Beyond
The BLACK+DECKER Power Crush extends its culinary versatility beyond smoothies and shakes, venturing into the realm of culinary creations. Prepare smooth and velvety soups, purées, sauces, and even baby food with effortless ease. This versatile culinary companion can handle a wide range of textures, from delicate fruits to hearty vegetables, making it an indispensable tool for any kitchen maestro.
2.4: Baking Horizons: Unleash Your Inner Baking Maestro
Unleash your inner baking maestro with the BLACK+DECKER Power Crush, your culinary partner in crime. Its ability to grind bread, cookies, and cereals into fine crumbs opens up a world of baking possibilities. Create homemade breadcrumbs for stuffing, coating, or adding texture to your favorite recipes. Experiment with flavored cookie crumbs for unique crusts or toppings. Let your creativity flow, knowing that the PowerCrush is always ready to transform your baking dreams into reality.
For full article: click here
0 notes
Text
Full Review: Best Ninja BL660 Professional Compact Blender For Sale
Pricing
The pricing details for the Ninja BL660 Professional Compact Smoothie & Food Processing Blender can vary depending on the retailer. However, the typical price range for the product is between $124.95 and $159.99.
Here are some specific pricing examples from popular online retailers:
Amazon: $124.95
Walmart: $149.00
Target: $139.99
Best Buy: $159.99
Please note that these prices are subject to change and may not reflect the most up-to-date information. It is always best to check the website of the retailer you are interested in purchasing from for the most accurate pricing information.
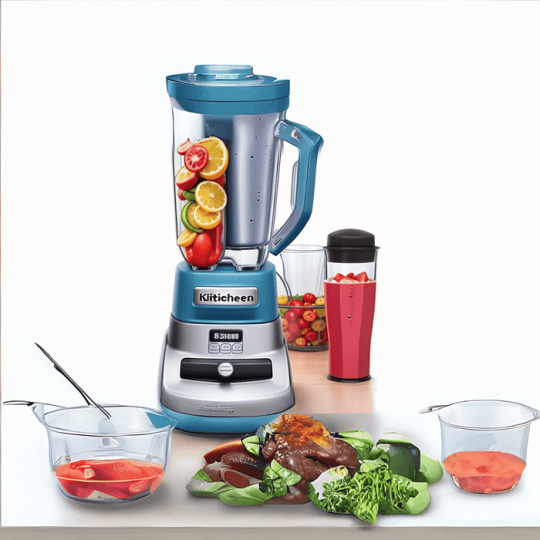
Chapter 1: Introduction To The Ninja BL660 Professional Compact Smoothie And Food Processing Blender For Sale
This versatile kitchen appliance empowers you to create culinary masterpieces with ease. Boasting a powerful 1100-watt motor, this blender effortlessly pulverizes ice and frozen ingredients, ensuring smooth and consistent results every time.
Unparalleled Power And Versatility
At the heart of the Ninja BL660 lies its robust 1100-watt motor, delivering exceptional power to tackle even the toughest ingredients. Effortlessly blend frozen fruits, vegetables, and ice into irresistibly smooth and creamy smoothies. Whether you’re crafting classic smoothies or experimenting with unique flavor combinations, the Ninja BL660 is your gateway to endless smoothie possibilities.
This versatile blender extends its prowess beyond smoothies, excelling in a wide range of culinary tasks. Create silky sauces, flavorful salsas, and dips with ease, transforming fresh ingredients into culinary delights. The Ninja BL660 is your go-to appliance for whipping up homemade pesto, hummus, and guacamole, adding a touch of homemade goodness to your meals.
XL-Capacity Pitcher For Generous Portions
Catering to large families or hosting gatherings is a breeze with the Ninja BL660’s generous 72-oz. Total Crushing Pitcher. Prepare ample batches of smoothies to fuel everyone’s day, or impress guests with an array of frozen drinks and cocktails. The pitcher’s ample capacity ensures that everyone gets their share of delicious creations.
Also: Full Review: Best Ninja BL610 Professional 72 Oz Countertop Blender
Also: Full Review: Best Powerful Immersion Blender, Electric Hand Blender 500 Watt With Turbo Mode
Also: Full Review: Best Magic Bullet Blender, Small, Silver, 11 Piece Set
Convenient To-Go Cups For On-The-Go Enjoyment
In today’s fast-paced world, convenience is key. The Ninja BL660 includes two 16-oz. Nutri Ninja Cups with spout lids, allowing you to blend individual portions and take your smoothies on the go. Enjoy your nutrient-packed creations anytime, anywhere, whether you’re heading to work, hitting the gym, or running errands.
Effortless Cleaning For Hassle-Free Maintenance
Cleaning up after your culinary creations should be effortless, not a chore. The Ninja BL660 is designed with convenience in mind, featuring dishwasher-safe components, including the pitcher, lids, and Nutri Ninja Cups. Place them in the dishwasher and let it do the work for you.
Empowering Your Health And Culinary Adventures
The Ninja BL660 Professional Compact Smoothie & Food Processing Blender for sale is more than just a kitchen appliance; it’s an investment in your health and culinary aspirations. With its exceptional power, versatility, and convenient features, the Ninja BL660 empowers you to create healthier, tastier meals and snacks, all while enjoying the convenience you deserve.
Chapter 2: Unveiling The Capabilities Of The Ninja Blender
2.1 Effortless Smoothie Creation
The Ninja BL660 Blender is designed to make smoothies effortlessly. Its powerful 1100-watt motor can easily blend frozen fruits, vegetables, and yogurt into smooth and creamy smoothies. The blender for sale also has multiple speed settings and a pulse function that gives you precise control over blending consistency.
In addition to its power, the Ninja BL660 blender is also versatile. It can create a variety of smoothie flavors and textures, catering to different preferences. Whether you like your smoothies thick and creamy or thin and refreshing, the Ninja BL660 can make them perfectly.
2.2 Frozen Drink Expertise
The Ninja BL660 blender is not just for smoothies. It is also an expert at crushing ice and transforming frozen ingredients into refreshing frozen drinks. With this Blender for sale, you can easily create margaritas, piña coladas, and other frozen cocktails.
The blender’s powerful motor and sharp blades can crush ice to a fine consistency, so your frozen drinks will be smooth and slushy. The Blender for sale also has a large-capacity pitcher so that you can make enough drinks for a crowd.
2.3 Sauce And Salsa Mastery
The Ninja BL660 Blender is also a master at creating sauces and salsas. Its sharp blades can chop fresh ingredients into small pieces, so your sauces and salsas will be smooth and flavorful.
The blender is also versatile enough to make a variety of sauces and salsas, from classic marinara sauce to fresh pico de gallo. With the Ninja BL660, you can easily create homemade sauces and salsas that are tastier and healthier than store-bought ones.
2.4 Food Processing Prowess
The Ninja BL660 Blender is more than just a Blender for sale; it is also a powerful food processor. Its sharp blades can chop, grind, and mince ingredients, so you can use it to make a variety of dishes, from homemade nut butter to spice blends.
The blender’s large-capacity pitcher makes it easy to process large quantities of ingredients. The pitcher also has a spout that makes it easy to pour out your processed ingredients.
2.5 On-The-Go Convenience
The Ninja BL660 Blender for sale comes with two 16-oz. Nutri Ninja Cups with spout lids, so you can blend individual portions and take your smoothies on the go. The spout lids prevent spills and leaks, so you can enjoy your smoothies mess-free.
The Nutri Ninja Cups are also dishwasher-safe, so they are easy to clean. This makes it even more convenient to take your smoothies on the go.
With its powerful motor, versatile functions, and convenient features, the Ninja BL660 blender for sale is an essential kitchen appliance for anyone who wants to make healthy and delicious meals and snacks.
for Full article: Click here
0 notes
Text
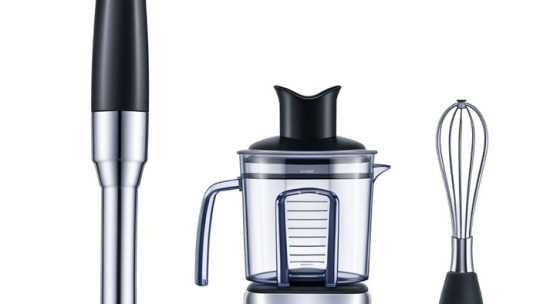
Full Review: Best Breville Blender, BSB510XL Control Grip Immersion, Stainless Steel
Pricing
Sure, here is the pricing information for the Breville BSB510XL Control Grip Immersion Blender:
Retail price: $129.95
Used prices: Starting from $124.75
Shipping: Free shipping on orders over $25
Payment options: Secure transactions with major credit cards and Amazon Pay
Chapter 1. Introduction To Brevilleille Blender BSB510XL Control Grip Immersion
In the fast-paced world of modern cuisine, where convenience and versatility reign supreme, the Breville blender BSB510XL Control Grip Immers n emerges as an indispensable kitchen companion. This culinary powerhouse seamlessly blends power, precision, and ergonomic design, transforming everyday blending tasks into effortless culinary artistry.
1.1. A Culinary Chameleon: Unveiling The Breville Blender BSB510XL’s Versatility
Crafted with culinary enthusiasts in mind, the Breville blender BSB510XL Control Grip Immer on shatters the boundaries of conventional blending, transcending mere smoothies to embrace a vast repertoire of culinary creations. Its sleek stainless steel design, reminiscent of a modern sculpture, adds a touch of elegance to any kitchen workspace.
1.2. Unveiling The Powerhouse Within Key Features Of The BreviBlendernder BSB510XL
At the heart of this culinary marvel lies a robust 280-watt motor, capable of effortlessly pulverizing ice, blending fibrous vegetables, and whipping up smooth, velvety sauces. Its unique bell-shaped base minimizes suction, ensuring seamless blending and preventing frustrating splashes. Adjustable speed control empowers you to achieve the perfect texture, from chunky soups to ultra-smooth smoothies.
1.3. Enhancing Culinary Experiences: Benefits Of Using The Breville BSB510XL
The Breville blender BSB510XL Control Grip Immersion Blender isn’t merely a kitchen appliance; it’s an extension of your culinary creativity. Its ergonomic pistol-grip handle provides the following:
Exceptional control.
Allowing you to blend directly in pots, pitchers, and bowls.
Minimizing mess and cleanup.
Its versatility extends beyond smoothies, enabling you to craft culinary masterpieces like silky soups, velvety purees, and delectable sauces.
Also: Full Review: Best Ninja BL610 Professional 72 Oz Countertop Blender
Also: Full Review: Best Powerful Immersion Blender, Electric Hand Blender 500 Watt With Turbo Mode
Also: Full Review: Best Magic Bullet Blender, Small, Silver, 11 Piece Set
Chapter 2. Exploring The Versatility Of The Breville BSB510XL Control Grip Immersion Blender
Transforming Culinary Creations: Unleashing The Versatility Of The Breville BSB510XL Immersion Blender
The Breville blender BSB510XL Control Grip Immersion transcends the boundaries of conventional blending, emerging as a culinary companion that empowers you to craft a symphony of flavors and textures. Its versatility extends far beyond mere smoothies, encompassing a vast repertoire of culinary creations that will elevate your culinary experiences.
2.1. Mastering The Art Of Smooth Soups And Purees: A Culinary Canvas For Creamy Delights
Immerse yourself in the world of silky smooth soups and velvety purees with the Breville BSB510XL Immersion Blender. Its powerful motor effortlessly pulverizes vegetables, transforming them into culinary masterpieces. Whether you’re craving a comforting tomato soup, a vibrant butternut squash delight, or a creamy cauliflower creation, this culinary chameleon seamlessly adapts to your culinary desires.
Creating Smooth Soups and Purees: A Step-by-Step Guide
Gather Your Ingredients: Prepare your desired vegetables, ensuring they are cut into uniform pieces for even blending.
Sauté for Enhanced Flavor: Sauté aromatics like onions or garlic in a pot over medium heat to add depth of flavor to your soup.
Introduce the liquids: Pour in your chosen broth, stock, or water, ensuring the vegetables are submerged.
Harness the Power of Blending: Submerge the immersion blender’s shaft into the pot and gradually increase the speed of blending until the desired consistency is achieved.
Season to Perfection: Adjust seasonings to taste, adding salt, pepper, or herbs to elevate the flavor profile.
for the full article : here
0 notes
Text
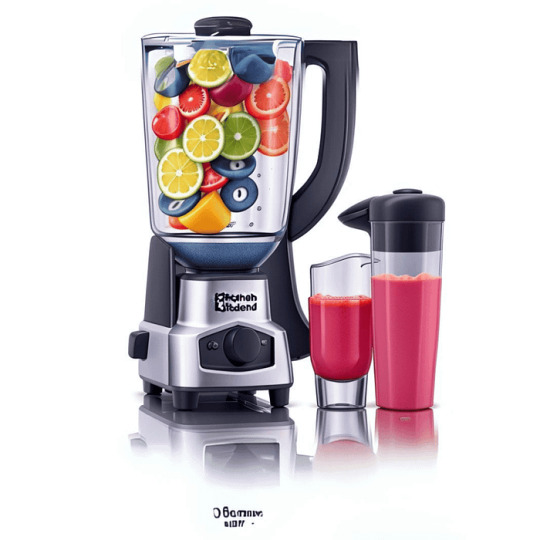
Princess House Blender VIDA SANA ELECTRICS High-Power 4571 Best [Full Review]
Pricing
The Princess House Blender VIDA SANA ELECTRICS High-Power Blender 4571 is currently priced at $615.00 on Amazon.com.
Please note that prices may vary depending on the retailer.
Chapter 1: Introduction
What Is The Princess House Blender VIDA SANA ELECTRICS High-Power 4571?
Why is it an excellent high-power blender?
There are many reasons why the Princess House Blender VIDA SANA ELECTRICS High-Power 4571 is a good choice for people looking for a high-power blender. Here are just a few:
It is very powerful, with a 1500-watt motor that easily blends even the toughest ingredients.
It has a durable stainless steel 6-prong blade that is designed to last.
It has various features that make it easy to use, such as manual mode, three pre-programmed functions, and a pulse mode.
It is BPA-free and dishwasher-safe.
It is backed by a one-year warranty.
Also: Full Review: Best Ninja BL610 Professional 72 Oz Countertop Blender
Also: Full Review: Best Powerful Immersion Blender, Electric Hand Blender 500 Watt With Turbo Mode
Also: Full Review: Best Ninja QB3001SS Ninja Fit Compact Personal Blender
Who Is The Ideal Customer For Princess House Blender?
The Princess House Blender VIDA SANA ELECTRICS High-Power 4571 is ideal for anyone looking for a powerful and versatile blender that can be used to make various healthy and delicious recipes. It is perfect for people who regularly make smoothies, soups, and other blended foods.
Chapter 2: Features And Benefits
The Princess House Blender VIDA SANA ELECTRICS High-Power 4571 has features and benefits that make it an excellent choice for anyone looking for a powerful and versatile blender.
Powerful 1500-Watt Motor
The 1500-watt motor is powerful enough to blend even the toughest ingredients, such as frozen fruits and vegetables, nuts, and seeds. This makes it ideal for creating various healthy and delicious recipes, such as smoothies, soups, sauces, and dips.
Stainless Steel 6-Prong Blade
The stainless steel 6-prong blade is durable and sharp, quickly and evenly blending all ingredients. This ensures that your smoothies, soups, and other blended foods are always smooth and creamy.
Manual Mode, Three Pre-Programmed Functions, And A Pulse Mode
The Princess House Blender VIDA SANA ELECTRICS High-Power 4571 offers manual mode, three pre-programmed functions (smoothie, soup, and dips/spreads), and a pulse mode. This gives you complete control over your blending to create the perfect consistency for any recipe.
For full article: see here
0 notes
Text
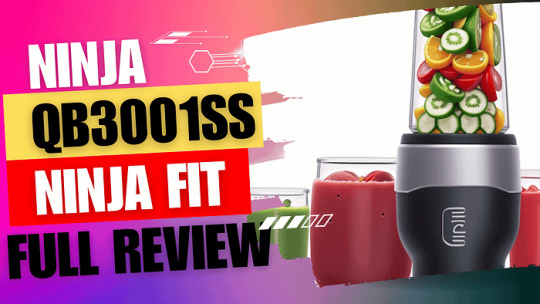
Full Review: Best Ninja QB3001SS Ninja Fit Compact Personal Blender
Pricing
The Ninja QB3001SS Ninja Fit Compact Personal Blender is currently priced at $69.99 on Amazon.com. It is also available on other websites, such as Walmart and Target, for similar prices.
Here is a breakdown of the pricing details:
Product price: $69.99
Shipping and import fees: $60.09 (for shipping to India)
Total price: $129.08
Please note that prices may vary depending on the retailer and shipping location.
Chapter 1: Introducing The Ninja QB3001SS Ninja Fit Compact Personal Blender
With its compact design, powerful 700-watt motor, and 16-oz cups, the Ninja Fit is the perfect choice for busy people who want to make healthy, delicious meals and snacks at home.
Compact Design
The Ninja Fit is designed to fit on even the smallest countertops, making it ideal for small kitchens or apartments. It also comes with two 16-ounce cups, so you can blend and go without transferring your drinks to another container.
Powerful Motor
The Ninja Fit’s powerful 700-watt motor can easily crush ice and pulverize frozen ingredients, so you can make your favorite frozen drinks and smoothies in seconds. It’s also powerful enough to chop nuts, seeds, and herbs, making it a versatile tool for food prep tasks.
Easy To Clean
The Ninja Fit is easy to clean, with all its parts being dishwasher-safe. The blades are also removable, so you can easily clean them by hand.
Recipe Inspiration
The Ninja Fit has a 50-recipe inspiration guide to get you started, with recipes for smoothies, frozen drinks, sauces, and more. So whether you’re a beginner or a seasoned pro, you’ll find recipes to love in Ninja Fit’s recipe guide.
Nutrient Extraction

Frozen Blending
The Ninja Fit is perfect for blending frozen ingredients, so you can make your favorite frozen drinks and smoothies in seconds. It can easily crush ice and pulverize frozen fruits and vegetables, so you can enjoy your drinks and smoothies at the perfect consistency.
On-The-Go Convenience
The Ninja Fit comes with two 16-ounce cups with spout lids, so you can blend directly in the cup and attach the spout lid to take your drink with you on the go. This is perfect for busy people who want to enjoy healthy and delicious meals and snacks on the go.
Overall, the Ninja QB3001SS Ninja Fit Compact Personal Blender is a versatile, easy-to-use blender perfect for making shakes, smoothies, frozen drinks, and more. With its compact design, powerful motor, and easy-to-clean parts, the Ninja Fit is an excellent choice for busy people who want to make healthy and delicious meals and snacks at home.
Also: Full Review: Best Ninja BL610 Professional 72 Oz Countertop Blender
Also: Full Review: Best Powerful Immersion Blender, Electric Hand Blender 500 Watt With Turbo Mode
Also: Full Review: Best Ninja BN801 Professional Plus Kitchen System, 1400 WP, 5 Functions For Smoothies
Chapter 2: Benefits Of Using The Ninja QB3001SS Ninja Fit Compact Personal Blender
The Ninja QB3001SS Ninja Fit Compact Personal Blender offers a variety of benefits, including:
Make healthy and delicious smoothies on the go. With its compact design and 16-ounce cups, the Ninja Fit is perfect for making smoothies on the go. Blend your ingredients in the cup, attach the spout lid, and you’re ready.
Crush ice and pulverize frozen ingredients for resort-like frozen drinks. The Ninja Fit’s powerful motor can easily crush ice and grind frozen ingredients, so you can make your favorite frozen drinks at home. Whether craving a margarita, daiquiri, or piña colada, the Ninja Fit can help you create the perfect frozen drink.
Prepare food quickly and easily by chopping nuts, seeds, and herbs. The Ninja Fit is also a versatile tool for food preparation tasks. It can quickly chop nuts, seeds, herbs, and puree fruits and vegetables. It is excellent for making pesto, hummus, and other sauces and dips.
Easy to clean and dishwasher-safe. The Ninja Fit is easy to clean
For full article: Click here
2 notes
·
View notes
Text
Full Review: Best Ninja BN801 Professional Plus Kitchen System, 1400 WP, 5 Functions For Smoothies
Chapter 1: Introduction

What Is The Ninja BN801 Professional Plus Kitchen System?
It features a 1400-peak-watt motor, a Total Crushing pitcher for crushing ice and frozen fruits and vegetables, and a Precision Processor bowl for chopping and processing food. The system also includes Auto-IQ technology, which takes the guesswork out of drink-making.
Why Is The Ninja BN801 Professional Plus Kitchen System The Best Choice?
Features And Benefits Of The Ninja BN801 Professional Plus Kitchen System
Powerful 1400-peak-watt motor
Total Crushing pitcher for crushing ice and frozen fruits and vegetables
Precision Processor bowl for chopping and processing food
Auto-IQ technology for easy drink-making
Easy to use and clean
Dishwasher-safe parts
Includes two 24-ounce to-go cups with lids
Suppose you are looking for a powerful and versatile kitchen appliance that can help you make various healthy and delicious foods. In that case, the Ninja BN801 Professional Plus Kitchen System is the perfect choice. With its Auto-IQ technology, easy-to-use controls, and dishwasher-safe parts, the system makes making delicious meals and snacks at home easy.
Also: Full Review: Best Ninja BL610 Professional 72 Oz Countertop Blender
Also: Full Review: Best Powerful Immersion Blender, Electric Hand Blender 500 Watt With Turbo Mode
Also: Full Review: Best Magic Bullet Blender, Small, Silver, 11 Piece Set
Benefits of using the Ninja BN801 Professional Plus Kitchen System
The Ninja BN801 Professional Plus Kitchen System is a powerful and versatile kitchen appliance that offers a variety of benefits, including:
Convenience: The Ninja BN801 Professional Plus Kitchen System can make various foods, from smoothies and frozen drinks to soups and sauces. This makes it a convenient kitchen appliance to have on hand, as it can be used to prepare various meals and snacks.
Versatility: The Ninja BN801 Professional Plus Kitchen System has various attachments, including a Total Crushing pitcher, a Precision Processor bowl, and to-go cups. This makes it a versatile appliance that can be used for multiple tasks, from blending to chopping to processing.
Power: The Ninja BN801 Professional Plus Kitchen System has a powerful motor that can easily crush ice and blend frozen fruits and vegetables. This makes it ideal for making smoothies, frozen drinks, and other recipes that require a powerful blender.
Ease of use: The Ninja BN801 Professional Plus Kitchen System is easy to use and clean. The controls are simple to understand, and the parts are dishwasher-safe.
Durability: The Ninja BN801 Professional Plus Kitchen System has high-quality materials and construction. This makes it a durable appliance that can withstand heavy use.
Chapter 2. How To Use The Ninja BN801 Professional Plus Kitchen System
2.1 Getting Started with the Ninja BN801 Professional Plus Kitchen System
Wash and dry all of the Ninja BN801 Professional Plus Kitchen System parts before using it for the first time.
Place the motor base on a flat, level surface.
If you are using the Total Crushing pitcher, attach it to the motor base.
Add your ingredients to the pitcher.
Secure the lid on the pitcher.
Select the appropriate program for your components.
Press the start button.
Once the program has finished, stop the blender and pour your drink.
2.2 How to make smoothies and frozen drinks
Add your ingredients to the Total Crushing pitcher to make a smoothie or frozen drink. Be sure to include a liquid, such as milk, juice, or water. Add frozen fruits and vegetables, yogurt, and protein powder.
Select the “Smoothie” or “Frozen Drink” program on the motor base. The blender will automatically blend your ingredients until they are smooth.
2.3 How to chop and process food
Attach the Precision Processor bowl to the motor base to chop or process food. Add your ingredients to the bowl. Secure the lid on the bowl. Select the appropriate program for your components.
The Ninja BN801 Professional Plus Kitchen System has a variety of programs for chopping and processing food, including:
Chop: chops food into small pieces.
Dough: Mix ingredients together to form a dough.
Pulse: Blends ingredients for a short period of time.
2.4 Auto-IQ technology: What it is and how to use it
Auto-IQ technology is a unique feature of the Ninja BN801 Professional Plus Kitchen System. It takes the guesswork out of drink-making by automatically blending your ingredients for the perfect amount of time.
To use Auto-IQ technology, select the appropriate program for your ingredients. The blender will automatically blend your ingredients until they are smooth.
Before: Readers may be hesitant to use the Ninja BN801 Professional Plus Kitchen System because it has so many features. They may be worried that it is difficult to use or that they will be unable to make the most of its features.
After: By following the instructions in this chapter, readers can confidently use the Ninja BN801 Professional Plus Kitchen System. They can easily make smoothies, frozen drinks, chopped salads, salsas, and more.
Bridge: The Ninja BN801 Professional Plus Kitchen System is a versatile and powerful kitchen appliance that can help readers make various healthy and delicious foods. By following the instructions in this chapter, readers can learn how to use the system’s features to their advantage
For full article: click here
0 notes
Text
Full Review: Best Hamilton Beach Portable Blender For Shakes And Smoothies With 14 Oz BPA Free

What Is the Hamilton Beach Portable Blender for Shakes and Smoothies?
The Hamilton Beach Portable Blender for Shakes and Smoothies is a lightweight and compact blender that is perfect for making single-serve smoothies and shakes on the go. It features a powerful 175-watt motor and durable stainless steel blades that can easily crush ice and frozen fruits. The blender also comes with a travel lid, so you can take your smoothie with you wherever you go.
Features And Benefits Of The Hamilton Beach Portable Blender
Portable and lightweight: The Hamilton Beach Portable Blender is easy to carry around, making it perfect for travel, the gym, or the office.
Powerful blending performance: The blender’s 175-watt motor and durable stainless steel blades can easily crush ice and frozen fruits, resulting in smooth and delicious smoothies and shakes.
Easy one-touch blending: Press the button on the blender base to start blending. It’s that easy!
Compact design: The blender’s compact design makes it easy to store on your countertop or in your kitchen cabinet.
Quick and easy cleanup: The blender jar, blades, and travel lid are all dishwasher-safe, so cleanup is a breeze.
Who Should Buy the Hamilton Beach Portable Blender?
The Hamilton Beach Portable Blender is a great choice for anyone who is looking for a convenient and easy way to make smoothies and shakes on the go. It is also a good option for people with limited counter space, as it is very compact.
Here are some specific people who may benefit from owning a Hamilton Beach Portable Blender:
People who are always on the go and need a way to make smoothies and shakes quickly and easily
People who are trying to eat healthier and want to make sure they are getting their daily dose of fruits and vegetables
People who are working out and need a way to make protein shakes and other post-workout drinks
People who have limited counter space and need a compact blender.
People who are looking for an affordable and reliable portable blender.
Also: Simple And Delicious Vegan Gluten-Free Recipes Cookbook
Also: Full Review: Best Multi Purpose Hand Blender Mueller Austria Ultra-Stick 500 Watt 9-Speed
Also: Full Review: Best Magic Bullet Blender, Small, Silver, 11 Piece Set
Suppose you are looking for a portable blender that is easy to use, powerful, and affordable. In that case, the Hamilton Beach Portable Blender for Shakes and Smoothies is a great option.
I love the Hamilton Beach Personal Creations Blender with Travel Lid! It’s so convenient to be able to blend my smoothies right in the jar and then take them with me on the go. The blades are really sharp and power through ice and frozen fruits with ease. It’s also really easy to clean, which is a big plus for me. I highly recommend this blender to anyone looking for a quick and easy way to make smoothies and shakes!
SWAT Analysis
Strengths
Portable and lightweight: The Hamilton Beach Portable Blender is easy to carry around, making it perfect for travel, the gym, or the office.
Easy to use and clean: The blender has a simple one-touch blending operation, and the jar, blades, and travel lid are all dishwasher safe.
Powerful blending performance: The blender’s 175-watt motor and durable stainless steel blades can easily crush ice and frozen fruits, resulting in smooth and delicious smoothies and shakes.
Durable stainless steel blades: The stainless steel blades are rust-resistant and long-lasting, so you can be sure your blender will perform well for years to come.
BPA-free travel jar and lid: The travel jar and lid are both made from BPA-free plastic, so you can be sure your beverages are safe to consume.
Affordable price: The Hamilton Beach Portable Blender is very affordable, making it a great value for the money.
Weaknesses
Small blending jar capacity: The blending jar has a capacity of 14 ounces, which is smaller than some other portable blenders on the market. This means that you may need to blend your smoothies or shakes in batches if you are making a large quantity.
Not ideal for blending large quantities of food or ice: The blender is not ideal for blending large quantities of food or ice, as the motor may not be powerful enough to handle the load.
May not be powerful enough for some heavy-duty blending tasks: The blender is not as powerful as some other blenders on the market, so it may not be suitable for some heavy-duty blending tasks, such as making nut butter or ice cream.
Opportunities
Growing market for portable blenders: The market for portable blenders is growing rapidly as more and more people are looking for convenient and easy ways to make smoothies and shakes on the go.
Increased popularity of healthy eating and smoothies: Healthy eating and smoothies are becoming increasingly popular, which is driving demand for portable blenders.
Growing awareness of the Hamilton Beach brand: The Hamilton Beach brand is well-known and respected for its quality home appliances. This gives the Hamilton Beach Portable Blender a competitive advantage over other portable blenders on the market.
Threats
Competition from other portable blender brands: There are many different brands of portable blenders on the market, which can make it difficult for the Hamilton Beach Portable Blender to stand out from the competition.
Rising prices of raw materials: The rising prices of raw materials, such as plastic and metal, could impact the cost of manufacturing the Hamilton Beach Portable Blender, which could lead to higher prices for consumers.
Economic downturn: An economic downturn could lead to a decrease in demand for portable blenders, as consumers may be less likely to spend money on discretionary items.
Overall, the Hamilton Beach Portable Blender is a great product with many strengths and opportunities. However, it is important to be aware of the weaknesses and threats that could impact its success.
How To Use The Hamilton Beach Portable Blender
How To Assemble The Blender
Wash the blending jar and travel lid in warm, soapy water and dry thoroughly.
Screw the travel lid onto the blending jar.
Place the blending jar on the blender base.
Make sure that the blending jar is securely locked in place before blending.
How To Add Ingredients To The Blender
Add your desired ingredients to the blending jar.
Be sure to not overfill the blending jar. The maximum capacity of the blending jar is 14 ounces.
Screw the travel lid onto the blending jar.
How To Blend Ingredients
Plug in the blender base.
Press and hold the power button to start blending.
Release the power button when your smoothie or shake has reached the desired consistency.
How To Pour And Enjoy Your Blended Beverage
Unscrew the travel lid from the blending jar.
Pour your smoothie or shake into a glass or travel mug.
Enjoy!
How To Clean The Blender
Disconnect the blender base from the power outlet.
Unscrew the travel lid and blending jar from the blender base.
Wash the blending jar and travel lid in warm, soapy water.
Rinse the blending jar and travel lid thoroughly under running water.
Dry the blending jar and travel lid thoroughly with a clean towel.
The Hamilton Beach Personal Creations Blender with Travel Lid is a lifesaver for me! I’m always on the go and don’t have time to make a smoothie at home before I leave. With this blender, I can just throw my ingredients in the jar and blend them up in minutes. The travel lid is also really convenient, so I can take my smoothie with me in the car or on the train. I highly recommend this blender to anyone looking for a quick and easy way to make healthy smoothies on the go!
Tips For Using The Hamilton Beach Portable Blender
For best results, use frozen fruits and vegetables in your smoothies and shakes.
If you are blending ice, add a small amount of liquid to the blending jar to help the blender get started.
If your blender is struggling to blend the ingredients, try adding more liquid or reducing the amount of ingredients in the blending jar.
Be careful not to overfill the blending jar.
Troubleshooting
If your blender is not turning on, make sure that it is plugged in and that the blending jar is securely locked in place.
If your blender is struggling to blend the ingredients, try adding more liquid or reducing the amount of ingredients in the blending jar.
If your blender is leaking, make sure that the travel lid is screwed on tightly.
For full article: Click here
0 notes
Text
Full Review: Best Magic Bullet Blender, Small, Silver, 11 Piece Set

Introduction to the Magic Bullet Blender
The Magic Bullet Blender is a small, versatile kitchen appliance that can be used to make a variety of foods and drinks, including smoothies, soups, sauces, dips, baby food, and frozen drinks. It is known for its compact size, powerful motor, and easy-to-use design.
What makes the Magic Bullet Blender different from other blenders?
The Magic Bullet Blender is unique in several ways:
It is very compact and lightweight, making it easy to store and transport.
It has a powerful motor that can easily blend even the toughest ingredients, such as ice and frozen fruits.
It is very easy to use.
Twist on the blade attachment, fill the cup with ingredients, and push down to blend.
What are the benefits of using a Magic Bullet Blender?
There are many benefits to using a Magic Bullet Blender:
It makes healthy eating and drinking easy. You can quickly and easily make your own smoothies, juices, and soups, which are packed with nutrients and vitamins.
It can save you time and money. By making your own food and drinks at home, you can avoid the expense of buying them from restaurants or stores.
It can help you reduce food waste. You can use the Magic Bullet Blender to blend up leftover fruits, vegetables, and herbs and use them in smoothies, soups, and sauces.
It is very easy to clean.
The blade attachments and cups are all dishwasher-safe.
I was looking for an affordable blender that I could use to make smoothies and other healthy drinks. I found the Magic Bullet blender and decided to give it a try. I’m so glad I did! It’s so easy to use and clean, and it makes great smoothies. I also use it to grind coffee and nuts. I’m very happy with my purchase and would definitely recommend the Magic Bullet blender to others.
Overall rating: 5/5 stars
Who should consider buying a Magic Bullet Blender?
The Magic Bullet Blender is a great choice for anyone who wants a convenient and easy-to-use way to make healthy meals and snacks. It is especially popular with people who enjoy making smoothies, as it can quickly and easily blend up a variety of ingredients, including fruits, vegetables, yogurt, and protein powder. The Magic Bullet Blender is also a great option for people who are short on time or who are trying to save money, as it allows you to make your own food and drinks at home.
Magic Bullet Blender Recipes
The Magic Bullet Blender is a versatile appliance that can be used to make a variety of delicious and healthy recipes. Whether you’re looking for a quick and easy smoothie in the morning or a more elaborate meal or snack, there’s a Magic Bullet Blender recipe out there for you.
Smoothies
Smoothies are one of the most popular uses for the Magic Bullet Blender. They’re quick and easy to make, and they’re a great way to get your daily dose of fruits, vegetables, and other nutrients. Here are a few simple smoothie recipes to get you started:
Berry Smoothie: Combine 1 cup frozen berries, 1 cup yogurt, 1/2 cup milk, and 1/4 cup honey in the Magic Bullet Blender and blend until smooth.
Green Smoothie: Combine 1 cup spinach, 1/2 cup banana, 1/2 cup yogurt, 1/2 cup milk, and 1/4 cup honey in the Magic Bullet Blender and blend until smooth.
Protein Smoothie: Combine 1 scoop protein powder, 1 cup milk, 1/2 cup yogurt, and 1/2 cup fruit in the Magic Bullet Blender and blend until smooth.
Also: Simple And Delicious Vegan Gluten-Free Recipes Cookbook
Also: Full Review: Best Multi Purpose Hand Blender Mueller Austria Ultra-Stick 500 Watt 9-Speed
Soups and Sauces
The Magic Bullet Blender can also be used to make delicious and healthy soups and sauces. Here are a few simple recipes to get you started:
Tomato Soup: Combine 1 can diced tomatoes, 1/2 cup broth, 1/4 cup chopped onion, and 1/4 teaspoon garlic powder in the Magic Bullet Blender and blend until smooth. Heat the soup in a saucepan over medium heat until warmed through.
Avocado Sauce: Combine 1 avocado, 1/4 cup lime juice, 1/4 cup cilantro, and 1/4 teaspoon salt in the Magic Bullet Blender and blend until smooth. Serve the sauce over tacos, burritos, or grilled fish or chicken.
Hummus: Combine 1 can chickpeas, 1/4 cup tahini, 1/4 cup lemon juice, 1/4 cup olive oil, 1/4 teaspoon garlic powder, and 1/4 teaspoon ground cumin in the Magic Bullet Blender and blend until smooth. Serve the hummus with pita bread, vegetables, or crackers.
Dips and Spreads
The Magic Bullet Blender can also be used to make delicious and healthy dips and spreads. Here are a few simple recipes to get you started:
Guacamole: Combine 1 avocado, 1/4 cup chopped onion, 1/4 cup chopped cilantro, and 1/4 teaspoon salt in the Magic Bullet Blender and blend until smooth. Serve the guacamole with tortilla chips or vegetables.
Salsa: Combine 1/2 cup chopped tomatoes, 1/4 cup chopped onion, 1/4 cup chopped cilantro, 1/4 teaspoon salt, and 1/4 teaspoon chili powder in the Magic Bullet Blender and blend until smooth. Serve the salsa with tortilla chips or grilled fish or chicken.
Pesto: Combine 1 bunch of basil, 1/4 cup pine nuts, 1/4 cup Parmesan cheese, 1/4 cup olive oil, and 1/4 teaspoon garlic powder in the Magic Bullet Blender and blend until smooth. Serve the pesto over pasta, grilled chicken, or fish.
Benefits of Using a Magic Bullet Blender
The Magic Bullet Blender is a versatile and convenient kitchen appliance that offers a variety of benefits, including:
Convenience: The Magic Bullet Blender is small and lightweight, making it easy to store and use. It also has a simple and intuitive design, making it easy to blend even the most difficult ingredients.
Versatility: The Magic Bullet Blender can be used to make a variety of foods and drinks, including smoothies, soups, sauces, dips, baby food, and frozen drinks. It can also be used to grind nuts, seeds, and spices.
Affordability: The Magic Bullet Blender is very affordable, making it a great value for your money.
Easy to clean: The Magic Bullet Blender is easy to clean. All of the parts are dishwasher-safe, and you can also clean them by hand with soap and water.
In addition to these general benefits, the Magic Bullet Blender can also offer specific benefits to different types of users. For example:
People who are looking for a healthy way to eat and drink: The Magic Bullet Blender makes it easy to make healthy and delicious smoothies, soups, and sauces.
People who are short on time: The Magic Bullet Blender is very quick and easy to use, making it a great option for people who are short on time.
People who are on a budget: The Magic Bullet Blender is very affordable, making it a great option for people who are on a budget.
People who have small kitchens: The Magic Bullet Blender is small and lightweight, making it a great option for people who have small kitchens.
Overall, the Magic Bullet Blender is a versatile, convenient, and affordable kitchen appliance that offers a variety of benefits to users of all types.
Here are some specific examples of how the Magic Bullet Blender can be used to improve your health and well-being:
Make nutritious smoothies: Smoothies are a great way to get your daily dose of fruits, vegetables, and other nutrients. The Magic Bullet Blender makes it easy to make smoothies in seconds.
Make healthy soups and sauces: Soups and sauces are a great way to add flavor and nutrition to your meals. The Magic Bullet Blender makes it easy to make healthy soups and sauces in minutes.
Grind nuts and seeds: Nuts and seeds are a great source of protein, fiber, and healthy fats. The Magic Bullet Blender makes it easy to grind nuts and seeds to use in smoothies, soups, sauces, and other recipes.
Make baby food: The Magic Bullet Blender is a great way to make healthy and nutritious baby food. It can be used to blend a variety of fruits, vegetables, and meats into a smooth puree.
Suppose you are looking for a versatile and convenient kitchen appliance that can help you improve your health and well-being. In that case, the Magic Bullet Blender is a great option to consider.
Tips for Using Your Magic Bullet Blender
The Magic Bullet Blender is a versatile and convenient kitchen appliance that can be used to make a variety of foods and drinks. Here are a few tips for using your Magic Bullet Blender to get the most out of it:
Use the right blade attachment. The Magic Bullet Blender comes with two different blade attachments: a cross blade and a flat blade. The cross blade is best for blending smoothies, soups, and sauces. The flat blade is best for chopping and grinding nuts, seeds, and spices.
Don’t overload the blender. The Magic Bullet Blender is small, so it’s important not to overload it. If you’re blending a lot of ingredients, blend them in batches.
Add liquid. When blending smoothies, soups, and sauces, it’s important to add some liquid to help the blender get started. Water, milk, or juice are all good options.
Start slowly. When you’re first starting out, start blending at a low speed and gradually increase the speed as needed.
Don’t overblend. Overblending can make your food or drink gritty. Once your food or drink is blended to the desired consistency, stop blending.
Also: Simple And Delicious Vegan Gluten-Free Recipes Cookbook
Also: Full Review: Best Multi Purpose Hand Blender Mueller Austria Ultra-Stick 500 Watt 9-Speed
Here are a few additional tips to keep in mind:
Use frozen fruit for smoothies. Frozen fruit will give your smoothies a thicker and creamier texture.
Add toppings to your smoothies. You can add a variety of toppings to your smoothies, such as granola, nuts, seeds, and yogurt.
Make soups and sauces ahead of time. Soups and sauces can be made ahead of time and reheated when you’re ready to eat.
Use the Magic Bullet Blender to grind nuts and seeds. You can use the Magic Bullet Blender to grind nuts and seeds to use in smoothies, soups, sauces, and other recipes.
Clean the Magic Bullet Blender immediately after use. The Magic Bullet Blender is easy to clean, but it’s important to clean it immediately after use to prevent food and drink from drying on the parts.
With these tips in mind, you’ll be well on your way to using your Magic Bullet Blender to make delicious and healthy meals and snacks.
For full article : Click here
0 notes
Text
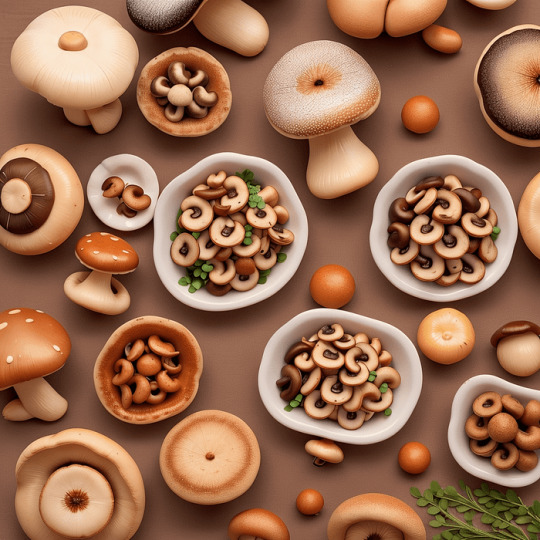
12 Ways To Make Mushrooms Taste Like Meat: A Meatless Culinary Adventure

Introduction
If you’re on a journey to reduce your meat consumption, you’ve to Make Mushrooms Taste Like Meat. Mushrooms, despite being fungi and not vegetables, possess a unique savoury flavour called umami and a meaty texture when cooked. They are an ideal foundation for vegetarian adaptations of classic meat dishes, from burgers and tacos to hot dogs and steak. This article will explore 12 mouthwatering ways to make mushrooms taste like meat. Whether you’re a committed vegetarian, a flexitarian, or simply looking for a delicious meatless meal, these recipes have covered you.
Mushroom Bolognese: Mushrooms Taste Like Meat
Indulge in a delightful and meat-free culinary experience with the Mushroom Bolognese from Gimme Some Oven. This pasta dish is a true masterpiece, perfect for Meatless Monday meals. The Mushroom Bolognese brings together a medley of flavours that rival the traditional Bolognese sauce, ensuring a rich and satisfying dining experience.
To recreate this delectable dish, follow the recipe below:
Ingredients:
1 pound of mushrooms (cremini or button), finely chopped
1 medium onion, diced
2 cloves of garlic, minced
1 carrot, finely chopped
1 celery stalk, finely chopped
1 can of crushed tomatoes
2 tablespoons of tomato paste
1/2 cup of vegetable broth
1 teaspoon of dried basil
1 teaspoon of dried oregano
Salt and pepper to taste
Cooked pasta of your choice
Fresh basil leaves for garnish
Grated Parmesan cheese for serving (optional)
Instructions:
Heat a large skillet over medium heat and add olive oil.
Add the diced onion, minced garlic, chopped carrot, and celery stalk to the skillet. Cook until the vegetables are soft and fragrant.
Add the finely chopped mushrooms to the skillet and cook until they release their moisture and start to brown.
Stir in the crushed tomatoes, tomato paste, vegetable broth, dried basil, dried oregano, salt, and pepper. Simmer for 15–20 minutes, allowing the flavours to meld together.
Serve the Mushroom Bolognese sauce over the cooked pasta of your choice.
Garnish with fresh basil leaves and, if desired, sprinkle with grated Parmesan cheese.
Enjoy your Meatless Monday masterpiece!
Portobello Pups: A Twist On Classic Hot Dogs
Love and Lemons introduces the Portobello Pups, a mouthwatering variation of hot dogs. These delectable treats are prepared by cooking portobello mushrooms in a flavorful blend of balsamic vinegar, olive oil, and mustard. The result is a taste that remarkably resembles the traditional hot dog experience.
Here is the recipe for Portobello Pups:
Ingredients:
4 large portobello mushrooms
1/4 cup balsamic vinegar
2 tablespoons olive oil
1 teaspoon mustard
Salt and pepper to taste
Hot dog buns
Toppings of your choice (e.g., ketchup, mustard, onions, relish)
Instructions:
Preheat your grill or grill pan to medium-high heat.
Clean the portobello mushrooms and remove the stems.
Whisk together balsamic vinegar, olive oil, mustard, salt, and pepper in a small bowl.
Brush the marinade mixture onto both sides of the portobello mushrooms.
Place the mushrooms on the grill and cook for 4–5 minutes per side or until tender.
While the mushrooms are grilling, lightly toast the hot dog buns.
Once the mushrooms are cooked, transfer them to the toasted buns.
Add your desired toppings and serve immediately.
Enjoy these Portobello Pups as a delightful twist on classic hot dogs!
Butternut Squash And Mushroom Enchiladas: A Hearty Spin On Enchiladas
Looking for a delicious meatless alternative? Pinch of Yum brings you a mouthwatering recipe for Butternut Squash and Mushroom Enchiladas. These enchiladas are packed with the perfect combination of mushrooms and butternut squash, creating a hearty and meaty texture that will satisfy your cravings.
To make these delectable enchiladas, follow these simple steps:
Ingredients:
1 medium butternut squash, peeled and cubed
8 ounces mushrooms, sliced
1 onion, diced
2 cloves garlic, minced
1 teaspoon ground cumin
1 teaspoon chilli powder
1/2 teaspoon paprika
Salt and pepper to taste
8 small tortillas
1 cup shredded cheese (cheddar or Monterey Jack)
Fresh cilantro, chopped (for garnish)
Sour cream or salsa (optional for serving)
Instructions:
Preheat your oven to 375°F (190°C).
In a large skillet, heat some olive oil over medium heat. Add the diced onion and minced garlic, and cook until fragrant and translucent.
Add the cubed butternut squash to the skillet and cook until it softens. Stir in the sliced mushrooms and season with cumin, chilli powder, paprika, salt, and pepper. Cook until the mushrooms are tender and the squash is cooked through.
Warm the tortillas in the microwave or stovetop to make them pliable.
Spread a spoonful of the butternut squash and mushroom mixture onto each tortilla and roll them up tightly. Place the enchiladas in a baking dish.
Sprinkle the shredded cheese over the enchiladas and cover the baking dish with aluminium foil.
Bake in the oven for about 20 minutes or until the cheese is melted and bubbly.
Remove the foil and continue baking for 5 minutes or until the tortillas are slightly crispy and golden.
Garnish the enchiladas with fresh cilantro and serve with sour cream or salsa, if desired.
Get ready to indulge in these Butternut Squash and Mushroom Enchiladas that offer a delightful twist on traditional enchiladas. Enjoy the hearty flavours and meaty texture, all while savouring the goodness of a satisfying vegetarian dish.
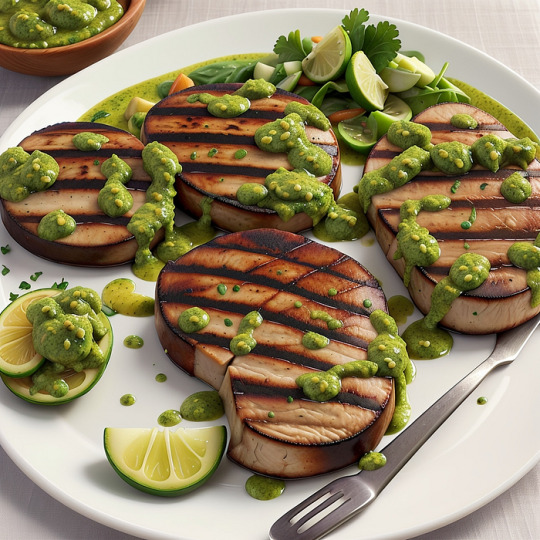
Portobello Steaks With Avocado Chimichurri: A Steak-Lover’s Dream
Indulge in the delightful flavours of Minimalist Baker’s Portobello Steaks with Avocado Chimichurri. These mouthwatering mushroom steaks are a carnivore’s dream, seasoned with paprika and steak sauce.
To make this delicious recipe, you will need the following ingredients:
Portobello mushrooms
Avocado
Fresh cilantro
Garlic
Lime juice
Olive oil
Red wine vinegar
Paprika
Steak sauce
Salt and pepper
To prepare the dish, follow these steps:
Preheat the grill or grill pan to medium-high heat.
Clean the Portobello mushrooms and remove the stems.
Combine the olive oil, paprika, steak sauce, salt, and pepper in a small bowl. Brush the mixture onto both sides of the mushrooms.
Place the mushrooms on the grill and cook for 4–5 minutes per side or until tender.
While the mushrooms are grilling, prepare the avocado chimichurri by blending the avocado, cilantro, garlic, lime juice, olive oil, red wine vinegar, salt, and pepper in a food processor or blender.
Once the mushrooms are done, remove them from the grill and rest for a few minutes.
Serve the Portobello steaks with a generous dollop of avocado chimichurri on top.
Tikka Mushrooms: Mushrooms Taste Like Meat
Amuse Your Bouche presents Tikka Mushrooms, a tantalizing dish that is both spiced and chewy. These delectable delights have the potential to surpass even the most traditional chicken pieces, offering a unique and flavorful twist.
To prepare Tikka Mushrooms, follow the recipe below:
Ingredients:
Button mushrooms: 250g
Greek yogurt: 2 tablespoons
Tikka masala paste: 1 tablespoon
Lemon juice: 1 tablespoon
Garlic cloves: 2, minced
Ginger: 1 teaspoon, grated
Ground cumin: 1 teaspoon
Ground coriander: 1 teaspoon
Paprika: 1/2 teaspoon
Salt: 1/2 teaspoon
Vegetable oil: 1 tablespoon
Fresh cilantro: for garnish
Instructions:
Clean the button mushrooms and remove any dirt or debris. Set aside.
Combine Greek yogurt, tikka masala paste, lemon juice, minced garlic, grated ginger, ground cumin, coriander, paprika, and salt in a bowl. Mix well to form a marinade.
Add the button mushrooms to the marinade and toss to coat them evenly. Allow them to marinate for at least 30 minutes or up to 2 hours for a more intense flavour.
Heat vegetable oil in a pan over medium heat. Add the marinated mushrooms and cook for about 8–10 minutes, stirring occasionally, until they are tender and slightly charred.
Remove from heat and garnish with fresh cilantro.
Serve the Tikka Mushrooms as an appetizer or a main dish with naan bread or rice.
Indulge in these flavorful Tikka Mushrooms that will surely leave your taste buds craving more. Enjoy!
Mushroom Bacon Bits: A Savory, Smoky Sensation
If you’re a fan of the rich, smoky flavour of bacon but prefer a vegetarian or vegan option, then Bon Appétit’s Mushroom Bacon Bits are the perfect choice. This recipe offers a quick and simple way to satisfy your cravings while enjoying a plant-based alternative.
To create these delectable Mushroom Bacon Bits, you’ll need a few simple ingredients: mushrooms, olive oil, garlic, and thyme or rosemary. When baked to perfection, combining these ingredients results in savoury mushroom bits that closely resemble the taste and texture of traditional bacon.
Not only do these Mushroom Bacon Bits offer a delicious and smoky flavour, but they are also incredibly versatile. You can sprinkle them over salads, soups, or pasta dishes to add a burst of umami goodness. They also make a fantastic topping for baked potatoes or elevate the flavour of your favourite sandwiches and wraps.
To make these Mushroom Bacon Bits, follow these step-by-step instructions:
Preheat your oven to 375°F (190°C).
Clean and slice your mushrooms into thin strips.
In a bowl, combine the sliced mushrooms, olive oil, minced garlic, and your choice of thyme or rosemary. Mix well to ensure the mushrooms are evenly coated.
Spread the mushroom mixture onto a lined baking sheet, arranging them in a single layer.
Place the baking sheet in the oven and bake for 20–25 minutes or until the mushrooms are crispy and golden brown.
Once done, remove from the oven and let the Mushroom Bacon Bits cool for a few minutes before enjoying.
Try this recipe and discover a new way to enjoy the savoury, smoky sensation of bacon while embracing a vegetarian or vegan lifestyle.
for more Click here
0 notes
Text
13 Best Vegan Mushroom Recipes — A Delightful Plant-Based Feast
A Delectable Journey Through Vegan Mushroom Delights
Vegan Mushroom Recipes truly hold a regal position in the realm of plant-based cuisine. They deliver a plethora of essential nutrients, such as Vitamins D and B, and they also wield the power to enhance gut health and fortify the immune system. The remarkable diversity of edible mushroom species, spanning different culinary traditions, is a testament to their remarkable versatility and undeniable culinary allure.
Discovering The Plethora Of Best Vegan Mushroom Recipes
Mushrooms, as the unsung heroes of the plant-based world, offer diverse tastes, textures, and flavours. The choices are endless, from the exquisite umami-rich shiitake to the delicate enoki and the hearty king oyster mushrooms. Let’s embark on a culinary adventure and explore the wonders of vegan mushroom recipes.
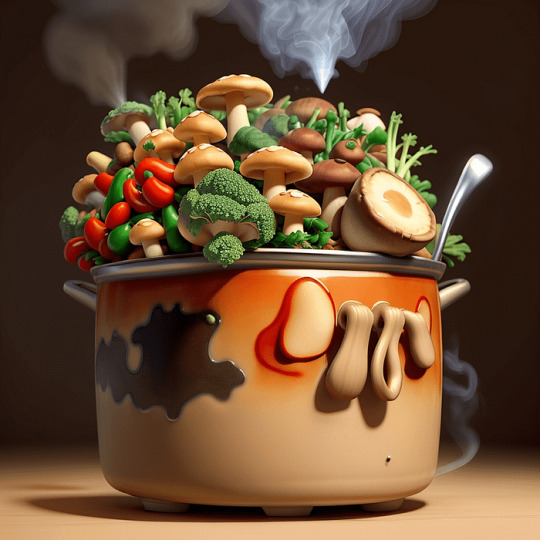
One-Pot Vegan Mushroom Stew
One-Pot Vegan Mushroom Stew is a delicious and satisfying dish that elevates mushrooms. It offers a meaty texture and rich umami flavour that will delight your taste buds. The best part is that it’s a one-pot wonder, making it convenient for family dinners or meal prep.
Here’s the recipe for One-Pot Vegan Mushroom Stew:
Ingredients:
1 tablespoon olive oil
1 onion, diced
2 cloves of garlic, minced
8 ounces mushrooms, sliced
2 carrots, diced
2 celery stalks, diced
1 can diced tomatoes
4 cups vegetable broth
1 teaspoon thyme
1 teaspoon paprika
Salt and pepper to taste
Instructions:
Heat olive oil in a large pot or Dutch oven over medium heat.
Add the diced onion and minced garlic sauté until fragrant and translucent.
Add the sliced mushrooms, diced carrots, and diced celery. Cook until the vegetables start to soften.
Stir in the diced tomatoes, vegetable broth, thyme, and paprika. Season with salt and pepper to taste.
Bring the stew to a boil, then reduce heat and let it simmer for about 20 minutes or until the flavours meld together.
Serve the One-Pot Vegan Mushroom Stew with potatoes, rice, or bread for a complete and delightful meal.
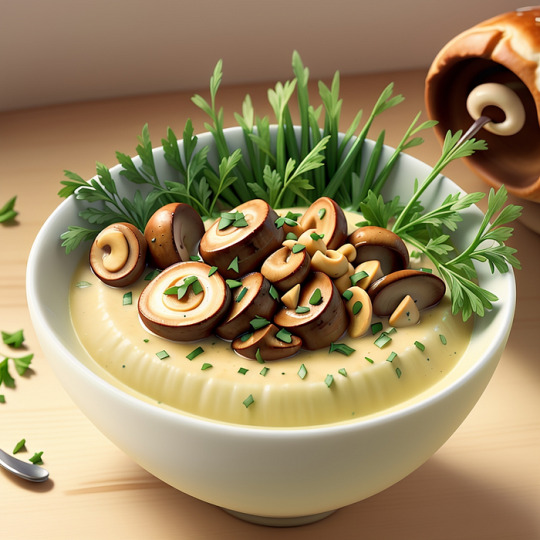
Cream Of Mushroom Soup
Indulge in the creamy goodness of this delicious mushroom soup, made entirely from wholesome, plant-based ingredients. You can prepare this comforting classic in just thirty minutes that will warm your soul. With only eight simple ingredients, it’s perfect for a quick and affordable lunch or dinner.
Recipe:
Ingredients:
1 tablespoon olive oil
1 onion, chopped
2 cloves garlic, minced
8 ounces mushrooms, sliced
4 cups vegetable broth
1 cup plant-based milk
2 tablespoons flour
Salt and pepper to taste
Instructions:
Heat olive oil in a large pot over medium heat. Add the chopped onion and minced garlic. Sauté until the onion is translucent and fragrant.
Add the sliced mushrooms to the pot and cook until they release their moisture and start to brown.
Sprinkle flour over the mushrooms and stir well to coat.
Gradually pour in the vegetable broth while stirring continuously to avoid lumps.
Add the plant-based milk to the pot and stir until well combined.
Bring the soup to a simmer and cook for about 10 minutes until it thickens slightly.
Season with salt and pepper to taste.
Remove from heat and let the soup cool slightly before serving.
Garnish with fresh herbs, if desired, and enjoy!
Note: Feel free to customize the recipe by adding your favourite herbs or spices for extra flavour.
Mushroom Gravy
Suppose you’re looking for a delicious vegan mushroom gravy to complement your classic Thanksgiving dinner. In that case, you’ve come to the right place! This easy-to-make gravy bursts with flavour and pairs perfectly with traditional Thanksgiving sides like mashed potatoes, roasted vegetables, savoury pies, and vegan stuffing.
Here’s the recipe:
Ingredients:
2 tablespoons olive oil
1 medium onion, finely chopped
2 cloves garlic, minced
8 ounces mushrooms, sliced
2 tablespoons all-purpose flour
1 cup vegetable broth
1 tablespoon soy sauce
1/2 teaspoon thyme
Salt and pepper to taste
Instructions:
Heat the olive oil in a saucepan over medium heat. Add the chopped onion and minced garlic, and sauté until soft and translucent.
Add the sliced Vegan Mushroom Recipes to the saucepan and cook until they have released moisture and are lightly browned.
Sprinkle the flour over the mushrooms and stir to combine, making sure the flour coats the mushrooms evenly.
Gradually pour in the vegetable broth, stirring constantly to avoid any lumps. Add the soy sauce, thyme, salt, and pepper.
Bring the gravy to a simmer and cook for about 5–7 minutes or until it thickens to your desired consistency. Stir occasionally.
Remove the mushroom gravy from the heat and let it cool slightly before serving.
Enjoy this flavorful vegan mushroom gravy with your Thanksgiving feast!
Mushroom Stroganoff
Mushroom stroganoff is a beloved classic; this vegan twist doesn’t disappoint. It features four Vegan Mushroom Recipes varieties: leeks, garlic, and a creamy tahini and coconut milk sauce. The deep mushroom flavour combines beautifully with cooked noodles.
Here’s the recipe for Mushroom Stroganoff:
Ingredients:
4 cups mixed mushrooms (such as cremini, shiitake, oyster, and portobello), sliced
1 leek, thinly sliced
2 cloves of garlic, minced
2 tablespoons olive oil
1/4 cup tahini
1 cup coconut milk
Salt and pepper to taste
Cooked noodles of your choice
Instructions:
Heat the olive oil in a large skillet over medium heat. Add the sliced mushrooms and cook until they release their moisture and start to brown, about 8–10 minutes.
Add the sliced leek and minced garlic to the skillet and sauté for another 2–3 minutes, until the leeks are tender.
Whisk together the tahini and coconut milk in a small bowl until smooth. Pour the mixture into the skillet with the mushrooms and leeks.
Stir well to combine and let it simmer for a few minutes until the sauce thickens slightly. Season with salt and pepper to taste.
Serve the Vegan Mushroom Recipes stroganoff over cooked noodles of your choice.
Enjoy your delicious vegan mushroom stroganoff!
Mushroom Risotto
Vegan mushroom risotto is a heartwarming dish that brings the rich and earthy flavours of mushrooms to the forefront. This delightful recipe takes inspiration from traditional Italian cuisine. It is made with onion, garlic, asparagus, and spinach.
To make this allergy-friendly dish, which is gluten, soy, and nut-free and does not contain refined sugar, follow the recipe below:
Ingredients:
1 cup Arborio rice
4 cups vegetable broth
1 onion, finely chopped
3 cloves of garlic, minced
8 ounces mushrooms, sliced
1 cup asparagus, chopped
2 cups fresh spinach
1/4 cup nutritional yeast
2 tablespoons olive oil
Salt and pepper to taste
Instructions:
In a large saucepan, heat the olive oil over medium heat. Add the onion and garlic, and sauté until they become translucent.
Add the mushrooms to the pan and cook until they release their moisture and begin to brown.
Stir in the Arborio rice and cook for a few minutes until it becomes slightly toasted.
Gradually add the vegetable broth to the pan, one cup at a time, stirring constantly until the liquid is absorbed before adding more.
Continue this process until the rice is cooked al dente, which should take about 20–25 minutes.
Meanwhile, blanch the asparagus in boiling water for 2–3 minutes, then transfer it to an ice bath to stop cooking. Drain and set aside.
Once the risotto is cooked, stir in the blanched asparagus, fresh spinach, and nutritional yeast. Cook for an additional 2–3 minutes until the spinach wilts.
Season with salt and pepper to taste.
Serve the mushroom risotto hot and enjoy!
Note: Feel free to customize this recipe by adding your favourite herbs or spices to further enhance the flavours. Bon appétit!
Mushroom Pasta
Sometimes, the simplest dishes are the most successful. This mushroom spinach pasta recipe is incredibly easy to make, satisfying, and full of flavour. Whether you’re a beginner cook, a busy professional, or someone who values time in the kitchen, this recipe is perfect for you.
Recipe:
Ingredients:
8 ounces of pasta
2 tablespoons of olive oil
1 small onion, finely chopped
3 cloves of garlic, minced
8 ounces of mushrooms, sliced
2 cups of fresh spinach
1/2 cup of vegetable broth
Salt and pepper to taste
Grated Parmesan cheese for garnish (optional)
Instructions:
Cook the pasta according to package instructions until al dente. Drain and set aside.
In a large skillet, heat the olive oil over medium heat. Add the chopped onion minced garlic, and sauté until the onion is translucent and fragrant.
Add the sliced mushrooms to the skillet and cook until they are tender and golden brown.
Stir in the fresh spinach and cook until wilted.
Pour in the vegetable broth and season with salt and pepper to taste. Simmer for a few minutes to allow the flavours to meld together.
Add the cooked pasta to the skillet and toss to coat it evenly with the mushroom and spinach mixture.
Remove from heat and serve hot. Garnish with grated Parmesan cheese, if desired.
Enjoy your delicious mushroom pasta!
Mushroom Burger
If you haven’t tried portobello Vegan Mushroom Recipes before, this mushroom burger is a fantastic way to be introduced to them. It provides a texture that mimics a traditional burger, all while using whole-food ingredients. The simple and elegant recipe uses a portobello mushroom as the patty.
Recipe:
Ingredients:
2 portobello mushrooms
2 burger buns
1 red onion, sliced
2 lettuce leaves
2 tomato slices
4 slices of cheese (optional)
Condiments of your choice (e.g., ketchup, mustard, mayo)
Instructions:
Preheat the grill or a grill pan over medium heat.
Clean the portobello mushrooms and remove the stems.
Brush the mushrooms with olive oil and season with salt and pepper.
Grill the mushrooms for 5–7 minutes on each side until tender.
Toast the burger buns on the grill for a few seconds until lightly golden.
Assemble the burger by placing a grilled mushroom on the bottom half of each bun.
Top the mushroom with sliced red onion, lettuce, tomato, cheese (if using), and condiments of your choice.
Cover with the top half of the bun.
Serve the mushroom burgers immediately, and enjoy!
Mushroom Sauce
This creamy Vegan Mushroom Recipes sauce is a delightful side dish that complements Thanksgiving feasts and family dinners. This delectable sauce pairs perfectly with main dishes such as nut roast or lentil loaf and with sides like mashed potatoes and steamed vegetables.
Recipe:
Ingredients:
1 tablespoon olive oil
1 medium onion, finely chopped
2 garlic cloves, minced
8 ounces mushrooms, sliced
1 cup vegetable broth
1 cup plant-based milk (such as almond or soy milk)
2 tablespoons all-purpose flour
1 tablespoon nutritional yeast
Salt and pepper to taste
Fresh parsley, chopped (for garnish)
Instructions:
Heat olive oil in a skillet over medium heat. Add chopped onion and minced garlic, and sauté until onion becomes translucent.
Add sliced mushrooms to the skillet and cook until they release their moisture and become tender.
In a separate bowl, whisk together vegetable broth, plant-based milk, all-purpose flour, and nutritional yeast until well combined.
Pour the mixture into the skillet with mushrooms. Stir well and bring to a simmer.
Cook the sauce for about 5 minutes or until it thickens to your desired consistency. Season with salt and pepper to taste.
Remove from heat and garnish with fresh parsley.
Serve the mushroom sauce hot alongside your favourite main dishes and sides.
Enjoy this irresistible mushroom sauce that adds a creamy touch to your meals.
For full article: click Here
0 notes
Text
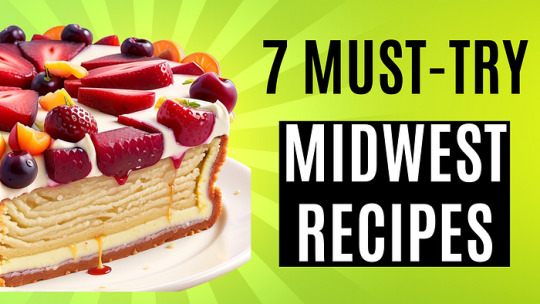
7 Must-Try Midwest Recipes That’ll Leave You Craving for More!”
Introduction:
Midwest recipes are the hidden treasure of regional American cuisine! Contrary to popular belief, the Midwest showcases its own unique and flavorful dishes. Drawing inspiration from German and Scandinavian immigrant cultures, this culinary tradition highlights comfort, homestyle cooking, and hearty, filling dishes. From delectable desserts to homemade pies, get ready to indulge in a mouthwatering journey through the heart of the Midwest. Let’s dive in!
What is Midwest Cuisine?
Midwest cuisine is the food culture of the states in the Midwest US, including Illinois, Indiana, Iowa, Kansas, Michigan, Minnesota, Missouri, Nebraska, North Dakota, Ohio, South Dakota, and Wisconsin. It’s predominantly home-style, with dishes that focus on the use of local ingredients like corn, wheat, soybeans, and meat. Although the cuisine shares some similarities with Southern and Mid-Atlantic cooking, Midwest cuisine has its own distinct flavor profile, with influences from the German and Scandinavian immigrants who settled in the region.
Traditional Midwest recipe
Midwest cuisine is a true delight, offering a rich variety of traditional dishes that tantalize the taste buds. From the deep-dish wonders of Chicago-style pizza to the mouthwatering allure of Kansas City Barbecue, the region is a treasure trove of culinary delights. But beyond these well-known favorites, there are countless other iconic dishes that capture the essence of the Midwest.
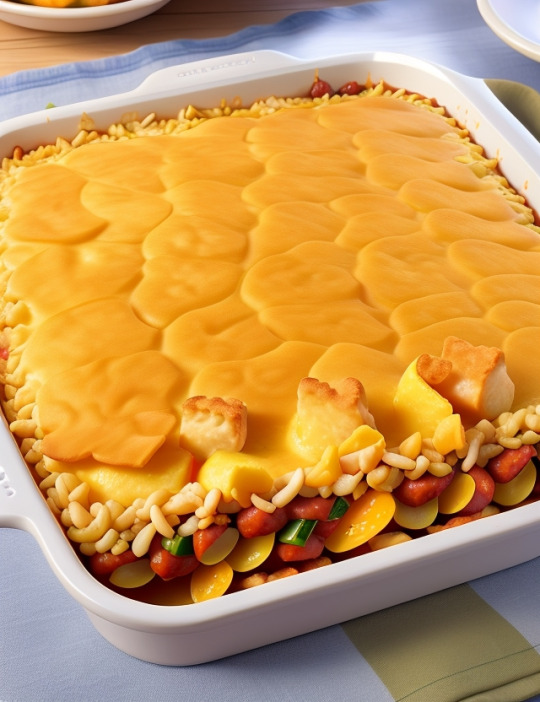
One cannot overlook the beloved Midwest recipe, a hearty casserole featuring a medley of ingredients like ground beef, vegetables, and creamy sauces, topped with a golden layer of crispy tater tots. Another Midwest classic is the butter burger, where the patty is cooked to perfection and topped with a generous dollop of butter that melts into pure bliss. And let’s not forget the fluffy and buttery biscuits served with creamy sausage gravy, a breakfast staple that warms the heart and satisfies the soul.
Comfort Food Midwest recipe
Midwest cuisine, with its strong emphasis on hearty and comforting food, is a true delight during those cold winter days. From soul-warming soups and stews to mouthwatering casseroles and succulent roast dishes, the Midwest offers a diverse range of recipes and textures that are sure to satisfy any palate. Indulge in timeless classics like the perfectly breaded pork tenderloin, savor the nostalgic taste of grandma’s sloppy joes, or dive into the unique and aromatic Cincinnati-style chili. With its rich culinary heritage, Midwest cuisine truly captures the essence of traditional comfort food that never goes out of style.
The Unique Flavors of Midwest recipe
Midwest cuisine is not just about meat and potatoes. The region also prides itself on a rich culinary heritage, with a wide range of unique and delicious dishes that you won’t find anywhere else. For example, in Wisconsin, cream puffs are a beloved dessert that has become synonymous with the state fair, delighting locals and visitors alike. These fluffy pastries filled with sweet cream are a must-try for anyone with a sweet tooth. On the other hand, in Nebraska and Iowa, strawberry pretzels hold a special place in the hearts of the locals.
This delightful treat, consisting of a layer of buttery pretzel crust, a creamy and tangy cream cheese filling, and a sweet strawberry gelatin topping, is a staple at potluck dinners and family gatherings. The combination of the salty pretzel crust, the creamy goodness of the filling, and the burst of fruity flavor from the strawberries creates a truly irresistible dessert that will leave you wanting more. So, when exploring the culinary delights of the Midwest, be sure to indulge in these regional favorites that showcase the diverse and delicious traditions of the heartland.
Rich Fruit Kuchens
Kuchen is a German term for cake, and fruit kuchens are a specialty in the Midwest. These cakes are typically made with sweet, yeasted dough and filled with slices of fresh fruit, such as plums, apricots, and cherries. They’re a perfect dessert option for summer picnics and gatherings.
Fruit Kuchen Recipe:
Ingredients:
Sweet, yeasted dough
Fresh fruit slices (plums, apricots, cherries)
Instructions:
1. Prepare the sweet, yeasted dough according to your preferred recipe or by using store-bought dough.
2. Preheat the oven to the recommended temperature.
3. Roll out the dough into a thin, even layer and transfer it to a greased baking dish.
4. Arrange the fresh fruit slices on top of the dough, ensuring even distribution.
5. Place the baking dish in the preheated oven and bake for the recommended time, or until the crust is golden brown and the fruit is tender.
6. Remove it from the oven and let it cool slightly before serving.
7. Serve the fruit kuchen as a delightful dessert option for summer picnics and gatherings.
Enjoy your homemade fruit kuchen!
Breaded Pork Tenderloin
Breaded pork tenderloin is an Indiana specialty that’s become popular throughout the Midwest. The dish consists of a pork cutlet that’s pounded thin, breaded, and fried until crisp and golden. It’s typically served on a bun with mustard, lettuce, tomato, and onion, and sometimes topped with pickles and cheese.
Recipe: Breaded Pork Tenderloin
Ingredients:
Pork tenderloin
- Breadcrumbs
Salt and pepper
All-purpose flour
Eggs
Vegetable oil
Mustard
Lettuce
Tomato
Onion
Pickles
Cheese (optional)
Instructions:
1. Pound the pork tenderloin until it is thin and even in thickness.
2. Season the pork with salt and pepper.
3. Place all-purpose flour, beaten eggs, and breadcrumbs in separate shallow dishes.
4. Dip the pork into the flour, then into the beaten eggs, and finally coat it with breadcrumbs.
5. Heat vegetable oil in a frying pan over medium heat.
6. Fry the breaded pork until it is crisp and golden brown on both sides.
7. Remove the pork from the pan and drain it on paper towels to remove excess oil.
8. Spread mustard on a bun and assemble the sandwich with lettuce, tomato, onion, pickles, and cheese (if desired).
9. Place the breaded pork cutlet on the bun and enjoy!
Note: Feel free to customize the toppings and condiments to your preference.
For the complete article, visit www.culinaryburst.com Enjoy an enhanced reading experience with rich content and valuable insights!
0 notes
Text
13 Asian Comfort Food Recipes: Satisfy Your Cravings

Introduction:
Asian comfort food is always an enjoyable way to satisfy our cravings and fill our tummies with something memorable and familiar. There’s just something special about eating a meal that reminds us of good memories or just feels like home. In the world of comfort food, there are many choices available, but have you ever tried Asian comfort food? It’s a fusion of flavors that are delicious, filling, and bursting with unique tastes. In this post, we’ll explore some of the most popular and satisfying Asian comfort dishes, so get your chopsticks ready and let’s dive in!
What Is Asian Comfort Food?
So, what is Asian Comfort Food? It’s the perfect blending of eastern flavors, spices, and cooking techniques that provides a unique blend that satisfies our soul and our palate. Asian comfort foods are typically high in flavor, full of spices and herbs, and served in warm bowls of goodness. Not only do these foods provide immense pleasure for our taste buds, but they’re also excellent for our overall health and well-being.
Benefits Of Eating Asian Comfort Foods
Asian comfort foods offer a delightful culinary experience with a myriad of flavors—sweet, spicy, sour, and umami. They provide a comforting and exciting sensory experience.
Not only are these dishes tasty, but they are also packed with nutrition. Ingredients like ginger, garlic, turmeric, and herbs used in these recipes have potent health benefits, including anti-inflammatory and antioxidant properties. Asian comfort foods are well-balanced with proteins, vegetables, and carbs, making them a wholesome meal.
In addition, the warm soups and broths common in Asian comfort foods are great for hydration and can help soothe the common cold. Lastly, these dishes allow us to connect with different cultures and appreciate the diversity of Asian cuisine.
Popular Asian Comfort Food Recipes
If you’re ready to embark on a culinary journey, here are some popular Asian comfort food recipes to get you started:
Ramen (Japan):
A satisfying bowl of ramen is an iconic Japanese dish. The broth, typically made from pork or chicken bones, is simmered for hours and served with noodles, slices of pork, a soft-boiled egg, and vegetables.
Ramen Recipe:
Ingredients:
Pork or chicken bones for broth
Noodles
Slices of pork
Soft-boiled eggs
Vegetables
Instructions:
1. Prepare the broth by simmering pork or chicken bones for several hours.
2. Cook the noodles according to the package instructions and set aside.
3. Slice the pork into thin slices.
4. Soft-boil the eggs until desired consistency.
5. Prepare the vegetables by chopping them into the desired sizes.
6. In a serving bowl, add the cooked noodles, slices of pork, a soft-boiled egg, and vegetables.
7. Pour the simmered broth over the ingredients in the bowl.
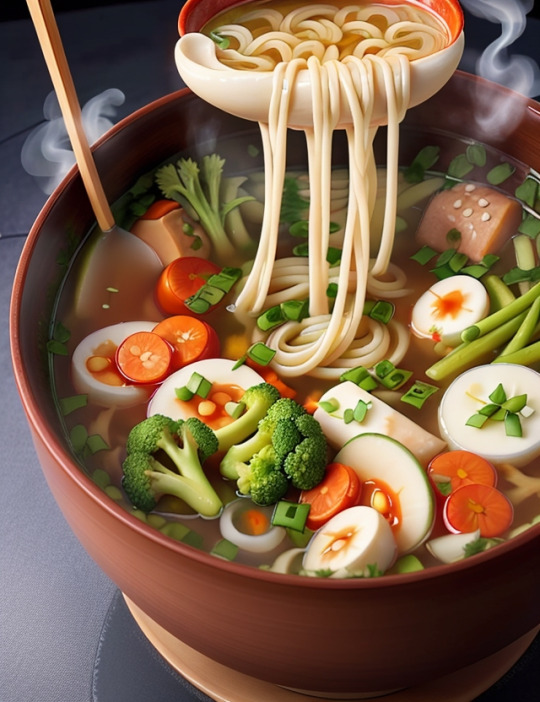
Pho (Vietnam):
This aromatic noodle soup is a staple in Vietnamese cuisine and is made with beef or chicken broth, rice noodles, herbs, and meat.
Ingredients:
Beef or chicken broth
Rice noodles
Herbs (such as cilantro, Thai basil, and green onions)
Meat (beef or chicken)
Instructions:
1. Prepare the broth by simmering beef or chicken bones in water for several hours. Skim off any impurities that rise to the surface.
2. Cook rice noodles according to package instructions. Drain and set aside.
3. Prepare the herbs by washing and chopping them.
4. Cook the meat separately by grilling, boiling, or stir-frying it. Slice it into thin pieces.
5. To assemble the soup, place a portion of rice noodles in a bowl. Add the cooked meat and herbs on top.
6. Pour the hot broth over the noodles, meat, and herbs.
7. Serve hot and enjoy the aromatic noodle soup!
Note: Feel free to adjust the ingredients and quantities based on your preferences.
Bibimbap (Korea):
This hearty bowl of rice is topped with an assortment of vegetables, beef, a fried egg, and a dollop of spicy gochujang sauce. It’s a meal that offers a myriad of flavors and textures in each bite.
Recipe: Beef Bibimbap
Ingredients:
Cooked rice
Assorted vegetables (such as carrots, spinach, mushrooms, and bean sprouts)
Beef (thinly sliced)
Fried egg
Spicy gochujang sauce
Instructions:
1. Prepare the vegetables: Julienne the carrots, blanch the spinach, sauté the mushrooms, and blanch the bean sprouts.
2. Cook the beef: Stir-fry the thinly sliced beef until cooked.
3. Assemble the bowl: In a large bowl, place a serving of cooked rice. Arrange the vegetables and beef on top.
4. Add the fried egg: Fry an egg and place it on top of the vegetables and beef.
5. Drizzle with gochujang sauce: Add a dollop of spicy gochujang sauce on top.
6. Mix and enjoy: Mix all the ingredients together thoroughly before eating to combine the flavors and textures.
Enjoy this delicious and flavorful beef bibimbap!
For the complete article, visit www.culinaryburst.com Enjoy an enhanced reading experience with rich content and valuable insights!
1 note
·
View note
Text
6 Healthy Tailgate Foods The Whole Team Will Love

Football season is upon us, and for many sports fans, that means tailgating is in full swing. But with all the greasy burgers, hot dogs, chips, and beers, it can be easy to forget about healthy eating. However, just because you’re tailgating doesn’t mean you have to sacrifice your health and clean eating habits. In fact, there are plenty of ways to enjoy delicious tailgate food that won’t break your healthy habits. In this blog post, we will talk about why healthy tailgate food matters, tips for healthy tailgating, and some quick and easy healthy tailgate recipes that you and your fellow tailgaters will love.
Choose Lean Protein Sources
When it comes to tailgating, grilling is one of the main activities. It’s not hard to make grilling healthy, though. Choose lean protein sources like chicken or turkey burgers, fish, chicken sausages, or grass-fed beef when you’re grilling. These options are lower in saturated fat and calories than traditional burgers or hot dogs. You can also grill vegetables like zucchini, peppers, or portobello mushrooms as a vegetarian option. They are delicious and healthy.
Make Grilling Healthier With Healthy Tailgate Food
Do you know that grilling itself can create carcinogens? So, do it right and make healthier choices when grilling food. Use olive oil, a healthy fat, instead of vegetable oil to baste your grill or grill pan. Olive oil contains monounsaturated fats that are healthy for your heart, unlike vegetable oil, which contains polyunsaturated fatty acids that are unstable under heat. Another option is to grill your meat on a piece of foil. This way, the fat will be trimmed, and you won’t be consuming excess calories and harmful chemicals.
Pack Smart Sides
Instead of bags of chips, offer smart sides like grilled or raw veggies, salads, or fruit. A fresh green salad with tomatoes, cucumber, onions, and olive oil is always a crowd-pleaser. You could also make protein-rich side dishes like quinoa or lentil salad. These options are nutrient-dense and provide fiber and proteins that will satisfy you until post-game. Raw veggies like carrots, peppers, or cherry tomatoes are perfect for dipping in a healthy dip.
Think Beyond Chips And Dip
Chips and dip are the staple of any tailgate party, but that doesn’t mean you can’t think beyond them. Make your own healthy dips like fresh tomato salsa, avocado hummus, and tequila guacamole. These dips are full of healthy fats and nutrients. Instead of cheese dips or other high-calorie dips, these options are delicious and abundant in vitamins and minerals.
Go With Fresh Fruit For Dessert
Your tailgate party will need some dessert. Instead of relying on high-calorie, high-sugar sweets, offer a fresh fruit bowl. It’s easy to make and will satisfy your need for something sweet. Cut up some fresh fruit like berries, melon, apple, or grapes. Fruit contains natural sugars, fiber, and plenty of vitamins, making it the perfect way to end a meal. Plus, you and your tailgate buddies will feel better knowing that you consumed something nutrient-dense and healthy.
Quick And Easy Healthy Tailgate Recipes
Suppose you want to make something beyond the basics. Here are some quick and easy healthy tailgate recipes to choose from:
Step-By-Step Guide To Fresh Tomato Salsa:
Dice up some ripe tomatoes.
Chop spicy jalapenos.
Add onions for a crunch.
Sprinkle aromatic cilantro for a burst of flavor.
Season the mix with a squeeze of zesty lime juice.
Add a pinch of salt to enhance the taste.
Enjoy this refreshing and vibrant salsa as a perfect accompaniment to your favorite chips or as a topping for tacos and grilled meats.
Step-By-Step Guide To Delicious And Creamy Avocado Hummus:
Mash a perfectly ripe avocado until smooth.
Add smooth chickpeas and minced garlic to the mashed avocado.
Drizzle extra-virgin olive oil over the mixture.
Sprinkle a pinch of salt.
Blend the ingredients together until well combined.
Enjoy the delightful blend that will leave your taste buds satisfied and craving for more!
For the complete article, visit www.culinaryburst.com Enjoy an enhanced reading experience with rich content and valuable insights!
0 notes
Text
Healthy Bliss Balls: A Delicious Way To Boost Your Energy

Ahh, bliss balls! Is there anything more satisfying than having one of these nutty little spheres arrive in your stomach with a burst of flavor? Healthy, delicious, and oh-so-easy to make at home, it’s no wonder why bliss balls have become the snack sensation they are today! Here at Culinary Bursts, we’ve got all you need to know about making scrumptious bliss balls that not only taste great but also give you an energy boost like no other. So come join us on this exciting journey as we explore how simple ingredients can blend together for something so incredibly delicious!
What Are Bliss Balls?
Bliss balls, also known as energy balls or protein balls, are these amazing little treats packed with nutrients. Picture this: a delightful combination of raw nuts, such as almonds and cashews, blended with nutrient-rich seeds like chia and flaxseed. Add in the natural sweetness of dried fruit, such as dates or cranberries, and a sprinkle of superfoods like cacao nibs or matcha powder. All these wholesome ingredients are carefully mixed and rolled into these cute little balls. And let me tell you, despite their small size, they pack a real punch of energy, giving you that extra boost to power through your day!
So imagine this: You’re rushing from one meeting to another, feeling a bit drained and in need of a pick-me-up. Instead of reaching for those processed desserts or sugary snacks, grab one of these bliss balls. As you take a bite, the flavors burst in your mouth; the sweetness of the dried fruit is balanced perfectly with the crunch of the nuts and seeds. Not only do they provide you with a quick and healthy energy boost, but they also satisfy your cravings in the most wholesome way.

Benefits Of Healthy Bliss Balls
Bliss balls are not just tasty treats; they come with a host of health benefits as well.
Nutrient-packed: Bliss balls are a delicious and healthy snack option that is a true powerhouse of nutrients. These delectable treats are meticulously crafted from a combination of raw nuts, seeds, dried fruits, and superfoods, ensuring a diverse range of vitamins, minerals, and antioxidants. With their abundance of essential nutrients, these bliss balls not only provide sustained energy but also bolster your immune system and promote overall health and well-being. Indulge in the goodness of these nutrient-rich delights and experience the incredible benefits they offer.
Great for energy: Thanks to their nutrient-dense ingredients, bliss balls provide a quick and sustained energy boost. These delicious and wholesome treats are packed with a balanced mix of protein, carbs, and healthy fats, making them an excellent snack choice for pre-workout fuel or a mid-afternoon pick-me-up. Whether you’re hitting the gym or need an extra boost during a busy day, bliss balls are a convenient and nourishing option to keep you going strong.
Tastes Absolutely Delicious: Despite their numerous health benefits, bliss balls do not compromise on taste. The perfect blend of fresh, ripe fruits, premium-quality nuts, and nutrient-rich seeds creates a heavenly sweet and satisfying flavor profile that will leave your taste buds craving for more. With countless ingredient combinations to explore and experiment with, you can easily find a bliss ball recipe to satisfy even the most discerning palate. Whether you prefer the rich and indulgent chocolate varieties or the refreshing burst of tropical flavors, these delightful treats make for an ideal substitute for those unhealthy and processed desserts that leave you feeling guilty. Indulge in these guilt-free delights and experience a blissful sensation with every bite.
How To Make Bliss Balls
Making bliss balls is incredibly easy and requires no baking! Simply gather your favorite ingredients, blend them in a food processor, and roll them into balls. Here’s a simple recipe to get you started:
Ingredients:
1 cup rolled oats
1/2 cup almond butter
1/4 cup honey
1/4 cup chocolate chips
1/4 cup chopped nuts (walnuts, almonds, or cashews)
1 tsp. vanilla extract
Instructions:
In a food processor, pulse the rolled oats until they are finely ground.
Add the almond butter, honey, chocolate chips, chopped nuts, and vanilla extract.
Pulse until the mixture comes together in a sticky dough.
Using your hands, roll the mixture into balls about 1 inch in diameter.
Refrigerate the bliss balls for at least 30 minutes to set.
For the complete article, visit www.culinaryburst.com Enjoy an enhanced reading experience with rich content and valuable insights!
0 notes
Text
Enjoy A Deliciously Healthy Rice Pudding With a culinary burst
Introduction
Introducing a healthier version of a classic dessert, our Healthy Rice Pudding is a creamy, delicious, and nutritious treat that everyone loves. This key dish is made with brown rice and low-fat milk, giving it a healthier twist on the traditional white rice version. Our recipe is packed with flavor and nutrition, making it the perfect dessert for any occasion. Enjoy this healthier version of a classic favorite, and make sure to share it with your loved ones.
Health Benefits Of Healthy Rice Pudding

How To Make A Creamy Brown Healthy Rice Pudding
Step 1: Gather the following ingredients:
Brown rice
Low-fat milk
Step 2: In a saucepan, combine the brown rice and low-fat milk.
Step 3: Bring the mixture to a simmer over medium heat, stirring occasionally.
Step 4: Reduce the heat to low and cover the saucepan. Allow the rice to cook for about 45 minutes, or until it becomes tender and creamy.
Step 5: Remove the saucepan from the heat and let the rice pudding cool for a few minutes.
Step 6: Serve the creamy brown rice pudding in bowls, and enjoy!
Note: Feel free to add your favorite toppings, such as cinnamon, raisins, or sliced almonds, for extra flavor.
Substitutions For Low-Fat Milk
When it comes to making a healthier version of creamy rice pudding, the key is to substitute low-fat milk for a full-fat version. This is an easy way to reduce the amount of fat and calories without sacrificing the flavor. Brown rice is also a great alternative to white rice, as it provides more nutrients and a slightly nuttier flavor. For those who want a truly creamy version, a combination of low-fat milk and cream can be used for a delicious dessert that everyone will love. The key to making this dish a healthy one is to use low-fat milk and brown rice, which are both nutritious and full of flavor. With this recipe, you can enjoy a delicious, creamy rice pudding that’s healthier than the traditional version.
For the complete article, visit www.culinaryburst.com Enjoy an enhanced reading experience with rich content and valuable insights!
1 note
·
View note