
boltcore07
BoltCoresims-n-otherstuff
Hi! I m BoltCore and i have created this blog about sims because i love the franchise so much! I started with sims 4 back in 2016 and i quite enjoyed it! Others told me to try older sims games and that was the best thing i was ever recomended to do,im in love with the franchise much more than before! On this blog i want to post about game guides,easter eggs,mods and much more! Please Make yourself comfy
5 posts
Don't wanna be here? Send us removal request.
Last Seen Blogs

glo-glow
I post random things


ms-m-astrologer
Eyes on the Stars

jodifiction
Jodi Fiction
lokiwi
do you remember me?
Text


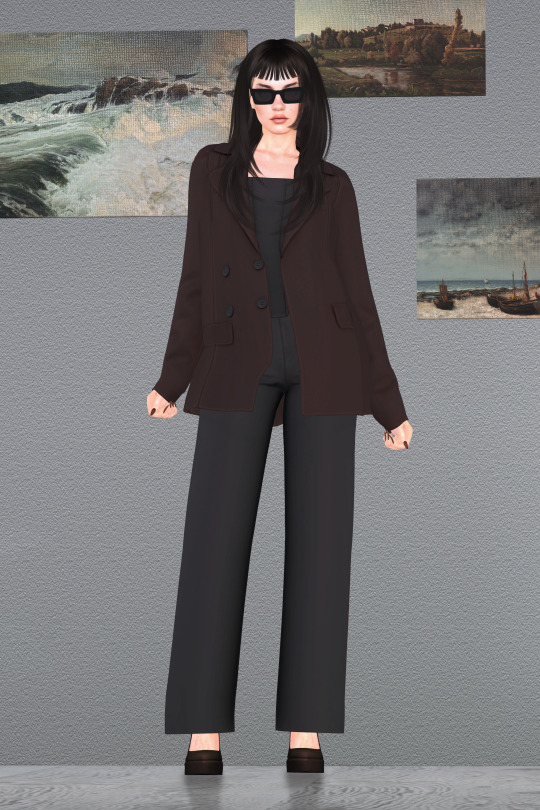
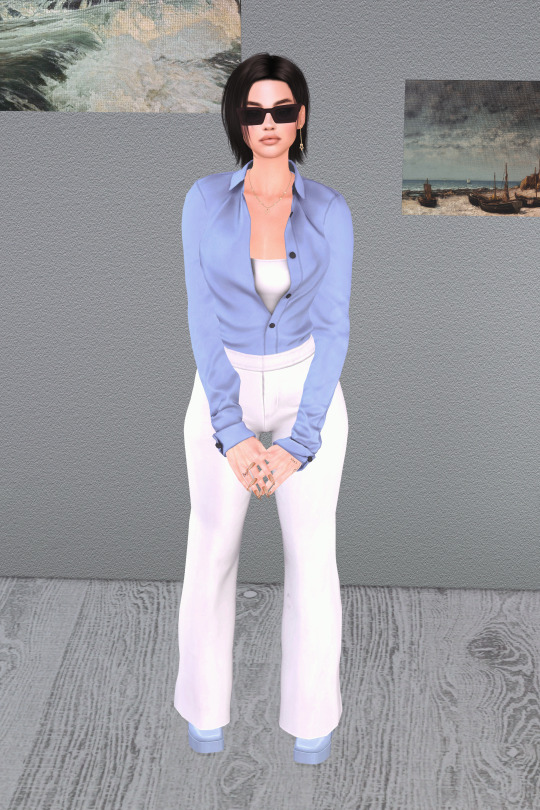


Old Money Collection pt.1 | August 2023 Collection
vest 01
56 swatches
new mesh
custom thumbnails
HQ compatible
top category
teen - elder
all morphs
thepancake1 slider compatible
vest 02
56 swatches
new mesh
custom thumbnails
HQ compatible
top category
teen - elder
all morphs
thepancake1 slider compatible
corset 01
56 swatches
new mesh
custom thumbnails
HQ compatible
top category
teen - elder
all morphs
thepancake1 slider compatible
jacket 01
56 swatches
new mesh
custom thumbnails
HQ compatible
top category
teen - elder
all morphs
thepancake1 slider compatible
shirt low\high waist
56 swatches
new mesh
custom thumbnails
HQ compatible
top category
teen - elder
all morphs
thepancake1 slider compatible
midi skirt 01
56 swatches
new mesh
custom thumbnails
HQ compatible
bottom category
teen - elder
all morphs
thepancake1 slider compatible
pants 01
56 swatches
new mesh
custom thumbnails
HQ compatible
bottom category
teen - elder
all morphs
thepancake1 slider compatible
pants 02
56 swatches
new mesh
custom thumbnails
HQ compatible
bottom category
teen - elder
all morphs
thepancake1 slider compatible
glasses 01
14 swatches
new mesh
custom thumbnails
HQ compatible
glasses category
teen - elder
all morphs
thepancake1 slider compatible
Download: Early Access at Boosty or Patreon
(Public access in September 20)
6K notes
·
View notes
Text
The Sims 2 Tutorial: How to create your own subhood (shopping district,downtown,uni,etc.)
Hello guys! I'm Luca and welcome! Today I'm gonna show you how to create your own subhood! Before we begin
This tutorial is based on this tread from MTS: https://modthesims.info/t/502306This is optional but I highly recommend it,you should create the subhood in an artificial game environment using any game starter tool: https://modthesims.info/d/250555/anygamestarter-v-2-1-3-for-cd-dvd-games-upd-29-dec-2017.html(For people who use the cd/DVD version) https://modthesims.info/d/604873/tester-needed-anygamestarter-v-2-2-0-uc-ultimate-collection-upd-25-dec-2017.html(For people who use the ultimate collection, this also works with the origin ultimate collection repack from g4tw) This tutorial doesn't require simPE but it can be used optionally for just checking to see if everything is in order. You will also need bulk rename:https://www.bulkrenameutility.co.uk/Please note that this technique will not work for neighborhoods with attached subhoods, it will only work for unattached neighborhoods and subhood templates like the ones shipped with the game. - If you have FreeTime installed, you will have to manually disable the FreeTime stealth neighborhood to create an empty environment. The AnyGameStarter will not do this for you correctly. See this post for detailed instructions. - If you try to add multiple Downtowns to a neighborhood, only sims from the first Downtown added will actually appear in your neighborhood. The game will remove the sims from all additional Downtown subhoods before those subhoods are added to your neighborhood. If you want to add multiple occupied Downtowns to the same neighborhood, you may not be able to use more than one Downtown template. - If you just want a generic subhood, then you will probably want a Suburb. As examples, all of the stealth neighborhoods from Pets, Seasons, Bon Voyage, FreeTime, and Apartment Life are Suburbs; most Mega-Hoods are also made with Suburbs. - If your neighborhood has occupied apartments and you want to change it to a subhood, you will have to move the sims out first. Do not have occupied apartments in a subhood template; occupied apartments will be corrupted when the subhood is added to a primary neighborhood. Unoccupied apartment buildings should have no problem. - Sims in a subhood template will receive a new ID when a subhood is attached to a neighborhood. This can cause problems if the game doesn't properly update the ID everywhere it is used. Most of the time, the game updates the ID correctly. However, you should be aware that this problem can occur and be careful with sim relationships in subhoods. A problem has been noticed with hired maids needing to be rehired. There may be other types of relationships that are also handled incorrectly. Be sure to test your neighborhood or subhood before sharing it. (this info was pasted from the original post)
This method is a work in progress still
Step 1:Creating the anygame environment
So after you have installed any game starter, open it! Then open the new shortcut that the setup file has created, Agree to the terms&liciense then select the packs that you would like! Mansion and garden will always be included for the ultimate collection version of the program (i think). Click next and select create an empty game (no maxis content included) then click next and install!
Step 2: Turning On Debug Mode
After the anygame has been created,run it and you should have no neighborhoods,if you do then you did something wrong,try again.
Close the game and then go into the anygame documents >EA Games> The Sims 2 Ultimate Collection (for UC users)>Config and create a new text document called userStartup.cheat,then open it and type boolprop testingcheatsenabled true
Step 3: Creating the neirghborhood (later convert it)
In order to create a subhood,we need to create a normal hood then convert it into a subhood,so enter the game then click the new hood button then click yes,select your preferred terrain and select ok then wait for it to load then leave the game.
Step 4: Renaming your neighborhood
Install Bulk rename uttility then run it. I know it might look hard but it’s actually very easy,navigate to the hood you just created,this is the UC default anygame location : Documents\AnyGameStarter\AnyGame1\EA Games\The Sims 2 Ultimate Collection\Neighborhoods\N001
Select the match case option in the replace(3) section and also select subfolders in the filters section
You need to rename the hood because it might conflict if you don t rename it

Make sure your characters folder and storytelling folder are both empty!!! If it's not then you did something wrong.
It is recommended to stick to the maxis naming conventions
Here is the standard naming convention:
University: U###
Downtown: D###
Suburbs (Open for Business): B###
Vacation (Far East): A###
Vacation (Mountain Lake): M###
Vacation (Island): T###
I named my hood B002 because I wanted to do a shopping district aka subhood, name your hood something different than B001 or D001 or U001,U002,U003 because otherwise, it will replace the maxis original subhoods
After renaming the hood folder, in the white area in which you see your hood folder then select ctrl+a and then go to the replace section and in the replace section type the original hood name with the “_” and in the “with” section type your desired new hood name and then press rename!,be sure to use both suffixes or prefixes!!
Step 5: Launch the environment and convert the hood
If you do not see your neighborhood on the main menu you’ve done something wrong.
If you see it then you are good to go :D, Make sure it looks as it should!
In the neighborhood view of the neighborhood that you want to change, open the cheat box (CTRL+SHIFT+C) and type the cheat: changeNeighborhoodType [primary/university/downtown/suburb/asia/mountains/tropics]
For example if I want to change my hood into a shopping district I would type changeNeighborhoodType suburb
If the game started the loading screen then you did everything right!
If the game gave you an object error or cheat error then you did something wrong such as debug mode not being enabled (shown in the steps above)
After the game finished loading it should look something like this in my example :
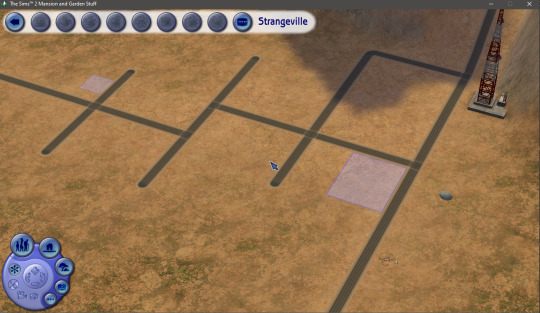
building
You can also check simPE if you’re not sure!
Step 6:Install the subhood/downtown/university or etc
University (UC)
C:\ProgramFiles\Origin Games\The Sims 2 Ultimate Collection\University Life\TSData\Res\NeighborhoodTemplate
Downtown (UC)
C:\ProgramFiles\Origin Games\The Sims 2 Ultimate Collection\Double Deluxe\EP2\TSData\Res\NeighborhoodTemplate
Shopping District (UC)
C:\ProgramFiles\Origin Games\The Sims 2 Ultimate Collection\Best of Bussines\EP3\TSData\Res\NeighborhoodTemplate
Vacation Destination(UC)
C:\ProgramFiles\Origin Games\The Sims 2 Ultimate Collection\Bon Voyage\TSData\Res\NeighborhoodTemplate
University(disk)
C:\Program Files\EA GAMES\The Sims 2 University\TSData\Res\NeighborhoodTemplate
Downtown(disk)
C:\Program Files\EA GAMES\The Sims 2 Nightlife\TSData\Res\NeighborhoodTemplate
Suburb(disk)
C:\Program Files\EA GAMES\The Sims 2 Open For Business\TSData\Res\NeighborhoodTemplate
Vacation Destination(disk)
C:\Program Files\EA GAMES\The Sims 2 Bon Voyage\TSData\Res\NeighborhoodTemplate
You should download this mod which fixes the add a new subhood selection menu!
https://modthesims.info/download.php?t=420924 (it was created by the person who created the original post that inspired me to make this one)
You can now start building the sub-hood freely and I hope I helped you!
Have fun!
6 notes
·
View notes
Text
Life hack for The Sims 2! (credit to crosimmer on twitter!)
Hi! I’m BoltCore and welcome to my blog! So i was scrolling on twitter and then saw a post by crosimmer saying that you can skip the selecting main menu for the sims 2! So with this your game will just load the hood you want or the lot you want! I think this was introduced for testing purposes and also for showing the demo version of the game at E3 or such!
To “tell” the game to skip the menu and instantly load the hood you wish you just need the game’s shortcut! Then Right-click on the shortcut and go to the target line! Should look like this:
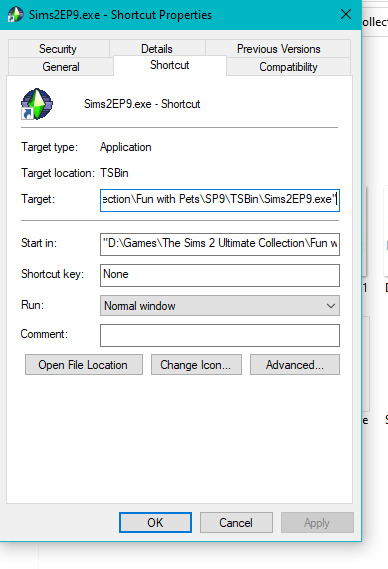
At the target line,press spacebar once and type: (with the “-”)
-load:N001 (for pleasantview)
-load:N002 (for strangetown)
-load:N003 (for veronaville)
-load:E001 (for belladona cove ,the sims 2 apartament life)
-load:F001 (for desiderata valley,the sims 2 freetime)
-load:G001 (for riverblossom hills,the sims 2 seasons)
Then click apply and you can close the window then open the shortcut to see the results! :D
(note that this dosent work with subhoods,only main hoods!)
But that’s not all! You can also load a specific lot! to do that you have to specify the lot adress! For example,to load the goth family you have to type:
-load:"N001;165 Sim Lane" and yes in a lot case you need to put the quotes before the hood s name and after the lot’s name!!!
You can also load CAS (Create-a-Sim) too!,for pleasantview type load:"N001;CAS!" ,the same rule applies!
Again crosimmer is a legend in the sims community <3 xoxo
Anyways i hope you find this quite helpful ! if you have questions please ask!
Follow crossimmer on twitter: https://twitter.com/Crosimmer
Follow me on twitter:https://twitter.com/LucasTheGAMER3
Link to thread:https://twitter.com/Crosimmer/status/1394601339129368577
#thesims2#lifehack#simshack#sims#thesims#thesims1#thesims3#thesims4#helpfulinfo#Donlothario#the sims cc#maxis#electronicarts
6 notes
·
View notes
Text
Game Instalation Guide:installing the sims castaway stories on your machine
Introduction
Hello! I’m Luca and welcome (back) to my tumblr! Recently i became addicted to the sims castaway stories so i decided that today i’m gonna show you how to install The Sims Castaway Stories on your machine! (and also make it to work)
DISCLAMER
i think we all know what is this game! So i won’t talk about it today! lil’ disclamer:The Sims Castaway Stories’s pc version is laptop frendly so it can run well on laptops but of course it has problems running on modern systems! However we will make the game to work on windows 10 so don’t worry!
BEGINNING
Before we begin please disable your antivirus! And you will also need a tool for extracting .zip or .rar files! You can get Winrar or 7-Zip,it dosen’t matter that much! Tho i recommend using 7-Zip because it’s free :D
1.Go to https://oldgamesdownload.com/the-sims-castaway-stories/ and go to the download the sims castaway stories then select the purple button,Should look like below:

2.After that,select how would you like to download castaway stories! You have to options: mega.org or archive.org,it dosen’t matter which one you select.

3.(7-ZIP USERS) After it finished downloading select the archive and right-click on it and then select open with,scroll down to the bottom and select look on another app on this pc then go to C:\Program Files\7-zip then select 7zFM.exe ,for 32 bit systems it should be the same default location or Program Files (x86)
(WinRAR USERS) You can do the same process but select the default location for winrar UNLESS it’s already set as default.
4.Continuing,after that open the archive then select its content and paste it into a new folder.
5.After it finished the extracting procces make sure your antivirus is disabled because if it is enabled the crack is going to be detected as a virus and will get removed,then add the folder with the game’s setup to the exceptions list (just to be safe <3)
6.Open the setup and if you get a pop-up from UAC(user account control) saying:an admin has blocked you from running this app, follow this tutorial: https://www.youtube.com/watch?v=1jgwD2e1MB8&ab_channel=TreeAcademy
7.Open the setup again and follow the on-screen instructions,when a serial code is required use this: N78Q-RZKW-7428-DB09-DVTY then select the directory you want to install the game then let the installer do its job,after it got finished select quit then finish.
8. You can enable UAC again now,also add the game’s installation directory to your exceptions,For Windows Defender go to Virus&treat protection > Virus&Treat Protection settings then select manage settings then scrol down to add or remove exclusions and then select the game’s folder,the default is C:\Program Files or Program Files(86)\EA Games\The Sims Castaway Stories
9.Go to the crack folder then select the files inside them and copy them to the game’s folder mentioned above then go into the tsbin folder and right click and select paste. CONGRATS! THE GAME IS FULLY INSTALLED BUT WE AIN’T FINISHED YET!
Optimizing the game!
1. We will need GRM (graphic rule maker) and ONLY IF YOU HAVE 8 GB OF RAM OR MORE we will use 4 gb patch. Download GRM here and 4 gb patch here
2.I’m gonna assume that you know how to install GRM and continue.After the tool got installed open it and it should look like this:
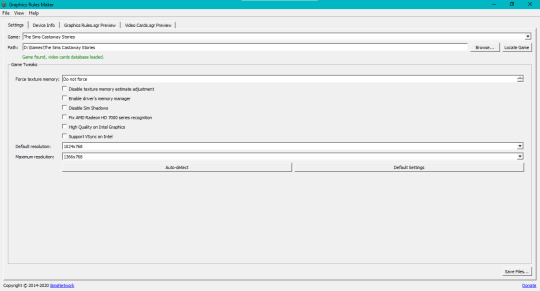
3.Select the game from the game list and then select the locate game button and if it dosen’t detect it select browse.. and select the game’s location.
4.Based on your GPU you need to force the texture memory or the game won t work,go to the search button (for windows 10) and search advanced display info and then scroll down and select Display Advanced Proprieties for Display 1 or 2,a window should open and you need to look at the dedicated video memory and the amount of vram that you see there is the amount that you will enter in the force texture memory section.
5.Select the disable sim shadows option and if you have an amd gpu select the fix amd radeon hd series option,then select your resolutions then save the files,select yes and then ok and you are done!
6.Open the 4gb patch and select the SimsCS.exe file from the tsbin sub-folder of the game’s directory.
Now you are done optimizing the game! You can right click on the SimsCS.exe and select send to desktop(create shortcut)
The game should work now,if you have any questions please ask them in the ask me anything section! Enjoy!
13 notes
·
View notes
Text
My First Post!
Hi!
This is my first post but to be honest i don’t even know what to say! i created this blog because my life was a mess and i just want to start to recover it! So i decided that a blog would be an amazing opportunity and responsibility!
As i said i will make sims regarding posts,guides,walktroughs,tutorials and much more, i also wanna share mods that i find amazing!
If someone sees this,welcome! And See You Soon!
P.s: if you want you can follow me on twitter :D (shameless plug)
https://twitter.com/LucasTheGAMER3
Here s a sims meme!
3 notes
·
View notes