airconditionerrepairservice
HVAC Repair Service & Installation
56 posts
Don't wanna be here? Send us removal request.
Last Seen Blogs

thegr8gambino
Untitled

glasssartenginelambert-blog
GlassARTengine

tophealthclinics-blog
Top Health Clinics

theusedtobee
the last of my kind
Text
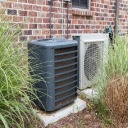
How to Clean Your Air Conditioning Unit Like a Pro
Did your air conditioning unit perform less efficiently than it used to? It might be time for a good cleaning. Regular cleaning of your AC unit ensures optimal performance and extends its lifespan. In this guide, we'll walk you through the steps to clean your air conditioning unit like a professional, ensuring it works effectively throughout the year.
Why Cleaning Your Air Conditioning Unit Is Important
As time passes, dust and debris may build up within your air conditioning system., clogging filters and hindering airflow. This reduces the unit's efficiency and compromises the quality of air circulating in your home. Additionally, a dirty AC unit is more prone to breakdowns and may require costly repairs if addressed quickly.
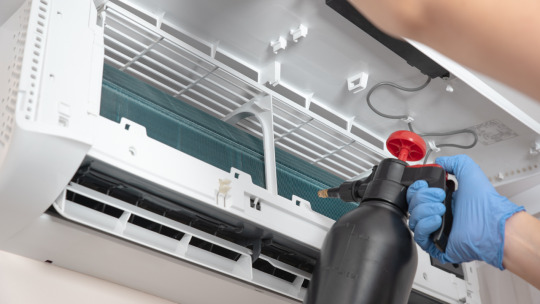
Step-by-Step Guide to Cleaning Your Air Conditioning Unit
Turn Off Power: Before you start cleaning, ensure the power to your AC unit is turned off at the main breaker to avoid any accidents.
Remove Debris: Carefully remove leaves, twigs, or other debris from the unit's exterior. Use a vacuum to clean the fins and coils gently.
Clean or Replace Filters: Air filters trap dust and particles but can become clogged over time. Clean or change your filters according to the manufacturer's instructions. This is typically recommended every 1-3 months.
Clean the Coils: Carefully clean the evaporator and condenser coils using a coil cleaner and a soft brush. Be gentle to avoid damaging the fins.
Check Drainage: Ensure that the condensate drain is clear of any obstructions. A clogged drain can lead to water failure and mold growth.
Inspect Insulation: Check the insulation around refrigerant lines for any signs of damage or wear. Replace or repair as needed to prevent energy loss.
Straighten Fins: Use a fin comb to straighten any bent fins on the exterior of the unit. This helps maintain proper airflow.
Trim Vegetation: Trim back any vegetation or shrubs around the AC unit to ensure proper airflow and prevent debris buildup.
Schedule Professional Maintenance: While regular cleaning can help maintain your AC unit, it's also essential to schedule professional maintenance at least once a year. A certified technician can thoroughly inspect and tune up to keep your unit running smoothly.
FAQs
Q1: How often should I clean my air conditioning unit?
A1: Air conditioning units should be cleaned at least once a year. However, you may need to clean them more frequently if you live in a dusty area or notice reduced airflow.
Q2: Can I clean my AC unit or hire a professional?
A2: While some maintenance tasks can be done by homeowners, such as cleaning filters and removing debris, it's recommended to have a professional technician perform a comprehensive cleaning and inspection annually. They have the expertise and tools to identify potential issues and ensure your AC unit operates efficiently.
By adhering to these guidelines and integrating consistent upkeep into your schedule, you can effectively maintain your air conditioning system, guaranteeing refreshing comfort throughout scorching months and enhancing indoor air quality for your household.
#ac system#air conditioner cleaning#cooling#hvac systems#air quality#air conditioning unit#indoor air quality#air conditioning#ac maintenance#hvac maintenance#hvac installation#hvac repair#efficiency#hvac system#home
0 notes
Text
How to Beat the Heat in Your Older Home
Living in an older home certainly has its charm, but dealing with the heat can be challenging when summer comes around. Older homes often lack modern insulation and energy-efficient features, making them more susceptible to heat buildup.

Install Ceiling Fans
Ceiling fans provide a cost-effective solution for improving air circulation and cooling your home during hot weather. They help distribute air evenly throughout the room, making it feel cooler without significantly increasing your energy bill. Consider installing ceiling fans in commonly used areas such as the living room, bedroom, and kitchen to maximize their cooling effect.
Use Window Treatments Wisely
Properly managing sunlight entering your home can make a significant difference in temperature. Explore the option of employing reflective window films or solar screens to mitigate the ingress of heat through your windows.
Seal and Insulate
One of the main reasons older homes struggle with heat retention is inadequate insulation and air leaks. Examine your residence for any openings around doors, windows, or other entry points, and utilize caulk or weather-stripping to seal them effectively.
Plant Shade Trees
Tactically situating trees near your residence can offer organic shade and assist in moderating indoor temperatures. Deciduous trees, renowned for shedding their leaves in autumn, prove highly efficient as they permit sunlight penetration during cooler seasons while furnishing shade during summer. Plant trees on your home's west and east sides to block out the harsh afternoon sun.
Upgrade to Energy-Efficient Appliances
Older appliances like refrigerators, washing machines, and air conditioners are often less energy-efficient than their modern counterparts. Consider upgrading to Energy Star-rated appliances to reduce energy consumption and lower heat output. Energy-efficient air conditioners, in particular, can significantly improve home cooling while keeping energy costs down.
Utilize Cross-Ventilation
Utilize natural ventilation by opening windows positioned on opposite sides of your residence, facilitating a cross breeze. This technique allows fresh air to flow through your living space, helping to lower indoor temperatures without relying solely on air conditioning. Use window or strategically placed box fans to enhance cross-ventilation throughout your home.
Optimize Your Thermostat Settings
Set your thermostat to a warmer temperature when you're not at home or sleeping to conserve energy. Use a programmable thermostat to automate temperature adjustments based on your schedule. Also, try using fans with your air conditioner to distribute cool air more effectively and raise the thermostat setting without sacrificing comfort.
Implementing these strategies can help you beat the heat and enjoy a cooler, more comfortable living environment in your older home.
FAQs:
1: Why is my older home so hot in the summer?
Answer: Older homes often lack modern insulation and energy-efficient features, making them more susceptible to heat buildup. Additionally, inadequate ventilation, inefficient appliances, and poor window insulation can contribute to higher indoor temperatures during the summer months.
0 notes
Text
Expert Tips for Sunroom Temperature Control
Sunrooms are delightful additions to any home, providing a space where you can enjoy the beauty of the outdoors without being subjected to the elements. However, maintaining an optimal temperature in your sunroom can be a challenge, especially as the seasons change. Whether you're dealing with scorching summers or chilly winters, implementing effective temperature control strategies is essential for maximizing your comfort and enjoyment. In this article, we'll explore expert tips for sunroom temperature control to help you create a cozy and inviting space year-round.

Choose the Right Insulation:
Insulation is key to regulating temperature in your sunroom. Consider installing high-quality insulation in the walls, ceiling, and floor to prevent heat loss during the winter and heat gain during the summer. Insulated windows with low-emissivity (low-E) glass can also help maintain a comfortable temperature by reducing heat transfer.
Install Window Treatments:
Window treatments such as blinds, shades, or curtains can significantly impact the temperature in your sunroom. During hot summer days, close blinds or shades to block out direct sunlight and reduce heat buildup. In the winter, open them during the day to let sunlight in and close them at night to retain warmth.
Use Fans and Ventilation:
Proper air circulation is crucial for temperature control in a sunroom. Install ceiling fans to distribute air evenly and promote cooling airflow during the summer months. Additionally, consider adding operable windows or vents to facilitate natural ventilation and allow hot air to escape when needed.
Invest in a HVAC System:
If you plan to use your sunroom year-round, investing in a heating, ventilation, and air conditioning (HVAC) system is worth considering. A ductless mini-split system offers efficient heating and cooling without the need for extensive ductwork, providing personalized temperature control for your sunroom.
Utilize Outdoor Shades or Awnings:
Outdoor shades or awnings can be installed to block direct sunlight and reduce heat gain in your sunroom. Retractable awnings are particularly convenient as they allow you to adjust shade levels according to the position of the sun, helping maintain a comfortable temperature indoors.
Incorporate Thermal Mass:
Thermal mass materials, such as concrete or tile floors, can help stabilize temperatures in your sunroom by absorbing excess heat during the day and releasing it slowly at night. Consider incorporating these materials into your sunroom design to enhance thermal comfort.
Control Humidity Levels:
Excessive humidity can make your sunroom feel uncomfortable, especially during the summer months. Use a dehumidifier to maintain optimal humidity levels and prevent mold or mildew growth. Conversely, in dry climates or during the winter, a humidifier can add moisture to the air and improve overall comfort.
FAQs:
1: Can I use my sunroom during the winter months?
Answer: Yes, with proper temperature control measures, you can use your sunroom during the winter months. Consider installing insulation, using window treatments to retain heat, incorporating thermal mass materials, and investing in a heating system such as a ductless mini-split HVAC system.
2: How can I prevent my sunroom from overheating in the summer?
Answer: To prevent your sunroom from overheating in the summer, you can employ several strategies. Install insulated windows with low-E glass, use window treatments to block out direct sunlight, incorporate outdoor shades or awnings, utilize ceiling fans for air circulation, and ensure proper ventilation to allow hot air to escape.
#sunroof#temperature#control#heating#cooling#sunroofhvac#ventilation#hvac systems#air quality#efficiency#indoor air quality
0 notes
Text
How Quality Installation Redefines Efficiency in HVAC Technology
Quality installation transcends the traditional boundaries of assembling components; it encompasses a comprehensive understanding of the system's design, the environmental context, and the specific requirements of the space it serves. Here, we explore the pivotal role of quality installation in reshaping the efficiency paradigm within HVAC technology. From optimizing energy consumption to ensuring superior performance and longevity of the system, the impact of precise installation reverberates through the entire lifecycle of HVAC systems.

Understanding the Importance of Quality Installation:
Quality installation goes beyond the basic connection of components. It involves a meticulous process that considers factors such as proper sizing, accurate placement of equipment, and adherence to industry standards. When installed with precision, HVAC systems operate at peak efficiency, leading to optimal energy utilization and extended lifespan.
Energy Efficiency and Environmental Impact:
The primary benefit of quality installation is enhanced energy efficiency. Properly installed HVAC systems consume less energy to achieve desired temperature levels, lowering utility bills. Additionally, reduced energy consumption contributes to a smaller carbon footprint, aligning with the growing emphasis on environmentally friendly practices.
Improved Indoor Air Quality:
Quality installation plays a crucial role in maintaining indoor air quality. Properly installed HVAC systems ensure effective ventilation and filtration, reducing the risk of airborne pollutants and allergens. In turn, it promotes a healthier living or working environment and minimizes the likelihood of respiratory issues among occupants.
Precision Sizing and Equipment Placement:
An often overlooked aspect of quality installation is the accurate sizing of HVAC systems based on the space's specific needs. Oversized or undersized equipment can lead to inefficiencies, increased wear and tear, and higher energy bills. Quality installation involves a detailed assessment to determine the appropriate size and optimal placement of HVAC components.
Long-Term Cost Savings:
While quality installation may involve a higher initial investment, it pays off in the long run through reduced operating costs and lower maintenance expenses. HVAC systems installed with precision are less prone to breakdowns and require fewer repairs, resulting in substantial cost savings over their lifespan.
FAQs:
FAQ 1: Why is quality installation essential for HVAC systems?
Answer: Quality installation ensures that HVAC systems operate at peak efficiency, reducing energy consumption, lower utility bills, and an extended lifespan. Proper installation also contributes to improved indoor air quality and minimizes the risk of equipment malfunctions.
FAQ 2: How can I determine if my HVAC system has been properly installed?
Answer: A few indicators of a quality installation include accurate sizing of equipment, proper placement of components, adherence to industry standards, and using reputable installation professionals. Additionally, regularly monitoring energy consumption and indoor air quality can provide insights into the effectiveness of the installation.
Conclusion:
In the dynamic landscape of HVAC technology, quality installation emerges as a cornerstone for achieving optimal efficiency, cost savings, and environmental sustainability. Investing in a meticulous installation process enhances the performance of HVAC systems and contributes to a more comfortable and healthier indoor environment. As the industry continues to evolve, recognizing the pivotal role of quality installation is paramount for unlocking the full potential of HVAC technology.
#hvac solution#heating#cooling#hvac installation#hvacquality#hvac systems#indoor air quality#hvac contractors
0 notes
Text
How a Broken Compressor Can Impact Your Cooling Comfort
A well-functioning air conditioning system is essential for maintaining a comfortable indoor environment, especially during hot summer months. The compressor plays a crucial role in the cooling process, and when it malfunctions, it can significantly impact your overall comfort. In this article, we will delve into the various ways a broken compressor can affect your cooling comfort and explore potential solutions.

The Role of the Compressor:
The compressor is the heart of your air conditioning unit, responsible for pressurizing and circulating refrigerant to absorb and release heat. When the compressor is in optimal condition, it ensures efficient cooling throughout your space. However, if it breaks down, the entire cooling process is compromised.
Reduced Cooling Capacity:
One of the most noticeable effects of a malfunctioning compressor is a decrease in cooling capacity. Your AC unit may struggle to reach the desired temperature, resulting in an uncomfortable indoor environment. This reduction in cooling efficiency often leads to increased energy consumption as the system works harder to compensate.
Uneven Temperature Distribution:
A broken compressor can also cause uneven temperature distribution within your home. Certain areas may be cooler than others, creating discomfort and frustration. This inconsistency can be attributed to the compressor's inability to maintain a consistent flow of refrigerant, hindering the even distribution of cool air.
Increased Energy Bills:
As the compressor works harder to compensate for its malfunction, your energy bills are likely to spike. The system's inefficiency can lead to increased energy consumption, causing a financial strain. Addressing compressor issues promptly can help prevent unnecessary energy expenses and keep your cooling costs in check.
Strain on Other Components:
A malfunctioning compressor can place added stress on other components of your air conditioning system. Over time, this strain may lead to further breakdowns, potentially resulting in costly repairs or even the need for a complete system replacement. Regular maintenance and timely repairs are crucial to preventing such cascading issues.
Unusual Noises:
A broken compressor often produces unusual noises, such as banging, clanking, or hissing sounds. These noises can be indicative of internal damage or refrigerant leaks. If you notice any unusual sounds coming from your AC unit, it's essential to seek professional assistance promptly to diagnose and address the issue.
Environmental Impact:
Beyond affecting your comfort, a malfunctioning compressor can have environmental consequences. Refrigerant leaks, a common issue associated with compressor failure, contribute to greenhouse gas emissions, harming the environment. Regular maintenance and prompt repairs are crucial for minimizing the environmental impact of your air conditioning system.
FAQs:
1: What are the signs of a failing compressor?
Answer: Signs of a failing compressor include reduced cooling capacity, uneven temperature distribution, unusual noises, and increased energy bills. If you experience any of these issues, it's advisable to consult with a professional HVAC technician for a thorough diagnosis.
2: Can a broken compressor be repaired, or is replacement necessary?
Answer: In some cases, a broken compressor can be repaired, especially if the issue is identified early. However, if the damage is extensive, a replacement may be more cost-effective. It's crucial to consult with a qualified HVAC technician to determine the most suitable course of action based on the specific circumstances.
By addressing compressor issues promptly and scheduling regular maintenance, you can ensure your air conditioning system operates efficiently, providing optimal cooling comfort while minimizing energy consumption and environmental impact.
0 notes
Text
Smart Solutions for Energy Efficiency and Indoor Air Quality in Your Home
In the current global landscape, where environmental issues and health awareness are prominent, it has become increasingly important to prioritize energy efficiency and indoor air quality in your home. The advancements in technology now offer a range of smart devices and methods that can assist in developing a more sustainable and healthier living environment. Here are some ideas to get you started:

1. Smart Thermostats:
Upgrade your energy efficiency game with a game-changing investment in a smart thermostat. These devices allow you to control and program your home's temperature remotely, optimizing energy usage according to your schedule. Smart thermostats even have sensors to detect when you're away, automatically adjusting the temperature to save energy.
2. Energy Monitoring Systems:
Knowing how much energy your home consumes is the first step towards reducing unnecessary usage. Energy monitoring units provide real-time data on your electricity consumption, enabling you to identify energy-hungry appliances and make informed decisions to save both energy and money.
3. Smart Lighting:
Replace traditional incandescent bulbs with smart LED lights. These lights consume less energy and often come with features like dimming capabilities, scheduling, and color options. Moreover, smart lighting systems can be controlled remotely using smartphones or voice commands, allowing you to customize the lighting levels according to your needs and preferences.
4. Home Energy Management Systems:
Integrating a home energy management system ensures that all your smart devices work together seamlessly. These systems centralize the control of various energy-consuming devices, allowing you to monitor and optimize energy usage across your entire home.
5. Indoor Air Quality Monitors:
Indoor air pollution can have an adverse impact on your health. Investing in smart indoor air quality monitors helps you keep track of pollutants such as volatile organic compounds (VOCs), carbon dioxide, and dust particles. These monitors can alert you when air quality deteriorates, prompting you to take necessary measures, like adjusting ventilation or using air purifiers, to improve the air you breathe.
6. Smart Ventilation:
Optimizing your home's ventilation system is crucial for maintaining good indoor air quality. Smart ventilation systems use sensors to detect occupancy and indoor air quality, automatically adjusting airflow rates to ensure efficient ventilation while preventing unnecessary energy losses.
7. Energy-Efficient Appliances:
When it's time to upgrade your home appliances, choose energy-efficient models. Look for appliances with energy-saving certifications like ENERGY STAR, as they consume less power and are designed to be more environmentally friendly.
Implementing these smart solutions can make a noticeable difference in your energy consumption, indoor air quality, and overall well-being. Not only will you contribute to a more sustainable future, but you'll also enjoy the benefits of lower energy bills and a healthier living environment for yourself and your loved ones. So, take the first step towards a smarter and greener home today!
#air quality#hvac systems#efficiency#energy saving#indoor air quality#home#Smart Solutions#home energy#air filter#hvac system#custom home#home office
1 note
·
View note
Text
Fireplace vs. Central Heat – Making the Right Choice for Your Space
When it comes to keeping your home warm and cozy, the decision between a traditional fireplace and central heating can be a pivotal one. Each option comes with its own set of advantages and considerations, making it crucial to evaluate your specific needs and preferences. In this article, we will explore the pros and cons of fireplaces and central heating systems, helping you make an informed decision that suits your space and lifestyle.

Efficiency and Heat Distribution:
Fireplaces: While fireplaces offer charming and atmospheric heat, they may not be the most efficient option when it comes to heating large spaces. The warmth they provide tends to be localized, making them more suitable for smaller rooms or as supplementary heating.
Central Heating: Central heating systems, on the other hand, are designed to distribute warmth throughout the entire house evenly. This makes them highly efficient for maintaining a consistent temperature in larger spaces and multiple rooms.
Installation and Cost:
Fireplaces: Installing a fireplace can be a significant investment, involving the construction of a chimney or vent system. The type of fireplace (wood-burning, gas, electric) also affects installation costs. Wood-burning fireplaces require more maintenance and may incur additional expenses for chimney cleaning.
Central Heating: While the initial installation cost of a central heating system can be higher, modern systems are generally more energy-efficient, potentially saving money on heating bills in the long run. The cost may vary depending on the type of central heating (forced air, radiant, geothermal).
Aesthetics and Ambiance:
Fireplaces: Beyond their heating capabilities, fireplaces add a touch of elegance and ambiance to a room. The crackling sound of a wood-burning fireplace and the dancing flames create a cozy and nostalgic atmosphere.
Central Heating: While central heating systems lack the visual and auditory appeal of a fireplace, they provide a consistent and convenient source of warmth without the need for tending to a fire.
Environmental Impact:
Fireplaces: Traditional wood-burning fireplaces can contribute to air pollution, and the sourcing of firewood may have environmental implications. Gas and electric fireplaces are considered cleaner options but still have associated energy consumption.
Central Heating: The environmental impact of central heating systems depends on the energy source. More eco-friendly options, such as geothermal or solar-powered systems, are available to reduce the carbon footprint.
Maintenance and Safety:
Fireplaces: Regular maintenance, such as chimney cleaning and inspections, is essential for safety. Wood-burning fireplaces may produce creosote buildup, which can pose a fire hazard.
Central Heating: Routine maintenance is required for central heating systems, including filter replacements and occasional professional check-ups. While safety concerns are generally lower compared to fireplaces, it's crucial to address any issues promptly.
Conclusion:
Choosing between a fireplace and central heating involves weighing factors such as efficiency, cost, aesthetics, environmental impact, and maintenance. Consider your heating needs, the size of your space, and your lifestyle preferences when making this decision. Whether you opt for the rustic charm of a fireplace or the convenience of central heating, making an informed choice will ensure a warm and comfortable home during the colder months.
0 notes
Text
How Various Heating Systems Keep Your Home Cozy
As the chill of winter sets in, the quest for a warm and cozy home becomes a top priority. Choosing the right heating system is crucial for creating a comfortable living space. In this guide, we'll explore various heating systems that can keep your home snug and warm throughout the colder months.
Forced Air Heating Systems:
For many homes, forced air heating systems are a popular choice. They work by heating air in a furnace and then distributing it through ducts using a blower. This system is known for its efficiency and quick warming capabilities. Regular maintenance, like swapping out those air filters, to keep things running smoothly and in tip-top shape!
Radiant Heating Systems:
Radiant heating systems operate by warming the objects and surfaces in a room rather than the air. It can be achieved through underfloor heating, wall-mounted panels, or even ceiling-mounted systems. Radiant heating provides consistent warmth and is often preferred for its energy efficiency.
Baseboard Heating:
Baseboard heating utilizes electric or hydronic systems installed along the baseboards of a room. Electric baseboard heaters can be easily installed and controlled individually, while hydronic baseboard heaters use hot water or steam for heat. They are known for their silent operation and zone heating capabilities.
Heat Pumps:
Heat pumps are systems that have the capability to both heat and cool a home. They operate by transferring heat between the indoor and outdoor units. While they are highly efficient, their effectiveness can be influenced by external temperatures. Some heat pumps come with backup heating elements for extremely cold days.
Fireplace Options:
Traditional fireplaces, as well as modern alternatives like gas or electric fireplaces, add both warmth and ambience to a home. Gas and electric options are cleaner and more convenient, while traditional wood-burning fireplaces provide a classic charm.
Smart Thermostats:
Regardless of the heating system you choose, integrating a smart thermostat can enhance energy efficiency. These devices allow you to control and schedule your heating system remotely, optimizing comfort while minimizing energy consumption.
Ductless Mini-Split Systems:
For homes without ductwork, ductless mini-split systems offer a versatile solution. Ductless Mini-Split Systems include an outdoor compressor unit and one or more indoor air-handling units. They provide both heating and cooling, making them a year-round comfort solution. Additionally, ductless mini-split systems allow for precise control over the temperature in individual rooms, maximizing energy efficiency.
Geothermal Heating:
Harnessing the Earth's natural heat, geothermal heating systems are an eco-friendly option for homeowners. These systems use the stable temperature of the ground to heat and cool a home. While installation costs may be higher, the long-term energy savings and minimal environmental impact make geothermal heating an attractive choice for those seeking sustainable solutions.
Conclusion:
In the quest for a cozy home during the winter months, selecting the right heating system is key. Whether you opt for the efficiency of forced air systems, the even warmth of radiant heating, or the classic charm of a fireplace, each system has its advantages. Consider your home's specific needs, energy efficiency goals, and personal preferences when making your decision. With the right heating system in place, you can transform your home into a warm and inviting haven during the coldest times of the year.
0 notes
Text
How to Choose the Right Trane Heat Pump for Your Home

Efficiently heating and cooling your home can be achieved by considering a heat pump, making it an excellent choice for your comfort. Trane, a reputable HVAC manufacturer, provides a variety of heat pumps meticulously crafted to enhance both comfort and energy efficiency. However, selecting the ideal Trane heat pump for your home may leave you wondering about the best approach. This article serves as your comprehensive guide, leading you through the decision-making process and empowering you to make an informed choice to fulfill your home's heating requirements.
Introduction to Trane Heat Pumps
Trane is a trusted name in the HVAC industry, known for its quality and reliability. Their heat pumps are no exception. These devices are designed to provide both heating and cooling, making them versatile options for homeowners. However, not all heat pumps are created equal, and choosing the right one is essential for optimal performance.
The Importance of Choosing the Right Heat Pump
Selecting the right heat pump goes beyond just picking a model; it's about ensuring your home stays comfortable throughout the year. A well-chosen heat pump can save you money on energy bills, reduce your carbon footprint, and offer consistent heating and cooling.
Assessing Your Home's Heating Needs
Before diving into the specifics of Trane heat pumps, it's essential to assess your home's heating needs. Factors such as climate, insulation, and the size of your living space play a significant role in determining the right heat pump for you.
Energy Efficiency and Savings
Trane heat pumps are designed with energy efficiency in mind. We'll explore how selecting an efficient model can lead to substantial long-term savings on your energy bills.
Types of Trane Heat Pumps
Trane offers two main types of heat pumps: air-source and ground-source (geothermal) heat pumps. We'll delve into the differences between these options, helping you decide which one suits your home best.
Air-Source Heat Pumps
Air-source heat pumps extract heat from the outdoor air and distribute it inside your home. They are a popular choice due to their affordability and ease of installation.
Ground-Source (Geothermal) Heat Pumps
Geothermal heat pumps harness heat from the ground, providing high energy efficiency and consistent heating and cooling. We'll discuss their benefits and considerations.
Sizing Your Heat Pump
Proper sizing is crucial for a heat pump to perform optimally. We'll explain why selecting the right size matters and provide guidance on how to calculate the appropriate heat pump size for your home.
Budget Considerations
Budget plays a significant role in your decision. We'll explore the initial costs of purchasing and installing a Trane heat pump versus the long-term savings on energy bills.
Click Here to get pricing details for the 2 Ton 18 SEER2, including installation costs!
Trane's Reputation and Reliability
Trane has earned a reputation for reliability and quality. We'll discuss why trusting a reputable brand like Trane can give you peace of mind.
Warranty and Maintenance
Understanding warranty options and the importance of regular maintenance is essential. We'll cover Trane's warranty offerings and provide tips on keeping your heat pump in top shape.
Installation by Professionals
Proper installation is key to a heat pump's performance. We'll emphasize the importance of hiring qualified professionals for the installation process.
User-Friendly Features
Trane offers various user-friendly features that enhance the overall experience. We'll highlight some of these features to help you make an informed choice.
Environmental Considerations
If environmental impact is a concern, we'll discuss how Trane heat pumps can align with your eco-friendly goals.
Frequently Asked Questions (FAQs)
Q: Are Trane heat pumps energy-efficient?
Trane heat pumps are designed with energy efficiency in mind. However, the level of efficiency varies among models. It's essential to choose a model with a high SEER (Seasonal Energy Efficiency Ratio) rating for maximum efficiency.
Q: What is the lifespan of a Trane heat pump?
With proper maintenance, a Trane heat pump can last between 15 and 20 years. Regular servicing by qualified technicians can extend its lifespan.
Q: Can I install a Trane heat pump myself?
It is strongly recommended to have a professional HVAC technician install your Trane heat pump. Proper installation ensures safety, efficiency, and warranty coverage.
Q: How do I know if an air-source or geothermal heat pump is right for my home?
The choice between air-source and geothermal heat pumps depends on factors like climate, available space, and budget. An HVAC professional can help you make the best decision for your specific needs.
Q: Are there any government incentives for installing a Trane heat pump?
In some regions, there are tax credits and incentives for installing energy-efficient HVAC systems, including Trane heat pumps. Check with your local government or utility company for available incentives.
Conclusion
Choosing the right Trane heat pump for your home is a significant decision that requires careful consideration of your specific needs and budget. By assessing your requirements, understanding the different types of heat pumps, and prioritizing factors like efficiency and professional installation, you can make a choice that ensures year-round comfort and energy savings for your household.
1 note
·
View note
Text
Mastering the Art of HVAC Unit Pricing: Your Guide to Getting the Best Deal
When purchasing a new HVAC (Heating, Ventilation, and Air Conditioning) unit, ensuring you get the best price is essential. After all, an HVAC system is a significant investment in your home's comfort and energy efficiency. In this article, I'll explore strategies and tips to help you confidently secure the best price on your HVAC unit while making an informed choice.
Expert Tips for HVAC Price Confidence
Get the best bang for your buck when it comes to HVAC services! Remember to settle for just one quote; get multiple from trusted providers. Make sure to ask about warranties and get all the costs upfront. And hey, remember to check out those customer reviews and ask for referrals for that extra peace of mind.
Do Your Homework
Before you even start shopping for an HVAC unit, it's crucial to do your research. Begin by understanding the specific HVAC needs of your home. Consider factors like the size of your living space, climate, and budget. It will give you a clear idea of the type and capacity of the HVAC system you require.
Get Multiple Quotes
To find the best price, getting quotes from multiple HVAC contractors is essential. Reach out to reputable companies in your area and request detailed estimates. Be sure to ask for a breakdown of costs, including equipment, labor, and any additional materials or services.
Compare Energy Efficiency
Efficiency matters when it comes to HVAC systems. Search for units with high Energy Efficiency Ratio and Seasonal Energy Efficiency Ratio ratings. A more energy-efficient system may have a higher upfront cost but can lead to significant long-term savings on your energy bills.
Consider Lifecycle Costs
While the initial price is crucial, remember to factor in the system's lifecycle costs. Consider maintenance, repair, and energy expenses over the system's expected lifespan. A slightly more expensive, high-quality unit may save you money in the long run.
Explore Rebates and Incentives
Get rewarded for going green! Governments and utility companies are known to dish out rebates and incentives for installing energy-efficient HVAC systems. Take advantage of the chance to save money and the planet. You should inquire with local authorities and utility providers to determine if you are eligible for any financial assistance programs.
Negotiate and Ask Questions
Feel free to negotiate with HVAC contractors. Ask questions about their quotes and any potential discounts or promotions. A willingness to negotiate often leads to a better deal.
Read Reviews and Ask for References
Research the reputation of the HVAC contractor you plan to hire. Consider reading online reviews and seeking references from previous customers. A trustworthy contractor is more likely to offer competitive prices and reliable service.
Timing Matters
Consider the timing of your HVAC purchase. Prices may vary depending on the demand, with potential discounts during the off-season. Plan ahead and avoid making rushed decisions during extreme weather conditions when HVAC systems are in high demand.
Conclusion
Want the best price on your HVAC unit? Plan and research carefully! Understand your needs, get multiple quotes, consider energy efficiency, and check out incentives. Don't just go for the lowest upfront cost; go for the most value over time! Invest in your home's comfort and energy savings. With these tips, you'll confidently pick the perfect HVAC unit!
1 note
·
View note
Text
Discover the Top Reasons Why Your AC Capacitor Keeps Failing
Do you find yourself constantly replacing the capacitor in your air conditioning unit? If so, you're not alone. Many homeowners experience the frustration of a failing AC capacitor, which leads to decreased cooling performance and adds up costs for repairs and replacements. In order to address this recurring issue, it's crucial to understand the common reasons why an AC capacitor fails and take preventive measures to ensure its longevity.

Image Source: https://www.bobvila.com/
Overloading
Overloading is the culprit! When a capacitor takes on more electrical load than it can handle, trouble brews. The excess stress leads to overheating and, ultimately, failure. Don't sweat it! Prevent overloading by making sure your AC unit is the perfect fit for your space. An oversized unit is a no-no, as it constantly cycles on and off, burdening the poor capacitor.
Voltage Issues
Don't zap your AC! Fluctuations in electrical voltage can shock your capacitor, leading to a shortened lifespan. Let a qualified AC expert zap-proof your electrical system and keep your AC running smoothly.
Age and Wear
Like any other component, capacitors have a limited lifespan. Over time, the internal components can wear out, leading to failure. The average lifespan of a capacitor is usually around 10 to 20 years. Regular maintenance and inspections can help identify when a capacitor is nearing the end of its lifespan, allowing for proactive replacement before failure occurs.
Dirt and Debris
The capacitor inside your AC unit is exposed to the elements, making it susceptible to dirt and debris. When these contaminants accumulate on the capacitor, they can interfere with its proper functioning and cause failure. Regularly cleaning and maintaining your AC unit, including the capacitor, can help prevent this issue.
Poor Installation
Improper installation of the capacitor can also lead to failure. If the connections are loose or not secure, it can result in electrical arcing, overheating, and, ultimately, capacitor failure. Hiring a professional HVAC technician to install or replace the capacitor is crucial to ensure it is done correctly.
Poor Quality Capacitors
The capacitor's quality plays a vital role in its durability and performance. Cheap or low-quality capacitors may have manufacturing defects or lower tolerances, making them more susceptible to failure. Always opt for high-quality capacitors from reputable manufacturers, even if they are slightly more expensive, as they will likely last longer and provide better reliability.
How to Prevent Frequent Capacitor Failures
Want to avoid capacitor failures? Follow these smart strategies! First, choose the right-sized capacitors that can handle the electrical load. Consider voltage, current, and temperature ratings. Second, stay on top of maintenance and inspections to catch wear and tear early. Keep the environment spotless, free from dust, moisture, and icky contaminants that can ruin performance.
And remember, surge protection devices! They'll shield your capacitors from nasty voltage spikes and surges that can cause serious damage. Lastly, invest in top-notch capacitors from trusted manufacturers. They'll be your superhero against failures. By taking these preventive measures, you'll say goodbye to capacitor mishaps and enjoy smooth-as-silk electrical systems. Bam!
Conclusion
Discover the secret to a chill and carefree summer! Uncover the hidden truths behind your AC capacitor failure and unlock the keys to a smoothly running cooling system. Say goodbye to costly repairs and replacements and say hello to a consistently cool and comfortable indoor oasis. It's time to take control of your cooling destiny with regular maintenance, proper sizing, voltage regulation, and professional installation. Don't settle for less than the ultimate in cooling perfection.
0 notes

Text
Preventing Tankless Water Heater Leaks: Expert Tips to Ensure Smooth Operation and Longevity
Tankless water heaters are super popular right now. They're amazing because they save energy, save space, and give you endless hot water. But guess what? They're not perfect. Leaks can be a major pain. And trust me, a leaky tankless water heater can cause severe damage. We're talking water damage, sky-high energy bills, and wallet-draining repairs. But fear not! I'm an HVAC expert, and I've got some mind-blowing tips to help you stop or prevent those pesky leaks. Say goodbye to leaks and say hello to a flawless water heater system that'll last you for years!

Regular Maintenance
Regular maintenance is crucial for the optimal performance of any appliance, including tankless water heaters. At least once a year, schedule a professional inspection and maintenance service. During this check-up, an experienced technician will thoroughly examine all water heater components, identify potential issues, and make necessary adjustments or repairs. Catching minor leaks can prevent them from developing into major problems later.
Monitor Water Pressure
High water pressure is a significant cause of tankless water heater leaks. The water pressure entering your home should be within the recommended range, typically between 40 to 80 psi (pounds per square inch). Excess pressure can put undue stress on the water heater's components, leading to leaks over time. Consider installing a pressure-reducing valve (PRV) if your water pressure exceeds the recommended range.
Check for Corrosion
Tankless and traditional water heaters can be attacked by the dreaded enemy – corrosion. So, keep an eye on your water heater, checking it often for any sneaky signs of corrosion. Pay close attention to those pipes, fittings, and connections – they're prime targets! If you spot rust or deterioration, don't waste a second; take action immediately! Oh, and here's a pro tip: flush your system regularly to ward off sediment buildup and keep corrosion at bay. It's like a knight in shining armor protecting your precious water heater!
Proper Ventilation
Improper ventilation can cause condensation to form inside the tankless water heater. Over time, this can lead to leaks and internal damage. Ensure that your water heater is adequately ventilated and exhaust gases are safely expelled outside your home. An HVAC professional can help assess your ventilation system to ensure it meets safety standards.
Quality Installation
Proper installation is the foundation of a leak-free tankless water heater. If you're investing in a new system, choose a reputable HVAC contactor or professional installer with experience in tankless water heater installations. An experienced technician will ensure a proper setup, use quality materials, and ensure all connections are secure.
Use Water Softeners and Filters
Keep your tankless water heater from going down the drain! Hard water can wreak havoc on your precious appliance, causing leaks and costly repairs. But fear not! By installing a water softener or filter, you can wave goodbye to those pesky minerals and extend the lifespan of your water heater. Say hello to worry-free showers and a wallet that's a little bit happier!
Respond Promptly to Warning Signs
If you notice any warning signs of a potential leak, such as water pooling around the unit, unusual noises, or fluctuations in water temperature, don't ignore them. Act promptly and contact a professional to inspect and diagnose the issue. Swift action can prevent further damage and save you from expensive repairs or replacements.
Conclusion
Tankless water heaters are efficient and reliable when properly maintained and cared for. By following these expert tips on how to stop or avoid tankless water heater leaks, you can ensure the longevity of your system and enjoy an uninterrupted hot water supply. Regular maintenance, monitoring water pressure, preventing corrosion, proper ventilation, quality installation, water softeners, and addressing warning signs are all essential steps in safeguarding your tankless water heater investment for years to come.
#preventing#water heater tankless#leaks#expert tips#regular maintenance#Monitor Water Pressure#Check for Corrosion#quality installation#Use Water Softeners
1 note
·
View note
Text
Keep Your Air Handler in Prime Condition: Simple Maintenance Guide for Optimal Performance
As an HVAC guru, I understand the importance of keeping your air handler in tip-top shape for maximum performance and energy-saving awesomeness. Think of the air handler as the superhero of your HVAC system, tirelessly circulating perfectly conditioned air throughout your humble abode or magnificent edifice.
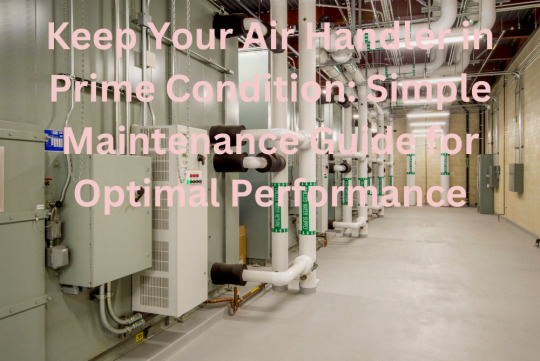
Neglecting its maintenance can lead to reduced efficiency, higher energy bills, and even system breakdowns. However, with a simple maintenance routine, you can keep your air handler in prime condition. Let's dive into the essential steps you need to follow.
Learn how to keep your air handler in prime condition with my simple maintenance guide.
Learn how to keep your air handler in prime condition with my simple maintenance guide. Optimize its performance, improve energy efficiency, and prevent breakdowns with these easy steps. Ensure a comfortable indoor environment with proper air handler care.
Regular Filter Replacement
One of your air handler's most vital maintenance tasks is regularly replacing the air filters. Clogged filters restrict airflow, reducing the system's efficiency and putting strain on the blower motor. Aim to replace disposable filters every one to three months or clean washable filters as the manufacturer recommends. This simple step will improve indoor air quality and ensure proper airflow.
Clear the Surrounding Area
The area around your air handler should be kept clean and free from obstructions. Remove any objects, debris, or clutter that may impede airflow to the unit. Adequate airflow is crucial for the efficient operation of your air handler, and obstructions can lead to overheating or reduced performance.
Inspect and Clean Coils
Dirty coils can really put a damper on your air handler's efficiency. But fear not! You have the power to take action and keep those coils clean! Make it a habit to regularly inspect and clean your coils for maximum heat exchange. Grab a soft brush or vacuum cleaner and gently rid them of any debris. And if things get a little out of hand, don't hesitate to bring in the pros for a deep cleaning that will restore peak performance. Your air handler will shower you with gratitude!
Check and Lubricate Moving Parts
Give your air handler some love by thoroughly inspecting its moving parts. Look out for any signs of wear and tear on the blower motor and fan, and make sure to give them a good lubrication session following the manufacturer's guidelines. Keeping these parts well-lubricated will reduce friction and ensure your air handler stays super efficient and lasts for years.
Verify Condensate Drainage
Air handlers often generate condensation as they cool or dehumidify the air. Ensure that the condensate drainage system is clear and functioning correctly. A clogged drain can lead to water leaks and potential water damage. Regularly check the condensate drain and clear any blockages to prevent issues.
Schedule Professional Maintenance
Don't wait for your HVAC system to give up on you! Give it the VIP treatment it deserves with professional maintenance. Only skilled technicians will work their magic, performing thorough inspections, catching sneaky issues, and fine-tuning your system to perfection. Say goodbye to breakdowns and hello to worry-free comfort all year round.
Monitor Performance and Energy Consumption
Keep an eye on your air handler's performance and energy consumption. Unusual noises, reduced airflow, or sudden spikes in energy bills can be signs of problems. Address any concerns promptly by consulting an HVAC professional to prevent further damage or inefficiency.
Following these simple maintenance steps ensures that your air handler operates at its best, providing optimal comfort and energy efficiency throughout your space. A well-maintained air handler improves your HVAC system's performance and extends its lifespan, saving you money in the long run. Remember, when it comes to HVAC maintenance, prevention is key.
Contact a qualified HVAC professional if you have any doubts or encounter complex issues. They have the knowledge and experience to keep your air handler and entire HVAC system in prime condition, delivering reliable comfort year-round.
#air handler#maintenance#guide#optimal#performance#HVAC Tips#maximum performance#energy-saving#filter replacement#clean coils#lubricate#Condensate Drainage#professional maintenance#HVAC system#HVACDuct
0 notes
Text
Proactive Strategies for Compressor Maintenance: Save Time and Money in the Long Run
The powerful compressor, the powerhouse of industries, fuels the lifeblood of pneumatic tools, refrigeration systems, and air conditioning units. But fear not, for with the sacred knowledge of proactive maintenance, you can unlock the secrets to its unstoppable performance and eternal youth. Embrace these strategies, and watch as time and money bend to your will, shielding you from breakdowns and the agony of downtime.
Here are some proactive maintenance tips to keep your compressor running smoothly.

1. Regular Inspection and Cleaning
To start with compressor maintenance, regular inspection and cleaning are essential. Inspect the compressor unit for wear and tear, leaks, or abnormal noises. Clean the compressor components, including the air intake filters, cooling fans, and oil filters, to remove any dust or debris hindering its performance.
2. Check and Change Oil Regularly
The oil in a compressor lubricates its moving parts and helps maintain proper operation. Regularly check the oil level and quality, and change it as the manufacturer recommends. Over time, oil can become contaminated with dirt, water, or other impurities, affecting the efficiency and lifespan of the compressor.
3. Monitor and Control Pressure Levels
Maintaining optimal pressure levels is crucial for the efficient operation of a compressor. Use pressure gauges to monitor and control the pressure, ensuring it stays within the recommended range. Excessive pressure can lead to overworking the compressor, causing premature wear and potential breakdowns.
4. Conduct Routine Maintenance Tasks
In addition to regular inspections and cleaning, certain routine maintenance tasks should be performed. These include checking and tightening any loose connections, inspecting and replacing worn-out belts and hoses, and cleaning or replacing the air filters. These simple tasks can prevent minor issues from escalating into costly problems.
5. Implement a Preventive Maintenance Schedule
Keep your compressor in tip-top shape by implementing a proactive maintenance schedule. This means staying on top of routine tasks like oil changes, filter replacements, and inspections while tackling more complex maintenance tasks that may require the help of a pro. By sticking to a schedule, you'll nip potential issues before they wreak havoc on your operations.
6. Train and Educate Personnel
Proper maintenance of a compressor not only relies on the equipment but also on the knowledge and skills of the Personnel responsible. Provide training and education to the relevant staff members, ensuring they understand the importance of maintenance procedures and can carry them out effectively. This will help create a culture of proactive maintenance within your organization.
7. Partner with an Experienced Service Provider
For more complex maintenance tasks or unexpected equipment issues, it is beneficial to partner with an experienced compressor service provider. They can offer professional expertise, conduct thorough inspections, and provide timely repairs or replacements when needed. Building a relationship with a trusted service provider can save you time and money in emergencies.
Proactive maintenance is the key to ensuring the reliability and longevity of your compressor. By following these strategies, including regular inspections, cleaning, oil changes, and implementing preventive maintenance schedules, you can save time and money in the long run. Remember to educate your staff on proper maintenance procedures and consider partnering with a reputable service provider for expert assistance. Taking proactive measures will not only prevent costly breakdowns but also optimize the performance of your compressor and extend its lifespan.
#compressor#maintenance#proactive#strategies#regular inspection#cleaning#monitor and control#maintenance schedule
0 notes
Text
How Home Cooling Systems Can Contribute to Allergies and Respiratory Issues
Home cooling systems, such as air conditioners and HVAC, can contribute to allergies and respiratory issues in several ways. Here are some potential factors:

1. Indoor air quality
Cooling systems circulate air throughout your home, and if the air filters are not regularly cleaned or replaced, they can accumulate dust, pollen, pet dander, mold spores, and other allergens. When the system is turned on, these particles can be released into the air, leading to sensitive individuals' allergy symptoms and respiratory issues.
2. Mold and mildew growth
In humid climates or if there is excessive moisture in the air, cooling systems can create an environment favorable to mold and mildew growth. Mold spores released from the system can trigger allergic reactions and respiratory problems, especially in individuals with mold sensitivity.
3. Inadequate ventilation
Poorly designed or maintained cooling systems may not provide adequate ventilation, leading to a buildup of indoor air pollutants. It can include volatile organic compounds (VOCs) from cleaning products, paints, and other household chemicals. Exposure to these pollutants can irritate the respiratory system and worsen allergies.
4. Dry air
Some cooling systems, particularly air conditioners, can remove moisture from the air, resulting in dry indoor conditions. Dry air can irritate the respiratory expanse and exacerbate symptoms such as coughing, sore throat, and nasal congestion. Additionally, dry mucous membranes can become more vulnerable to airborne allergens and respiratory infections.
5. Spread of outdoor allergens
If windows or doors are left open while the cooling system is operating, outdoor allergens such as pollen can enter the home and be distributed by the system. It can be problematic for individuals with allergies or respiratory conditions, as they can experience symptoms indoors.
To minimize the impact of cooling systems on allergies and respiratory issues, consider the following measures:
1. Regular maintenance
Ensure that your cooling system is well-maintained, including regularly cleaning or replacing air filters and scheduling professional inspections to prevent mold growth and ensure proper ventilation.
2. Air purification
Consider using air purifiers with HEPA filters in combination with your cooling system to capture and remove airborne allergens and pollutants.
3. Humidification
If your cooling system removes too much moisture from the air, use a humidifier to maintain an optimal indoor humidity level (around 40-50%) to prevent dryness and respiratory irritation.
4. Keep windows and doors closed
To minimize the entry of outdoor allergens, avoid keeping windows and doors open while the cooling system is running, especially during high pollen seasons.
5. Regular cleaning
Regularly clean your home to reduce the accumulation of dust, pet dander, and allergens that the cooling system can circulate.
Remember that if you or someone in your household experiences persistent or severe allergy or respiratory symptoms, it's advisable to consult with a healthcare professional for personalized advice and treatment options.
#home#cooling#cooling systems#allergies#respiratory#indoor air quality#mold and mildew#ventilation#dry air#regular maintenance#air purification#humidification#regular cleaning
0 notes
Text
How I Managed to Reduce Energy Bills during the Summer
Summer is known for high temperatures and increased energy bills. However, it is possible to lower those costs with some effort.
Here's how I managed to reduce my energy bills during the summer:

1. Adjust the Thermostat
One of the simple ways to reduce energy bills is to adjust the thermostat. The higher the temperature, the less energy is used to cool your home. I keep the thermostat around 78 degrees during the day when I'm away and lower it to around 74 degrees at home. This small adjustment can help save a significant amount of money.
2. Use Fans Whenever Possible
Fans are a practical option to promote air circulation and provide relief from the heat during summer. Both ceiling and portable fans can aid in circulating air throughout a home, resulting in a cooler feel.
3. Keep Doors and Curtains Closed
Closing doors and curtains can be a helpful way to maintain cool indoor temperatures and prevent warm outdoor air from entering, particularly during peak daytime hours when temperature levels are highest.
4. Unplug Electronics When Not in Use
Electronic devices use energy even when they are not in use. The accumulation of this can result in increased energy costs over time. I unplug all electronics when I'm not using them to save money.
5. Take Advantage of Natural Light
During the summer, the sun is often out for longer periods of time. This means there is more natural light available. I use this by keeping the lights off during the day and opening blinds and curtains to let in the natural light.
6. Plant Trees and Shrubs
Strategically planting trees and shrubs near your home can limit direct sunlight, potentially decreasing home temperature and lowering energy expenses.
Discover these easy and ingenious tips to reduce energy bills and keep your wallet cool. Get ready for jaw-dropping savings and a summer full of chill!
1 note
·
View note