#waterpixel
Text
JSB Grocery 001: (Functional Jacky93Sims Remix)

Published: 1-13-2024 | Updated: N/A
SUMMARY
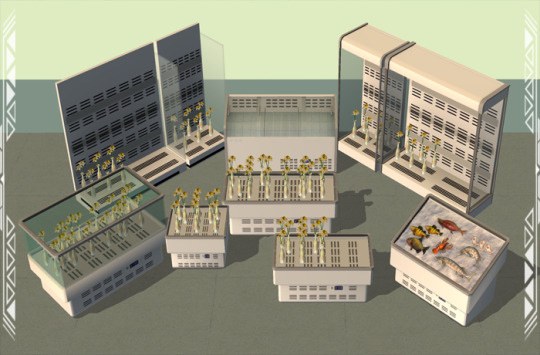
Grocery store objects (Severinka_, 2022; BodegaBaby, 2021) converted by Jacky93Sims (2023), have been edited, expanded, and made functional. Slots have been added to most surfaces along with new items and recolors (select AL Woods; CuriousB, 2010). Some objects require shifting and/or placement cheats for ideal positioning. See below for details.

DETAILS
Requires all EPs/SPs.
§100-500 | Buy > Surfaces/Electronics
Items with “MESH” in their filename are REQUIRED for textures/recolors to display correctly in-game. Also, Object Freedom 1.02 (Fway, 2023) is required. Since some items are cloned from shelves, you may need to shift items up once in order for them to place properly.

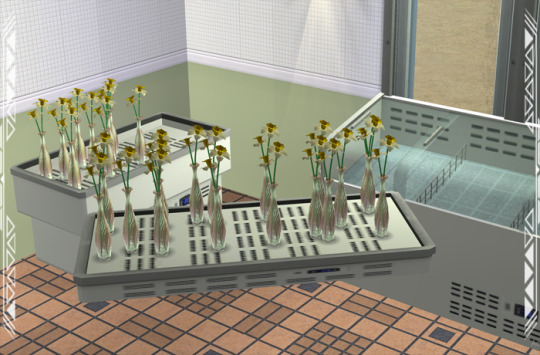
Display Island 4 (Fish) is cloned from the default grocery bin and now has an empty state. There is an “ice only” recolor in case you want to decorate it with your own food items - just know that it will be harder to tell when the bin needs restocking if you use this recolor.

Cold displays/fridges only have slots on the bottom-left side, and Display Island 3 only has slots on the front side. This is on purpose to allow intersection with other deco objects. Also, Shelf 3 (Fridge) is the ONLY shelf that will keep food from spoiling. Do not place perishable items on other shelves/displays!
ITEMS
Cash Desk (Center) (~450 poly) – single counter (no corners)
Cash Desk (Left End) (226 poly) – shelf
Cash Desk (Right End) (198 poly) – endtable; place w/ “move objects” and “grid on/off” cheats
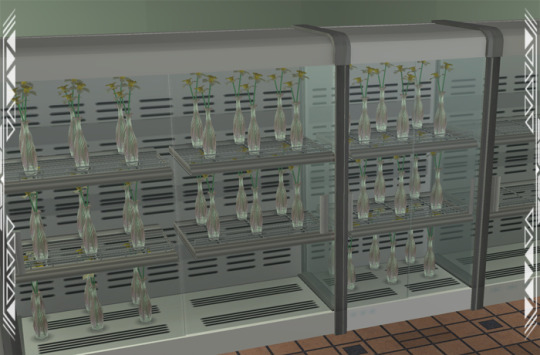
1-tile/2-tile Cold Showcases (498 poly) - slots on bottom-left
1-tile/2-tile Display Fridges (446 poly) – slots on bottom-left
2-Tile Low Display Fridge (Deco)(660 poly) – shelves #4 and #5 can be used with this
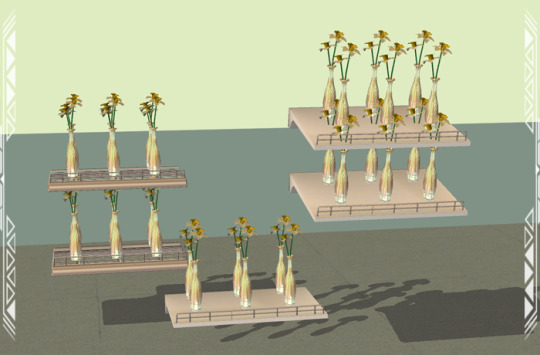
Display Islands 1-2 (250 poly)
Display Island 3 (Half Slots/Half Deco) (250 poly) – slots on front-side only
Display Island 4 (Fish) (3008 poly, HIGH)
Display Aquarium (350 poly) – over-sized, not really meant to go against walls
Floorlite (300 poly)
Self-Checkout Bag Table (2520 poly, HIGH) - shelf
Self-Checkout Register (318 poly)
Shelf 1 (152 poly)
Shelf 2 (Sloped) (304 poly)
Shelf 3 (Fridge) (472 poly) – this will keep spoilable food items, other shelves will NOT.
Shelves 4-5 (196-204 poly)
DOWNLOAD (choose one)
MESHES from SFS | from MEGA
RECOLORS (unmerged, 190+ files) from SFS | from MEGA
*A known game bug may disable some OFB shelf slots. Not all players experience this bug in the same way, but if you do – there is a long-standing fix for it. If you cannot access more than 2 slots on shelves, download ONE of these fixes:
MORE_Custom-objects-placeable-on-shelves (Numenor, 2006)
MORE_Custom-objects-placeable-on-shelves+LOCKEDTILES (Numenor, 2006)
Object Freedom 1.02 (Fway, 2023)
SOME ASSEMBLY REQUIRED
Assembly can be annoying, but you gain greater functionality in the end. Place sale items on any one of the FIVE shelves, then add them to Cold Showcases, Fridge Displays, or your own unique display.
To assemble the Cash Desk: 1) place the Cash Desk (Center) (this is a counter meant for the cashier/register), 2) place the Cash Desk (Left End) on the tile directly to the left of the Center counter, and 3) use “move objects on/off” and/or “grid on/off” cheats to align the Cash Desk (Right End) part on the right side of the Center counter. Be sure all three parts are facing the same direction.


CREDITS
Thanks: @chocolatecitysim, @kashmiresims, @jacky93sims, Waterpixels, Severinka_, BodegBaby. Sources: Any Color You Like (CuriousB, 2010), BBNiche1Master (BuggyBooz, 2012), Beyno (Korn via BBFonts), Cubic Dynamics (EA/Maxis), EA/Maxis, Great Groceries Display (Balkopat, 2020), Grocery Store Part 1 (Jacky93sims, 2023; Severinka, 2022; Bodegababy, 2021), Kitchen Basic (Hafiseazale, 2016; BuggyBooz 2008), Kitchen Basic Extras (Hafiseazale, 2016; BuggyBooz, 2010), Offuturistic Infographic (Freepik), Slated Shelf (Katy76/PC-Sims).
234 notes
·
View notes
Link
Waterpixel Art #182 by Eynoxart
22 notes
·
View notes
Text
"Travel while you're young, for the world is a vast canvas waiting to be painted with the colors of your experiences, and youth is the brush that allows you to create the most vibrant masterpieces of your life."
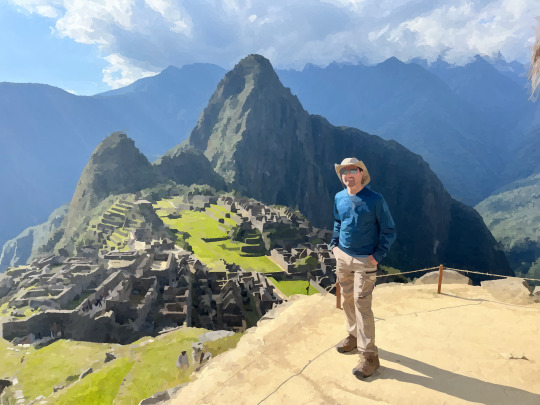
"Embark on a Journey of Ancient Majesty! Discover the Mystical Inca Ruins of Machu Picchu nestled amidst the breathtaking Andes! Unveil the secrets of a lost civilization, wander through stone pathways echoing centuries of history, and soak in the awe-inspiring beauty of one of the Seven Wonders of the World! Adventure awaits at every turn, as you trace the footsteps of ancient kings and queens in this UNESCO World Heritage Site. Let the majestic peaks and mystical ruins of Machu Picchu ignite your wanderlust and leave you spellbound!
Photo captured by B.Clark - Waterpixel, Enhanced by Gimp
#MachuPicchu#IncaRuins#AndesAdventure#PeruvianHeritage#AncientWonders#IncaCivilization#LostCity#SouthAmericanTravel#HistoricalSites#MountainMarvels
2 notes
·
View notes
Photo
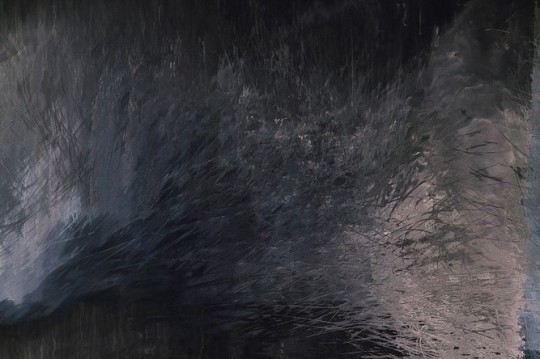
Waterpixels, 2019 #glitch #processing #glitchart #digitalart https://www.instagram.com/p/Cd03rM4LxHG/?igshid=NGJjMDIxMWI=
4 notes
·
View notes
Photo
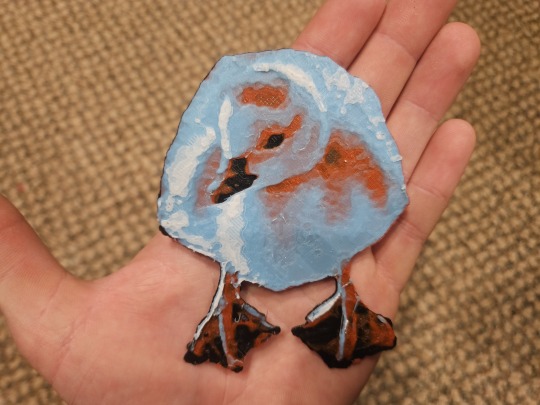
Babee Goose!
My first successful multicolor print! This is a photo of a baby goose I took some time ago. I put a waterpixel filter on it to get a more stylized image that would work better with the method of creation here.
The way these are created is pretty interesting. You do tests with each of your colored filaments. The purpose of the test is to determine the Transmission distance of each filament. Basically, you're looking for how much light travels through the same amount of filament for each color. This is don by printing 1,2,3,4 and 5 layers of the colored filament on top of a black square. It gives you a colored result that you can fine tune in a program!
After that, you import your image and decide which color stops printing at what layer. It enables you to create some pretty cool results, but I have a looong ways to go in terms of creating artistic pieces with this program. There is a lot to learn here!
Posted using PostyBirb
0 notes
Text
youtube
Hello, and welcome to the first of what is planned to be a monthly series of devlogs chronicling the development of my new game, Grippy Golf! Today, I’ll be taking you on a longer journey than normal, all the way from my first lines of code to the creation of my shiny new store page. There’s a lot to cover, so I won’t go into too much detail on any one subject, but maybe there will be some future posts that break things down further, who knows.
So first off, what is Grippy Golf? Well, the initial concept is like golf, except that everything the ball hits, sticks. I first came up with the idea over a year ago, when I challenged myself to make 10 games over the course of just 10 weeks. Grippy Golf, or as it was known back then, Sticky Golf, was my first entry into the challenge, and probably one of the best, or at least the funniest. So, after wrapping up my previous game, I decided to take the concept and expand it into a full release.

It was nice to already have a prototype available, but there were a number of significant changes I wanted to make. For one, the pure chaos of the prototype is fine for a game meant to last 10 – 20 minutes, but I worried that it would lose its appeal in a game meant to last 10 – 20 hours. It needed something more, but at the time, I wasn’t sure exactly what. Don’t worry though, we’ll come back to that.
The other major mechanical change is that I decided to include a multiplayer mode, for both local and online play. Now, as any game dev will tell you, this is not trivial. Online multiplayer in particular fundamentally changes how you have to think about your code. I’ve also never done it before, though that’s true of a lot of things I do as a solo dev. So, after rewatching Alex Forsythe’s excellent video on multiplayer in Unreal for the 5th or 6th time, I got to coding.
I spent the first several weeks creating the basic framework of the game in C++: the character controls, the behavior of stickable objects, etc. It’s generally nitty-gritty details that are kind of boring, so I’ll mostly skip discussing it. At the end, I had a functional, albeit ugly game, where you could hit the ball, have it stick to objects, and reach a goal.
On to the next step: aesthetics.
Now, that might seem strange. There are lots of resources about game dev that will tell you that you shouldn’t worry about the look of your game at first, and should instead work on refining your mechanics and making sure they’re crisp. Mario 64 is the classic example here, and there’s undeniably truth to that statement.
However, it’s also true that as an indie dev, you need to attract customers, and you need to start doing so as early as possible. And if your game plays well but looks bad, it’s going to be hard to generate interest.
A balance is needed, where your game looks pretty enough to show off, without the visuals taking up too much of your time, at least initially. So, to beautify things up a bit, I first needed to determine the game’s art direction.
One of the main limitations I face as a solo dev is that I am not particularly good at art, especially 2D art. As a result, any art style I come up with has to avoid using anything hand-drawn or painted, which sadly locks me out of a lot of my favorite styles. Still, there’s a lot you can do within those limitations.
Here’s the process that I settled on for Grippy Golf. First, I download realistic textures for the material I want, typically from amazing Creative Commons 0 websites like AmbientCG. Then, I open them up in Gimp (yes, I use Gimp) and mess around with the Waterpixel and Oilify filters to achieve a softer, painted look. The next step is to desaturate the resulting image, and increase the contrast so it stretches all the way from black to white. I know that sounds weird, but bear with me.

Now, I add the modified texture to my model over in Blender. I prefer to have just one material per model for performance reasons, so I bake all the different materials to a single texture. However, there’s a lot more here than just the black and white image. There’s the normal map, of course, and other basics like metallic, roughness, and ambient occlusion. Then there’s a black and white vertical gradient that runs up the model, and an index value that is different for each material.

Baking all these different maps and consolidating them is annoying, so I also wrote a python script to automate it, which is probably my single biggest time saving decision so far. If you haven’t messed with scripting in Blender, I highly recommend it.
Anyway, Unreal is where everything starts to come together. Here, I use that black and white image to interpolate between two colors, which lets me change the color of my materials in Unreal, without having to rebake the texture. The vertical gradient is used similarly, and keeps things from looking too flat or static. The material index that I mentioned earlier lets me apply different settings to different parts of the model, even though they all use just one material. The end result is that I have lots of ability to fine-tune the look of the game without leaving the editor.
After making several example models using this approach, I also spent some time working on so-called “game feel”, things like particles, camera shake, and so on. In my experience, prioritizing these is a great way for your visuals to stand out, even if the rest of your game still uses placeholders. I ended up redoing all of these later, but even the preliminary versions were very well received.
In the process of testing these FX, I stumbled across the “something more” that I had been looking for in the gameplay. Namely, I realized that it was super fun to chain together a bunch of arrow boosters to get a “hole in one”. That, coupled with Mark Brown’s video on Neon White completely changed my conception of the game. Now, rather than the player being at the mercy of the wacky physics, I realized I could give the player tools to work with and around that wackiness, with an emphasis on fast, frenetic combos.

To that end, I created a flurry of new systems and powerups. The most notable is the dash, a one-time burst of speed in the direction of the player camera. This increase in player control over the ball completely changes the feel of the game, especially once I made it so that the arrows refresh the dash ability, like in Celeste.
I also added fans that blow you around, a magnet powerup that draws objects towards you, barriers that only break if you have enough objects stuck to you, and my personal favorite, the firework.
I could have kept going, but I deemed it was time to start working towards the next landmark: a store page. Having a store page is really important, as it gives you something to point people towards and lets you start gathering wishlists, i.e. potential sales. My personal prerequisite for a store page was to fill in all my current placeholder assets, namely the player character, the walls, and the floor.
Up until now, the player character had used models and animations from Mixamo, and they worked just fine. For the final product though, I wanted a character that was fun and appealing, something that could serve as a mascot for the game. I chose a robot so that I didn’t have to deal with human facial animations, which intimidate me. I also decided that they would fly, so that I didn’t have to figure out where the ground was every time I moved them. The noodley arms are a massive pain to animate, but I really like the way they look so I’ll probably keep it.
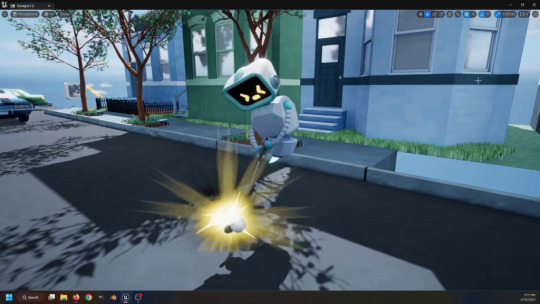
For the walls, I created a bunch of houses, largely inspired by the architecture around Capitol Hill, DC. There’s not as much variety as I would like, but for now it’s fine. Of course, this is a game about a ball that sticks to things, so I made sure each separate part of the building can be individually detached. I did the same thing with some trees as well, with each branch being a separate object.
For the floor, I didn’t want to be constrained by square tiles anymore, so I used Unreal’s Geometry Scripting system to make a custom landscape editor. It lets me trace out an outline with one spline, while setting the height of the resulting landscape with another. On top of that, a barrier is automatically generated around the level, so the ball can’t fall into the void. The more flexible terrain also needed more flexible roads, so I made a road tool using spline meshes.
With everything together, I made an example level or two, took some screenshots, and sent the page for review! Everything’s approved, and you can check out the page right now if you’re interested.
That brings us to the present! There’s a number of smaller topics I didn’t have a chance to discuss (creating an options menu, implementing controller remapping, fiddling with splitscreen for online multiplayer, various physics shenanigans, etc.) but this post is already long enough, and I’m itching to get back to work. I hope you found it interesting to see how I progressed from a basic prototype to something that at least resembles a full game. Again, if there’s anything you want to hear more about, let me know.
Cheers!
#gaming#gamedev#indiedev#indie games#devlog#game development#golf#crazy golf#get motivated#game physics#youtube#video games#video content#Youtube
1 note
·
View note
Text
A Mountain Pathway
A mountain pathway hike frees my thoughts and prepares me for a new way of thinking. This photo art creation is based on my photo, but I have made some digital revisions to give it a waterpixel effect.
As I travel a mountain pathway, my thoughts are at once captured by the sights, sounds, smells, and the sense that my presence communes with the space I move through. Each moment my observation is keen for that which grabs my attention. Upon awareness of such an encounter, I pause and more fully observe as much detail as possible. Only then, I ask myself questions about how my life may be…
View On WordPress
0 notes
Photo

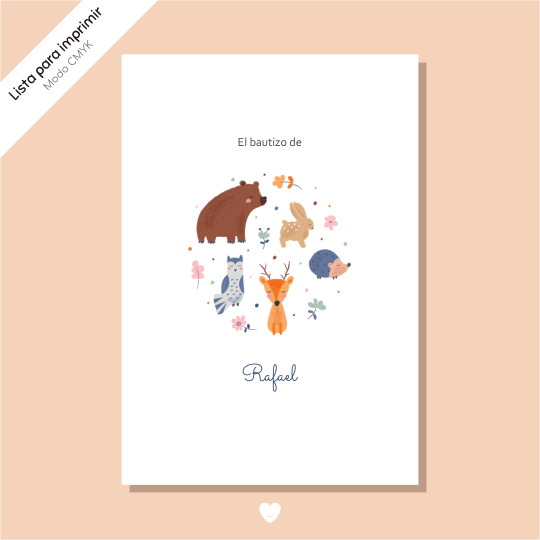
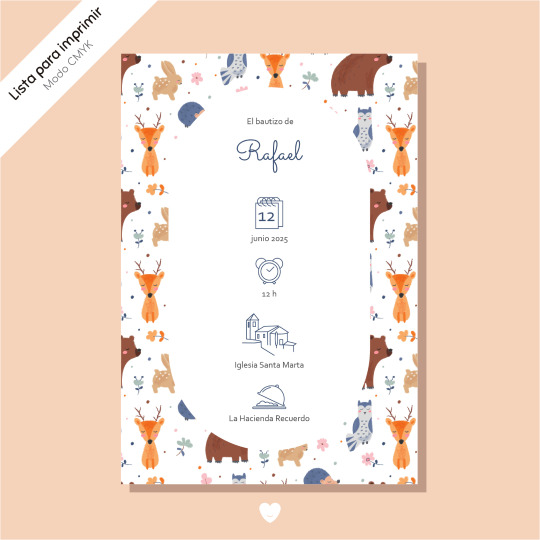
DBA004″
Descarga tu diseño preferido y celebra su feliz bautizo…
Quiero el diseño ¿Qué hago?
1. Escríbeme un correo a [email protected].
2. No te olvides de decirme el número del diseño, está en la descripción entre comillas. También necesitamos los datos que deseas poner en la tarjeta. Como nombre de tu bebé, lugar de la celebración y del evento. Ya sabes esas cosillas que hacen que nadie se confunda para estar en su día especial.
3. Recibirás un email con tu diseño listo para que lo lleves a tu imprenta de confianza.
Os deseamos una feliz celebración y ¡Gracias por celebrar con nosotros!
#bautizo#invitacionesdebautizos#serpadres#sermama#serpadre#bebe#mibebe#detallesbautizo#mamaprimeriza#invitacionespersonalizada#invitacionesdigitales#waterpixels#invitacionesparaimprimir
2 notes
·
View notes
Photo

3 Roses by evisdotter https://flic.kr/p/2izym5V
0 notes
Text
Made some art for my WIP, Crows Cry Red. It comes in cover form and non cover form. Spoiler: I didn’t leave enough space for a title, so the cover version looks very crowded. oops.


I didn’t draw the background in I edited it in because I’m lazy. I took a photograph and waterpixeled it until it became basically unrecognizable. Whatever.
Listen I was getting tired of this stupid drawing because I have been working on this for at least a week, two weeks, and I’m fucking tired.
Lmao shading sucks but it’s whatever.
But update on the WIP for those who care: I’ve written 5k. I plan on writing at least 20k before I publish the first chapter, but we’re moving steadily along. I’ll probably post a preview whenever I get somewhere between 10-15k on @clexa-infinite (since it’s a clexa fic, of course, what else do I write?) so head on over there because clexa is gay and gay is best.
#lmao#i hate myself#and my shameful artwork#I don't hate my writing though#most of the time#so at least that's good
2 notes
·
View notes
Photo

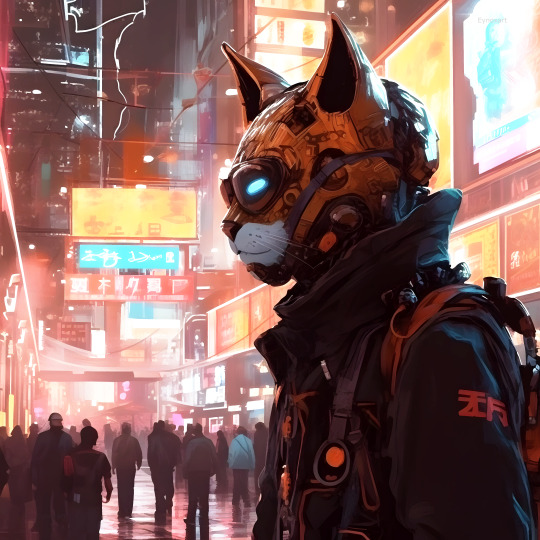
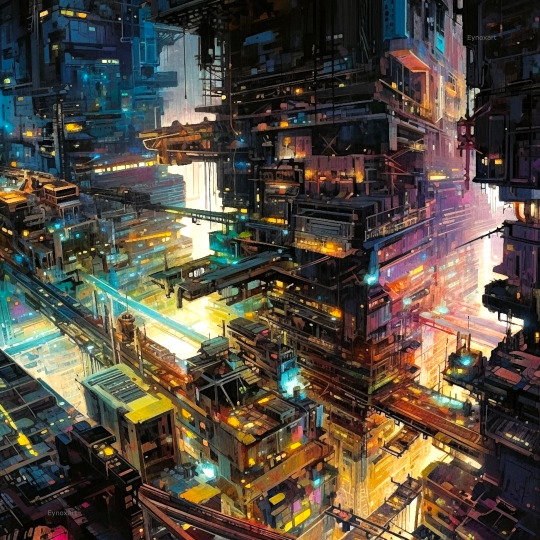
Waterpixel Art #140
#city#building#surreal#surrealism#surreal art#surrealistic#cyberpunk#cyberpunk art#urban#weird#house#night#ai art#digital art#mixed media#waterpixel#nft#nft community#nft art
90 notes
·
View notes
Text
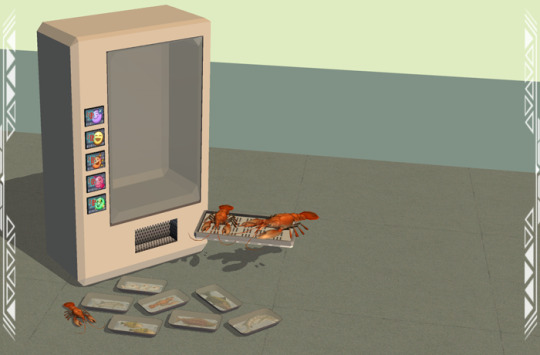
JSB Grocery 002: (Functional Jacky93Sims Add-Ons)

Published: 1-13-2024 | Updated: N/A
SUMMARY
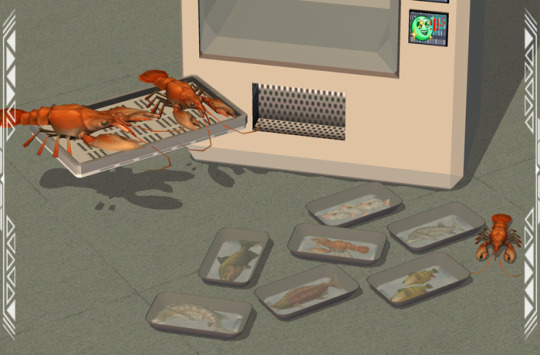
This is a vending machine and functional seafood products to go with the JSB Grocery 001 set (Simmons, 2023). The machine itself vends groceries while shop owners can place sale items in the open interior – sell more items while using less space! Additionally, there are several seafood products which can be sold in OFB shops and used to stock fridges for food points. Some objects require shifting and/or placement cheats for ideal positioning. See below for details.
DETAILS
Requires all EPs/SPs.
§60-500 | Buy > Appliances > Large Appliances (Community Lot Only)
The JSB Grocery 001 set (Simmons, 2023) and Object Freedom 1.02 (Fway, 2023) are BOTH required. Items with “MESH” in their filename are REQUIRED for textures/recolors to display correctly in-game. Since some items are cloned from shelves, you may need to shift items up once for them to place properly. See below for more details and a download link.
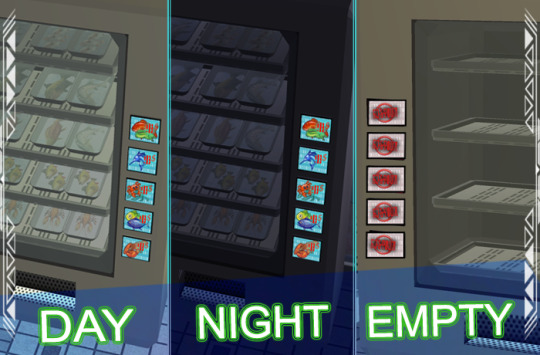
Two items in one -purchase groceries by clicking on the machine itself. On OFB lots, place sale items (like the seafood products) on the vending machine shelf, then place the shelf behind the glass (you’ll need “move objects ON” and “snap objects to grid OFF” cheats).
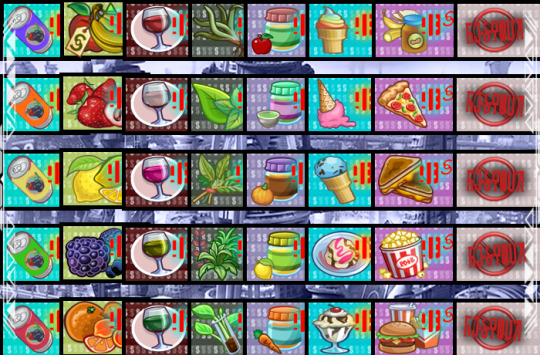
Let sims know what you’re selling by applying one of 21 swatches to the machine buttons. When it runs out of stock, the buttons will glow red.


ITEMS
Vending Machine – (252 poly) – functions like the default grocery bin, use with shelving
Vending Machine Shelf (196 poly) – place w/ “move objects” and “grid on/off” cheats
Lobster (Small/Medium/Large) (530 poly)
Lobster Package (974 poly)
Fish Package #1 (679 poly)
Fish Package #2 (861 poly)
Fish Package #3 (689 poly)
Fish Package #4 (798 poly)
Fish Package #5 (730 poly)
Fish Package #6 (796 poly)
DOWNLOAD (choose one)
MESHES from SFS | from MEGA
RECOLORS from SFS | from MEGA
*A known game bug may disable some OFB shelf slots. Not all players experience this bug in the same way, but if you do – there is a long-standing fix for it. If you cannot access more than 2 slots on shelves, download ONE of these fixes:
MORE_Custom-objects-placeable-on-shelves (Numenor, 2006)
MORE_Custom-objects-placeable-on-shelves+LOCKEDTILES (Numenor, 2006)
Object Freedom 1.02 (Fway, 2023)

*Seafood is part of THIS set. The aquarium display is part of JSB Grocery 001 set (scroll back up for the link).
CREDITS
Thanks: Stockable Food Math (@curiousb), @chocolatecitysim, @kashmiresims, @jacky93sims, Waterpixels, Severinka_, BodegBaby. Sources: Any Color You Like (CuriousB, 2010), BBNiche1Master (BuggyBooz, 2012), Beyno (Korn via BBFonts), Cubic Dynamics (EA/Maxis), Dessert Deco Set (PForest, 2021), EA/Maxis, FFP in SimPE (@creesims, 2019), Great Groceries Display (Balkopat, 2020), Grocery Store Part 1 (Jacky93sims, 2023; Severinka, 2022; Bodegababy, 2021), Kitchen Basic (Hafiseazale, 2016; BuggyBooz 2008), Kitchen Basic Extras (Hafiseazale, 2016; BuggyBooz, 2010), Offuturistic Infographic (Freepik), Other Imagery (EA/Maxis; Hyde, 2000-2013 via LightningCoyote), Steak Package (Patrakeevasveta, 2020/2021 via Creative Commons Attribution), Vending Machine (Robotic Earth, 2023 via Creative Commons Attribution), “How do I change object ‘weight’ for surfaces?” (Simmer22 via modthesims.com, 2017), Make Food Clutter Useable – A Tutorial (@deedee-sims, 2019), Mini-Tutorial: Batch-fix Custom Objects to make them *placeable on OFB shelves* (Numenor, 2006), SimPE Resources (@gayars, 2022), Stockable Foods (CuriousB, 2023), Offuturistic Infographic (Freepik), “What restricts which object can go into which slots?” (Jonasn, 2023), Vegemite Jar (WR/HChangeri).
101 notes
·
View notes
Photo
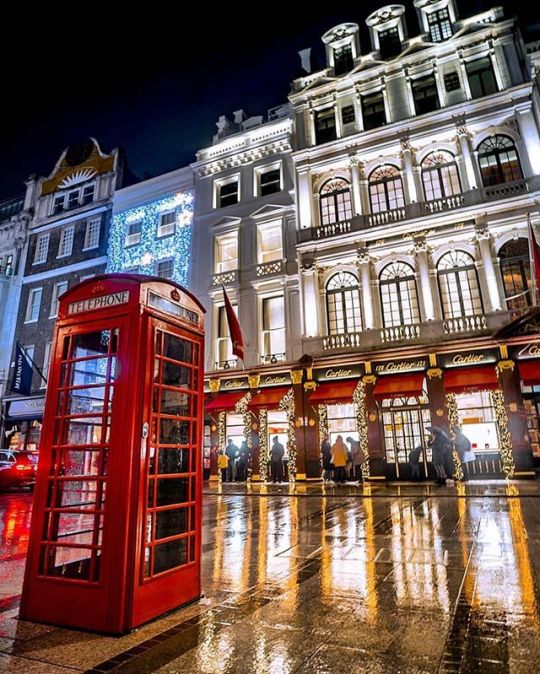
Wet streets and umbrellas ☔️ Who cares?! Let’s shop! 🤣 Great snap from @waterpixel outside #Cartier 😍 // #thisislondon #london https://ift.tt/2UQOgSa
138 notes
·
View notes
Text
Making a Castle, Fun With Gimp [Photoshop]
Hello readers!
I recently discovered that a new version of GIMP is almost out. One of the awesome new features is live preview of image transformations. Words cannot express exactly how much I was nerding out when I read that.
So, eager to cut my teeth on it, I boldly set a course for the nearest image…
… so I could play around with the new image filters.
Fortunately, I did not have to wait long. I found
a really great image of an actual castle, right off the bat:
Eager to test out the new dark-interface I began doing what I normally do: turning a great picture into what appears to be a great painting, drawing, or other art-form. I think I had some success.
Clothify
The clothify filter is an interesting one: it adds a texture to an image. Using this in conjuction with one of the several pixel grouping filters (I believe this was the waterpixel filter) I was able to produce a very modern looking image:
However, it’s a bit dreary for my taste. So I took a second crack at it to lighten it up. This time I used the Clothify filter, Softglow, and the ever mysterious Van Gogh filter. It came out pretty neat:
Great! It’s much less dreary!
Using the Softglow filter to lighten it up really helped, but the Van Gogh filter is what really made it. Despite that, the Van Gogh filter is … complex to say the least, operating on multiple dimensions of the picture data at once. I’ll have to devote some more time to unraveling its mysteries later.
Cartoonify
I’ve been a huge fan of the Cartoonify filter for a long time. I find when using it on architecture, people, plants, vespa, wormholes, or anything remotely complex, it takes a bit of pre or post-processing to make it work.
One of the things that goes great with a Cartoony filter, or with most photo-editing in general, is adjusting the color saturation. By increasing the saturation you really make the image *pop*. So for the next round I decided to try increasing the color saturation (to about 1.8), cartoonifying it, and then applying a nice Softglow effect. It came out with nice, vivid colors:
It looks pretty nice!
But the edges are a little sharp in the foreground. In an effort to dull it a bit and make it look more “hand-painted” I decided to repeat the process with the bizarre Van Gogh filtering enabled:
Much softer! It has bright colors and nice, friendly feel. Combines with the distortion of the Van Gogh effect, it really gives that “hand-painted” feel.
It would make a great image for a D&D or ttrpg campaign, a good, lively feeling visual of a mysterious castle while the tide is out.
Conclusion
The new GIMP filters are great and the live preview of the filtering is a huge improvement. To top it off, the user interface was similar enough that I did not require re-training to dive right in.
Passing real life imagery through these filters has the added benefit of making it feel more at place in a tabletop setting. We’ve outlined a simple, 3 filter procedure for turning high quality images into game-worthy content.
Do you have images that you want transformed into hand-drawn style? Post them in the comments today!
Making a Castle, Fun With Gimp [Photoshop] was originally published on Friendly Neighborhood Lizard Man
0 notes
Photo
Waterpixel Art #51
#city#cityscape#scifi#scifi art#scifi concept#scifi city#futuristic#futuristic city#futuristic art#lights#citys#cyberpunk#cyberpunk art#rpg#ai art#digital art#mixed media#waterpixel
79 notes
·
View notes
Last Seen Blogs
simlish-fears
pov
brookesimpson92
Omg. F U

bornova-travesti
Bornova travesti Berra

sakanami
Four-Eyed Rainbow Factory

brianbates123
Cools Garden