#supahtasty
Photo
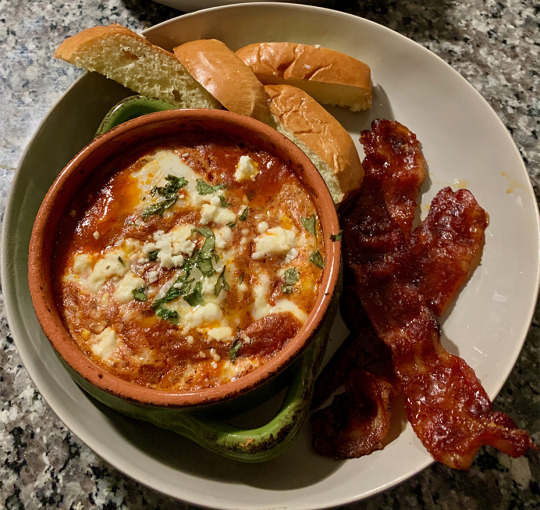
Shakshuka w/Feta 🍳 🍅
I was living in NYC when I first encountered Shakshuka. It was showing up on brunch menus all over the city. Also goes by another name: Eggs in Purgatory!
In its essence, Shakshuka is a simple dish in which you poach eggs, and then nestle them into in tomato sauce, with peppers and spices. It’s said to have originated in Tunisia, and is as popular in the Middle East.
When I first tried it, it stood out as a rare option that allowed me to skip the carb coma known as “Sunday”, at a time when eating healthier became more of a priority.
It also allowed me to save calories for other priorities (Mimosas. Ahem.)
And although it makes a great brunch, if you’re big tomato fan, it really does transcend time of day: Great for lunch or dinner, too! Here’s what you’ll need:
1 tbsp olive oil
2 small red onions, chopped
1 green bell pepper, seeded/chopped
1 (or 5 :) cloves garlic, chopped
1/2 tsp cumin
1 tsp coriander
1 tsp sweet paprika
1/2 tsp crushed black pepper
Just a pinch of herbal sea salt (Feta will add saltiness, too)
1 tbsp harissa paste (Sub: 1-2 pinches, red pepper)
4 large beefsteak 🍅, chopped well
4 eggs 🍳
1/4 cup crumbled feta
1/4 cup chopped basil
There are different ways to cook Shakshuka. Some prefer to use their stovetop, others like to bake in the oven. I personally like a combo of the two, so as to not overcook the eggs:
Start by setting the oven to 350º. Now heat your oil on medium in a big skillet. Add chopped onion and pepper, cooking until they’re very soft (approx. 20 min.) Now turn it down to medium-low, to add your garlic for 1-2 minutes. Now add cumin, coriander, paprika, salt, and harissa, allowing all the spices to come together another 3 minutes, stirring every minute or so.
Add your tomatoes and a touch of pepper, allowing all to simmer until thickened (should take about 12 minutes or so).
At this point, you can choose a couple paths forward: The first is to crack the eggs right into the skillet, over the tomatoes.
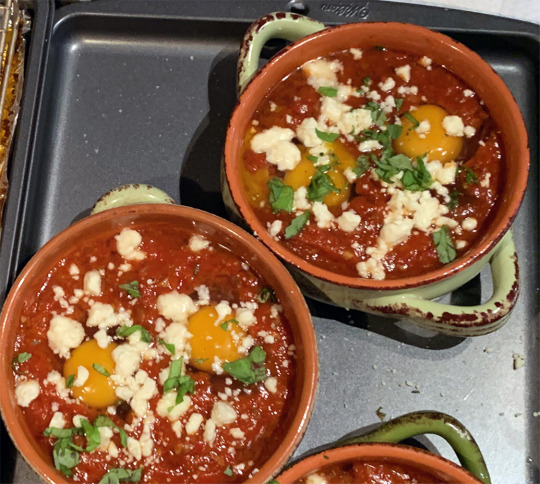
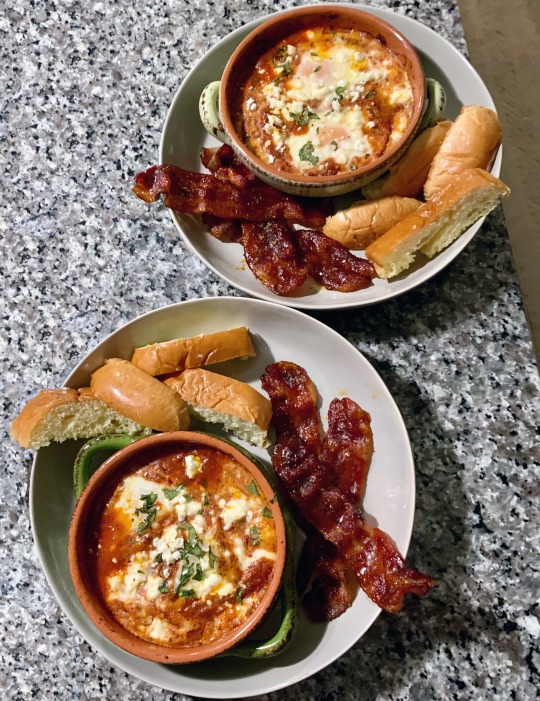
Or you can make an individual dish for each person: I like to serve Shakshuka in individual, terra cotta bowls. So I put two of those on a big baking sheet, and ladle everything into them, from my skillet.
Then carefully crack 2 eggs into each bowl over the tomatoes, sprinkle with feta and chopped basil, and slide the baking sheet with both bowls into the middle of the oven. Bake, uncovered, until eggs are just about set (approx. 6-10 min.)
Serve with thick cut bacon and warm brioche, to help mop up all of that savory sauce! NOM. Enjoy.
0 notes
Photo
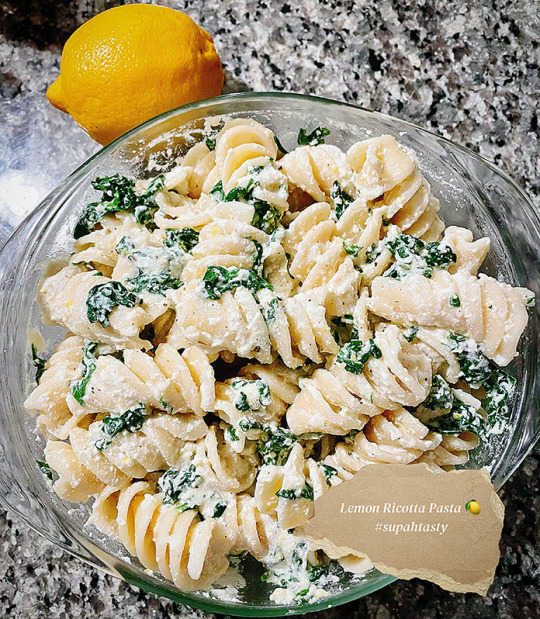
Lemon Ricotta Pasta 🍋
My full recipe will be up in a bit. Right now, we’re having dinner ;) But this one tastes like Summer on a plate. So come back soon, if you want the lowdown on this lemony goodness...
0 notes
Photo


Drunken Monkey Bread 🐒
We lovvve rum. Especially smooth, aged, sipping rum. So we’ve had Zacapa, and similar offerings. Amazing, no doubt. But years ago, in Costa Rica, I was introduced to Ron Centenario 25 Year Gran Reserva.
And, whoa. My rum game hath changeth.
I mean, if butterscotch, silk, slow jams, and fairy dust came together in the smoothest, most magical elixir, this would be that. And while I’d never suggest using a $70+ bottle of reserve rum in a dessert recipe, I’m as fond of using rum in my baking & cooking, as I am of tasting it in a glass or cocktail🍹
Reason being: Rum is easily one of the most versatile, swoonworthy additions to baked goods, desserts, recipes of all kinds. And IMHO, also one of the most under-utilized!
A nice spiced or dark rum brings a depth of flavor that amps up the goodness and complexity of every other ingredient it touches. Butter? Butter rum! Cheese? Yes, even 🧀: One of my all-time favorites is finished with rum. And its salty, rum-washed, buttery flavor consistently makes it the unicorn of every cheese board I’ve ever put out. People say, “Rum? In cheese?”, and look at me suspiciously. Then taste it. And devour it, before all else ;)
So, because there’s big energy in rum, and a lot of flavor coming together in this, not to mention an inherent sweetness in most 🐒 bread to begin with, I decided to add some cardamom, and a hint of macadamia nut liqueur, along with rum I’d added. To make it nuttier and more unique, flavor-wise.
Using biscuit dough allows you to shave time off the recipe. But it’ll still taste like you spent the whole day baking (cue fainting couch ;)
So if you’re looking for a new, Supah Tasty brunch idea for the weekend, or just want a little somethin-somethin with your morning coffee, give it a go!
Here’s what you’ll need:
• 1/4 cup unsweetened 🥥 flakes
• 1/2 cup spiced rum🍹
• 2-3 cans buttermilk biscuits
• 1/4 cup white sugar
• 3 tsp. cinnamon
• 1/2 tsp. cardamom
• 1/4 cup sliced toasted almonds
• 2 sticks unsalted butter
• 1/2 cup brown sugar
• 3-4 tbsp. macadamia nut liqueur
Preheat your oven to 350ºF. Pour the coconut flakes into a bowl with your spiced rum, allowing them to soak it all in for the next 15 minutes.
Cut your biscuits into quarters. Mix white sugar, cinnamon, cardamom, almonds in another large bowl. Drop your biscuit pieces into the mix, coating each evenly and generously.
Once your 🥥 is done soaking, strain it well, setting aside the rum it soaked in (it’ll smell all coconut-y & wonderful but don’t drink it! You need it later ;)
Add the coconut to the bowl with your biscuit dough, etc. Coat inside of Bundt pan with butter, add biscuit pieces, coconut, etc., in an even layer.
Now combine two sticks of butter, 1/2 cup brown sugar, 3-4 tbsp. macadamia nut liqueur, rum you set aside from the coconut, in a pan on medium-high. Stir regularly for a few minutes until it boils, and the sugar has dissolved.
Drizzle that rummy-buttery-goodness over the dough evenly, and pop it in the oven for 35-40 min, until the top is a nice shade of golden brown.
Remove and allow to cool 25-30 min. before turning it over onto a plate, to release your creation. Enjoy! 🥥🍹
0 notes
Photo
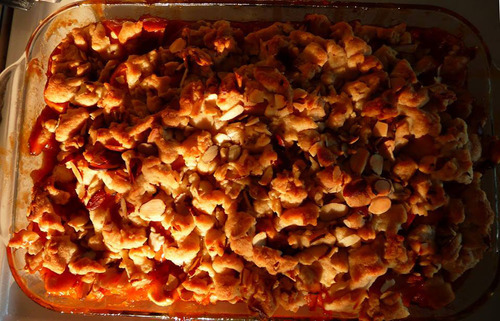
Caramel 🍎 Almond Crisp
I think my favorite thing about making this dessert is the spun caramel, growing up from the stove like some candy-land forest come to life. Really cool. And if you have any extra, you can make some really beautiful abstract, edible art!
Another thing I love about this recipe is the presence of not just vanilla, but also an ample amount of almond. It adds a richness that brings out the best in both the apples and the caramel. Here’s what you’ll need…
For the topping:
• 2 cups all-purpose flour
• 12 tablespoons sugar
• 1 ½ sticks cold unsalted butter, cut in small pieces
• ½ teaspoon salt
• 1 teaspoon pure vanilla extract
• ½ teaspoon pure almond extract
• ½ cup sliced almonds
For the filling:
• 2/3 cup sugar
• ¼ cup unsweetened 🍎 juice
• 3 tablespoons cold unsalted butter, cut into smallish pieces
• Pinch o'salt
• 4 lbs baking 🍎 (about 8 large) peeled, cored, cut in 1-inch slices. I went with Galas, but Golden Delicious or Crispins work nicely in this, too!
Equipment: 2 to 2 ½ quart baking dish, buttered or coated w/nonstick baking spray. Make sure the rack is in the middle of your oven (if it’s too high or low you’ll instead be making Burnt Caramel Apple Almond Crisp :) Preheat the oven to 375ºF.
For the topping:Pulse flour, butter, sugar, salt, vanilla & almond in a food processor until you’ve got large clumps. Set aside ¼ cup of that for the filler, and transfer what remains to a large bowl. Stir in the sliced almonds.
For the filling: Cook the sugar in a dry 2-quart heavy saucepan over medium heat, without stirring, until it begins to melt. Continue cooking, now stirring periodically with a wooden spoon until the sugar is melted into a deep, golden caramel. Remove the caramel from the heat, and let sit for a minute. Carefully add the apple juice, butter and salt. Cook over medium low, stirring until all of that appley-buttery-goodness infuses the caramel. At this point your house should smell crazy-delicious.
Add the apples to a large bowl, along with the topping you reserved, and the caramel. Caramel starts to harden when it cools, so you need to mix it together somewhat quickly. Best way is to just use your hands, to make sure all the apples are sufficiently bathed in caramel. Once you’ve licked the remaining caramel off your fingers (yes I did it too ;) wash your hands and spoon the apples into the baking dish. Scatter the topping over the apples in little clumps. Bake until the apples are tender and the top is golden brown and crisp (about 1 hour).
Cool to room temperature. If you’re bringing this to someone’s house, the topping may get soggy. You can easily rewarm it in their oven at 350ºF for a few minutes, so the crisp on top is actually crisp. Also, you can’t have any kind of apple pie/crisp without ice cream. It’s illegal ;) I went with Toasted Almond gelato. Swoon-worthy!
1 note
·
View note
Photo
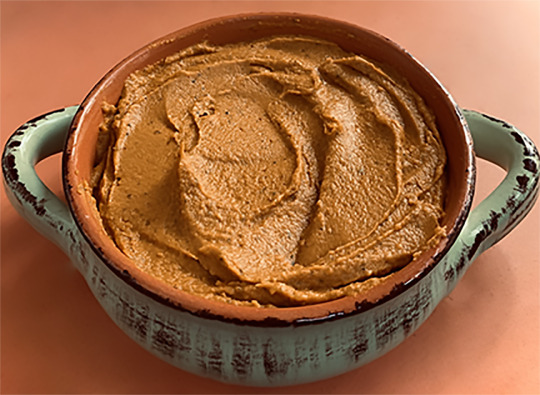
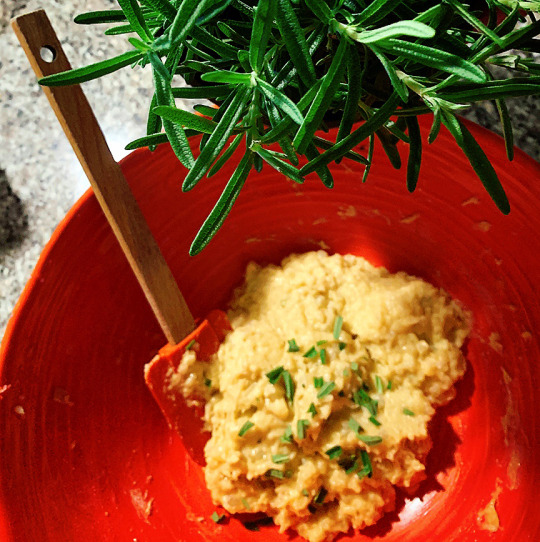
Smoky Paprika 🥕 Dip w Toasted Almonds
Not everything we made for Thanksgiving was unhealthy! Take this dip: Supah flavorful & also dairy-free, so it won’t add to the carb-a-palooza at hand. It was a big hit! Here’s what you’ll need:
½ cup skin-on almonds
2 lb. 🥕🥕🥕 trimmed & peeled
2 tbsp. + ½ cup extra-virgin olive oil
2½ tsp. kosher salt, divided
2 garlic cloves
½ cup canned chickpeas
3 tbsp. (or more) fresh 🍋 juice
1 tsp. fresh ground black pepper
¾ tsp. hot smoked Spanish paprika
½ cup chopped parsley + more for serving
Preheat oven to 350°. Toast almonds on a rimmed baking sheet. After 5 minutes, toss and then put back in for another 5. They should be slightly dark and fragrant, but not blackened. Put them aside in a bowl, and let cool.
Cut carrots in half lengthwise, than in half again. Put them on a parchment-lined baking sheet and toss them with 2 tbsp. oil and 1 tsp. salt. Spread evenly on baking sheet and roast, stirring once or twice, until tender and starting to brown. This should take about an hour, so check them and stir ‘em up a bit at the half hour mark.
Transfer carrots to food processor and add garlic, chickpeas, 🍋 juice, pepper, paprika, chopped parsley, ½ cup oil, 1½ tsp. salt with your almonds. Process all of it, adding a bit of water, or oil, as needed, until your mixture is completely smooth. Taste dip and add more lemon juice and/or salt if needed.
Transfer to a small bowl and drizzle with a little more oil. Cover and keep chilled.
My favorite time to eat this dip is actually the day after Thanksgiving - as a sandwich spread, with turkey & boozy bourbon cranberry sauce.
Enjoy!
0 notes
Photo
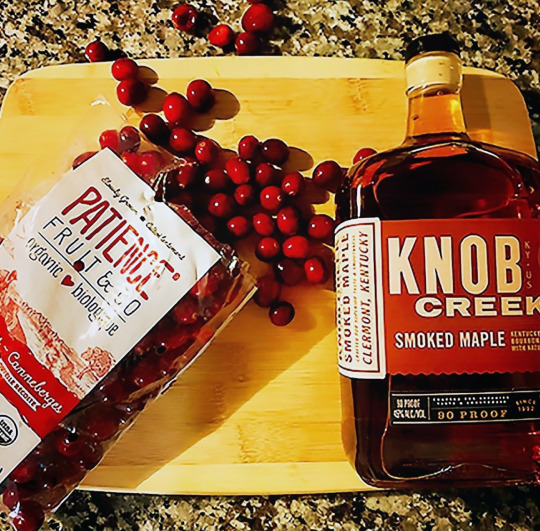
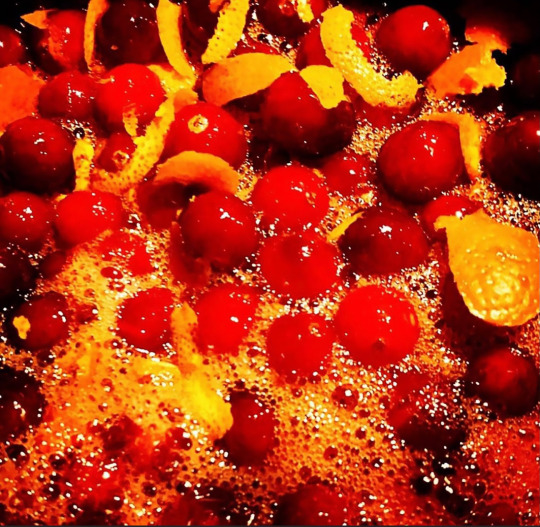
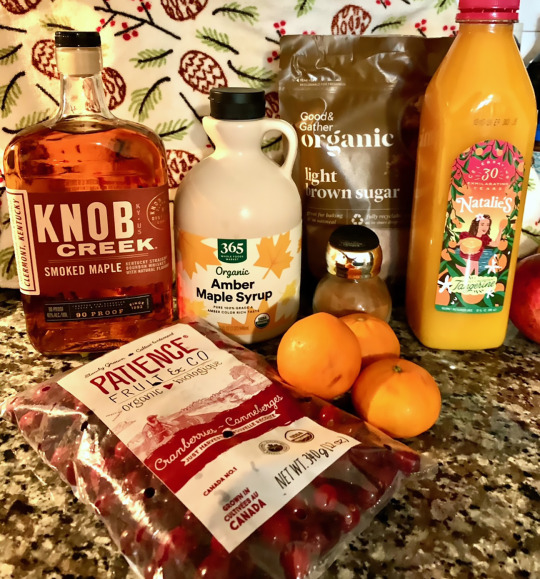
Maple Bourbon Brown Sugar Cranberry Sauce 🍁
1 lb cranberries
1/2 lb bing 🍒🍒
1 cup brown sugar
1 cup maple syrup 🍁
2-3 tablespoons 🍊juice: I used tangerine. Has a bit more tang, to it!
1-2 tablespoons fresh orange/tangerine zest
1/2 teaspoon cinnamon
1/4 cup bourbon: I used Knob Creek Smoked Maple 🥃 (Sooo yummy!)
Put your first 7 ingredients in a sauce pan and stir well. Put the lid on and bring to a boil. Then reduce heat to medium-low, cover, simmer and stir every 10 minutes or so, until it’s the texture you want it to be (about a half hour).
Remove from heat to cool. If you have kidlets joining for dinner, set some aside before adding the bourbon, of course... then stir in 1/4 cup bourbon, for the adults in the room!
Refrigerate to chill, then enjoy... getting sauced ;) Happy Thanksgiving!
0 notes
Photo
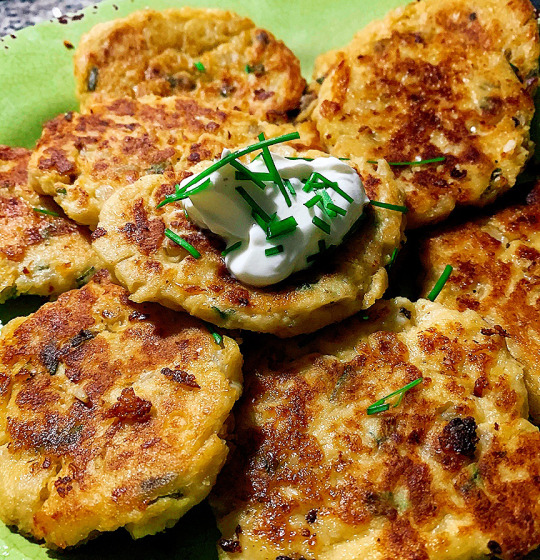
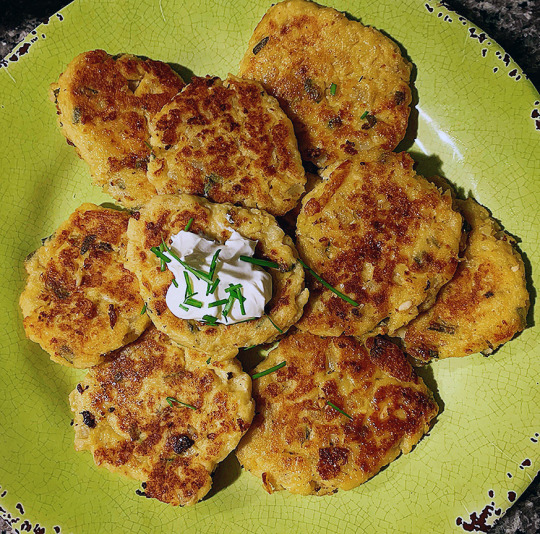
Garlic Rosemary Cauliflower Fritters w/Truffle Oil 🧄
I’ve been cooking more again, and we’re back to eating healthier (YAY on both fronts – take that, quarantine 15!) So I’ve had fun exploring new ways to replace heavy carb dishes we love with things that don’t leave us longing for flavor.
And the more I experiment with cauliflower, the more I realize: Draining it vs. not draining it is almost like cooking with two completely different vegetables! It is possible to crisp cauliflower and use it as a crust base for things like pizza, and that brekkie egg cup recipe I posted the other day. But you have to make sure you drain it really, really well - and multiple times - to get all of the water out. When you do that, the sky’s the limit!
So I came up with these fritters as an interesting side for the cod I was baking for dinner. And they’re supah tasty! Easiest if you start with a bag of already riced cauliflower. But if you have a head of cauliflower, you can just steam that and rice it yourself, too. Here’s what you’ll need:
• 1 bag cauliflower rice, steamed (or a head of cauliflower cut into florets, steamed & pulsed in the food processor until riced)
• 1/2 cup all-purpose flour
• 2 tablespoons of freshly cut rosemary
• 2 large eggs, beaten
• 3 cloves garlic, minced (or 1-2 tablespoons garlic powder)
• Truffle oil (or olive oil)
• Herbal sea salt
• Fresh pepper
• 2 tablespoons freshly cut chives, to garnish
Steam your cauliflower rice. Take some strong paper towels (or cheese cloth, if you have it), and drain the cauliflower well. Do this multiple times, until you can no longer get any liquid out of it.
Measure out 3.5 - 4 cups of cauliflower and add it to a large mixing bowl along with your flour, eggs, rosemary, garlic, herbal sea salt and pepper. Stir well.
Grab a plate and line it with paper towels. Heat a nonstick skillet over medium-high heat and spray your truffle/olive oil, just enough to coat it. Scoop 2-3 tablespoons of your cauli mixture into the pan and spray the back of your spatula with more oil, before flattening the mounds slightly with your spatula (oiling the spatula keeps the mixture from sticking to it!)
Add several of these to the pan, about an inch apart. Cook them for 3-5 minutes, flip once and cook for an additional 3-5, until golden brown. Transfer plate and let cool slightly.
Serve warm (or reheat in your oven later, to make sure they remain crisp!). Some serving ideas: A dollop of sour cream and chives, or plain Greek yogurt works well. These would also make a great brekkie side, with eggs in the morning! And won’t give you the carb coma hash brown potatoes will ;)
However you have them, hope you enjoy!
0 notes
Photo


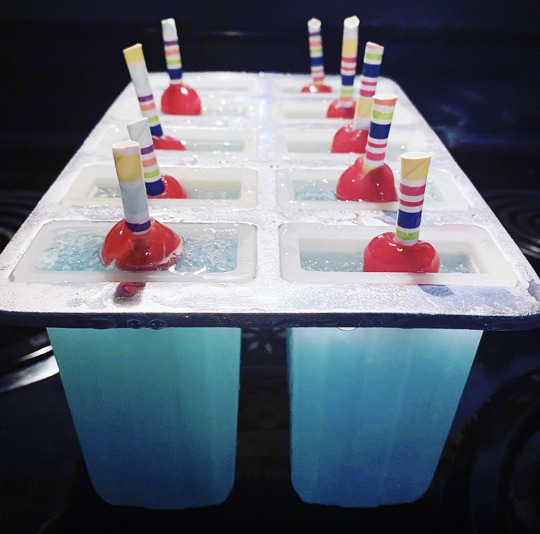
Mermaid 🧜🏼♀️ Lemonade 🦩🌴
When in Florida, make like a mermaid! We decided a tiki-style, kitsch-y Labor Day cocktail would be fun. So I mixed up a batch of 🧜🏼♀️ Lemonade!
Started out with more of an ombre effect, but when blended up, turned into a beautiful, icy shade of Caribbean blue. Both are pretty (& supah tasty :) Here’s how to make it (recipe makes approx. 4🍹 - or, 2 strong ones ;)
• 2 cups ice
• 1/4 cup blue curaçao
• 1 cup 🍍 rum (I used Bacardi’s naturally-flavored, fusion option - yummy!)
• 2 cups lemonade
• 🍋, 🍊 or 🥭 slice
• Maraschino 🍒🍒🍒
Put 5-6 cubes in each glass and add a small splash of blue curaçao. Then add 1/4 cup of 🍍 rum and another 5-6 cubes (layering it will help give it an ombre effect). Then add 1/2 cup of lemonade.
Skewer your 🍒 & fruit with a 🍹umbrella, garnish glass and… Cheers 🍹🍹!
PS Also yummy as an adult popsicle (See pics!)
0 notes
Photo
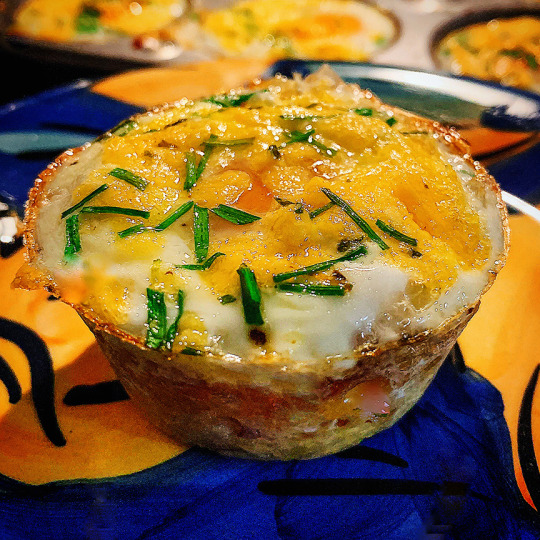

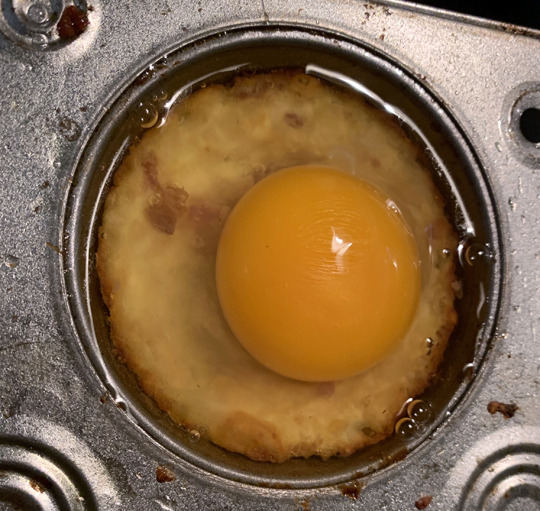
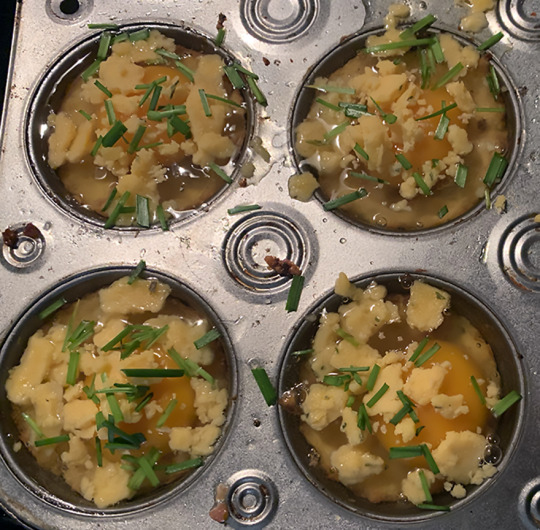

Cauliflower 🍳 Cups w 🥓, Garlic, Cheddar & Goat 🧀 & Chives
I love eggs in the morning, but don’t often have time to make them during the week. So these are a supah tasty, healthy way to have a quick and yummy brekkie without spending hours in the kitchen.
I like to make them on a Sunday night as meal prep for the week. They’re also a nice way to sneak more veggies into your breakfast, as cauliflower stands in for hash brown potatoes, making them low-carb, as well. And the best part? You won’t even miss (or notice) the lack of potatoes! Here’s what you’ll need:
• 1 head of cauliflower cut into florets & steamed (Alt: Many markets sell fresh, riced cauliflower. So if pressed for time, just buy that & steam!)
• 2 cups shredded 🧀: I used goat & cheddar, use whatever you like
• 14 large 🥚
• 2 teaspoons garlic 🧄 powder
• 1 teaspoon herbal sea salt / sea salt
• 6 slices cooked/crumbled 🥓, or bits
• 2 tablespoons chopped chives
• Ground black pepper
• Truffle oil (Cause I do like to work that into almost everything ;)
Preheat oven to 375°. Lightly grease a 12-cup muffin tin (I use truffle oil, for added flavor!)
Drop your steamed cauliflower into a food processor and pulse until fine. If you’re using a bag of riced cauliflower, just steam per directions on bag.
Pour ground cauliflower onto paper towels or cheese cloth and twist, to wring out liquid. Do this multiple times until cauliflower becomes fairly dry (this is key, for it to be able to brown/crisp. I think it took me 5-6 rounds of paper towels!)
Transfer dry cauliflower to a large mixing bowl. Add cheddar, 2 eggs, garlic, half the bacon and half of the chives, along with the herbal sea salt. Stir to combine.
Distribute mixture between muffin tins. Use your fingers to press mixture into the sides and bottom of each cup, to form a bit of a nest.
Bake 16-18 minutes, or until edges are golden.
Now sprinkle the rest of the bacon in each cup & crack an egg on top (try not to break the yokes!). Then crumble your remaining chives and a little bit of crumbled cheese on top of all.
Return to the oven and bake for another 7-10 minutes, until the eggs look like they’ve just set. Enjoy!
PS If you can’t eat them all within a few days, they freeze well: Just put them in a Ziploc in the freezer and defrost on a lower temp in your microwave for a quick, protein-rich, low-carb breakfast!
0 notes
Video
🍋 Adding lemonade to Butterfly Pea Flower Tea 🦋
0 notes
Photo
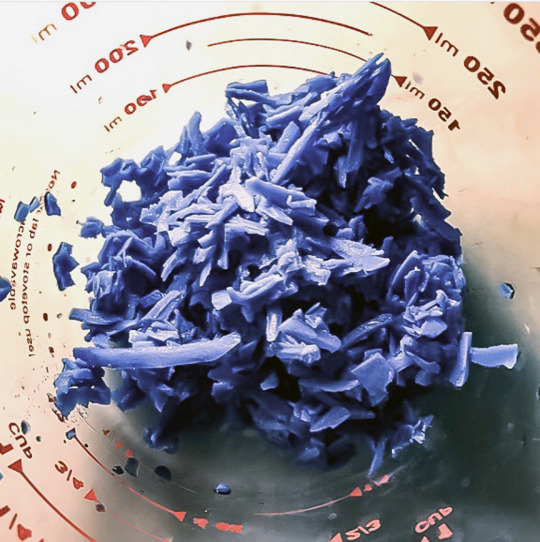
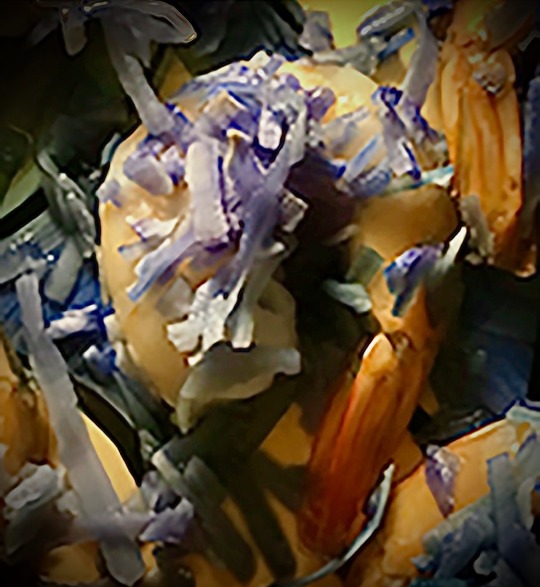
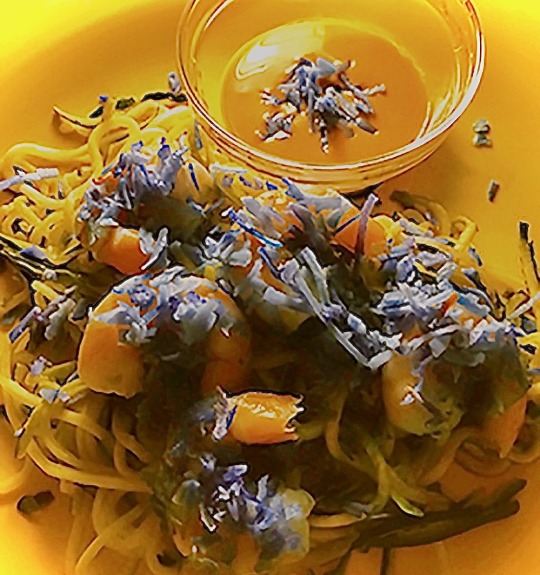
🥥 Coconut Shrimp w Butterfly Pea Flower Tea 🦋
Some of you may remember earlier posts where I experimented with the stunning, blue hues of Butterfly Pea Flower tea, a few years ago. Now I’m seeing it everywhere! And my own #supahtastytestkitchen for this ingredient continues, too.
This Southeast Asian tea has been brewed for centuries, but is recently popping up on all kinds of menus. It’s hard to believe this vivid shade of blue is 100% natural. It also turns a vivid purple color, when you add even a hint of citrus to it.
What I like about using it as an ingredient in baking, cooking and beverages, is that Butterfly Pea Flower has a really mild flavor, too. So it pairs perfectly with any other ingredient or recipe you add it to.
For this recipe I brewed the flowers as tea, and then steeped unsweetened coconut in the tea overnight, in the fridge. Then I toasted the coconut in the oven for a few minutes, before topping shrimp with it, and serving over zoodles.
Peanut sauce proved a #supahtasty side for it, too. Full recipe will be up here on #supahtasty, soon...
#supahtasty#foodblog#healthy#allnaturalfoodcoloring#playwithyourfood#butterflypeaflower#tastethenonGMOrainbow🌈
0 notes
Photo

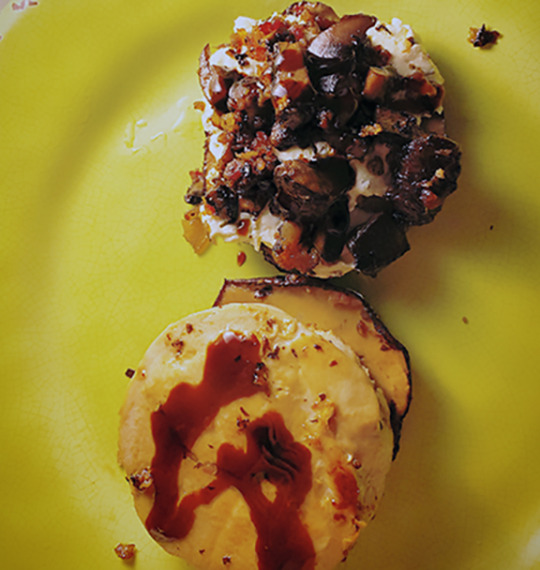
Balsamic tuna burger on portobello 🍄 buns w/onion chive cream cheese, 🥓 & truffle oil
My quest to come up with new ways to prepare & enjoy 🐟 burgers continues! And during #tuesdaytestkitchen I was happy to stumble upon a Supah Tasty idea I’ll definitely make again.
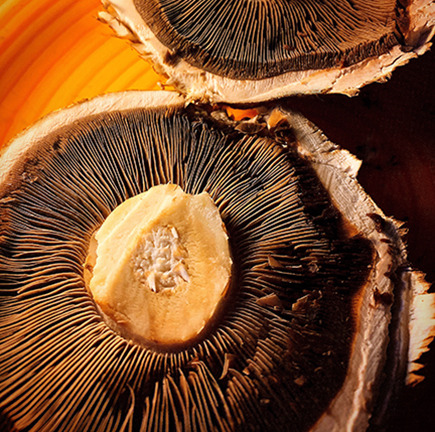
Balsamic and tuna are of course a classic combo. And when I found huge, organic portobello 🍄 🍄 at the market I thought “why not use them for buns?”
So now here we are! What you’ll need:
1 🐟 burger - from the seafood dept. or Trader Joe’s
2 large portobello 🍄 - they’ll shrink when cooked, so go big!
Onion & chive cream cheese
Few pieces of chopped 🥓
Splash of Balsamic glaze
Few tablespoons truffle olive oil
Per my last post, I’m a fan of Trader Joe’s 🐟 burgers. They’re mainly tuna, sans filler (unlike others). And also pretty tasty! So if using their version, make sure you take them out of the freezer to defrost about 10 min, prior to cooking. If using a fresh/not frozen tuna burger, skip to the next.
While your burger is defrosting, cut the tops off of your 🍄🍄, and scoop or cut out the mushroom in the middle. Chop that up, throw it in a pan on medium low with some truffle olive oil and your chopped bacon.
Cook for several minutes until the bacon is crispy, and your mushroom pieces are nicely sautéed. Remove from pan, place on a plate, leaving that 🥓-y oil in your pan.
Now add the two “buns” to the pan, and cook them for few minutes, each side. Remove, pat with a paper towel to blot oil, set aside. And while they’re still hot, spread a couple tablespoons of onion & chive cream cheese onto the top 🍄 “bun”. I found cream cheese is not only a great addition flavor-wise, but also provides a nice, creamy balance to the acidity of the balsamic vinegar!
So now add a little more olive oil to the pan with your tuna burger, turn heat to medium high. Cook a few minutes, each side. Before removing, spoon the 🥓-y mushrooms you cooked earlier back into the pan, to heat/crisp them a bit more.
Then pile those onto the top 🍄 bun, on top of your cream cheese, putting your tuna burger on the bottom bun. Add a healthy drizzle of balsamic to both sides, and a shake of herbal sea salt.
Put both sides together, and enjoy your Supah Tasty balsamic tuna burger!
0 notes
Photo
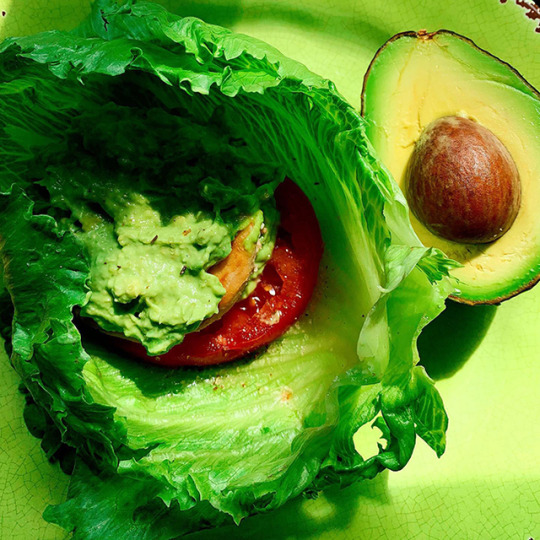
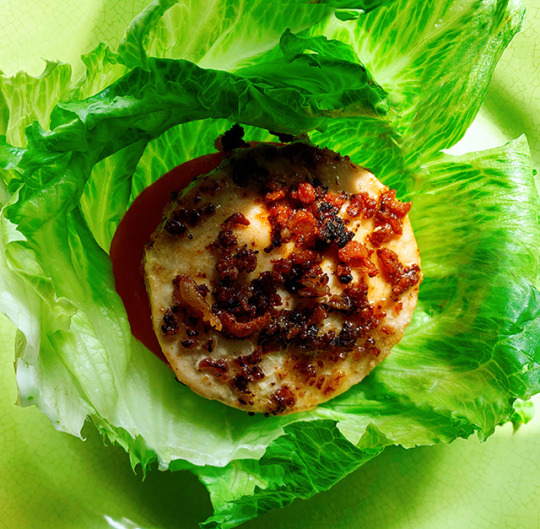
Tuna burger on romaine with 🍅, garlicky-🥑 goodness & herbal sea salt
This is one of my favorite quick, healthy lunches to make when working from home! Here’s all you need:
1 🐟 burger - from local seafood dept. or Trader Joe’s!
2 big leaves of romaine lettuce
1 tablespoon garlic mayo
Half an 🥑
🍅 slices
Herbal sea salt
Optional: 🥓
Trader Joe’s makes a pretty good Tuna burger! Their Mahi burgers are yummy, too. Either works if you don’t have time to head to your seafood dept., but still want to make a healthy lunch. I try to keep some on hand for when I have writing deadlines, and I don’t want to just reach for whatever’s closest (& less healthy!) just because I’m busy.
So whether you’re cooking one fresh, or taking TJ’s version out of the freezer, same instructions apply, with one difference: For the TJ’s prepared/frozen version, let it defrost 10 minutes or so, before adding it to the pan. Rest is the same: Add a tiny bit of olive oil to a pan on medium-high, and cook your burger for a few minutes, each side. Should turn opaque, indicating it’s cooked. Watch it closely too, so you don’t overcook/dry it out. Remember with fish, you can always add time - but you can’t take it away!
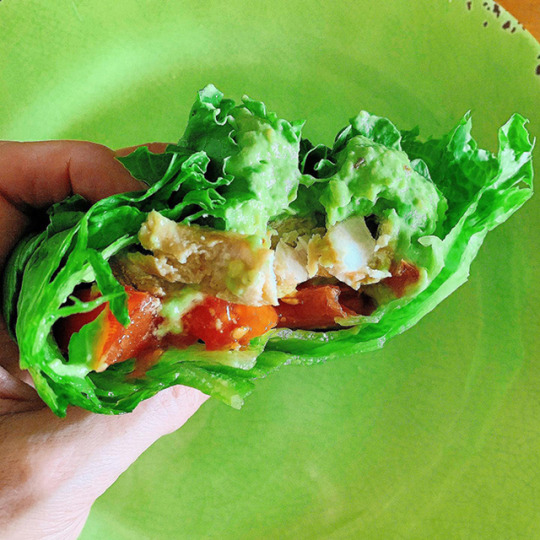
Option: If you’re somewhat healthy, but also love 🥓 (aka me!) fry some up in the pan with your burger, turning it into more of a tuna BLT (see pic #3). Yummm.
While your bacon and/or burger cook, mash up half an 🥑 and mix it with 1 tablespoon garlic mayo. If you don’t have that, just add a teaspoon or 2 of garlic powder to regular mayo, to give it a little flavor. Slice up some 🍅, grab a couple romaine leaves. And I like to use two, because it adds a nice crunch - and also helps it stay contained, as a sandwich!
Flip your tuna burger onto the romaine, top it with 🥑 garlicky-mayo, add slice or 2 🍅, dash of herbal sea salt - and wrap it up. Enjoy!
0 notes
Photo
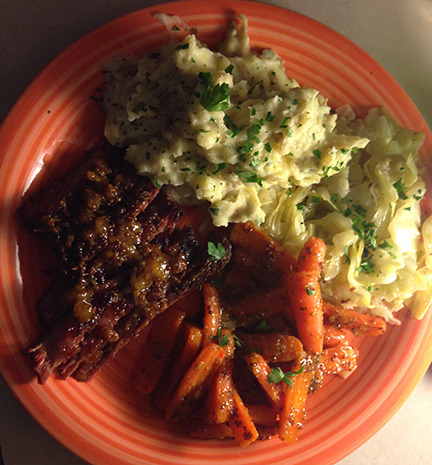
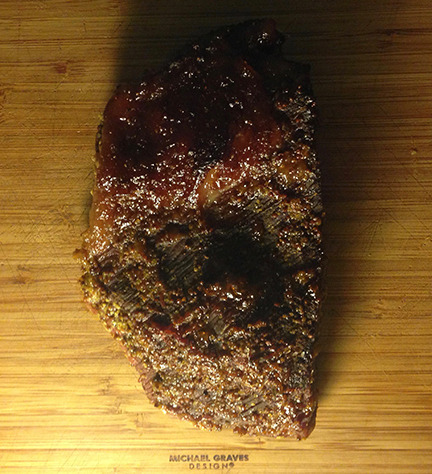
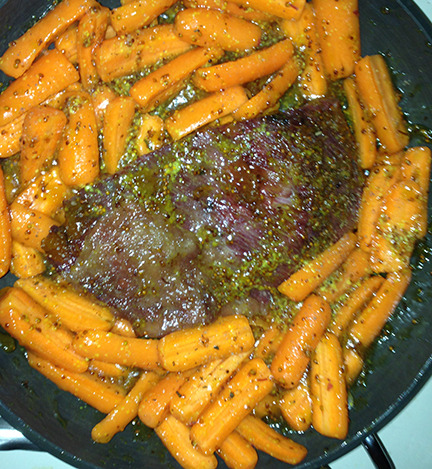
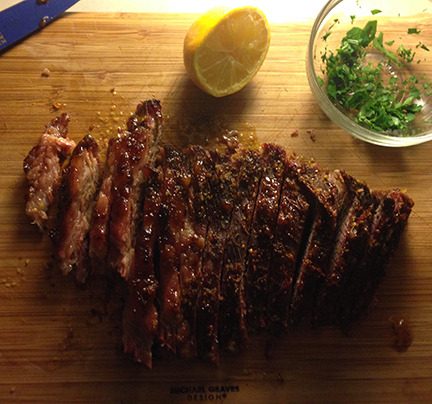
Corned beef with 🥕🥕🥕🥕🥕 & Whiskey-Marmalade Glaze
Happy St. Patty’s Day! ☘
I’m still in the process of moving posts over, from my previous food blog. And can’t think of a better day for my fave (& easiest) Corned Beef!
This is great if you’re celebrating today and don’t want to spend a whole day in the kitchen, as it calls for fully-cooked corned beef you can get at the market. So if you’re in need of a Supah Tasty St. Patty’s supper, that frees you up to enjoy the festivities, give it a try with homemade mashed potatoes & cabbage on the side. What you’ll need:
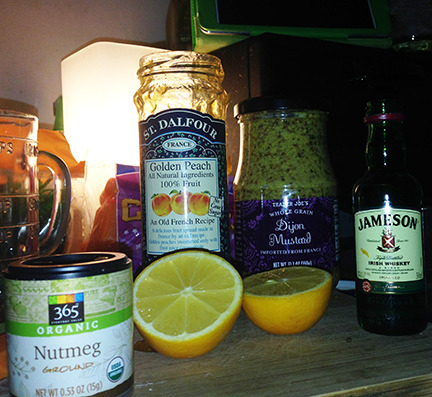
• 1 ¼ cup sweet marmalade: I used 🍑 (so good!), 🍊is great, too
• ¾ cup Irish Whiskey
• ¼ teaspoon ground nutmeg
• 1 tablespoon Dijon mustard
• 2-3 lb. piece lean, fully-cooked corned beef
• 12 🥕peeled, halved lengthwise
• Fresh parsley sprigs
• Salt & pepper to taste
Preheat your oven to 425ºF. Now put the first 3 ingredients into a sauce pan and boil until they reduce to about 1 cup of liquid. And stir it often, so it doesn’t burn on the bottom! Sticky business, for sure. Should take 6-7 minutes. Mix in 1 tablespoon of Dijon.
Now coat a baking sheet with nonstick olive oil spray. Remove glaze from the stove, and generously coat your corned beef on all sides. Place on center of sheet. Put a ½ cup of the glaze in a bowl and add the carrots with a shake of salt & pepper. Place carrots on the sheet around beef, roast for 35 minutes, until carrots are tender, beef is golden. While cooking, brush both carrots & beef with extra glaze every few minutes, to keep em tender and make sure they don’t dry out!
Garnish with parsley, serve with Dijon on the side. Hope it’s lucky for ya ☘
0 notes
Photo


Strawberry 🍓 Cream Donuts (aka Heath’s Valentine’s Day dessert ♥️)
Full post coming soon!
0 notes
Photo
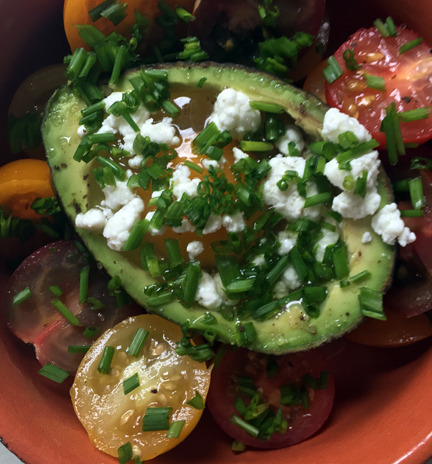
Green Eggs No Ham
Well you can add some, if you want to. But I didn’t :)
I love avocado. I put it in and on everything. But up until now I’ve not been a fan of warm or cooked avocado. This simple little dish changed that. It’s super tasty, quick & healthy. And made for a great post-workout breakfast. I roasted some heirloom tomatoes on the side, too. Nom. Here’s all you need:
• ½ a ripe avocado
• 1 large egg
• Fresh chives
• Handful of heirloom tomatoes
• Olive oil: w/truffle? #nextlevel
• Several crumbs of goat cheese
• Dash of salt & pepper
Preheat oven to 425ºF.
Scoop a little avocado out, so the egg can fit. Eat what you scooped out. It’s the gold standard of “good fat”. Not to mention delicious. Put the avocado in something ovenproof, preferably with depth to it. So it’ll stand up. I chose a terracotta bowl, but you can use a baking sheet, too.
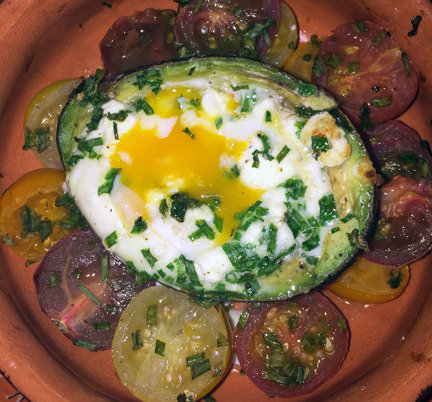
Crack an egg into the center of the avocado. Cut heirloom tomatoes in half, place around the sides of the avocado. These help keep the avocado upright too, so egg doesn’t spill everywhere, when cooking.
Drizzle a teaspoon of olive oil onto the tomatoes. Snip fresh chives over the egg, avocado and tomatoes. Add a dash of pepper and sea salt, if you like. Top with a few creamy crumbs of goat cheese. That’s the only thing that doesn’t make it straight-up Paleo. So if that’s what you’re going for, skip the cheese.
Bake for 17-23 minutes, depending on how you like your eggs. Check on it at the 17 min. mark, add/delete time accordingly.
Devour!
0 notes
Last Seen Blogs

josiedmnt
– ☾ ❛ + Josie * !

teannamon
♡ tea + cinnamon

carbonhands
ARTISTS RUIN IT FOR EVERYONE.

virtual-dreamgirl
VirtualDreamGirl.Ai

meriaadoo
𝐌𝐞𝐫𝐢 𝐀𝐚𝐝𝐨