#sorry if this is grainy I took screenshots from a YouTube video and cropped them to get the tnt logo off lol
Text


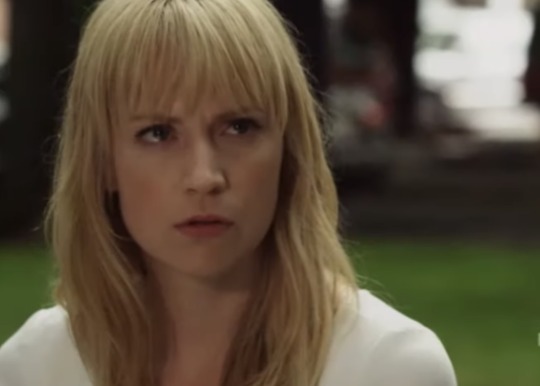
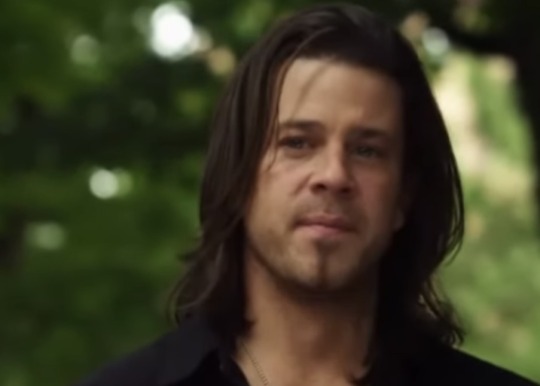
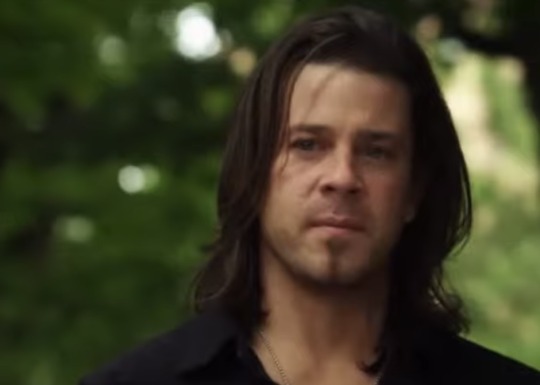
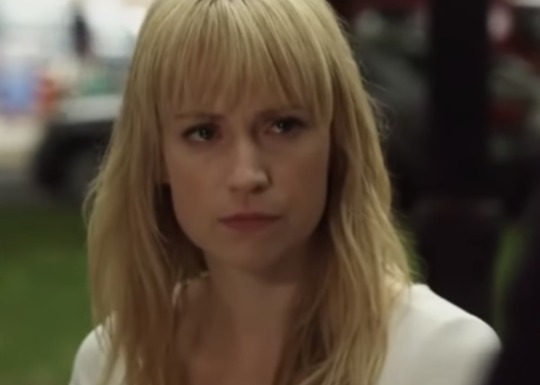
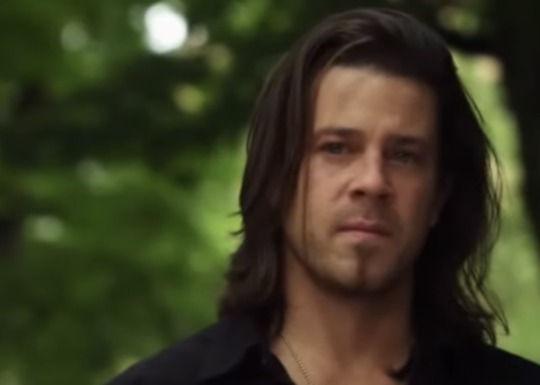


#disclaimer: I do not think eliot is a monster but he thinks that of himself so this edit is fine#this scene is seared into my brain sorry#edits#my edits#leverage ot3#parker x eliot#parker x hardison x eliot#parker#eliot spencer#quotes#leverage edit#mine#stills#screencaps#watch leverage#leverage#the big bang job#leverage season 3#sorry if this is grainy I took screenshots from a YouTube video and cropped them to get the tnt logo off lol#leverage: let’s go steal a queue
693 notes
·
View notes
Note
if you don't mind me asking, how did you make your header? :")
hi there! not at all!! i'm not sure how much detail you want me to go in to so i'll just put the tutorial down under and take what you wish.
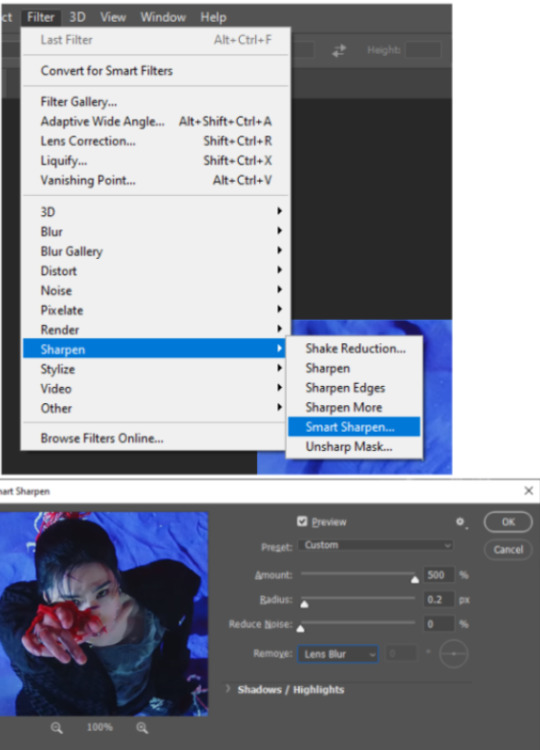
1. get a screenshot / picture you want to use. to start, i took a screenshot from the one mv which i wanted to make into a header. if you want to use a screenshot instead of a picture, make sure that the video is at full resolution. i suggest downloading the video to your computer before screenshotting, but you can also do this on youtube. anyhow, make sure that you have the highest resolution of the picture available.
2. editing the picture. for that i personally use photoshop. if you don't have photoshop, my only suggestion would be knowing the optimal size for tumblr rendering for the picture to not look blurry when you upload it. i personally use 640x360 pixels for headers, i'm sure other dimensions would work, too, but these are the only dimensions i found that don't blur the picture. so just crop it / resize your screenshot to that, if you have access to such, use a sharpening feature, and you'll be good. and just continue editing it the way you prefer. psst photopea is basically photoshop online, you can always use that.
how i personally edited it (sorry i can't completely recreate the header):
a. sharpen and blur the image. once you have the size that you need, you can sharpen and blur the image to make it look smoother. to sharpen go to:
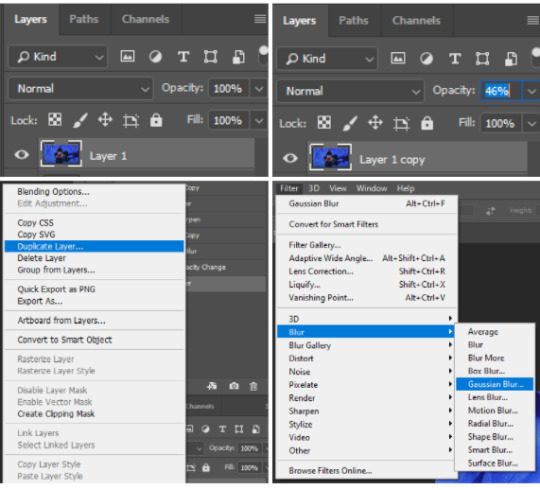
then right click the layer, duplicate it, blur it and adjust the opacity of the duplicated layer:
note: i'm sure there are extensions that allow you to do this the easier way. just do you. :)
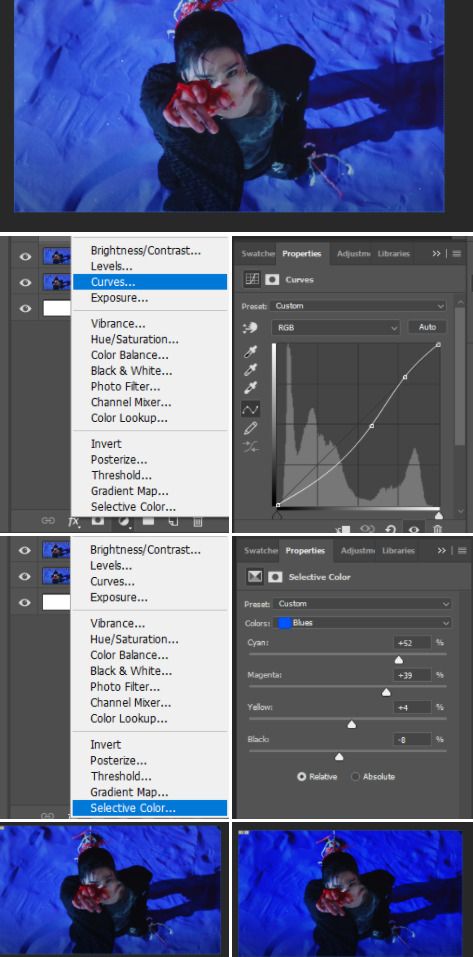
b. work on the colouring. i suggest using curves, levels and selective colours. you can find all of those options down below where the layers section is. what i personally do with all my editing is make the pictures slightly darker and use the selective colouring to play with the most prominent colours in the picture/
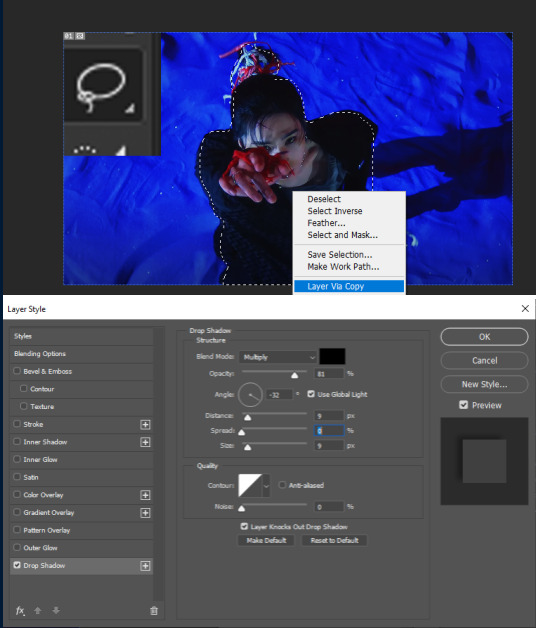
then what i like doing is adding a shadow to my subject. use the lasso tool to make a rough selection of your object, right click, make a layer via copy. then go to the layers section and double click it, select the drop shadow option and play with the settings until you’re satisfied.
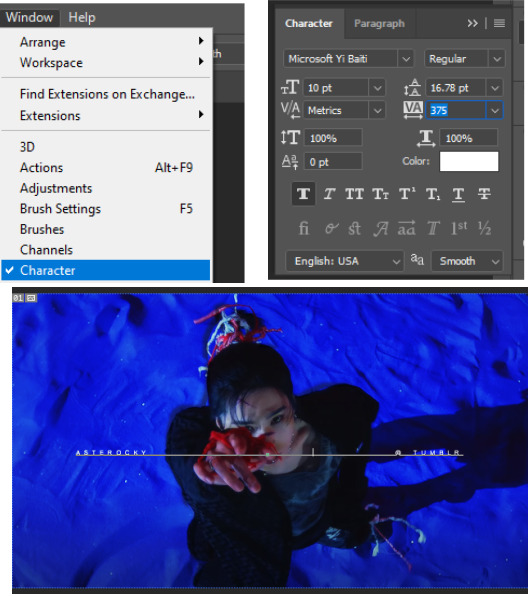
c. add on text. i personally always use the font microsoft yi balti, no bigger than 10 px. i also play with the spacing of the letters before placing it wherever i like on the layer.
3. save the image. at this point you can just save it as png (important, as jpg is a very grainy save and does not provide with the highest quality output) and upload.
something extra: getting rid of things you don’t want in the picture.
however, since i was bothered by the shadow, i want to get rid of it. this is also how i filled all of the empty space when i did the original header in which rocky is a lil bit smaller than the edit. so how do i get rid of things?
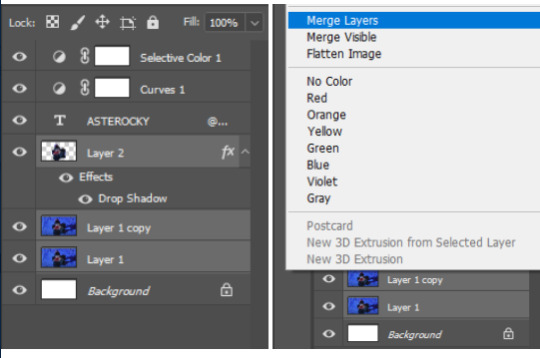
1. select all rocky layers and merge them together by left clicking and selecting merge layers
2. duplicate the merged layer as you did before.
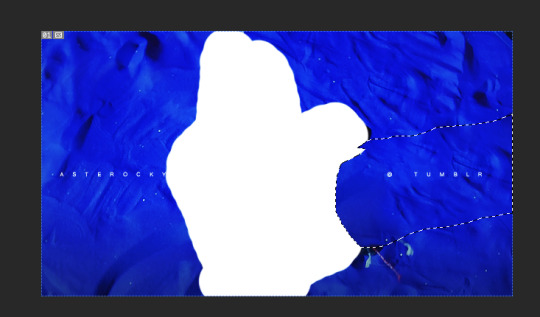
3. delete rocky completely from the duplicated layer. this is needed for image processing as photoshop will end up filling the space with a bunch of rockys instead of the blue sand.
4. use the lasso tool to select the area you don’t want in the picture, right click and select fill -> content aware fill - > ok.

you get this:
then just move the layer with the deleted rocky under your original rocky layer and use the eraser tool to erase the part you just edited. it should look something like this.

the end. if you have any questions do reach out!
#header#this is how i make all of my headers since forever i just apply the same setps to the pictures
9 notes
·
View notes
Last Seen Blogs

alovelyconcept
hipsterity for the anti-hipster
vans-medina
😘😘😘

hanbsi
some wild sexi hanbsi

faeriefaggot
lavender

nuvex
NUVEX