#smartobjects also.....
Text
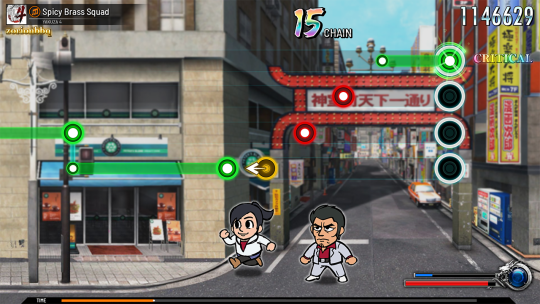
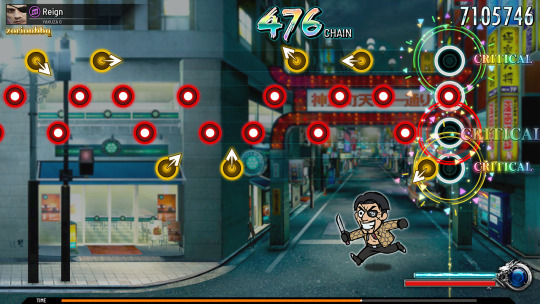

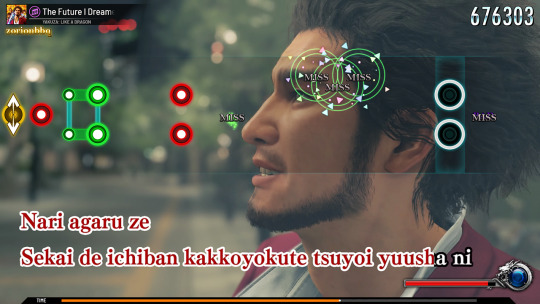
YAKUZA THEATRHYTHM RHYTHM GAME NOW!!!!!!!!
#yakuza#rgg#theatrhythm final fantasy#fanart#I HAVE BEEN POSSESSED. NORMAL HOURS#THERE ARE NO WORDS............#lichrally this (and yakuza sportsgame) is my dream 👍 karaoke minigame is great but there are like 8+ whole OSTs!!!!!! SO MUCH POTENTIAL#i've only played the demo but theatrhythm sound design is too darn good and the beatmaps(?) are fun#and the battle/party system with the intraseries crossover cast IS PERFECT FOR RGG!!!!!!!!!!#we NEED to continue the saga of messedup-looking rgg chibis#apparently there's even a dragonquest version......... you know what would go great with ichiban's upcoming game? 👁👁#anwyags!#the notes don't actually match the songs they were just copied from theatrhythm tracks so they'd look realistic 😌#if there's one thing ph*otoshop can actually do.... it's layer styles 🤔😳#smartobjects also.....
104 notes
·
View notes
Text
What is the K2 Workflow Engine?
About the K2 Workflow Engine
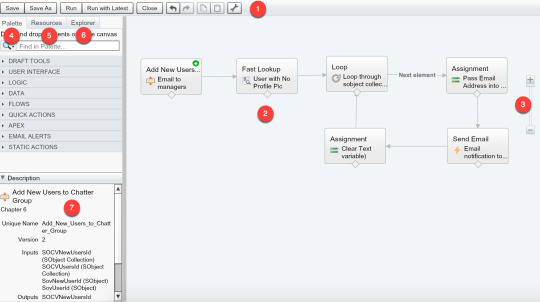
The k2 workflow engine helps you build, automate and manage your business processes across people, services, information and systems with a simple no-code, drag and drop visual designer. It eliminates redundancies and lets process designers reuse what they have built, like building blocks, to assemble new applications that meet your evolving business needs.
Data Integration, SmartObjects & Forms
The K2 data layer, called smartobjects, enables you to connect with virtually any line-of-business system using pre-built connectors - or custom Javascript-based broker connectors. Once established, you can easily access data with forms, workflows and reports.
Forms – A powerful user experience requires forms that are designed to be responsive. Using the K2 Software’s form designer, you can design forms once and reuse them across your application incorporating business rules for data validation and dynamic display logic.
Reporting & Analytics:
The K2 reporting and analytics platform offers a variety of out-of-the-box and customizable reports and dashboards to provide key metrics into process health. This makes it easier to track the performance of your applications and identify areas for improvement.
Task Panel:
The k2 task panel is the centralized view for all outstanding tasks, forms and reports. Featuring actions, history and activity feeds, this provides a streamlined view for your employees to understand their tasks.
Deployment Options:
The k2 workflow engine is a fully managed SaaS solution and can be deployed on-prem or in the cloud. This offers organisations a wide range of deployment options, from private-cloud to hybrid deployments, depending on their requirements.
Also Read : K2 data layer
SITES WE SUPPORT
Workflow Rules Engine - Blogger
SOCIAL LINKS
Facebook
Twitter
LinkedIn
Instagram
YouTube
0 notes
Text
*✧・゚ — GIF TUTOTIAL ・゚✧ *
I’ve been asked a couple times to put together a tutorial on how I make my gifs so this is me doing my best. Please be aware that I use Photoshop in German so all screenshots are in German. I’ll explain things in English of course and I think if you have basic knowledge of Photoshop and know how things look, it shouldn’t pose a huge problem. I am using Photoshop CC 2018 for this, so depending on your version, some things may vary.
1. Preparation
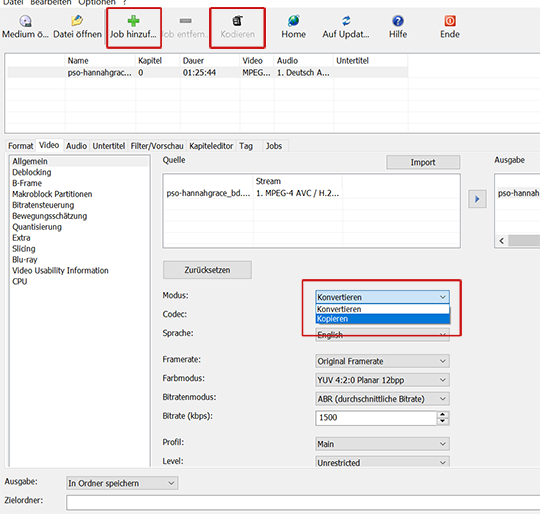
Your source material should be either 720 or 1080p for this and be in MP4. I’m using The Possession of Hannah Grace for this because I’m currently giffing it anyway. If your video isn’t MP4 already, I use xMedia Recode to copy videos over into that format. I’ll include this here because it’s a super easy and quick way to do it that changed my life.
Open the program and drag your source video (mine tend to come in .mkv) into it. In the ‘Format’ tab, choose .mp4. Now you’ll want to select the ‘Video’ tab and change the Mode from Convert to Copy. This is essential because it makes the difference between this taking 2 hours vs. 6 seconds. Do the same in the ‘Audio’ tab. Specify a folder to save the finished MP4 in at the very bottom. When you’re done, click the little green plus sign (”Add Job”) I marked below and after that, the “Code” button I also marked.
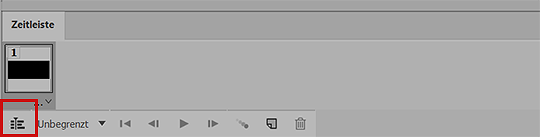
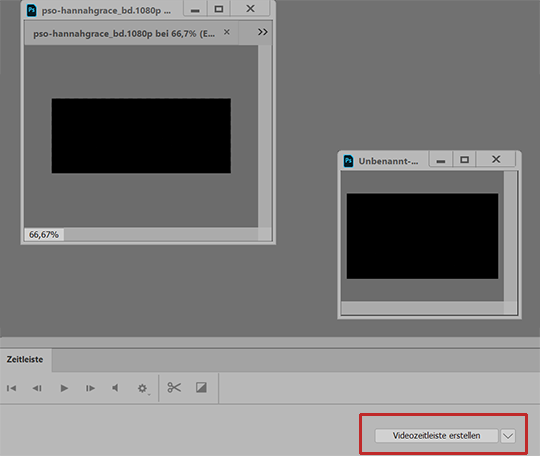
Now you’re done and have your .mp4 video. Open this into Photoshop by simply drag/dropping or going to File > Open... and selecting it. If it isn’t already displayed in timeline view, switch to it by clicking the little button in the bottom left left corner circled below. If you don’t have this bar at all, go to Window > Timeline.
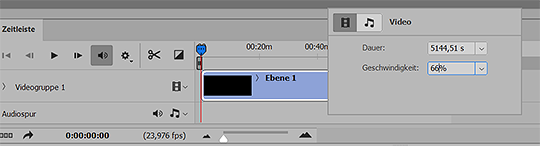
Next change the speed of the video by right-clicking on the track (blue below). I always use 66% for my gifs. Click enter.
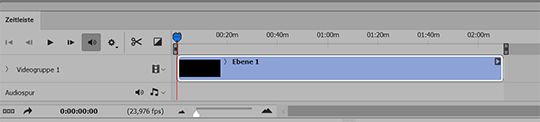
Because we’ve slowed the video down, you now need to drag the track back to its full length, otherwise you’ll miss the last third or so of your video. do this simply by grabbing the right edge of the blue track and dragging it to the right until it doesn’t move any further:
2. Resizing
Next, I resize the video. I actually make 3 versions of this for copping’s sake but because this is already complicated enough, i’ll stick to one for now. My gifs tend to be 268x151 so for this video, I went with the dimensions below:
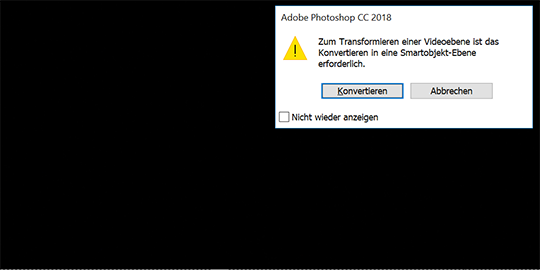
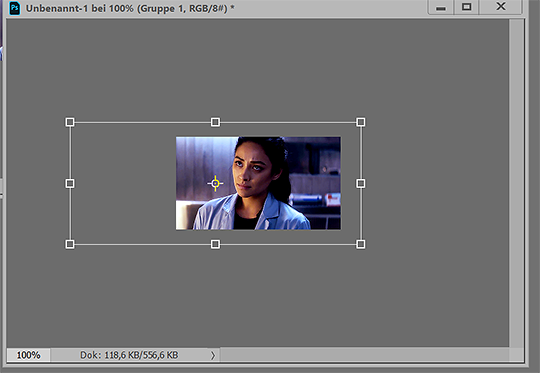
When you hit enter, you’re going to get a pop-up telling you Photoshop wants to convert your video into a Smartobject, just click ‘convert’.
Now, make a new image the size you want your gifs to be, so for me 268x151. Now drag the video layer on the right onto this new image and center it a bit. you’ll be moving this around later plenty anyway. Turn the timeline feature back on (button circled below):
3. Editing/Sharpening/Coloring:
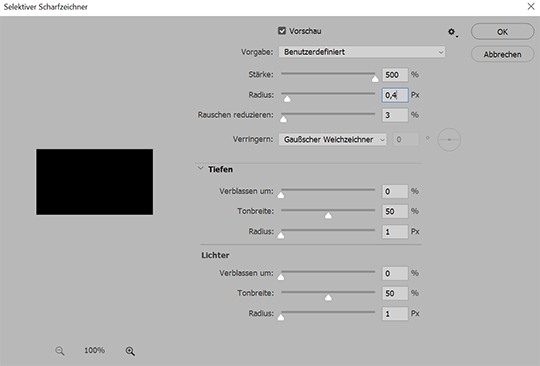
Cool, the hard part is done! Now onto sharpening. You can download an action for this or sharpen however you like. I personally do it this way: First I apply a selective sharpening (Filter > Sharpening > Selective Sharpening) as pictured below:
Next,
I’ll duplicate (ctrl + j) that layer and add a Gaussian Blur (Filter > Blur > Gaussian Blur) as follows on that duplicated layer:
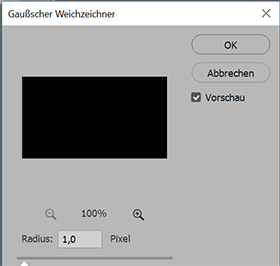
Things should look like below right now. Next, I put the opacity of the top (the duplicated) layer to usually around 27%. You can play around and see what you like best.
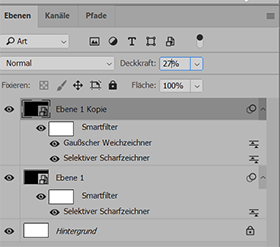
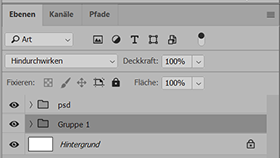
I then tend to put these two layers together in a Group (select both layers and then crtl + g) to make resizing and moving things around easier later. If you just applied a sharpening action or sharpened the one layer, you don’t need to do that. Next comes the psd. You can make your own or download one of the many available on tumblr:
4. Giffing
And now to the actual part of making the gifs. For this, we use the timeline feature at the bottom. Using the current time indicator (the blue triangle thingy with the red line at the bottom that I circled) find the first little bit you want to turn into a gif/the first scene with your FC in it. I usually have the video open on the side in any video player so i can skip through and find the estimated position of where the scene is in the video (photoshop tends to be a bit slower than video players for me, so it’s faster to figure out whether I can just skip the next quarter of the timeline because there’s no scene I want to gif in it than slowly skipping through it with the time indicator).
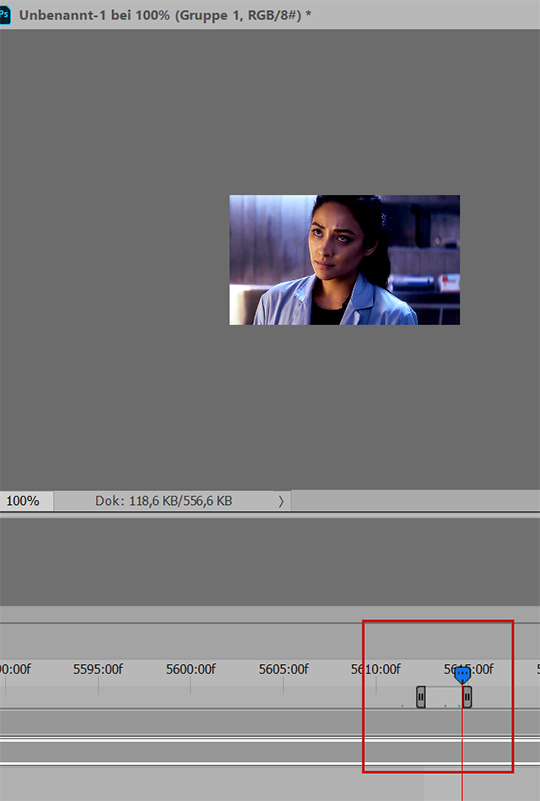
Once you found a scene, zoom in using the slider circled below. I usually do this until the markers are going by frame (the little f pictured above).

Now, move the start and end markers (the grey brackets above in the photo with the time indicator) to the position of where you want the gif to start and end. I use the time indicator to locate those points and to make sure there’s nothing else in the middle that I don’t actually want in the gif (you can see the little green dots above that indicate the time indicator has been placed there before). You’ll get a feeling for how wide you can make this bracket without the gif having like 200 frames. What’s pictured above is 32 frames.
5. Saving / Cropping
And that’s the hard part done, honestly! If you need to crop a certain scene differently, you can do this by selecting your video layer/the Group with your layers in it. Then go to Edit > Transform > Scale. Make sure to lock dimensions by selecting the little chain-link at the top and then you can just drag the video larger or smaller until it pictures exactly what you want it to.
And now we just save the gif as per usual. So just go to File > Export > Save for Web and we’re done:
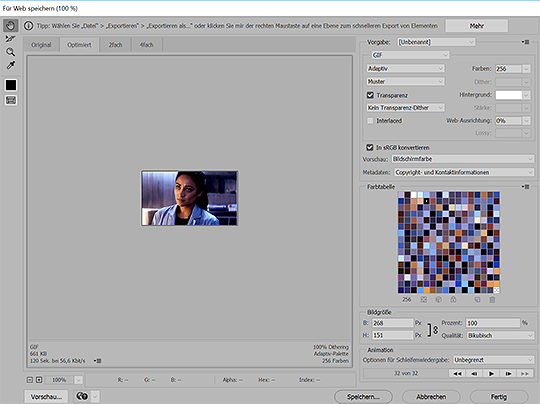
And that is how I make gifs. I hope this was at all useful. If anything is unclear, please don’t hesitate to message me about it and I’ll do my best to clear things up!
237 notes
·
View notes
Photo
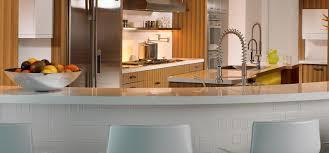
Architecture & Interior Design Firm
k2design is provided best architecture designer services you to easily create simple to advanced SmartObjects, It also allows users to integrate Forms with Workflows and interact with.
1 note
·
View note
Text
Information:
First of all I just want to say that I am NOT a professional and have no clue what I am actually doing here. There might be ways to do this that are way easier and more efficient, but this is the only way I know based on my self taught experience.
• You need: Photoshop (I am using CS5.1)
My Photoshop is unfortunately not in English but I will try my best to find the accurate translations.
• This is about: Creating a picture/gif with an animated background (as a mobile theme header for example).
Under the cut you will find a very detailed tutorial on how to create the example on top so please like/reblog if you found this helpful and don’t claim as yours!
Before we start : The size of the mobile header is a 16:9 ratio (640 pixel width and 360 pixel height for example) and the upload limit is unfortunately only 2 megabytes for gifs (for a normal post it’s 3MB) - please keep that in mind.
1. Building a base
First we need a base aka a background to add the sparkle to (or whatever effect you would like). You can settle for a monochrome background, a colour gradient or a picture, just choose whatever you like, but keep in mind that the effect might look better on a darker background. In my example I am only using a part of the Dispatch Facebook Header with Taehyung on it.

So I open a new document in Photoshop with a transparent background and a size within the 16:9 ratio. I personally like to start with a bigger base and then resize it in the end but of course you can start with 640x360 px as well. For the rest I use the default settings.
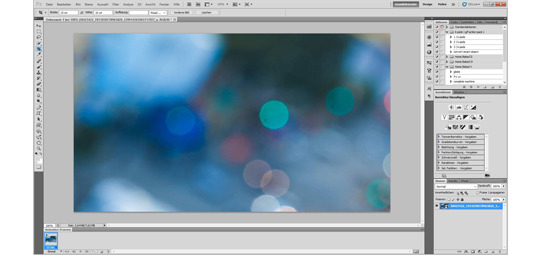
Now that you have your naked base you can build your background however you like it. In my case I just drag the photo from the folder directly onto my new Photoshop document and place it in a way I like it.
2. Adding the effect
Time to search for an effect you like. It has to be gif! On Tumblr you can find a ton of these searching the ‘texture gif’ or ‘sparkle/stars’ tag. If you find a transparent one then congrats - it would be ideal. I am quite picky and favour the endless loop ones, so that there is no harsh cut in the sprakle if you get what I’m trying to say here. I can highly recommend the ones from LEMAT WORKS, they have literally every kind of sparkle you can wish for.
When you found the one you like best, open it in Photoshop and check how many frames it has and how much delay each and every frame has.

Then you go back to your first base and duplicate your frame until it has the same amout of frames as the sparkle gif. Then also change the delay to the same amount and don’t forget to change the loop from ‘Once’ to ‘Forever’.
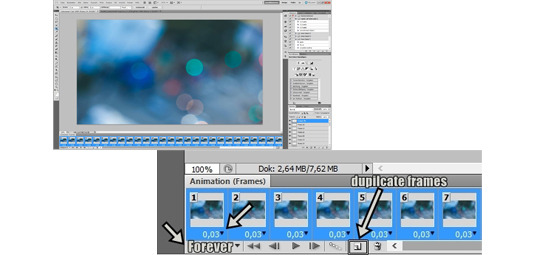
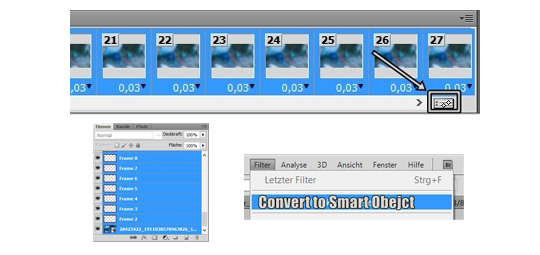
When both are the exact same you have to change both of them individually into smart objects. For doing so you select all of your frames on the bottom row and click on the timeline button. Then also select all the layers on the right side and click on ‘Filter’ → ‘Convert to Smart Object’.
Now everything should be compressed into only one layer. To get your sparkling effect onto your base you just have to pick the first tool on the left side and simply take the whole sparkle gif and drag it onto the background document.

With pressing ‘CTRL’ + ‘T’ (for Apple users ‘CTRL’ → ‘ Command ⌘’) you can now resize the sparkle gif to your liking and change the opacity. Again, the darker the whole picture, the better the effect. I changed the opacity to 40% in my case. Now is also a moment to add any kind of other filters if you want to change the colour, put on a gradient or add something to the background, you do you.

Then you just have to save it as a gif. So keep in mind that you can’t just save it normally like a picture, you have to save it under ‘Save for web and devices’. Also check again that your Looping Options are on ‘Forever’ Photoshop likes to change this when you work with a smartobject.

3. Adding the main part
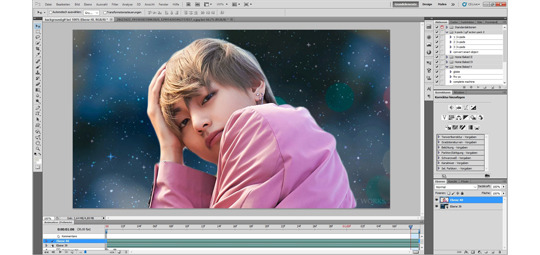
Since the base is done we can open the saved gif and change it into a smart object again to be able to work with it further. Now we have to think about what we want to put on top of it. Keeping in mind that we don’t want to cover up our wonderful background we need a png, or cut it out ourself. In my case I just crappily cut out Tae from the original picture and then drag and dropped it onto our background (just like we did with the texture gif earlier).
Now you can resize and place your png to your liking again with ‘CTRL’ + ‘T’. Of course you can place as much different things as you like, just take care that the layers on the right side don’t get mixed up and something ends up under your background. Again you can add any kind of filters here, don’t hold back, but don’t forget that the filter is going to change the background now too. So if you want to add any kind of filters only to the things on top you have to do that beforehand seperately.
At this point you can go crazy with your creativity and do whatever you want and save when you feel like it’s done. Remember to save as a gif and that your limit is 2 megabytes for Tumblr to accept it as a header!
4. (Optional) Creating a transition
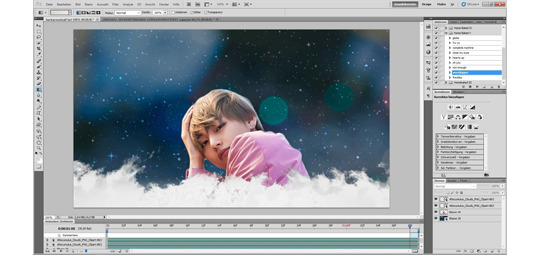
Personally I like it when my header has a nice transition to the mobile theme main colour, so I take it a step further. There are many different ways to get a transition and you can just search on google for a ‘border png’ and slap it on your gif or create your own. I just personally like clouds and think they fit well to this dreamy vibe, so i just drag and drop a cloud png onto what I have done so far. Again resizing and placing it to my liking. I ended up using the same cloud twice, layering it for a better opacity.
To get a smoother colour in the clouds I use the ‘Gradient Tool’ (I sadly don’t know if this the right name) on the left toolbar. You can change the settings of this tool to your liking as always but the default settings work just fine. You can choose the colour in the upper right and double click on the left square to get the exact colour you want in the pop up.

Now you have to move the cursor from the bottom of your picture upwards to the top of your clouds to get a smoother colour gradient. You can repeat this as often as you want and play with the opacity of the clouds to get a little more dimension until you are happy with it.
To wrap it all up I put a soft colour filter over everything (except for one cloud) and saved it.
And that’s it, we’re done!
If there are still questions that Google can’t answer I will try my best to help you out, I am only self taught as well after all.
I hope that this can help someone and you can go further from here and make even better things! Feel free to tag me or send a message, I would love to see what amazing things you create!
151 notes
·
View notes
Text
Week 22
Task: Scene 8: Filipino
This scene requires me to show the struggles that of every Filipino experience as they are compelled to leave their country and the people they love.
This idea was based originally on the first styleframe that I made for my animatic. In my Production Bible, I explained that one of my inspirations was Banksy, hence the reason for the black silhouette sytle.
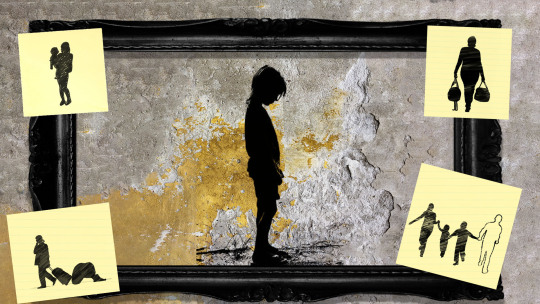
However, I decided that I needed to change it to the design below.

I find that this new design conveys more sadness. Also, compared with the first one, this new one possesses such fragility and empathy.For this new one, I decided to use blue ink instead of solid black colour as I found the black ink soo bold and domineering. In addition, the blue thin ink looks more fragile and nostalgic.
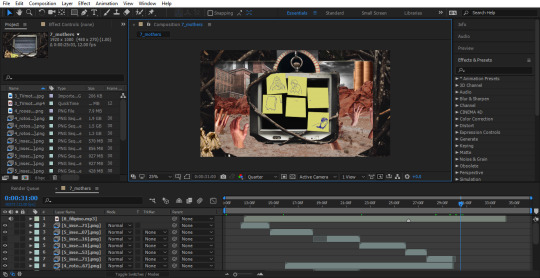
The tasks below breaks down the scene I created below.
youtube
Rotoscope the hands and figures in the stickynote
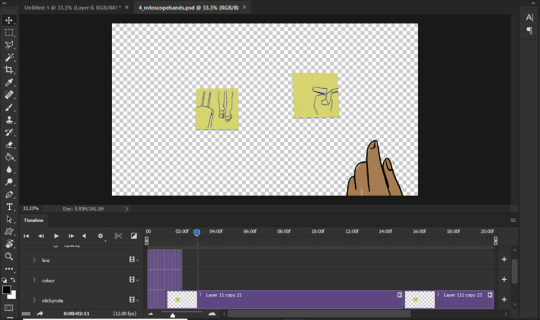
I divided the rotoscoping work to several Photoshop files to reduce the burden on my RAM. Therefore, per Photoshop file I could animate two sticky notes and hands without it crashing. The process in creating sticky note and the hands are all the same, hence it was just a matter of getting everything done.
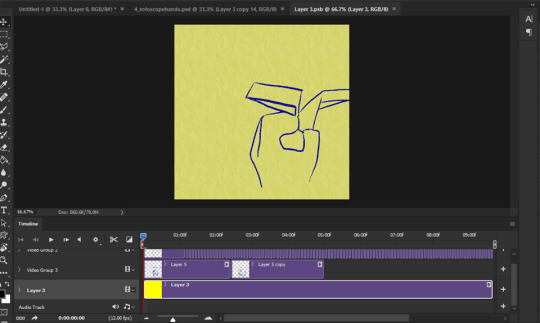
For each files, the stickynotes were created by creating smartobjects which are nested files. Below, you could see how these nested files look like.
Next Task:
Animate insects flying
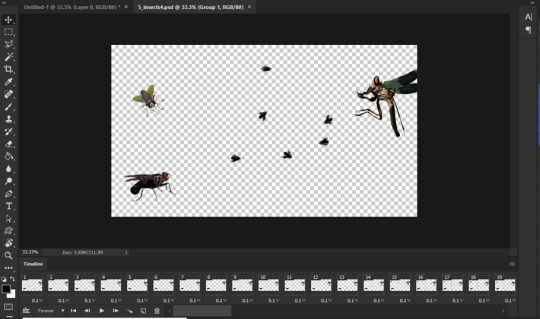
As mentioned before, insects play a huge role in the narration of the film. Hence, throughtout the film we see transition of the intesects; from butterflies to flies and moths. The flies represents how the Philippines and its people are slowly decaying. In addition, in the Philippine culture moths especially death head moth is regarded as a symbol of death.Therefore, this represenst the lives lost as more and more Filipinos leave the country.
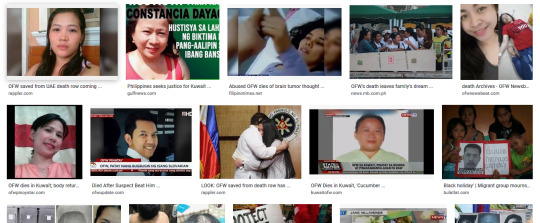
Below shows how vulnerable overseas Filipino workers are.In addition, the risk they take just to provide better future for their families back home.
Post Production
0 notes
Text
Sharepoint List Binding with K2 Workflow & Smartforms
Sharepoint List Binding with K2 Workflow & Smartforms

Today we shall see how we can bind a K2 workflow with a Sharepoint List and trigger the workflow when an item gets added to the list. Also we shall see how we can use K2 smartforms for adding & updating an items in SharePoint list.
In previous post I have shown how to enable K2 for a list using K2 Five for Sharepoint tool and the options for generating the Smartobjects, Smartforms, workflows &…
View On WordPress
0 notes
Photo
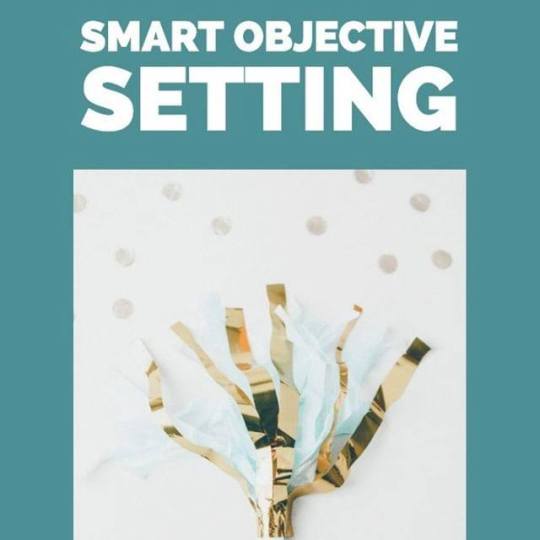
New blog post! ➡️ It’s the start of a New Year, and you’re probably hyper-focused on your goals and objectives for 2019. In today’s world, Return on Investment (ROI) and Return on Expectations (ROE) drive PR professionals and the C-Suite to want to learn more in the Evaluation phase. That’s where SMART objectives come in. In the world of public relations and other industries, goals are comprised of SMART objectives, which include: Specific, Measurable, Achievable, Realistic and Timebound. ➡️ Read more here (and link is also in bio!): http://bit.ly/2s8C5TB #behindthehourglass #hourglassmedia #goalsetting #objectivesetting #smartgoals #smartobjectives #goals #newyear #planning #publicrelations http://bit.ly/2R4gNFq http://bit.ly/2R4TOKy
0 notes
Text
15+ Best File & Folder Mockups (Free & Premium)
15+ Best File & Folder Mockups (Free & Premium)
UNLIMITED DOWNLOADS: 500,000+ Product Mockups & Design Assets
All the Product Mockups you need and many other design elements, are available for a monthly subscription by subscribing to Envato Elements. The subscription costs $29 per month and gives you unlimited access to a massive and growing library of 500,000+ items that can be downloaded as often as you need (stock photos too)!
DOWNLOAD NOW
In this roundup, we are presenting some free & premium pillow mockups to present your designs. These psd mockups are perfect to showcase your design projects. Many of these mockups offer changeable backgrounds and these mockups are easy to use through Smart Objects.
Free Folder Mockup PSD
This folder mockup offers a pocket folder, letterhead and two brochures for the presentation of your designs. You can also adjust the shadows, colors and the background of this freebie with a single click. Just use smart object option to personalize it with your designs and well-organized layers for the rest of the customizations. Dimensions of the psd file are 3500x2300px.
Price: Free
Download
Serpentine Presentation Folder – Free MockUp
A stylish folder mock-up that will help you create realistic presentations of your design. The PSD files are incredibly easy to use, just replace the image inside the smart object with your design, make any adjustments if needed. The dimensions of the psd file are 3000×2300 px.
Price: Free
Download
Pocket Folder Mockups with CD 9.5 x 12 – 4 Mockups
This is a Pocket Folder Mockups with CD pocket on the left side and a business card slot on the right side, well organized and easy to customize the layer, adjust the tone of the brightness, light, and shadow. This folder mockups came with the size of 9.5″ x 12″ folded. you can place your design for the inside part or change the color, simply drag and drops your design into the smart object area your mockups will be done in a minute.
Price: Paid
Download
Paper Folder – Free Mockups
Two mockups of a closed and open folder. High-res, layered PSD with smart object. Dimensions: 3508 x 2480 px at 300 dpi.
Price: Free
Download
Top Secret Folder Mockup
Price: Free
Download
Three Panel Presentation Folder 9×12 – 4 Mockup Scenes
Three panel folder type to insert your letter sized document, brochure, etc. It’s also included a business card slot on the pocket side, ant the folded size for the folder is 9″x12″. Use this Three Panel Presentation Folder 9″x12″ mockup to showcase your great folder design, well customized layer to adjust the mockups. Dimensions are 4000 x 3000 px.
Price: Paid
Download
Free Presentation Folder Mockup
This freebie offers a beautiful file folder in three different colors i.e. blue, brown and white. You change the design of this presentation folder using smart object options. The size of the front design is 10 x 14 inches and the size of its binding is 0.75 x 14 inches. This file folder mockup also offers customizable walls and a floor for the background but you can also change it with a single background. Use well-described layers to customize the shadows, light effects and the background.
Price: Free
Download
2 Free PSD Binder Mockups
Exclusive 2 free PSD binder mockups for different goals and implementing interesting ideas.
Price: Free
Download
Presentation Folders Mockup
Ideal for presentations and product/brand visualization . Place your own art with Smart Objects. High resolution 3200×2130 px.
Price: Paid
Download
Corporate Folder Mockup
Mockup of an open A4 folder with an attached business card. PSD file with organized layers measuring 2546 x 1800 px.
Price: Free
Download
Free Box File Mockup Scene
In this mockup scene, you can change the design of the box file (front & side label), paper, book cover (front & binding) and the box just by using smart object option. All the objects are placed in separate folders so you can adjust the shadows and light effects of each item individually. This mockup also allows you to customize the background and the mat placed under objects. Dimensions are 3500×2300 px.
Price: Free
Download
Stationary File Folder Mockup – 5 Mockup Files
Simple Stationery item – Documents Folder. Photorealistic mock-ups for branding or simply to present your design. Easy to place your own content by smartobjects.
Price: Paid
Download
Dual Stacked Presentation Folders – Free Mockup
The two presentation folders in this mockup are fanned on a flat surface, giving the viewer an engaging look at the design’s front cover.
Price: Free
Download
Front Open Folder Mockup Template
This mockup provides an excellent view of your folder design’s front cover. The folder is slightly open, so the audience also gets a slight peek at the folder’s interior.
Price: Free
Download
Front and Inside Folder Mockup Template
With this presentation folder mockup, the audience gets a view of two different parts of your design at once: the front cover and inside pockets/panels.
Price: Free
Download
https://inscribemag.com/file-folder-mockups-free-psd-download/
0 notes
Photo
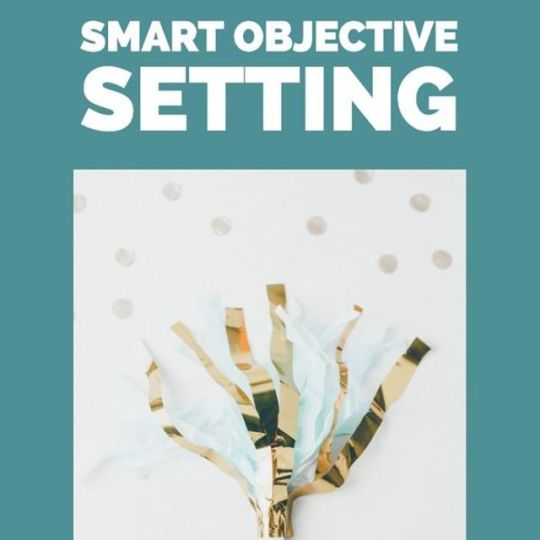
New blog post! ➡️ It’s the start of a New Year, and you’re probably hyper-focused on your goals and objectives for 2019. In today’s world, Return on Investment (ROI) and Return on Expectations (ROE) drive PR professionals and the C-Suite to want to learn more in the Evaluation phase. That’s where SMART objectives come in. In the world of public relations and other industries, goals are comprised of SMART objectives, which include: Specific, Measurable, Achievable, Realistic and Timebound. ➡️ Read more here (and link is also in bio!): http://bit.ly/2s8C5TB #behindthehourglass #hourglassmedia #goalsetting #objectivesetting #smartgoals #smartobjectives #goals #newyear #planning #publicrelations http://bit.ly/2R4gNFq
0 notes
Last Seen Blogs
mynxiiwhite
Decadence & Debauchery

strongset11
Men

nacho163163
Nacho

whosdefsoul
hey
coolcat-catra
Catra turned me into a furry and that's okay