#madflip
Photo
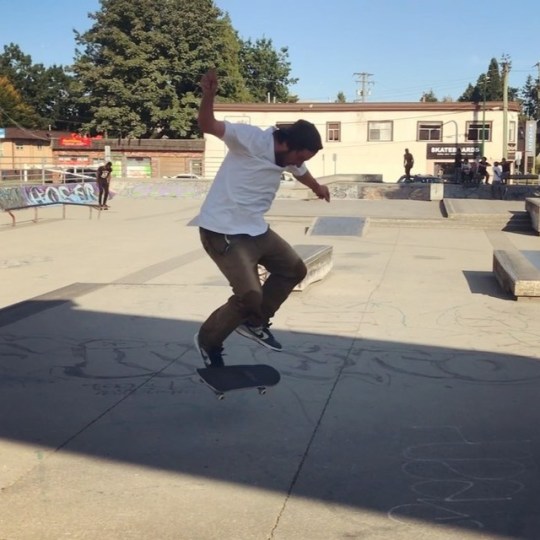
🤮I’m naming this trick the #madflip because it’s a mad stupid trick🤓 I Sliced open my knee good on this😒...Tried to get it cleaner but blood was poring all over my favourite green @jslv pants ... best pants ever! 👖 please make them again so I don’t have to look like a bum wearing 4 years old pants 🙏 😂 thanks ❤️ @306shop @smartrdevice @tensortrucks @hilx @dwindlecanada #skateboarding #skate #sk8 #skatepark #skater #underflip #doubleflip #bigspin #fakie #bigerspin #fakiebigspin #bumlife #blood #splitknee #sunday #summer #fakiebigger doubleunderflip (at Burnaby, British Columbia) https://www.instagram.com/p/B0NI-9vFatE/?igshid=19nslah5fyop1
#madflip#skateboarding#skate#sk8#skatepark#skater#underflip#doubleflip#bigspin#fakie#bigerspin#fakiebigspin#bumlife#blood#splitknee#sunday#summer#fakiebigger
1 note
·
View note
Text
Customer Bio: DJ MooseHead
Every once in a while we receive emails from our customers thanking us for the support we provided them. Here is one that stood out.
Frank Mazzuca contacted us because he wanted to get his son a DJ Controller that is great for beginners but still fully functional for Professional gigs. He spoke to one of our Pro Sales Representatives, Scott Magno, and they both agreed that the Mixtrack was the perfect product.
"I introduce to you DJ MooseHead. Moose is my son's nickname at school. First gig was a major success...just wanted to share the love.
Frank
PS: he loves his Numark gear!"
The best part about this story is that Marcel Mazzuca aka DJ MooseHead is only 13!
DJ MooseHead with his Numark Mixtrack
DJ MooseHead Set Up
If you have any great stories like this to share with us, please send them to our Marketing Manager, Ariff Glick, [email protected] and you might be featured on our blog.
0 notes
Text
I Wanna Be A DJ, How Do I Get Started? Part 1
I get asked all the time "How do I become a DJ?" I love having this conversation because I love being one. Sometimes it happens when I'm in between mixes in a loud environment, and sometimes it happens on this blog or on our You Tube Channel. Either way the answer is quite simple. "Become What You Already Are". You are already a DJ to some degree. It might sound Zen-like or Utopian but it is true. You probably have a favorite song or you've compiled a play list to listen to or even to share with a friend. If you have ever made a mix tape for a special occasion or for a significant other or for yourself then you're already closer to being a DJ than you think. Here are the first things to consider when your journey begins.
MUSIC
Decide what you want to play and start your collection. Start with what you already have and build upon it. Without dating myself (accurately anyway), I bought records in vinyl form the old fashioned way. I watched 120 Minutes late on Sunday nights and made a list of what I liked. I went to the local record store with my list and bought what they had and asked Eric to order what they didn't have. Rinse and repeat every week. My intentions back then were to compile a collection of cool tunes so I could record my favorites on a cassette and share with my friends who wanted to listen to it. These days you have many resources in which to listen to and purchase good music. DJs will post their Top 10's on sites like Beatport in order to give you an idea of what's hot and you can almost always purchase the tracks directly from the site. There are also a multitude of music blogs that exist to keep you up to date on new releases, remixes and the artists and DJs that are making the hot tracks. So in essence you want to get educated on the music and the people that create it, decide what you want to play and buy it, build your collection and finally, prepare it for presentation. You can then start to develop ideas of how you want to program your mix based on what you want to accomplish. This process is ongoing especially if you want to stay current and get gigs. At the end of the day, it is really all about the music. No matter what.
BYOG - BUY YOUR OWN GEAR
Period. No matter what it is, professional, intermediate, or beginner, new or used. You can learn to play on anything, but I strongly encourage you to invest the money, great or small, into owning some sort of DJ set-up. There is a process involved in deciding exactly what to buy, and we can certainly help here at Unique Squared. But, a Jedi one does not become without his or her light saber. It's paramount to have the gear at your disposal so you can get used to the mechanics and tolerances of your equipment in order for you to develop your skills. It doesn't have to happen over night, but it has to happen in order to become a true DJ. Do some research for there are many options. I started with a Gemini mixer and 2 Technics SL-1210Mk2's. I purchased the mixer at an Air Force Base Exchange and I ordered the turntables from a Navy Exchange catalog. Yup, I served in the Navy. Nuclear Field. Anyway, this was a standard DJ set-up in the late 20th century and it was perfect for me at the time. I use a controller now but the layout is directly based on the very set-up that I started with a long time ago. Two turntables and a mixer. The point is I bought the gear and I learned how to use it because it was always at my disposal. Then I learned to love it and I never looked back.
LEARN THE BASICS
Crawl, walk, run, fly. This can be defined in many different ways in term of DJing. I follow a basic guideline when I give lessons. Without getting into great detail here's my nutshell version:
1. CRAWL - Listen to a lot of music but especially the music you want to mix. Count 8's, 16's, and 32's. Listen for intros, verses, bridges, choruses, builds and breakdowns. Listen for the mix when you listen to other DJs. You have to develop your ear in order to differentiate between 2 tracks. All of this can be done before you even touch the equipment.
2. WALK - Learn your mixer. Learn your turntable or CD player. Learn your controller. Learn how and where to plug in RCA, XLR, and 1/4" cables. Press every button, turn every knob, slide every fader. Learn the tolerances of your cross-fader, channel fader, pitch adjust, jog wheels and turntables. Learn how to cue and monitor each channel on your mixer. All of this can be done before you put on a record or load a track.
3. RUN - Mix two tracks. Every one has their own way of doing this, but this my favorite. I would match two records of similar BPM on the turntables so that they were already beat matched and no pitch adjustments were needed. My student would then practice throwing each track on the first beat to get used to the feel of the record and turntable and monitoring through headphones. After they become comfortable with that, they could slowly bring in the mix, adjust the EQ, and slide the cross fader to the incoming track. I would then speed up or slow down one of the tracks so that they would have to listen to match snares or hi-hats and adjust the pitch in order to match the records before bringing in the mix. Rinse and repeat.
4. FLY - Inevitably, everyone wants to learn tricks. Only after becoming comfortable and confident in a basic mix can one attempt scratching or EQ filter sweeps. Mixing tracks that have complimentary keys is also an advanced technique that can be implemented after hundreds of mixes and an accurate musical knowledge of one's record collection. We've all seen some incredibly creative things that occur behind a good DJ's turntables and once you have the confidence and experience it is time to fly.
NOTHING IS IMPOSSIBLE
Yes, I know it sounds like a cliché, but it is my mantra when it comes to DJing. This has many meanings when it comes to DJing. When it comes to learning how to mix it is important to understand that you will become frustrated on occasion. Don't give up because you WILL get better. If you are learning to mix on what one may consider to be substandard DJ equipment then you will be happy to know that once you get the hang of it you will probably be more accurate when you finally get the proper gear. It is a labor of love as I've said before and the fulfillment that you get when you've practiced and practiced and finally start seeing the result is truly amazing. Nothing Is Impossible in technical terms relates to what you do when you mix. You can express your music in so many different creative ways if you can break down musical boundaries and be inventive.
So you wanna be a DJ? Great, you should. Everyone should. I respect the art form and I respect any one, beginner or professional, that does it. Why? Because I love music and there's music out there that one of you is going to play or mix that I haven't heard yet and it's probably incredible. In the weeks to come I will share my views on what it takes to be a DJ. In Part 2 I will go into more detail about making and uploading mixes, promoting yourself, gigs and gig etiquette, and creating your own business. Stay tuned. Cheers!
Check out Part 2 here.
0 notes
Text
Numark NS6 Demo on The Mobile Studio @ WMC 2011 | Unique Squared Mobile Studio
During our time at this years' Winter Music Conference, we were able to finally get our hands on the Numark NS6, courtesy of the folks over at Numark and Mike Hoska.
The NS6 uses Serato Itch and allows for 4 deck simultaneous control of your mix. Couple that with an array of blazing hot effects, advanced looping functionality, and a highly responsive and accurate control surface and you have a definite game changer in the DJ Controller market. We will do an in depth demo and review when we receive our very own. Until then, put on your seat belt and check out the video.
For more information, check out http://blog.UniqueSquared.com.
Be sure to follow us on Twitter for updates on where the bus is going next!
Also follow UniqueSquared on Facebook.
#@Mobileunique#Blog#Madflip#Mike Hoska#Mobile Studio#Numark#Numark NS6#UniqueSquared Mobile Studio#Winter Music Conference
0 notes
Text
Pioneer DDJ-S1 Review
At long last we have a Pioneer Serato Itch controller in the DDJ-S1. We reviewed it's predecessor, the T1 Traktor Controller, and had a fun time with that beast so we knew a little of what to expect. The quality of the Pioneer Pro DJ products are considered to be the blue print by which other DJ product manufacturers strive to emulate. We were excited to see the DDJ-S1 arrive at the shop and quickly opened it as if it were Christmas morning. Check out the video below:
It maintains the same features of the T1 controller, the laptop dock, large CDJ style jog wheels, and the needle drop touch strip. You have 5 hot cues that coincide with those in Serato Itch and the FX section allows you to easily select and tweak the 12 outstanding effects within the software. You can select 2 effects to each channel, both to one, or to the maser output. The browse area with a nice bigger scroll knob and dedicated crate and file buttons combined with the alphabetical search on the needle drop strip allow for near flawless navigation of your music without ever having to touch your laptop. The line faders and cross-fader are of the same quality you expect from Pioneer's DJM series mixers and you can adjust the cross-fader directly on the controller itself and in the Itch software if you want an even sharper curve for the turntablists. Overall the S1 played and felt very comfortable and accurately responded to every nudge and tweak when we ran it through the demo. The S1 by far would be the best controller if you're transitioning from the standard CDJ and mixer set-up. Check out the video and stay tuned for our own Unique Artist DJ Smiles S1 demo coming soon. Cheers!
Transcript:
Hi this is Scott Magno DJ MadFlip here with UniqueSquared.com and yes it has arrived, the Pioneer DDJ-S1, let’s have a look.
Right out of the box this is a great looking controller, it’s going to give you master outputs, both balanced and RCA. It’s going to give you two microphone outputs, XLR ¼ inch on one, ¼ inch on mic two.
Now the mic 2 input also serves as an auxiliary input with the RCA here. So if your software goes down, plug in an MP3 and boom!
EQ right here, volume control, to keep the party going. Alright, so we’ve got the CDJ section of it, jog wheels, nice touch sensitivity, rotation LED’s.
Transport section, great Pioneer quality that we’re used to. And we also have five hot cues on there, that coincides specifically with Serato Itch, that’s the Pioneer edition of Serato Itch, really nice.
Loop in and out, you also have your auto loop roll section right here, really nice to get that glitchy stuff done. Even cooler that you’ve got the slip mode function, where the track continues to go even if you punch in one of those glitchy little snare rolls, you don’t look like a rookie, you look like a really cool DJ.
So now we’ve got the needle search section right here, this means that we can scroll through touch pad, go to that build, go to that break down, there I am, ready to go.
It also serves, if you hit the shift button, as an alphabetical search for your software. Another reason why you don’t have to fumble through your laptop by using the laptop dock. That’s really nice and it makes you even quicker.
Alright, so moving on to the mixer section, good Pioneer DJM quality. You can adjust the crossfader here for your turntables, make it a little sharper. EQ, mids, highs, lows, you’ve got your trim knobs a little bit smaller. If you’re in a dark place and you need to find it, there it is.
Alright, so your effects section, you’ve got 12 different high quality effects on Serato Itch. Bank A, bank B. Select those to either both A, one on A one on B. I can also select those on the master and also on the mic if I want to put some delay onto my shoutout. Really nice.
Now, scrolling through your tracks is really easy on the Pioneer DDJ-S1. You’ve got the browse section here so you can go through, back button. And I can go to my crates and my files automatically too right there. Really nice layout.
If you’re a DJ who’s used to having turntables or CDJs and a mixer and you were thinking “I might need to switch to a controller” then this might be the one for you because this is virtually the same as having a pair of CDJs and a high quality DJM mixer. So yes there it is the Pioneer DDJ-S1.
You know Pioneer is high quality, Serato Itch one of the most popular DJ softwares out there, we’re looking at a winner, I love it.
If you have any questions or comments about this I’ll be happy to answer them personally. Don’t forget to check us out on Facebook, on Twitter, and on the UniqueSquared.com blog. I’m Scott Magno, DJ MadFlip. Be you, be unique, at UniqueSquared.com.
0 notes
Text
Traktor Scratch Pro 2 Review
By now you guys know that I am an advocate of Native Instruments Traktor Scratch software. I fell in love about 3 years ago at the 2008 Winter NAMM show thanks to an amazing demo by Dynamix and Hapa from Scratch DJ Academy in Los Angeles. I was a Serato Scratch Live user and was pretty happy using it for my gigs, but I didn't know that almost all of Europe was using a superior DVS for DJing. After seeing this demo it was a no brainer. I wanted cleaner and louder audio, the ability to record my sets, playback recorded audio from a mic on the fly, and have the ability to use my midi controller to tweak incredible effects and set loops. I had to switch to Traktor Scratch Pro. Native Instruments has an innate ability to anticipate the needs of the DJ by providing a pallet of brilliant effects and functions that truly inspire DJs to play at a level beyond the capabilities of any other DVS system. They've listened to feedback from loyal users and even haters to continue pushing the limits of DJing, elevating their product to it's new inception: Traktor Scratch Pro 2.
Customized For Your Protection
The Traktor Scratch Pro 2 system comes with the new Audio 10 interface. We can do a complete review on this alone but I'll sum it up like this: 10 ins/10 outs, seamless integration of 4 turntables plus 2 other audio devices, midi sync for those extra audio devices, mic input, 24-bit / 96kHz Cirrus Logic® AD/DA converters, AND it's louder than BOMBS!
So what are the major differences from TS Pro to TS Pro 2? Native Instruments S4 users have already been reaping the benefits of the new T2 software to some degree and the now TS Pro 2 has added the same abilities and a few extras.
TRAKTOR SCRATCH PRO 2 features an intuitive software interface, as well as TruWave frequency-specific colored waveforms for a new experience in mixing. I can choose layouts to define my waveform highs and lows, kicks and snares. This somewhat mirrors the Serato Scratch Live or Itch layout but goes even further with the ability to choose your color scheme.
Thanks to Auto Detection and configuration for NI audio interfaces, you can set up in seconds, while TRAKTOR AUDIO 10’s Direct Thru function makes switching DJs in the club a breeze. The SoftSync feature adds a new level of tempo-awareness to TRAKTOR SCRATCH that expands your mixing options when using vinyl control.
The intuitive looping and cueing functions have been enhanced with the addition of Sample Decks, making live remixing and re-editing a cinch. Grab and layer your own loops, use the library of included loop content or fire off one-shot samples such as the included scratch sounds. Record from any channel via the Loop Recorder and add dynamic layers to dramatically heighten your mix. While each Sample Deck can add up to four simultaneous samples or loops to the mix, the Loop Recorder allows DJs to capture audio from various sources on the fly and drop it back into the mix at any time, opening up creative techniques far beyond conventional DJing.
When other DJ's see me using Traktor they always ask if I've ever tried Serato. I say that I have but that I really like the layout of Traktor more, and that it allows me to organize my music better. Then I show them all of the things I can do using Traktor that aren't possible with Serato. They are usually left with the same look I had at that demo in 2008. Priceless.
With all due respect to Serato, Traktor is just a better fit for me and I encourage you guys to give it a spin if you haven't already. Check out our video and let us know what you think. Happy gigs!
Transcript:
Hey I’m Scott Magno, DJ MadFlip here with UniqueSquared.com. Today we’re going to talk about Traktor Scratch Pro 2. This is going to come with the new Traktor Pro 2 software which is banging.
Now not only are you going to have brand new high res, colored, truwave, waveforms, we’re also going to have the ability to layer and sample with awesome sophistication.
And we’re also going to have some cool new effects, a bunch of other stuff, let’s check it out now.
If you were familiar with Traktor Scratch pro before, first off you will see the colored, truwave, high res waveforms here. That is really nice to go in and personalize your color mode.
If you look at that, I’ve got it on spectrum, I can go ultraviolet or infrared, the X-Ray, but I’m going to go with the spectrum, I like a lot of different color in my life.
So, that is nice also with the waveforms. You know I’ve got some cue points set up here, I’m going to run just a little bit of audio. Now I can zoom in on that cue point there, and I can zoom in much further than on the previous Traktor Scratch.
So if I really want to get the front end of that attack on that, I can go super Dr. Science, and I’ll lift that cue point out, and I’ll make you a little bit closer right there just so I can be more accurate. So there it is, it’s moving really fast there.
So if I zoom out you can see now, so you get the idea. I can be right there on the edge of the attack on there. Ok, let’s go to the different layouts now.
I’ve got it set up in the essential layout here. It’s going to be two decks here, and then with the use of the controller I can control decks C and B for my samples as well.
I’ve got my Do Work mix right here, I like to see everything, my EQs, everything, my effects. And then the browser, so I can just quick browse through all of my tracks there and then the last one, this is my favorite, Mad Flip Prime. This is when I’m going to use just primarily the turntables and effects.
But the point is you can customize all of this, make your own, and it’s really nice to be able to have a customized workspace.
Ok so, what else do we have here? If you look you actually have, those of you who are used to using Serato, we actually have the rotating turntable here. This also serves as your check for your calibration. And if you need more room you can hide that right there, which is kind of a nice feature as well.
Alright, let’s talk about some of the cool effects now. Native Instruments has always had some incredible effects. I’m just going to run through some of my favorites. I’m going to go ahead and set a loop there and show you some effects.
This is the beat masher. That’s one of the new effects. This one Mulholland Drive is kind of a nice filtery thing. You’ve got the auto bouncer, and ramp delay, tape delay. I’ve got this set up so I can apply three effects at once. You can get some nice tricky things. I’ve always loved the flanger flux just to give you a little more flavor. Real nice.
So we’ve got some all new effects, some nice waveforms there. The ability again to do four decks on Traktor. Those of you that are familiar with the S4, you’ve been familiar with these capabilities, but now Traktor Scratch Pro 2 allows you to have that on turntables or CDJ, another timecode set up and a lot of good improvements on that.
Alright, there it is Traktor Scratch Pro 2, it is amazing. This is certainly my weapon of choice. If you have any questions feel free to leave them in the comments and I will answer them personally. Thanks for following us on our blog, on Twitter, and friending us on Facebook. This is Scott Magno, DJ MadFlip. Be you, be unique, at UniqueSquared.com.
#DJ#DJ Software#DVS#Madflip#Native Instruments#Pro Audio#Product Reviews#remix#Review#Scratch#Traktor#Traktor Scratch Pro 2
0 notes
Text
MadFlip Mixtape with Auralex Mudguard | UniqueSquared.com
Inside the Unique Squared Mobile Studio, we have all kinds of gear to be able to record, tweak, and play away to your hearts' content. However, if the environment in which you have all that gear doesn't provide ideal acoustics -- it's all for naught. Enter Auralex Acoustics. Auralex provides us with the most ideal blend of sonic engineering, visual aesthetics, and placement options to use their acoustic foam products.
The Auralex MudGuard is an excellent way to minimize excessive room ambience and eliminate external noise bleed. You can imagine that if it's such a good fit in our mobile recording studio, the home studio set-up would benefit from this greatly.
Check out the video below to see the mind-blowing revolutionary effects of the Auralex MudGuard.
A big thank you goes out to Auralex for providing us with their top notch quality products and expert assistance during our design and installation process.
#Auralex Acoustics#Auralex MudGuard#Blog#Madflip#Mobile Studio#Taylor Morken#UniqueSquared Mobile Studio
0 notes
Text
Using The Numark NS6 With Traktor Pro 2: Yes, Please!
This mapping may not work with the latest version of Traktor.
We finally got a chance to use the acclaimed Numark NS6 Serato Itch controller with Native Instruments flagship Traktor Pro 2 software, and the results were quite good. Thanks to a foundation provided by Numark and a heavily tweaked re-fix by our resident marketing manager and controller mapping stud, Ariff Glick, we came up with a mapping that suited the NS6's layout nicely with Traktor.
THE SCOOP ON MAPPING
The NS6 is basically a midi controller with sliders, knobs, and buttons that are assignable to virtually any function that your software requires. Traktor has a controller manager within the preferences where you can do this. You can download our .tsi file and import it to the controller manager. Please keep in mind that this is just one version of many possibilities that can be used and you can definitely create your own mapping to suit your particular layout and playing style. If you are well versed with Traktor and have midi-mapped controllers before then this will be an old hat for you. If you aren't, not to worry. We put together a basic template and video tutorial so you can get up and running in no time. We have included a link below of our mapping with the NS6 drivers included for good measure.
SET-UP
A. This is how you set up the NS6 with Traktor if you HAVE NOT already set up the drivers and/or installed ITCH 1.8.1.
Make sure the correct NS6 drivers installed on our computer. We also included them with our .tsi file below.
Plugged the NS6 into your laptop and turned it on making sure the power adapter is connected, then opened up Traktor Pro 2.
Import and apply the .tsi file.
Open Preferences
Select "Import" at the bottom
Open the file called "UniqueSquaredTP2NS6Mapping.tsi" (sorry it's so long)
Make sure you select the box "Audio Device Settings" so that it is checked and click "OK"
In the controller manager you will see that there are 5 separate mappings that correspond to every function in Traktor for the NS6. Select "Numark USB Audio" for the In-Port and Out-Port.
B. This is how you set up the NS6 with Traktor if you HAVE set up the drivers and/or installed ITCH 1.8.1.
Plugged the NS6 into your laptop and turned it on making sure the power adapter is connected, then opened up Traktor Pro 2.
Import and apply the .tsi file.
Open Preferences
Select "Controller Manager"
Under Device select "Add"
Select "Import"
Open the file called "UniqueSquaredTP2NS6Mapping.tsi" (sorry it's so long)
In the controller manager you will see that there are 5 separate mappings that correspond to every function in Traktor for the NS6. Select "Numark USB Audio" for the In-Port and Out-Port.
You now have the NS6 controlling Traktor Pro 2 with relative ease. Easy enough, right?
LAYOUT
The strawberries taste like strawberries, the snozberries taste like snozberries! Right? Well, almost. This particular mapping was for 4 decks and almost everything translates flawlessly. The EQ knobs, crossfader, line faders, cue points, jog wheels, sync, pitch adjust, browse, transport and loop section work as the NS6 and Traktor is normally laid out. The most noticeable difference is in the Effects section and the Filter adjust. In Traktor you have 2 ways of setting up your effects, single (advanced) and group (chained). On the NS6 you have an effect activate (on/off) button, parameters knob to adjust, effect select knob, and a wet/dry fader. We decided to map the Trakor effect in group mode with only the first effect active since the physical layout restricts more than 2 effects per deck to be active. This allowed us to map the software perfectly to the NS6 .
NS6 Traktor Pro 2 Effects Section
We then mapped the filter adjust to the "strip search" section on the NS6 because it made the most sense. The filter can be adjusted using the strip and turned on and off using the "Bleep / Reverse" button, the red light indicator meaning it's "on."
NS6 Traktor Pro 2 Filter Section
Again, you have complete freedom to choose what works best for you and this worked well for us.
THE VERDICT
It was relatively easy to get everything up and running on the NS6, but keep in mind this controller was designed for Serato Itch and there are some features that we did not map to the controller. For instance, we did not set up any of the record features like the internal mix recorder and the loop recorder. Is it possible? Absolutely, but we did a basic set-up just to show what is possible. The other noticeable difference was the jog wheel response when scratching. It was very good, but we found that the jog wheels were more accurate when scratching in Serato Itch. Overall we were very pleased with the performance and response and we highly recommend using the NS6 with Traktor even if it's just as an alternative to Serato Itch. Check out the video and please feel free to leave us any comments or questions so we can help. Thanks again to Numark for the foundation of this mapping and also to you all for requesting this particular video. Cheers!
THE FILE
Unique Squared NS6 Traktor Pro 2 Mapping
Video Transcript:
What’s going on? This is Scott Magno DJ MadFlip here with UniqueSquared.com. Hey man, we’ve got NS6 by Numark working with Traktor Pro 2. You guys asked for it, we wanted to show a video of it, so let’s check it out, we got this done.
Alright, so the first thing you want to do is go to our blog and download this particular mapping. Go ahead and save it to your desktop or something and once you're in Traktor, go to your preferences, you’re going to go to the controller manager too here, you want to add and then down to import and import that setting from the desktop here.
Once you do that you will find that decks C and D, decks A and B, the platters, the loops and browsers, and also the mix and main section all for Numark USB audio device.
Select that, make sure your port is on Numark for in and out and you should be ready to rumble it up.
Alright, so now we’ve got that up and running, and you can see the layout that I have here. We’ve purposely made it super wide, that way you can see every knob and every slider on all four decks.
You don’t have to have it that way but for visual feedback we wanted to go ahead and show it like that. Ok, so starting off you can see that we have line levels for all of our decks here. You’ve got EQ and all of that working, and our platters, we’ve got that going right here. Our pitch adjust.
So all of that is pretty standard, you can see we have it all working. We can even go into our files here, browse and load into each deck like so and switch that deck over, so we’ve got all four decks loaded as you can see everything is up and running.
There are a couple of things that I wanted to tell you guys about our particular mapping.
The NS6 has two effects that you can choose from and from those you can have the effects parameter and also the amount of dry/wet of that effect that you have.
So that is what we have, you also have the effects select. So we mapped it like this, with a chained selection within the effects, but in that chain you will see that we have no effect on our second and third effects for each side.
Now, we did that because we didn't get deep enough to map this for an advanced effect because we wanted to show, basically, a very elementary level setup just to get you up and running. Of course, you guys can modify, this particular mapping and customize it however you need to.
That’s the beauty of Traktor Pro 2, it’s just always been that way where you can kind of just customize it yourself. So, those effects are going to be here, I can select through my different effects.
Right, and then I can turn that effect on and off on the NS6, then I can control the parameter of that effect, and also the dry/wet will be with your NS6, FX mix slider.
So, let me show you guys that that’s working, go ahead and put that loop on. So, I can select effect A, pick a different effect. Alright, so you get the idea.
The effects work, our looping section works just fine. The last thing that I wanted to tell you guys was the filters.
Now, the filters on Traktor are usually going to be controlled with a knob. In this, we have in mapped out to the strip search. If you guys can see that, we have each filter on a strip search.
It’s kind of our best option for that particular, I know it will take a little bit to get used to, maybe you guys can find a better way to map that, and feel free to share it with us.
Alright, so we have got the TSI mapping for this available to you. So, just check out the description below and we will have a link to our blog where you can download it for yourself.
If you have any other questions just leave me a comment here and I’ll be happy to answer it personally. This is Scott Magno, DJ MadFlip. Be you, be unique, at UniqueSquared.com.
#Demo#DJ Controller#How To#Madflip#MIDI#Numark NS6#Pro Audio#Tips and Tricks#Traktor#Traktor Pro 2#TSI Mapping
0 notes
Text
5 Reasons Why You Should Use Kontrol S4 With Turntables
I recently had the pleasure of using my Kontrol S4 in tandem with Traktor Scratch Pro 2 with turntables for an awesome gig at Halo Lounge in Atlanta. Here's my list of why it was so awesome.
1. Easy to hook up
No need for additional gear or accessories. You would normally require an Audio 8 or Audio 10 interface, and multi-core cables or additional RCA cables in order to use Traktor Scratch Pro. Simply plug both turntables directly into inputs C and D and you are ready for action. No sweat.
2. Flexible input options
You can select which decks or sample decks the turntables will control by going into Preferences, then Input Routing. Here you can select either turntable for decks A through D, track play or sample play. Brilliant.
3. Easy to switch back
Use the drop down tab on deck A or B to select track or sample deck and then scratch control. After you get a good timecode signal you are now rocking your turntables in Traktor Scratch with all the functionality of the S4. If I wanted to switch back to the S4 jog wheels I simply press the play button next to the absolute and relative turntables and I'm back on the S4. Vice versa to switch back.
4. Scratching on vinyl
I switched from Traktor Scratch to the S4 and never looked back, but now I have the best of both worlds without any additional hardware. There is really no substitute for scratching on the real thing.
5. Free upgrade
Yes, there's still time to get the Traktor Scratch upgrade kit free with the purchase of your new Kontrol S4 through August 23rd! You will be glad you did. Seriously.
Check out our website for more details. Cheers and until next time, happy gigs!
#DJ#DJ Software#DVS#Kontrol S4#Madflip#Native Instruments#Pro Audio#remix#Review#Scratch#Tips and Tricks#Traktor Scratch Pro 2
0 notes
Text
Vestax PAD-One In Action
We first saw the Vestax PAD-One at the Winter NAMM show in Anaheim earlier this year. We marveled at it's sturdy construction, compact size, x-y touch pad, and most of all it's 12 dual led lit highly responsive drum pads. We couldn't wait to try it out ourselves here in our studio. It finally arrived and we were eager to get our drum-on, but what are we going to use it with? The obvious was with any drum software, but that was too easy. We wanted to use it with DJ software. Luckily our resident marketing manager, Ariff Glick, was up to the task yet again of mapping a cool .tsi file for us to use the PAD-One with Traktor Pro 2. The results were magnificent.
The Goods
The first thing you notice about the PAD-One is the size and construction. It has a die-cast aluminum body which gives the controller some good weight and gives you confidence when really beating on the pads. Next is the groovy X-Y touch pad used for performance style play. You have corresponding roll, chromatic, and xy hold buttons above the touch pad, a tap button for real time tempo adjustments, a bank button to select from 4 banks, a hold button for the drum pads, and a set button to execute changes in midi channel, note, velocity, and cc on each pad. Finally, there is a rotary dial and an edit button on the upper right of the controller.
The Pads
By far the drum pads themselves is what really sets this controller apart from the rest. The rubber feels good and the pads respond accurately to even the most intricate drum rhythms and rolls. They are also dual lit in green and red to distinguish whatever feature or function you have assigned. Having 12 pads on the controller also allows for some versatility in your layout without occupying too much space. With 4 banks 12 pads per bank there are a total of 48 different functions you can apply from the pads alone, and then some if you change the values on the pads. Brilliant, especially for such a compact controller.
The Verdict
The Pad-One is USB bus powered but can also be used via midi (adapter included) with an external keyboard or drum machine as long as you use an optional DC adapter. Overall it is definitely a useful and versatile pad controller for any application. I personally would like to see a few more rotary knobs on a controller, but using the X-Y pad in performance makes up for it's lack of knobs. The pads feel great and the construction and size of the Pad-One truly make it on of the best in the market.
The Mapping (by Ariff)
So to start off all the values for each pad had to be set to a unique value. Since there are 4 Banks with 12 pads on each Bank, that gives us 48 individual values. I set the PAD-One as followed going left to right, first row then second:
Bank A: Pad values 1-12
Bank B: Pad values 13-24
Bank C: Pad values 25-36
Bank D: Pad values 37-48
Here's how the mapping is set up:
The first pad on each Bank has been assigned as the "shift" button. This allows the remaining 11 pads to have a secondary function.
Pads 2-6 on each Bank are your cues: When shift is held down then each cue can be deleted.
Pads 7-9 on each Bank is your Transport section: Sync, Cue, Play. I will go into second function soon!
Pads 10-12 are your loop functions: Loop On/Off, Decrease Loop Size, Increase Loop Size.
Pads 7-12 are your effects buttons, when Shift is held.
Here's how you can use the effects:
Activate your "Hold" button, a light will indicate it is ON.
Press the "Shift" button, it will remain lit orange.
When "Shift" is ON, you are able to turn your effects on and off by pressing the pads. Pads 7-9 are your 1st set of effects, and Pads 10-12 are your 2nd set of effects.
While the "Shift" button is ON, and an effect is ON, you are able to change the parameter of the effect by using the XY Pad.
Move your finger Left and Right to control effects 1-3
Move your finger Up and Down to control effects 4-6
While the "Shift" button is OFF, and an effect is ON, you are able to change the wet/dry of the effect by using the XY Pad.
Move your finger Up and Down to control effects 1-3
Move your finger Left and Right to control effects 4-6
That's pretty much it, you can get real silky with this mapping and I hope you like it. The download for it can be found below.
UniqueSquared Pad One Mapping
Video Transcript:
What is going on yall? This is Scott Magno, DJ MadFlip here with UniqueSquared.com to check out a brilliant controller from Vestax, the Vestax PAD-One.
Alright, so there are a lot of drum controllers out there, but very few on the market are as cool as the Vestax PAD-One.
Now, first off you’ve got his die cast aluminum chassis. It’s very rugged, a little bit heavier than some of the other controllers out there.
You’ve got this XY axis touchpad that allows you to control different things, whether it’s effects, or sweeps, or filters. You can assign almost anything to that XY axis.
Alright, you also have twelve velocity sensitive pads. Now these are very accurate, they feel really good when you’re playing through some of your drum kits, or even cueing some of your loops, turning on and off effects, really nice.
Since it is a drum pad controller, you’ve got three buttons on here which are associated more with, if you’re using it for drumming.
You’ve got a roll pad, a chromatic pad, and also for an XY hold. That way if you apply one of these rolls, you can hit the hold button, so you can continue to apply that roll.
You can also use the chromatic button to go up and down your scale, 16th, 32nd, 8th, 4th, what have you. That’s really nice to have.
Conveniently you also have a tap tempo button, this can be used for many different things, but of course the tap tempo button allows you to speed up or slow down the track in real time.
You have four different banks to select from, select that there.
You also have a hold button, so if you have some of these effects or some of these functions where you want to hold that down, you don’t have to sit there and keep pressing the button, you can use the hold button for that.
You also have your note set, your velocity set, and also your CC set. Those are all MIDI functions, if you’re familiar with MIDI, you can select those right there as well as changing from your XY effects on the axis.
You’ve got this nice little scrolling jog so that you can go assign any of your channels, any values you might have. And you also have an edit button, hitting that button allows you to go in, you can assign that to some of the edit features within any of your functions.
You hit that and you can go ahead and turn mutes on, mutes off. Whatever you assign that, you can assign it to the edit button.
So overall, a very useful controller. You can use it with a number of DAWs, production software, or even DJ softwares, with great success. Really good, sensitive, very responsive, the Vestax PAD-One, it’s really awesome.
So Ariff, the renegade master with the mappings lately, put together a pretty cool mapping for the Vestax PAD-One and Traktor Pro 2.
So I have got the first row mapped to; a shift button, and then all of my cues. But I’ve got five different cue points there, If I want to get rid of something I just hit the shift button, and then I can get rid of the second cue.
So if I want to put another cue on that rock, all I have to do is hit 2, and I’m in there. So for the bottom row, this is going to be my transport section with my shift disabled.
I have got my sync button, I’ve got my cue, and then I’ve got my play right here. So, the next buttons are going to be my loop on and off, and then my loop select.
Now here’s where we get a little bit crazy with the mapping. So if I want to get into my effects, as you can see I like to do chained effects on 1 and 2.
If I want to start manipulating those effects, I hit the shift button here, and then my hold button.
Now, what that’s going to do is it’s going to make this my effects section. I can turn on my effects on effect one there, one, two, three, and then the next set is going to be effect 2 on and off.
So if I have this effect selected, I can actually use the XY axis.
Now if I want to turn the dry wet up and down, what I’m going to do is I’m going to deactivate the shift and then I can go and control the amount of that effect right there.
Let’s check out how it all sounds put together.
Pretty cool, nifty. PAD-One, Traktor Pro 2, pretty nice. You guys can check out the mapping we’re going to have it within the comments, go to the blog and download it.
This is Scott Magno, DJ MadFlip. Be you, be unique, at UniqueSquared.com.
#.tsi#DJ#DJ Controller#Drum#Madflip#Mapping#MIDI#Pad#Pad One#Pro#Pro Audio#Product Reviews#remix#Traktor
0 notes
Text
Numark 4Trak Review
Numark is back, this time with the release of their new dedicated Traktor 2 controller, the 4Trak. I have always been forthcoming in admitting that I am an avid Native Instruments Traktor Scratch Pro fan, and that I am also a Kontrol S4 user. We at Unique Squared also recognize that Traktor is one of the most widely used DJ software worldwide, hence our mapping segments with the M-Audio Torque Xponent and the ever popular Numark NS6. We were super excited to see that Numark was releasing the 4Trak when we first saw it at Winter Namm earlier this January. Well, we finally appropriated a demo unit here at the Unique Squared studios just last week and got an opportunity to check it out.
For decades Numark has been delivering some of the best DJ products to hungry, perspective DJs as well as professional DJs worldwide. But it has been in the past three years or so that they have really stepped up their game and arguably become the leading manufacturer of DJ controllers in the market. It seems that there is no end to their research and development of innovative DJ products that fit every price point and meet the unrelenting needs of the most demanding of DJs. The release of the 4Trak continues in Numark's tradition of excellence and innovation. Here are the basics:
Four decks of software control with included TRAKTOR 2 4TRAK-Edition software
Controlling four decks has become the standard for professional DJs, whether it's using playback decks, sample decks, or both. The 4Trak edition Traktor software identically mirrors the layout of the controller making it extremely easy for beginners to learn or professionals to perfect their skills.
12-knob FX KOMMAND CONSOLE for complete control over effects & filters
Traktor has the best digital effects in the world. Period. The FX Kommand Console extends the layout of the 4Trak eliminating any extra clutter, and tilts with a gangster lean so DJs can be quick on the draw when delivering the goods. It also connects and detaches easily to protect your controller when transporting between gigs.
Built-in four-channel DJ mixer that works with or without a computer
Stand alone capability gives mobile DJs a safety net if the lappy goes down. The 4Trak sports four line inputs, two turntable inputs and two microphone inputs. You can also switch back and forth from software, iPod, CD/media player, and/or turntable if you want to diversify your dj set-up and optimize your creative choices.
Touch-sensitive illuminated platters with 3600 ticks of resolution per rotation
Arguably the most accurate non-rotating platters on the market. We fell in love with these on the NS6 and now they have returned on the 4Trak for the previously jealous Traktor users. Your welcome.
Built-in 24-bit audio interface with balanced XLR outputs
Super high quality AD/DA conversion ensures your tracks and cuts maintain fidelity, while balanced XLR and separate booth outputs give you the freedom and confidence to utilize your 4-Trak in the booths of the biggest night clubs or massive event stages.
Solid metal construction
Solid, rugged, and ready for touring. This is definitely a pro controller weighing less than 20 pounds that is lighter yet and with more capabilities than two decks and mixer.
Maps seamlessly with TRAKTOR PRO 2 including sample triggers
It is a marriage of heavyweights without the headache of a time consuming mapping. The integration is precise and effortless.
Ultra-precise, low-latency high-speed MIDI
The 4Trak maintains Numark's quality low-latency design, plus it plays well with other dj software programs.
Strip Search with illuminated track-position indicator
Needle dropping has never been easier, plus the LED visual confirmation let's you know when you are close to the edge when laziness or vodka drinks ensue.
Mouseless library navigation with view options
You are no longer slaved to your laptop with the numerous browsing and view options on the 4-Trak. Speed kills and you will murder your dance floor.
Laying It Out
Not unlike many Georgia correctional facilities and institutions, DJ controllers often fall victim to overcrowding in terms of their layout and work space. Such is not the case on the 4Trak especially with the addition of the FX Kommand Console, or FXKC . The 4Trak is actually more like a mixing console than a standard controller due to its size and weight. The layout is pretty typical of what you expect from Numark, with each side of the deck in a mirrored layout. The Sync, Cue, and Play/Pause the largest on the controller, well lit and located on the bottom either side of the decks.
Just above the transport section is the shift button and five hot cue buttons. This cue area is still relatively small keeping in Numark's tradition via the NS6 but still somewhat manageable if you are into drumming or juggling your tracks. To the lower inside area of each platter there is a "jump back" button which takes you to the very beginning of the track when you hit it. This replaces the "skip" button that was found in the identical location on the NS6. To the outside of each platter are the pitch adjust faders. These are quite firm and offer little resistance acting more like a pitch set rather than an adjust, as it should be. If you don't want to nudge your track via the sides of the platters, you can do so utilizing the plus/minus pitch bend buttons below the pitch adjust faders.
The platters on the 4Trak are identical in size, stature, and ability to those of the NS6. They have 3600 ticks of resolution per rotation making them super smooth, very accurate, and definitely great for scratching. The platters also have rotating LED on the outside edge giving you visual confirmation of the track when it is paused or playing. If you don't want to use the platters to scratch, simply deactivate the scratch button on the upper outside of the platter. This prevents accidental interruption of your track when reaching over the platter to tweak your loops.
On the upper inside of each respective platter is the layer button which switches all deck control from A to C on the left and B to D on the right. The looping section is actually pretty elaborate having ten buttons exclusively for sizing, activating, moving, setting, and shifting your loops. Without getting into too much detail you can punch in and out of loops, auto-activate loops that are of a pre-determined length, as well as storing and activating loops automatically. WHOA, anyway you have a lot of ways to loop. Overall, the deck section is very easy to navigate and is logically laid out.
The Set Up
The 4Trak arrived on a Thursday and we were quick to unbox and unveil via Instagram. We pretty much knew we had to install the proprietary Traktor 2 Numark 4Trak edition and possibly a specific driver, which were conveniently included, which we did promptly. However, I was pleasantly surprised that my current version of Traktor Pro 2 also recognized the Numark 4Trak immediately after plugging it in, but some tricky configuring had to be implemented in order to have full functionality.
Launching the 4Trak edition of Traktor 2 proved to be the way to go as it was literally just plug and play and everything was ready to go without any additional configuring or routing. I like to just start playing music and figure things out while I go, but it was remarkably easy load a track, navigate, load the next and execute the mix immediately. To be fair I am very familiar with the software and to some degree even the 4Trak due to its strikingly similar layout to that of the Numark NS6. In fact, the only MAJOR difference is the addition of the FX Kommand Console which was easily attached with the built in brackets and two adjustable screws.
In The Mix
The 4Trak is a seriously professional controller in terms of feel and accuracy. Navigation of all of my music and files was also very quickly and easily done having quick buttons to take me in and out of folders and sub-folders. Preparation is definitely the key to successful DJing so that you can focus on the mix, transitions, and creativity. Once my tracks were loaded and ready to go, I like to set my cue points for the intro, first drop, build, and outro. The 4Trak has five hot cues directly above the transport section and right below the platters making it super easy to set cues. Simply hit the cue button where you need it and it's set. If you are a little off, you can delete the cue point by holding down the first "shift" button and pressing the desired cue point to erase it. Simple as that.
Even scrolling through the track to find the exact cue points was easy using the "strip-search". This was first introduced on the NS7 and truly perfected on the NS6. By holding down the shift button in the cue section, you can then slide your finger across the touch strip located above the looping section to navigate quickly through your track. This is a useful tool when setting your cues or finding specific parts to mix into while playing. Having to hold down the shift button also is brilliant in that it prevents you from accidentally displacing your current track when you are adjusting any of the loops just below. Very cool.
Once into the mix it was easy to blend because the EQ and gain section is just wonderful and has a solid, broad range. I personally like to "up and down" level mix with the channel faders with the cross-fader centered. The faders are long and tolerant and feel just as good as any of the best full DJ consoles on the market, and they are perfect for the long mix. The addition of the FX console also gave me complete control when selecting and modifying my incredible Traktor effects and filters. Overall, mixing on the 4Trak was just as easy and efficient as using any of the best controllers on the market including Native Instruments' coveted S4 and that alone makes the 4Trak a heavy contender.
4Trak with Felix Pacheco at SXSW
Numark 4TRAK Brief Overview and Demo with Felix UniqueSquared Mobile Studio
We recently caught up with Felix Pacheco of Numark when we were in Austin, Texas for SXSW. Felix is a SXSW veteran calling Austin home and playing many gigs in the area both as a DJ and as a bassist for his band, Cilantro Boombox. Felix has been a long time friend of UniqueSquared and this was the second year we visited with him for SXSW at the MobileStudio tour bus. We met him and Casey Lloyd (also with Akai, Numark, Alesis) at the bus parked conveniently at 7th and Neches, deep in the heart of the festival.
After setting up the 4Trak in the tracking room of the bus, Felix commenced his eclectic mix of soulful, Latin laden house, exploring the array of nifty effects from Trakor's arsenal. I took the liberty to show him some of my favorites since he is primarily a Serato Itch and NS6 user for most of his gigs and he quickly went to town. The cool thing about jamming with Felix and the 4Trak is that it instantly became a party with Zack Rocket, Lonely Paul, and myself getting some spins on the 4Trak as well. When all was said and done Felix compared the similarities of the 4Trak and NS6, and shared his favorite features of both for our cameras.
The Verdict
The 4Trak is a beast. It is a big gig, professional controller with a solid layout and a very rigid, full metal construction. But at the end of the day it's all about the software. The long awaited marriage of Numark and Traktor is so necessary for the DJ universe. Sure, we can map Traktor to almost anything and we will continue to, but for Numark to release the 4Trak amidst the success of the NS6 makes it very easy for Traktor fans (especially in Europe) to choose Numark. In all fairness there are a few minor quirky features on the 4Trak (like the assign buttons and sliders above the browser) that seem like leftovers from the NS6, but the quality of this controller is undeniable and we know it will be a huge success. We also know that Native Instruments has something on the horizon with Traktor Remix 2.5 in April and hopefully some of the new features will still translate nicely to the 4Trak. I personally look forward to doing a comparison with this and the Vestax VCI-400 very soon. But that's another blog. If you have any input or questions, please be sure to leave them in the comments below. Until next time, happy gigs!
#DJ Controller#Effects#Felix#Kontrol S4#Madflip#Numark#Numark 4Trak#Pro Audio#Product Reviews#Traktor Pro 2
0 notes
Text
Reloop Beatmix Announced
Direct from Musikmesse in Frankfurt, Reloop announced their newest prime time controller, the Beatmix. This is a hot new 2-channel Virtual DJ controller coming with a version specifically for the Beatmix. It boasts shiny new, ultra flat, 14cm aluminum jog wheels, designed for deadly scratching and quick browsing of tracks. The large transport section is clean and minimal and the (3) Hot Cue panel allows triggering and remixing whilst having a double functionality via a shift layer for all control elements.
The effects and looping sections are also grouped very nicely above the large platters making it very easy to loop and tweak with ease with dedicated knobs for loop size, effect parameter, select, and filter. There are also dedicated buttons in this area for auto loop, FX on, and the super cool Beat Mash.
Beat Mash closely emulates the popular Beatmasher effect in Traktor Pro, allowing you to chop and glitch out tracks with the simple push of it's dedicated button, SMART. Pitch adjust is also conveniently located on either side of this FX/Looping area on the upper, outer edge of the controller.
The rest of the layout is in typical clean, minimal, Reloop fashion, including the "Trax Encoder" for navigation and loading of your tracks; located just below the EQ/Gain and Master/Cue volume section. The Beatmix also sports professional ASIO drivers, offering ultra low latency for tight track control and responsiveness while in the mix.
Overall the Beatmix looks delicious and it is touted as a fascinating new controller that "Newbies" and experienced DJs alike will soon familiarize themselves with. This intuitive 2-channel controller can be up and running in the mix, and in no time at all. Here's the goods:
Features
2-deck Virtual DJ all-in-one MIDI DJ controller
Integrated 4-channel USB audio interface
Plug’n’Play: simply connect your computer and start mixing your MP3s
Designed for the worldwide popular DJ software Virtual DJ
Extensive transport section with newly developed trigger buttons
Flat 14cm XL jog wheels with aluminium platters
Ergonomically arranged mixer/CD player design for quick and easy access
Classic 2-channel mixer design
Smooth-running 70mm pitch fader
Mouse-less music library management with Reloop Trax Encoder
Versatile controls for effects, smart looping, Hot Cues, Beat Mash and sampler
Designated filter dial per deck
Fader start feature
Smart loop section
Hot Cue section with delete button
The Beatmix is also compatible with Serato Intro, and yes, with any other software that supports MIDI. There is no doubt that this will follow in the (soon to be) success of the Terminal Mix, much like the Kontrol S2 via S4.
At the end of the day, it is still all about the software. Virtual DJ is highly popular and it serves as a "gateway" software to other, higher level, software like Traktor Pro and Serato Itch. Reloop does very well due to their reliability, sexy design, and affordability. The Beatmix is sure to be a major player this year, and depending on the price, it very well may dominate in a competitive controller market. Hopefully we will get our hands on one soon. When we do, we will be sure to give it a filthy test drive and share our results. Until then, happy gigs!
#Beatmix#DJ Controller#Madflip#MIDI#Musikmesse#Pro Audio#product announcement#Product Reviews#reloop#software
0 notes
Text
Korg Kaossilator 2 and Mini KP2 Review
We have just received the Kaossilator 2 and the Mini KP2 and we are stoked to get our hands on them. Korg first introduced the Kaoss Pad in 1999 and it was a one-of-a-kind touch pad effects unit that took the world by storm.
I remember the first time I used the original Kaoss Pad during a gig many years ago; it was a lot of fun to use because it had a lot of cool effects and it was really the first FX touch pad that I had ever seen. I could plug a mic into it as well and do cool vocal effects whenever I performed in a live PA environment. I also remember watching a guitarist run a Kaoss Pad inline with his guitar pedals, using the pad FX with his bare foot while he played. It was really versatile and super fun to see.
Korg has always had a reputation of having solid synthesis in their keyboards, workstations; and the release of the Kaoss pad, along with their Electribe series, pushed them into the DJ/remix world with full force in the late 90's. Their products stemmed from synth or sample-based grooveboxes, vocoder mini-synths, like the Micro Korg, to DJ mixers with the illustrious Kaoss Pad built directly in. They were all pretty good, but it was the Kaoss Pad that really became popular, and stood the test of time.
Many different versions were to follow, including the Koassilator, which introduced a phrase synth complete with built-in sounds, the Kaoss Pad 3, and more recently the Kaoss Pad Quad as the range of Kaoss products continued to grow and evolve. They are all a lot of fun to use, whether it is in production, recording, or live performance. The latest additions to the Kaoss family were unveiled at Winter NAMM earlier this year and now we have them in the studio for a proper review.
Korg Kaossilator 2 and Mini Kaoss Pad 2 Overview UniqueSquared
Kaossilator 2
The Korg Kaossilator 2 is a portable handheld phrase synth that has capabilities far beyond its small stature. With 150 PCM synth and drum sounds, 50 arpeggios, dual loop recording and playback, it is an awesome way to create dance grooves from anywhere, anytime, on the fly. Here are the basics.
150 built-in sounds cover every style of dance music
PCM sound engine serves up realistic drums
Scale Key and Note Range eliminates "wrong" notes
Built-in Gate Arpeggiator with adjustable gate time and swing settings
Loop Recording allows the creation of layered phrases with unlimited overdubs
Dual Loop Recording banks allow DJ-Style mutes and cross-fades
Record using the built-in mic; or use the mic input for recording of external input
microSD/SDHC card slot for saving loops and recorded performances
The Kaossilator 2 is palm-sized, slightly thinner than a gameboy, with a black top face and a detachable yellow back. It is powered by a pair of AA batteries when on the move, or by a 4.5V optional DC adapter. The screen is a small, but brightly lit OELD, organic electroluminescent display, which is a nice change from the standard LED displays on Kaos devices past. You have a nice +/- touch strip for cycling through and selecting your patches and functions.
The x/y touch pad is much smaller than the original Kaossilator, but it feels good and looks quite durable. The loop recorder buttons are LED back lit, green when playing, flashing red when recording the loops. Power on button and volume control are located on the upper right side of the Kaossilator 2, with the microphone on/off on the upper left. The 1/8 inch mic input, headphone output, and DC input are along the top. Overall, it is built well, and exactly what you expect from a palm-sized device.
Creating Loops
The Kaossilator 2 has the ability to save and record 2 loops, with unlimited overdub. This is really the bread and butter of this device. You can choose from numerous lead, bass, acoustic, chords, drums, and drum patterns, with 50 different arpeggios. When playing any of these musical sounds, it's probably a good idea to choose which key and key range you want to play, and also the scale i.e. major, minor, lydian, ionian, etc. This is pretty important because the small size of the touchpad makes it quite a challenge to pluck out individual notes, sure it is possible, but very difficult to be bull's eye accurate without hours of practice.
Determining your favorite arpeggios, patterns, scale and key range makes the performance and production process much easier and the result will sound much cooler. I chose a basic Hip Hop pattern at 110 BPM and extended my loop length to 8 beats before I recorded my loop. I then selected an arpeggio to use when I played the wobble bass. The overdubs are unlimited, but I didn't want to add too much this loop. I pretty much just want to establish a foundation to play over with some of the other patches.
For the second loop, I chose a more minimal beat as the foundation and balanced it with a synth bass line and nice synth pad. The cool thing about the Kaossilator 2 is that I could create a loop, cross-fade into the next, and then create another one. Rinse and repeat. It's a lot of fun, and it's a great way to compose simple grooves, or ideas, especially since I am able to save my loops. As far as being a piece of gear that I must have in my studio, probably not, but the Kaossilator 2 is fun to use when I am on the go and have the urge to jam out.
Mini Kaoss Pad 2
The Mini Kaoss Pad 2, Mini KP2, is the Kaossilator 2's partner in crime and the latest touchpad-controlled effects processor to come from the company. Like the Kaossilator 2, the Mini Kaoss Pad 2 lets you play back MP3s (and vary the pitch), which you can record yourself using the line input or mic and store on the microSD card. Also featured are 100 effects programs, auto BPM detection, pitch change and cue point settings, and more. Here are the basics.
Control effects in real time using the intuitive touchpad interface
MP3 player with microSD card slot for data storage/exchange;
Perform on the Mini Kaoss Pad 2 without needing any other equipment!
100 effect programs, ideal for DJ mixes or sound design
3 Program Memories provide instant recall of favorite effects
Powerful Looper, Vinyl Break, and Ducking Comp effects borrowed from the Kaoss Pad Quad
Internal mic plus external audio inputs
Support for pitch change and cue point settings allows serious DJ play.
Record your performances and save them to using the microSD card slot
6 preset audio demo loops
The Mini KP2 is pretty easy to use because you can take almost any source adapted to 1/8 inch and start jamming and tweaking lickety-split. You can also load your own MP3's conveniently via the mini SD card slot, or just use one of the six groovy patterns that the Mini KP2 comes with. The legacy of the Kaoss Pad definitely is upheld with the Mini KP2, having all of the popular effects from the original series, plus adding the powerful Looper, Vinyl Break, and Ducking Comp effects borrowed from the Kaoss Pad Quad.
The effects are robust, the pad is very responsive, and it is very easy to navigate with the bright OELD and the touch strip. One major difference in the Mini KP2 than of previous versions is having a built-in microphone. This was an obvious addition because this is really the first hand-held, or palm sized Kaoss pad. This really opens the door to some really creative, on the fly production, especially by using some of the vocoder FX on board. The Mini KP2 is very functional, even in a more compact size, and the recording and saving capabilities really steps it up compared to previous versions.
In The Groove
I hooked up the Mini KP2 directly from my DJ mixer's main outputs using 2 RCA to 1/8 inch cables, one each for the in and outputs. These cables may not always be readily available in your DJ bag, but they are easily found at any type of consumer electronic store. After getting the Mini KP2 set up, I selected some of my favorite DJ friendly FX, like Isolator, Flange filter, and a standard Delay.
With the Mini KP2, I am able to save up to three program memory settings to easily access my favorites. In true Kaoss fashion, the FX were easy to apply and tweak, especially since the size of the KP just felt nice in the palm of my hand. The cool looper FX was something I discovered when we did the Kaoss Pad Quad demo, and it was nice to have them on the smaller KP2.
Navigating through was really easy because I could use the +/- on the touch strip for smaller increments, or I could swipe quickly to navigate deeper into the 100 effects. With the improved BPM detection, the delays and loops synced pretty well, but you still had to decide exactly when that loop effect could be useful; probably as a transitional effect when switching to a considerably different BPM. Another cool thing about the Mini KP2 is that you can set a cue point on the internal MP3 player, which could be helpful again if used in a DJ environment. Overall, the Mini KP2 stayed true to form and continues the legacy of the original Kaoss Pad.
The Verdict
At first glance it is very easy to brush off the Kaossilator 2 and the Mini KP2, probably because they look like a cross between a guitar tuner and a Fluke multimeter. But for those of you who have the urge to create grooves and tweak effects while on the move, these are both perfect and a whole lot of fun.
I wouldn't necessarily recommend the Kaossilator 2 for advanced studio production or a live performance because the amount of sounds is just too limited, and the surface in which to create just doesn't make sense because of the size. The x/y pad just does not allow for any real defined note play, especially when you could buy a number of controllers, keyboard or otherwise, for the same price that could be more effective in production.
The built-in microphone and microphone input are a nice touch, considering you can record simple licks, grooves, and vocal stabs on the fly, making for a neat session, but again the limitations on the pad surface might hinder any real accuracy in doing so. The Kaossilator 2, now with record/save/load functionality, is a great scratchpad for coming up with ideas that could potentially serve to inspire more complex productions, but for now it is a really fun novelty. The street price of $159 is a bit much, considering apps on your smartphone might have more capabilities for a fraction of the cost, but if you have the means, and you are familiar with Korg's pedigree of Kaoss products, then you will thoroughly enjoy your investment.
On the other hand, the Mini KP2 has some really cool, decent quality FX, and I could see it being used in a live environment for DJ's or live performers. It is compact and extremely easy to use, considering an FX unit does not often serve as the foundation of the performance. The Mini KP2 is cosmetic and ornamental, but the FX are chunky, flexible, and tweaking them in a live environment might serve to elevate your performance.
Having only an 1/8 inch input and output does mean you have to get creative adapter-wise, but that minor headache is worth the end result. It is a major plus that the Mini KP2 has memory saving capabilities now, so if you spend the time cycling through all of the rad effects that it has to offer, you could come up with the perfect combinations that suit you best, and save them. I don't know if I would necessarily use the memory to record the performance for production or playback, but it is nice to be able to save my favorite settings. The Mini KP2 will also cost you around $159, but as an FX unit/controller it makes more sense to pay that amount if you are a serious DJ or performer and you are a Korg Kaoss fan.
Please feel free to leave any questions or comments below and I'll be sure to respond quickly. Until next time, happy gigs!
0 notes
Text
Vestax PAD-One In Action
We first saw the Vestax PAD-One at the Winter NAMM show in Anaheim earlier this year. We marveled at it's sturdy construction, compact size, x-y touch pad, and most of all it's 12 dual led lit highly responsive drum pads. We couldn't wait to try it out ourselves here in our studio. It finally arrived and we were eager to get our drum-on, but what are we going to use it with? The obvious was with any drum software, but that was too easy. We wanted to use it with DJ software. Luckily our resident marketing manager, Ariff Glick, was up to the task yet again of mapping a cool .tsi file for us to use the PAD-One with Traktor Pro 2. The results were magnificent. The Goods The first thing you notice about the PAD-One is the size and construction. It has a die-cast aluminum body which gives the controller some good weight and gives you confidence when really beating on the pads. Next is the groovy X-Y touch pad used for performance style play. You have corresponding roll, chromatic, and xy hold buttons above the touch pad, a tap button for real time tempo adjustments, a bank button to select from 4 banks, a hold button for the drum pads, and a set button to execute changes in midi channel, note, velocity, and cc on each pad. Finally, there is a rotary dial and an edit button on the upper right of the controller. The Pads By far the drum pads themselves is what really sets this controller apart from the rest. The rubber feels good and the pads respond accurately to even the most intricate drum rhythms and rolls. They are also dual lit in green and red to distinguish whatever feature or function you have assigned. Having 12 pads on the controller also allows for some versatility in your layout without occupying too much space. With 4 banks 12 pads per bank there are a total of 48 different functions you can apply from the pads alone, and then some if you change the values on the pads. Brilliant, especially for such a compact controller. The Verdict The Pad-One is USB bus powered but can also be used via midi (adapter included) with an external keyboard or drum machine as long as you use an optional DC adapter. Overall it is definitely a useful and versatile pad controller for any application. I personally would like to see a few more rotary knobs on a controller, but using the X-Y pad in performance makes up for it's lack of knobs. The pads feel great and the construction and size of the Pad-One truly make it on of the best in the market.
The Mapping (by Ariff) So to start off all the values for each pad had to be set to a unique value. Since there are 4 Banks with 12 pads on each Bank, that gives us 48 individual values. I set the PAD-One as followed going left to right, first row then second: Bank A: Pad values 1-12 Bank B: Pad values 13-24 Bank C: Pad values 25-36 Bank D: Pad values 37-48 Here's how the mapping is set up:
The first pad on each Bank has been assigned as the "shift" button. This allows the remaining 11 pads to have a secondary function.
Pads 2-6 on each Bank are your cues: When shift is held down then each cue can be deleted.
Pads 7-9 on each Bank is your Transport section: Sync, Cue, Play. I will go into second function soon!
Pads 10-12 are your loop functions: Loop On/Off, Decrease Loop Size, Increase Loop Size.
Pads 7-12 are your effects buttons, when Shift is held.
Here's how you can use the effects:
Activate your "Hold" button, a light will indicate it is ON.
Press the "Shift" button, it will remain lit orange.
When "Shift" is ON, you are able to turn your effects on and off by pressing the pads. Pads 7-9 are your 1st set of effects, and Pads 10-12 are your 2nd set of effects.
While the "Shift" button is ON, and an effect is ON, you are able to change the parameter of the effect by using the XY Pad.
Move your finger Left and Right to control effects 1-3
Move your finger Up and Down to control effects 4-6
While the "Shift" button is OFF, and an effect is ON, you are able to change the wet/dry of the effect by using the XY Pad.
Move your finger Up and Down to control effects 1-3
Move your finger Left and Right to control effects 4-6
That's pretty much it, you can get real silky with this mapping and I hope you like it. The download for it can be found below.
UniqueSquared Pad One Mapping
Video Transcript: What is going on yall? This is Scott Magno, DJ MadFlip here with UniqueSquared.com to check out a brilliant controller from Vestax, the Vestax PAD-One. Alright, so there are a lot of drum controllers out there, but very few on the market are as cool as the Vestax PAD-One. Now, first off you’ve got his die cast aluminum chassis. It’s very rugged, a little bit heavier than some of the other controllers out there. You’ve got this XY axis touchpad that allows you to control different things, whether it’s effects, or sweeps, or filters. You can assign almost anything to that XY axis. Alright, you also have twelve velocity sensitive pads. Now these are very accurate, they feel really good when you’re playing through some of your drum kits, or even cueing some of your loops, turning on and off effects, really nice. Since it is a drum pad controller, you’ve got three buttons on here which are associated more with, if you’re using it for drumming. You’ve got a roll pad, a chromatic pad, and also for an XY hold. That way if you apply one of these rolls, you can hit the hold button, so you can continue to apply that roll. You can also use the chromatic button to go up and down your scale, 16th, 32nd, 8th, 4th, what have you. That’s really nice to have. Conveniently you also have a tap tempo button, this can be used for many different things, but of course the tap tempo button allows you to speed up or slow down the track in real time. You have four different banks to select from, select that there. You also have a hold button, so if you have some of these effects or some of these functions where you want to hold that down, you don’t have to sit there and keep pressing the button, you can use the hold button for that. You also have your note set, your velocity set, and also your CC set. Those are all MIDI functions, if you’re familiar with MIDI, you can select those right there as well as changing from your XY effects on the axis. You’ve got this nice little scrolling jog so that you can go assign any of your channels, any values you might have. And you also have an edit button, hitting that button allows you to go in, you can assign that to some of the edit features within any of your functions. You hit that and you can go ahead and turn mutes on, mutes off. Whatever you assign that, you can assign it to the edit button. So overall, a very useful controller. You can use it with a number of DAWs, production software, or even DJ softwares, with great success. Really good, sensitive, very responsive, the Vestax PAD-One, it’s really awesome. So Ariff, the renegade master with the mappings lately, put together a pretty cool mapping for the Vestax PAD-One and Traktor Pro 2. So I have got the first row mapped to; a shift button, and then all of my cues. But I’ve got five different cue points there, If I want to get rid of something I just hit the shift button, and then I can get rid of the second cue. So if I want to put another cue on that rock, all I have to do is hit 2, and I’m in there. So for the bottom row, this is going to be my transport section with my shift disabled. I have got my sync button, I’ve got my cue, and then I’ve got my play right here. So, the next buttons are going to be my loop on and off, and then my loop select. Now here’s where we get a little bit crazy with the mapping. So if I want to get into my effects, as you can see I like to do chained effects on 1 and 2. If I want to start manipulating those effects, I hit the shift button here, and then my hold button. Now, what that’s going to do is it’s going to make this my effects section. I can turn on my effects on effect one there, one, two, three, and then the next set is going to be effect 2 on and off. So if I have this effect selected, I can actually use the XY axis. Now if I want to turn the dry wet up and down, what I’m going to do is I’m going to deactivate the shift and then I can go and control the amount of that effect right there. Let’s check out how it all sounds put together. Pretty cool, nifty. PAD-One, Traktor Pro 2, pretty nice. You guys can check out the mapping we’re going to have it within the comments, go to the blog and download it. This is Scott Magno, DJ MadFlip. Be you, be unique, at UniqueSquared.com.
0 notes
Text
5 Reasons Why You Should Use Kontrol S4 With Turntables
I recently had the pleasure of using my Kontrol S4 in tandem with Traktor Scratch Pro 2 with turntables for an awesome gig at Halo Lounge in Atlanta. Here's my list of why it was so awesome. [caption id="attachment_3070" align="aligncenter" width="432" caption="Kontrol S4 with Turntables, YES"][/caption] 1. Easy to hook up No need for additional gear or accessories. You would normally require an Audio 8 or Audio 10 interface, and multi-core cables or additional RCA cables in order to use Traktor Scratch Pro. Simply plug both turntables directly into inputs C and D and you are ready for action. No sweat. 2. Flexible input options You can select which decks or sample decks the turntables will control by going into Preferences, then Input Routing. Here you can select either turntable for decks A through D, track play or sample play. Brilliant. 3. Easy to switch back Use the drop down tab on deck A or B to select track or sample deck and then scratch control. After you get a good timecode signal you are now rocking your turntables in Traktor Scratch with all the functionality of the S4. If I wanted to switch back to the S4 jog wheels I simply press the play button next to the absolute and relative turntables and I'm back on the S4. Vice versa to switch back. 4. Scratching on vinyl I switched from Traktor Scratch to the S4 and never looked back, but now I have the best of both worlds without any additional hardware. There is really no substitute for scratching on the real thing. 5. Free upgrade Yes, there's still time to get the Traktor Scratch upgrade kit free with the purchase of your new Kontrol S4 through August 23rd! You will be glad you did. Seriously. [caption id="attachment_3069" align="aligncenter" width="432" caption="An Artsy Shot of my Turntables"][/caption] Check out our website for more details. Cheers and until next time, happy gigs!
#DJ#DJ Software#DVS#Kontrol S4#Madflip#Native Instruments#remix#Review#Scratch#Tips and Tricks#Traktor Scratch Pro 2
0 notes
Text
Using The Numark NS6 With Traktor Pro 2: Yes, Please!
This mapping may not work with the latest version of Traktor.
We finally got a chance to use the acclaimed Numark NS6 Serato Itch controller with Native Instruments flagship Traktor Pro 2 software, and the results were quite good. Thanks to a foundation provided by Numark and a heavily tweaked re-fix by our resident marketing manager and controller mapping stud, Ariff Glick, we came up with a mapping that suited the NS6's layout nicely with Traktor.
THE SCOOP ON MAPPING
The NS6 is basically a midi controller with sliders, knobs, and buttons that are assignable to virtually any function that your software requires. Traktor has a controller manager within the preferences where you can do this. You can download our .tsi file and import it to the controller manager. Please keep in mind that this is just one version of many possibilities that can be used and you can definitely create your own mapping to suit your particular layout and playing style. If you are well versed with Traktor and have midi-mapped controllers before then this will be an old hat for you. If you aren't, not to worry. We put together a basic template and video tutorial so you can get up and running in no time. We have included a link below of our mapping with the NS6 drivers included for good measure.
SET-UP
A. This is how you set up the NS6 with Traktor if you HAVE NOT already set up the drivers and/or installed ITCH 1.8.1.
Make sure the correct NS6 drivers installed on our computer. We also included them with our .tsi file below.
Plugged the NS6 into your laptop and turned it on making sure the power adapter is connected, then opened up Traktor Pro 2.
Import and apply the .tsi file.
Open Preferences
Select "Import" at the bottom
Open the file called "UniqueSquaredTP2NS6Mapping.tsi" (sorry it's so long)
Make sure you select the box "Audio Device Settings" so that it is checked and click "OK"
In the controller manager you will see that there are 5 separate mappings that correspond to every function in Traktor for the NS6. Select "Numark USB Audio" for the In-Port and Out-Port.
B. This is how you set up the NS6 with Traktor if you HAVE set up the drivers and/or installed ITCH 1.8.1.
Plugged the NS6 into your laptop and turned it on making sure the power adapter is connected, then opened up Traktor Pro 2.
Import and apply the .tsi file.
Open Preferences
Select "Controller Manager"
Under Device select "Add"
Select "Import"
Open the file called "UniqueSquaredTP2NS6Mapping.tsi" (sorry it's so long)
In the controller manager you will see that there are 5 separate mappings that correspond to every function in Traktor for the NS6. Select "Numark USB Audio" for the In-Port and Out-Port.
You now have the NS6 controlling Traktor Pro 2 with relative ease. Easy enough, right?
LAYOUT
The strawberries taste like strawberries, the snozberries taste like snozberries! Right? Well, almost. This particular mapping was for 4 decks and almost everything translates flawlessly. The EQ knobs, crossfader, line faders, cue points, jog wheels, sync, pitch adjust, browse, transport and loop section work as the NS6 and Traktor is normally laid out. The most noticeable difference is in the Effects section and the Filter adjust. In Traktor you have 2 ways of setting up your effects, single (advanced) and group (chained). On the NS6 you have an effect activate (on/off) button, parameters knob to adjust, effect select knob, and a wet/dry fader. We decided to map the Trakor effect in group mode with only the first effect active since the physical layout restricts more than 2 effects per deck to be active. This allowed us to map the software perfectly to the NS6 .
[caption id="attachment_2932" align="aligncenter" width="600"] NS6 Traktor Pro 2 Effects Section[/caption]
We then mapped the filter adjust to the "strip search" section on the NS6 because it made the most sense. The filter can be adjusted using the strip and turned on and off using the "Bleep / Reverse" button, the red light indicator meaning it's "on."
[caption id="attachment_2933" align="aligncenter" width="600"] NS6 Traktor Pro 2 Filter Section[/caption]
Again, you have complete freedom to choose what works best for you and this worked well for us.
THE VERDICT
It was relatively easy to get everything up and running on the NS6, but keep in mind this controller was designed for Serato Itch and there are some features that we did not map to the controller. For instance, we did not set up any of the record features like the internal mix recorder and the loop recorder. Is it possible? Absolutely, but we did a basic set-up just to show what is possible. The other noticeable difference was the jog wheel response when scratching. It was very good, but we found that the jog wheels were more accurate when scratching in Serato Itch. Overall we were very pleased with the performance and response and we highly recommend using the NS6 with Traktor even if it's just as an alternative to Serato Itch. Check out the video and please feel free to leave us any comments or questions so we can help. Thanks again to Numark for the foundation of this mapping and also to you all for requesting this particular video. Cheers!
THE FILE
Unique Squared NS6 Traktor Pro 2 Mapping
Video Transcript: What’s going on? This is Scott Magno DJ MadFlip here with UniqueSquared.com. Hey man, we’ve got NS6 by Numark working with Traktor Pro 2. You guys asked for it, we wanted to show a video of it, so let’s check it out, we got this done. Alright, so the first thing you want to do is go to our blog and download this particular mapping. Go ahead and save it to your desktop or something and once you're in Traktor, go to your preferences, you’re going to go to the controller manager too here, you want to add and then down to import and import that setting from the desktop here. Once you do that you will find that decks C and D, decks A and B, the platters, the loops and browsers, and also the mix and main section all for Numark USB audio device. Select that, make sure your port is on Numark for in and out and you should be ready to rumble it up. Alright, so now we’ve got that up and running, and you can see the layout that I have here. We’ve purposely made it super wide, that way you can see every knob and every slider on all four decks. You don’t have to have it that way but for visual feedback we wanted to go ahead and show it like that. Ok, so starting off you can see that we have line levels for all of our decks here. You’ve got EQ and all of that working, and our platters, we’ve got that going right here. Our pitch adjust. So all of that is pretty standard, you can see we have it all working. We can even go into our files here, browse and load into each deck like so and switch that deck over, so we’ve got all four decks loaded as you can see everything is up and running. There are a couple of things that I wanted to tell you guys about our particular mapping. The NS6 has two effects that you can choose from and from those you can have the effects parameter and also the amount of dry/wet of that effect that you have. So that is what we have, you also have the effects select. So we mapped it like this, with a chained selection within the effects, but in that chain you will see that we have no effect on our second and third effects for each side. Now, we did that because we didn't get deep enough to map this for an advanced effect because we wanted to show, basically, a very elementary level setup just to get you up and running. Of course, you guys can modify, this particular mapping and customize it however you need to. That’s the beauty of Traktor Pro 2, it’s just always been that way where you can kind of just customize it yourself. So, those effects are going to be here, I can select through my different effects. Right, and then I can turn that effect on and off on the NS6, then I can control the parameter of that effect, and also the dry/wet will be with your NS6, FX mix slider. So, let me show you guys that that’s working, go ahead and put that loop on. So, I can select effect A, pick a different effect. Alright, so you get the idea. The effects work, our looping section works just fine. The last thing that I wanted to tell you guys was the filters. Now, the filters on Traktor are usually going to be controlled with a knob. In this, we have in mapped out to the strip search. If you guys can see that, we have each filter on a strip search. It’s kind of our best option for that particular, I know it will take a little bit to get used to, maybe you guys can find a better way to map that, and feel free to share it with us. Alright, so we have got the TSI mapping for this available to you. So, just check out the description below and we will have a link to our blog where you can download it for yourself. If you have any other questions just leave me a comment here and I’ll be happy to answer it personally. This is Scott Magno, DJ MadFlip. Be you, be unique, at UniqueSquared.com.
#Demo#DJ Controller#How To#Madflip#MIDI#Numark NS6#Tips and Tricks#Traktor#Traktor Pro 2#TSI Mapping
0 notes
Last Seen Blogs

superanonymousthethird
What are you doing in my swamp?

gentleman-velvet
Mr.Velvet

tailschannel
The Sonic News Leader's art blog

tote711-blog
トラベルなどの最新情報をお届けします

infodreamvision
Untitled