#i redid so many of the shots because i wanted them to match with the original scene
Text
Roswell, New Mexico as a brickfilm, part 7 (x)
2x13, the pod squad meets a man in a cave and get a sense of déjà vu
#this is probably the lego film ive worked on the hardest#i redid so many of the shots because i wanted them to match with the original scene#i am very happy with how it turned out#the editing was a pain but its sorted now#hopefully ill find a way to get the two shots side by side as a comparison#but not today#rnm#roswell new mexico#thesquidkid brickfilms#rnm as brickfilm#rnm 2x13#lego#stopmotion
29 notes
·
View notes
Text
We’re Only Young and Naive Still Chapter 2

Chapter 1
Nora was scratched against Detroit which wasn’t a surprise. She hadn’t had a stellar debut and she hadn’t curried favor with Sutter, but the press had taken her first game and run with it. Everyone had told her to stay off of the internet and to not read articles about herself, but it was hard to ignore the things that popped up on her Twitter feed. There were already some reporters who asked to interview her and there were even a few names that she recognized and wouldn’t mind interviewing with. She had listened to Steve Dangle’s podcast on her morning commute to college occasionally and thought he’d been fair in his assessments. She didn’t think that he’d take cheap shots at her or try to make her uncomfortable.
She also knew though that the publicity that was being offered to her was something that some athletes worked their entire lives for. Maybe if it was different, if she was naturally talented in the way that Sidney Crosby or Connor McDavid were, the attention would be warranted, but she was just a novelty. So for the moment, Nora politely declined the interviews with the canned rejection that she wanted to focus on contributing to the team and that she would consider at a later time.
She was on the practice squad for the scrimmage before the game clad in a white jersey with some of the other two-way players skating on the ice against the permanent Flames and halfway through practice, she was already exhausted and soaked in sweat. “Tired, Hallisay?”
“I’m fine,” Nora said and skated back to the ice with renewed resolve.
“Take the face off,” Sutter yelled and Nora paired off against Matthew Tkachuk. Off ice he was just aloof but on ice, he was ferocious. He was the type of player that teams hated playing against and everyone wanted on their team. He glared at her from across the face-off circle, his cold, blue eyes almost wild as their coach approached them with the puck. Nora reacted just a split second faster to pass the puck over to Jusso for the break-away. The play was called off and everyone reset with new players at the face-off.
“Lucky,” Matthew said.
“Had nothing to do with luck,” Nora replied.
“It won’t happen again,” Matthew said, but there was a lightness in his voice.
“We’ll see,” Nora said, knowing that the odds of her squaring off against Matthew would be few and far in between. She was a fourth-liner at best; he was on the first line. As practice wrapped up, Nora skated to the bench and grabbed some Gatorade. Some of the guys headed straight to the locker room, but Nora lingered rink side.
“You coming?” one of the trainers asked.
“I’m going to stick around here a little longer,” Nora said, “I want to get in a little more practice.”
“They won’t let you stay too long,” the trainer warned.
“I’ll take what I can get,” Nora said. She skated back on the ice and worked on puck-handling drills. She wished she had the hands of Pavel Datsyuk, but she didn’t. It was never her strong suit on the ice.
“Move your top hand more, it’ll give you better control” a voice called behind the bench.
Nora stopped for a moment and glanced over to where the voice was coming from. A small group of players, already showered and changed, watched.
“Move your hand more,” Matthew repeated, gesturing with his own hand.
Nora shifted her hands to match his, “Like this?”
“Yeah, that’s what they teach you when you’re eight,” Matthew said.
Nora saw red. Matthew could fuck off. “Well, we don’t all have dads who can get us on the best junior teams.”
A couple of the guys chuckled, but Matthew’s jaw clenched and his face turned red. Nora felt her stomach sink as the barb landed exactly where she anticipated. If things were different, Nora would have been contrite and even as it was, she didn’t like to be the type of person that made other people feel bad, but she wasn’t just going to roll over and take it either. She knew she didn’t have the same hockey knowledge that the other players did. They had had some of the best coaches, had had the time to play for hours after school, and had had opportunities that she couldn’t have dreamed of. So yeah, they didn’t have the same background, but she had worked her way to where she was, and she deserved to be there no matter what anyone else said.
After they left, she redid the drill following Matthew’s advice. It was better; he was right. Nora gritted her teeth and did it again and again, adjusting her grip when she noticed herself slipping into her old routine. “Fuck,” Nora murmured.
“You have to go,” the zamboni driver said as he waited for her to get off the ice.
“Sorry,” Nora said sheepishly and skated towards the locker room. Everyone was already gone by the time she was ready to leave the rink.
She pulled out her phone and followed the map back to the hotel. A few blocks away from the hotel, a text message popped up on her phone.
From Liam: Congrats on your debut.
Nora smiled and pocketed her phone away to respond to him later. She made a mental note to text him back later.
“A few of us are playing FIFA later, if you want to join?” Mikael said as he caught her coming out of the elevator.
Nora smiled slightly, grateful for the invitation, “Whose room?”
“Don’t know yet, but it’ll be in the group chat.”
“I’ll be there,” Nora promised. She headed to her room, sat on the edge of the bed, and pulled up the text that Liam had sent her. Thanks, you watched?
Liam’s response was almost immediate: I saw the highlights. How are things with the team?
Nora wanted to tell him everything, she wanted to say how hard it was, how Sutter didn’t want her there, and the team didn’t want her there, and how all she wanted to do was go home. But she didn’t. Instead she typed out, I kind of fucked up with a teammate today.
Liam wrote back, You’ll make the right decision, you always do.
Nora sighed.
As promised, the open invitation in the group chat said they were planning on playing FIFA in Rasmus’s room in fifteen minutes and Nora showed up just a few minutes afterwards.
“Are you any good?” Milan asked.
“I’m horrible at video games,” Nora said.
“You’re on their team, then,” Milan said as he nodded over to the other half of the room.
Nora glanced over at Matthew who had been leaning against the wall, arms crossed over his chest, still looking as pissed off as he had at the rink.
“I think I’m gonna leave,” Matthew said, despite protests from their teammates. Nora couldn’t help but feel as though it was a reaction to her joining, a remnant from their fight at the rink.
She remembered what Liam had sent her, “You’ll make the right decision, you always do,” and she knew what she’d have to do.
After a few rounds of watching them play FIFA, Nora stood up to leave.
“You know where Matthew’s room is?” she asked Elias as a new game was getting set up.
“I think he’s 219,” Elias replied.
“Thanks.”
Nora talked herself into going over to Matthew’s room. She sighed and knocked on the door, hoping that he would already be asleep or in the shower. Instead, though, Matthew opened the door and glared at her.
“Can we talk?” Nora asked. Matthew didn’t answer, but instead pushed the door open and made way for her to come in.
“I’m sorry, for what I said at the rink. That wasn’t fair and it wasn’t true. You worked hard to be here and it wasn’t right for me to imply that it was because of who your father is or who your family is, so I’m sorry about it. And...you were right,” Nora said, “About my hands, it’s better your way.”
There was a long pause, “This is where you would usually apologize, too.”
“Why should I? I was just trying to help,” Matthew said.
“No, you weren’t,” Nora said, “You were trying to humiliate me.”
“What’s your problem?” Matthew said, “Why do you think we’re all out to get you or something?”
Nora paused for a moment, “I know you don’t want me here. I know most of the guys don’t want me here, and that’s fine, but it’s hard not to think that way when you know otherwise.”
“What do you mean we don’t want you here?” Matthew asked, his eyebrows furrowing in confusion, “Did someone say something?”
Nora pulled out her phone and scrolled through the group chat to the incriminating messages, “You did.” She held out the phone for Matthew to read the messages.
His eyes widened in recognition and he went to apologize, but Nora held out her hand, “Don’t. It is what it is, but I know, so don’t play dumb. And I don’t expect us to be friends or even like each other, I don’t care about that, but I deserved better than that and I don’t deserve the type of comments that you made at practice either.”
Matthew didn’t say anything and to be honest, Nora wasn’t sure if there was anything left to clear the air, “See you tomorrow then.”
She headed back to her room and saw another message from Liam, Do you need to talk?
No, I’m good, but thanks, good night Li.
Nora had woken up before they were scheduled for breakfast and she looked on her phone for a local coffee shop to try before they were set to leave Detroit. She headed to a small, locally owned one just a few blocks from the hotel that they had passed in transit and ordered a vanilla latte. She grabbed a table towards the back and pulled up some of the NHL highlights
“Can I join you?” A familiar voice asked and Nora glanced up to find Matthew Tkachuk awkwardly standing in front of her with a cup of coffee.
“Were you following me?” Nora asked.
“No, yes, but I was hoping we could talk,” Matthew said.
“I don’t think there’s anything more to say,” Nora said, “I said everything I wanted to last night.”
“I didn’t,” Matthew said, “Can I?” he gestured to the empty chair across from her and Nora shrugged.
“Is this a conversation that we should have here?” Nora asked.
“There aren’t too many people here and it’s better here than in the hotel, I guess,” Matthew said.
“Okay,” Nora said.
“I’m sorry for what I said at the rink yesterday and, more importantly, for what you saw in the group chat,” Matthew said, “You were right, you didn’t deserve that and we should have made more of an effort to make you feel welcome and to treat you like one of the guys.”
“I’m not one of ‘the guys’, though, and I’m not trying to be,” Nora said, “Things are different with me and I can’t help that.”
“I know, I didn’t mean it like that,” Matthew said.
“I know how you meant it,” Nora said, “And I appreciate your apology.”
Matthew outstretched his hand, “Let’s start over?”
Nora eyed up his hand, but shook it, “Sure. We better start heading back to the hotel anyways.”
“What are you drinking by the way?” Matthew asked.
“A vanilla latte,” Nora said, “Why?”
“In case I need to know for future apologies,” Matthew said.
“Let’s hope not,” Nora said with a small smile.
47 notes
·
View notes
Photo


99% - GX Season 2 Opening: “Ambitions->Dashed Hopes” ft. Earlier Napoleon (WIP)
poor chronos
Alright, finally finished this scene up! After *checks notes* nearly three weeks of editing, lol. So, following up on the first WIP with Pharaoh crawling onto Chronos’s desk, here’s the next scene I’ve managed to get textless and then translated--and it was a doozy.
Doing it for the V1 of this scene wasn’t too bad; once I replicated the design of the placard’s translation as edited in the Pharaoh scene over the course of the 8-9 frames it’s onscreen for, it was just a matter of repainting Chronos in Photoshop to wipe out the name as it slides in, then masking out Chronos in Sony Vegas in order to recreate the fade from the chair to his deck behind him--this after I borrowed a deck shot from elsewhere in the OP to get the color background over the name, then made a proxy for Limiter Removal and Antique Gear Drill to cover up the name in those spots. Then I added in the name translation I made early on and recreated the slide-in to finish the clip. You can see the end result in action in Gifs #2 and #3!
Now, getting the V2 scene textless was the harder task--mainly on account of having to deal with both the lyrics and the name, but also because for some reason, as they did with the Pharaoh scene, they cropped the shot for the V2 so I couldn’t just reuse some of the edits I’d just made.
First, once I redid the placard translation, I added an extra crossout, and then once in Vegas had to manipulate the table foreground to cover up the lyrics; I also masked in Chronos’s fingers on the placard to restore some lost detail. Then, I worked with the 30 frames of Chronos moping to repaint him and his fingers, but for the frames where the name was starting to come in and the deck fade started, I only focused on repainting Chronos--this was because I later went in and masked Chronos himself out because I was recreating the chair-to-deck fade. To do this fade, I had to repaint the chair and window over Chronos so he wasn’t in the shot, and then I had to recreate Chronos’s deck, which involved creating proxies for each card shown and replacing them, while also adding in the empty background space next to Limiter Removal; the only issue was there was one Spell behind Chronos that I couldn’t make out to Antique Gear’s right (the Wikia claims it might’ve been Antique Gear Tank but he doesn’t use it until episode 69, and the top-left part of the art we can see in V1 doesn’t match up), so I put a second Antique Gear Drill there. Likewise, I couldn’t tell what Earth Antique Gear was to Magnet Circle LV2′s left, so I put a second Antique Gear Golem there--both cards are barely visible as Chronos covers them up. I also did try to make the proxies as close to Series 4 format (the card layout at the time) as I could with the template I’d downloaded, but I didn’t get it perfectly. Once that fade was recreated, I masked Chronos out as I noted above, added the name translation I’d created early on for V2, copied over the masking keyframes, and the translated version was all done!
Finally, since I want to release a lyric-textless version of the V2 that we never got, I kept many of the frame edits I made for the full textless video, but masked in the Japanese footage to keep the JP name slide-in; the only issue was residual kana from the lyrics showing up in a few spots near the bottom of the name box, so I just took those frames into Photoshop and cleaned them up, reinserted them, and got the JP textless version finished! You can see the end results in Gifs #4-6 (4: JP textless; 5: translated; 6: full textless)!
Photos 7 and 8 show two stills to show off the coverup I did on the name in V1, while the last compilation photo shows it off on V2 with what’s probably my favorite Chronos frame there haha.
I also added a gif of the Napoleon name scene at the end since I noticed I hadn’t shown it off yet; it was probably easier than these two since I only had to focus on repainting Chronos’s torso, lol.
Overall, I’m happy with how well this finally came out! Now that I’ve done the two hardest edits in the OP, I’ll backtrack and work on translating the names starting with Judai, which should be a bit more of a walk in the park.
#GX#yugioh gx#yugioh#ygo gx#ygo#Chronos de Medici#VP Napoleon#subbing rambling#Samejima coming back from the woods to dash Chronos's hopes of ruling the academia lol#it must've been nice to be 4Kids and have the textless assets that ultimately went unused in the dub OPs
13 notes
·
View notes
Photo

Another Volta drawing, this time of the protagonist Waz. Technically this is like one of his three outfits in the show, based on the “Wrap Party/Meeting Ela” segments near the beginning of the show. Definitely want to attempt to draw his other outfits too.
Not gonna lie, I’m not as happy with this one as I was with the Ela drawing...I redid so many sections of it repeatedly it probably became a whole new drawing from the initial sketch; but I had to put down my pen and just call it good enough... So I guess I learned from this that Waz is more challenging to draw than I initially thought! Hopefully though that bit of practice will make the next attempt at least a little bit easier
I did a lot of blending, trying a new technique with shading mainly because I was trying to achieve the gradient effect on his shirt. So have some closeups:
I tried to copy the pattern on the actual shoes based on the one poor reference I had of them, but it wasn’t going well so I was just like “screw it! general gold glittery effect it is”
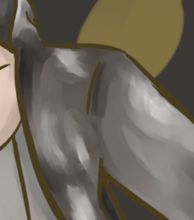
His coat’s just a blending of shades of grey (super similar to the Greys coats). It was fun pushing the colours around and trying to blend them as seamlessly as I could.

A slightly closer shot at his hair. It was a bit of a challenge to figure out how to get feathers to stay looking like feathers but also follow the shape of hair.
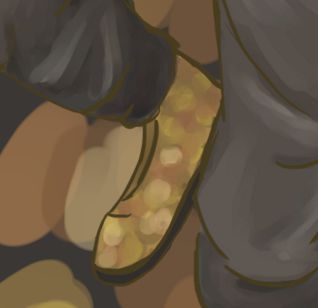
His shoes have a certain pattern on it to match his gold suit, but I couldn’t figure it out based on the few photos I had, so I was just like “screw it! let’s just do a generic glittery pattern; same difference”
#digital art#Fanart#artists on tumblr#Cirque du Soleil#Cirque du Soleil Volta#Volta#wuwmm's fanart#I'm honestly so done with staring at this drawing...#I'm ready to move on to something new
6 notes
·
View notes
Text
Closure 6 (the fic I cried while writing)
Jamie stood at the door to her room, preparing to finally leave the hospital after a long five weeks. She felt almost normal again, though still physically far from her former self and was eager to get outside at last. Winona and Ally were helping get her meager belongings ready and make sure she had the required hypos in her bag. Bones had told her she had to take one every morning and evening until her system was stronger.
“All ready to go, honey?” Winona asked, zipping Jamie’s duffle up. “Spock’s parked by the door, so we can make a quick getaway.”
“Yep. I am so sick of this place.” She declared. “Ready to be home!” Well, she thought she was, anyway. Winona had warned her the memories would be overpowering at first and recommended she stay with a friend for a time, but Jamie decided to face it head on.
“Don’t overdo it now,” Bones warned her. “If you have ANY problems, comm me right away. I’ll be checking on you frequently to make sure you’re you’re obeying the restrictions.”
“Yes, Doctor McCoy” she sighed with an aggravated eye roll. He was really annoying with the protective doctor mode. It was perfectly understandable, but she wanted her best friend back and the sooner she was out of this place, the sooner that could happen.
She was smuggled out the door and into Spock’s car with little fuss. Uhura was there to keep reporters at bay and she soon joined them in the vehicle just before it made its getaway.
Staring out at the damaged city, she was grateful she even had a home to go back to. Thousands of people had been killed or displaced when their buildings had collapsed when the Vengeance crashed into them.
She’d talked to several nurses who’d lost loved ones in the attacks and found an empathy there as they tended to be more open with someone who understood what they were dealing with.
In her low moments, Jamie resented the fact that she COULD understand them.
She’d grown up watching her mother grieve a man she’d never known and she’d felt guilty that she’d never really known what she was missing.
Now, though, she knew exactly what and who she’d be missing for the rest of her life and it hurt like a razor blade in her chest.
“I should’ve punched Khan harder,” she muttered.
Spock, miraculously, did not say anything. Maybe he’d learned there were times to keep his logic to himself in the aftermath of the tragedy.
Nyota gave a her an understanding look.
“I wanted to do the same thing,” she admitted to Jamie. “I may understand why he did what he did, but he killed part of our family and hurt our captain.”
“I heard you got to shoot him with a phaser,” Jamie commented, feeling warmer at the loyalty of her space family. “Must have been awesome.”
“It was” the lieutenant confirmed. “I think Spock thought it was hot. You should have seen the wild, feral look he shot me right before he knocked Khan out. Whoa, boy!”
She pretended to fan herself, bringing a pleased smile to Jamie’s face.
“I was not in control of myself,” Spock explained. “But I admit it was very satisfying to see Nyota coming to my aid.”
“I bet it was,” Jamie smirked.
Spock pulled up and parked in front of the apartment building that housed many Starfleet officers including himself and Nyota and where Jamie and Chris called home for the last ten months. It was well over 100 stories and gleaned in the Sunshine. Jamie soaked in the warm rays for a most moment before fumbling for her key card.
“I’ve got it, honey,” Winona said, coming alongside her as she neared the lobby doors.
“What floor are you on?”
“Sixteen,” Jamie replied absently, looking around at the familiar leather furniture and steel and glass features of the lobby she’d walked through countless times.
The trip in the elevator was quiet as she thought about the many stolen kisses and goofy moments they’d shared on their way home after she’d returned from a mission.
Jamie walked purposely down the hall and swiped her card and placed her thumb on the pad that scanned her print and let them in.
It looked the same as when Jamie and Chris had left to go to the Daystrom meeting: neat and tidy. Chris couldn’t stand to leave the place messy, being a bit of a neat freak.
“Wow, nice place. Chris always had to have everything ship-shape,” commented Ally, looking around at their eclectic decor, which included both western art and Jamie’s collection of various spaceship models. Even the little kitchen area was clean, amazingly.
The bedroom though, was what cracked Jamie’s composure. The smell of his cologne, the wedding picture over the bed, her pink cami laying on the floor where it had been unceremoniously removed that last night……
She opened the closet and saw all his shirts hanging there and that was all it took to bring the tears up.
“Chris….” she gasped, eyes filling up. She felt her husband’s loss all over again, seeing all his things hanging there like he’d be back any minute.
Winona was by her side in an instant, arms pulling her in close as she cried. Tears were rolling down Ally’s cheeks as well and she sat down on the bed behind them.
“It feels so final now, Mom,” she sniffled between sobs. “Before, I kind of mentally separated myself from it. How am I going to do this?”
“Not alone, that’s for certain,” Winona whispered. “If you don’t want to stay elsewhere, one of us will stay with you.”
“Right,” Allison agreed firmly. “Crying alone is overrated. Let it all out, Jimbo.”
She did, even more than she ever had at the hospital until she was spent and exhausted. Somewhere along the line, She was helped into bed and her shoes removed and vaguely heard Bones’s voice over her as gentle hands soothed her hot forehead.
When she woke up again, it was dark out, and she was alone, except for quiet voices coming from the living area.
Pulling herself out of the nest of covers, she groggily stumbled to the bathroom to wash her face. Someone had been cleaning up, because most of Chris’s things were gathered in a box by the door.
It was a small space, so Jamie knew it wouldn’t make any sense to keep unused toiletries around. A few unfamiliar and decidedly female accessories had replaced them and she assumed they were her mother’s.
Having made herself somewhat presentable, she ambled into the kitchen to find food for her growling stomach.
Something smelled good and she saw Winona and Allison sitting at the table eating soup and looking through a photo album.
“Hey, what’s for dinner?” She rasped out. “No fair starting without me.”
“Welcome back, Sleeping Beauty,” Ally said, greeting her sister-in-Law cheerfully. “And no need to gripe. We only just started. Plenty of soup left for you. It’s broccoli cheese, from the deli down the way.”
Jamie’s stomach growled loudly again, causing them all to crack up laughing while she dished herself up a generous bowl of cheesy deliciousness. It was warm and creamy and pure comfort food, which was just what she needed.
“What were you guys looking at?” She said after she’d licked the bowl clean in a scandalously ill-mannered way.
“Just peeking at the pics from your surprise wedding. I still can’t believe you pulled that over on us.”
Allison was still a little irritated that she hadn’t figured out her brother’s plans until Jamie and Chris were holding each other’s hands in front of Admiral Barnett. It had been the surprise of the year, according to the papers and most of Starfleet buzzed with speculation as to how the well known couple had pulled it off.
Jamie shrugged. “You did say we were evenly matched evil geniuses.” A faint smirk threatened as she remembered their massive trickery.
**********
They’d planned what was ostensibly a big birthday party for Chris, inviting fifty of their closest family and friends to the ranch for a celebratory cook out. Only Jamie’s mom, Chris’s dad, and Richard Barnett were aware of the true purpose of the event.
It was the only way they could think of, short of eloping, to get married without it getting turned into a PR show or media feeding frenzy.
“Appealing as eloping sounds, I can’t make Winona miss her only daughter’s wedding,” he’d said one night on one of their dates.
“Me neither,” Jamie had agreed fervently. “Besides, won’t it be great to see their faces when they realize what’s happening?”
“You know it,” he smirked.
The plan went off perfectly. Halfway through the afternoon while everyone was mingling and looking satisfied, Jamie and Chris slipped into the house a few minutes apart to change.
Her heart was pounding with excitement and nerves as she redid her makeup and slipped into the baby blue chiffon dress she’d picked out.
She hoped Bones, Spock, and Uhura would forgive her for keeping this a secret, but she thought they’d understand once she explained. Winona had been in earlier and laid out her accessories, including a dainty flower crown to bedeck Jamie’s flowing blonde locks and the pearl set Winona herself had worn for her own wedding.
Then she put on white flats and breathed in and out deeply before emerging onto the patio as casually as possible. She caught her fiancé’s gaze and he smiled brightly, excusing himself from the conversation he’d been in and heading her way.
Eyebrows were raised, but no one grasped what was happening until the Admirals and the parents joined her on the deck and Richard got their attention with a sharp whistle.
“Not nearly as good as yours!” She whispered to Chris, who was known for his ear-piercing volume. She’d first heard it the day he broke up the bar fight with an especially loud whistle that stopped Cupcake’s fist mid-punch.
(Heaven help the poor cadet or junior officer who happened to merit the Pike Train Blast, as it was called.)
Chris gave her the side eye, which made her clap her free hand to her mouth to keep from giggling.
“You may all be thinking "I came here for a barbecue, not a wedding,” Barnett was saying. “Well, you’re getting both. Jamie and Chris hope you’ll forgive them for doing it this way, but it seemed the best scenario to keep things private other than eloping. Things like this get tricky when two Federation heroes tie the knot. It’s been a long time coming, but I am thrilled to FINALLY ensure the end of Chris’s long bachelorhood.”
There were titters and sounds of agreement from the guests who knew the groom quite well.
“So if you two are ready, you can face each other now for the vows.”
Jamie put her hands in his and adoring ocean blue eyes locked with tender grey blue as the two of them made their solemn promises.
In minutes, they’d slid each other’s wedding bands on and were officially husband and wife. The whoops, whistles, and cheers that followed their first kiss were unforgettable and Jamie opened her eyes to smile at her new husband.
“You sly, sly, woman,” he said in her ear. “You know what it does to me when you wear that color.”
“That’s exactly right,” she responded smugly. “And YOU know I like you in gray. Brings out your eyes.” She ran her hand down the front of his light gray suit, extremely grateful he was able to be back on his feet.
He didn’t have time to respond since they were quickly swarmed by excited guests, eager to scold and squeal.
Nyota went easy on her, having understood the reason for secrecy.
“You rascal!” She said as she hugged her captain tightly. “I never suspected a thing until you came out all dressed up. That was brilliant scheming, you two, even if I am a little annoyed with you right now.”
Spock was next.
“Congratulations, Admiral, Captain. Your ruse was well executed and admirably planned.”
Bones, on the other hand hung back until last, his face a study in various degrees of agitated emotion.
“I can’t believe you had the gall to do this and not tell me, sir.” He said tightly, forcing a smile as he shook hands with Chris. “Not that I’m not happy for you, but this is a pretty big thing to hide from your best friend.” He looked at the bride pointedly.
“I probably should have let you on in it, Bones,” Jamie admitted “and I hope you’ll forgive me, because I’m sorry if I hurt you. Literally, only three people in the world knew.”
“Wow. That’s tight-lipped, especially for you, Jamie,” her friend said, a teasing glint returning to his face.
“Yep, well. I’ve got GREAT incentive to keep my lips sealed,” Jamie said suggestively, winking outrageously at Chris.
“Dammit, Jamie!” He groaned and then turned to Chris again. “Good luck, Admiral. You’ll need it being married to this troublemaker.”
Chris merely smiled lovingly at Jamie.
“I’m partial to trouble, McCoy. It comes in such an irresistible package.”
Jamie batted her eyelashes at him and thought flirting with her husband was going to be quite enjoyable.
*********
Looking back on the pictures with Winona and Ally, Jamie was crying again–but not the gut-wrenching sobs from earlier. These were cleansing bittersweet tears that came from her grief at what she’d lost and the thankfulness that she’d had such wonderful moments with the man who’d turned her whole life around with one sharp whistle.
“You can whistle really loud, you know that?”
2 notes
·
View notes
Text
Before & Afters Of Our Beach House: Downstairs
I’m not sure I’ve ever been so excited to share before and after photos as I am today. Last month marked the 2-year anniversary of buying the beach house and while we never like to declare a home “done,” this place has come so far that this felt like a good moment to look back at everything (and to document what’s still ahead).
We’ve dug up dozens of before photos (including many that we haven’t ever shared!) and we’ve done our best to find or take similar angles to match up with them. There are so many angles to show you, and so much to cover, we’re just doing the downstairs today – and then we’ll follow up soon with the upstairs once we can shoot those photos and organize another big before-and-after-fest of a post.
We’ll link some of the key items in each “after” for you, but remember you can always visit our Shop Our Beach House page for the paint colors and source info of each room (it’s always linked up in our menu bar right under our blog header). And before we dive into the photos, you may want to treat yourself to this walk down memory lane: the before video tour! Note: if you’re reading this post in a feed reader like Bloglovin or Feedly and can’t see the video below, you may have to click into our post to view it – but trust me, it’s worth it.
The Exterior
Before we head into the downstairs, let’s look at the outside. This is a shot of it from the sidewalk back when we bought it. Did you even remember that “the pink house” was once “the greenish-gray house?” Complete with cream trim, mismatched windows (some of which were boarded up), and cinderblock steps.
And here it is from a similar angle (a little closer up). We snapped this photo this summer:
Here’s another before shot. The cinderblock steps and the sad rotting siding weren’t gorgeous… but we loved the old bones.
Thanks to a new roof, new siding, new windows, new steps, and a repointed brick foundation, we got the house looking a lot happier. After much debate, a takeout coffee cup helped us choose pink for its new color scheme (Sherwin William’s Mellow Coral, with SW Snowbound for the trim).
Here’s another angle of the front of the house. Fun fact: that vine had snaked its way into the house and was growing in there as well as on the porch. For real.
We actually repainted both the porch ceiling and the floor their original colors, or at least the best we could match. The ceiling is Sherwin William’s Breaktime and the floor is Behr’s Pacific Fog. The ceiling also already had hooks in it for a porch swing, so we ordered one, popped it up, and called it done.
We still haven’t done most of the landscaping or hardscaping that we have planned for the side and backyard yet, but we could resist sharing one last angle. Remember how rotten this side of the house was??? This was a former porch that someone enclosed with interior wood floorboards instead of actual weather-proof siding (they had rotted so badly that you could stick your fist through the siding and into the house in a bunch of places). So yeah, it had nowhere to go but up.
This was the side of the house that had to be completely torn off and rebuilt due to a sinking foundation and a ton of weather damage to the support beams. So at one point this whole section was completely missing! This is where the mudroom, pantry, bathrooms, and bunk room now are. So, for reference, that exposed wall on the second floor that’s all black is where the bunk beds now hang. Crazy!
Now it’s looking more like this (minus that giant bush in the front that we learned is actually a tree that would grow taller than our house – so we had to get it outta there before it wrecked our freshly fixed foundation). We still have to landscape the entire side of the house and add a stone pathway to lead people back to the outdoor shower, but it’s a far cry from where we started.
The Entryway
Despite the crumbling plaster, unfinished drywall, and water damage – this view into the foyer was immediately charming to us. That fireplace mantle was not original, it was just one of many items that the previous owner had collected over the years (there were also two old stoves, various rolls of paintable wallpaper, and even an old boat in the shed out back).
This is the entry now. It, like the rest of the house, got fresh drywall and paint, refinished floors, and a whole lot more. We were able to salvage enough of the home’s original trim to use it throughout the first floor – and the original color of it in this foyer (see it in that photo above around the doorway?) is what inspired us to use non-white trim throughout the downstairs. The color is Sherwin William’s Stone Isle. The walls in the entire house are painted Sherwin Willaim’s White Heron and the floors – OH THE FLOORS! They’re the original heart pine that we had refinished and clear sealed with water based sealer (extremely durable but it won’t yellow over time like poly). It’s so hard to believe they’re the same floors in some of these photos because they were looking so rough when we bought this house.
mirror | similar light | similar lamp | similar dresser
It’s worth noting that we attempted to keep the railing wood (but stain it to match the floors since it was much redder than they were), but it proved impossible since it’s not heart pine like the floors and steps are. So we painted it a slightly deeper gray color than the trim, which allows the floors to sing instead of competing with a different tone of wood all the way up the stairs.
The Kitchen, Dining Room, & Pantry
Through the foyer is the largest room of the house, which we turned into a kitchen/dining space. It was a giant mess when we first bought it, but have no fear, that beautiful original light fixture is the one we had rewired that now hangs in the pantry!
Before jumping to the after on this one, I’m actually going to take you through the progression of this angle, since it tells a nice story about the journey this house went through. Below is what it looked like during demo. The mess was cleared (mostly) but there was still a long way to go.
Then here it is being rebuilt. That area to the left that’s all new wood is the side that had to be completely torn down and rebuilt – and a lot of the ceiling joists in the kitchen had to be reinforced with new boards.
I won’t bore you with photos of all of the new plumbing and electrical that got added (we redid those systems as well as installing new HVAC throughout the house), so let’s jump to drywall. It’s starting to look like a house again.
And now another big jump forward to present day. After some debate about the floor plan, we actually ended up with both the dining and the kitchen functions in relatively the same spot as they originally were. Let the record state that we love this downstairs layout so much that if we could blink our eyes and have our Richmond house laid out this way – complete with the back staircase – we would in a heartbeat. It’s not huge but it feels nice and open, and when we spend time downstairs we all feel close and connected but not cramped.
dining chair | chandeliers | sconces | pendants | barstools
Here’s the before photo again for comparison:
Here’s another view of this space. You can see the previous stove there next to the back door. And note that pink beadboard that runs along the back wall. We didn’t even register that it was there until way after we painted the house pink and it caught our eye in old photos from our initial walk-throughs. Sherry swears the house wanted to be pink all along and it was trying to send us signals (all of which we missed until after the fact).
Here’s that same view now. Even though it made floor planning a little more challenging, we were intent on keeping the placement of the original back door and that back staircase (some of our neighbors with similar houses don’t have them anymore) and we’re SO GLAD we did. They limited the useable wall space for the kitchen itself, but we ended up shifting that doorway on the left that you see above (which used to lead to the rotted side porch) to give us room for the wall that hosts the vintage pink stove now.
hood | cabinet pulls | similar runner | sconces | pendants | faucet | pink letterboard
It basically just got moved about 5′ further down the wall towards the dining area and it now leads to the laundry room/mudroom (which you enter through the house’s side door) as well as a full downstairs bathroom.
And that doorway that you see in the back left corner of the kitchen leads into our pantry, but that room used to be a full bathroom…. complete with pink trim. See it’s like this house wanted to be pink! There was a plastic shower stall between those exposed studs and a toilet tucked behind it.
You saw that the full bathroom downstairs shifted over by the mudroom, which freed up this space for another super functional area that took some trial-and-error to figure out: our walk-in pantry. We’ve got a full tutorial on building pantry shelves like these if you’re interested. Also, there’s the original light fixture that used to hang in the kitchen – we had it rewired so it’s safe.
Sherry often declares the pantry to be her favorite room in the house (especially this time of year because she stands on the floor vent to heat her feet while snacking). As weird as it sounds to declare a pantry your favorite, I’m going to top that. My favorite = the back stairs… which I know isn’t really a room… but hear me out! This is what they looked like before:
The old door on the third step up from the floor wasn’t to code anymore (you’d need a landing to stand on when opening a door) and we knew the stairs would look much better being open. So now we’ve got doors at the top of the stairs instead – which provide some nice privacy to anyone sleeping in that bedroom without blocking the view of the stairs from the kitchen.
I know this is a downstairs tour, but this photo will help to explain what I mean. Now when you reach the top of the stairs there’s a landing with a built-in dresser and these pocket doors can be closed for privacy.
Ok, back to the downstairs tour. I love these old stairs because (1) they’re such a cool quirky original detail and (2) they’re crazy functional. We weren’t even sure if we’d use them much (we thought maybe just the kids would love sneaking up them) but they act kind of like a private entry into the upstairs master bedroom for us, and I’m now so spoiled that I wish we had them in our Richmond house too.
Here is a view from the stairs themselves. It’s a “before” angle you probably haven’t seen before (probably because it’s blurry – ha!) but it’s looking towards where the pink stove now sits. The main thing to notice here is the blue door….
…that’s the one we kept as is (well, after carefully removing the flaking paint and clear sealing it with Safecoat Acrylacq so any old lead paint is completely encapsulated – you can read how to deal with lead here – BE SAFE GUYS). So that’s the very same door, it just got rehung in the doorway to the mudroom. We leave it open 95% of the time, only closing it while laundry is running, because it adds a nice dose of age and color to the room. This photo is from before we finished the backsplash, hence no finish piece across the top, but you get the idea:
If you’re wondering in all of this: “Well, where was the kitchen before?” allow me to show it to you. Since we bought the house in the midst of some stage of demo, we’re not entirely sure where appliances went (remember there was no working water meter that led to this house when we bought it, so it’s very possible it hadn’t had a functional kitchen in decades), and these clearly aren’t the original cabinets from 1920, but they were cornered against this wall that the previous owner was in the process of taking down. Btw, we donated all of the cabinets and appliances to the local Habitat ReStore, which was an easy way to dispose of them without them going to waste. They even came and picked them up, so that’s an option if you’re renovating – just call to schedule a pickup!
This is that same view now. I almost laughed out loud looking at this photo because it feels like the sink ended up in almost exactly the same spot.
framed art | curtains | curtain rods | sconces | pendants | barstools | similar runner
Stepping forward in this room, here’s another view of the previous dining area. There’s a lot to take in here – the giant hole in the floor (lower right), the vine creeping through the window (lower left), that hit of bright green trim (?!), and that second stove sitting in the living room.
But here we are today. At some point the secondhand table needs to be refinished (the leaf is a darker color than the rest of it) and we sometimes think we’d like to add a rug under the table (although we love the ease of cleaning the room just like this – so maybe not). Either way – still a big improvement over the before!
dining chairs | dining benches | similar chandeliers |curtains | curtain rods
The Living Room
If you step forward through the dining room doorway, this is the view you see – well, or would’ve seen two years ago. Again, there’s a lot to take in: the always-damp couch, maroon trim, that second stove. Not pictured are the new rolls of paintable wallpaper piled in the corner. The funny thing is that by the time we bought the house, no amount of paintable wallpaper was gonna save it.
Here’s how that same angle is looking lately. The fireplace mantel in the before photo wasn’t original and actually didn’t even fit on the wall (it overhung the far corner by an inch or two). So we donated the mantle and exposed the cool old brick chimney that had been hiding behind the plaster.
chandelier | rug | bookshelf | media cabinet | curtains | curtain rods
In this before photo you can sort of see better how the fireplace mantel didn’t fit on the wall (it was too wide on that left side). And while we didn’t rehang that door in that exact spot, this is one of the many original wood doors we had stripped down to the original pine, clear sealed, and then rehung throughout the house. I can’t say where this exact door ended up, but you’ll see one of them in a minute on the downstairs bathroom. All of the interior doors on the house are original (and all of the exterior ones except for the side door – which was a dinged up 50’s metal one – are too!).
Looking at this area today, you can better see how the exposed brick chimney adds a little bit of age and interest to the room. The warm tones of the brick also look great with the warm pine floors, which are balanced by the gray trim and some of the cooler colors we worked into the space, like the rug and the media cabinet.
rug | media cabinet | curtains | curtain rods | similar chair | similar table
And if you thought a second stove in the living room was weird, I dug up this before photo from another angle that featured a doorless fridge in there too. And there’s all that paintable wallpaper I mentioned.
Here’s that same angle now – taken from standing in that doorway that used to have the wood door on it. This is one of the first views you see when you walk into the foyer (when you step into the house, this is immediately on your right) and we love how light and bright this room has become.
rug | bookshelf | curtains | curtain rods | similar chair | similar fig
Here’s a similar vantage point, just looking slightly back toward the dining room. This must’ve been after closing since the doorless fridge is gone (the seller took that out before we closed), but at least now you can see the open bag of concrete left on the floor… WHICH HAD COMPLETELY HARDENED. I guess I shouldn’t be mad at that though, since it made it less messy to clean up.
Here’s an after from a similar POV. This room actually didn’t have an overhead fixture before, so we had one wired and added a decorative medallion to balance out the modern chandelier. We’re planning to swap out our 7-year-old Ikea sectional for the Mellow sofa from our own furniture line whenever we bring a moving truck out for the duplex. Can’t wait!
chandelier | rug | bookshelf | curtains | curtain rods | similar table
Okay, one last angle of the stove, I mean, living room. This is standing in the living room looking back through into the dining and kitchen area.
And here’s a similar view now, which shows you how the dining table helps act as overflow seating for the living room, since someone can easily sit on the bench and face into the living room to chat. We love how flexible it is, and we’ve had big groups over for a casual meal and it works so well.
rug | dining chairs | dining benches | similar chandeliers
The Mudroom & Bathroom
The last two rooms to show you downstairs are some of our hardest working spaces in the house. The mudroom and the downstairs bathroom, (along with the pantry) were located in the section of the house that had to be completely torn off and rebuilt. Remember that rotted exterior side of the house that we showed you with fist-sized holes? Well, this is the room behind it (note the sunlight streaming in between the gaps in the “siding”).
I can’t get quite far back enough to take that same angle now, because we added a wall to split the space into two rooms: the mudroom and the bathroom. But the wall seen above is now home to our laundry area and – since this is the room you enter from the side door – it acts as a mudroom of sorts too, complete with an oversized wall hook rail, a bench, and baskets for shoes. That tall Ikea cabinet also hides our tankless water heater while storing brooms, a vacuum, and other cleaning supplies.
floor tile | washer | dryer | light | shelf brackets | towels | similar bench | shelf basket
Turning around, this was the view of the other side of that room when we first bought it (standing where the washer & dryer are now). It’s a little hard to orient yourself since we changed the layout, but just note the location of the door and window on the left side.
Now, looking from the washer and dryer today, the door and window stayed in the same spot – but there’s a wall between them to create the downstairs bathroom (which now has that window in it). And in this photo you can see one of the original wood doors after it was stripped and resealed. Plus, see that trio of photos? Those are “before” photos that we had framed so anyone who visits can appreciate how far this house has come.
Now I’ll show you the bathroom up close. I don’t really have comparable “before” photos because this didn’t exist as a separate room before, but in many ways it matches the layout of the original downstairs bathroom (which is now the pantry).
floor tile | shower wall tile | wall art | shower curtain | toilet | tp holder
And here’s the view of the other side of that wall, where you can see the vanity area. Just like the picture frames above the toilet, we chose a mirror with wood accents to pick up on the original wood doors. This one was actually a more recent swap (we had a larger rectangular one there before) and this suits the space much better.
mirror | vanity | faucet | light | hand towel | floor tile
So now that you’ve seen the entire downstairs both before and after, I’m gonna end with a deep dark confession. We filmed a video tour of the beach house on the last weekend before it started to get overtaken with duplex materials (think tile piled up in the foyer and extra furniture and frames everywhere) and when we got home, the video was a fail. I won’t bore you with the details, but it was a focusing issue I couldn’t detect until we got it home and uploaded. So rather than subject you to it, we’re going to try to take a better one in a few weeks. So stay tuned for that AND the before and after photos of the upstairs!
PS: If there’s any source you missed you can probably find it (or something similar) on our Shop Our Beach House page. You can also browse all of our beach house posts and projects here.
*This post contains affiliate links*
The post Before & Afters Of Our Beach House: Downstairs appeared first on Young House Love.
Before & Afters Of Our Beach House: Downstairs published first on https://bakerskitchenslimited.tumblr.com/
0 notes
Text
Before & Afters Of Our Beach House: Downstairs
I’m not sure I’ve ever been so excited to share before and after photos as I am today. Last month marked the 2-year anniversary of buying the beach house and while we never like to declare a home “done,” this place has come so far that this felt like a good moment to look back at everything (and to document what’s still ahead).
We’ve dug up dozens of before photos (including many that we haven’t ever shared!) and we’ve done our best to find or take similar angles to match up with them. There are so many angles to show you, and so much to cover, we’re just doing the downstairs today – and then we’ll follow up soon with the upstairs once we can shoot those photos and organize another big before-and-after-fest of a post.
We’ll link some of the key items in each “after” for you, but remember you can always visit our Shop Our Beach House page for the paint colors and source info of each room (it’s always linked up in our menu bar right under our blog header). And before we dive into the photos, you may want to treat yourself to this walk down memory lane: the before video tour! Note: if you’re reading this post in a feed reader like Bloglovin or Feedly and can’t see the video below, you may have to click into our post to view it – but trust me, it’s worth it.
The Exterior
Before we head into the downstairs, let’s look at the outside. This is a shot of it from the sidewalk back when we bought it. Did you even remember that “the pink house” was once “the greenish-gray house?” Complete with cream trim, mismatched windows (some of which were boarded up), and cinderblock steps.
And here it is from a similar angle (a little closer up). We snapped this photo this summer:
Here’s another before shot. The cinderblock steps and the sad rotting siding weren’t gorgeous… but we loved the old bones.
Thanks to a new roof, new siding, new windows, new steps, and a repointed brick foundation, we got the house looking a lot happier. After much debate, a takeout coffee cup helped us choose pink for its new color scheme (Sherwin William’s Mellow Coral, with SW Snowbound for the trim).
Here’s another angle of the front of the house. Fun fact: that vine had snaked its way into the house and was growing in there as well as on the porch. For real.
We actually repainted both the porch ceiling and the floor their original colors, or at least the best we could match. The ceiling is Sherwin William’s Breaktime and the floor is Behr’s Pacific Fog. The ceiling also already had hooks in it for a porch swing, so we ordered one, popped it up, and called it done.
We still haven’t done most of the landscaping or hardscaping that we have planned for the side and backyard yet, but we could resist sharing one last angle. Remember how rotten this side of the house was??? This was a former porch that someone enclosed with interior wood floorboards instead of actual weather-proof siding (they had rotted so badly that you could stick your fist through the siding and into the house in a bunch of places). So yeah, it had nowhere to go but up.
This was the side of the house that had to be completely torn off and rebuilt due to a sinking foundation and a ton of weather damage to the support beams. So at one point this whole section was completely missing! This is where the mudroom, pantry, bathrooms, and bunk room now are. So, for reference, that exposed wall on the second floor that’s all black is where the bunk beds now hang. Crazy!
Now it’s looking more like this (minus that giant bush in the front that we learned is actually a tree that would grow taller than our house – so we had to get it outta there before it wrecked our freshly fixed foundation). We still have to landscape the entire side of the house and add a stone pathway to lead people back to the outdoor shower, but it’s a far cry from where we started.
The Entryway
Despite the crumbling plaster, unfinished drywall, and water damage – this view into the foyer was immediately charming to us. That fireplace mantle was not original, it was just one of many items that the previous owner had collected over the years (there were also two old stoves, various rolls of paintable wallpaper, and even an old boat in the shed out back).
This is the entry now. It, like the rest of the house, got fresh drywall and paint, refinished floors, and a whole lot more. We were able to salvage enough of the home’s original trim to use it throughout the first floor – and the original color of it in this foyer (see it in that photo above around the doorway?) is what inspired us to use non-white trim throughout the downstairs. The color is Sherwin William’s Stone Isle. The walls in the entire house are painted Sherwin Willaim’s White Heron and the floors – OH THE FLOORS! They’re the original heart pine that we had refinished and clear sealed with water based sealer (extremely durable but it won’t yellow over time like poly). It’s so hard to believe they’re the same floors in some of these photos because they were looking so rough when we bought this house.
mirror | similar light | similar lamp | similar dresser
It’s worth noting that we attempted to keep the railing wood (but stain it to match the floors since it was much redder than they were), but it proved impossible since it’s not heart pine like the floors and steps are. So we painted it a slightly deeper gray color than the trim, which allows the floors to sing instead of competing with a different tone of wood all the way up the stairs.
The Kitchen, Dining Room, & Pantry
Through the foyer is the largest room of the house, which we turned into a kitchen/dining space. It was a giant mess when we first bought it, but have no fear, that beautiful original light fixture is the one we had rewired that now hangs in the pantry!
Before jumping to the after on this one, I’m actually going to take you through the progression of this angle, since it tells a nice story about the journey this house went through. Below is what it looked like during demo. The mess was cleared (mostly) but there was still a long way to go.
Then here it is being rebuilt. That area to the left that’s all new wood is the side that had to be completely torn down and rebuilt – and a lot of the ceiling joists in the kitchen had to be reinforced with new boards.
I won’t bore you with photos of all of the new plumbing and electrical that got added (we redid those systems as well as installing new HVAC throughout the house), so let’s jump to drywall. It’s starting to look like a house again.
And now another big jump forward to present day. After some debate about the floor plan, we actually ended up with both the dining and the kitchen functions in relatively the same spot as they originally were. Let the record state that we love this downstairs layout so much that if we could blink our eyes and have our Richmond house laid out this way – complete with the back staircase – we would in a heartbeat. It’s not huge but it feels nice and open, and when we spend time downstairs we all feel close and connected but not cramped.
dining chair | chandeliers | sconces | pendants | barstools
Here’s the before photo again for comparison:
Here’s another view of this space. You can see the previous stove there next to the back door. And note that pink beadboard that runs along the back wall. We didn’t even register that it was there until way after we painted the house pink and it caught our eye in old photos from our initial walk-throughs. Sherry swears the house wanted to be pink all along and it was trying to send us signals (all of which we missed until after the fact).
Here’s that same view now. Even though it made floor planning a little more challenging, we were intent on keeping the placement of the original back door and that back staircase (some of our neighbors with similar houses don’t have them anymore) and we’re SO GLAD we did. They limited the useable wall space for the kitchen itself, but we ended up shifting that doorway on the left that you see above (which used to lead to the rotted side porch) to give us room for the wall that hosts the vintage pink stove now.
hood | cabinet pulls | similar runner | sconces | pendants | faucet | pink letterboard
It basically just got moved about 5′ further down the wall towards the dining area and it now leads to the laundry room/mudroom (which you enter through the house’s side door) as well as a full downstairs bathroom.
And that doorway that you see in the back left corner of the kitchen leads into our pantry, but that room used to be a full bathroom…. complete with pink trim. See it’s like this house wanted to be pink! There was a plastic shower stall between those exposed studs and a toilet tucked behind it.
You saw that the full bathroom downstairs shifted over by the mudroom, which freed up this space for another super functional area that took some trial-and-error to figure out: our walk-in pantry. We’ve got a full tutorial on building pantry shelves like these if you’re interested. Also, there’s the original light fixture that used to hang in the kitchen – we had it rewired so it’s safe.
Sherry often declares the pantry to be her favorite room in the house (especially this time of year because she stands on the floor vent to heat her feet while snacking). As weird as it sounds to declare a pantry your favorite, I’m going to top that. My favorite = the back stairs… which I know isn’t really a room… but hear me out! This is what they looked like before:
The old door on the third step up from the floor wasn’t to code anymore (you’d need a landing to stand on when opening a door) and we knew the stairs would look much better being open. So now we’ve got doors at the top of the stairs instead – which provide some nice privacy to anyone sleeping in that bedroom without blocking the view of the stairs from the kitchen.
I know this is a downstairs tour, but this photo will help to explain what I mean. Now when you reach the top of the stairs there’s a landing with a built-in dresser and these pocket doors can be closed for privacy.
Ok, back to the downstairs tour. I love these old stairs because (1) they’re such a cool quirky original detail and (2) they’re crazy functional. We weren’t even sure if we’d use them much (we thought maybe just the kids would love sneaking up them) but they act kind of like a private entry into the upstairs master bedroom for us, and I’m now so spoiled that I wish we had them in our Richmond house too.
Here is a view from the stairs themselves. It’s a “before” angle you probably haven’t seen before (probably because it’s blurry – ha!) but it’s looking towards where the pink stove now sits. The main thing to notice here is the blue door….
…that’s the one we kept as is (well, after carefully removing the flaking paint and clear sealing it with Safecoat Acrylacq so any old lead paint is completely encapsulated – you can read how to deal with lead here – BE SAFE GUYS). So that’s the very same door, it just got rehung in the doorway to the mudroom. We leave it open 95% of the time, only closing it while laundry is running, because it adds a nice dose of age and color to the room. This photo is from before we finished the backsplash, hence no finish piece across the top, but you get the idea:
If you’re wondering in all of this: “Well, where was the kitchen before?” allow me to show it to you. Since we bought the house in the midst of some stage of demo, we’re not entirely sure where appliances went (remember there was no working water meter that led to this house when we bought it, so it’s very possible it hadn’t had a functional kitchen in decades), and these clearly aren’t the original cabinets from 1920, but they were cornered against this wall that the previous owner was in the process of taking down. Btw, we donated all of the cabinets and appliances to the local Habitat ReStore, which was an easy way to dispose of them without them going to waste. They even came and picked them up, so that’s an option if you’re renovating – just call to schedule a pickup!
This is that same view now. I almost laughed out loud looking at this photo because it feels like the sink ended up in almost exactly the same spot.
framed art | curtains | curtain rods | sconces | pendants | barstools | similar runner
Stepping forward in this room, here’s another view of the previous dining area. There’s a lot to take in here – the giant hole in the floor (lower right), the vine creeping through the window (lower left), that hit of bright green trim (?!), and that second stove sitting in the living room.
But here we are today. At some point the secondhand table needs to be refinished (the leaf is a darker color than the rest of it) and we sometimes think we’d like to add a rug under the table (although we love the ease of cleaning the room just like this – so maybe not). Either way – still a big improvement over the before!
dining chairs | dining benches | similar chandeliers |curtains | curtain rods
The Living Room
If you step forward through the dining room doorway, this is the view you see – well, or would’ve seen two years ago. Again, there’s a lot to take in: the always-damp couch, maroon trim, that second stove. Not pictured are the new rolls of paintable wallpaper piled in the corner. The funny thing is that by the time we bought the house, no amount of paintable wallpaper was gonna save it.
Here’s how that same angle is looking lately. The fireplace mantel in the before photo wasn’t original and actually didn’t even fit on the wall (it overhung the far corner by an inch or two). So we donated the mantle and exposed the cool old brick chimney that had been hiding behind the plaster.
chandelier | rug | bookshelf | media cabinet | curtains | curtain rods
In this before photo you can sort of see better how the fireplace mantel didn’t fit on the wall (it was too wide on that left side). And while we didn’t rehang that door in that exact spot, this is one of the many original wood doors we had stripped down to the original pine, clear sealed, and then rehung throughout the house. I can’t say where this exact door ended up, but you’ll see one of them in a minute on the downstairs bathroom. All of the interior doors on the house are original (and all of the exterior ones except for the side door – which was a dinged up 50’s metal one – are too!).
Looking at this area today, you can better see how the exposed brick chimney adds a little bit of age and interest to the room. The warm tones of the brick also look great with the warm pine floors, which are balanced by the gray trim and some of the cooler colors we worked into the space, like the rug and the media cabinet.
rug | media cabinet | curtains | curtain rods | similar chair | similar table
And if you thought a second stove in the living room was weird, I dug up this before photo from another angle that featured a doorless fridge in there too. And there’s all that paintable wallpaper I mentioned.
Here’s that same angle now – taken from standing in that doorway that used to have the wood door on it. This is one of the first views you see when you walk into the foyer (when you step into the house, this is immediately on your right) and we love how light and bright this room has become.
rug | bookshelf | curtains | curtain rods | similar chair | similar fig
Here’s a similar vantage point, just looking slightly back toward the dining room. This must’ve been after closing since the doorless fridge is gone (the seller took that out before we closed), but at least now you can see the open bag of concrete left on the floor… WHICH HAD COMPLETELY HARDENED. I guess I shouldn’t be mad at that though, since it made it less messy to clean up.
Here’s an after from a similar POV. This room actually didn’t have an overhead fixture before, so we had one wired and added a decorative medallion to balance out the modern chandelier. We’re planning to swap out our 7-year-old Ikea sectional for the Mellow sofa from our own furniture line whenever we bring a moving truck out for the duplex. Can’t wait!
chandelier | rug | bookshelf | curtains | curtain rods | similar table
Okay, one last angle of the stove, I mean, living room. This is standing in the living room looking back through into the dining and kitchen area.
And here’s a similar view now, which shows you how the dining table helps act as overflow seating for the living room, since someone can easily sit on the bench and face into the living room to chat. We love how flexible it is, and we’ve had big groups over for a casual meal and it works so well.
rug | dining chairs | dining benches | similar chandeliers
The Mudroom & Bathroom
The last two rooms to show you downstairs are some of our hardest working spaces in the house. The mudroom and the downstairs bathroom, (along with the pantry) were located in the section of the house that had to be completely torn off and rebuilt. Remember that rotted exterior side of the house that we showed you with fist-sized holes? Well, this is the room behind it (note the sunlight streaming in between the gaps in the “siding”).
I can’t get quite far back enough to take that same angle now, because we added a wall to split the space into two rooms: the mudroom and the bathroom. But the wall seen above is now home to our laundry area and – since this is the room you enter from the side door – it acts as a mudroom of sorts too, complete with an oversized wall hook rail, a bench, and baskets for shoes. That tall Ikea cabinet also hides our tankless water heater while storing brooms, a vacuum, and other cleaning supplies.
floor tile | washer | dryer | light | shelf brackets | towels | similar bench | shelf basket
Turning around, this was the view of the other side of that room when we first bought it (standing where the washer & dryer are now). It’s a little hard to orient yourself since we changed the layout, but just note the location of the door and window on the left side.
Now, looking from the washer and dryer today, the door and window stayed in the same spot – but there’s a wall between them to create the downstairs bathroom (which now has that window in it). And in this photo you can see one of the original wood doors after it was stripped and resealed. Plus, see that trio of photos? Those are “before” photos that we had framed so anyone who visits can appreciate how far this house has come.
Now I’ll show you the bathroom up close. I don’t really have comparable “before” photos because this didn’t exist as a separate room before, but in many ways it matches the layout of the original downstairs bathroom (which is now the pantry).
floor tile | shower wall tile | wall art | shower curtain | toilet | tp holder
And here’s the view of the other side of that wall, where you can see the vanity area. Just like the picture frames above the toilet, we chose a mirror with wood accents to pick up on the original wood doors. This one was actually a more recent swap (we had a larger rectangular one there before) and this suits the space much better.
mirror | vanity | faucet | light | hand towel | floor tile
So now that you’ve seen the entire downstairs both before and after, I’m gonna end with a deep dark confession. We filmed a video tour of the beach house on the last weekend before it started to get overtaken with duplex materials (think tile piled up in the foyer and extra furniture and frames everywhere) and when we got home, the video was a fail. I won’t bore you with the details, but it was a focusing issue I couldn’t detect until we got it home and uploaded. So rather than subject you to it, we’re going to try to take a better one in a few weeks. So stay tuned for that AND the before and after photos of the upstairs!
PS: If there’s any source you missed you can probably find it (or something similar) on our Shop Our Beach House page. You can also browse all of our beach house posts and projects here.
*This post contains affiliate links*
The post Before & Afters Of Our Beach House: Downstairs appeared first on Young House Love.
Before & Afters Of Our Beach House: Downstairs published first on https://ssmattress.tumblr.com/
0 notes
Text
Before & Afters Of Our Beach House: Downstairs
I’m not sure I’ve ever been so excited to share before and after photos as I am today. Last month marked the 2-year anniversary of buying the beach house and while we never like to declare a home “done,” this place has come so far that this felt like a good moment to look back at everything (and to document what’s still ahead).
We’ve dug up dozens of before photos (including many that we haven’t ever shared!) and we’ve done our best to find or take similar angles to match up with them. There are so many angles to show you, and so much to cover, we’re just doing the downstairs today – and then we’ll follow up soon with the upstairs once we can shoot those photos and organize another big before-and-after-fest of a post.
We’ll link some of the key items in each “after” for you, but remember you can always visit our Shop Our Beach House page for the paint colors and source info of each room (it’s always linked up in our menu bar right under our blog header). And before we dive into the photos, you may want to treat yourself to this walk down memory lane: the before video tour! Note: if you’re reading this post in a feed reader like Bloglovin or Feedly and can’t see the video below, you may have to click into our post to view it – but trust me, it’s worth it.
The Exterior
Before we head into the downstairs, let’s look at the outside. This is a shot of it from the sidewalk back when we bought it. Did you even remember that “the pink house” was once “the greenish-gray house?” Complete with cream trim, mismatched windows (some of which were boarded up), and cinderblock steps.
And here it is from a similar angle (a little closer up). We snapped this photo this summer:
Here’s another before shot. The cinderblock steps and the sad rotting siding weren’t gorgeous… but we loved the old bones.
Thanks to a new roof, new siding, new windows, new steps, and a repointed brick foundation, we got the house looking a lot happier. After much debate, a takeout coffee cup helped us choose pink for its new color scheme (Sherwin William’s Mellow Coral, with SW Snowbound for the trim).
Here’s another angle of the front of the house. Fun fact: that vine had snaked its way into the house and was growing in there as well as on the porch. For real.
We actually repainted both the porch ceiling and the floor their original colors, or at least the best we could match. The ceiling is Sherwin William’s Breaktime and the floor is Behr’s Pacific Fog. The ceiling also already had hooks in it for a porch swing, so we ordered one, popped it up, and called it done.
We still haven’t done most of the landscaping or hardscaping that we have planned for the side and backyard yet, but we could resist sharing one last angle. Remember how rotten this side of the house was??? This was a former porch that someone enclosed with interior wood floorboards instead of actual weather-proof siding (they had rotted so badly that you could stick your fist through the siding and into the house in a bunch of places). So yeah, it had nowhere to go but up.
This was the side of the house that had to be completely torn off and rebuilt due to a sinking foundation and a ton of weather damage to the support beams. So at one point this whole section was completely missing! This is where the mudroom, pantry, bathrooms, and bunk room now are. So, for reference, that exposed wall on the second floor that’s all black is where the bunk beds now hang. Crazy!
Now it’s looking more like this (minus that giant bush in the front that we learned is actually a tree that would grow taller than our house – so we had to get it outta there before it wrecked our freshly fixed foundation). We still have to landscape the entire side of the house and add a stone pathway to lead people back to the outdoor shower, but it’s a far cry from where we started.
The Entryway
Despite the crumbling plaster, unfinished drywall, and water damage – this view into the foyer was immediately charming to us. That fireplace mantle was not original, it was just one of many items that the previous owner had collected over the years (there were also two old stoves, various rolls of paintable wallpaper, and even an old boat in the shed out back).
This is the entry now. It, like the rest of the house, got fresh drywall and paint, refinished floors, and a whole lot more. We were able to salvage enough of the home’s original trim to use it throughout the first floor – and the original color of it in this foyer (see it in that photo above around the doorway?) is what inspired us to use non-white trim throughout the downstairs. The color is Sherwin William’s Stone Isle. The walls in the entire house are painted Sherwin Willaim’s White Heron and the floors – OH THE FLOORS! They’re the original heart pine that we had refinished and clear sealed with water based sealer (extremely durable but it won’t yellow over time like poly). It’s so hard to believe they’re the same floors in some of these photos because they were looking so rough when we bought this house.
mirror | similar light | similar lamp | similar dresser
It’s worth noting that we attempted to keep the railing wood (but stain it to match the floors since it was much redder than they were), but it proved impossible since it’s not heart pine like the floors and steps are. So we painted it a slightly deeper gray color than the trim, which allows the floors to sing instead of competing with a different tone of wood all the way up the stairs.
The Kitchen, Dining Room, & Pantry
Through the foyer is the largest room of the house, which we turned into a kitchen/dining space. It was a giant mess when we first bought it, but have no fear, that beautiful original light fixture is the one we had rewired that now hangs in the pantry!
Before jumping to the after on this one, I’m actually going to take you through the progression of this angle, since it tells a nice story about the journey this house went through. Below is what it looked like during demo. The mess was cleared (mostly) but there was still a long way to go.
Then here it is being rebuilt. That area to the left that’s all new wood is the side that had to be completely torn down and rebuilt – and a lot of the ceiling joists in the kitchen had to be reinforced with new boards.
I won’t bore you with photos of all of the new plumbing and electrical that got added (we redid those systems as well as installing new HVAC throughout the house), so let’s jump to drywall. It’s starting to look like a house again.
And now another big jump forward to present day. After some debate about the floor plan, we actually ended up with both the dining and the kitchen functions in relatively the same spot as they originally were. Let the record state that we love this downstairs layout so much that if we could blink our eyes and have our Richmond house laid out this way – complete with the back staircase – we would in a heartbeat. It’s not huge but it feels nice and open, and when we spend time downstairs we all feel close and connected but not cramped.
dining chair | chandeliers | sconces | pendants | barstools
Here’s the before photo again for comparison:
Here’s another view of this space. You can see the previous stove there next to the back door. And note that pink beadboard that runs along the back wall. We didn’t even register that it was there until way after we painted the house pink and it caught our eye in old photos from our initial walk-throughs. Sherry swears the house wanted to be pink all along and it was trying to send us signals (all of which we missed until after the fact).
Here’s that same view now. Even though it made floor planning a little more challenging, we were intent on keeping the placement of the original back door and that back staircase (some of our neighbors with similar houses don’t have them anymore) and we’re SO GLAD we did. They limited the useable wall space for the kitchen itself, but we ended up shifting that doorway on the left that you see above (which used to lead to the rotted side porch) to give us room for the wall that hosts the vintage pink stove now.
hood | cabinet pulls | similar runner | sconces | pendants | faucet | pink letterboard
It basically just got moved about 5′ further down the wall towards the dining area and it now leads to the laundry room/mudroom (which you enter through the house’s side door) as well as a full downstairs bathroom.
And that doorway that you see in the back left corner of the kitchen leads into our pantry, but that room used to be a full bathroom…. complete with pink trim. See it’s like this house wanted to be pink! There was a plastic shower stall between those exposed studs and a toilet tucked behind it.
You saw that the full bathroom downstairs shifted over by the mudroom, which freed up this space for another super functional area that took some trial-and-error to figure out: our walk-in pantry. We’ve got a full tutorial on building pantry shelves like these if you’re interested. Also, there’s the original light fixture that used to hang in the kitchen – we had it rewired so it’s safe.
Sherry often declares the pantry to be her favorite room in the house (especially this time of year because she stands on the floor vent to heat her feet while snacking). As weird as it sounds to declare a pantry your favorite, I’m going to top that. My favorite = the back stairs… which I know isn’t really a room… but hear me out! This is what they looked like before:
The old door on the third step up from the floor wasn’t to code anymore (you’d need a landing to stand on when opening a door) and we knew the stairs would look much better being open. So now we’ve got doors at the top of the stairs instead – which provide some nice privacy to anyone sleeping in that bedroom without blocking the view of the stairs from the kitchen.
I know this is a downstairs tour, but this photo will help to explain what I mean. Now when you reach the top of the stairs there’s a landing with a built-in dresser and these pocket doors can be closed for privacy.
Ok, back to the downstairs tour. I love these old stairs because (1) they’re such a cool quirky original detail and (2) they’re crazy functional. We weren’t even sure if we’d use them much (we thought maybe just the kids would love sneaking up them) but they act kind of like a private entry into the upstairs master bedroom for us, and I’m now so spoiled that I wish we had them in our Richmond house too.
Here is a view from the stairs themselves. It’s a “before” angle you probably haven’t seen before (probably because it’s blurry – ha!) but it’s looking towards where the pink stove now sits. The main thing to notice here is the blue door….
…that’s the one we kept as is (well, after carefully removing the flaking paint and clear sealing it with Safecoat Acrylacq so any old lead paint is completely encapsulated – you can read how to deal with lead here – BE SAFE GUYS). So that’s the very same door, it just got rehung in the doorway to the mudroom. We leave it open 95% of the time, only closing it while laundry is running, because it adds a nice dose of age and color to the room. This photo is from before we finished the backsplash, hence no finish piece across the top, but you get the idea:
If you’re wondering in all of this: “Well, where was the kitchen before?” allow me to show it to you. Since we bought the house in the midst of some stage of demo, we’re not entirely sure where appliances went (remember there was no working water meter that led to this house when we bought it, so it’s very possible it hadn’t had a functional kitchen in decades), and these clearly aren’t the original cabinets from 1920, but they were cornered against this wall that the previous owner was in the process of taking down. Btw, we donated all of the cabinets and appliances to the local Habitat ReStore, which was an easy way to dispose of them without them going to waste. They even came and picked them up, so that’s an option if you’re renovating – just call to schedule a pickup!
This is that same view now. I almost laughed out loud looking at this photo because it feels like the sink ended up in almost exactly the same spot.
framed art | curtains | curtain rods | sconces | pendants | barstools | similar runner
Stepping forward in this room, here’s another view of the previous dining area. There’s a lot to take in here – the giant hole in the floor (lower right), the vine creeping through the window (lower left), that hit of bright green trim (?!), and that second stove sitting in the living room.
But here we are today. At some point the secondhand table needs to be refinished (the leaf is a darker color than the rest of it) and we sometimes think we’d like to add a rug under the table (although we love the ease of cleaning the room just like this – so maybe not). Either way – still a big improvement over the before!
dining chairs | dining benches | similar chandeliers |curtains | curtain rods
The Living Room
If you step forward through the dining room doorway, this is the view you see – well, or would’ve seen two years ago. Again, there’s a lot to take in: the always-damp couch, maroon trim, that second stove. Not pictured are the new rolls of paintable wallpaper piled in the corner. The funny thing is that by the time we bought the house, no amount of paintable wallpaper was gonna save it.
Here’s how that same angle is looking lately. The fireplace mantel in the before photo wasn’t original and actually didn’t even fit on the wall (it overhung the far corner by an inch or two). So we donated the mantle and exposed the cool old brick chimney that had been hiding behind the plaster.
chandelier | rug | bookshelf | media cabinet | curtains | curtain rods
In this before photo you can sort of see better how the fireplace mantel didn’t fit on the wall (it was too wide on that left side). And while we didn’t rehang that door in that exact spot, this is one of the many original wood doors we had stripped down to the original pine, clear sealed, and then rehung throughout the house. I can’t say where this exact door ended up, but you’ll see one of them in a minute on the downstairs bathroom. All of the interior doors on the house are original (and all of the exterior ones except for the side door – which was a dinged up 50’s metal one – are too!).
Looking at this area today, you can better see how the exposed brick chimney adds a little bit of age and interest to the room. The warm tones of the brick also look great with the warm pine floors, which are balanced by the gray trim and some of the cooler colors we worked into the space, like the rug and the media cabinet.
rug | media cabinet | curtains | curtain rods | similar chair | similar table
And if you thought a second stove in the living room was weird, I dug up this before photo from another angle that featured a doorless fridge in there too. And there’s all that paintable wallpaper I mentioned.
Here’s that same angle now – taken from standing in that doorway that used to have the wood door on it. This is one of the first views you see when you walk into the foyer (when you step into the house, this is immediately on your right) and we love how light and bright this room has become.
rug | bookshelf | curtains | curtain rods | similar chair | similar fig
Here’s a similar vantage point, just looking slightly back toward the dining room. This must’ve been after closing since the doorless fridge is gone (the seller took that out before we closed), but at least now you can see the open bag of concrete left on the floor… WHICH HAD COMPLETELY HARDENED. I guess I shouldn’t be mad at that though, since it made it less messy to clean up.
Here’s an after from a similar POV. This room actually didn’t have an overhead fixture before, so we had one wired and added a decorative medallion to balance out the modern chandelier. We’re planning to swap out our 7-year-old Ikea sectional for the Mellow sofa from our own furniture line whenever we bring a moving truck out for the duplex. Can’t wait!
chandelier | rug | bookshelf | curtains | curtain rods | similar table
Okay, one last angle of the stove, I mean, living room. This is standing in the living room looking back through into the dining and kitchen area.
And here’s a similar view now, which shows you how the dining table helps act as overflow seating for the living room, since someone can easily sit on the bench and face into the living room to chat. We love how flexible it is, and we’ve had big groups over for a casual meal and it works so well.
rug | dining chairs | dining benches | similar chandeliers
The Mudroom & Bathroom
The last two rooms to show you downstairs are some of our hardest working spaces in the house. The mudroom and the downstairs bathroom, (along with the pantry) were located in the section of the house that had to be completely torn off and rebuilt. Remember that rotted exterior side of the house that we showed you with fist-sized holes? Well, this is the room behind it (note the sunlight streaming in between the gaps in the “siding”).
I can’t get quite far back enough to take that same angle now, because we added a wall to split the space into two rooms: the mudroom and the bathroom. But the wall seen above is now home to our laundry area and – since this is the room you enter from the side door – it acts as a mudroom of sorts too, complete with an oversized wall hook rail, a bench, and baskets for shoes. That tall Ikea cabinet also hides our tankless water heater while storing brooms, a vacuum, and other cleaning supplies.
floor tile | washer | dryer | light | shelf brackets | towels | similar bench | shelf basket
Turning around, this was the view of the other side of that room when we first bought it (standing where the washer & dryer are now). It’s a little hard to orient yourself since we changed the layout, but just note the location of the door and window on the left side.
Now, looking from the washer and dryer today, the door and window stayed in the same spot – but there’s a wall between them to create the downstairs bathroom (which now has that window in it). And in this photo you can see one of the original wood doors after it was stripped and resealed. Plus, see that trio of photos? Those are “before” photos that we had framed so anyone who visits can appreciate how far this house has come.
Now I’ll show you the bathroom up close. I don’t really have comparable “before” photos because this didn’t exist as a separate room before, but in many ways it matches the layout of the original downstairs bathroom (which is now the pantry).
floor tile | shower wall tile | wall art | shower curtain | toilet | tp holder
And here’s the view of the other side of that wall, where you can see the vanity area. Just like the picture frames above the toilet, we chose a mirror with wood accents to pick up on the original wood doors. This one was actually a more recent swap (we had a larger rectangular one there before) and this suits the space much better.
mirror | vanity | faucet | light | hand towel | floor tile
So now that you’ve seen the entire downstairs both before and after, I’m gonna end with a deep dark confession. We filmed a video tour of the beach house on the last weekend before it started to get overtaken with duplex materials (think tile piled up in the foyer and extra furniture and frames everywhere) and when we got home, the video was a fail. I won’t bore you with the details, but it was a focusing issue I couldn’t detect until we got it home and uploaded. So rather than subject you to it, we’re going to try to take a better one in a few weeks. So stay tuned for that AND the before and after photos of the upstairs!
PS: If there’s any source you missed you can probably find it (or something similar) on our Shop Our Beach House page. You can also browse all of our beach house posts and projects here.
*This post contains affiliate links*
The post Before & Afters Of Our Beach House: Downstairs appeared first on Young House Love.
Before & Afters Of Our Beach House: Downstairs published first on https://novaformmattressreview.tumblr.com/
0 notes
Photo

Before & Afters Of Our Beach House: Downstairs https://ift.tt/2K596YW
I’m not sure I’ve ever been so excited to share before and after photos as I am today. Last month marked the 2-year anniversary of buying the beach house and while we never like to declare a home “done,” this place has come so far that this felt like a good moment to look back at everything (and to document what’s still ahead).
We’ve dug up dozens of before photos (including many that we haven’t ever shared!) and we’ve done our best to find or take similar angles to match up with them. There are so many angles to show you, and so much to cover, we’re just doing the downstairs today – and then we’ll follow up soon with the upstairs once we can shoot those photos and organize another big before-and-after-fest of a post.
We’ll link some of the key items in each “after” for you, but remember you can always visit our Shop Our Beach House page for the paint colors and source info of each room (it’s always linked up in our menu bar right under our blog header). And before we dive into the photos, you may want to treat yourself to this walk down memory lane: the before video tour! Note: if you’re reading this post in a feed reader like Bloglovin or Feedly and can’t see the video below, you may have to click into our post to view it – but trust me, it’s worth it.
The Exterior
Before we head into the downstairs, let’s look at the outside. This is a shot of it from the sidewalk back when we bought it. Did you even remember that “the pink house” was once “the greenish-gray house?” Complete with cream trim, mismatched windows (some of which were boarded up), and cinderblock steps.
And here it is from a similar angle (a little closer up). We snapped this photo this summer:
Here’s another before shot. The cinderblock steps and the sad rotting siding weren’t gorgeous… but we loved the old bones.
Thanks to a new roof, new siding, new windows, new steps, and a repointed brick foundation, we got the house looking a lot happier. After much debate, a takeout coffee cup helped us choose pink for its new color scheme (Sherwin William’s Mellow Coral, with SW Snowbound for the trim).
Here’s another angle of the front of the house. Fun fact: that vine had snaked its way into the house and was growing in there as well as on the porch. For real.
We actually repainted both the porch ceiling and the floor their original colors, or at least the best we could match. The ceiling is Sherwin William’s Breaktime and the floor is Behr’s Pacific Fog. The ceiling also already had hooks in it for a porch swing, so we ordered one, popped it up, and called it done.
We still haven’t done most of the landscaping or hardscaping that we have planned for the side and backyard yet, but we could resist sharing one last angle. Remember how rotten this side of the house was??? This was a former porch that someone enclosed with interior wood floorboards instead of actual weather-proof siding (they had rotted so badly that you could stick your fist through the siding and into the house in a bunch of places). So yeah, it had nowhere to go but up.
This was the side of the house that had to be completely torn off and rebuilt due to a sinking foundation and a ton of weather damage to the support beams. So at one point this whole section was completely missing! This is where the mudroom, pantry, bathrooms, and bunk room now are. So, for reference, that exposed wall on the second floor that’s all black is where the bunk beds now hang. Crazy!
Now it’s looking more like this (minus that giant bush in the front that we learned is actually a tree that would grow taller than our house – so we had to get it outta there before it wrecked our freshly fixed foundation). We still have to landscape the entire side of the house and add a stone pathway to lead people back to the outdoor shower, but it’s a far cry from where we started.
The Entryway
Despite the crumbling plaster, unfinished drywall, and water damage – this view into the foyer was immediately charming to us. That fireplace mantle was not original, it was just one of many items that the previous owner had collected over the years (there were also two old stoves, various rolls of paintable wallpaper, and even an old boat in the shed out back).
This is the entry now. It, like the rest of the house, got fresh drywall and paint, refinished floors, and a whole lot more. We were able to salvage enough of the home’s original trim to use it throughout the first floor – and the original color of it in this foyer (see it in that photo above around the doorway?) is what inspired us to use non-white trim throughout the downstairs. The color is Sherwin William’s Stone Isle. The walls in the entire house are painted Sherwin Willaim’s White Heron and the floors – OH THE FLOORS! They’re the original heart pine that we had refinished and clear sealed with water based sealer (extremely durable but it won’t yellow over time like poly). It’s so hard to believe they’re the same floors in some of these photos because they were looking so rough when we bought this house.
mirror | similar light | similar lamp | similar dresser
It’s worth noting that we attempted to keep the railing wood (but stain it to match the floors since it was much redder than they were), but it proved impossible since it’s not heart pine like the floors and steps are. So we painted it a slightly deeper gray color than the trim, which allows the floors to sing instead of competing with a different tone of wood all the way up the stairs.
The Kitchen, Dining Room, & Pantry
Through the foyer is the largest room of the house, which we turned into a kitchen/dining space. It was a giant mess when we first bought it, but have no fear, that beautiful original light fixture is the one we had rewired that now hangs in the pantry!
Before jumping to the after on this one, I’m actually going to take you through the progression of this angle, since it tells a nice story about the journey this house went through. Below is what it looked like during demo. The mess was cleared (mostly) but there was still a long way to go.
Then here it is being rebuilt. That area to the left that’s all new wood is the side that had to be completely torn down and rebuilt – and a lot of the ceiling joists in the kitchen had to be reinforced with new boards.
I won’t bore you with photos of all of the new plumbing and electrical that got added (we redid those systems as well as installing new HVAC throughout the house), so let’s jump to drywall. It’s starting to look like a house again.
And now another big jump forward to present day. After some debate about the floor plan, we actually ended up with both the dining and the kitchen functions in relatively the same spot as they originally were. Let the record state that we love this downstairs layout so much that if we could blink our eyes and have our Richmond house laid out this way – complete with the back staircase – we would in a heartbeat. It’s not huge but it feels nice and open, and when we spend time downstairs we all feel close and connected but not cramped.
dining chair | chandeliers | sconces | pendants | barstools
Here’s the before photo again for comparison:
Here’s another view of this space. You can see the previous stove there next to the back door. And note that pink beadboard that runs along the back wall. We didn’t even register that it was there until way after we painted the house pink and it caught our eye in old photos from our initial walk-throughs. Sherry swears the house wanted to be pink all along and it was trying to send us signals (all of which we missed until after the fact).
Here’s that same view now. Even though it made floor planning a little more challenging, we were intent on keeping the placement of the original back door and that back staircase (some of our neighbors with similar houses don’t have them anymore) and we’re SO GLAD we did. They limited the useable wall space for the kitchen itself, but we ended up shifting that doorway on the left that you see above (which used to lead to the rotted side porch) to give us room for the wall that hosts the vintage pink stove now.
hood | cabinet pulls | similar runner | sconces | pendants | faucet | pink letterboard
It basically just got moved about 5′ further down the wall towards the dining area and it now leads to the laundry room/mudroom (which you enter through the house’s side door) as well as a full downstairs bathroom.
And that doorway that you see in the back left corner of the kitchen leads into our pantry, but that room used to be a full bathroom…. complete with pink trim. See it’s like this house wanted to be pink! There was a plastic shower stall between those exposed studs and a toilet tucked behind it.
You saw that the full bathroom downstairs shifted over by the mudroom, which freed up this space for another super functional area that took some trial-and-error to figure out: our walk-in pantry. We’ve got a full tutorial on building pantry shelves like these if you’re interested. Also, there’s the original light fixture that used to hang in the kitchen – we had it rewired so it’s safe.
Sherry often declares the pantry to be her favorite room in the house (especially this time of year because she stands on the floor vent to heat her feet while snacking). As weird as it sounds to declare a pantry your favorite, I’m going to top that. My favorite = the back stairs… which I know isn’t really a room… but hear me out! This is what they looked like before:
The old door on the third step up from the floor wasn’t to code anymore (you’d need a landing to stand on when opening a door) and we knew the stairs would look much better being open. So now we’ve got doors at the top of the stairs instead – which provide some nice privacy to anyone sleeping in that bedroom without blocking the view of the stairs from the kitchen.
I know this is a downstairs tour, but this photo will help to explain what I mean. Now when you reach the top of the stairs there’s a landing with a built-in dresser and these pocket doors can be closed for privacy.
Ok, back to the downstairs tour. I love these old stairs because (1) they’re such a cool quirky original detail and (2) they’re crazy functional. We weren’t even sure if we’d use them much (we thought maybe just the kids would love sneaking up them) but they act kind of like a private entry into the upstairs master bedroom for us, and I’m now so spoiled that I wish we had them in our Richmond house too.
Here is a view from the stairs themselves. It’s a “before” angle you probably haven’t seen before (probably because it’s blurry – ha!) but it’s looking towards where the pink stove now sits. The main thing to notice here is the blue door….
…that’s the one we kept as is (well, after carefully removing the flaking paint and clear sealing it with Safecoat Acrylacq so any old lead paint is completely encapsulated – you can read how to deal with lead here – BE SAFE GUYS). So that’s the very same door, it just got rehung in the doorway to the mudroom. We leave it open 95% of the time, only closing it while laundry is running, because it adds a nice dose of age and color to the room. This photo is from before we finished the backsplash, hence no finish piece across the top, but you get the idea:
If you’re wondering in all of this: “Well, where was the kitchen before?” allow me to show it to you. Since we bought the house in the midst of some stage of demo, we’re not entirely sure where appliances went (remember there was no working water meter that led to this house when we bought it, so it’s very possible it hadn’t had a functional kitchen in decades), and these clearly aren’t the original cabinets from 1920, but they were cornered against this wall that the previous owner was in the process of taking down. Btw, we donated all of the cabinets and appliances to the local Habitat ReStore, which was an easy way to dispose of them without them going to waste. They even came and picked them up, so that’s an option if you’re renovating – just call to schedule a pickup!
This is that same view now. I almost laughed out loud looking at this photo because it feels like the sink ended up in almost exactly the same spot.
framed art | curtains | curtain rods | sconces | pendants | barstools | similar runner
Stepping forward in this room, here’s another view of the previous dining area. There’s a lot to take in here – the giant hole in the floor (lower right), the vine creeping through the window (lower left), that hit of bright green trim (?!), and that second stove sitting in the living room.
But here we are today. At some point the secondhand table needs to be refinished (the leaf is a darker color than the rest of it) and we sometimes think we’d like to add a rug under the table (although we love the ease of cleaning the room just like this – so maybe not). Either way – still a big improvement over the before!
dining chairs | dining benches | similar chandeliers |curtains | curtain rods
The Living Room
If you step forward through the dining room doorway, this is the view you see – well, or would’ve seen two years ago. Again, there’s a lot to take in: the always-damp couch, maroon trim, that second stove. Not pictured are the new rolls of paintable wallpaper piled in the corner. The funny thing is that by the time we bought the house, no amount of paintable wallpaper was gonna save it.
Here’s how that same angle is looking lately. The fireplace mantel in the before photo wasn’t original and actually didn’t even fit on the wall (it overhung the far corner by an inch or two). So we donated the mantle and exposed the cool old brick chimney that had been hiding behind the plaster.
chandelier | rug | bookshelf | media cabinet | curtains | curtain rods
In this before photo you can sort of see better how the fireplace mantel didn’t fit on the wall (it was too wide on that left side). And while we didn’t rehang that door in that exact spot, this is one of the many original wood doors we had stripped down to the original pine, clear sealed, and then rehung throughout the house. I can’t say where this exact door ended up, but you’ll see one of them in a minute on the downstairs bathroom. All of the interior doors on the house are original (and all of the exterior ones except for the side door – which was a dinged up 50’s metal one – are too!).
Looking at this area today, you can better see how the exposed brick chimney adds a little bit of age and interest to the room. The warm tones of the brick also look great with the warm pine floors, which are balanced by the gray trim and some of the cooler colors we worked into the space, like the rug and the media cabinet.
rug | media cabinet | curtains | curtain rods | similar chair | similar table
And if you thought a second stove in the living room was weird, I dug up this before photo from another angle that featured a doorless fridge in there too. And there’s all that paintable wallpaper I mentioned.
Here’s that same angle now – taken from standing in that doorway that used to have the wood door on it. This is one of the first views you see when you walk into the foyer (when you step into the house, this is immediately on your right) and we love how light and bright this room has become.
rug | bookshelf | curtains | curtain rods | similar chair | similar fig
Here’s a similar vantage point, just looking slightly back toward the dining room. This must’ve been after closing since the doorless fridge is gone (the seller took that out before we closed), but at least now you can see the open bag of concrete left on the floor… WHICH HAD COMPLETELY HARDENED. I guess I shouldn’t be mad at that though, since it made it less messy to clean up.
Here’s an after from a similar POV. This room actually didn’t have an overhead fixture before, so we had one wired and added a decorative medallion to balance out the modern chandelier. We’re planning to swap out our 7-year-old Ikea sectional for the Mellow sofa from our own furniture line whenever we bring a moving truck out for the duplex. Can’t wait!
chandelier | rug | bookshelf | curtains | curtain rods | similar table
Okay, one last angle of the stove, I mean, living room. This is standing in the living room looking back through into the dining and kitchen area.
And here’s a similar view now, which shows you how the dining table helps act as overflow seating for the living room, since someone can easily sit on the bench and face into the living room to chat. We love how flexible it is, and we’ve had big groups over for a casual meal and it works so well.
rug | dining chairs | dining benches | similar chandeliers
The Mudroom & Bathroom
The last two rooms to show you downstairs are some of our hardest working spaces in the house. The mudroom and the downstairs bathroom, (along with the pantry) were located in the section of the house that had to be completely torn off and rebuilt. Remember that rotted exterior side of the house that we showed you with fist-sized holes? Well, this is the room behind it (note the sunlight streaming in between the gaps in the “siding”).
I can’t get quite far back enough to take that same angle now, because we added a wall to split the space into two rooms: the mudroom and the bathroom. But the wall seen above is now home to our laundry area and – since this is the room you enter from the side door – it acts as a mudroom of sorts too, complete with an oversized wall hook rail, a bench, and baskets for shoes. That tall Ikea cabinet also hides our tankless water heater while storing brooms, a vacuum, and other cleaning supplies.
floor tile | washer | dryer | light | shelf brackets | towels | similar bench | shelf basket
Turning around, this was the view of the other side of that room when we first bought it (standing where the washer & dryer are now). It’s a little hard to orient yourself since we changed the layout, but just note the location of the door and window on the left side.
Now, looking from the washer and dryer today, the door and window stayed in the same spot – but there’s a wall between them to create the downstairs bathroom (which now has that window in it). And in this photo you can see one of the original wood doors after it was stripped and resealed. Plus, see that trio of photos? Those are “before” photos that we had framed so anyone who visits can appreciate how far this house has come.
Now I’ll show you the bathroom up close. I don’t really have comparable “before” photos because this didn’t exist as a separate room before, but in many ways it matches the layout of the original downstairs bathroom (which is now the pantry).
floor tile | shower wall tile | wall art | shower curtain | toilet | tp holder
And here’s the view of the other side of that wall, where you can see the vanity area. Just like the picture frames above the toilet, we chose a mirror with wood accents to pick up on the original wood doors. This one was actually a more recent swap (we had a larger rectangular one there before) and this suits the space much better.
mirror | vanity | faucet | light | hand towel | floor tile
So now that you’ve seen the entire downstairs both before and after, I’m gonna end with a deep dark confession. We filmed a video tour of the beach house on the last weekend before it started to get overtaken with duplex materials (think tile piled up in the foyer and extra furniture and frames everywhere) and when we got home, the video was a fail. I won’t bore you with the details, but it was a focusing issue I couldn’t detect until we got it home and uploaded. So rather than subject you to it, we’re going to try to take a better one in a few weeks. So stay tuned for that AND the before and after photos of the upstairs!
PS: If there’s any source you missed you can probably find it (or something similar) on our Shop Our Beach House page. You can also browse all of our beach house posts and projects here.
*This post contains affiliate links*
The post Before & Afters Of Our Beach House: Downstairs appeared first on Young House Love.
0 notes
Text
Before & Afters Of Our Beach House: Downstairs
I’m not sure I’ve ever been so excited to share before and after photos as I am today. Last month marked the 2-year anniversary of buying the beach house and while we never like to declare a home “done,” this place has come so far that this felt like a good moment to look back at everything (and to document what’s still ahead).
We’ve dug up dozens of before photos (including many that we haven’t ever shared!) and we’ve done our best to find or take similar angles to match up with them. There are so many angles to show you, and so much to cover, we’re just doing the downstairs today – and then we’ll follow up soon with the upstairs once we can shoot those photos and organize another big before-and-after-fest of a post.
We’ll link some of the key items in each “after” for you, but remember you can always visit our Shop Our Beach House page for the paint colors and source info of each room (it’s always linked up in our menu bar right under our blog header). And before we dive into the photos, you may want to treat yourself to this walk down memory lane: the before video tour! Note: if you’re reading this post in a feed reader like Bloglovin or Feedly and can’t see the video below, you may have to click into our post to view it – but trust me, it’s worth it.
The Exterior
Before we head into the downstairs, let’s look at the outside. This is a shot of it from the sidewalk back when we bought it. Did you even remember that “the pink house” was once “the greenish-gray house?” Complete with cream trim, mismatched windows (some of which were boarded up), and cinderblock steps.
And here it is from a similar angle (a little closer up). We snapped this photo this summer:
Here’s another before shot. The cinderblock steps and the sad rotting siding weren’t gorgeous… but we loved the old bones.
Thanks to a new roof, new siding, new windows, new steps, and a repointed brick foundation, we got the house looking a lot happier. After much debate, a takeout coffee cup helped us choose pink for its new color scheme (Sherwin William’s Mellow Coral, with SW Snowbound for the trim).
Here’s another angle of the front of the house. Fun fact: that vine had snaked its way into the house and was growing in there as well as on the porch. For real.
We actually repainted both the porch ceiling and the floor their original colors, or at least the best we could match. The ceiling is Sherwin William’s Breaktime and the floor is Behr’s Pacific Fog. The ceiling also already had hooks in it for a porch swing, so we ordered one, popped it up, and called it done.
We still haven’t done most of the landscaping or hardscaping that we have planned for the side and backyard yet, but we could resist sharing one last angle. Remember how rotten this side of the house was??? This was a former porch that someone enclosed with interior wood floorboards instead of actual weather-proof siding (they had rotted so badly that you could stick your fist through the siding and into the house in a bunch of places). So yeah, it had nowhere to go but up.
This was the side of the house that had to be completely torn off and rebuilt due to a sinking foundation and a ton of weather damage to the support beams. So at one point this whole section was completely missing! This is where the mudroom, pantry, bathrooms, and bunk room now are. So, for reference, that exposed wall on the second floor that’s all black is where the bunk beds now hang. Crazy!
Now it’s looking more like this (minus that giant bush in the front that we learned is actually a tree that would grow taller than our house – so we had to get it outta there before it wrecked our freshly fixed foundation). We still have to landscape the entire side of the house and add a stone pathway to lead people back to the outdoor shower, but it’s a far cry from where we started.
The Entryway
Despite the crumbling plaster, unfinished drywall, and water damage – this view into the foyer was immediately charming to us. That fireplace mantle was not original, it was just one of many items that the previous owner had collected over the years (there were also two old stoves, various rolls of paintable wallpaper, and even an old boat in the shed out back).
This is the entry now. It, like the rest of the house, got fresh drywall and paint, refinished floors, and a whole lot more. We were able to salvage enough of the home’s original trim to use it throughout the first floor – and the original color of it in this foyer (see it in that photo above around the doorway?) is what inspired us to use non-white trim throughout the downstairs. The color is Sherwin William’s Stone Isle. The walls in the entire house are painted Sherwin Willaim’s White Heron and the floors – OH THE FLOORS! They’re the original heart pine that we had refinished and clear sealed with water based sealer (extremely durable but it won’t yellow over time like poly). It’s so hard to believe they’re the same floors in some of these photos because they were looking so rough when we bought this house.
mirror | similar light | similar lamp | similar dresser
It’s worth noting that we attempted to keep the railing wood (but stain it to match the floors since it was much redder than they were), but it proved impossible since it’s not heart pine like the floors and steps are. So we painted it a slightly deeper gray color than the trim, which allows the floors to sing instead of competing with a different tone of wood all the way up the stairs.
The Kitchen, Dining Room, & Pantry
Through the foyer is the largest room of the house, which we turned into a kitchen/dining space. It was a giant mess when we first bought it, but have no fear, that beautiful original light fixture is the one we had rewired that now hangs in the pantry!
Before jumping to the after on this one, I’m actually going to take you through the progression of this angle, since it tells a nice story about the journey this house went through. Below is what it looked like during demo. The mess was cleared (mostly) but there was still a long way to go.
Then here it is being rebuilt. That area to the left that’s all new wood is the side that had to be completely torn down and rebuilt – and a lot of the ceiling joists in the kitchen had to be reinforced with new boards.
I won’t bore you with photos of all of the new plumbing and electrical that got added (we redid those systems as well as installing new HVAC throughout the house), so let’s jump to drywall. It’s starting to look like a house again.
And now another big jump forward to present day. After some debate about the floor plan, we actually ended up with both the dining and the kitchen functions in relatively the same spot as they originally were. Let the record state that we love this downstairs layout so much that if we could blink our eyes and have our Richmond house laid out this way – complete with the back staircase – we would in a heartbeat. It’s not huge but it feels nice and open, and when we spend time downstairs we all feel close and connected but not cramped.
dining chair | chandeliers | sconces | pendants | barstools
Here’s the before photo again for comparison:
Here’s another view of this space. You can see the previous stove there next to the back door. And note that pink beadboard that runs along the back wall. We didn’t even register that it was there until way after we painted the house pink and it caught our eye in old photos from our initial walk-throughs. Sherry swears the house wanted to be pink all along and it was trying to send us signals (all of which we missed until after the fact).
Here’s that same view now. Even though it made floor planning a little more challenging, we were intent on keeping the placement of the original back door and that back staircase (some of our neighbors with similar houses don’t have them anymore) and we’re SO GLAD we did. They limited the useable wall space for the kitchen itself, but we ended up shifting that doorway on the left that you see above (which used to lead to the rotted side porch) to give us room for the wall that hosts the vintage pink stove now.
hood | cabinet pulls | similar runner | sconces | pendants | faucet | pink letterboard
It basically just got moved about 5′ further down the wall towards the dining area and it now leads to the laundry room/mudroom (which you enter through the house’s side door) as well as a full downstairs bathroom.
And that doorway that you see in the back left corner of the kitchen leads into our pantry, but that room used to be a full bathroom…. complete with pink trim. See it’s like this house wanted to be pink! There was a plastic shower stall between those exposed studs and a toilet tucked behind it.
You saw that the full bathroom downstairs shifted over by the mudroom, which freed up this space for another super functional area that took some trial-and-error to figure out: our walk-in pantry. We’ve got a full tutorial on building pantry shelves like these if you’re interested. Also, there’s the original light fixture that used to hang in the kitchen – we had it rewired so it’s safe.
Sherry often declares the pantry to be her favorite room in the house (especially this time of year because she stands on the floor vent to heat her feet while snacking). As weird as it sounds to declare a pantry your favorite, I’m going to top that. My favorite = the back stairs… which I know isn’t really a room… but hear me out! This is what they looked like before:
The old door on the third step up from the floor wasn’t to code anymore (you’d need a landing to stand on when opening a door) and we knew the stairs would look much better being open. So now we’ve got doors at the top of the stairs instead – which provide some nice privacy to anyone sleeping in that bedroom without blocking the view of the stairs from the kitchen.
I know this is a downstairs tour, but this photo will help to explain what I mean. Now when you reach the top of the stairs there’s a landing with a built-in dresser and these pocket doors can be closed for privacy.
Ok, back to the downstairs tour. I love these old stairs because (1) they’re such a cool quirky original detail and (2) they’re crazy functional. We weren’t even sure if we’d use them much (we thought maybe just the kids would love sneaking up them) but they act kind of like a private entry into the upstairs master bedroom for us, and I’m now so spoiled that I wish we had them in our Richmond house too.
Here is a view from the stairs themselves. It’s a “before” angle you probably haven’t seen before (probably because it’s blurry – ha!) but it’s looking towards where the pink stove now sits. The main thing to notice here is the blue door….
…that’s the one we kept as is (well, after carefully removing the flaking paint and clear sealing it with Safecoat Acrylacq so any old lead paint is completely encapsulated – you can read how to deal with lead here – BE SAFE GUYS). So that’s the very same door, it just got rehung in the doorway to the mudroom. We leave it open 95% of the time, only closing it while laundry is running, because it adds a nice dose of age and color to the room. This photo is from before we finished the backsplash, hence no finish piece across the top, but you get the idea:
If you’re wondering in all of this: “Well, where was the kitchen before?” allow me to show it to you. Since we bought the house in the midst of some stage of demo, we’re not entirely sure where appliances went (remember there was no working water meter that led to this house when we bought it, so it’s very possible it hadn’t had a functional kitchen in decades), and these clearly aren’t the original cabinets from 1920, but they were cornered against this wall that the previous owner was in the process of taking down. Btw, we donated all of the cabinets and appliances to the local Habitat ReStore, which was an easy way to dispose of them without them going to waste. They even came and picked them up, so that’s an option if you’re renovating – just call to schedule a pickup!
This is that same view now. I almost laughed out loud looking at this photo because it feels like the sink ended up in almost exactly the same spot.
framed art | curtains | curtain rods | sconces | pendants | barstools | similar runner
Stepping forward in this room, here’s another view of the previous dining area. There’s a lot to take in here – the giant hole in the floor (lower right), the vine creeping through the window (lower left), that hit of bright green trim (?!), and that second stove sitting in the living room.
But here we are today. At some point the secondhand table needs to be refinished (the leaf is a darker color than the rest of it) and we sometimes think we’d like to add a rug under the table (although we love the ease of cleaning the room just like this – so maybe not). Either way – still a big improvement over the before!
dining chairs | dining benches | similar chandeliers |curtains | curtain rods
The Living Room
If you step forward through the dining room doorway, this is the view you see – well, or would’ve seen two years ago. Again, there’s a lot to take in: the always-damp couch, maroon trim, that second stove. Not pictured are the new rolls of paintable wallpaper piled in the corner. The funny thing is that by the time we bought the house, no amount of paintable wallpaper was gonna save it.
Here’s how that same angle is looking lately. The fireplace mantel in the before photo wasn’t original and actually didn’t even fit on the wall (it overhung the far corner by an inch or two). So we donated the mantle and exposed the cool old brick chimney that had been hiding behind the plaster.
chandelier | rug | bookshelf | media cabinet | curtains | curtain rods
In this before photo you can sort of see better how the fireplace mantel didn’t fit on the wall (it was too wide on that left side). And while we didn’t rehang that door in that exact spot, this is one of the many original wood doors we had stripped down to the original pine, clear sealed, and then rehung throughout the house. I can’t say where this exact door ended up, but you’ll see one of them in a minute on the downstairs bathroom. All of the interior doors on the house are original (and all of the exterior ones except for the side door – which was a dinged up 50’s metal one – are too!).
Looking at this area today, you can better see how the exposed brick chimney adds a little bit of age and interest to the room. The warm tones of the brick also look great with the warm pine floors, which are balanced by the gray trim and some of the cooler colors we worked into the space, like the rug and the media cabinet.
rug | media cabinet | curtains | curtain rods | similar chair | similar table
And if you thought a second stove in the living room was weird, I dug up this before photo from another angle that featured a doorless fridge in there too. And there’s all that paintable wallpaper I mentioned.
Here’s that same angle now – taken from standing in that doorway that used to have the wood door on it. This is one of the first views you see when you walk into the foyer (when you step into the house, this is immediately on your right) and we love how light and bright this room has become.
rug | bookshelf | curtains | curtain rods | similar chair | similar fig
Here’s a similar vantage point, just looking slightly back toward the dining room. This must’ve been after closing since the doorless fridge is gone (the seller took that out before we closed), but at least now you can see the open bag of concrete left on the floor… WHICH HAD COMPLETELY HARDENED. I guess I shouldn’t be mad at that though, since it made it less messy to clean up.
Here’s an after from a similar POV. This room actually didn’t have an overhead fixture before, so we had one wired and added a decorative medallion to balance out the modern chandelier. We’re planning to swap out our 7-year-old Ikea sectional for the Mellow sofa from our own furniture line whenever we bring a moving truck out for the duplex. Can’t wait!
chandelier | rug | bookshelf | curtains | curtain rods | similar table
Okay, one last angle of the stove, I mean, living room. This is standing in the living room looking back through into the dining and kitchen area.
And here’s a similar view now, which shows you how the dining table helps act as overflow seating for the living room, since someone can easily sit on the bench and face into the living room to chat. We love how flexible it is, and we’ve had big groups over for a casual meal and it works so well.
rug | dining chairs | dining benches | similar chandeliers
The Mudroom & Bathroom
The last two rooms to show you downstairs are some of our hardest working spaces in the house. The mudroom and the downstairs bathroom, (along with the pantry) were located in the section of the house that had to be completely torn off and rebuilt. Remember that rotted exterior side of the house that we showed you with fist-sized holes? Well, this is the room behind it (note the sunlight streaming in between the gaps in the “siding”).
I can’t get quite far back enough to take that same angle now, because we added a wall to split the space into two rooms: the mudroom and the bathroom. But the wall seen above is now home to our laundry area and – since this is the room you enter from the side door – it acts as a mudroom of sorts too, complete with an oversized wall hook rail, a bench, and baskets for shoes. That tall Ikea cabinet also hides our tankless water heater while storing brooms, a vacuum, and other cleaning supplies.
floor tile | washer | dryer | light | shelf brackets | towels | similar bench | shelf basket
Turning around, this was the view of the other side of that room when we first bought it (standing where the washer & dryer are now). It’s a little hard to orient yourself since we changed the layout, but just note the location of the door and window on the left side.
Now, looking from the washer and dryer today, the door and window stayed in the same spot – but there’s a wall between them to create the downstairs bathroom (which now has that window in it). And in this photo you can see one of the original wood doors after it was stripped and resealed. Plus, see that trio of photos? Those are “before” photos that we had framed so anyone who visits can appreciate how far this house has come.
Now I’ll show you the bathroom up close. I don’t really have comparable “before” photos because this didn’t exist as a separate room before, but in many ways it matches the layout of the original downstairs bathroom (which is now the pantry).
floor tile | shower wall tile | wall art | shower curtain | toilet | tp holder
And here’s the view of the other side of that wall, where you can see the vanity area. Just like the picture frames above the toilet, we chose a mirror with wood accents to pick up on the original wood doors. This one was actually a more recent swap (we had a larger rectangular one there before) and this suits the space much better.
mirror | vanity | faucet | light | hand towel | floor tile
So now that you’ve seen the entire downstairs both before and after, I’m gonna end with a deep dark confession. We filmed a video tour of the beach house on the last weekend before it started to get overtaken with duplex materials (think tile piled up in the foyer and extra furniture and frames everywhere) and when we got home, the video was a fail. I won’t bore you with the details, but it was a focusing issue I couldn’t detect until we got it home and uploaded. So rather than subject you to it, we’re going to try to take a better one in a few weeks. So stay tuned for that AND the before and after photos of the upstairs!
PS: If there’s any source you missed you can probably find it (or something similar) on our Shop Our Beach House page. You can also browse all of our beach house posts and projects here.
*This post contains affiliate links*
The post Before & Afters Of Our Beach House: Downstairs appeared first on Young House Love.
Before & Afters Of Our Beach House: Downstairs published first on https://carpetgurus.tumblr.com/
0 notes
Text
Before & Afters Of Our Beach House: Downstairs
I’m not sure I’ve ever been so excited to share before and after photos as I am today. Last month marked the 2-year anniversary of buying the beach house and while we never like to declare a home “done,” this place has come so far that this felt like a good moment to look back at everything (and to document what’s still ahead).
We’ve dug up dozens of before photos (including many that we haven’t ever shared!) and we’ve done our best to find or take similar angles to match up with them. There are so many angles to show you, and so much to cover, we’re just doing the downstairs today – and then we’ll follow up soon with the upstairs once we can shoot those photos and organize another big before-and-after-fest of a post.
We’ll link some of the key items in each “after” for you, but remember you can always visit our Shop Our Beach House page for the paint colors and source info of each room (it’s always linked up in our menu bar right under our blog header). And before we dive into the photos, you may want to treat yourself to this walk down memory lane: the before video tour! Note: if you’re reading this post in a feed reader like Bloglovin or Feedly and can’t see the video below, you may have to click into our post to view it – but trust me, it’s worth it.
The Exterior
Before we head into the downstairs, let’s look at the outside. This is a shot of it from the sidewalk back when we bought it. Did you even remember that “the pink house” was once “the greenish-gray house?” Complete with cream trim, mismatched windows (some of which were boarded up), and cinderblock steps.
And here it is from a similar angle (a little closer up). We snapped this photo this summer:
Here’s another before shot. The cinderblock steps and the sad rotting siding weren’t gorgeous… but we loved the old bones.
Thanks to a new roof, new siding, new windows, new steps, and a repointed brick foundation, we got the house looking a lot happier. After much debate, a takeout coffee cup helped us choose pink for its new color scheme (Sherwin William’s Mellow Coral, with SW Snowbound for the trim).
Here’s another angle of the front of the house. Fun fact: that vine had snaked its way into the house and was growing in there as well as on the porch. For real.
We actually repainted both the porch ceiling and the floor their original colors, or at least the best we could match. The ceiling is Sherwin William’s Breaktime and the floor is Behr’s Pacific Fog. The ceiling also already had hooks in it for a porch swing, so we ordered one, popped it up, and called it done.
We still haven’t done most of the landscaping or hardscaping that we have planned for the side and backyard yet, but we could resist sharing one last angle. Remember how rotten this side of the house was??? This was a former porch that someone enclosed with interior wood floorboards instead of actual weather-proof siding (they had rotted so badly that you could stick your fist through the siding and into the house in a bunch of places). So yeah, it had nowhere to go but up.
This was the side of the house that had to be completely torn off and rebuilt due to a sinking foundation and a ton of weather damage to the support beams. So at one point this whole section was completely missing! This is where the mudroom, pantry, bathrooms, and bunk room now are. So, for reference, that exposed wall on the second floor that’s all black is where the bunk beds now hang. Crazy!
Now it’s looking more like this (minus that giant bush in the front that we learned is actually a tree that would grow taller than our house – so we had to get it outta there before it wrecked our freshly fixed foundation). We still have to landscape the entire side of the house and add a stone pathway to lead people back to the outdoor shower, but it’s a far cry from where we started.
The Entryway
Despite the crumbling plaster, unfinished drywall, and water damage – this view into the foyer was immediately charming to us. That fireplace mantle was not original, it was just one of many items that the previous owner had collected over the years (there were also two old stoves, various rolls of paintable wallpaper, and even an old boat in the shed out back).
This is the entry now. It, like the rest of the house, got fresh drywall and paint, refinished floors, and a whole lot more. We were able to salvage enough of the home’s original trim to use it throughout the first floor – and the original color of it in this foyer (see it in that photo above around the doorway?) is what inspired us to use non-white trim throughout the downstairs. The color is Sherwin William’s Stone Isle. The walls in the entire house are painted Sherwin Willaim’s White Heron and the floors – OH THE FLOORS! They’re the original heart pine that we had refinished and clear sealed with water based sealer (extremely durable but it won’t yellow over time like poly). It’s so hard to believe they’re the same floors in some of these photos because they were looking so rough when we bought this house.
mirror | similar light | similar lamp | similar dresser
It’s worth noting that we attempted to keep the railing wood (but stain it to match the floors since it was much redder than they were), but it proved impossible since it’s not heart pine like the floors and steps are. So we painted it a slightly deeper gray color than the trim, which allows the floors to sing instead of competing with a different tone of wood all the way up the stairs.
The Kitchen, Dining Room, & Pantry
Through the foyer is the largest room of the house, which we turned into a kitchen/dining space. It was a giant mess when we first bought it, but have no fear, that beautiful original light fixture is the one we had rewired that now hangs in the pantry!
Before jumping to the after on this one, I’m actually going to take you through the progression of this angle, since it tells a nice story about the journey this house went through. Below is what it looked like during demo. The mess was cleared (mostly) but there was still a long way to go.
Then here it is being rebuilt. That area to the left that’s all new wood is the side that had to be completely torn down and rebuilt – and a lot of the ceiling joists in the kitchen had to be reinforced with new boards.
I won’t bore you with photos of all of the new plumbing and electrical that got added (we redid those systems as well as installing new HVAC throughout the house), so let’s jump to drywall. It’s starting to look like a house again.
And now another big jump forward to present day. After some debate about the floor plan, we actually ended up with both the dining and the kitchen functions in relatively the same spot as they originally were. Let the record state that we love this downstairs layout so much that if we could blink our eyes and have our Richmond house laid out this way – complete with the back staircase – we would in a heartbeat. It’s not huge but it feels nice and open, and when we spend time downstairs we all feel close and connected but not cramped.
dining chair | chandeliers | sconces | pendants | barstools
Here’s the before photo again for comparison:
Here’s another view of this space. You can see the previous stove there next to the back door. And note that pink beadboard that runs along the back wall. We didn’t even register that it was there until way after we painted the house pink and it caught our eye in old photos from our initial walk-throughs. Sherry swears the house wanted to be pink all along and it was trying to send us signals (all of which we missed until after the fact).
Here’s that same view now. Even though it made floor planning a little more challenging, we were intent on keeping the placement of the original back door and that back staircase (some of our neighbors with similar houses don’t have them anymore) and we’re SO GLAD we did. They limited the useable wall space for the kitchen itself, but we ended up shifting that doorway on the left that you see above (which used to lead to the rotted side porch) to give us room for the wall that hosts the vintage pink stove now.
hood | cabinet pulls | similar runner | sconces | pendants | faucet | pink letterboard
It basically just got moved about 5′ further down the wall towards the dining area and it now leads to the laundry room/mudroom (which you enter through the house’s side door) as well as a full downstairs bathroom.
And that doorway that you see in the back left corner of the kitchen leads into our pantry, but that room used to be a full bathroom…. complete with pink trim. See it’s like this house wanted to be pink! There was a plastic shower stall between those exposed studs and a toilet tucked behind it.
You saw that the full bathroom downstairs shifted over by the mudroom, which freed up this space for another super functional area that took some trial-and-error to figure out: our walk-in pantry. We’ve got a full tutorial on building pantry shelves like these if you’re interested. Also, there’s the original light fixture that used to hang in the kitchen – we had it rewired so it’s safe.
Sherry often declares the pantry to be her favorite room in the house (especially this time of year because she stands on the floor vent to heat her feet while snacking). As weird as it sounds to declare a pantry your favorite, I’m going to top that. My favorite = the back stairs… which I know isn’t really a room… but hear me out! This is what they looked like before:
The old door on the third step up from the floor wasn’t to code anymore (you’d need a landing to stand on when opening a door) and we knew the stairs would look much better being open. So now we’ve got doors at the top of the stairs instead – which provide some nice privacy to anyone sleeping in that bedroom without blocking the view of the stairs from the kitchen.
I know this is a downstairs tour, but this photo will help to explain what I mean. Now when you reach the top of the stairs there’s a landing with a built-in dresser and these pocket doors can be closed for privacy.
Ok, back to the downstairs tour. I love these old stairs because (1) they’re such a cool quirky original detail and (2) they’re crazy functional. We weren’t even sure if we’d use them much (we thought maybe just the kids would love sneaking up them) but they act kind of like a private entry into the upstairs master bedroom for us, and I’m now so spoiled that I wish we had them in our Richmond house too.
Here is a view from the stairs themselves. It’s a “before” angle you probably haven’t seen before (probably because it’s blurry – ha!) but it’s looking towards where the pink stove now sits. The main thing to notice here is the blue door….
…that’s the one we kept as is (well, after carefully removing the flaking paint and clear sealing it with Safecoat Acrylacq so any old lead paint is completely encapsulated – you can read how to deal with lead here – BE SAFE GUYS). So that’s the very same door, it just got rehung in the doorway to the mudroom. We leave it open 95% of the time, only closing it while laundry is running, because it adds a nice dose of age and color to the room. This photo is from before we finished the backsplash, hence no finish piece across the top, but you get the idea:
If you’re wondering in all of this: “Well, where was the kitchen before?” allow me to show it to you. Since we bought the house in the midst of some stage of demo, we’re not entirely sure where appliances went (remember there was no working water meter that led to this house when we bought it, so it’s very possible it hadn’t had a functional kitchen in decades), and these clearly aren’t the original cabinets from 1920, but they were cornered against this wall that the previous owner was in the process of taking down. Btw, we donated all of the cabinets and appliances to the local Habitat ReStore, which was an easy way to dispose of them without them going to waste. They even came and picked them up, so that’s an option if you’re renovating – just call to schedule a pickup!
This is that same view now. I almost laughed out loud looking at this photo because it feels like the sink ended up in almost exactly the same spot.
framed art | curtains | curtain rods | sconces | pendants | barstools | similar runner
Stepping forward in this room, here’s another view of the previous dining area. There’s a lot to take in here – the giant hole in the floor (lower right), the vine creeping through the window (lower left), that hit of bright green trim (?!), and that second stove sitting in the living room.
But here we are today. At some point the secondhand table needs to be refinished (the leaf is a darker color than the rest of it) and we sometimes think we’d like to add a rug under the table (although we love the ease of cleaning the room just like this – so maybe not). Either way – still a big improvement over the before!
dining chairs | dining benches | similar chandeliers |curtains | curtain rods
The Living Room
If you step forward through the dining room doorway, this is the view you see – well, or would’ve seen two years ago. Again, there’s a lot to take in: the always-damp couch, maroon trim, that second stove. Not pictured are the new rolls of paintable wallpaper piled in the corner. The funny thing is that by the time we bought the house, no amount of paintable wallpaper was gonna save it.
Here’s how that same angle is looking lately. The fireplace mantel in the before photo wasn’t original and actually didn’t even fit on the wall (it overhung the far corner by an inch or two). So we donated the mantle and exposed the cool old brick chimney that had been hiding behind the plaster.
chandelier | rug | bookshelf | media cabinet | curtains | curtain rods
In this before photo you can sort of see better how the fireplace mantel didn’t fit on the wall (it was too wide on that left side). And while we didn’t rehang that door in that exact spot, this is one of the many original wood doors we had stripped down to the original pine, clear sealed, and then rehung throughout the house. I can’t say where this exact door ended up, but you’ll see one of them in a minute on the downstairs bathroom. All of the interior doors on the house are original (and all of the exterior ones except for the side door – which was a dinged up 50’s metal one – are too!).
Looking at this area today, you can better see how the exposed brick chimney adds a little bit of age and interest to the room. The warm tones of the brick also look great with the warm pine floors, which are balanced by the gray trim and some of the cooler colors we worked into the space, like the rug and the media cabinet.
rug | media cabinet | curtains | curtain rods | similar chair | similar table
And if you thought a second stove in the living room was weird, I dug up this before photo from another angle that featured a doorless fridge in there too. And there’s all that paintable wallpaper I mentioned.
Here’s that same angle now – taken from standing in that doorway that used to have the wood door on it. This is one of the first views you see when you walk into the foyer (when you step into the house, this is immediately on your right) and we love how light and bright this room has become.
rug | bookshelf | curtains | curtain rods | similar chair | similar fig
Here’s a similar vantage point, just looking slightly back toward the dining room. This must’ve been after closing since the doorless fridge is gone (the seller took that out before we closed), but at least now you can see the open bag of concrete left on the floor… WHICH HAD COMPLETELY HARDENED. I guess I shouldn’t be mad at that though, since it made it less messy to clean up.
Here’s an after from a similar POV. This room actually didn’t have an overhead fixture before, so we had one wired and added a decorative medallion to balance out the modern chandelier. We’re planning to swap out our 7-year-old Ikea sectional for the Mellow sofa from our own furniture line whenever we bring a moving truck out for the duplex. Can’t wait!
chandelier | rug | bookshelf | curtains | curtain rods | similar table
Okay, one last angle of the stove, I mean, living room. This is standing in the living room looking back through into the dining and kitchen area.
And here’s a similar view now, which shows you how the dining table helps act as overflow seating for the living room, since someone can easily sit on the bench and face into the living room to chat. We love how flexible it is, and we’ve had big groups over for a casual meal and it works so well.
rug | dining chairs | dining benches | similar chandeliers
The Mudroom & Bathroom
The last two rooms to show you downstairs are some of our hardest working spaces in the house. The mudroom and the downstairs bathroom, (along with the pantry) were located in the section of the house that had to be completely torn off and rebuilt. Remember that rotted exterior side of the house that we showed you with fist-sized holes? Well, this is the room behind it (note the sunlight streaming in between the gaps in the “siding”).
I can’t get quite far back enough to take that same angle now, because we added a wall to split the space into two rooms: the mudroom and the bathroom. But the wall seen above is now home to our laundry area and – since this is the room you enter from the side door – it acts as a mudroom of sorts too, complete with an oversized wall hook rail, a bench, and baskets for shoes. That tall Ikea cabinet also hides our tankless water heater while storing brooms, a vacuum, and other cleaning supplies.
floor tile | washer | dryer | light | shelf brackets | towels | similar bench | shelf basket
Turning around, this was the view of the other side of that room when we first bought it (standing where the washer & dryer are now). It’s a little hard to orient yourself since we changed the layout, but just note the location of the door and window on the left side.
Now, looking from the washer and dryer today, the door and window stayed in the same spot – but there’s a wall between them to create the downstairs bathroom (which now has that window in it). And in this photo you can see one of the original wood doors after it was stripped and resealed. Plus, see that trio of photos? Those are “before” photos that we had framed so anyone who visits can appreciate how far this house has come.
Now I’ll show you the bathroom up close. I don’t really have comparable “before” photos because this didn’t exist as a separate room before, but in many ways it matches the layout of the original downstairs bathroom (which is now the pantry).
floor tile | shower wall tile | wall art | shower curtain | toilet | tp holder
And here’s the view of the other side of that wall, where you can see the vanity area. Just like the picture frames above the toilet, we chose a mirror with wood accents to pick up on the original wood doors. This one was actually a more recent swap (we had a larger rectangular one there before) and this suits the space much better.
mirror | vanity | faucet | light | hand towel | floor tile
So now that you’ve seen the entire downstairs both before and after, I’m gonna end with a deep dark confession. We filmed a video tour of the beach house on the last weekend before it started to get overtaken with duplex materials (think tile piled up in the foyer and extra furniture and frames everywhere) and when we got home, the video was a fail. I won’t bore you with the details, but it was a focusing issue I couldn’t detect until we got it home and uploaded. So rather than subject you to it, we’re going to try to take a better one in a few weeks. So stay tuned for that AND the before and after photos of the upstairs!
PS: If there’s any source you missed you can probably find it (or something similar) on our Shop Our Beach House page. You can also browse all of our beach house posts and projects here.
*This post contains affiliate links*
The post Before & Afters Of Our Beach House: Downstairs appeared first on Young House Love.
Before & Afters Of Our Beach House: Downstairs published first on https://landscapingmates.blogspot.com
0 notes
Text
Before & Afters Of Our Beach House: Downstairs
I’m not sure I’ve ever been so excited to share before and after photos as I am today. Last month marked the 2-year anniversary of buying the beach house and while we never like to declare a home “done,” this place has come so far that this felt like a good moment to look back at everything (and to document what’s still ahead).
We’ve dug up dozens of before photos (including many that we haven’t ever shared!) and we’ve done our best to find or take similar angles to match up with them. There are so many angles to show you, and so much to cover, we’re just doing the downstairs today – and then we’ll follow up soon with the upstairs once we can shoot those photos and organize another big before-and-after-fest of a post.
We’ll link some of the key items in each “after” for you, but remember you can always visit our Shop Our Beach House page for the paint colors and source info of each room (it’s always linked up in our menu bar right under our blog header). And before we dive into the photos, you may want to treat yourself to this walk down memory lane: the before video tour! Note: if you’re reading this post in a feed reader like Bloglovin or Feedly and can’t see the video below, you may have to click into our post to view it – but trust me, it’s worth it.
The Exterior
Before we head into the downstairs, let’s look at the outside. This is a shot of it from the sidewalk back when we bought it. Did you even remember that “the pink house” was once “the greenish-gray house?” Complete with cream trim, mismatched windows (some of which were boarded up), and cinderblock steps.
And here it is from a similar angle (a little closer up). We snapped this photo this summer:
Here’s another before shot. The cinderblock steps and the sad rotting siding weren’t gorgeous… but we loved the old bones.
Thanks to a new roof, new siding, new windows, new steps, and a repointed brick foundation, we got the house looking a lot happier. After much debate, a takeout coffee cup helped us choose pink for its new color scheme (Sherwin William’s Mellow Coral, with SW Snowbound for the trim).
Here’s another angle of the front of the house. Fun fact: that vine had snaked its way into the house and was growing in there as well as on the porch. For real.
We actually repainted both the porch ceiling and the floor their original colors, or at least the best we could match. The ceiling is Sherwin William’s Breaktime and the floor is Behr’s Pacific Fog. The ceiling also already had hooks in it for a porch swing, so we ordered one, popped it up, and called it done.
We still haven’t done most of the landscaping or hardscaping that we have planned for the side and backyard yet, but we could resist sharing one last angle. Remember how rotten this side of the house was??? This was a former porch that someone enclosed with interior wood floorboards instead of actual weather-proof siding (they had rotted so badly that you could stick your fist through the siding and into the house in a bunch of places). So yeah, it had nowhere to go but up.
This was the side of the house that had to be completely torn off and rebuilt due to a sinking foundation and a ton of weather damage to the support beams. So at one point this whole section was completely missing! This is where the mudroom, pantry, bathrooms, and bunk room now are. So, for reference, that exposed wall on the second floor that’s all black is where the bunk beds now hang. Crazy!
Now it’s looking more like this (minus that giant bush in the front that we learned is actually a tree that would grow taller than our house – so we had to get it outta there before it wrecked our freshly fixed foundation). We still have to landscape the entire side of the house and add a stone pathway to lead people back to the outdoor shower, but it’s a far cry from where we started.
The Entryway
Despite the crumbling plaster, unfinished drywall, and water damage – this view into the foyer was immediately charming to us. That fireplace mantle was not original, it was just one of many items that the previous owner had collected over the years (there were also two old stoves, various rolls of paintable wallpaper, and even an old boat in the shed out back).
This is the entry now. It, like the rest of the house, got fresh drywall and paint, refinished floors, and a whole lot more. We were able to salvage enough of the home’s original trim to use it throughout the first floor – and the original color of it in this foyer (see it in that photo above around the doorway?) is what inspired us to use non-white trim throughout the downstairs. The color is Sherwin William’s Stone Isle. The walls in the entire house are painted Sherwin Willaim’s White Heron and the floors – OH THE FLOORS! They’re the original heart pine that we had refinished and clear sealed with water based sealer (extremely durable but it won’t yellow over time like poly). It’s so hard to believe they’re the same floors in some of these photos because they were looking so rough when we bought this house.
mirror | similar light | similar lamp | similar dresser
It’s worth noting that we attempted to keep the railing wood (but stain it to match the floors since it was much redder than they were), but it proved impossible since it’s not heart pine like the floors and steps are. So we painted it a slightly deeper gray color than the trim, which allows the floors to sing instead of competing with a different tone of wood all the way up the stairs.
The Kitchen, Dining Room, & Pantry
Through the foyer is the largest room of the house, which we turned into a kitchen/dining space. It was a giant mess when we first bought it, but have no fear, that beautiful original light fixture is the one we had rewired that now hangs in the pantry!
Before jumping to the after on this one, I’m actually going to take you through the progression of this angle, since it tells a nice story about the journey this house went through. Below is what it looked like during demo. The mess was cleared (mostly) but there was still a long way to go.
Then here it is being rebuilt. That area to the left that’s all new wood is the side that had to be completely torn down and rebuilt – and a lot of the ceiling joists in the kitchen had to be reinforced with new boards.
I won’t bore you with photos of all of the new plumbing and electrical that got added (we redid those systems as well as installing new HVAC throughout the house), so let’s jump to drywall. It’s starting to look like a house again.
And now another big jump forward to present day. After some debate about the floor plan, we actually ended up with both the dining and the kitchen functions in relatively the same spot as they originally were. Let the record state that we love this downstairs layout so much that if we could blink our eyes and have our Richmond house laid out this way – complete with the back staircase – we would in a heartbeat. It’s not huge but it feels nice and open, and when we spend time downstairs we all feel close and connected but not cramped.
dining chair | chandeliers | sconces | pendants | barstools
Here’s the before photo again for comparison:
Here’s another view of this space. You can see the previous stove there next to the back door. And note that pink beadboard that runs along the back wall. We didn’t even register that it was there until way after we painted the house pink and it caught our eye in old photos from our initial walk-throughs. Sherry swears the house wanted to be pink all along and it was trying to send us signals (all of which we missed until after the fact).
Here’s that same view now. Even though it made floor planning a little more challenging, we were intent on keeping the placement of the original back door and that back staircase (some of our neighbors with similar houses don’t have them anymore) and we’re SO GLAD we did. They limited the useable wall space for the kitchen itself, but we ended up shifting that doorway on the left that you see above (which used to lead to the rotted side porch) to give us room for the wall that hosts the vintage pink stove now.
hood | cabinet pulls | similar runner | sconces | pendants | faucet | pink letterboard
It basically just got moved about 5′ further down the wall towards the dining area and it now leads to the laundry room/mudroom (which you enter through the house’s side door) as well as a full downstairs bathroom.
And that doorway that you see in the back left corner of the kitchen leads into our pantry, but that room used to be a full bathroom…. complete with pink trim. See it’s like this house wanted to be pink! There was a plastic shower stall between those exposed studs and a toilet tucked behind it.
You saw that the full bathroom downstairs shifted over by the mudroom, which freed up this space for another super functional area that took some trial-and-error to figure out: our walk-in pantry. We’ve got a full tutorial on building pantry shelves like these if you’re interested. Also, there’s the original light fixture that used to hang in the kitchen – we had it rewired so it’s safe.
Sherry often declares the pantry to be her favorite room in the house (especially this time of year because she stands on the floor vent to heat her feet while snacking). As weird as it sounds to declare a pantry your favorite, I’m going to top that. My favorite = the back stairs… which I know isn’t really a room… but hear me out! This is what they looked like before:
The old door on the third step up from the floor wasn’t to code anymore (you’d need a landing to stand on when opening a door) and we knew the stairs would look much better being open. So now we’ve got doors at the top of the stairs instead – which provide some nice privacy to anyone sleeping in that bedroom without blocking the view of the stairs from the kitchen.
I know this is a downstairs tour, but this photo will help to explain what I mean. Now when you reach the top of the stairs there’s a landing with a built-in dresser and these pocket doors can be closed for privacy.
Ok, back to the downstairs tour. I love these old stairs because (1) they’re such a cool quirky original detail and (2) they’re crazy functional. We weren’t even sure if we’d use them much (we thought maybe just the kids would love sneaking up them) but they act kind of like a private entry into the upstairs master bedroom for us, and I’m now so spoiled that I wish we had them in our Richmond house too.
Here is a view from the stairs themselves. It’s a “before” angle you probably haven’t seen before (probably because it’s blurry – ha!) but it’s looking towards where the pink stove now sits. The main thing to notice here is the blue door….
…that’s the one we kept as is (well, after carefully removing the flaking paint and clear sealing it with Safecoat Acrylacq so any old lead paint is completely encapsulated – you can read how to deal with lead here – BE SAFE GUYS). So that’s the very same door, it just got rehung in the doorway to the mudroom. We leave it open 95% of the time, only closing it while laundry is running, because it adds a nice dose of age and color to the room. This photo is from before we finished the backsplash, hence no finish piece across the top, but you get the idea:
If you’re wondering in all of this: “Well, where was the kitchen before?” allow me to show it to you. Since we bought the house in the midst of some stage of demo, we’re not entirely sure where appliances went (remember there was no working water meter that led to this house when we bought it, so it’s very possible it hadn’t had a functional kitchen in decades), and these clearly aren’t the original cabinets from 1920, but they were cornered against this wall that the previous owner was in the process of taking down. Btw, we donated all of the cabinets and appliances to the local Habitat ReStore, which was an easy way to dispose of them without them going to waste. They even came and picked them up, so that’s an option if you’re renovating – just call to schedule a pickup!
This is that same view now. I almost laughed out loud looking at this photo because it feels like the sink ended up in almost exactly the same spot.
framed art | curtains | curtain rods | sconces | pendants | barstools | similar runner
Stepping forward in this room, here’s another view of the previous dining area. There’s a lot to take in here – the giant hole in the floor (lower right), the vine creeping through the window (lower left), that hit of bright green trim (?!), and that second stove sitting in the living room.
But here we are today. At some point the secondhand table needs to be refinished (the leaf is a darker color than the rest of it) and we sometimes think we’d like to add a rug under the table (although we love the ease of cleaning the room just like this – so maybe not). Either way – still a big improvement over the before!
dining chairs | dining benches | similar chandeliers |curtains | curtain rods
The Living Room
If you step forward through the dining room doorway, this is the view you see – well, or would’ve seen two years ago. Again, there’s a lot to take in: the always-damp couch, maroon trim, that second stove. Not pictured are the new rolls of paintable wallpaper piled in the corner. The funny thing is that by the time we bought the house, no amount of paintable wallpaper was gonna save it.
Here’s how that same angle is looking lately. The fireplace mantel in the before photo wasn’t original and actually didn’t even fit on the wall (it overhung the far corner by an inch or two). So we donated the mantle and exposed the cool old brick chimney that had been hiding behind the plaster.
chandelier | rug | bookshelf | media cabinet | curtains | curtain rods
In this before photo you can sort of see better how the fireplace mantel didn’t fit on the wall (it was too wide on that left side). And while we didn’t rehang that door in that exact spot, this is one of the many original wood doors we had stripped down to the original pine, clear sealed, and then rehung throughout the house. I can’t say where this exact door ended up, but you’ll see one of them in a minute on the downstairs bathroom. All of the interior doors on the house are original (and all of the exterior ones except for the side door – which was a dinged up 50’s metal one – are too!).
Looking at this area today, you can better see how the exposed brick chimney adds a little bit of age and interest to the room. The warm tones of the brick also look great with the warm pine floors, which are balanced by the gray trim and some of the cooler colors we worked into the space, like the rug and the media cabinet.
rug | media cabinet | curtains | curtain rods | similar chair | similar table
And if you thought a second stove in the living room was weird, I dug up this before photo from another angle that featured a doorless fridge in there too. And there’s all that paintable wallpaper I mentioned.
Here’s that same angle now – taken from standing in that doorway that used to have the wood door on it. This is one of the first views you see when you walk into the foyer (when you step into the house, this is immediately on your right) and we love how light and bright this room has become.
rug | bookshelf | curtains | curtain rods | similar chair | similar fig
Here’s a similar vantage point, just looking slightly back toward the dining room. This must’ve been after closing since the doorless fridge is gone (the seller took that out before we closed), but at least now you can see the open bag of concrete left on the floor… WHICH HAD COMPLETELY HARDENED. I guess I shouldn’t be mad at that though, since it made it less messy to clean up.
Here’s an after from a similar POV. This room actually didn’t have an overhead fixture before, so we had one wired and added a decorative medallion to balance out the modern chandelier. We’re planning to swap out our 7-year-old Ikea sectional for the Mellow sofa from our own furniture line whenever we bring a moving truck out for the duplex. Can’t wait!
chandelier | rug | bookshelf | curtains | curtain rods | similar table
Okay, one last angle of the stove, I mean, living room. This is standing in the living room looking back through into the dining and kitchen area.
And here’s a similar view now, which shows you how the dining table helps act as overflow seating for the living room, since someone can easily sit on the bench and face into the living room to chat. We love how flexible it is, and we’ve had big groups over for a casual meal and it works so well.
rug | dining chairs | dining benches | similar chandeliers
The Mudroom & Bathroom
The last two rooms to show you downstairs are some of our hardest working spaces in the house. The mudroom and the downstairs bathroom, (along with the pantry) were located in the section of the house that had to be completely torn off and rebuilt. Remember that rotted exterior side of the house that we showed you with fist-sized holes? Well, this is the room behind it (note the sunlight streaming in between the gaps in the “siding”).
I can’t get quite far back enough to take that same angle now, because we added a wall to split the space into two rooms: the mudroom and the bathroom. But the wall seen above is now home to our laundry area and – since this is the room you enter from the side door – it acts as a mudroom of sorts too, complete with an oversized wall hook rail, a bench, and baskets for shoes. That tall Ikea cabinet also hides our tankless water heater while storing brooms, a vacuum, and other cleaning supplies.
floor tile | washer | dryer | light | shelf brackets | towels | similar bench | shelf basket
Turning around, this was the view of the other side of that room when we first bought it (standing where the washer & dryer are now). It’s a little hard to orient yourself since we changed the layout, but just note the location of the door and window on the left side.
Now, looking from the washer and dryer today, the door and window stayed in the same spot – but there’s a wall between them to create the downstairs bathroom (which now has that window in it). And in this photo you can see one of the original wood doors after it was stripped and resealed. Plus, see that trio of photos? Those are “before” photos that we had framed so anyone who visits can appreciate how far this house has come.
Now I’ll show you the bathroom up close. I don’t really have comparable “before” photos because this didn’t exist as a separate room before, but in many ways it matches the layout of the original downstairs bathroom (which is now the pantry).
floor tile | shower wall tile | wall art | shower curtain | toilet | tp holder
And here’s the view of the other side of that wall, where you can see the vanity area. Just like the picture frames above the toilet, we chose a mirror with wood accents to pick up on the original wood doors. This one was actually a more recent swap (we had a larger rectangular one there before) and this suits the space much better.
mirror | vanity | faucet | light | hand towel | floor tile
So now that you’ve seen the entire downstairs both before and after, I’m gonna end with a deep dark confession. We filmed a video tour of the beach house on the last weekend before it started to get overtaken with duplex materials (think tile piled up in the foyer and extra furniture and frames everywhere) and when we got home, the video was a fail. I won’t bore you with the details, but it was a focusing issue I couldn’t detect until we got it home and uploaded. So rather than subject you to it, we’re going to try to take a better one in a few weeks. So stay tuned for that AND the before and after photos of the upstairs!
PS: If there’s any source you missed you can probably find it (or something similar) on our Shop Our Beach House page. You can also browse all of our beach house posts and projects here.
*This post contains affiliate links*
The post Before & Afters Of Our Beach House: Downstairs appeared first on Young House Love.
Before & Afters Of Our Beach House: Downstairs published first on https://aireloomreview.tumblr.com/
0 notes
Text
Evaluation
Looking back on this project, I would open by saying that I am quite happy with the progress I have made. Indeed, before this project, I had never touched Nuke or done any VFX before. It was very challenging to learn everything from scratch, from the concepts of visual effects to the practice of it. I really enjoyed the fact that live action and 3D can interact together and sky is the limit when it comes to what can be done with Nuke, 3D packages and imagination. Considering that I would very much like to work in the film industry, I find that this has provided me with an incredible set of skills to pursue such a career.
Other than having to catch up in order to successfully complete the submission as well as follow along lectures, I ran into many walls during my practice and have really worked on my problem solving skills.
The first issue came from the first footage I shot. I had in mind a still shot of the Old Royal Naval College where my 3D model would slowly crawl and, as it would notice the camera, slowly stand up in an intimidating manner. The issue I faced was that because it was a still shot I could not track it properly and kept obtaining very high solve errors. Because of my incapacity of getting a good track, and therefore importing the virtual camera into my 3D package of choice, I decided I would reshoot. Refilming, I integrated a pan from right to left, making sure that this time the shot would not be still. Here, again, my lack of knowledge in tracking and VFX in general caused me to track my footage over and over again, getting bad solve errors again. It then struck me: I had to rotoscope the sky out in order to track only the buildings: the sky was very windy that day and the clouds, which were being tracked by Nuke, affected the solve very strongly. Finally, still on Nuke and exporting the tracked camera, I ran into a very unusual bug. Indeed, every time I exported by Nuke camera to Maya in order to place and animate my character to the footage, the footage was very stretched and my markers were not matching the original shot anymore. This was a major issue as I would have had to guess in order to place my 3D model in the scene. It took me about a week to figure out what was wrong as I could not seem to find a solution either on the internet or asking my peers. I redid my comp in Nuke many times because I wanted to see if the error came from Nuke. I worked on the 4k version of my footage as well as 2000x1080, 1920x1037 and 1920x1080 versions of the shot, tweaking the camera tracker as well as I could and exporting my camera over and over. This was a quite intensive week as I was extremely dependent from the University. Indeed, at home, I was using the free version of Nuke, Nuke Non-Commercial. However, the WriteGeo node, that allows you to export your camera to a 3D package, is only available in the Commercial version, available at University. I managed to make it work no matter what, yet my footage was still stretched in Maya. I concluded that the bug surely came from Maya. After desperately trying to come up with a solution to this bug that was freezing my work, trying to tweak Maya’s settings as much as I could, I figured that it was the image plane that was problematic and not the camera or the render settings, as I initially thought. In the image plane’s settings I finally managed to get my backplate to match my resolution and therefore get rid of the stretched renders.
On the other hand, I faced some difficulties when working on my CGI. The first one was against myself: I was struggling to come up with a concept that I liked and that I wanted to stick with. I really wanted to have creatures climbing the domes of the Old Royal Naval College but I realized quite fast, talking to my peers, that it was maybe a little too ambitious to have multiple animated 3D characters in my scene. I settled for having one animated gargoyle-like character for certain and seeing whether I would have time to add more. I sculpted two characters before getting the look and feel that I really wanted for my scene. I then retopologized my multi-million Dynamesh into an easily animatable character. I am really glad I learnt retopologizing as I feel it is a very important aspect of working on 3D characters, especially in a VFX environment, where the model is going to be handed over to colleagues. Finally, I UV unwrapped it using Zbrush and imported into Substance Painter in order to texture it but realized my texture was completely stretched. To fix this, I had to learn UV unwrapping in Maya, which had always been one of my worst fears when it came to 3D. Looking back, I can tell I learnt an extremely valuable skill and texturing in Substance was a piece of cake thanks to a proper UV. Linking the Substance textures into Arnold 5 textures was a completely different story: it took me a lot of time to figure it out because I started working on my model very early on, before we got tutorials from our lecturers.
Still on the CGI, I feel like positioning it properly in the scene was a little hard because it was hard to get the perspective right and make sure that it was lit properly. In Nuke, I softened my model, matched the grain from the footage, got the shiny shine more and darken the skin using my render passes, and finally cropped the legs out by tracking a rotoscope in order to make it look like it is standing on the side of the building.
As a means to conclude, I think that although I am quite proud and happy with the final result of my CGI and my scene as well as all the skills I have aquired, there is still a lot that can be done to improve them. Indeed, I think that a CameraShake node would have really helped the storytelling and cinematography of the shot by imitating a handheld camera (render times were too long). Rendering a proper motion blur pass would have definitely helped too in order to get very nice results when it comes to the creature’s movements. Consequently, now that I have an efficient workflow, I would love to continue working on this shot, or other ones and really push myself further. I think that I would really enjoy working in VFX for the film industry, especially on creating the assets, not so much animating them, or in compositing the shots and seeing the scenes come to life as I am very interested into cinematography.
0 notes
Text
Before & Afters Of Our Beach House: Downstairs
I’m not sure I’ve ever been so excited to share before and after photos as I am today. Last month marked the 2-year anniversary of buying the beach house and while we never like to declare a home “done,” this place has come so far that this felt like a good moment to look back at everything (and to document what’s still ahead).
We’ve dug up dozens of before photos (including many that we haven’t ever shared!) and we’ve done our best to find or take similar angles to match up with them. There are so many angles to show you, and so much to cover, we’re just doing the downstairs today – and then we’ll follow up soon with the upstairs once we can shoot those photos and organize another big before-and-after-fest of a post.
We’ll link some of the key items in each “after” for you, but remember you can always visit our Shop Our Beach House page for the paint colors and source info of each room (it’s always linked up in our menu bar right under our blog header). And before we dive into the photos, you may want to treat yourself to this walk down memory lane: the before video tour! Note: if you’re reading this post in a feed reader like Bloglovin or Feedly and can’t see the video below, you may have to click into our post to view it – but trust me, it’s worth it.
The Exterior
Before we head into the downstairs, let’s look at the outside. This is a shot of it from the sidewalk back when we bought it. Did you even remember that “the pink house” was once “the greenish-gray house?” Complete with cream trim, mismatched windows (some of which were boarded up), and cinderblock steps.
And here it is from a similar angle (a little closer up). We snapped this photo this summer:
Here’s another before shot. The cinderblock steps and the sad rotting siding weren’t gorgeous… but we loved the old bones.
Thanks to a new roof, new siding, new windows, new steps, and a repointed brick foundation, we got the house looking a lot happier. After much debate, a takeout coffee cup helped us choose pink for its new color scheme (Sherwin William’s Mellow Coral, with SW Snowbound for the trim).
Here’s another angle of the front of the house. Fun fact: that vine had snaked its way into the house and was growing in there as well as on the porch. For real.
We actually repainted both the porch ceiling and the floor their original colors, or at least the best we could match. The ceiling is Sherwin William’s Breaktime and the floor is Behr’s Pacific Fog. The ceiling also already had hooks in it for a porch swing, so we ordered one, popped it up, and called it done.
We still haven’t done most of the landscaping or hardscaping that we have planned for the side and backyard yet, but we could resist sharing one last angle. Remember how rotten this side of the house was??? This was a former porch that someone enclosed with interior wood floorboards instead of actual weather-proof siding (they had rotted so badly that you could stick your fist through the siding and into the house in a bunch of places). So yeah, it had nowhere to go but up.
This was the side of the house that had to be completely torn off and rebuilt due to a sinking foundation and a ton of weather damage to the support beams. So at one point this whole section was completely missing! This is where the mudroom, pantry, bathrooms, and bunk room now are. So, for reference, that exposed wall on the second floor that’s all black is where the bunk beds now hang. Crazy!
Now it’s looking more like this (minus that giant bush in the front that we learned is actually a tree that would grow taller than our house – so we had to get it outta there before it wrecked our freshly fixed foundation). We still have to landscape the entire side of the house and add a stone pathway to lead people back to the outdoor shower, but it’s a far cry from where we started.
The Entryway
Despite the crumbling plaster, unfinished drywall, and water damage – this view into the foyer was immediately charming to us. That fireplace mantle was not original, it was just one of many items that the previous owner had collected over the years (there were also two old stoves, various rolls of paintable wallpaper, and even an old boat in the shed out back).
This is the entry now. It, like the rest of the house, got fresh drywall and paint, refinished floors, and a whole lot more. We were able to salvage enough of the home’s original trim to use it throughout the first floor – and the original color of it in this foyer (see it in that photo above around the doorway?) is what inspired us to use non-white trim throughout the downstairs. The color is Sherwin William’s Stone Isle. The walls in the entire house are painted Sherwin Willaim’s White Heron and the floors – OH THE FLOORS! They’re the original heart pine that we had refinished and clear sealed with water based sealer (extremely durable but it won’t yellow over time like poly). It’s so hard to believe they’re the same floors in some of these photos because they were looking so rough when we bought this house.
mirror | similar light | similar lamp | similar dresser
It’s worth noting that we attempted to keep the railing wood (but stain it to match the floors since it was much redder than they were), but it proved impossible since it’s not heart pine like the floors and steps are. So we painted it a slightly deeper gray color than the trim, which allows the floors to sing instead of competing with a different tone of wood all the way up the stairs.
The Kitchen, Dining Room, & Pantry
Through the foyer is the largest room of the house, which we turned into a kitchen/dining space. It was a giant mess when we first bought it, but have no fear, that beautiful original light fixture is the one we had rewired that now hangs in the pantry!
Before jumping to the after on this one, I’m actually going to take you through the progression of this angle, since it tells a nice story about the journey this house went through. Below is what it looked like during demo. The mess was cleared (mostly) but there was still a long way to go.
Then here it is being rebuilt. That area to the left that’s all new wood is the side that had to be completely torn down and rebuilt – and a lot of the ceiling joists in the kitchen had to be reinforced with new boards.
I won’t bore you with photos of all of the new plumbing and electrical that got added (we redid those systems as well as installing new HVAC throughout the house), so let’s jump to drywall. It’s starting to look like a house again.
And now another big jump forward to present day. After some debate about the floor plan, we actually ended up with both the dining and the kitchen functions in relatively the same spot as they originally were. Let the record state that we love this downstairs layout so much that if we could blink our eyes and have our Richmond house laid out this way – complete with the back staircase – we would in a heartbeat. It’s not huge but it feels nice and open, and when we spend time downstairs we all feel close and connected but not cramped.
dining chair | chandeliers | sconces | pendants | barstools
Here’s the before photo again for comparison:
Here’s another view of this space. You can see the previous stove there next to the back door. And note that pink beadboard that runs along the back wall. We didn’t even register that it was there until way after we painted the house pink and it caught our eye in old photos from our initial walk-throughs. Sherry swears the house wanted to be pink all along and it was trying to send us signals (all of which we missed until after the fact).
Here’s that same view now. Even though it made floor planning a little more challenging, we were intent on keeping the placement of the original back door and that back staircase (some of our neighbors with similar houses don’t have them anymore) and we’re SO GLAD we did. They limited the useable wall space for the kitchen itself, but we ended up shifting that doorway on the left that you see above (which used to lead to the rotted side porch) to give us room for the wall that hosts the vintage pink stove now.
hood | cabinet pulls | similar runner | sconces | pendants | faucet | pink letterboard
It basically just got moved about 5′ further down the wall towards the dining area and it now leads to the laundry room/mudroom (which you enter through the house’s side door) as well as a full downstairs bathroom.
And that doorway that you see in the back left corner of the kitchen leads into our pantry, but that room used to be a full bathroom…. complete with pink trim. See it’s like this house wanted to be pink! There was a plastic shower stall between those exposed studs and a toilet tucked behind it.
You saw that the full bathroom downstairs shifted over by the mudroom, which freed up this space for another super functional area that took some trial-and-error to figure out: our walk-in pantry. We’ve got a full tutorial on building pantry shelves like these if you’re interested. Also, there’s the original light fixture that used to hang in the kitchen – we had it rewired so it’s safe.
Sherry often declares the pantry to be her favorite room in the house (especially this time of year because she stands on the floor vent to heat her feet while snacking). As weird as it sounds to declare a pantry your favorite, I’m going to top that. My favorite = the back stairs… which I know isn’t really a room… but hear me out! This is what they looked like before:
The old door on the third step up from the floor wasn’t to code anymore (you’d need a landing to stand on when opening a door) and we knew the stairs would look much better being open. So now we’ve got doors at the top of the stairs instead – which provide some nice privacy to anyone sleeping in that bedroom without blocking the view of the stairs from the kitchen.
I know this is a downstairs tour, but this photo will help to explain what I mean. Now when you reach the top of the stairs there’s a landing with a built-in dresser and these pocket doors can be closed for privacy.
Ok, back to the downstairs tour. I love these old stairs because (1) they’re such a cool quirky original detail and (2) they’re crazy functional. We weren’t even sure if we’d use them much (we thought maybe just the kids would love sneaking up them) but they act kind of like a private entry into the upstairs master bedroom for us, and I’m now so spoiled that I wish we had them in our Richmond house too.
Here is a view from the stairs themselves. It’s a “before” angle you probably haven’t seen before (probably because it’s blurry – ha!) but it’s looking towards where the pink stove now sits. The main thing to notice here is the blue door….
…that’s the one we kept as is (well, after carefully removing the flaking paint and clear sealing it with Safecoat Acrylacq so any old lead paint is completely encapsulated – you can read how to deal with lead here – BE SAFE GUYS). So that’s the very same door, it just got rehung in the doorway to the mudroom. We leave it open 95% of the time, only closing it while laundry is running, because it adds a nice dose of age and color to the room. This photo is from before we finished the backsplash, hence no finish piece across the top, but you get the idea:
If you’re wondering in all of this: “Well, where was the kitchen before?” allow me to show it to you. Since we bought the house in the midst of some stage of demo, we’re not entirely sure where appliances went (remember there was no working water meter that led to this house when we bought it, so it’s very possible it hadn’t had a functional kitchen in decades), and these clearly aren’t the original cabinets from 1920, but they were cornered against this wall that the previous owner was in the process of taking down. Btw, we donated all of the cabinets and appliances to the local Habitat ReStore, which was an easy way to dispose of them without them going to waste. They even came and picked them up, so that’s an option if you’re renovating – just call to schedule a pickup!
This is that same view now. I almost laughed out loud looking at this photo because it feels like the sink ended up in almost exactly the same spot.
framed art | curtains | curtain rods | sconces | pendants | barstools | similar runner
Stepping forward in this room, here’s another view of the previous dining area. There’s a lot to take in here – the giant hole in the floor (lower right), the vine creeping through the window (lower left), that hit of bright green trim (?!), and that second stove sitting in the living room.
But here we are today. At some point the secondhand table needs to be refinished (the leaf is a darker color than the rest of it) and we sometimes think we’d like to add a rug under the table (although we love the ease of cleaning the room just like this – so maybe not). Either way – still a big improvement over the before!
dining chairs | dining benches | similar chandeliers |curtains | curtain rods
The Living Room
If you step forward through the dining room doorway, this is the view you see – well, or would’ve seen two years ago. Again, there’s a lot to take in: the always-damp couch, maroon trim, that second stove. Not pictured are the new rolls of paintable wallpaper piled in the corner. The funny thing is that by the time we bought the house, no amount of paintable wallpaper was gonna save it.
Here’s how that same angle is looking lately. The fireplace mantel in the before photo wasn’t original and actually didn’t even fit on the wall (it overhung the far corner by an inch or two). So we donated the mantle and exposed the cool old brick chimney that had been hiding behind the plaster.
chandelier | rug | bookshelf | media cabinet | curtains | curtain rods
In this before photo you can sort of see better how the fireplace mantel didn’t fit on the wall (it was too wide on that left side). And while we didn’t rehang that door in that exact spot, this is one of the many original wood doors we had stripped down to the original pine, clear sealed, and then rehung throughout the house. I can’t say where this exact door ended up, but you’ll see one of them in a minute on the downstairs bathroom. All of the interior doors on the house are original (and all of the exterior ones except for the side door – which was a dinged up 50’s metal one – are too!).
Looking at this area today, you can better see how the exposed brick chimney adds a little bit of age and interest to the room. The warm tones of the brick also look great with the warm pine floors, which are balanced by the gray trim and some of the cooler colors we worked into the space, like the rug and the media cabinet.
rug | media cabinet | curtains | curtain rods | similar chair | similar table
And if you thought a second stove in the living room was weird, I dug up this before photo from another angle that featured a doorless fridge in there too. And there’s all that paintable wallpaper I mentioned.
Here’s that same angle now – taken from standing in that doorway that used to have the wood door on it. This is one of the first views you see when you walk into the foyer (when you step into the house, this is immediately on your right) and we love how light and bright this room has become.
rug | bookshelf | curtains | curtain rods | similar chair | similar fig
Here’s a similar vantage point, just looking slightly back toward the dining room. This must’ve been after closing since the doorless fridge is gone (the seller took that out before we closed), but at least now you can see the open bag of concrete left on the floor… WHICH HAD COMPLETELY HARDENED. I guess I shouldn’t be mad at that though, since it made it less messy to clean up.
Here’s an after from a similar POV. This room actually didn’t have an overhead fixture before, so we had one wired and added a decorative medallion to balance out the modern chandelier. We’re planning to swap out our 7-year-old Ikea sectional for the Mellow sofa from our own furniture line whenever we bring a moving truck out for the duplex. Can’t wait!
chandelier | rug | bookshelf | curtains | curtain rods | similar table
Okay, one last angle of the stove, I mean, living room. This is standing in the living room looking back through into the dining and kitchen area.
And here’s a similar view now, which shows you how the dining table helps act as overflow seating for the living room, since someone can easily sit on the bench and face into the living room to chat. We love how flexible it is, and we’ve had big groups over for a casual meal and it works so well.
rug | dining chairs | dining benches | similar chandeliers
The Mudroom & Bathroom
The last two rooms to show you downstairs are some of our hardest working spaces in the house. The mudroom and the downstairs bathroom, (along with the pantry) were located in the section of the house that had to be completely torn off and rebuilt. Remember that rotted exterior side of the house that we showed you with fist-sized holes? Well, this is the room behind it (note the sunlight streaming in between the gaps in the “siding”).
I can’t get quite far back enough to take that same angle now, because we added a wall to split the space into two rooms: the mudroom and the bathroom. But the wall seen above is now home to our laundry area and – since this is the room you enter from the side door – it acts as a mudroom of sorts too, complete with an oversized wall hook rail, a bench, and baskets for shoes. That tall Ikea cabinet also hides our tankless water heater while storing brooms, a vacuum, and other cleaning supplies.
floor tile | washer | dryer | light | shelf brackets | towels | similar bench | shelf basket
Turning around, this was the view of the other side of that room when we first bought it (standing where the washer & dryer are now). It’s a little hard to orient yourself since we changed the layout, but just note the location of the door and window on the left side.
Now, looking from the washer and dryer today, the door and window stayed in the same spot – but there’s a wall between them to create the downstairs bathroom (which now has that window in it). And in this photo you can see one of the original wood doors after it was stripped and resealed. Plus, see that trio of photos? Those are “before” photos that we had framed so anyone who visits can appreciate how far this house has come.
Now I’ll show you the bathroom up close. I don’t really have comparable “before” photos because this didn’t exist as a separate room before, but in many ways it matches the layout of the original downstairs bathroom (which is now the pantry).
floor tile | shower wall tile | wall art | shower curtain | toilet | tp holder
And here’s the view of the other side of that wall, where you can see the vanity area. Just like the picture frames above the toilet, we chose a mirror with wood accents to pick up on the original wood doors. This one was actually a more recent swap (we had a larger rectangular one there before) and this suits the space much better.
mirror | vanity | faucet | light | hand towel | floor tile
So now that you’ve seen the entire downstairs both before and after, I’m gonna end with a deep dark confession. We filmed a video tour of the beach house on the last weekend before it started to get overtaken with duplex materials (think tile piled up in the foyer and extra furniture and frames everywhere) and when we got home, the video was a fail. I won’t bore you with the details, but it was a focusing issue I couldn’t detect until we got it home and uploaded. So rather than subject you to it, we’re going to try to take a better one in a few weeks. So stay tuned for that AND the before and after photos of the upstairs!
PS: If there’s any source you missed you can probably find it (or something similar) on our Shop Our Beach House page. You can also browse all of our beach house posts and projects here.
*This post contains affiliate links*
The post Before & Afters Of Our Beach House: Downstairs appeared first on Young House Love.
Before & Afters Of Our Beach House: Downstairs published first on https://bakerskitchenslimited.tumblr.com/
0 notes
Last Seen Blogs


cartoon-anime-transparents
Transparent images from Cartoons,anime, etc.

shrinrei-shashin
心霊写真

stephenskinnerbatz
Batz Skinner

rainstravels
Rain’s Travels ✈️✨