#but in any case I do like the art
Text
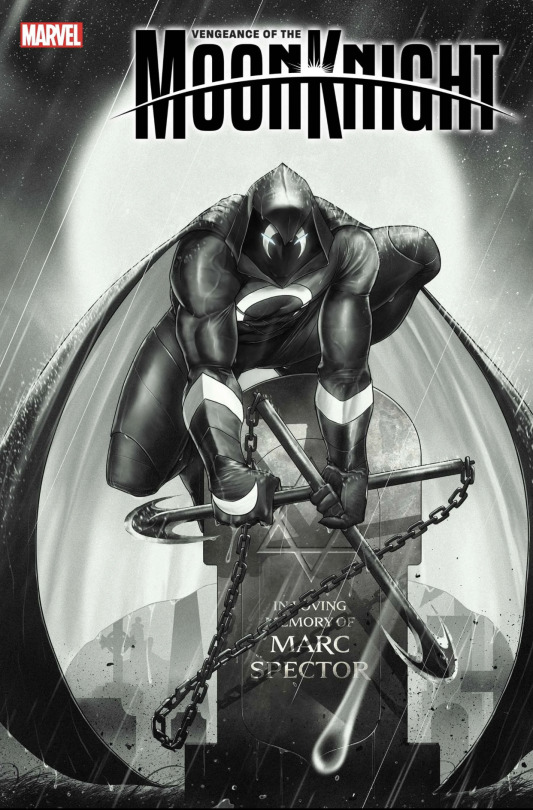
Variant cover for Vengeance of the Moon Knight (Vol. 2/2024), #2 by Dotun Akande.
#Marvel#Marvel comics#Marvel 616#Vengeance of the Moon Knight vol. 2#Vengeance of the Moon Knight 2024#Let’s get this other bread#Moon Knight#don’t mind me just such an interaction with a headstone gets me a little…twitchy#but in any case I do like the art#and am I hallucinating or between the two weapons and that one big ol’ rain drop are we line away from a magen david?#(I have also spent the whole day digging through AI-generated images with subliminal messaging so maybe that’s the issue hahaha)
21 notes
·
View notes
Text
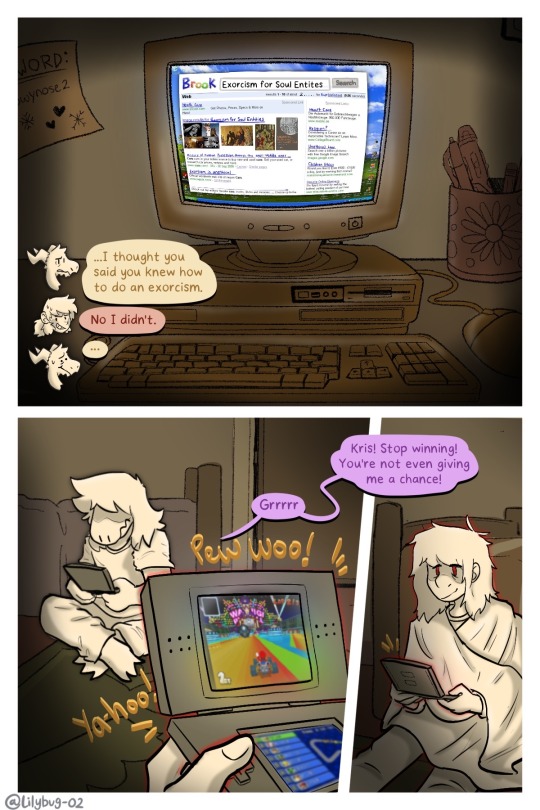
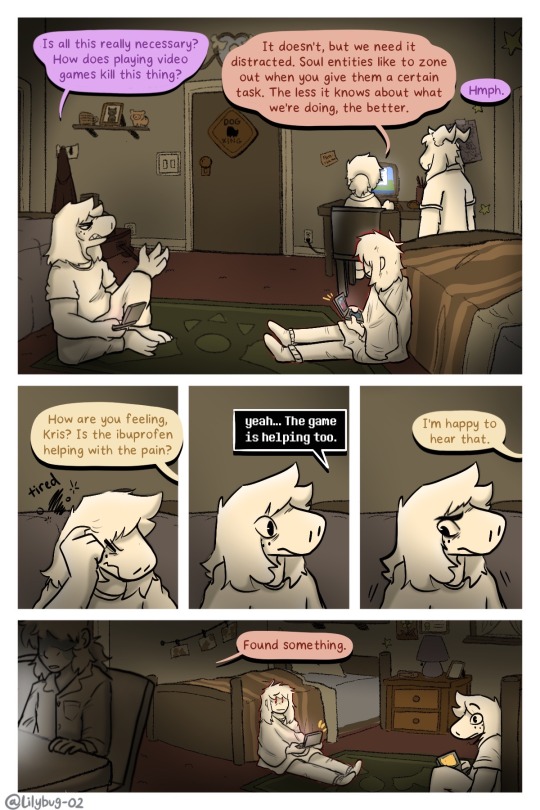
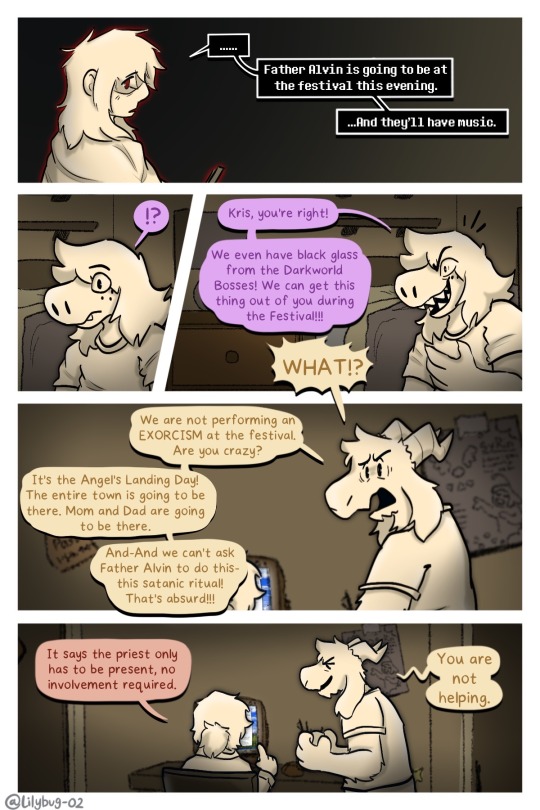
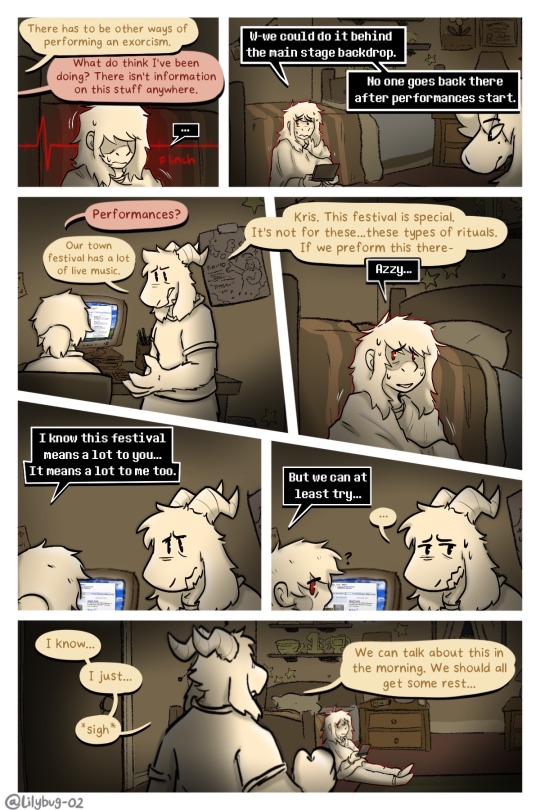
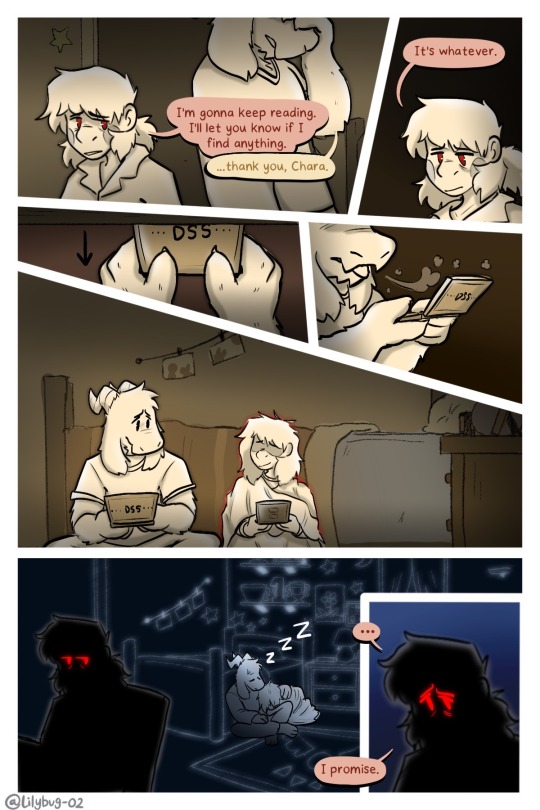
Patience and responsibility....that's a promise....right?
Part 27 First || Previous || Next...
--Full Series--
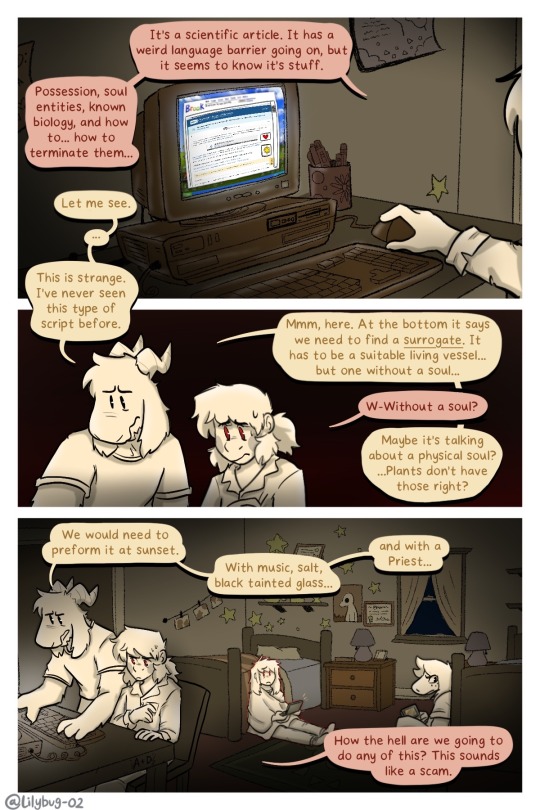
An exorcism? In my family-friendly Deltarune? It's more likely than you may think. The backgrounds here were very interesting! Much more complex than how I usually do them (especially that computer).
Player POV:
Feral energy.
#Syke! Chara has no idea how to do sh*t with Exorcisms#in a society where it's literally seen as a blessing of some kind. It is seen as unethical! Your hurting the silly little guy :(#Why is Azzy so hesitant with this festival??#WHAT THE HECK IS THE ANGELS LANDING DAY??? Azzy get over here-#without a soul?.....I dont know any creatures like that....plants maybe?#That is totally a knock off Mario cart and not a png I found online. DO NOT LOOK INTO THIS#Salt!? owo hehehe#I was very iffy on how much light I wanted here. I kept layering the darkness lmaoo. They kept the lights low in case Toriel woke up.#can you spot the everyman? ;)#hmm your not supposed to be able to read the computer....but I may make an update so people can actually see it?? I hate to leave it grainy#but im a little tired so thats maybe for tomorrow!#thank you all again for waiting so long!#deltarune chara timeline#deltarune chara timeline comic#bread#art#my art#chara#asriel#kris#susie
2K notes
·
View notes
Text
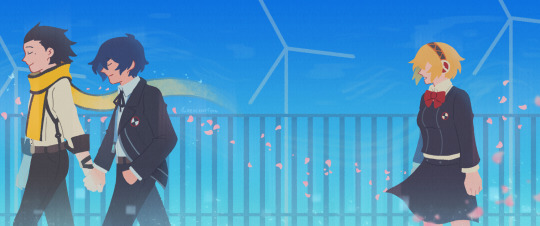
reunion 🌸
#persona 3#persona 3 spoilers#minato arisato#makoto yuki#ryoji mochizuki#aigis#ryomina#lizzy does art#HELLO EVERYONE!!! march 5th is upon us again so i bring... my contribution for this year. my third year drawing for it!#i made the thumbnail for this a few weeks after last year's graduation day#i thought it would be fun to lean into the ryominaigis angle of graduation day (you could read this as minato/aigis if you like-#but i feel like most people would read it as ryoji/minato)#IN ANY CASE working on this made me very emotional over this game :') (specifically minato)#i really enjoy how p3 ends it's such a nice way of wrapping up the narrative's messages and themes#working on this. minato's kindness was at the forefront of my mind throughout the piece#and i really wanted to capture how. ultimately it was his decision to sacrifice himself- to do the great seal#while to an outsider's perspective it is. sad that minato passes. i think becoming the seal is something that minato-#actively welcomes. in the same way that death (ryoji) is a comfort to him because death was housed in him for Ten YearsTM#AND I ALSO GOT REALLY SAD OVER AIGIS TOO. i still get fucked up over how in fes's animated cutscene for 3/5 they portray-#her as human and not drawing the robot parts so i wanted to do something smilar here...#but also i am very sad on aigis's behalf because she discovers her humanity through minato and realizes what she-#wants to do and then. well. minato is like. he's ready to pass on (even if he's scared) and im like. OH MY GOD THIS TRIO GETS ME MESSED UP#this was more coherent in my head LOL BUT ough i like drawing p3 and working through my feelings about it...#anyway! happy (in quotations) march 5th. i love this game to bits. it's so fun to draw for this day every year and see how i've improved#if you've read all this thank you :) lizzy appreciates you all very much. mwah! <3
1K notes
·
View notes
Photo
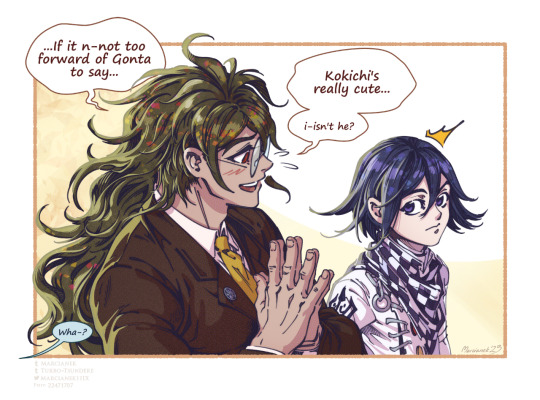


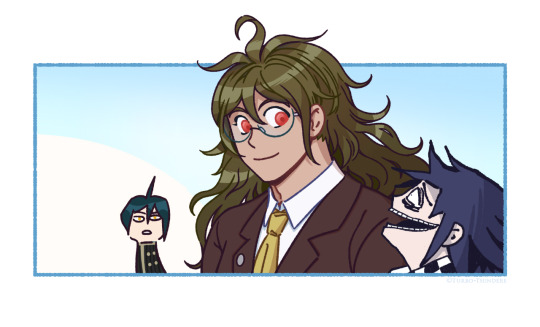

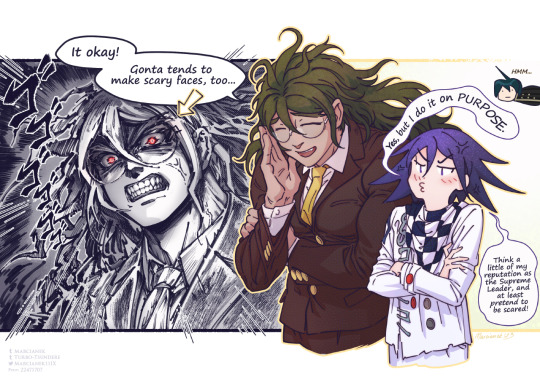
Kokichisake-onna
*Happy anime narrator voice*: “And thus, Kokichi has once again successfully evaded the dread of emotional openness!”
Also here’s a random selection of derpy concept doodles for this comic :)
Thank you byeeeeee
#gonta gokuhara#gokuhara gonta#kokichi ouma#ouma kokichi#kokichi oma#featuring shuichi xD#ougoku#awwgoku#my art#I wanted to post it on ougoku day but work and migraines piled up on me and I really wanted to give this one the time it needs!#If you know the legend you know why Shuichi is panicking XDD#Look into Kokichi's eyeballs in panel 3 and see the sad hope against hope and yet! he still actively sabotages any comfort coming his way!#Is Gonta just kind or is his compassion a warped mix of compulsive fawning and misplaced empathy that keeps inviting menace into his life?#there's a secret sadness to this silly comic lmao and it's those poor sods' autopilots#I say laughing but by god do they need help#anyway enjoy! I might try posting more of Gonta ships I like - like this one; or with Shuichi; and some others 8D#btw I LOVE Gonta's scariest sprite - fantastic detail bc it does look like a snarl and ofc a wild child would imitate animal expressions!#and 2 out of 3 times he uses it he's actually NOT angry but hyped or frustrated - both cases also smth I appreciate for certain reasons#his actual 'serious angry' sprite is far more toned down in comparison
2K notes
·
View notes
Text
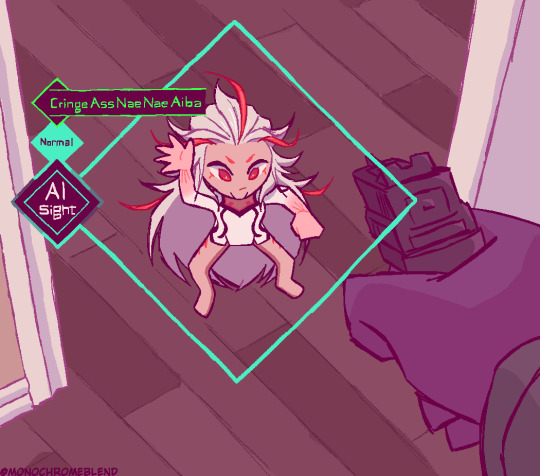
fluorescent shrimp
#i wanted to draw the evolver gun but i couldn't find any refs with a good angle#normal gun will have to do#in any case i wanted to draw this like 2 weeks ago when i started playing the first game#but then i couldn't stop playing it and ended up finishing it at 1 am last saturday#and then i tried to sleep right after but i couldn't bc i wanted to play nirvana initiative so badly#so then i stayed up from then on until sunrise playing the second game#just beat it the other day#didn't like it as much as the first game but i still really enjoyed it#also this marks the second year in a row where i become obsessed with a duology of visual novels and play them in under two weeks#(last year was dgs)#my grades briefly plummeted as a result but they're ok now lol#ai the somnium files#aitsf#aiba#my art
442 notes
·
View notes
Text
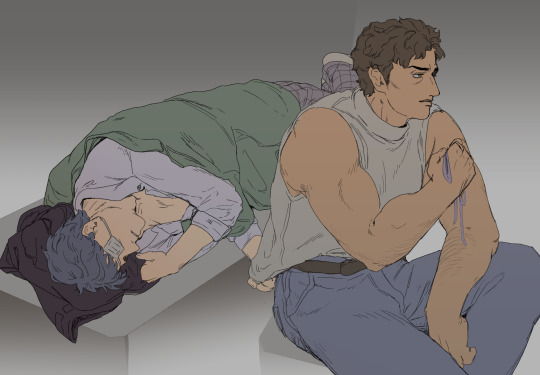
daanmarcoh doodle -
they're sleeping in shifts and keeping watch
#daanmarcoh#daarcoh#kickdraw#funger#i just wanted to draw them and try to punch through artblock !#as soon as i have the energy to actually render something and draw a background its so over#the eternal struggle of 'do i use daan's portrait or map sprite for hair color'#really just wanted to draw daan with marcoh's jacket#thought to myself yesterday - 'idk why they aren't as popular' so figured i'd throw some art into the mix again#such good fanfiction coming out for them too#I really want to get back into a drawing stride for them :')#the shirt grab is to make sure he's still there watching - if marcoh turns around or leaves daan would feel it#i feel like they're walking a weird line in my mind#they just met and in some cases all they have is each other - but they dont really know each other in any way#they just have to trust the stranger who didn't kill them immediately won't be worse than the fucked up monsters around them
183 notes
·
View notes
Text
taking some extra anatomy classes this year, here are some of my notes in case they could help someone. should be updated every weekend (aside from october 28th and november 4th which are free days) with the following lesson's notes. (further explanations at the end)
anyway. here goes:
SCENE 0-1: LEARNING HOW TO LOOK/OBSERVE
when drawing, we each more or less have our own methods when approaching certain subjects, with multiple tools at our disposal in order to achieve the desired results.
but generally, when drawing a model (or most things from life, actually) we can in some sort of way define a general order as to when to draw what:
Looking / Observing
Blocking In
Correcting
Details
for today i’ll focus on the first one of the list, looking / observing.
the existing nuance between “seeing” and “looking” exists in the sense that “seeing” is more passive than “looking”. when you say “i can see a cat”, you aren’t paying too much attention to the cat. but when you say “i am looking at a cat’, you are actively paying attention to the cat and what they’re doing.
(given the class is in French, the nuance was similar, using the words “voir” and “regarder”. but due to French not having a close equivalent to “watch” i cannot make more parallels about this, as my knowledge of English and French-to-English translation is still fairly limited)
when looking at a subject, the primary objective should be to understand what you’re looking at. you can look at a subject (or the world as a whole) under multiple filters: values, hues, proportions, in 2D or 3D, and so on. you need to define how you want to look at a subject following these filters of vision. what do you want to look at first? what do you want the viewer to look at first? this is important to define before you put your tool to your support.
generally when drawing from life, it’s a bit reckless to rush to draw the model without actually observing them a minimum. you should take the time to observe, you are allowed to take your time to observe. no amount of limited time should paralyze you from examining the model the best you can before you put your tool to use.
getting this more precise vision of your model can give you a better vision of their body, which is often hidden under detail. when drawing them, you should ask yourself “how is the model posing?”
why look/observe? (probably like the most given piece of advice by pros and art youtubers who aren’t pros but still get called pros cause they have 1 million subscribers on youtube)
this question is very easily asked but also very easily answered:
to know how and what you’re going to draw
to time yourself correctly and have a good time management (drawing a pose in 2 minutes is completely different to drawing a 10 minutes one), thus,
to avoid rushing to draw the subject. as said previously, take your time. start slow, but stay accurate to the model. (teacher compared it to a musician rehearsing a piece, first slowly, then speeding it up progressively as he gets to know the piece itself better and better. unfortunately as someone who is as farthest from a musician as can be, i cannot honestly attest to if this is accurate).
but really, there is actually no such thing as a “finished” drawing. a graphite drawing could always have color added afterwards, a painting could always get more and more detailed. a piece is “finished” only when you deem it is finished. the French Académie des Beaux Arts didn’t like the Impressionists because to them, what the impressionists were doing were half assed jobs, since the idea of “transmitting a vague feeling, or an emotion through a specific style of very visible strokes” was absolute fuckery to them. speaking of,
to transmit an emotion, or a feeling through the posing of the model. the more technical and controlled the strokes will be, the finer the wanted sensation will be felt by the viewer. this also ties in the physical aspect of the model. ideally, in order to achieve this, you can try posing the same way the model does. it may be a bit awkward but it works (depending on your learning type, of course.)
to understand how the whole “body system” works. “i know the rules of the human body, therefore i make little to no mistakes.”
adding a whole context to the pose helps: adding a situation in which the pose could work in gives some meaning to your drawing, as well as helping you remember it better. it also adds a narrative element to your drawing(s), which are absolutely always a plus. (memorization is also an important tool!)
now let me play devil’s advocate and ask: why not look/observe?
well, uh, there are two reasons my teach told us:
to let your instinct and imagination go wild and free, trust your gut and have fun!!
and, tying back,
to let yourself be surprised by what you’ve done.
form synthesis (or just different types of approaches to draw form)
when drawing a model, there’s a few things that can be mentioned:
multiple types of lines exist with different purposes within the drawing: the action line(s), structural lines, and contour lines.
action lines define the overall movement of the pose. the principal one is the one you see when giving a better look at how dynamic the pose is. the secondary ones are the ones you can find in secondary rhythms when examining the pose a little longer.

(here's a better example, actually:)
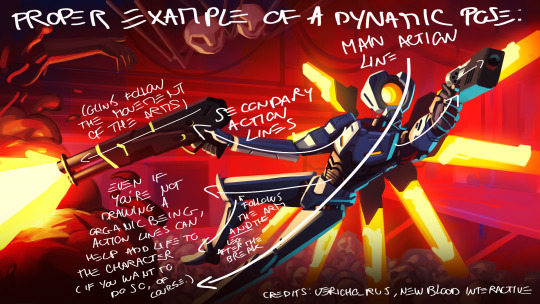
structural lines are pretty much the “stickman skeleton” you sometimes see in certain how to draw books (specifically the more advanced manga themed ones).

contour lines surround the form in a way as to draw all of the outer body without using inside shapes or lines. (it is also the basis for the Bargue method which will be slightly discussed below. there unfortunately won’t be any talk about cross-contour lines, as it hasn’t been talked about in class (yet?))

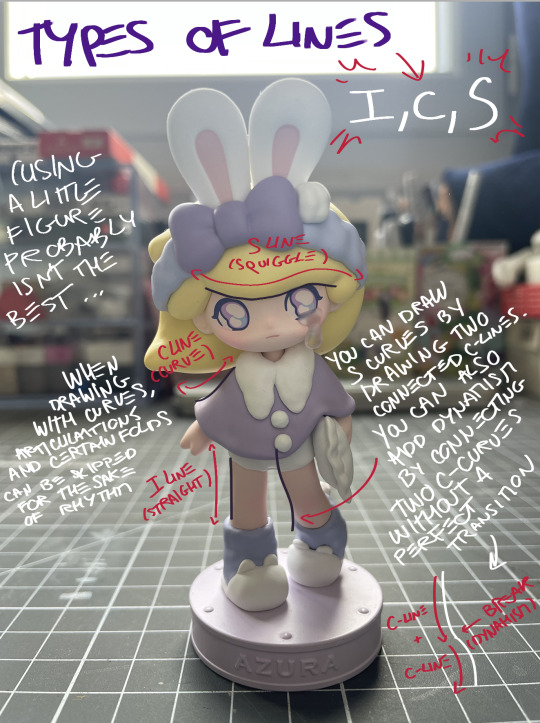
generally, lines take either an I shape, a C shape or an S shape. (teach said it’s preferable to mostly use I and C type lines when drawing live models. probably due to the fact that S shapes are much trickier to use “effectively” within a piece (effectively not meaning much in this context, if nothing at all. again, have fun.)). using these lines tell a lot about the model and the pose, telling a sort of dynamic storytelling which varies depending on what type of line you choose to represent your model.
we can mostly talk about 2D shapes when three or more points have been linked by lines. sometimes, lines can skip articulations for the sake of dynamism. shapes should be thought about in their entirety, the difficulty that can be encountered usually being remaining vague but accurate with your form.
now, a quick word about:
the Bargue method (or, the fuck do you mean the Americans used it in art schools before us, Bargue was literally born in Paris, i fucking hate the Académie des Beaux-Arts)
the Bargue method is probably fairly well known among certain art schools or artistic communities. if i do recall correctly; it originated with Bargue noticing the low level of the students of the Académie des Beaux-Arts de Paris (or some other place basing itself solely on academic style art and paintings located in the city of Paris in the country of France on the continent of Europe) and devising a simple way to learn how to draw accurately from life (or plaster casts, depending on what you prefer). it solely based itself on straight, contour lines, forming a base around which to slowly add details to. apparently, a lot of art schools in america base their teaching of life drawing on this method, but given i do not feel like getting over $200k in debt without even mentioning living and travel costs, i cannot say if that is actually true.
here's an example of it:

it’s pretty much basing yourself on simplifications of the form to attain absolute accuracy. no curves here to distract you, only straights. somehow, when pulled off correctly, it gives a very neat impression of realism.
anyway, that’s all i wrote down. hope teach won’t see this anytime soon, and hope this kinda helped a little bit. next week’s notes should be about blocking in shapes, so we’re starting to be a little more concrete with the actual drawing process.
these classes were taught by Mr Francis Buchet at a class given at the Académie de la Grande Chaumière, so most of the things i’m saying here are taken from him and his class. if you live in/close to Paris and are interested in learning artistic anatomy, i suggest you look up where he is giving public classes, since they’re infinitely more engaging than these notes. his instagram is be linked below. (hoping he doesn’t get mad at me for sharing these notes… in any case i will use my own example sheets to avoid getting in any more trouble.)
and, may i remind you: these notes are only here to showcase one approach among many others, so they don’t mean much in the grand scheme of things. i myself am in absolutely no way a professional, so please, take all of this with a grain of salt (or a spoonful, even). draw how you enjoy drawing, and find happiness in the way you want to draw.
Francis Buchet's instagram: x
so, seeyou next weekend! (or earlier, if i draw something i want to show here.)
#artist tips#art tutorial#art tips#art help#drawing tips#literally no one asked but why not#that was something i've wanted to do for a while tbh#god i hope that doesn't sound pretentious#next time i'll try to show more examples since this one seems a little bit bare#first four classes will be about drawing theory so it might take a little while before we get to actual anatomy :(#so it's gonna be a little bit boring for the first while :((#really sorry about this#next ones should be a little more concrete so. yea#i apologize if this sounds abit confusing; it's the first time i try to make a “tutorial” or anything like that for art#will also try to find a spot to put my own drawings i did while attending the class to show the stuff we do there#in any case#hope this helps someone!
242 notes
·
View notes
Photo
hahaha wheee haha
#sk8 the infinity#kyan reki#hasegawa langa#renga#continuing to tag ship instead of answering any of the reporters' questions#as you can see. I am still on my Reki Speaks English Pretty Fluently But Can Not Read It For Shit bullshit#and also. teen shenanigans. which can also be grown up shenanigans if ur not a square#man. todays been a Whole thing. how was it really the case that every art supply store I went to ran out of black ink#three! I went to three stores! literally a triangle in the city!#still have some of the devils tar left but I'm not enthusiastic about it#well! that's for future baku to care about and for me to ignore babeyy#tbh this is like. Im just glad I can still scribble a funny comic when it strikes me it's been too long#I don't do that a lot anymore... even tho its such a good measure of like. ur sense of timing#if u can draw a funny comic ur powerful enough to do anything. u can eat the sun u can kick its ass. u can draw a sad comic too#I realized I missed that...#also accidentally sent this from draft without adding tags lol. and tried adding tags on mobile and it spit in my face and called me a bitch#got enough of that. one must never forget one's currently on tumblr#now I sleep. gods. gods do I need a bit of that#have a good night lads. bring a worm onto a rollercoaster. see what happens
594 notes
·
View notes
Text
Creature. (The rendered ones are referenced from manga panels)
#mediocre art#tokyo ghoul#On some level I think I should like Kaneki more than I do but there's this weird sense of detachment#I have not only from him but being able to perceive him as a character?#I don't even dislike him it's just that I can't feel any which way about him at all. He's a catalyst for events#feels more like the conch from Lord of the Flies or something rather than a fictional person.#He doesn't suffer and learn from the consequences#he just suffers and does what got him there again. It's arguable that the lack of punishment denies him the satisfaction#but if that's the case why does he end the story with everything working out perfectly for him?#Why do his friends oblige his flaws and accept his lack of change?#Is the problem my lack of understanding or his lack of good writing?#Is he well written?#Why do I like a certain character from a different anime who's a very similar person with very similar dynamics#but with a goal and acceptance by himself and those around him that his actions really are reprehensible and cannot truly be atoned for#not only more but to the point that he's actually one of my favorites?#Am I just sitting upon a throne of entitlement#because his thought process and experiences are not catered to be applicable to and understood by myself?#GOD IF I KNOW ANYMORE#I'm not pressuring myself to like him or anything I just don't understand anything about kaneki these days and I don't know why
213 notes
·
View notes
Text

#kirby#daily kirby#my art#digital#hal laboratory#nintendo#so like aliexpress used to have a terrible reputation in terms of like quality and truth in advertising and such right#but like. amazon and etsy are swamped with bootleggers and dropshippers now too#so I figured like. can't be any worse right?#besides I know how to double check descriptions and measurements and examine images critically#I've shopped shady sites before like back when banggood was the only place to get those cute diy miniature kits#(now you can get them at regular craft store chains which is Wild to me)#but I have never opened aliexpress because everyone was always just like 'Never Go There'#(but then again these days folks are doing massive temu hauls left and right)#(so clearly norms have changed even if common perception of aliexpress has not)#I open it up and I immediately find the rug I spent an entire day hunting for unsuccessfully earlier in the month.#and a ton of incredible bootleg kirbs.#and a style of hair clip I've been hunting for for *years*.#soooo I spent the entire day in a pastel fugue lol#(I have not spent any money yet but I'm probably gonna)#(so like I can't confirm that you're not gonna get scammed or whatever just like. use common sense.)#(don't trust sale prices read descriptions/reviews when available and try to avoid work stolen from independent artists)#(that's usually gonna be on printed stuff like phone cases and posters)#(and tbh I have no qualms with stolen official art as long as the quality is as advertised)#(but there's a big difference between stealing from Multinational Corporation and stealing from Some Guy)#anyway done rambling now <3
145 notes
·
View notes
Text

Rem Saverem as that pic of Susan Kare
#my art#trigun#trigun maximum#rem saverem#rem trigun#トライガン#crying for one billion years#the more I look at this the less convinced I am it looks like her at all lmfao I do not understand what her bangs r doing in the manga#oh well i think it still looks nice in any case#women in technology core#lol#alcohol marker#colored pencil#traditional art#the colored pencil didn’t play that well with the scanner on this one :/#somehow looks both grainy and overly de-noised oops well it’s ok I can look at it in person whenever :)
714 notes
·
View notes
Text


Qijiu Week Day 1: Animal Transformation
when ur sect leader gets cursed and you gotta fix it before anyone finds out U_U not that ur sect leader is HELPING, since he seems to have the brain of dog now, too.... well at least hes soft
bonus:

#qijiuweek2023#day 1#arts#svsss#shen jiu#yue qingyuan#qijiu#hehe yqy's butt#in case u were wondering yqy pubby form is based off a wolfdog#i love how any time a weird transformation happens in anyone involved is like#there must be a Cure somewhere. i do not see it but i will FIND it#and then half the time it just runs its course in like a week
275 notes
·
View notes
Text
I'm sorry I REFUSE to believe Franziska isn't in later AA titles, especially Dual Destinies. You're telling me the moment she learns Phoenix got his badge back she wouldn't charter a flight to be first in line of whooping his ass in court?? THE Franziska von Karma, prodigy with a massive superiority complex, who was raring to go head to head with him the very MOMENT she saw him in Bridge despite the fact he was running a cold induced fever of 102.2??? Franziska would not pass up the chance to earn her rightful victory against him and what better way to do so than the moment he returns to law???? Anyways. Franziska for AA7
#ace attorney#aa7#(sort of????)#franziska von karma#dual destinies spoilers#(kind of?)#tbf it's probably for the best. the future designs are. hmmm. but there's plenty of concept art to pull from#I don't know the future games' writing cuz I keep restarting the first case of aj but there's definitely discrepancies in behavior#from what I've seen anyways. would they do her justice? she's adorable in the stageplays but like. that's different???#I'm a franziska in aa7 truther bc I can't see any world she wouldn't reappear out of pure spite and I love her so!!!
154 notes
·
View notes
Text
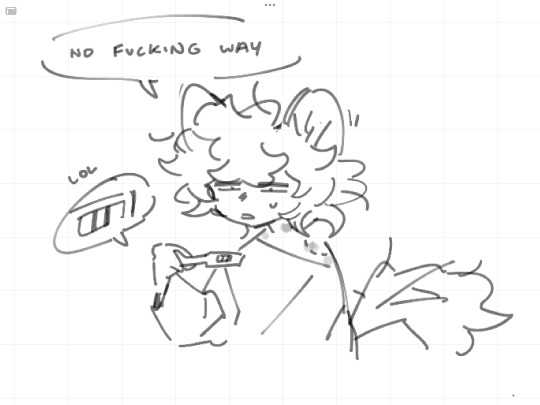
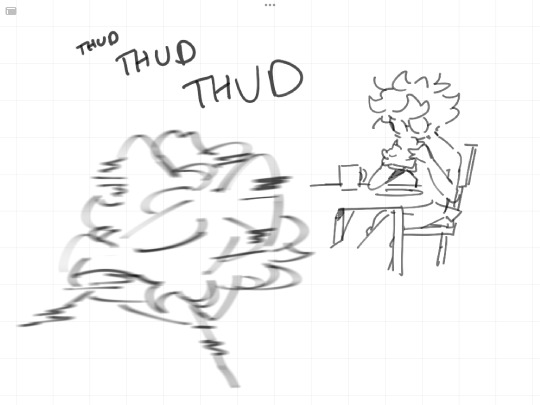

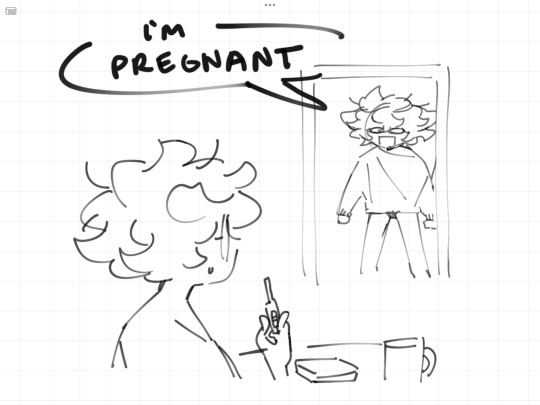

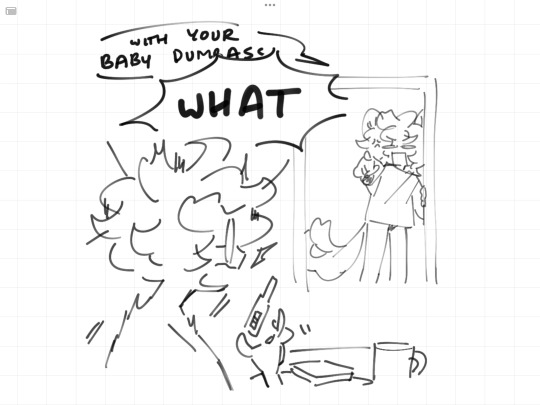
gregnant
anton belongs to @poicyss
#someone help them LMAO#im all kinds of panic induced stress rn so. woe pregant auggie be upon ye#shes very excited but also extremely fucking nervous and couldnt think of any other way to break the news#also because how do you deal with the spawn of a literal shadow creature. what the fuck do u do#im sure theyve probably discussed the possibility of being parents once in a while but not like actually intended to conceive#idk much else though ive never been pregnant. shrugs#i think her bump is probably smaller bc vincent forms as a dog before he takes on human form a couple months after being born#so the fetus is smaller.. although its more obvious when shes in her animal form so she doesnt transform while pregnant just in case#can you tell ive thought abt this a normal amount#my art#myart#doodles#my oc#friend oc#augusta#anton#suggestive#?#i mean kinda..? its implied this is after they boink but not much else#oc lore
51 notes
·
View notes
Text

Went on a mushroom trip on New Years, saw this random image on my phone and it spoke to me. He is like a deep sea organism comb jelly copepod looking thing to me
Always so fascinated by my shroomy art, it's somehow even more colorful than usual and looks nothing like how it was supposed to, lol! Definitely going in my wallpapers folder
#digital art#digital painting#cats#idek how to tag this#meme#?#high art. get it lol#<- making this the tag in case you aren't comfy with that stuff#eyestrain#that too probably haha LOTS of rainbows#tempted to tag as marine biology#maybe someday i'll try to make it more like i was seeing it but i really dig the surrealism#i've always loved surrealist/conceptual art and have wanted to make some but never have any ideas#i did meet a surrealist artist once who gave me some good tips that I still haven't utilized yet LOL should really do that#rambling sorry that's what tags are for
55 notes
·
View notes
Note
Hiya :) I've been getting into DSMP animatics, and I love seeing the different interpretations of the character designs even though I only have a vague sense of the lore so far. It's all got cool vibes!! Can I request a drawing of Ranboo or Wilbur, or maybe even both? I'm not sure if they actually ever interact in the story or not, but I'd say interpret the prompt however you want and have fun??
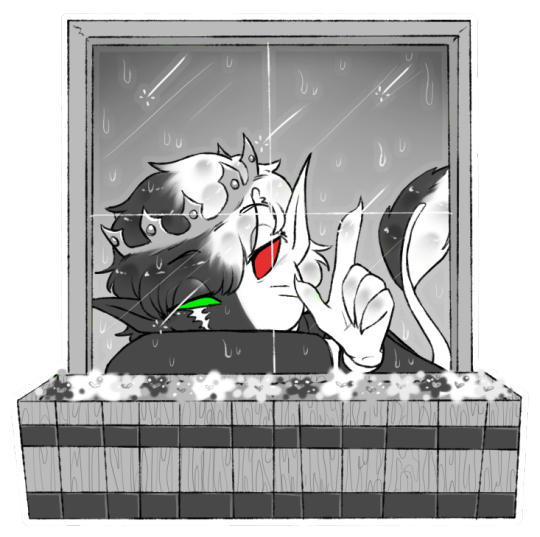
Day 19 - Stuck inside
#My art#Requestober#DSMP#Ranboo#Yeah I don't think I've seen any instances of Wilbur and Ranboo meeting either :0#Well they did meet when Ghostbur came into town after the whole thing with Techno and Phil was still under house arrest#But I don't think they had any particularly hard-hitting moments just pleasant greetings haha#Which is a shame! Then again everything is a missed opportunity with what Ghostbur didn't get to do huh haha#I never really got into Alivebur so I opted for Ranboo for this one :)#See! He and Ghostbur would've both had to hide from the rain! Lore-wise anyhow haha#In this case I was thinking of Ranboo going to visit Michael and then it starts raining#Although it would only snow where Michael is wouldn't it? Ahhh just don't sweat the details too much lol#I don't think I ever saw Tubbo's house either - and Ranboo kinda moved in with Techno too didn't he?#At least at one point he was next door I think - man it's been a while since I brushed up on my half-learned lore lol#Point is! Rain outside Ranboo inside!#Hopefully someone will come to visit him soon :) Or it'll stop raining so he can go run around some more haha#Also the kinda ghosting effect on the glass was not intentional! :0 I actually didn't notice until now haha#I think I like it though :D
87 notes
·
View notes
Last Seen Blogs

kacperkrajnik
YouTube Center
aether--system
The Aether System

dunk-or-die
Dunk'Or'Die

exceptionalbuilds
Exceptional Builds

madavega
King