#bottlecap pins
Text

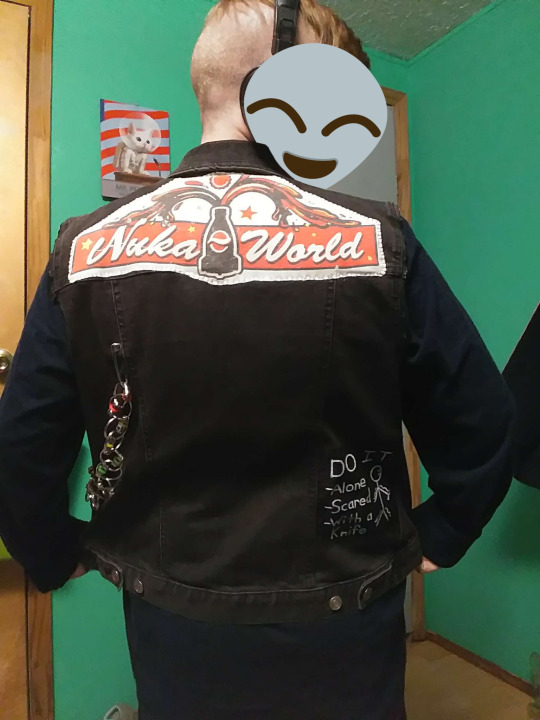
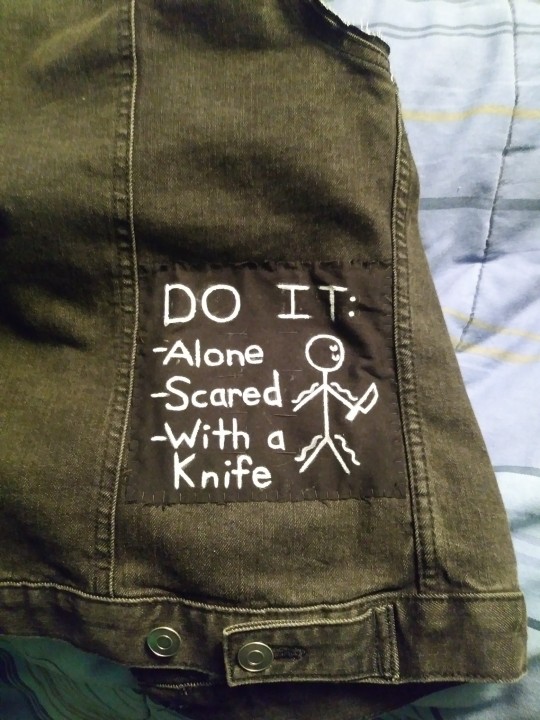
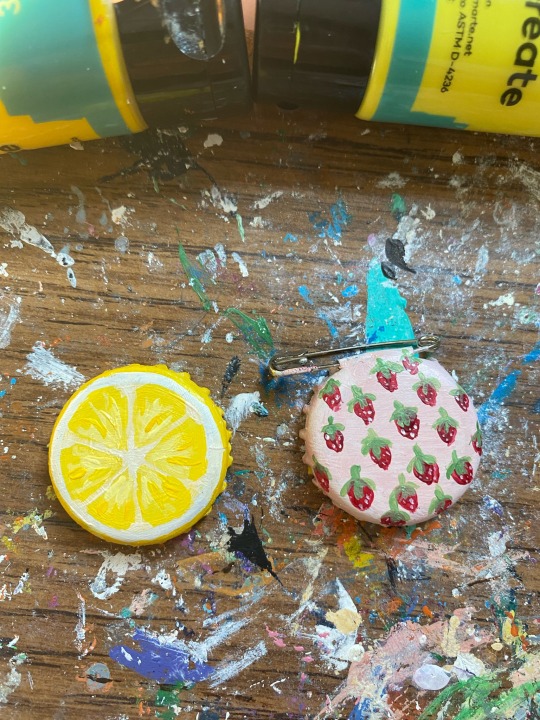
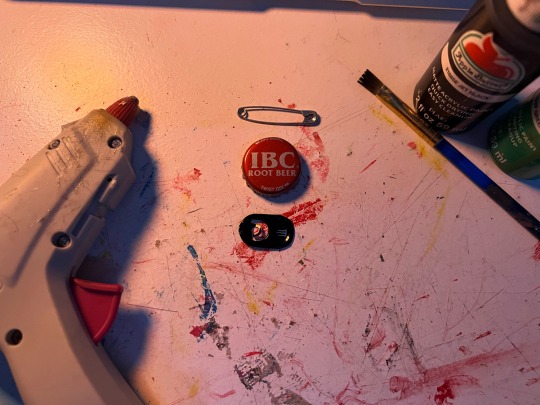
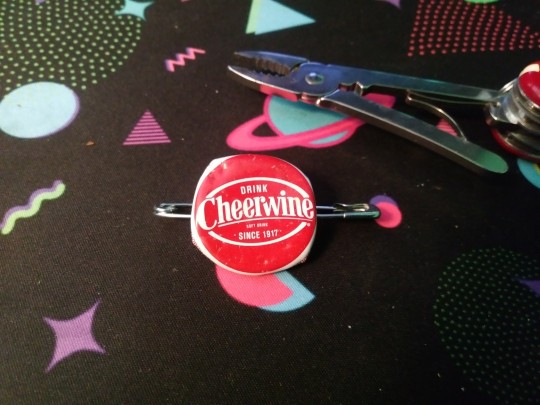
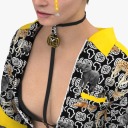
Vest update! New pins and patches!

256 notes
·
View notes
Photo
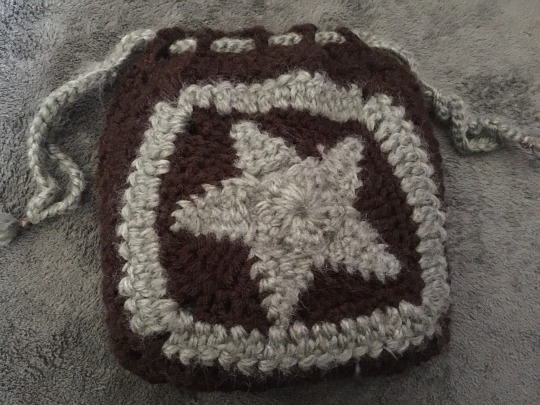


I decided to finally get around to making my own tarot cards! <|:^) I’ve never really felt like buying an actual set, because I just didn’t really feel drawn to any affordable tarot decks I’ve seen, so I made my own :)
I know they’re not the neatest work, and the offee staining ended up a little darker on some of them (or some got more faded). I also used cardboard of different thicknesses for them, since that’s all I had, but I got to make them in my style, so I still like them.
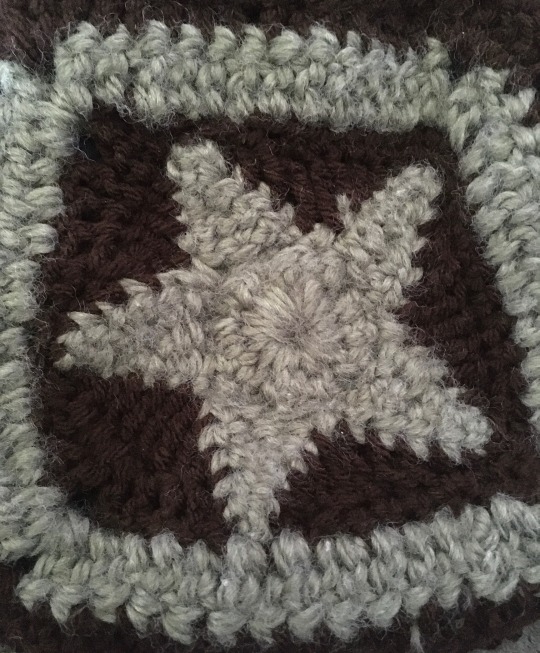
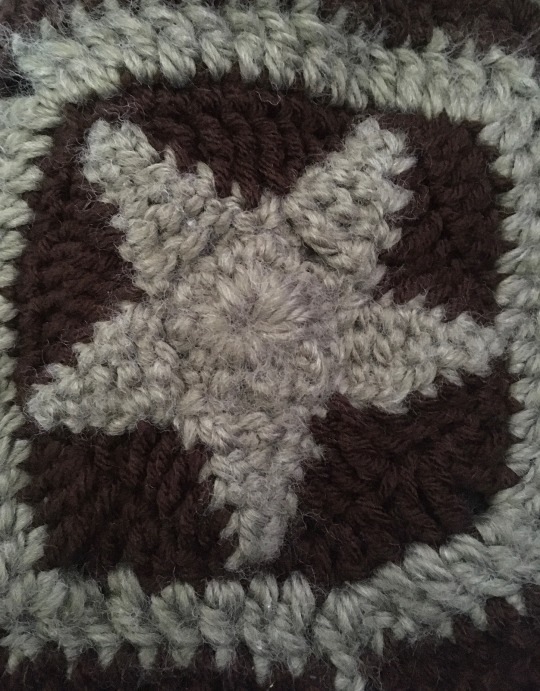
I crocheted a tarot bag to hold the cards too. I used the star granny square pattern in green and brown. I also made some bottle cap pins of a few of my favourite bands, so I included them in this post, I’ll definitely make more once I get more bottle caps and safety pins.
#tarot#tarot cards#witchcraft#my post#my crafts#my photos#crochet#crocheting#handmade#handsewn#sewing#fiber art#bottle caps#bottle cap pins#bottlecap pins#corvidcore#gremlincore#crowcore#forestcore#witch#witch diy#tarot bag#granny square#divination witch#divination#divination magic#alt diy#fairycore#goblincore#black metal
160 notes
·
View notes
Text


Some pins I have made and painted recently!
#id in alt text#art#handmade#diy#diy or die#pins#my art#acrylic painting#self taught artist#bottlecap pins#monarch butterfly#citrus
38 notes
·
View notes
Text
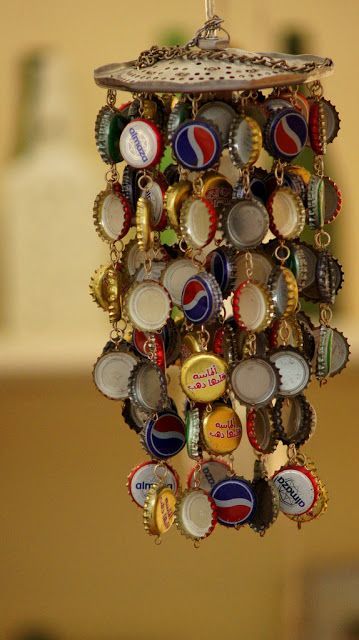
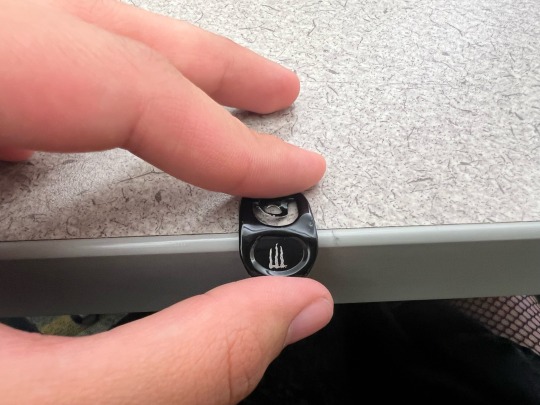
Bottlecaps
#trash#trashcore#trashy aesthetic#trashy y2k#garbage#garbagecore#bottle caps#bottlecap pins#trashy decor#diy craft#crafts
9 notes
·
View notes
Text

I love painting bottle caps. I have to boost my production of these, I pin them to my backpack and keep bumping into people in the subway so these keep falling off when I do’t notice.. I lost a good one right the other day…
9 notes
·
View notes
Text

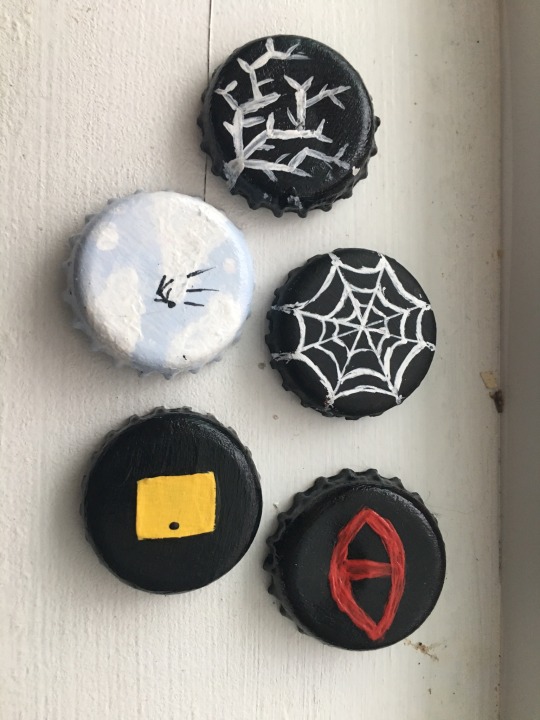
The Magnus Archives pins I’ve made! Ive done 4/14 entities! I want to do all of them in the style of the first image (simple drawing on black backgrounds). If you have ideas, feel free to let me know :DD
Its also my first time using image ids, so let me know if theres anything else i should do!
#the magnus archives#tma#art#my art#bottlecap pins#the eye#the vast#the web#the spiral#magnus archives
10 notes
·
View notes
Text


dandelion :]
#honestly not very recognizable esp from a distance but it was fun so thats okay#my art#my pins#bottlecap pins#im abt to make an erythronium seed one :] i might make a tooth lily one too but idk yet
3 notes
·
View notes
Text
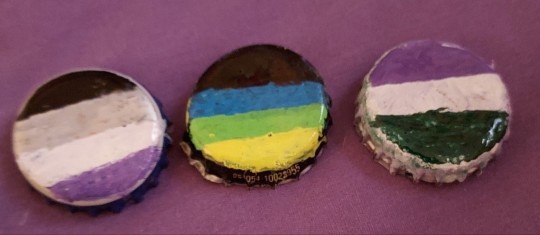
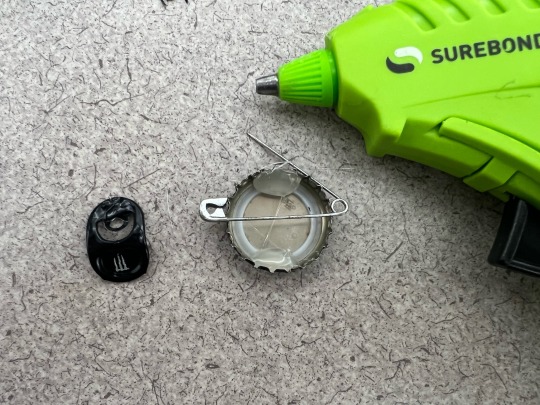
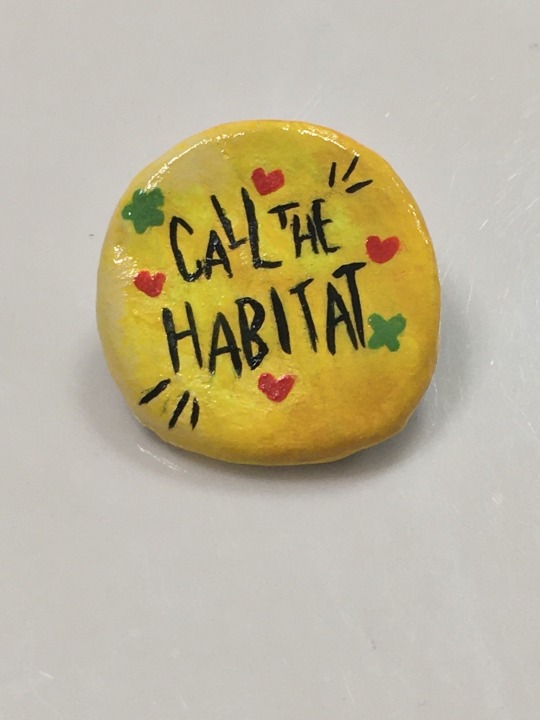
painting bottlecaps to turn into pins!! :3 they are ace, did/osdd, & genderqueer
will be letting them dry + going over w more paint for more vibrant uniform colors + then I will begin the process of adding the safety pin (need hot glue and regular glue for that though -_-)
3 notes
·
View notes
Text
[ DANNY'S TUTORIALS: BOTTLECAP PIN ]
Hi there!! I'm gonna teach you how to make a bottlecap pin since I've gotten a lot of questions about where I got mine from baby punks and others who just find them cool! I've found that a lot of people buy their pins online from companies that overprice and over-process their designs, and often times steal them from smaller businesses. Punk has been gentrified over the years, so this tutorial acts as a way to reconnect to the roots of DIY fashion made by people with limited resources and time. This is a great way to show your interests, pride in your community, and pretty much anything else you want even if you don't have a penchant for traditional art. Don't worry about it looking good, just try to have fun! At the end of the day, the shittier the job, the more punk it is.
[ Step Count : 6 ]

Here's what you're gonna need! (optional materials have a star next to them instead of a regular point):
-> hot glue gun (in replacement of pliers)
-> safety pin
-> bottlecap (unbent, preferably a twist off)
-> can tab
✮ pencil/pen
✮ sandpaper
✮ paint & paintbrush/posca pens
✮ regular Elmer's glue
STEP 1:
Gather your all of your materials and place them on your workspace. I'm going to paint mine, so I got the sandpaper, paintbrush, and paints as extra materials.
STEP 2:
If you're not going to paint yours, go ahead and skip to step 3. Otherwise, get your sandpaper and your bottlecap, then sand down the surface (A). Paint your base, draw a design with the pencil/pen, and fill it in with your paints/posca pens (B)! After I'm done painting I'll usually seal it in regular Elmer's glue to make sure it doesn't get messed up anytime soon (C). I chose a little green skull since the person I'm gifting this too likes and spooky stuff and green is their favorite color :]

[ Also sorry for the change of scenery, I had to finish at the library cause I was studying. Visiting, donating, and helping your local library is Punk As Fuck. ]
STEP 3:
What you're going to do now is set your bottlecap aside, and take out your can tab. I have joint problems and I can't use pliers, so I bend it over the edge of a table by holding it half over the edge and pushing down to bend the metal. But try not to bend it too much so your safety pin stays in place!
STEP 4:
Okay, here comes the tricky part. Like I said, I have joint issues, so I can't use pliers because they hurt my hands. Instead I'm going to set aside my now bent can tab and bring back my bottle cap, then flip it over. Place 2 hefty drops of hot glue on the bottom and top of the pin, then get your safety pin and open it so you can place it on the back horizontally.
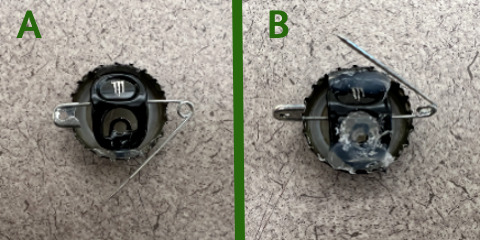
STEP 5:
Now, place your bent can tab on the back of the pin and over the open safety pin, pressing it into the hot glue drops and letting it dry for a little bit (A). If you like, you can also put two more drops of hot glue on the tops of the bent can tab for extra security (B). I also put some hot glue in the middle of the tab's opening for extra security on the safety pin. Please pardon the absolute dogshit photo quality it wasn't cooperating for some reason LMAO
STEP 6 [FINAL]:
Wait for it to dry, then you're all done!! Your very own bottlecap pin. You can attach this to bags, jackets, shirts, pants, and pretty much any material that a safety pin can glide through.

Here's the finished product, as presented by my friend D at the library (everybody say thank you D for modeling)!!
[ -> Next (coming soon:]) ]
#punk#diy punk#bottle cap pin#diy tutorial#punk rock#bottlecap#bottle caps#punk tutorial#diy#diy jewelry#diy accessories#danny's tutorials
473 notes
·
View notes
Text
Baby's first bottlecap pin
#diy punk#punk#bottlecap pins#//forgot to file the paint off it and use a smaller pin#//but hey 'tis a learning process#goopins logs
2 notes
·
View notes
Note
hello I hope you are having a good day! I was wondering if you were still planning to do international pre-orders for the woowoos? I would love to have some little guys of my own 🥹 I love your art so much!
HI HELLO!! so sorry for the late response but update: yes I am! I've just been extremely slow at it bcs of irl school + comms + imtooscaredtoapproachthemanufacturersihavecripplinganxiety bUT!! I FINALLY BRAVED MYSELF AND I DID IT!!!! I had a talk and I think I got the gist on how to go about from here so I'm getting to it!!
I'm currently thinking of making a few more merchs (iirc someone wanted a full-body standee so I'm here to serve 🫡‼️) though it'll be slow...

and I've revamped the design of my old charms, though I have leftovers from the previous batch that I'm planning to sell as grade-B charms! (like, 5-7 ish? it'd be nice if they can find a home...🥹)

(I'll reprint the miniwoof zine + additional pages and—no promises yet—a small tiny Vashwood compilation zine of my previous artworks, comics (revamped), and some extra stuff!)
I hope this will keep you on your toes...apologies for being slow abt this... 🥹🥹
#also I'm thinking of using kofi as the shop is that okay for you guys?🥹 🥹#i tried looking at bigcartel but it intimidates me sm...i need to prepare my mental before researching again.. there's lots of researching.#like i looked through abt 5 diff manu bcs i overthink alot .#i have so many ideas for merchs.. i lowkey wanna do bottlecap pins or pins and sticker sheet in general but no time...#myu blender era had their lecturer chasing them down everyday to attend his class bcs they can't focus on their schoolwork at home sobs#i hope you can look forward to it still! sorry for the slow progress!! 🥹🥹#myuask
46 notes
·
View notes
Text
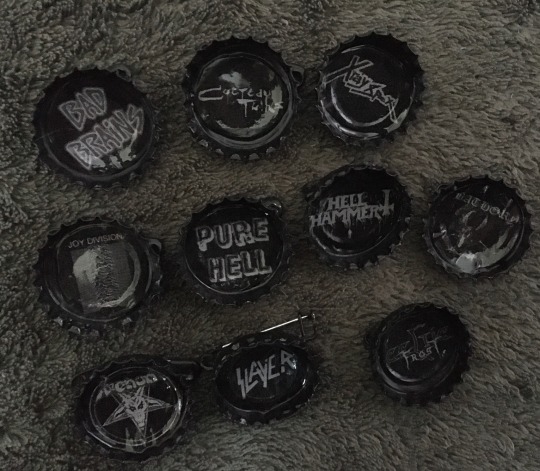

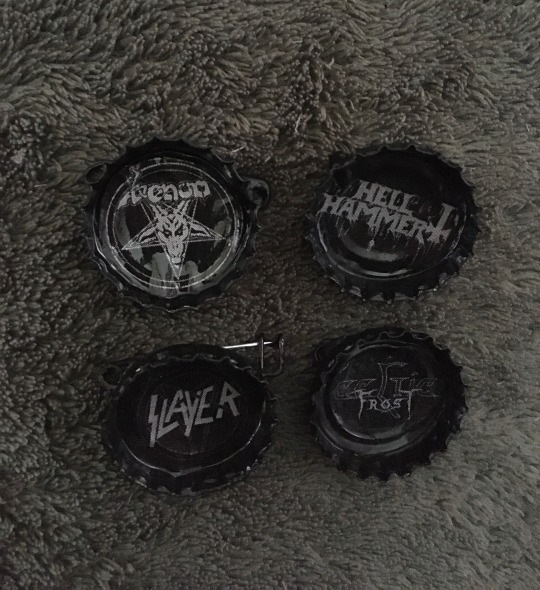
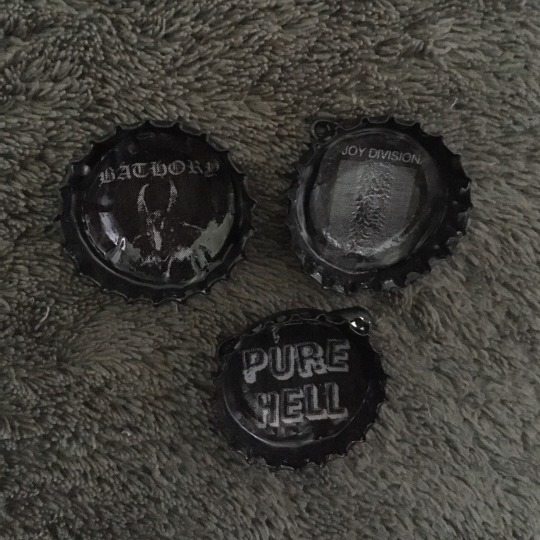

Here's all the bottle cap band pins I've made so far (and a little cermaic pig from a thrift store). I still have plenty more I want to make once I get more caps :)
#pins#bottlecap pins#bottle cap pins#my crafts#my post#bottle caps#diy pins#gremlincore#crowcore#corvidcore#ravencore#magpiecore#x ray spex#cocteau twins#bathory band#bathory#joy division#death metal#black metal#metal bands#goth bands#goth music#venom band#bad brains#slayer#bad brains band#punk diy#diy punk#pure hell band#punk band
104 notes
·
View notes
Text
Oh wait yeah forgot to post this
Can’t wait to wear this and have no one know wtf it is!!
also? I hate mixing paint >:/
#diy craft#pin buttons#bottlecap button#pinback button#smile for me game#sfm game#s4m game#s4m fanart#pizzacrustdisposal#my art#s4m
88 notes
·
View notes
Text

A few days ago I made a teensie pin based off the little icon from legends! Its a bit messy but I am actually happy with how it turned out!
#i pretty much used whatever materials i had around like colored pencils. post it notes. markers. a safety pin and a bottlecap#i love the teensies so much they're so cute ♡#rayman#crafts#idk how to tag this so ill just put in my art tag#dreaming doodles
27 notes
·
View notes
Text
absolutely going insane frothing at the mouth spinning in circles (chonny jash has taken over my consciousness)

#chonny jash#chonnys charming chaos compendium#music#hms#heart mind soul#also hi hello im here in the fandom#i have made so many bottlecap pins i shit you not#cw gore
56 notes
·
View notes
Text
I love turning trash into punk accessoires thank u
5 notes
·
View notes
Last Seen Blogs
danddclothing-blog
D&D Clothing

sonikko-blog
Cuisine

bulbiferumlily
A sunflower
vicariousanti
salem
clovergazette
Nox