#and convince yourself Will is irrelavent?
Text
Trying to comprehend how Will Byers antis make it through s1-2 of Strangers Things.
#byler#stranger things#will byers#even s3-4 for that matter…#but especially for s1-2#how do you watch those two seasons#and convince yourself Will is irrelavent?#i just know they’re skipping 99.99% of the show#bc idk how you could watch st and enjoy it while thinking Will is irrelavent 😅
135 notes
·
View notes
Text
Dude Herman reviews CINEMA 4D Studio R18
I’ll speak more about the personality object, and also some associated with R13’s other new functions later, but first we will begin with CINEMA 4D’s new rendering engine.
Let us get Physical
While CINEMA 4D’s old standard renderer remains available and may be invoked to provide your scenes, there can be an important new plus enhanced rendering engine on this latest version of CINEMA 4D known as the particular physical renderer. The title of this new renderer is an important hint to understanding what this does. It recreates accurate photo-realistic physical effects centered on real camera attributes such as motion obnubilate, depth of field plus lens distortion.
These bodily camera effects are managed with authentic, real-world digital camera parameters, which become obtainable once the physical renderer is selected for example f-stop, focal length, shutter swiftness, and ISO - functions you would expect in order to find on the bodily camera.
Here’s the factors i like about this particular new capability: Rather compared to just dialing in irrelavent numbers to control such things as motion blur and key length, those with encounter operating real cameras within the real-world can right now draw upon and utilize their considerable knowledge inside CINEMA 4D.
This means that will CINEMA 4D artists plus animators who are educated with how directors plus DPs talk can consider their comments and utilize it for this second item stage of production, producing for a more incorporated workflow.
Working in the particular physical renderer, the performer will inherently know that will different combinations of shutter speed (how long the frame is exposed in order to light) and f-stop (how much light is permitted to enter the frame) affect how much movement blur is apparent within a scene and also exactly what objects are in sharpened focus or blurred out there (otherwise known as level of field). CINEMA 4D’s physical renderer enables customers to consider in conditions of a “physical digital camera, ” a concept a lot more easily understandable to the producer, director or just about anyone else included in production.
Varying key lengths on the bodily camera.
Motion blur can be an important factor within creating convincing looking computer animation and is also important when merging live actions and CGI. In previous versions of CINEMA 4D, before the physical renderer, there was two ways in order to achieve natural looking movement blur. The first had been to use scene movement blur (renamed Sub-Frame Movement Blur in version 13) which looks good, yet is extremely costly within terms of render period. Another option is in order to use a strategy known as vector motion blur, or even VMB, which is quick and offers decent outcomes, but less realistic. VMB is frequently used in association with Consequences and the particular ReelSmart Motion Blur connect to from RE: Vision Results.
The new physical renderer, however, now offers upward accurate, motion blur within considerably less time compared to scene motion blur. Within addition, shadows cast through moving objects appear normally blurred, which was unattainable with VMB. Below can be really a simple check that I setup associated with a physical camera delivered with a shutter position of 180 degrees plus subsequently with a shutter angle of 360 levels. Notice the effect that will the different shutter sides have on the resulting motion blur.
You do not have to apply Worldwide Illumination (or GI) individually to your render choices when using the bodily renderer since it’s constructed in - light will get bounced around indirectly within your scene automatically. As an aside, you may still wish to use the regular renderer unless you require it since it may be faster in specific cases.
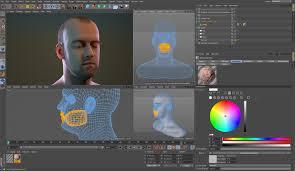
Getting into Character
R13’s innovative new personality tools are very effective. As a result, I actually wouldn’t be surprised in order to get a lot a lot more character animation made upward of CINEMA 4D within the near future. The particular most crucial of these types of character animation innovations : and one can claim perhaps the most essential of all the improvements to R13 itself, may be the new character object.
Typically, before one could also consider animating a personality, it had been essential to first construct the skeletal rig, bind this to your model plus carefully weight the factors from the mesh in order to the different joints within the rig.
This had been no easy task, except if you’re highly skilled. The rig is really the highly complex and comprehensive construction that is composed of many hierarchies associated with joints, nulls, targets, movement and controls. Skeletal rigs often implement an sophisticated technique called inverse kinematics (or IK) that enables you to do factors like move a hands around and also have got the rest of the particular joints in the supply follow automatically. This extras you the need in order to animate each bone individually while also having the particular advantage of making the particular motion look natural.
Producing a good character rig is definitely an artwork unto itself as well as a correctly designed rig should conceal its complexity from your animator. It’s no surprise, therefore, that means building the complete rig from the begining can take a great deal of time. Days, in case not weeks, of cautious planning and hard function will often be needed, not in order to speak of time this takes to fully realize all of the elaborate concepts involved in the construction. Of course this particular assumes that you have got already gained an effective knowing of the mechanics associated with human anatomy and locomotion and have already healed the considerable hurdles included in learning to design.
To help simplify the particular down sides of rigging, MAXON has established the particular character object, which enables you to definitely immediately add an expertly designed skeletal rig for your own model simply by sketching upon predefined templates to get components such as spines, arms, legs, hands plus fingers. In just the few clicks, voila! You have got yourself a completely built and articulated rig that would have used a very long period to create yourself.
After producing the rig, you make use of handles to customize plus adjust it to suit the proportions of the particular model. During this procedure, any adjustments made in order to the rig will immediately be reflected symmetrically upon the other side along with the ability to change it off. To join the mesh to the particular rig, you merely drag the particular icon from the nylon uppers into the binding component of the rig : CINEMA 4D will utilize intelligent auto-weighting to the particular points on the nylon uppers (which you are free to customize later). As soon as done, you will end up being off and animating within a fraction of the particular time it might have used you traditionally.
Simply click on to build a brand new rig, pictured here following to a simple design.
Drag around the circular handles to make the particular rig fit the nylon uppers precisely.
Soon you’re prepared to begin posing plus animating.
Bipedal rigs usually share similar characteristics, varying mostly in where the particular joints are placed. Nevertheless, as you might anticipate, significant differences exist in between bipeds, quadrupeds or millipedes. Therefore, the character item contains templates for numerous different types of animals such as bipeds, quadrupeds, fish, insects, birds plus reptiles. You can develop your own personal rig templates to get others to make use of. Additional themes are being created that will be implemented within the future by MAXON and others. Components can be combined as properly, so if you’re functioning on a model associated with the winged horse Pegasus, you can add the particular wings component to the quadruped rig.
There are usually also rigs in CINEMA 4D, which are ideal for common motion catch and animation interchange types for example BVH, FBX plus Mixamo.
Once a personality rig is to establish, you might want to make use of the exciting brand new CMotion object. CMotion can be excellent to create stroll cycles and, in reality, many different kinds associated with cyclical motion. With CMotion you are able in order to create a customized stroll cycle for your personality by adding hubs plus targets. Once you complete, you can apply that will motion to the personality and make it stick to a spline path all through your scene. This can be all done without getting to worry about the particular massive amounts of keyframes and f-curves that are usually ordinarily necessary when carrying out this kind of function.
There’s also a brand new muscle system in R13: muscle objects can end up being placed in your design and anchored to the rig. The muscles are usually used to deform the particular mesh or skin through the character and simply by default, these are set in order to render. Their visibility may easily be turned away from since, probably, you will certainly only use them in order to affect the mesh. Here is a good example associated with how to use muscle tissue: You can place 1 where the bicep must be and tell it in order to develop when the forearm curls while lifting the heavy object. In this particular manner, you can duplicate the effect of the component of an arm increasing the size of as the muscle flexes beneath the skin. An efficient example of using muscle tissue in R13 is noticeable on this render associated with a walking dinosaur.
Subwoofer Surface Spreading
CINEMA 4D R13 now includes a good advanced Sub-Surface Scattering (or SSS) shader. SSS can be useful in accurately object rendering surfaces that absorb plus diffuse light within their particular interior. Did you actually put your hand more than a flashlight? Using an effective enough flashlight, you’ll observe that the light can be absorbed to some level by your flesh so that your hand seems in order to almost glow with the particular light. Why’s that? Considering that some of the lighting penetrates the surface associated with your skin, it actually is then diffused or even scattered within your hands. That is a great example of what SSS achieves enhanced realism; this can be seen upon many surfaces including plant life, marble, milk and thin-skinned aliens.
Various amounts associated with SSS on a design of a horse.
XRefs
R13 has made significant improvements to XRefs (external references) which are really useful, specially when working within a collaborative environment upon large-scale projects. Imagine the particular project is a technology fiction movie that occurs on a space place. You may have somebody working on the home furniture while another artist produces a robot that moves about in the scene. Nevertheless another person might end up being working on the device panels and so upon.
But precisely how would a person work concurrently on the particular project with a restricted deadline? Well, you can pass the files about to all the group members so everybody can do their part, yet as you can visualize, that would be a good extremely inefficient way in order to do it. Merging different projects into one can be also time-consuming with the particular added potential to backfire if the wrong data files are mistakenly incorporated.
When you might have guessed, XRefs would be the method to go. Simply place, XRefs are references in order to other Cinema 4D tasks that are embedded within a “master project”. (Other design programs use the particular same term. ) To get example, the individual creating the robot could create his file be a good XRef inside of the particular master space station task. In this way, he or she is able to keep on working on the automaton, even as the sleep of the project can be done. Inside the learn project, it will probably be constantly up-to-date whenever the XRef can be changed or saved.
A person can work with a good XRef just as a person would some other object, simply by animating its components, incorporating materials into it or even applying expressions into this. Similarly, the furniture, instrumentation and even the illumination rigs and textured items can all be XRefs, all coming together within one grand file exactly where one could have a look at just how the scene is arriving together just by starting it.
When importing a good XRef from an outdoors source, you are capable to decide whether a person want to import the animation or materials. To get instance, suppose the automaton has a little antenna that twirls around upon the top from the particular head. The person who also created the XRef can set this up outwardly, but you might desire to ignore it, since well as any components that were applied in order to it, and choose in order to import a stripped lower, untextured version of the particular XRef instead. You can even determine whether any changes produced to the XRef in the master project will influence the reference or stay only inside the learn project.
When Objects Clash
R13 also includes the new Collision Deformer which usually, when applied to the subject, will deform the mesh accordingly when this collides with another item. This can be helpful when making things such as mattresses and cushions. To get example if something large is set down upon a bed, such since a bowling ball or even a character’s rear finish, the collision deformer will certainly cause the mattress in order to interact with the collider and its mesh can be going to be deformed accordingly. Within the crash deformer’s parameters, there are usually options to make a good object bounce back within shape after a crash (as it would within the case of the mattress), or maintain the particular new deformed shape : useful in making factors like footsteps or car tire tracks in the snowfall.
The checkerboard surface can be deformed by the world due to the crash deformer
Incidentally, the crash deformer is not centered on soft body design, but rather on angles. This means that the effect does not need you to set upward physics simulations.
There’s A lot more
There exists a great deal more that is brand new in CINEMA 4D R13. Here are a couple of other features that I actually think are key enhancements.
There are many stereoscopic enhancements, so if you are doing 3D you’ll certainly want to upgrade. These types of include the opportunity in order to convert any camera in order to some parallel, on-axis, off axis or radial stereoscopic digital camera. Stereo images can furthermore be previewed directly within the 3D editor plus may be rendered since merged stereoscopic images or even separate images for every camera. The picture viewers now also supports the particular playing of stereo makes.
New Anti-Aliasing filters right now allow you to accomplish higher quality results simply by using the advanced Mitchell and Gauss algorithms.
Currently known for its user-friendly user interface, R13 contains a quantity of improvements. New cursor-based navigation uses the place you click as the particular point of interest whenever zooming and rotating Program. Drawing. Bitmap model. Within the past, the viewport would pivot around the thing that was selected and if this particular were far from exactly what you were viewing, navigating around the portion associated with the model you had been looking at might end up being difficult and confusing. Upward to now, I believe this cursor-based navigation can be good way to move and much more dependable in its results.
Python and COFFEE scripting vocabulary integration has also already been improved. Scripting languages provide users immense power within customizing and extending the particular capabilities of Cinema 4D to ensure that experienced programmers and developers may create customizable solutions to get specific tasks and apply them into their sewerlines. Notably, Python plug-ins plus scripts now appear together with those created using C++ and COFFEE APIs.
CINEMA 4D had been experienced at exchanging data along with After Effects. Past variations of the program permitted you to definitely result entire AE compositions comprehensive with 3D camera movement, lights, object buffers and also 3D coordinates of aeroplanes that can be inter-changeable out for Consequences levels. Version 13 contributes in order to this by adding assistance for CINEMA 4D’s phase object, time marker foreign trade and support for twenty nine. 97 frame rates.
Bottom line
CINEMA 4D has turn out to be a mature and able product that steadily provides improvements. The new functions such as the bodily renderer, character object, CMotion, SSS, XRefs are all of innovations that are helpful, important and will conserve you time.
Depending upon the work you perform, you are able in order to choose from several tastes of CINEMA 4D. Leading has got the essentials to get you began. Then there’s Broadcast plus Visualize and lastly the particular Mother of all CINEMA 4D packages, Studio, which usually has everything the some other packages include and a lot more, such as the particular character tools. In situation you are thinking regarding doing character animation, a person should get Studio.
To get those considering doing movement graphics and broadcast style, however, CINEMA 4D Send out should cover all the particular bases. It retails to get $1, 695. Upgrades through CINEMA 4D Broadcast Edition 12 are $695. Studio sells for $3, 695 and the upgrade through Version 12 is $995.
You should consider obtaining the Annual Licensing choice, or MSA. It’s essentially a yearly subscription, which usually entitles you to all of upgrades. It costs $650 for Studio, so a person find yourself saving around $350 in the normal upgrade cost.
Regardless of what edition you get, CINEMA 4D has certainly earned the place among the many respectable 3D software rooms out there. Actually this has recently been called a recipient of the particular Computer Graphics World SIGGRAPH 2011 Silver Edge Prize.
0 notes
Last Seen Blogs

ceo-of-hootlingo
🦉Hootlingo🦉

forevasil3nc3d
†.for3va-sil3nc3d.†

foodkittykat
kitty 🎀

wutangmelodys
Melody Nikki

specialgirlinherownworld
This is our story in the making.