#also thank you procreate liquify and flip tools…
Text
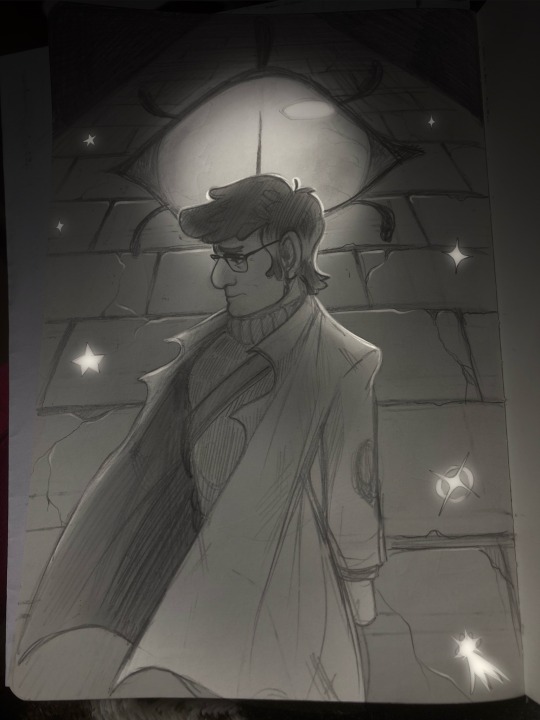
“I’ve got my eye on you, Sixer.”
A little bit of menacing Bill and troubled Ford for Forduary! :)))
Edited the pencil drawing to fix some features, add detail and highlights, and push the contrast a little.
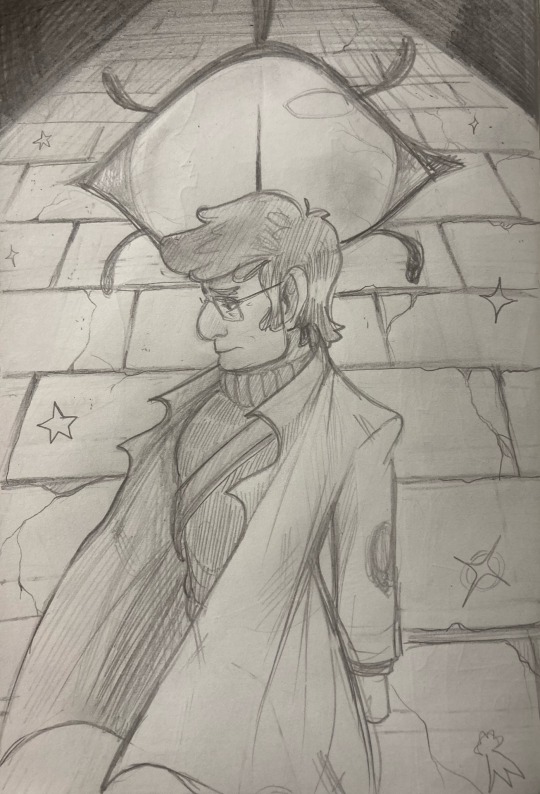
The unedited version! :))
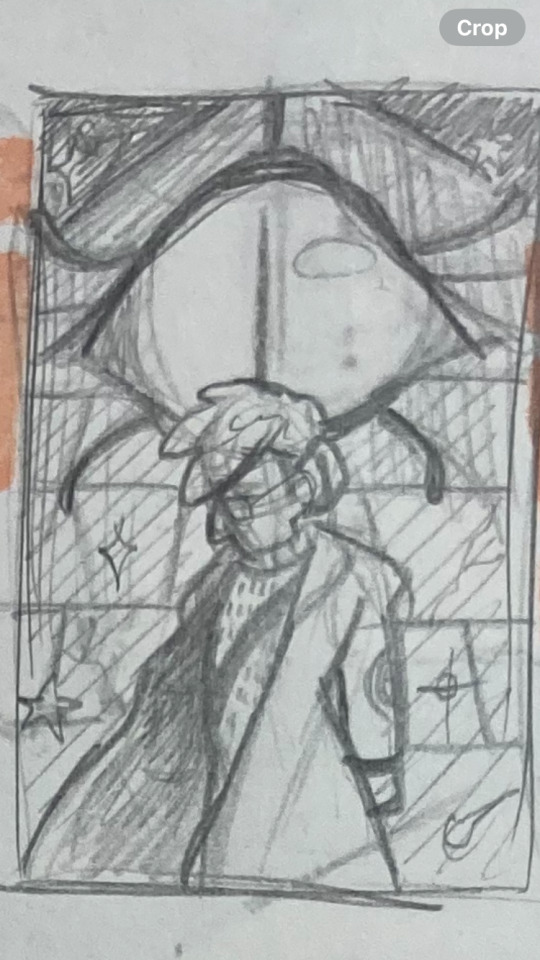
Goofy thumbnail:
#forduary#stanford pines#ford pines#bill cipher#berrybanana#they have a complicated history#muse and artist#god and devotee#berry gf art#also Stan my beloved I didn’t mean to put so much less effort into you-#I just have actual drawing time/motivation now#forduary 2024#also thank you procreate liquify and flip tools…#helping me fix all my mistakes#forduary2024#tag it as you see it folks#my favourite divorcees#billford#but not explicitly??? or necessarily-#They're just homoerotic and nemeses your honour
311 notes
·
View notes
Note
Prima you're so talented! The way you do lighting, coloring, shading and even how you draw that helps guide the viewer's eye onto a focus point is just beautiful.
Is there any tips/tricks/advices you could so graciously bestow onto others who are struggling?
If there was advice you could give your past self about drawing, what would it be and why?
Thank you in advance Prima, and as always, keep up the amazing work! :)
~With love <3
Thank you for the ask, and thank you for the compliment, you’re very sweet!
Im not the holder of the universal truth, so what I’m about to say is to take with a grain of salt, but here’s what’s working well with me and what I learnt:
I know this has become a joke among the art community, but I flip my canvas a lot lol. The eye tends to get used to the image it sees, so it’s getting harder to spot mistakes as you keep working on your piece.
Learning values!! From the moment I started working in grayscale, it made me realize how important it is to understand how values works, and how they will define your entire piece. Values are directly linked to the light, which is the most important part of a painting, it’s what will give your artwork « life » and its dynamic. Lighting is my first priority when I start something, I always choose a light source first and then I start the process. Learning how light works allows you to understand how it will affect and interact with its environment, how it reflects on some objects, and it helps a lot to construct an homogeneous piece. There are different types of lighting, with variable degree of intensity, and they will set the mood you chose for your piece.
When I start a sketch, I work with shapes first, I make a very messy line work and exaggerate curves instead of trying to make a perfect lineart first. The goal is to « catch » the dynamic of the pose, and to emphasis where the eye is supposed to focus on. It helps to get the proportions right as well.
Now tools speaking, I use Procreate, and I rely a lot on the liquify tool, to make minor changes on my shapes, the lasso tool is very useful to create sharp/smooth edges and for a lot of things actually, to work on some areas without touching their surroundings, the smudge tool, Gradient maps/color balance/curve/Hue settings are pretty uselful throughout all the process, I have no real advice for that, just tinker with it and see what fits you the most. And for the layer modes I use Multiply/Overlay mainly for the shades or to add colors to my grayscale thumbnail, and color dodge/screen/add for the ambiant light, vfx and rim light.
To my past self, I would tell to learn the theory alongside the practice. It’s a lot easier to understand how things work. To try everything, even if it might fail, even if it might take time to learn it. I think that’s the only real advice I can give, try again and again, do not feel discouraged by failure and if things become too overwhelming and if you start feeling you might never succeed in the task, just take a break, do something you know you’re good at, it will boost your self confidence and you will go back to the previous task with renewed confidence, and more willing to keep trying. Learning is a long process, we learn things throughout our entire life, so be patient, you have your whole existence to succeed. Do things at your own pace and even though it’s a completely human thing to do, try to not compare yourself with the others. They also had their hardships, and they also worked hard. Do not be afraid to get inspiration from them tho, we are all influenced by something or someone, so if you want to recreate something you saw, for your own learning process, there’s nothing wrong with it.
I hope this helped, I’m sorry if some things didn’t really make sense, I suck at explaining and at synthesizing. Have a wonderful day! ❤️
36 notes
·
View notes
Note
do you have an idea of a checklist for learning how to create digital art? like i know practice is essential, but i don't really know where to start or where to go from there. thanks so much xox
I think I can toss some stuff out here that might be of use. Assuming an artist learning digital art starts from the beginning–owning a tablet & drawing program but not knowing how to use them–here’s an inconveniently long list of stuff that could help them.
TL;DR: 1, mess around till you’re used to drawing digitally. 2, study and create ad infinitum. 3, a bunch of tips that are pretty hard to TLDR so you should probably just go over em. Step 2 is basically what you asked me NOT to tell you (“practice”!), but unfortunately it’s all I know how to do :,(
1) If you own a tablet that you plug into your computer (i.e., you don’t draw directly on the screen), feel free to spend a few weeks or even a month+ just getting used to it. When you first start out, it’s really freaky drawing in one place and seeing things appear somewhere else, but trust me in that you won’t even notice the disconnect after a few months of consistent digital drawing. I’ve been painting digitally for about 2 years now, and it’s actually slightly easier for me to draw digitally than traditionally. [If you have a cintiq, or you use an iPad with Procreate, or something similar, then you probably don’t have to spend as much time in step 1.]
Keep in mind that it doesn’t matter how good you were with traditional drawing when you start digital; the mental disconnect you have will make it very difficult to think about proportions, values, edges, colors, etc. You’ll probably notice yourself making mistakes that you wouldn’t normally make on paper. Don’t worry about them, just keep drawing as you usually would. Digital you will catch up to traditional you in time.
For now, get used to blending colors, drawing somewhat steady lines that go in the correct direction, and fooling around with brushes and brush settings. If you come across a brush that you like (easy to work with + pleasing results), it may help to stick with it as you continue to learn. Digital doodles and sketches are good for this stage; though try to keep doing traditional work so your base art skills don’t atrophy.
If you’re just starting out with Photoshop or Sai or Krita or whatever software you’re using, you’re gonna be intimidated by all the funky buttons and settings that you first see. If it makes you feel any better, I use maybe 0.1% of the tools that Photoshop offers me. When you start, all you need to worry about is the brush tool and control-z, maybe the eraser too.
2) Do studies as well as pieces from imagination. You can move into step 2 as early as you please; you don’t have to wait until you think you’ve become “skillful” at digital drawing (in fact, this step is what will probably help you become the most comfortable with digital). It’s alright if your colors are icky looking and your values are off (tip, occasionally turn the saturation of your drawing to 0 to check the values), because as long as you keep studying reality and appealing art & continually learn from your mistakes, you’ll get better.
Always remember to study or at least appreciate the qualities of art you enjoy. It’s the same thing that people always tell writers–you have to read a lot to write well. You probably shouldn’t shield yourself from the influence of other artists; while you may think that this action would help you develop artistically in the manner most true to yourself, in reality the vast majority of the process of learning art will be honing in on what you find visually pleasant so that you may, in turn, express your artistic taste in your work. If you look at other people’s art, you can pick out tiny aspects of it that you like and incorporate that into your style. It’s a bit trickier to build a style without the “help” of other artists, though you can always turn to nature for help. On that note, I also recommend referencing nature as much as you can, because we as human beings are sort of wired to find natural designs, colors, and structures beautiful. Look at nature for the universally beautiful, and look at art for the subjectively beautiful (i.e., enjoyed uniquely by you).
If you find yourself getting burnt out pretty quickly, then just paint/draw simple and small things for period of half an hour to 1 ½ hours a day (and switch back to traditional). You can spend this time mapping out proportions, creating thumbnails of values/colors, drawing linework, or whatever. Add complexity to your pieces as the months go by, and if you already have a decent foundation in drawing aim to create somewhat finished pieces after maybe four months to a year. Please note that the second part of that sentence was something I completely made up out of my head, because I’m trying to quantify pretty unquantifiable concepts such as a “decent foundation in drawing” and a “somewhat finished” piece of art. If you find it unrealistic, or just too easy of a goal, disregard it entirely. It can take you half a decade to learn to make finished digital art, or you can get it down in a couple months.
3) Fun fact, there’s not really a step 3 as you stay in 2 forever, always studying and creating. But there’s a few other things about digital art that you ought to know, so here they are:
• If your computer doesn’t make a fuss about it, I’d recommend working on a decently large canvas (at least 3000 by 3000; I personally prefer 6000 by 6000). You’ll get less defined edges and colors if you go below 1000 by 1000, from my experience.
• If you have a tablet with pressure sensitivity (you probably should otherwise digital painting is kinda hellish), go to your brush settings and set ‘transfer’ to ‘pen pressure.’ This is what makes it possible to blend.
• If you’re having trouble matching colors while studying, you can always color pick the ref (in photoshop: bring the pic into PS and use the eye dropper tool) and compare its colors to your colors. Some people add too much red to their skin tones, some people draw their highlights with overly desaturated colors, some people make trees and grass in their landscapes too green; whatever the case, take note of and correct errors that you consistently make.
• Get used to using the transform/warp/liquify tools (liquify is technically a filter but you get what I mean). They’re lifesavers for fixing proportion mistakes that you’ve only noticed 8 hours into a piece.
• Give layers a shot. I only work on one layer, but I’ve heard from people who divide their piece up into multiple layers that they’re damn useful (until you draw on the wrong one).
• Flip your canvas horizontally every once in a while to make sure stuff hasn’t gone awry.
• Screw around with color modes; they can do some really fancy things that are difficult to duplicate with normal digital painting, let alone traditional. On the topic of colors, don’t be afraid to use somewhat desaturated colors (near the center of the color picker square in PS). There are some very aesthetically pleasing color combinations that you can make out of somewhat dulled colors.
• If you’re using PS, bind ‘step backward’ to control Z, not ‘undo.’ This is under keyboard shortcuts. Set up a bunch of shortcuts that are the most convenient for you–personally, I only keep my left hand near the lower left region of my keyboard (my right hand is away from the keyboard and off to the right, drawing on the tablet), so I have all of my necessary shortcuts in that area.
This was a bit longer than I expected, but I figure that someone out there can get something out of it. Cheers to you, if you do.

#asks#digital art#art tips#art help#aesthetic#black and white#illustration#beauty#how to#artists on tumblr
8K notes
·
View notes
Last Seen Blogs

alberichw
Topless high cut panties

a7mdmaged
ثوس سبوك ماجا

akislays
mothx (Crowley's therapist)

ayumuhanyu
Hanyu

gendermaterials
gendermaterials