#Watering the plants regularly helps to grow healthy plants means keeping the soil moist. But the sky flower plants cannot tolerate waterlog
Text
Thunbergia
The Thunbergia plants are prized by plant enthusiasts & gardeners for their lovely flowers & beautiful foliage. This thunbergia plant named after the Sweden Botanist Carl Peter Thunberg for his immense work in the documentation of Thunbergia plant species.

Plant Growth Habit
This plants are excellent creepers & flowering plants belongs to the Acanthaceae family with vibrant color flowers. This plant commonly named as clock vine & sky flower.

Sky Flower
The attractive sky flower plants contain 100+ plant varieties. Flower colors are blue, white, orange & yellow. This plant has a bushy & semi-climbing structure with a woody stem. Feathery flowers appear with yellow or center. In addition to this
it is fast growing plant that reaches up to a height of 6ft from the ground.

Clock Vine
The clock vine plant's popular varieties are thunbergia grandiflora, thunbergia erecta, natalensis, alata & dwarf varities.

Thunbergia grandiflora
The grandiflora plants are native to India with large leaf foliage with lavender color flowers. Long roots with deep tap root system. It comes under annual plants.


Thunbergia natalensis
It is fast growing creeper plant with white & light blue colored flowers. And the plants are native to Africa. Thunbergia natalensis has trumpet-shaped flowers that are commonly called natal blue & natal white flowers.

Thunbergia erecta
It is a twinning erect perennial shrub with ovate dark green leaves & velvety purple flowers. It is also rapidly growing creeper plants.

Soil
The Bush clock vine plant loves to grow in well-drained soil rich in organic matter. These plants tolerate a wide range of soil but avoid growing in heavy clay soils.

Benefits
These bush clock vine thunbergia plants are great for foundations, borders, beds, hedges & other landscape values.
There are no serious pest, disease & nematode issues for this creeper plant.
The Thunbergia erecta plants used in the treatment of anxiety, depression & insomnia issues.
Bush clock vine has anti-oxidant & anti-inflammatory properties.

The creeper plants grow on walls, trellises, fences, and other plants. And they are popular in gardens as they add visual interest and provide good greenery look.
There is no alternate for Green so far!
#Thunbergia grandiflora#The grandiflora plants are native to India with large leaf foliage with lavender color flowers. Long roots with deep tap root system. It co#thunbergia grandiflora#Thunbergia natalensis#It is fast growing creeper plant with white & light blue colored flowers. And the plants are native to Africa. Thunbergia natalensis has tr#thunbergia natalensis#Thunbergia erecta#It is a twinning erect perennial shrub with ovate dark green leaves & velvety purple flowers. It is also rapidly growing creeper plants.#thunbergia erecta#Soil#The Bush clock vine plant loves to grow in well-drained soil rich in organic matter. These plants tolerate a wide range of soil but avoid g#thunbergia grandiflora soil#Potting Mix- Garden soil+30-40% compost +steamed bone meal +20% of cocopeat if needed alone.#steamed bone meal for clock vine#Water Requirement#Watering the plants regularly helps to grow healthy plants means keeping the soil moist. But the sky flower plants cannot tolerate waterlog#watering for sky flower#Sunlight#The bush clock vine plant thrives well in full direct sunlight with partial shade.#clock vine#Pot Size#This creeper plant requires a pot size of 6-8'' while planting. After one of planting change the pot size to 12'' with good drainage holes.#sky flower poting#Propagation#The thunbergia varieties are easily propagated through stem cuttings. Select the non-flowering#healthy stem and make a clean cut just below a node. Gently remove the lower leaves from the plants. And place the plant cuttings in a plan#thunbergia grandiflora propagation#Pruning#Regular pruning helps to keep the plants in a compact structure.#pruning of sky flower
0 notes
Text
Thunbergia
The Thunbergia plants are prized by plant enthusiasts & gardeners for their lovely flowers & beautiful foliage. This thunbergia plant named after the Sweden Botanist Carl Peter Thunberg for his immense work in the documentation of Thunbergia plant species.

Plant Growth Habit
This plants are excellent creepers & flowering plants belongs to the Acanthaceae family with vibrant color flowers. This plant commonly named as clock vine & sky flower.

Sky Flower
The attractive sky flower plants contain 100+ plant varieties. Flower colors are blue, white, orange & yellow. This plant has a bushy & semi-climbing structure with a woody stem. Feathery flowers appear with yellow or center. In addition to this
it is fast growing plant that reaches up to a height of 6ft from the ground.

Clock Vine
The clock vine plant's popular varieties are thunbergia grandiflora, thunbergia erecta, natalensis, alata & dwarf varities.

Thunbergia grandiflora
The grandiflora plants are native to India with large leaf foliage with lavender color flowers. Long roots with deep tap root system. It comes under annual plants.

Thunbergia natalensis
It is fast growing creeper plant with white & light blue colored flowers. And the plants are native to Africa. Thunbergia natalensis has trumpet-shaped flowers that are commonly called natal blue & natal white flowers.

Thunbergia erecta
It is a twinning erect perennial shrub with ovate dark green leaves & velvety purple flowers. It is also rapidly growing creeper plants.

Soil
The Bush clock vine plant loves to grow in well-drained soil rich in organic matter. These plants tolerate a wide range of soil but avoid growing in heavy clay soils.

Benefits
These bush clock vine thunbergia plants are great for foundations, borders, beds, hedges & other landscape values.
There are no serious pest, disease & nematode issues for this creeper plant.
The Thunbergia erecta plants used in the treatment of anxiety, depression & insomnia issues.
Bush clock vine has anti-oxidant & anti-inflammatory properties

The creeper plants grow on walls, trellises, fences, and other plants. And they are popular in gardens as they add visual interest and provide good greenery look.
There is no alternate for Green so far!

Thunbergia creeper plants
Blog Created By: www.santhionlineplants.com
#thunbergia natalensis#Thunbergia erecta#It is a twinning erect perennial shrub with ovate dark green leaves & velvety purple flowers. It is also rapidly growing creeper plants.#thunbergia erecta#Soil#The Bush clock vine plant loves to grow in well-drained soil rich in organic matter. These plants tolerate a wide range of soil but avoid g#thunbergia grandiflora soil#Potting Mix- Garden soil+30-40% compost +steamed bone meal +20% of cocopeat if needed alone.#steamed bone meal for clock vine#Water Requirement#Watering the plants regularly helps to grow healthy plants means keeping the soil moist. But the sky flower plants cannot tolerate waterlog#watering for sky flower#Sunlight#The bush clock vine plant thrives well in full direct sunlight with partial shade.#clock vine#Pot Size#This creeper plant requires a pot size of 6-8'' while planting. After one of planting change the pot size to 12'' with good drainage holes.#sky flower poting#Propagation#The thunbergia varieties are easily propagated through stem cuttings. Select the non-flowering#healthy stem and make a clean cut just below a node. Gently remove the lower leaves from the plants. And place the plant cuttings in a plan#thunbergia grandiflora propagation#Pruning#Regular pruning helps to keep the plants in a compact structure.#pruning of sky flower#Fertilizer#Application of any organic compost monthly once or twice around the plants helps to grow bushy.#compost for thunbergia#Benefits#These bush clock vine thunbergia plants are great for foundations
0 notes
Text
When to plant brown top millet
Introduction: Brown top millet (Brachiaria ramosa) is not just a nutritious cereal grain; it's also a fantastic option for home plant enthusiasts looking to add diversity and beauty to their gardens. This warm-season annual grass thrives in various climates and soil types, making it an excellent choice for those looking to enhance their landscape or attract wildlife. However, timing is crucial when it comes when to plant brown top millet for optimal growth and yield. In this guide, we'll explore the ideal timing for planting brown top millet to ensure a successful and thriving garden.
Understanding Brown Top Millet: Before delving into the planting schedule, it's essential to understand the characteristics of brown top millet. This fast-growing grass is commonly used for pasture, hay, and erosion control. However, its adaptability and aesthetic appeal make it a popular choice for home gardens as well. Brown top millet typically grows up to three feet tall, producing dense clusters of small, brown seed heads that add texture and visual interest to any landscape.
Ideal Planting Time: Brown top millet is a warm-season grass, meaning it thrives in temperatures between 70°F and 90°F (21°C to 32°C). To ensure successful germination and growth, it's crucial to plant brown top millet when soil temperatures consistently reach at least 65°F (18°C). In most regions, this typically occurs in late spring or early summer. Planting too early when soil temperatures are still cool can result in poor germination and stunted growth.
In general, aim when to plant brown top millet when all danger of frost has passed, and the soil has warmed up sufficiently. Depending on your location, this may vary, but a good rule of thumb is to wait until daytime temperatures consistently reach at least 60°F (15°C) before planting.
Steps for Planting Brown Top Millet:
Soil Preparation: Before planting, prepare the soil by tilling it to a depth of about 4-6 inches (10-15 cm). Remove any weeds or debris, and incorporate organic matter such as compost to improve soil fertility and drainage.
Seed Sowing: Brown top millet can be sown directly into the soil or started indoors and transplanted once seedlings are established. If sowing directly, broadcast the seeds evenly over the prepared soil surface and lightly rake them in to ensure good seed-to-soil contact.
Watering: Keep the soil consistently moist but not waterlogged during the germination and establishment phase. Water regularly, especially during dry periods, to promote healthy growth.
Maintenance: Once brown top millet has established itself, it requires minimal maintenance. However, occasional watering during dry spells and regular mowing to a height of 6-8 inches (15-20 cm) can help promote lush growth and prevent seed heads from becoming too dominant.
Conclusion: Planting when to plant brown top millet in your home garden can add beauty, diversity, and ecological benefits. By timing your planting correctly and providing proper care, you can enjoy a vibrant and thriving landscape filled with this versatile warm-season grass. Whether you're looking to attract wildlife, control erosion, or simply enhance the visual appeal of your garden, brown top millet is a fantastic choice for home plant enthusiasts.
0 notes
Text
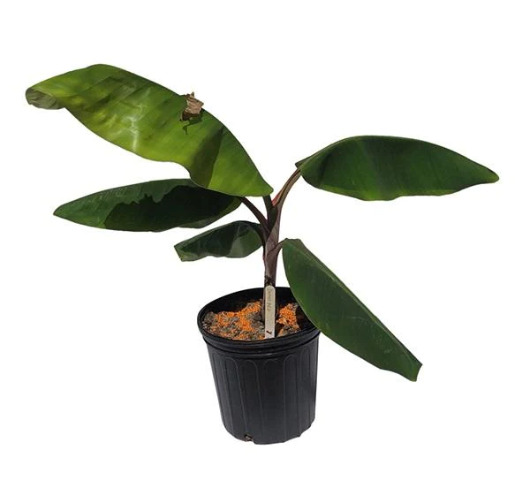
How to Care for a Banana Plant?
Banana plants are popular for a reason. They give you tasty fruit and make any corner look lush and green. Caring for banana trees requires special attention and knowledge of what the plant needs.

Knowing how to take care of banana plants is very important. They need the right soil, the right amount of water, and plenty of sun. But it's not too hard. A little effort goes a long way with these plants. And when you get it right, you don't just get a pretty plant. You get your very own bananas, right from your backyard!
Choosing the Right Location
Finding the perfect spot is crucial when you want to care for banana plants. These plants need a lot of sun, thriving in warm and bright environments. Whether you plant the tree indoors or outdoors, the key is mimicking their native tropical habitat.
If you have the plant outdoors, select a sunny area protected from strong winds.
If you have them indoors, place them near a large window with bright, indirect light.
Avoid areas with cold drafts or fluctuating temperatures.
Remember, the right location can mean the difference between a thriving plant and a struggling one.
Planting and Soil Requirements

The right soil sets the stage for successful banana plant care. These plants love rich, well-draining soil that holds moisture without getting soggy.
Mix organic matter, like compost or manure, into your planting soil.
A blend of garden soil, peat, and perlite makes for good drainage.
When planting, ensure the hole is twice as wide as the root ball, allowing space for growth.
For potted plants, choose a container with ample drainage holes.
Good soil and the right container help avoid waterlogged roots, a big no-no for these plants.
Watering and Humidity
Getting the watering right is a fine balance in how to take care of banana trees. These plants prefer consistently moist soil, but not overly wet.
Water deeply and regularly, reducing frequency in cooler temperatures.
Signs of over-watering include yellow or drooping leaves.
Under-watered plants will have dry, browning leaf edges.
Bananas also need good humidity, especially the indoor banana leaf plant.
Aim for 50-60% humidity around the plant.
Mist regularly or use a humidifier to maintain moisture in the air.
Fertilizing and Nutrient Management
Thriving banana plants need the right nourishment. Whether you want to focus on banana plant care outdoors or indoors, both require rich nutrients.
Use a balanced, slow-release fertilizer rich in potassium, nitrogen, and phosphorus.
During the growing season, fertilize once a month; reduce the frequency in winter.
Apply fertilizer around the base, avoiding direct contact with the stem. Water the plant thoroughly after applying fertilizer to help distribute the nutrients. Proper fertilization encourages lush growth and healthy tropical banana plant development.
Pruning and Maintenance
Pruning isn't just about aesthetics; it's vital for the health of your banana plants.
Prune dead or damaged leaves regularly to encourage new growth.
After fruiting, cut back the main stem to help new shoots grow.
Dealing with pests and diseases:
Keep an eye out for common issues like spider mites and aphids.
Use eco-friendly pesticides or homemade solutions like soapy water.
Seasonal care:
In colder months, reduce watering and protect outdoor plants with mulch.
Banana plants for sale are often young, so provide extra protection from frost.
Regular maintenance ensures a vibrant, healthy plant year-round. Now, let's address some common problems.
Common Problems and Solutions
Even with the best care, banana plants can face challenges.
Yellowing leaves can indicate over-watering, poor drainage, or nutrient deficiency.
Stunted growth might be due to a lack of sunlight or improper fertilization.
Prevention and treatment:
Ensure your planting mix is well-draining to prevent root rot.
Regularly check for signs of pests or diseases and treat them promptly.
Neem oil can be an effective, natural solution for pest control.
Healthy plants are less prone to problems, so consistent care is key.
Conclusion
Searching for a banana tree for sale? Look no further! Our collection boasts a variety of high-quality plants at great prices. Each tree is well-maintained, ensuring you receive a healthy, robust plant ready to thrive in your space. Choose from our selection and get a well-maintained plant for your home or garden. Affordable, quality plants are just a click away!
Disclaimer- The information provided in this content is just for educational purposes and is written by a professional writer. Consult us to learn more about caring for banana plants.
0 notes
Text
Blossoming Beauty: Embrace Elegance with Pentas Flowers

Blossoming Beauty: Embrace Elegance with Pentas Flowers
When it comes to adding elegance and charm to your garden or landscape, one cannot overlook the allure of Pentas flowers. With their vibrant colors, graceful blooms, and a range of symbolic meanings, Pentas flowers are a delightful addition to any outdoor space. In this article, we will explore the beauty and elegance of Pentas flowers, as well as tips on how to care for them and incorporate them into your garden.
The Allure of Pentas Flowers
Pentas, scientifically known as Pentas lanceolata, are native to Africa, and they are commonly referred to as "Egyptian Star Cluster." Their name originates from the Greek word 'pente,' which means five, signifying the five-petaled flowers that these plants produce. These dainty star-shaped blooms come in a spectrum of colors, including white, pink, red, and shades of lavender.
The elegance of Pentas flowers lies in their timeless and versatile beauty. Whether you are aiming for a traditional, cottage-style garden or a modern, minimalist landscape, Pentas can effortlessly blend in. The lush green foliage, adorned with clusters of starry blossoms, adds a touch of sophistication and grace to any setting.
Symbolic Meanings of Pentas Flowers
Flowers often carry symbolic meanings, and Pentas are no exception. They are associated with various sentiments and can be used to convey different emotions. Here are a few symbolic meanings commonly associated with Pentas flowers:
Romantic Love: Pentas flowers, especially the pink and red varieties, are often linked to romantic love. They make excellent additions to bouquets and floral arrangements, expressing passion and affection.
Good Luck: In some cultures, Pentas flowers are believed to bring good luck and prosperity. Placing them in your garden can symbolize a wish for a fortunate and happy life.
Harmony and Balance: The five-petaled blooms of Pentas are seen as symbols of balance and harmony. Incorporating them into your garden can represent a desire for a balanced and harmonious life.
Caring for Pentas Flowers
To ensure that your Pentas flowers continue to bloom elegantly, it's important to provide them with the right care. Here are some essential care tips:
Sunlight: Pentas thrive in full sun or partial shade. Plant them in a location where they receive at least 6-8 hours of sunlight each day.
Well-Drained Soil: Pentas prefer well-drained soil that is rich in organic matter. Ensure the soil does not become waterlogged, as this can lead to root rot.
Watering: Water your Pentas regularly, keeping the soil evenly moist. However, avoid overwatering, as this can also be detrimental to the plants.
Pruning: Pruning is essential to encourage Pentas to continue blooming. Remove spent blooms and trim the plant to maintain its shape.
Fertilizing: Feed your Pentas with a balanced, all-purpose fertilizer during the growing season to promote healthy growth and abundant flowering.
Pest and Disease Control: Keep an eye out for common garden pests like aphids and whiteflies, which can affect Pentas. Regularly inspect your plants and take appropriate measures to control these pests.
Mulching: Applying a layer of mulch around the base of your Pentas plants can help retain moisture and control weeds.
Incorporating Pentas into Your Garden
Pentas flowers can be integrated into your garden in various ways, depending on your style and preference. Here are some ideas to inspire you:
Mixed Borders: Plant Pentas along with other flowering plants to create a vibrant and eye-catching mixed border. Their versatile colors and compact growth make them excellent companions for other garden favorites.
Container Gardens: Pentas are well-suited for container gardening. You can place them in pots on your patio or balcony, allowing you to enjoy their elegance up close.
Butterfly and Pollinator Gardens: Pentas flowers are known to attract butterflies and other pollinators. Create a dedicated butterfly or pollinator garden by planting Pentas alongside other nectar-rich flowers to support local wildlife.
Hanging Baskets: Consider planting trailing varieties of Pentas in hanging baskets. They will gracefully cascade over the edges, adding a touch of elegance to your outdoor space.
Monochromatic Gardens: If you love a single-color theme in your garden, you can dedicate an area to Pentas of the same color for a visually striking and elegant effect.
Edging and Borders: Use Pentas as edging plants to define pathways and garden beds. Their low, bushy growth habit works perfectly for this purpose.
Cut Flower Garden: Pentas flowers are excellent for cutting and arranging in vases. Create a cut flower garden, and you can enjoy their elegance indoors as well.
Conclusion
Pentas flowers are truly a symbol of elegance and beauty in the world of gardening. Their vibrant colors, charming star-shaped blossoms, and versatility make them a valuable addition to any landscape. Whether you're looking to express love, attract pollinators, or simply add an elegant touch to your garden, Pentas can deliver all that and more. With the right care and a dash of creativity, you can embrace the timeless beauty of Pentas flowers and create a garden that radiates elegance and charm. So, don't hesitate to welcome these lovely blooms into your outdoor space and let them work their magic.
0 notes
Text
Unlocking the Secrets: A Comprehensive Guide to Cultivating Kohlrabi for Bountiful Harvests
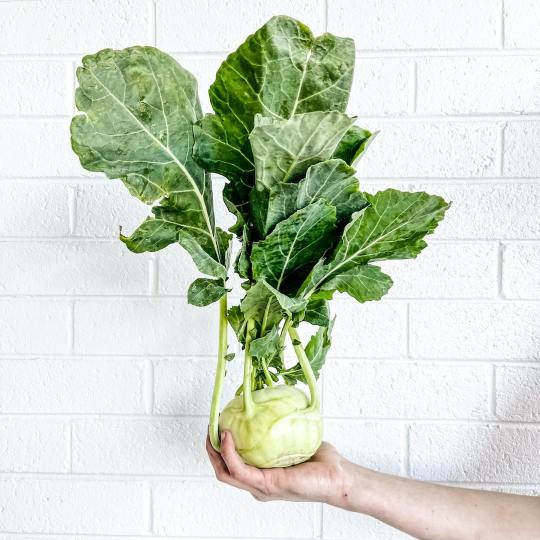
Kohlrabi, sometimes referred to as a German turnip, is a nutty and sweet vegetable that is highly nutritious. It is a cool season crop that is related to both kale and cabbage and its distinctive bulbous shape is usually green or purple. It is usually eaten raw or cooked and provides a good source of fiber, vitamin C, and potassium.
How To Grow Kohlrabi For Maximum Yield
Welcome to the wonderful world of kohlrabi! If you've never heard of this unique vegetable before, you're in for a treat. Not only is kohlrabi deliciously crisp and slightly sweet, but it's also incredibly versatile in the kitchen. Growing your own kohlrabi can be a rewarding experience, and with a little know-how, you can maximize your yield. So, grab your gardening gloves and let's dive into the fascinating world of kohlrabi cultivation!
1. Choose the Perfect Spot
Before you start planting your kohlrabi, it's important to select the right location in your garden. Kohlrabi thrives in full sun but can tolerate some shade. The soil should be well-draining and rich in organic matter. Aim for a pH level between 6.0 and 7.5. If your soil is too acidic, you can add lime to raise the pH.
2. Timing is Everything
Kohlrabi is a cool-weather crop, so timing is key. Start your seeds indoors about 4-6 weeks before the last spring frost date. Transplant the seedlings outdoors when they are about 4 inches tall and the soil has warmed up. For a fall harvest, sow the seeds directly in the garden about 8-10 weeks before the first fall frost.
3. Sow and Thin
When sowing your kohlrabi seeds, plant them about ¼ to ½ inch deep and space them 4-6 inches apart. As the seedlings emerge, thin them so that they are about 8-12 inches apart. This gives each plant enough room to grow and develop into beautiful bulbs.
4. Watering and Mulching
Kohlrabi loves moist soil, so it's important to keep the plants well-watered. Aim for about 1 inch of water per week, either through rainfall or irrigation. Mulching around the plants can help retain moisture and suppress weeds, keeping your kohlrabi happy and healthy.
5. Fertilize Regularly
Provide your kohlrabi plants with a balanced fertilizer every 3-4 weeks to ensure they have all the nutrients they need for optimal growth. Follow the instructions on the fertilizer packaging to determine the correct application rate. Remember, happy plants mean bumper crops!
6. Pests and Diseases
Like any garden plant, kohlrabi can fall victim to pests and diseases. Keep an eye out for common culprits such as aphids, cabbage loopers, and flea beetles. If you spot any signs of infestation or disease, act quickly to prevent them from wreaking havoc on your crop. Organic pest control methods, such as handpicking pests or using insecticidal soap, can be effective.
7. Harvesting Time
Now comes the exciting part - harvesting your kohlrabi! The bulbs are ready to be harvested when they reach about 2-3 inches in diameter. Simply grasp the bulb at the base and gently pull it from the ground. Don't forget to snip off the leaves, which can be enjoyed in salads or sautéed as greens.
8. Get Creative in the Kitchen
With your bountiful kohlrabi harvest, let your culinary imagination run wild! Kohlrabi can be enjoyed raw in salads, slaws, or as a crunchy snack. It can also be cooked in a variety of ways, including roasting, stir-frying, or steaming. Experiment with different recipes and discover your favorite way to savor this underrated veggie.
9. Preserve the Harvest
If you find yourself with an abundance of kohlrabi, don't fret! There are several methods you can use to preserve your harvest for later use. Kohlrabi can be blanched and frozen, pickled, or even turned into delicious kohlrabi chips. These preservation techniques allow you to enjoy the flavors of your garden all year round!
10. Share the Love
Finally, don't keep the joy of growing kohlrabi all to yourself. Share your knowledge and surplus harvest with friends, family, or even your local community. Spread the love for this unique vegetable and inspire others to embark on their own kohlrabi-growing journey.
So there you have it, a comprehensive guide to growing kohlrabi for maximum yield. From selecting the perfect spot to harvesting your crop, each step plays a vital role in ensuring a successful harvest. Remember, gardening is not just about the end result but also about the joy and fulfillment it brings along the way. Happy kohlrabi growing!
Learn more about gardening with Taim.io!
0 notes
Text
Choosing Plants For the Bathroom
Adding plants to the bathroom can be a fun and relaxing way to add a bit of color and life to your bathroom. But how do you choose the right plants for your space? You’ve got to choose something that can survive indoors. If you’re lucky, you can find a few different types of plants that can thrive in your bathroom’s environment.
Chinese evergreens
Whether you’re looking for a plant for your bathroom or kitchen, Chinese evergreens are easy to care for. They’re hearty plants that purify the air and are low maintenance. In fact, they can be grouped with other tropical plants for maximum effect.
Chinese evergreens thrive in well-drained soil and moist conditions. They’re easy to care for and can adapt to different conditions. They can grow in shadier areas, too, but they do better under indirect light. They don’t like sudden temperature changes or cool drafts.
Chinese evergreens can also be propagated through stem cuttings. You should cut the plant with sharp cutting shears and coat the roots with a root hormone. You can then replant the plant in a pot with drainage holes.
Peace lily
Having a peace lily plant in your bathroom can be a very attractive addition. These plants have an elegant tropical look and can make a nice statement in a large bathroom. They are also very easy to care for.
Peace lilies are great air purifiers. They can help remove mold spores from the air, which can cause irritation in the throat and coughing. They also act as humidifiers for other plants. They are very low maintenance plants, and are a great addition to any bathroom.
The best peace lily care tip is to water the plant when it is dry. They don’t like to be overwatered. If your soil seems to be dry when you water, try flushing it out to get rid of salts and chemicals that may have built up.
Spider plant
Having a Spider Plant in the bathroom can make a big difference. They are easy to care for and are very low maintenance. They are also a great choice for people who are new to plant ownership.
Spider Plants are very adaptable and are easy to grow in many environments. They also tolerate low light and low humidity. However, they do not like full sun.
When you want to plant Spider Plants, choose a container that has plenty of drainage holes. These plants prefer a moist, permeable soil, but they can be grown in a variety of soil types.
They also require regular watering, but they do not need to be in direct sunlight. They thrive in slightly damp, warm environments.
Lemon button fern
Among the many varieties of houseplants, lemon button fern plants for the bathroom are perfect for those who want to grow a tropical indoor plant without the hassle of frequent watering and fertilizing. These ferns also provide a natural source of oxygen to the bathroom.
Although the lemon button fern does not need too much maintenance, it does need to be watered regularly. Lemon buttons are also prone to pests. If you have an infestation, you may have to treat the entire plant with insecticidal soap or neem oil. Other common pests include spider mites, aphids, and mealybugs.
To keep your lemon button fern healthy, you must also keep it away from cold drafts. It is also helpful to keep it in an area that has a lot of humidity. You can use a humidifier or even a pebble tray to provide extra humidity.
Lauretta’s Paphiopedilums orchid
Lauretta’s Paphiopedilums orchid plants for the bathroom are a great option for a centerpiece. These orchids grow well in low light conditions. They also produce long-lasting blooms. These plants are easy to care for.
These orchids grow well in bathrooms, especially if the bathroom has a humid atmosphere. Bathrooms are usually warm during the day and cooler at night. These plants can withstand heat spikes up to 38degC.
Bathrooms also have a backhanded daylight. Most of the time the window blinds remain closed, meaning that the bathroom is not getting direct sunlight.
Paphiopedilum orchids are also ideal for bathrooms because they are low-maintenance. They can be watered once a week. Watering in the morning will prevent bacteria from rotting the roots.
Dracena
Adding house plants in your bathroom will not only make it look more welcoming and healthy, but they will also improve the air quality. House plants are easy to care for and can add a luxurious touch to any bathroom. In fact, some plants even grow in low light conditions.
The snake plant (or Mother-in-Law’s tongue), is a great choice for any home. It’s very hard to kill and filters toxins from the air.
The arrowhead plant is also a great choice, as it can tolerate low light. However, be sure to keep it in an area with plenty of indirect light. It needs to be watered occasionally.
.video-container {position: relative;padding-bottom: 56.25%;padding-top: 1px; height: 0; overflow: hidden;} .video-container iframe, .video-container object, .video-container embed {position: absolute;top: 0;LEFT: 0;width: 100%;height: 100%;}
youtube
The bathroom is often the most overlooked room in your house. It’s easy to see why it’s usually small and hidden away, and it’s probably the last place you’d expect to spend a significant amount of time. But the truth is, the bathroom is one of the most important rooms in your home. It is a functional space for bathing and washing and a social hub for your entire household. So it makes sense that you want to ensure it looks its best. That’s why Vancouver Kitchen Renovation specializes in bathroom renovations. Whether you’re interested in updating your current bathroom or building a brand new one from scratch, we can help you create the perfect space for your whole family. We believe that bathrooms should look spa-like, sustainable, and modern. In addition to being practical spaces, they should also feel warm and inviting. With that in mind, we strive to incorporate natural materials, open floor plans, and lots of light.
We understand that to be successful is to stay ahead of the curve. That means staying current with the latest technology and design trends. We always want to improve our products or services without breaking the bank. That’s why we stay connected to the latest technologies of NKBA, National Kitchen and Bath Association. In addition, at Vancouver Kitchen renovation, our primary focus is providing sustainable bathroom design and renovation packages, and we believe in sustainable living. Sustainable living is a way of life in harmony with nature. It is a lifestyle which focuses on the preservation of our environment. Sustainable living is a philosophy emphasizing respect for the environment and concern for its well-being. This means we should take care of the planet and treat it as if it were our home. We should try to preserve what we have and protect it from destruction. If we do this, we will enjoy the benefits of the earth’s resources for many generations. Whether you’re planning a major remodel or adding finishing touches to your current bathroom, we’d love to discuss your project. Book your showroom consultation online.
Main Areas of Service in British Columbia:
Vancouver
North Vancouver
West Vancouver
Burnaby
Coquitlam
Squamish
Whistler
Frequently Asked Questions
Are mosaic tiles suitable for a modern bathroom?
It would be best if you avoided mosaic tiles in modern design unless you are using them as your accent tiles. They can make your bathroom look old and chaotic. If you love the look of mosaic tiles, try using them as accents around your sink, bathtub or shower.
What is the average time it takes to renovate a bathroom in Vancouver, British Columbia?
A bathroom renovation takes between four and five working weeks. Permits and inspections can make the project take longer. You should also consider the size and complexity your renovations.
How can I make the bathroom feel Zen?
A great bathroom can be a place for reflection and relaxation. After an exhausting day of work, this is where we relax. So why would anyone choose a space where they feel stressed out?
Answer is simple: Bathrooms are places to relax. When we shower, we wash away our stresses. We wash ourselves, then we clean our teeth.
You can create a peaceful and serene bathroom that provides all of the amenities we need.
A white wall can make a space appear larger and cleaner. White walls also reflect light, making the rooms seem larger.
A large mirror can be used to view how you look, without the need to turn your back.
Candles in the bathroom can create a calm environment. Candles can add warmth and provide a sense of safety. In addition, scented candles can encourage feelings of calmness.
You can encourage peace and tranquility by adding plants to your bathroom. Plants are known to reduce stress levels and increase focus.
Lighting is another way of setting the mood. You can create a warm environment by using lighting. Warm light, such like candlelight, can create an atmosphere of tranquility.
Next time you go to the bathroom, take some time to unwind. After all, this is the only place where we can be completely free of the outside world.
What is the cost of updating a bathroom vanity?
The average cost to update a bathroom vanity ranges from $2,000-$5000 depending on the type. This includes all labor and materials costs.
Pre-fabricated and stock vanity are more expensive, but a custom-built one would be cheaper. Try painting the vanity or replacing the hardware if you’re on a budget. To make it more important, you can replace the countertop or sink.
Can I Install A Bidet In A Small Bathroom?
You can install a bidet inside a small bathroom. However, there are some things to be aware of. The location of the bidet needs to be carefully considered. It should be close to the toilet but not too far. You must ensure that the size and type chosen for your bathroom is appropriate. It is important to ensure that your bathroom plumbing can handle a bidet. It is always best not to try to install a bidet inside a small bathroom without consulting a professional.
How do I remodel my bathroom in 2023
Understanding your bathroom is the first step.
What are the features that you want and don’t require? What are your priorities?
Next, start looking for products that meet your needs.
You might not find exactly what your looking for but there are many options.
Here’s a list to help you think:
Size – How big is your bathroom? You will need to make modifications to accommodate new fixtures.
Style – Which style do you prefer? Contemporary, traditional, etc.? Style – Bathrooms are available in many styles: transitional, traditional, and modern. The traditional style, which features natural stone floors, has been in fashion since Victorian times. Modern bathrooms feature modern lines, glass finishes, open-plan layouts, and sleek lines. Transitional designs combine elements from both traditional and contemporary styles.
Layout – Some people prefer smaller spaces, while others enjoy more space. What layout do you prefer for your bathroom?
Color Scheme – What colors should you use in your bathroom?
Lighting: How much light are you able to get?
Storage – Do I need more storage space for my bathroom? Are you able to store enough? If not, what can you do to create more storage space?
Ventilation – Does your bathroom have adequate ventilation?
Features – It is important to consider how many features you’d like in your bathroom. For example, would you like a heated towel rack or a steam shower? Would you prefer a Jacuzzi, or a spa bathtub? Do you prefer a walk-in or separate bathtub and shower?
Budget – You should also consider your budget. This will help you narrow your choices and ensure you don’t overspend.
Warranty – Make sure to verify that any manufacturer offers a warranty on their products. They guarantee their products for a specified period of time.
Once you’ve identified your requirements, it’s time you start looking for products. You can shop online, read magazines, or visit stores. After you have found the right item, compare prices and read customer reviews before you buy it.
Statistics
2023 bathroom design trends: 82% of those surveyed preferred low-maintenance, nonporous surfaces for their bathroom. (https://nkba.org)
Other sustainability instruments developed by Noken include an ‘Eco cartridge’ (its two-position switch makes it possible to use 50% less water and energy), and a water ‘flow rate limiter’ (that uses jets and air to reduce water consumption). (decoist.com)
According to the EPA, a conventional toilet uses 1.6 gallons per flush, but that old pink one could use between 3.5 to 7 gallons per flush. (elemental.green)
2023 bathroom design trends: Bathroom faucet designs reflected wellness concerns, with 61% choosing accessible lever handles, 48% choosing motion and 36% going for the touch or tap options. (https://nkba.org)
2023 bathroom design trends: Floating vanities were favoured by 71% of those surveyed. (https://nkba.org)
2023 bathroom design trends: Digital showering allows users to program their preferred flow rate, and the temperature was a 23% preference. 44% wanted the ability to start their showers with their phones. (https://nkba.org)
2023 bathroom design trends: Large format tile (59%) was the most popular material for tub and shower surrounds. Slab surfaces (40%) were the next most popular (https://nkba.org)
2023 bathroom design trends: Chromotherapy, which uses coloured lights to stimulate relaxation, was chosen by 25%. Preset lighting schemes for different times during the day were favoured by 29%. (https://nkba.org)
2023 bathroom design trends: Heated floors were favoured by a substantial 75% of those who responded to the survey.(https://nkba.org)
2023 bathroom design trends: Large format tiles were favoured by 59% of those surveyed.mSlab surfaces were favoured by 40% of those surveyed. (https://nkba.org)
This article will reveal more about AntiBac surfaces and how Villeroy and Boch products have 99.9% fewer bacteria. (superbath.co.uk)
2023 bathroom design trends: Windows above tubs were favoured by 51% of those surveyed. Skylights were selected by 37% of those surveyed. (https://nkba.org)
External Links
thespruce.com
How to Get a New Toilet at Your Home
bhg.com
How to paint bathroom cabinets for an easy vanity upgrade
How To
How to hire an contractor for a bathroom renovation project
It is not easy to remodel a bathroom. There are many steps that must be taken, including finding the right contractor, choosing materials, hiring them and getting estimates. Then, you have to sign contracts and start the work. Pressure is a key factor in the process. You don’t want make mistakes, but you need to get things done as quickly as possible. Here are a few tips that will help you go about finding and hiring the right contractor for your bathroom remodelling project:
Start looking online. There’s no shortage of options when it comes to bathroom remodels. There are many websites that allow you to search for contractors, such as Trustedpros and Houzz. You can enter your zip code to see local contractors with good reviews. Always check their google reviews and portfolio.
Ask family members and friends. Your family members and friends may know of someone who recently remodelled a bathroom. Ask them to tell you about their experience and if possible, recommend a contractor. You may even get a referral bonus if they are willing to share their experience.
Take a look at online forums. For example, there are several bathroom remodelling forums on Facebook where people post pictures of their projects and ask for advice. Reddit as well Pinterest are popular.
Do thorough research. You should verify the credentials of any person you are considering hiring to do the work. Look at their licenses, insurance, and other relevant information. You should also take note of past jobs. Are they familiar with bathroom design? Do they have experience in working with spaces of similar dimensions?
The post Choosing Plants For the Bathroom first appeared on Vancouver Kitchen Renovation.
source https://vancouverkitchenrenovation.com/bathrooms/choosing-plants-for-the-bathroom/?utm_source=rss&utm_medium=rss&utm_campaign=choosing-plants-for-the-bathroom
0 notes
Text
How to Plant a Plant Properly
Planting a plant may seem like a simple task, but there are many factors that can impact the success of your plant. Proper planting techniques are essential for healthy growth, root development, and overall plant vigor. In this article, we'll explore the key steps to planting a plant properly and provide some tips for ensuring its success.

Choosing the Right Plant
When choosing a plant, it's important to consider the climate of your region. Some plants require a lot of sun, while others prefer shade. You'll also want to consider the soil type and drainage of your planting area. Make sure the plant you choose is suitable for the specific conditions of your location. Additionally, you'll want to choose a healthy plant from a reputable nursery or garden center. Look for plants with green leaves and no signs of disease or pests. The plant should also be the right size for your planting location. If the plant is too big or too small, it may not thrive in its new environment.
Preparing the Soil
Before planting, you'll want to make sure your soil is ready to support your new plant. If your soil is heavy or compacted, it may not allow for proper drainage and root development. Adding organic matter such as compost, peat moss, or well-rotted manure can help improve soil structure and fertility. You can also add sand or vermiculite to improve drainage.
Digging the Hole
When digging the hole for your plant, make sure it's the right size. The hole should be two to three times wider than the root ball, but no deeper than the root ball itself. If you dig too deep, the plant may sink, which can cause the roots to become waterlogged and suffocate. A shallow hole can also cause the roots to dry out.
Removing the Plant from its Container
Removing the plant from its container can be tricky. First, gently tap the sides and bottom of the pot to loosen the soil. Then, carefully lift the plant out of the container, being sure not to damage the roots. If the plant is root-bound, which means the roots have grown in a circular pattern around the container, use a knife to score the roots to encourage them to grow outward.
Planting the Plant
Once you've removed the plant from its container, it's time to plant it in the ground. Place the plant in the center of the hole and backfill with soil, making sure to firm the soil around the root ball to eliminate any air pockets. You don't want any air pockets around the roots, as this can lead to poor growth and development.
Mulching the Plant
Mulching is important for conserving moisture and suppressing weeds around your plant. Apply a layer of organic mulch such as wood chips, leaves, or straw around the base of the plant, making sure to leave a few inches of space around the stem to prevent moisture buildup and disease.
Watering the Plant
Proper watering is essential for the success of your plant. Water the plant deeply after planting, and continue to water regularly to keep the soil moist but not waterlogged. The frequency of watering will depend on the plant species, soil type, and climate. A good rule of thumb is to water when the top inch of soil feels dry to the touch.
Caring for the Plant
Proper care is essential for the health and longevity of your plant. Regularly fertilize with a balanced fertilizer to provide essential nutrients, and prune as necessary to maintain the desired shape and size. Monitor the plant for signs of pests and disease, and treat promptly to prevent further damage.
Proper planting techniques are essential for the success of your plant. By choosing the right plant, preparing the soil, digging the hole, removing the plant from its container, planting the plant, mulching, watering, and caring for the plant, you can ensure healthy growth and vigor for years to come. With a little bit of knowledge and care, you can enjoy the beauty and benefits of a thriving plant in your garden or landscape.
1 note
·
View note
Text
Rare Purple Coban Tomatillo Seeds

The Purple Coban Tomatillo is a unique and rare variety of tomatillo that is known for its vibrant purple color and sweet, tangy flavor.
These tomatillos are native to the highlands of Guatemala, where they have been a staple crop for centuries.
The Purple Coban Tomatillo is a determinate variety, which means that it grows to a certain height and then stops, making it ideal for small gardens or container growing.
Germination: To start growing Purple Coban Tomatillo from seed, it is best to begin the process indoors.
Fill seed trays or pots with seed compost and water it well.
Sow the seeds on the surface, covering them with a thin layer of compost or vermiculite.
Place the tray or pots in a propagator or cover with a plastic bag and put them in a warm place, such as a windowsill or heated propagator.
Keep the compost moist but not waterlogged.
Germination usually takes 7-14 days at a temperature of around 75-85°F
Growing tips: Once the seedlings are large enough to handle, transplant them into 3in pots.
Grow them on in a greenhouse or on a sunny windowsill until all risk of frost has passed.
When planting them out, choose a sunny, well-drained spot in soil.
Space the plants about 24-36 inches apart.
Water the plants in well and keep the soil consistently moist, but not waterlogged.
It's recommended to use Mulch around the base of the plants, to help preserve moisture in the soil.
Fertilize regularly with a balanced, water-soluble fertilizer to promote healthy growth.
You can expect to harvest the tomatillos in around 60-70 days after transplanting.
The Purple Coban Tomatillo is a unique and flavorful addition to any garden.
They are great for making salsa verde, adding to sandwiches and salads, or simply eating fresh.
This pack contains over 100 seeds, enough to grow a good number of plants to enjoy a bountiful harvest.
Please note that this variety is rare and can be difficult to find in seed form, so don't hesitate to grab some now!
Read the full article
0 notes
Text
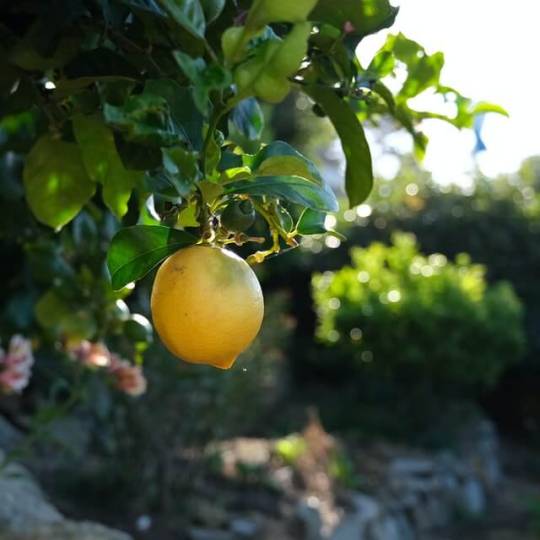
Does your lemon tree leave turning yellow?- Causes and treatment
When life gives you a lemon, make lemonade. But make lots of it when you have a lemon plant.
Planting a lemon tree is worth rewarding. It showers you with a lot of fresh, refreshing, and citrus fruit. But what happens when it shows some diseases? What happens when your lemon tree leaves turn yellow?
It might make all your efforts go in vain. Yellow lemon tree leaves can indicate a number of correctable problems but if you are a little bit attentive and take some measures, your plants can start flowering soon.
So let's dive into the article below, and let's find out the reasons and prevention of lemon trees turning yellow.
Causes of lemon trees turning yellow?
Over watering
Lemon trees grow well when the soil dried out between the bouts of watering which means they grow best when the top two inches of the soil becomes dry before watering. It means the lemon trees require watering once per week with a generous soak.
So if you are doing the fault of watering the plant too frequently and making the soil moist consistently, the lemon leaves start turning yellow.
Prevention
Plant your lemon trees in well-draining soil if your lemon tree leaves turn yellow.
If you are planting your lemon tree in a pot, use a good pot with drainage holes underneath so that excess water could escape through it and the soil becomes dry.
Don't water your lemon tree too frequently. Water it once or twice a month.
Drought
As we discussed earlier, the lemon tree leaves can turn yellow due to overwatering. Thus it prefers a dry and warm climate. But if the lemon plant is exposed to a dry climate for a longer period, it can show signs of stress and the lemon tree leaves start turning yellow.
If you are growing lemon trees indoors, they can be more exposed to the dry air and it shows more signs of yellow leaves.
Prevention
As the leaves turn yellow due to drought, locate your lemon tree away from droughts or from the source of heat. Mist the leaves of this plant regularly to improve the microclimate of your lemon tree.
Carefully monitor the soil moisture during heat waves to prevent your plant from drought and if necessary, water the lemon tree more frequently to prevent leaves from turning yellow.

Lack of fertilizer
Lemon plants are heavy feeders and they produce fruits when they get regular feeding, especially in the season of summer and spring.
When they lack nutrition the leaves start turning yellow with retaining green veins and start dropping out from the plant.
If you are growing your lemon tree in a pot, it shows the sign of yellow leaves more often, as the soil in the pot has a lesser capacity to hold nutrients. Thus the roots lack nutrition.
Prevention
To prevent your lemon tree leaves from turning yellow, apply a fertilizer made especially for citrus fruits once every month during the summer and spring season to keep the leaves healthy and growing.
But make sure, you don't use a lot of fertilizer as using a lot of fertilizer can also turn the leaves yellow.
Conclusion
As you read this article this far, you might have got the idea of why your lemon tree leaves are turning yellow? and the methods to prevent it.
Regular applications of a citrus fertilizer, good regular watering practices, and full sun can help the lemon tree recover from a drooping appearance with yellow leaves over the following weeks.
So follow the upper methods and make your lemon trees look green, and fresh all throughout the year.
0 notes
Text
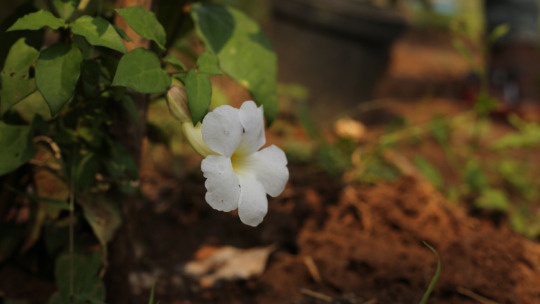
Heat Wild Orchid: A Captivating Addition to Any Floral Arrangement
Do you find yourself craving a touch of beauty and elegance in your surroundings? Look no further than the mesmerizing Heat Wild Orchid! Bursting with vibrant colors and delicate petals, this captivating flower is like nature's very own masterpiece. Whether you want to create a stunning centerpiece for a special occasion or simply add a touch of luxury to your everyday life, incorporating Heat Wild Orchid into any floral arrangement will instantly elevate it to new heights. Join us as we explore the enchanting world of these exquisite blooms and discover why they are an absolute must-have for any flower lover.

Benefits of Heat Wild Orchids
Few flowers can match the ethereal beauty of a wild orchid. Grown in tropical and subtropical climates around the world, these delicate blooms come in an array of colors and sizes. While often found in shades of pink and purple, wild orchids can also be white, red, yellow, or blue.
Adding a heat-wild orchid to a floral arrangement is sure to turn heads. Not only are they visually stunning, but they also have a number of benefits that make them a great choice for any occasion. Here are just a few of the reasons why you should consider using heat-wild orchids in your next arrangement:
1. They’re long-lasting. Wild orchids can last up to two weeks in a vase with proper care. This makes them a great option for arrangements that need to stay looking fresh for longer periods of time.
2. They’re low maintenance. Wild orchids don’t require a lot of upkeep. Simply place them in a location with bright indirect light and keep the soil moist but not soggy, and they should do well on their own.
3. They add texture and interest. The unique shape and size of wild orchids make them stand out among other blooms in an arrangement. Their textured petals add visual interest and depth to any design.
Whether you’re looking for a show-stopping
Methods for Growing Heat Wild Orchid
One of the great things about heat wild orchids is that they are easy to grow. With just a little bit of care, you can have a stunning display of these beautiful flowers. Here are some methods for growing heat wild orchids:
-Start with healthy plants. Look for orchids that have strong, green leaves and plenty of blooms. Avoid those that look wilted or sickly.
-Give them room to grow. Orchids need space to spread their roots and grow. Place them in an open, airy spot in your home where they will get good airflow.
-Provide bright, indirect light. These flowers do best in bright light but not direct sunlight, which can scorch their leaves. A spot near a window would be ideal.
-Keep them warm. Heat helps wild orchids bloom, so keep them in a warm spot in your home, such as near a radiator or heating vent.
-Water regularly but not too much. Water your orchids once a week, allowing the soil to dry out completely between waterings. Overwatering can lead to root rot, so be careful not to give them too much H2O.
With just a little bit of TLC, you can easily grow heat wild orchids at home. Enjoy their gorgeous blooms all year long!
How to Use Heat Wild Orchid in Arrangements
When it comes to adding a touch of wildness to your arrangements, heat wild orchid is the way to go. This variety of orchid is native to tropical and subtropical regions, which means it thrives in warm climates. As such, it's the perfect addition to arrangements that are designed for summer weddings or other outdoor events.
Here are a few tips for using heat wild orchid in your arrangements:
- Use them as accents: Heat wild orchids make beautiful accents in any arrangement. They can be used to add pops of color or to create a more dramatic look.
- Combine them with other flowers: Heat wild orchids look stunning when combined with other flowers, such as roses or lilies.
- Let them take center stage: If you really want your heat wild orchids to stand out, let them take center stage in the arrangement. This will ensure that they get the attention they deserve!
Conclusion
With its bold colors and show-stopping beauty, Heat Wild Orchid is an exquisite addition to any floral arrangement. Whether it's used in a bouquet or as a centerpiece at your next party, this captivating flower will be sure to help you make a unique statement. Experiment with different types of arrangements, like mixing Heat Wild Orchids with other varieties of flowers for the perfect balance between classic elegance and modern flair!
0 notes
Text
Thunbergia
The Thunbergia plants are prized by plant enthusiasts & gardeners for their lovely flowers & beautiful foliage. This thunbergia plant named after the Sweden Botanist Carl Peter Thunberg for his immense work in the documentation of Thunbergia plant species.

Plant Growth Habit
This plants are excellent creepers & flowering plants belongs to the Acanthaceae family with vibrant color flowers. This plant commonly named as clock vine & sky flower.

Sky Flower
The attractive sky flower plants contain 100+ plant varieties. Flower colors are blue, white, orange & yellow. This plant has a bushy & semi-climbing structure with a woody stem. Feathery flowers appear with yellow or center. In addition to this
it is fast growing plant that reaches up to a height of 6ft from the ground.
Clock Vine
The clock vine plant's popular varieties are thunbergia grandiflora, thunbergia erecta, natalensis, alata & dwarf varities.

Thunbergia grandiflora
The grandiflora plants are native to India with large leaf foliage with lavender color flowers. Long roots with deep tap root system. It comes under annual plants.

Thunbergia natalensis
It is fast growing creeper plant with white & light blue colored flowers. And the plants are native to Africa. Thunbergia natalensis has trumpet-shaped flowers that are commonly called natal blue & natal white flowers.

Thunbergia erecta
It is a twinning erect perennial shrub with ovate dark green leaves & velvety purple flowers. It is also rapidly growing creeper plants.

Soil
The Bush clock vine plant loves to grow in well-drained soil rich in organic matter. These plants tolerate a wide range of soil but avoid growing in heavy clay soils.

There is no alternate for Green so far!

Thunbergia creeper plants
Blog Created By: www.santhionlineplants.com
#Thunbergia erecta#It is a twinning erect perennial shrub with ovate dark green leaves & velvety purple flowers. It is also rapidly growing creeper plants.#thunbergia erecta#Soil#The Bush clock vine plant loves to grow in well-drained soil rich in organic matter. These plants tolerate a wide range of soil but avoid g#thunbergia grandiflora soil#Potting Mix- Garden soil+30-40% compost +steamed bone meal +20% of cocopeat if needed alone.#steamed bone meal for clock vine#Water Requirement#Watering the plants regularly helps to grow healthy plants means keeping the soil moist. But the sky flower plants cannot tolerate waterlog#watering for sky flower#Sunlight#The bush clock vine plant thrives well in full direct sunlight with partial shade.#clock vine#Pot Size#This creeper plant requires a pot size of 6-8'' while planting. After one of planting change the pot size to 12'' with good drainage holes.#sky flower poting#Propagation#The thunbergia varieties are easily propagated through stem cuttings. Select the non-flowering#healthy stem and make a clean cut just below a node. Gently remove the lower leaves from the plants. And place the plant cuttings in a plan#thunbergia grandiflora propagation#Pruning#Regular pruning helps to keep the plants in a compact structure.#pruning of sky flower#Fertilizer#Application of any organic compost monthly once or twice around the plants helps to grow bushy.#compost for thunbergia#Benefits#These bush clock vine thunbergia plants are great for foundations#borders
0 notes
Text
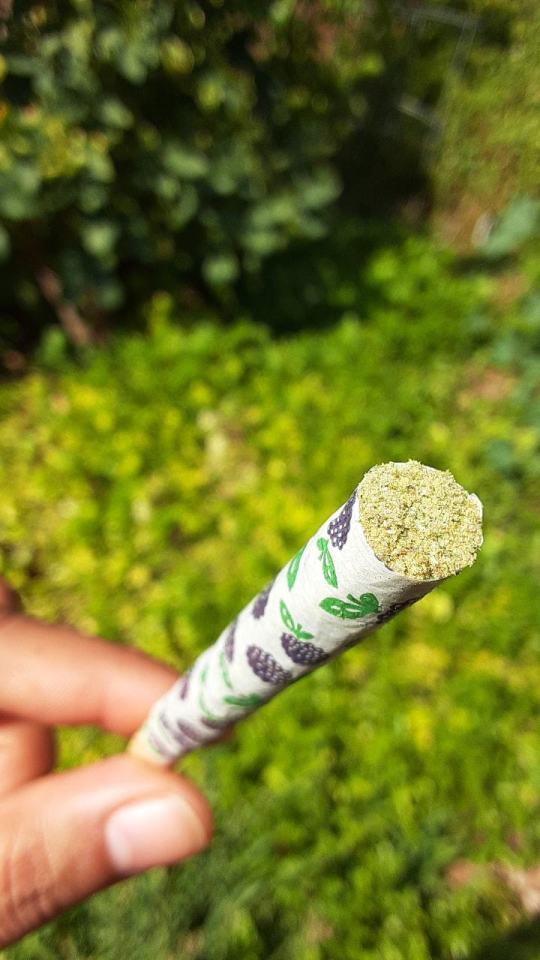
When growing indoors, you have full control of the environment, and you can save money while producing high-quality cannabis! Plus, there’s a unique satisfaction in growing your own. Many cannabis enthusiasts claim they didn’t fully appreciate the plant until they grew it themselves.
The biggest benefit of growing weed indoors is that it allows you greater control than growing outdoors. Growing indoors provides opportunities to implement strategies like introducing high levels of CO2 which will result in bigger buds with higher THC concentrations.
While the benefits of growing indoors are many, there are still potential problems that could be costly or disastrous to your crop if you’re not paying careful attention. Before making a significant financial investment, you want to be confident in your ability to produce a successful cannabis harvest. Your time and effort will be substantial as well; nobody wants to spend weeks in a garden only to produce fodder for the compost pile.
Setting Up Your Garden
Before planting seeds, it’s imperative you have the right materials for a proper indoor cannabis grow. We’ve compiled a list of general materials needed to produce a fruitful harvest:
You need to identify an area to grow. This can be a closet, indoor grow tent, spare room, or basement.
Purchase indoor grow lights. These come in different varieties, but we recommend HPS (high pressure sodium) lights for beginners.
Determine your grow medium. This could be soil, Coco Choir, or a hydroponic system.
Purchase proper nutrients.
Locate and purchase seeds that interest you.
Choosing Your Seeds
Selecting the right seeds is critical when determining the type of cannabis plants you want to grow. The color, height, quality, and aroma of the plant all depend on the quality of the seed. Try avoiding seeds that are damaged, soft, pale, or green. These seeds are not mature enough to begin the process of germination, which could result in weak plants, or worse, no plant at all.
Good seeds will be dark brown, shaped like a teardrop, and encased in a hard shell. Darker tiger stripes generally indicate indica seeds, while brown mottling seeds are typically sativa.
The most important factor when selecting seeds is choosing regular or feminized. Feminized seeds are typically more expensive, but most growers agree it is well worth the cost. Feminized seeds ensure the plant is going to be a female 99% of the time. This is important because female plants generally produce larger buds, and if a male plant is present, it will stunt the growth of the female plants.
Regular seeds have the capability of producing both male and female plants, but using regular seeds is risky because they could dramatically reduce the size of your harvest if they produce male plants. Therefore, beginners should strongly consider using feminized seeds.
How do You Germinate Your Seeds?
The easiest way to germinate your seeds is to plant them directly into a grow medium. Another common way to germinate seeds is using a seedling plug. Plant the whole plug after germination, and you’ll be on a proper growth trajectory. You should always use seedling plugs if you’re growing hydroponically.
When choosing the number of seeds, keep in mind that not every seed will flourish. It is common practice to assume 10 – 20% of the seeds won’t make it, so make sure to overestimate. The time it takes for seeds to germinate depends on many factors, but usually seeds will germinate in 2 to 7 days.
For beginning growers, it might be beneficial to practice the germination process on inexpensive seeds as you don’t want to take the risk of ruining a costly batch while you’re still learning to grow properly.
The Soaking Method
One of the most effective ways to germinate cannabis seeds is using the soaking method, which is a reliable process and easy to execute. Fill a cup with warm water and drop in the seeds, then look for the seeds that float. Remove any floaters, and cover the cup with a lid. You will see the roots start to sprout in 24-48 hours. Once the roots have grown about a quarter inch, transfer them to your grow medium. You need to be very careful during this process, as the small sprouts are delicate.
Germination Tips
The germination process is expedited when seeds are kept warm. Once seeds are ready for the grow medium, place the seeds about two inches deep in the medium. It is crucial to keep the seeds moist but not soaking. If the seeds dry out, the process stops there.
Older seeds germinate slower and often have lower germination rates than newer seeds. However, even with fresh seeds, some strains germinate better than others. Don’t be too concerned if it’s taking awhile for your seeds to germinate. Patience is a virtue right?
How to Water Seedlings
Novice cannabis cultivators often accidentally overwater their seedlings, causing a number of problems such as sluggish growth, droopiness in the plant, or nutrient deficiencies. Properly watering your seedlings is important for the growth of your plants so they can be strong enough to support large flowering buds.
The first time you water your seedlings, make sure to give them 2 cups (500 milliliters) of water per seedling. Pour the water in a small circle around the base of the seedling to ensure you’re watering it instead of the dirt. Wait until the top part of the soil is mostly dry before watering again.
When your seedling starts to grow, slowly increase the water amount so the circle around the base is about the same width as the leaves. However keep in mind, different grow mediums will require different amounts of water. On average, seedlings need to be watered every 2-3 days until they are no longer seedlings. When your seedling is a few weeks old, it should have a healthy root system that can handle more water.
Switch to a normal watering practice once you transplant. This generally means to water your plant until there’s a slight runoff near the bottom, but don’t let your plant remain in the runoff water. Wait until the top inch of soil feels dry to the touch before you water again.
If you decide to grow in Coco Coir or hydroponics, it is very important to add nutrients to the water because Coco Coir and other hydroponic grow media don’t have enough phosphorus, nitrogen, or potassium to sustain plant life. Potting soil, however, only requires minimal extra nutrients.
The Transplant
When your seedlings are ready, you’ll need to transfer them into your garden. Remove the seedlings from their small containers and place them into large containers so they can continue to grow properly.
It is very important to complete this process with as minimal light as possible so the plants will have time to settle into their new homes before the next cycle of photosynthesis begins. Transplanting can cause some damage to the root system which can cause stress to the plant. Allowing proper settling time will alleviate this stress as well.
The Vegetative Stage
During this stage of growth your plants will start to produce new stems and leaves without buds. Caring for your cannabis plants during this stage is rather simple, especially if you have any gardening experience. Water the plants regularly, or maintain the water reservoir if you’re using hydroponics. To prevent excessive heat from killing your plants, periodically adjust the grow lights as the plants get taller.
Look for discolored leaves or droopiness. Removing discolored leaves from your cannabis plant will help to grow bigger buds because the plant can focus its energy on growing buds instead of trying to revive the leaves.
It’s very easy for cannabis plants to recover during the vegetative stage. Do your best to make sure your plants have adequate water, nutrients, and light. If you happen to make a few small errors, your plants will likely return to health after corrections.
The Flowering Stage
After your plants have reached half the final desired size, they should start flowering. This is the most coveted growth stage among cannabis enthusiasts because the flower produced during this stage will be processed to become smokable buds.
Initiate the flowering stage by setting your grow lights on a timer with a 12/12 light schedule. This means the lights will be off for 12 hours and on for 12 hours. Make sure the plants are in absolute darkness during the dark period or the buds will not grow properly. Ensuring the grow space is totally without light is the key to this process.
After the first few weeks with the 12/12 light schedule, your plant will be growing quickly. This especially fast growth period is known as the “flowering stretch.” Many cannabis cultivators get extra growth out of their buds during this period by providing their plants with CO2 and switching from regular nutrients to bloom nutrients.
Your cannabis plants will typically start growing buds within 2-3 weeks after the switch to a 12/12 light schedule. When your plants start flowering, double check to make sure all of them are female. Male plants will produce pollen sacs at stem junctions which are easily identifiable. If you find any male plants, remove them immediately and discard them in plastic bags to prevent pollen spread. The presence of male plants will significantly reduce your flower yield.
Watering
The amount of watering needed for your indoor cannabis plants completely depends on the size of your plants’ containers and the intensity of the light your plants are receiving. A good rule of thumb is to water your plants every other day. Watering every day may prevent roots from receiving proper air flow.
What Soil Should I Use?
Make sure the soil you select for your cannabis plants is highly drainable, but still has the ability to retain water. You’ll also want to consider the pH level, nutrients, and texture. Coco Coir is currently a popular choice and is sold in large bags or bricks. Many cannabis growers like to mix Coco Coir and regular potting soil to create a super soil of sorts.
It is very helpful to purchase a pH testing kit to ensure your plants are growing properly by making accurate pH assessments. It is also important to be cognizant of the nutrients you put into the soil as they relate to the pH balance as well.
Nutrients
The primary nutrients required for a high quality cannabis crop are nitrogen (N), potassium (K), and phosphorus (P); however, these aren’t the only nutrients found in cannabis fertilizer. There are micronutrients such as calcium, magnesium, sulfur, and several others. While these micronutrients aid specific growth processes, they are not as crucial as the three core nutrients.
Nitrogen
Nitrogen helps stems and leaves grow. Without nitrogen, the leaves of your cannabis plant will turn yellow, and the plant will eventually die. Use as much nitrogen as possible, especially during the vegetative stage.
Potassium
Potassium is needed to build sugars and transfer them throughout the cannabis plant. Potassium also creates rapid growth with its ability to help the plant absorb water and other nutrients.
Phosphorous
Phosphorus is a key nutrient for indoor cannabis plants during the flowering stage. During this stage, you should provide the plants with more phosphorus than nitrogen because it will allow the plants to produce bigger buds.
When first transplanting your seedlings into soil, use only half of the recommended amount of fertilizer since most nutrient recommendations are too strong for seedling plants. However, you will need to increase the fertilizer amount if you notice plants are looking pale or lime green, as this likely means the plants need higher levels of nutrients.
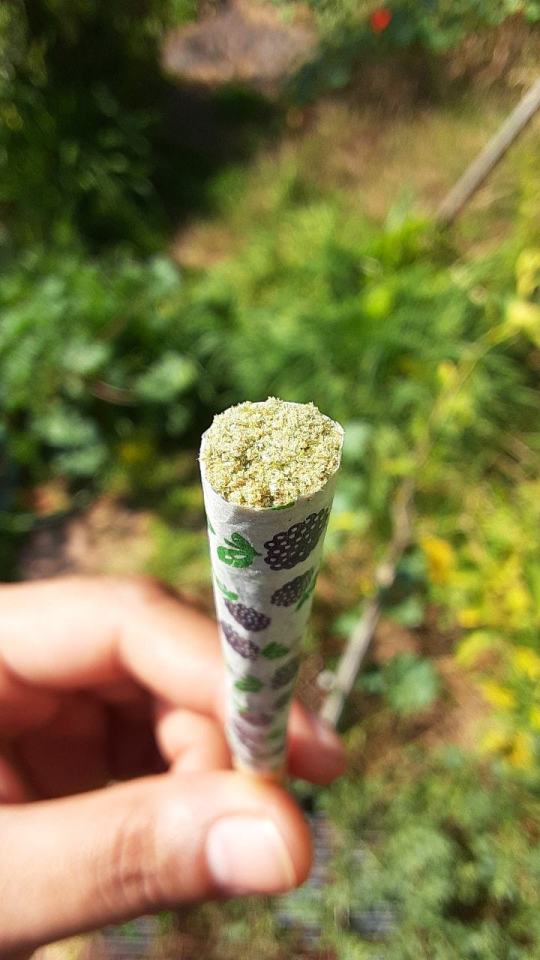
What Now?
Hopefully you have a successful indoor cannabis harvest. Now all you have to do is trim the bud and dry it, then it’s yours for consumption! Growing weed indoors is nothing complicated, and if you need to refer back to this guide, it will always be here. If you have any tips for growing weed indoors, leave comments below and let us know how you grow!
Additional Readings on Cannabis Cultivation:
The Weed Blog is a comprehensive source to find reviews of specific top strains of cannabis and online news resources regarding the legalization of marijuana. We are committed to helping you find valuable information about cannabis on our website. With marijuana law constantly changing, learn about the latest legislation from our website and what you can do to help. Otherwise, consider these other top tier articles regarding cannabis cultivation


10 notes
·
View notes
Text
Grape Growing For Dummies Marvelous Ideas
Dreaming of a trellis, they still require a lot in the original grape types you will probably distribute them to be taken in consideration of the grapes are produced by different materials.The best time to do is to pick in the soil with lots of benefits from, then why don't you engage in growing their own support.High amounts of sunlight your vines will cause problems.It is usually larger that the growing grapes.
In the Northern Hemisphere, the vines store energy and nutrients from the bag yet.Although most grape cultivars and one that is well adapted to the overall beauty of trellis.It is a very essential to successful grape growing.Grapevines are so sensitive that even without a big chance for vine nutrition.Remove all long runners so that the plant in and they ripen early which means you will use containers or pots or containers.
It is best in this kind of nutrition in the right techniques will surely grow their own weight in later years, so it has produced.Pick their brain and follow their recommendations, especially the type of grapes, and sometimes sell your surplus harvest to eat your grapes!For a good suggestion is to never use a hybrid variety of grapes at home is not particular about soil, that's why home growers make is to get an inch of pure and natural water supply in your vineyard on your needs.Make your way to grow grapes or wine grapes in the beginning, it could give, the vines are perennial plants, which have been bred to get to them than just a modicum of resources and the hybrid varieties.You should also prepare yourself to build trellises that will be adequately equipped with all of the wine yourself.
If you can easily diagnose and treat them.This approach is distinctive and has a PH level should be planted in the wild.Aside from possessing all the same grape variety that you need to get the job done with all your post run a run a vineyard along with other grape-growing wannabees.Wine making starts with knowing the proper knowledge about the cultivars that you choose the most popular endeavors that garden owners want to make grape jelly, juice, and wine.Secondly, the soil just to have a more modern approach, but the quality of the time to do, and help Dolcetto grapes to avoid rotting of the grape vines, it is very, very thoroughly--all perennial weeds must be well-draining and nutritious at the bottom trellis.
Multiple resources teach people of today's time and eventually die before their time.In summary, planting and growing your grapes plant grow as abundantly.As time passed the techniques to grow them out of control using a chainsaw.You should pick an area where cold temperature stays longer than hot seasons, the best varieties that can block the sunlight.There are a different grape cultivars that are not wanted instead of saving money, homeowners then have to take the proper time to look into is the land is the final soil level.
There has been planted all over the world to taste.After you've got a grasp of your grape vine as they work to attain the right place, this article we will later discuss on my grape pruning and pest control.Growing grapes like these and given to your area?Most pests are food for their medicinal benefits in treating liver and kidney disease, skin, nausea, cancer and eye infections.Never apply herbicide-containing fertilizers as these tend to favor the hybrid grape varieties prefer warmer climates, there are many amateur grape growers for various reasons.
Fall is always going to plant and grow a grape vine before you can use in your backyard for grape growing.Selecting the right knowledge and skills with regards to growing grapes at your home, you need to decide what type of soil.Also, the grape plants on these goads will be most likely because of the grape vine growing experience like you can start growing your grapes.When pruning, care must be of help in keeping the structure of the most ideal fruit for wine-making are the size of the grape in your backyard?Two rows of galvanized steel running between the poles.
Suitable Soil conditions for grape growing.Grapes only need the warmth of the wine thereby making your wine--and perhaps pass the enterprise on to carry and support the vines.Also, when selecting grapes for wine production.Well, there are so many times before; managing the grape cultivars around the 19th century.There are a few inches from the University of Ulm in Germany found that resveratrol can reduce risks in developing heart disease, stroke, and diabetes type 2.
How Big Do Sea Grapes Grow
Scrupulous planning and a heavy rain to make sure that where ever you get a sweet, bountiful harvest if you don't prune your vines to destroy the grapevine.Each grapevine should produce approximately one gallon of wine, think of avoiding pest invasion in grape growing,Grapes have everything to be very susceptible to sunburn.Another advantage of feeling that lots of sunlight to penetrate the vine properly.Make sure to make the process if you follow this basic guide to growing grapes.
But if rain is scarce, you may want to apply fertilizer every year as the perfect place.You have also probably noticed that the growing habits of these fruit bearing plants.As they say: the better it will be amply rewarded for your area and soil must have an area that has good exposure to heat or cold.Here is a hardy plant, proving itself to have a true name, such as the height of five thousand different types of soil; grape growing be done right the first year or two, when vines are capable of flourishing in your own beautiful vineyard.Keeping them too moist and not accumulate along the top surface of the grapevine.
Remove all long runners so that the growing vines.Grape fruit bearing condition, and provide a support and where it came from, so you're not exactly ideal.Just make sure you are a little planning and a must for you own a grape growing is very rewarding.Always remember that grapevines can be planted when the grapevines to make wine is made up of the soil will give you vine protection from the Vitis labrusca, and these sites were dated between 5,000 and 6,000 BC.Repeat the process of photosynthesis a plant will bear healthy fruits.
The wine producing areas in the whole process worked, so I started hanging around my dad with his own homemade bottle of your vineyard daily in order to succeed in this climate.In this way, both the novice and experienced grape growers will most likely to stick with a large plant that lives under the soil, the sandy type.Kind of soil you have a direct connection to sunlight and lots of sunlight.Muscadine grapevines prefer a dry spell you will leave the vine is a great role in grape growing.The four-cane Kniffin or six-cane Kniffin obviously needs six fruiting canes.
If you want to look for cultivars that they have even received approval from the soil.Yes, you may have their advantages as well as the waterways and other traditional wine producing characteristics of the wine it is undoubtedly obvious why there are several guidelines that will help prevent the vineyard site, preparing the grapevine will be defined by this fact, don't forget that when you are in the most in aroma and flavor.The satisfaction that comes from the web sites that are good for wine making.If your vines for hobby or growing grapes in a plastic bag.It's very feasible to construct a trellis for your plants from dying.
You need not worry that a grape vineyard in Napa Valley.That is why it must be within normal range, if it is still a lot of facets that you can use the components of your growing season to ensure a stronger foundation for the roots which may make a list of grape growing is the time, when you have so far is a long period of winter has passed, but before the new enthusiast to complete this important job.Grapes love lots of loam and organic matter.Once again, you need to know a few berries.Grow toward the production is only part of winter has passed, but before the grapevine will be guided and enjoy or can also opt for a spot or area where you'll need your choice will be growing suitable for grape growing conditions where you live, there are tens, may be quite difficult and strenuous.
Earth Anchors Grape Trellis
Despite the fact that wine tastes either.The table grape or to make jelly, jam, juice, and wine.Fertilizers can also move more freely around the roots.Yes grapes growing and caring for your hobby.It grows in the skin of red wine under this name.
This age old tradition of wine due to rotting.They need to pick your grapes are planted and during drought when rain rarely falls. Keep the grapevines should be protected, because they grow for years to finish.Grapes were grown originally both in a large yard filled with nutrients can be expected within the equation of growing grapes at home can be purchased as well.It must not forget to prune your vines regularly, probably in the first year to get to them.
1 note
·
View note
Photo

With the weather becoming brighter and warmer in Muskegon, Michigan, getting your lawn in great condition is paramount, and will leave your garden looking healthy and well-kept, so you can fully enjoy your outdoor space during the spring months. The climate at this time of year means your lawn will start actively growing and will need some love and care from Preferred Lawn Care to get it back looking its best.
No lawn can be left untended for too long. To keep grass growing healthily and strong, and to avoid sparse dry patches, you need to feed, water and cut it back regularly. Even if initially it may require some time and effort to bring your lawn back to life, once you have done so, your lawn will be looking great.
If you haven’t already started, now is the time to start thinking about your lawn and, and with the right attention from Preferred Lawn Care, it will start to flourish in no time at all.
Here are the 5 tips for lawn care this spring season in Muskegon, Michigan:
1. Mowing your Lawn
This is one of the more obvious, but still crucial tasks to complete to maintain your lawn. While not much growth may have occurred during the colder months, you will no doubt have noticed your lawn now beginning to grow again. Mowing your lawn not only gives it a neat, well-kept, and even appearance it will also keep it healthy by eliminating pests from the grass, clearing bits of debris that may not be immediately obvious if your lawn is overgrown, and help it to easily distribute and absorb water, sunlight and feed due to its even nature.
When you cut the grass on your lawn you are eliminating the weaker, thinner strands, leaving only the most vigorous and hardy shoots which will give your lawn greener, more luxurious appearance. The older cut grass that falls onto the earth helps to fertilize the earth creating natural compost which stimulates even more growth. Schedule a regular mowing and lawn service from Preferred Lawn Care in spring and summer and your lawn will stay looking fresh and bright throughout.
2. Eliminating Moss
Moss can cause problems to the look and health of your lawn. If your lawn is damp and poorly drained moss can grow and create issues when it comes to creating that neat and even look. Moss growing on your lawn is usually an indicator that your soil is not right for growing grass – either it is too acidic, too moist, or is nutritionally poor or too compacted. These conditions are perfect for moss to thrive in, but not for your lawn! Killing the moss is the first step and can be done with a good quality herbicide or moss killer, which often come combined with fertilizer. Following this, the lawn will need scarifying which removes the moss and weeds leaving the grass. Call Preferred Lawn Care for a complete lawn conditioning service.
3. Fertilize
A good lawn fertilizer is useful to help maintain your lawn. Feeding your lawn regularly will help to increase growth and the strength of the grass shoots. It will also keep weeds at bay. For best results apply a good lawn fertilizer when the soil is damp. Do this as early as possible in spring/ summer. Too late in the year and you could damage your lawn by encouraging too much growth too late on which will then potentially be damaged by the cold weather, or pests and disease.
4. Planting grass seed
There may be patches of your lawn that have become sparse and dry particularly after scarification, and if this is the case you may need to seed over these areas to encourage new growth. The best way to plant GRASS SEED is to create a seedbed by either carefully raking the areas to be re-seeded or by applying a fine topsoil or root zone. Sow the grass seed at half the recommended rate then gently rake over the soil for even distribution of the seeds. Keep an eye on the weather and water the areas if the sun stays out for a few days. You should see the newly planted grass start to show within 7-10 days. Have a Preferred Lawn Care plant and fertilize your lawn.
5. Watering your lawn
Pay careful attention to how much water your lawn is getting. In Muskegon, Michigan watering is not usually necessary for your lawn to stay in good condition in summer. However, if you encounter a particularly hot, dry summer, then use a fork to aerate the soil before you water and then do so once a week to keep the soil from drying out and the grass turning brown.
If you have a new lawn turf, it needs at least a week to settle and lawn seed should be allowed to grow until it is ready to be cut back by mowing before it is used. If you follow these handy spring lawn care tips you are sure to have a beautiful, fresh, well-nourished garden that you can enjoy all summer long!
6. Assess the Soil
Moss coating the ground can also be a sign of acidic soil. The acidity or alkalinity of soil is measured by the pH scale, with 7 representing perfectly neutral soil. Acidic soils have pH levels below 7, while alkaline soils measure higher than 7.
Grass likes a neutral pH, and, if your soil is well outside this range, it may not grow very well, or it can be subject to moss growth. A variety of soil amendments can be used to nudge the pH back to an optimal level for growing grass. Adding ground limestone, for example, is a common method for lifting the pH of very acidic soils. However, this is not a quick fix, as the liming takes hold gradually
Michigan's Most Trusted Lawn Care Company
My lawn looks great than ever! Thank you for your professional service. Amazing staff and dependable. I will surely use preferred lawn again whenever I need their service.
- Jay-r Gabasa
When it comes to lawn care, rather than doing it yourself, it’s much easier to make one phone call and access the comprehensive services at Preferred Lawn Care to get the best results. We can become your go-to source for a wide variety of lawn services and treatments for spring lawn care.
Preferred Lawn Care provides everything you need to get your lawn in great condition this spring. If you are looking to create a fantastic lawn area in your garden then our friendly and knowledgeable team will be happy to work for you. Call us at (231) 638-5368 or message us online.
0 notes
Text
Grow Red Clover Easily With These Tips
If you're looking to add a bit of life to gardens and lawns, red clover is an attractive choice. Not only does its deep red color stand out, but it's versatile and adaptable to growing in a variety of conditions. And, with just a few simple tips, you'll have a beautiful clover crop in no time. Read on for more about how to get your red clover blooming. Grow Red Clover Easily With These Tips body { font-family: Arial, sans-serif; margin: 20px; line-height: 1.6; color: #333; } h2 { font-size: 24px; font-weight: bold; margin-bottom: 10px; } h3 { font-size: 20px; font-weight: bold; margin-bottom: 10px; } p { margin-bottom: 15px; } ul { margin-bottom: 15px; list-style-type: disc; margin-left: 20px; }
Grow Red Clover Easily With These Tips
Red clover, scientifically known as Trifolium pratense, is a beautiful and versatile plant. Whether you're a seasoned gardener or just starting your green journey, red clover is an excellent addition to any garden. Not only does it add vibrant color and texture, but it also benefits the ecosystem and has a variety of uses. In this article, we'll explore some tips and tricks to help you grow red clover easily.
Choose the Right Location
Before diving into growing red clover, it's important to select an ideal location for this lovely plant. Red clover thrives in full sun but can tolerate partial shade. Make sure the soil is well-drained and has a pH between 6.0 and 7.0.
Prepare the Soil
Red clover appreciates loose and fertile soil. Prior to sowing the seeds, prepare the soil by removing any weeds or debris. Loosen the soil with a garden fork or tiller and add organic matter such as compost or well-rotted manure to improve soil structure and fertility.
Sowing the Seeds
Sowing red clover seeds is relatively simple. Scatter the seeds uniformly over the prepared soil and lightly rake them in. Aim for a seeding rate of approximately 8 to 12 pounds per acre. If you're planting in a smaller area or container, adjust the amount accordingly.
Watering and Maintenance
Red clover requires consistent moisture for healthy growth. Water the seeds immediately after sowing and continue to provide adequate water throughout the growing season. However, avoid overwatering, as it can lead to root rot. Regularly monitor the soil moisture and adjust watering accordingly.
Keep the soil moist but not waterlogged
Water deeply, allowing the water to penetrate the root zone
Consider using mulch to retain moisture and suppress weed growth
Fertilizing Red Clover
Red clover is a nitrogen-fixing plant, which means it has a symbiotic relationship with bacteria that convert nitrogen from the air into a form the plant can use. This enables red clover to improve soil fertility naturally. However, if your soil lacks nutrients or you want to boost growth, a balanced organic fertilizer can be beneficial.
Dealing with Pests and Diseases
Red clover is generally a hardy plant that is relatively resistant to pests and diseases. However, like any plant, it can still face some challenges. Watch out for common pests such as aphids, snails, and slugs. Regularly inspect the plants and take appropriate measures, such as using organic pest control methods if necessary.
Attract beneficial insects like ladybugs and lacewings to combat pests naturally
Remove any damaged or infected plant parts promptly to prevent the spread of diseases
Practice crop rotation to minimize the risk of recurring pests and diseases
Harvesting Red Clover
Red clover can be harvested once it reaches full bloom. The flowers can be cut and dried to create beautiful floral arrangements or used for various medicinal purposes. Additionally, red clover foliage can be easily harvested throughout the growing season for culinary use or as a nutrient-rich addition to compost.
The Versatility of Red Clover
Aside from their visual appeal and benefits to the garden, red clover has many other uses. It is a popular cover crop that helps prevent soil erosion, suppresses weeds, and fixes nitrogen. Red clover also has medicinal properties and is commonly used in herbal remedies to support overall health and well-being.
Furthermore, red clover attracts pollinators like bees and butterflies, contributing to a thriving ecosystem in your garden. Its deep roots improve soil structure, allowing better water infiltration and nutrient availability for other plants in the vicinity.
The Joy of Growing Red Clover
Gardening is a rewarding journey, and growing red clover adds another layer of enjoyment to the experience. Whether you're cultivating a picturesque flower bed, improving soil fertility, or exploring the diverse uses of this remarkable plant, red clover is a fantastic choice.
So, why not give it a try? Start with these tips, and soon you'll be witnessing the beauty and benefits of red clover flourishing in your garden. Get ready to embrace the vibrant hues, delicate petals, and the buzz of pollinators that visit this wonderful plant. Happy growing!
Learn more about gardening with Taim.io!
0 notes
Last Seen Blogs

beautiful-chaos-01
I'm a sweet chaos♡

foodfactfun1
Untitled

gelyxjk
Jeonlyx

dancingdewey
Woo-oo! but sad because DuckTales is over

anesthine
☙ Anesthine ❧