#Install Cricut Design Space
Text
How to Set Up My Cricut Explore Air 2: A Stepwise Guide
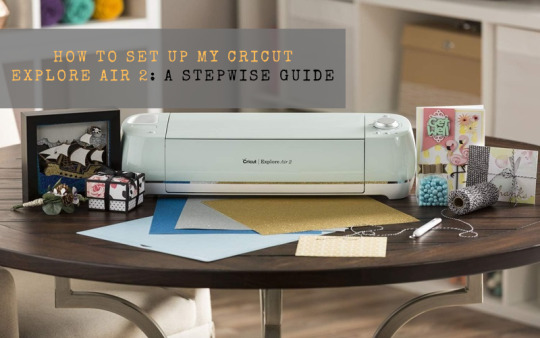
The common question every other DIYer searches for is how to set up my Cricut Explore Air 2. Beyond the shadow of a doubt, this Cricut product makes the user’s DIY dreams come true by cutting 100+ different materials. Also, the Cricut Explore Air 2 works with 6 different tools to cut, write, score, and foil on various materials. Whether you are creating cards, T-shirts, or home decor, this Cricut machine makes it easy to go from an idea to I Did It.
Further, when referring to the Cricut machine, one must download and connect the Cricut Design Space app to this Cricut product. Following this, all DIYers need to do is set up and pair both devices for any projects. Keep going with the blog and study the Design Space download, machine setup, and pairing process.
How to Download Cricut Design Space on Mobile Devices?
Before I encountered how to set up my Cricut Explore Air 2 for crafting purposes, I was obliged to install the Cricut app on my mobile devices. To save you time, I have explained the installation process straightforwardly. Stay focused on the given below steps:
Android
Intending to install the Cricut app on Android phones, follow the steps provided below:
Start by paying a visit to the Google Play Store and navigating to Design Space.
After getting lucky in finding the app, press the Install option, which appears in the middle of the page.
Now, the app will start to install, and keep the phone open till the installation is ongoing.
Afterward, return to your device’s home screen and open the app.
Next, choose Cricut Machine Setup or Sign In and make new designs on the blank canvas.
iOS
Furthermore, this Cricut software is also compatible with iOS devices as an app. To get this free-of-cost app, follow these steps in a systematic order:
First, open the App Store and type Cricut Design Space inside the Search blank.
Afterward, hit the Get button and confirm the installation by entering your iTunes password (If asked).
Now, you need to wait for a few seconds until the app installation is going on.
After installing the app, click the Cricut Design app and open it.
To get started, press Machine Setup or Sign In (as per your preference) and start designing your craft on the canvas.
After downloading this Cricut app, it’s best to introduce you to setting up this Cricut machine with mobile devices. The details of the machine setup process can be learned from the paragraph below.
How to Set Up My Cricut Explore Air 2 on Android/iOS?
To finish the Cricut Explore Air 2 setup process with Android/ iOS devices, you need to follow the steps given below:
Initiate the process by plugging your cutting machine into the socket and turning it on.
After that, pair up your Android or iOS devices with Cricut products via Bluetooth.
Further, install Cricut Design Space from the App Store or Play Store and launch it.
Following this, if you already have an account, then sign in or create your account.
Next, tap the Menu panel and then tick the Machine Setup option.
At this point, click Cricut Explore Family and then follow the on-screen instructions.
In the end, you will be notified that the setup has been completed when invited for a material test cut.
These steps should have taught you how to set up my Cricut Explore Air 2 with mobile devices. The DIYer needs to pay special attention while performing the setup process, as it will help them finish the pairing process quickly.
How to Pair Cricut Explore Air 2 to Mobile Devices via Bluetooth?
On the contrary, this Cricut product can pair them wirelessly with Android/ iOS devices. Get to know about the process by referring to the steps below:
Android
Take a quick scan at the steps given below and grab the details about the pairing process:
Initiate the pairing process by ensuring your respective machine is on and within 10-15 ft of your Android device.
Next, go to Settings and enable Bluetooth on your device (If it isn’t on).
After that, you will see your device name inside the Available Devices column.
Then, enter your four-digit PIN code (0000) and click the OK button.
At last, your wireless pairing process will come to an end.
iOS
See the steps below and learn how to pair this Cricut machine with iOS devices.
First, you must ensure that your Cricut cutting machine is on and available within 10-15 feet of your iOS device.
Following this, go to Settings and activate your device Bluetooth by moving the toggle to the right-hand side.
Select your Cricut machine name from the Devices section and enter the PIN code.
After that, enter the PIN code and click the Pair option.
Finally, both of your devices will easily get paired with each other.
Conclusion
You must have understood how to set up my Cricut Explore Air 2. After finishing the download, set up, and pairing process, the user can make various custom-made crafts with this cutting machine. In addition, this Cricut machine is compatible with all PCs and smartphones and works with the Design Space app. Moreover, all users must ensure they take the correct steps during the setup process.
FAQs
Can I Set Up My Cricut Explore Air 2 on My Mobile Device?
Crafters can use Cricut Design Space software to set up their Explore Air 2 with mobile devices. After installing the app, they must turn on their machine and connect it to mobile devices. Then, they must create their respective account by entering the required details or signing in using their Cricut ID and password.
How to Set up Cricut Explore Air 2 on a Desktop?
With the help of the below steps, you can easily set up Cricut Explore 2 with a desktop:
First, unpack your cutting machine, plug in the power cable & switch it on.
Next, connect both devices via USB cable or Bluetooth.
After doing that, download Cricut Design Space & create your account.
Now, follow the on-screen instructions and wait till the setup process is on.
Finally, when the setup is finished, you will be invited to cut the material.
How Do I Install Cricut Design Space on My Windows?
By referring to these steps, one can easily install the Cricut software on their Windows:
First, go to Cricut Design Space’s official website Cricut.com setup mac and click Download.
After that, double-click the file available in the Downloads folder.
Next, open the installed app and create your account (If you are a new user).
Finally, you can start working on new projects on the Cricut app.
Source: how to set up my cricut explore air 2
#how to set up my cricut explore air 2#setting up cricut explore air 2#cricut design space download#cricut design space login#cricut design space app#design.cricut.com#cricut explore air 2 setup#how to set up a cricut explore#install cricut explore air 2#Install Cricut Design Space
2 notes
·
View notes
Text
install cricut design space app:
Cricut Is Smart Cutting Machine Which Makes Beautiful Designs for Home or Offices, Cricut Cutting Machine Works with Design Space Software App with the Help of Cricut Design Space you can easily Craft your Designs. Cricut App is Essential App for Cricut Machines So need to Download and Install cricut Design Space App, for more
#install cricut design space app#install cricut design space#install cricut explore air 2#install cricut#cricut create connect to computer#cricut setup on computer#cricut new product setup#cricut new product device#cricut.com/setup#www.cricut.com setup login#www.cricut.com/setup#www.cricut.com/setup login
0 notes
Text
How to Connect Cricut to MacBook: A Complete Guide
Do you want to connect your Cricut machine to your MacBook? If yes, then this blog will help you understand the connection between Cricut and Macbook. It’s not only about you; almost everyone who is starting with a Cricut machine finds the setup procedure difficult. Therefore, be with me and learn how to connect Cricut to MacBook here.
Before that, you need to understand that Cricut Design Space is an intuitive Cricut software that you need to set up on your device to connect your Cricut product. To get this software, you need to download and install it on your device. Then, you will be ready to set up your Cricut machine for a MacBook.
What Do You Need to Get Started?
To get started with the Cricut connection to MacBook, you need to keep a few things in mind. Look at the steps below to learn the necessary requirements.
Now, you are ready to start the Cricut setup on your MacBook. Let’s check the steps.
How to Connect Cricut to MacBook?
As you know, Cricut machines are compatible with Windows and Mac computers; you can set it up easily on any of your devices. Here, you’ll learn how to connect it to a Mac device. Look at the steps below.
Step 1: Connect Cricut to a MacBook via Bluetooth
Your first step should be to connect your Cricut to a MacBook using a suitable method. I’m choosing the Bluetooth connection method, which is the best wireless connection.
Finally, your pairing process will be finished. You have learned one step towards how to connect Cricut to MacBook.
Step 2: Download Cricut Design Space
In the second step of connecting Cricut to a MacBook, you need to download and install the Cricut Design app on your device. Look at the steps given below to install the Cricut software.
Finally, you have learned how to install Cricut Design Space and how to connect Cricut to MacBook. Now, you can start project-making with your amazing Cricut machine.
FAQs
How Do I Setup Cricut Machine on My Phone?
To set up a Cricut product on a phone, follow these steps.
How to Connect Cricut Maker to Mac?
Follow these steps to learn how to connect Cricut to MacBook:
Why Am I Unable to Run Cricut Design Space on My Mac?
This problem is common, and everyone might have experienced it. This issue may arise when your app is not updated or there are some issues with the device you’re installing. Hence, if you get such issues, immediately try updating your app. Otherwise, you can also uninstall it and then install it back.
Visit: install cricut design space app
www.cricut.com setup login
Source: https://explorenewmachine.com/how-to-connect-cricut-to-macbook-a-complete-guide/
#cricut.com/setup mac#cricut.com/create#cricut.com/setup#cricut.com sign in#cricut.com design space#cricut setup#cricut explore air 2#cricut#install cricut design space#cricut design space#install cricut design space app#cricut design space login#cricut design space app#www.cricut.com setup login#www.cricut.com/setup#www.cricut.com/setup login#install cricut explore air 2#cricut new machine setup#cricut software app#cricut create connect to computer#setting up your cricut maker#cricut setup for pc#cricut setup explore air 2 setup
0 notes
Text
#cricut.com/setup#Cricut explore air 2 setup#install cricut design space#Cricut Mini Setup#cricut.com setup Mac
0 notes
Text
#install cricut design space#cricut.com/setup#Cricut explore air 2 setup#www.cricut.com/setup#cricut login#cricut design space login
0 notes
Text
How to Use Cricut BrightPad: Beginner's Guide to Get Started
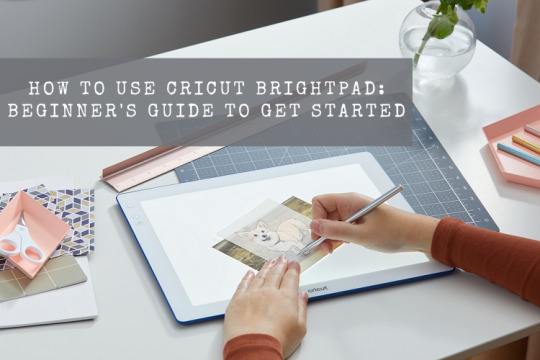
Hey there! Do you want to learn how to use Cricut BrightPad in simple steps? In this blog, I am covering everything about BrightPad, such as a list of projects you can create, how it works, and how to use it.
I truly appreciate Cricut for this innovative craft machine. Indeed, I will not forget the day when I ruined one of my vinyl designs. I worked hard on it as I made this from scratch. Since I was a beginner, I was not aware that I needed to be extra cautious while weeding it. But as I started weeding, I mistakenly weeded the part that I should not have removed. That day, I couldn’t save my design, and due to this disappointment, I headed to the Cricut website Cricut.com/setup and found this amazing gadget: Cricut BrightPad. I have used it in all my DIY projects where there are fine cuts. Keep reading to learn more!
How Does Cricut BrightPad Work?
First, let’s understand what is a Cricut BrightPad. The BrightPad is a lightbox tool used to add light from behind or under a project. The device is simple, and you can easily adjust the brightness level using the power button. So, there are no extra or complex settings to do. Just a single button that does everything for you.
Although the BrightPad doesn’t come with a rechargeable battery, Cricut BrightPad Go, which is the latest model in Cricut’s lineup, comes with a lithium-ion rechargeable battery. But later in this blog, we will only talk about how to use Cricut BrightPad, not the latest one.
As you can see in the picture below, this is the purpose of using this light pad. Be it glitter vinyl design or other, you can simply weed the design by putting it on the top of the BrightPad. Moreover, you can adjust the brightness as per your requirements using the power button.
Things You Can Do With Cricut BrightPad
Other than weeding, there are several things you can do with BrightPad. So, you don’t know that it is only for weeding. I know 90% use of this device is for weeding, but for the rest, you can do the following. Here’s what you can do with BrightPad:
Jewelry Making
Creating Baking Pieces
Weed Vinyl
Trace Lettering
Painting without Pencil Lines
Work with Metal Pieces
Piece Together Quilt Squares
Work with Beads
Trace Images
Now, let us look at the steps below to understand the use of BrightPad.
How to Use Cricut BrightPad for the First Time?
As I have already discussed above, you can perform various types of tasks on BrightPad. Be it weeding, tracing, jewelry making, and more. So, let me show you how you can use the following steps:
First of all, you will need a wall adapter so that you can plug in the BrightPad to the power source.
Then, press the Power button to turn on the device.
You need to place the cut vinyl design or anything that you are working on on the top surface of BrightPad. You can also use the painter’s tape to tape your vinyl to keep it in one place.
After that, you can start weeding the negative space from the vinyl. If required, press the same power button to adjust the brightness level.
So far, you might have understood how to use Cricut BrightPad for the weeding of a vinyl design. Now, you can easily use it as there is no setup required, and it is portable and easy to use. So whether it is tracing the figure, jewelry making, or anything like weeding, the Cricut has made it easier for you in just a single press. Plug, Press, and Use; that’s what you will need to do only.
FAQS
Do I need to plug in the Cricut BrightPad?
In Cricut BrightPad, there is no battery. Hence, you will need to plug it into the power source every time you use it. For this, you can use a standard USB wall adapter; otherwise, use a computer USB port to light the BrightPad. Plus, Cricut doesn’t provide any wall adapter with this product. So, you need to use your own wall adapter.
Is it possible to use Cricut BrightPad with an external battery pack?
As per Cricut, you can use the BrightPad with external battery packs, but they have never tested this method and also do not guarantee the charge expectancy while using the external battery. So, you can use it but at your own risk. Besides this, you always have an option to try with the direct power source.
What do Cricut BrightPad button lights indicate?
The meaning of the BrightPad button is simple. For example, when you plug it into the power source, the power button turns white, indicating it has been plugged into the power socket. Also, it turns white when it is on, and the BrightPad surface is lighting. Hence, there is one single-color light that is given only in the BrightPad.
What is the main difference between Cricut BrightPad and BrightPad Go?
The first basic difference between both the devices is that A BrightPad comes with a single power button that is used to change the brightness level and power on the device. On the other hand, Cricut BrightPad Go has one dedicated button for power buttons and another up and down button for brightness settings. Besides, BrightPad has more features, such as a rechargeable battery, a scratch-resistant surface, a non-slip base, and more.
Wrap Up
In this blog, we learned how to use Cricut BrightPad. Besides these, I also explained how this device works and the list of things you can do with BrightPad. At last, I talked about the use of this device. The use is quite simple and easy, as you don’t need to do a complex setup before using the BrightPad. Using this device, you can work on fine design and cut vinyl that is not easily visible in room light.
For more information visit: install cricut explore air 2
cricut explore air 3 setup
cricut Design Space download
cricut machine set up
Source: How to Use Cricut BrightPad
#how to use Cricut BrightPad#Cricut BrightPad Go#what is a Cricut BrightPad#cricut.com/setup#cricut design space download#install cricut explore air 2#cricut machine setup
3 notes
·
View notes
Text
5 Cricut Christmas Shirt Ideas to Elevate Your Holiday Style

In just a few more weeks, the Christmas holidays will start. I know many of you are looking for unique Christmas ideas that will stand out. Therefore, this year, I have created something new. Having already made 5 Christmas shirts with my Cricut Maker, I will share some Cricut Christmas shirt ideas for you to try on yourself or for your family members.
Trust me, it is always fun to make shirts for Christmas using the Cricut machine. You can wear these during the holiday season or on Christmas Eve. But, every year, during Christmas, my children want to try something unique to look different. So, I tried on many shirts for my kid and husband.
In this blog, you will find the best ideas for Christmas shirts that will be suitable for both children and adults. Ready to try these Christmas shirt ideas? Let’s start.
1. Christmas Shirt for Kids
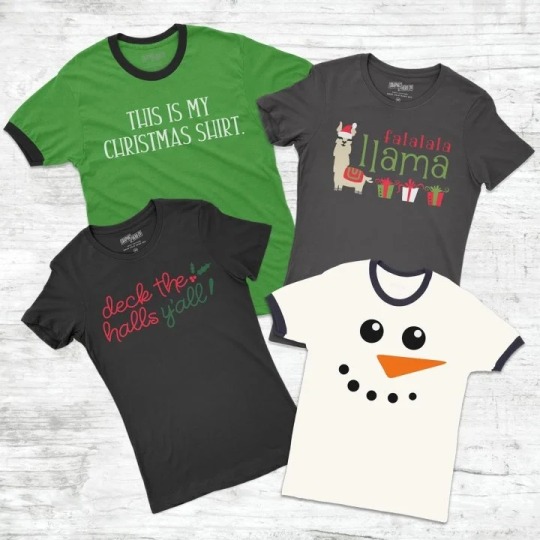
This year, gift these elegant shirts to your kids. This green, black, and white color t-shirt will get your child in the holiday spirit. I made two pairs of T-shirts for my children, and I added the texts of their choices. Yes, my sons are also as creative as I am, and they helped me to find the best texts from the Internet. Finally, see the result after making it using vinyl material and a Cricut Maker machine. Try them today and bring a smile to your children’s faces.
2. Merry Christmas Shirt

What do you think about these cozy Christmas shirts? This is my all-time favorite from all Cricut Christmas shirt ideas. Yes, you can make it for your child and even for yourself if you are curious to try.
Cricut sees no age because the available designs on Cricut are meant for everyone. But the best thing about this design is that it is available on the Cricut website. Just navigate to the official site and try the design on your children’s T-shirts.
3. Snowflake T-shirt

Do you want to try something simple this Christmas? Here is the snowflake white T-shirt. I made this using a compatible infusion ink blank, and I also recommended you use the suitable blank. Otherwise, it will be difficult to transfer the material onto your T-shirt. Since the design is quite simple, you can easily make it on your Cricut Joy.
4. Christmas Crew Shirt

I added this ‘Christmas Crew’ text to my husband’s white t-shirt. He really liked it so much. For this, you will need a cutting machine. However, if you want to try this for your child, then you can. The red Santa cap gives it a good spirit of the Christmas holidays. Don’t delay, and try this elegant shirt this year on Christmas.
5. Shirt for Newborn Baby

Is it your child’s first Christmas? Then, gift them this beautiful, simple-looking white t-shirt. The color I have used in texts or pictures is black only. It is because it looks amazing on a White T-shirt. For this, I used heat-transfer vinyl along with my Cricut Maker 3. Vinyl materials are available in different types, such as permanent and removable vinyl. But, my recommendation is permanent.
Wrap Up
In this blog, I have explained 5 Cricut Christmas shirt ideas for everyone, including children. In contrast, most of the designs are suitable for people of all ages. But the last T-shirt design I have mentioned in this blog is only suitable for the child going to celebrate his/her first Christmas. Also, there are many types of materials but the two most common materials are removable and permanent. If you want permanent, then go with permanent Cricut vinyl.
FAQs
Can I make a Christmas stocking with a Cricut machine?
Yes, you can easily personalize your stocking for special occasions like Christmas. During this time, most people like to wear personalized stockings. However, making stockings using a Cricut machine is quite simple and does not require many tools and accessories. Just get your blank stockings in the desired color and add the designs you want to add to them.
What are some Cricut Christmas shirt ideas for beginners?
There are many types of text or graphics available that you can try on your shirts. But I have some of the best ideas for your Christmas shirt. Find the list below:
Matching Same-Color Family Christmas Shirts
Funny Christmas Shirts
Mini Santa Shirts
My First Christmas Logo Shirt
Santa Baby Shirt
What are the Christmas shirt ideas using Cricut Maker?
If you want to use Cricut Maker for your Christmas shirt, then you are free to try any kind of creativity you want. Maker is a versatile machine that cuts more than 300 materials easily. So, here are the best Cricut Christmas shirt ideas that you can create using Cricut.
Merry Christmas Bear Shirt
This Is My First Christmas T-Shirt
Merry and Bright Tree Delivery Shirt
Merry Christmas With Little Gnomes Tee
For more information visit: Cricut.com setup mac
cricut new product setup
install cricut design space app
Cricut Design Space software
#cricut christmas shirt ideas#Cricut Design Space software#Cricut.com setup mac#cricut design space download#install cricut design space app
2 notes
·
View notes
Text
How to Upload Fonts to Cricut? [Easy Ways]

The use of the right font is essential in creating crafts projects. Each font you select gives your project a different feeling and emotional effect. Fonts are an important element in the process for a crafter using Cricut. The good news is they can learn how to upload fonts to Cricut and use them for their project.
Here is a useful tutorial that you can read and learn how. It will teach you quick ways of uploading fonts to the Cricut Design Space software and using them on Windows and Mac. After that, you can use them to give a personalized touch to your project. But to upload a font, you first need to download it. Before starting the uploading process, let's first know where you can find fonts to download.
Where to Find Eye-catching Fonts to Download?
There are several places where crafters can discover both free and paid fonts to download for their projects. They can select from beautiful and high-quality font collections and include them in the Design Space to begin with their project. Most often, their free font downloads option includes a personal use license. It makes them use those fonts for free in their projects. Thus, if you want to sell items with certain fonts, include only the one for commercial use.
Easy Steps to Access Fonts in Cricut Design Space
You can access Fonts in the Cricut Design Space with some basic steps. Here are some of the steps you need to execute for the purpose.
First, download the font you want.
After that, unzip your font file folder.
Double-click on the individual font file.
Follow the prompts to install the font file on your computer.
Now, open Cricut Design Space.
Start to create a New Project.
In the next step, add a new text box to your canvas.
Click on the font drop-down menu to change the font.
How to Upload Fonts to Cricut Design Space on Windows/Mac?
You can access the font on several devices. You only need to download and install the font onto each device you want to use. Here are some easy steps that can help you add fonts to this Cricut's software on Windows and Mac computers.
For Windows
Follow these instructions if you use Windows to access the Cricut Design Space. Once you learn how to upload fonts to Cricut on Windows, you can include those fonts in your project.
First of all, download the font file you want to have in your project.
Next, navigate to your Downloads folder.
Find the downloaded font file and right-click on it.
Choose the Extract option to extract those files.
In the following step, right-click on the font file and choose Install.
Once you perform these steps, the fonts will get installed on your windows. You can find them in the Design Space to access.
For Mac
Do you want to add fonts on your Mac device? Here are a few of the directions that you need to follow.
First, download the font you prefer.
Double-click on the downloaded zip folder.
Once unzipped, select the fonts and use ctrl+click to launch the menu.
Now, select Open with > Font Book option.
Now, you will see a pop-up to install fonts.
Tap on the Install tab to begin the installation process.
It will make your fonts appear in the FontBook. From there, you can use it in the Design Space.
Conclusion
The text gives an emotional touch to the project. Thus, every craft lover should know how to upload fonts to Cricut. The process is also quick and straightforward. Moreover, Design Space makes it effortless and time-saving too. First, download the font from a specific site and then add it on a device - windows or Mac to use it in your project. Keep experimenting with crafts and fonts for attractive projects.
Frequently Asked Questions
How Can I Add Fonts to Design Space on My iPhone?
For this purpose, you first need to install Fonts, a free font manager app. Below are some instructions to make your fonts available in the Design Space app.
Begin to download and install the Fonts app.
Unzip the file after downloading.
Now, open the iFont and choose Font Finder.
After selecting Open Files, move to the font file and select the file you want to install.
Next, select the Installer tab and click on Install to continue.
Now, close the app and open Settings.
Tap on the tab Profile Downloads.
In the end, press install.
Why are My Downloaded Fonts Not Showing Up in Cricut?
Have you downloaded your favorite font, but it's not showing? It can be because of several reasons, which include the following:
After downloading, you still need to install the fonts.
There was no successful installation.
Your font file format was not .ttf or .otf.
You still need to restart the app after installation.
How Can I Unzip the Downloaded Fonts File?
Make sure to execute these easy steps to unzip your downloaded font file. Here they are.
Right-click on the .zip folder with font files.
Next, click on Extract.
Select the TrueType or OpenType font files.
Subsequently, right-click on them and then install them.
At last, click Yes to allow the program to change your device.
Source: How to Upload Fonts to Cricut
Visit: design.cricut.com/setup
Cricut.com/setup
Cricut EasyPress 3 Setup
Cricut heat press guide
Cricut Design Space Login
#Cricut.com/setup#Cricut EasyPress 3 Setup#design.cricut.com/setup#cricut design space#install cricut design space app#cricut design space for mac#Cricut heat press guide#how to upload fonts to cricut
2 notes
·
View notes
Text
Cricut machines are the new-generation advanced DIY cutting machines that give you the freedom to personalize anything you want, from your favorite T-shirt to your nameplate and wood sign. Moreover, it provides heat presses to prepare iron-on projects. Plus, it allows you to make paper crafts, stickers, and decals for your home or office decor, hand-made greeting cards, seating projects, wood engraving, and etching effortlessly. To utilize all the amazing features of a Cricut machine, visit its official website at Cricut.com setup windows
and get the Cricut Design Space software.
0 notes
Text
Cricut Setup on Computer: Easy Connection Guide
Setting up a Cricut machine on a computer may seem like a tedious task, but it’s not. Being a craft enthusiast, I have setup many Cricut machines on devices. With my experience, I can tell you the procedure involved in the setup of a Cricut machine. Thus, if you were searching for a guide to learn the Cricut setup on computer, your search is complete here.
I will show you the easiest ways in this guide. Cricut machines are excellent feature-rich tools that are compatible with almost all devices except Chromebooks. With the Cricut machine, you can make tons of things using numerous Cricut materials and supplies.
If you want to learn the process quickly and start your crafting journey with this ultimate machine. Never miss this opportunity to see what I can teach you here.
Cricut Setup on Computer (Windows and Mac)
Explore the steps to learn how to setup the Cricut machine on a computer. I’m using a Bluetooth connection to connect the machine to a computer device. Check out the steps below.
For Windows
If you’re a Windows user, you’ll need to consider the steps below to setup your Cricut on Windows.
That’s how to perform the Cricut setup on computer. Now, you can start crafting with your amazing Cricut machine.
For Mac
To perform the Cricut machine setup on a Mac computer, you’ll need to follow the steps given below. The steps for Mac are slightly different, so follow them carefully.
Finally, your Mac will connect to your Cricut product via Bluetooth. This is how to complete the Cricut setup on computer effortlessly.
Download Cricut Design Space on Computer
The Cricut Design Space software is important for setting up your Cricut machine on any device, like a desktop or smartphone. This software will help your machine communicate with your device. Let’s get started with the steps.
For Windows
To get the Cricut Design Space on your Windows computer, follow the steps below.
That’s how you can get the Cricut Design Space software and start creating projects.
For Mac
To get the Cricut Design Space on a Mac system, you’ll need to follow these steps. Have a look at them.
That’s how you can get the Cricut Design Space application on your Mac. Finally, you have learned how to do Cricut setup on computer easily.
FAQs
How to Do Cricut Setup on Computer Windows 10?
To setup a Cricut machine on a Windows 10 PC, you will have to follow the steps given below.
How to Do Cricut Design Space Download for Windows 10?
To get the Cricut Design Space on Windows 10, follow these steps:
How to Setup Cricut on Phone?
To setup your Cricut machine on a phone, follow these steps.
Visit: install cricut design space app
Source: https://cricutspace6.wordpress.com/2024/05/14/cricut-setup-on-computer-easy-connection-guide/
#install cricut design space app#install cricut explore air 2#cricut.com setup download#cricut.com/create#cricut.com/setup#cricut.com/register#cricut.com sign in#cricut.com design space#www.cricut.com setup login#cricut new machine setup#cricut design space#cricut create connect to computer#setting up your cricut maker#cricut explore air 2#cricut explore air 2 setup#cricut setup#cricut new product setup#cricut setup on computer
0 notes
Text
How to Connect Cricut Explore Air 2 via Bluetooth: Full Guide
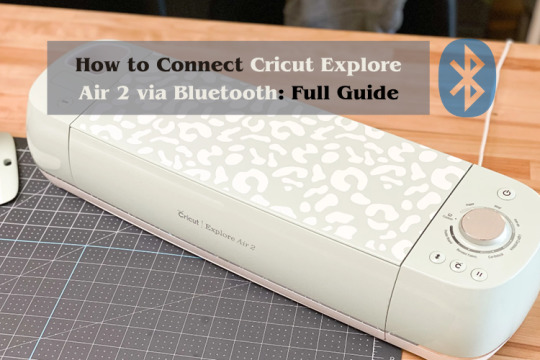
Hello to all my readers; welcome back to my other blog. Please remember that I introduced you to the latest member of the Explore series in the last blog. Now, it’s time to discuss how you can connect Cricut Explore Air 2 via Bluetooth. You all will agree that Cricut keeps launching new Cricut machines. Among all those models, I prefer the Cricut Explore Air 2 Setup as it gives physical form to my DIY dreams and creates new ideas.
Ever since I added this Cricut machine to my craft room, I have been creating new projects for personal and professional use. Apart from cutting materials, the Explore Air 2 has an in-built Bluetooth feature. You can connect the Cricut machine wirelessly to Windows, Mac, iOS & Android devices. This tutorial will help you understand the method of connecting this Cricut Explore model to computers and mobile devices.
Connect Cricut Explore Air 2 via Bluetooth to Desktop
As mentioned in the earlier section of this tutorial, the Explore Air 2 easily connects to PCs wirelessly. Don’t leave the golden chance of learning the process following which you smoothly connect both devices via Bluetooth:
For Windows
By studying this area of this blog, you will be able to collect details on connecting this craft plotter to the Windows system.
Initiate the process by switching on your cutting machine and keeping 10-15 feet from your computer.
Now, tap the Start menu, then select Settings > Devices option.
If your Bluetooth is on, click the Add Bluetooth or other device option.
Following this, tap the Bluetooth and stand by till your computer detects this Cricut machine.
Afterward, a pop-up window will display a list on your computer screen.
From the list, click the Cricut Explore Air 2 mentioned in the list.
You can successfully connect Cricut Explore Air 2 via Bluetooth on Windows through these steps.
Are you curious to learn how to connect this Cricut model to your Mac wirelessly? Then, you are most welcome to refer to the following part of the blog.
For Mac
Are you looking for directions to connect this Cricut machine setup to your computer? If yes! Then you need to pay attention to the following instructions:
Inaugurate the method by repeating step 1, which you did on a Windows computer.
Then, open the Apple menu > select System Preferences > tick the Bluetooth icon.
Now, select Turn Bluetooth On on the left-hand and stand by till the scanning is in progress.
Further, select your Cricut machine from the device’s list to continue the process.
In the end, you will learn that the connection process has been completed successfully.
Connect Cricut Explore Air 2 via Bluetooth to Mobile Devices
You must be aware of the connection process if you complete most of your work from your mobile device. The Cricut new product setup supports desktop computers like this, so you can efficiently operate it on your Android or iOS device.
For iOS (iPad, iPhone)
Educate yourself by coming across the guidelines that will give you a chance to learn about wirelessly connecting the Explore Air 2 machine to your iOS smartphone:
Ensure your machine is on to connect Cricut Explore Air 2 via Bluetooth to an iOS device.
After verifying that, place both devices at a distance of 10-15 ft from each other.
Then, open the Settings tab and click the Bluetooth option.
Start looking for the Cricut Explore Air 2 inside the Other Devices section.
After finding it, select it and stand by for a few minutes till the connection process is on the way.
You deserve a pat on the back for successfully connecting this cutting machine to your iOS device.
For Android
Subsequently, take a look at the below steps as it will be sharing with you the steps for connecting your Android phone to the Cricut Explore Air 2:
You must begin this process by repeating the iOS device step 1.
After that, scroll down your Android device home screen and hold on to the Bluetooth icon.
Now, enable Bluetooth and keep calm till your Android device detects the machine.
At this time of the process, click the Cricut Explore Air 2 from the Available Devices section.
Finally, both of your devices will successfully connect and are all set for cutting materials.
Connecting this Cricut Explore model to PCs and mobile devices will make it much simpler to create thousands of custom-made projects from this craft plotter.
Frequently Asked Questions
Can I Connect My Cricut Explore Air 2 Using a USB Cord?
You can connect your Cricut Explore Air 2 to devices using a USB cord. No doubt, you have to follow the below-said steps:
Please turn on your respective devices and keep them close to each other.
Now, unbox the USB cord that comes with your cutting machine.
After that, take one side of the cord and put it inside the machine’s USB port.
Next, insert the cable’s other end into your device’s USB port.
Then, the machine power button gets enabled, indicating that the connection has been made successfully.
How Can I Setup My Cricut Explore Air 2 on Computer?
To setup your Explore Air 2 on your computer, go through the following steps:
Begin the process by switching on your machine & plugging it into the wall socket.
Now connect your devices via USB cable or Bluetooth (as per your choice).
Next, download the Cricut Design Space app on your system & sign in to the account.
After doing that, go through the on-screen instructions for setting up your devices.
Finally, you will be invited to a test cut when the setup is finished.
Why Is My Cricut Explore Air 2 Not Connecting to Bluetooth?
There are different reasons why you might be facing errors while connecting the Explore Air 2 to Bluetooth. The reasons are as follows:
Incompatible device
Your device operating system isn’t updated
Other devices already connected
Your device’s Bluetooth is off
For more information: Cricut.com setup mac
how to setup cricut explore
install cricut design space app
Source: Connect Cricut Explore Air 2 via Bluetooth
#connect cricut explore air 2 via bluetooth#cricut design space download#cricut design space login#how to setup cricut explore#cricut new product setup#install cricut design space
0 notes
Text
How to Connect My Cricut Maker 3 to Bluetooth: Easy Guide
How to connect my Cricut Maker 3 to Bluetooth is the most frequently asked question I receive from my readers. The question is easy to answer, and I will make it easier for you.
I remember the day I got my first Cricut Maker 3 machine. I was a little bit, but somehow, I learned to connect Cricut to a device using Bluetooth. When I can do this, you can also do it in no time. For this, you will need a compatible computer or mobile device to which you want to connect. Let’s learn how to connect a Cricut machine with different devices, including Windows, macOS, iOS, and Android. Let’s delve into this blog and start establishing a connection.
How to Connect My Cricut Maker 3 to Bluetooth on Windows?
Connecting your Cricut cutting machine to a Windows computer using Bluetooth is not rocket science. By following the simple steps given below, anyone can easily connect their Cricut to their PC.
Here’s how to connect Cricut Maker 3 to Bluetooth on Windows 10:
How to Connect My Cricut Maker 3 to Bluetooth on Mac?
Cricut is easily compatible with the MacBook. Besides, the first and second steps are the same for all devices as for the Windows computer. So, take out your Cricut machine outside or unbox it if you haven’t done it yet and start connecting it to your Mac.
Here’s how to connect Cricut Maker 3 to Bluetooth on Windows 10:
How to Connect My Cricut Maker 3 to Bluetooth on iOS?
So, now I am going to talk about the steps to connect your Cricut cutting machine to your iOS devices, including your iPhone or iPad. The steps will be the same for both iPhone and iPad devices.
Here’s how to connect your Cricut machine to your iOS device via Bluetooth:
How to Connect My Cricut Maker 3 to Bluetooth on Android?
Android users can also establish a connection between their Cricut Maker 3 and Android smartphones without any hassle. All you need is an Android phone that is compatible with Cricut.
Here’s how to connect your Cricut machine to your iOS device via Bluetooth:
FAQs
Question 1: What if I can’t connect my Cricut machine to Bluetooth?
Answer: Here are some things that you must try to connect:
Question 2: What’s wrong with my Cricut that it doesn’t connect?
Answer: It is probably some of the reasons that you must know. First thing, you will need to know whether you have connected your Cricut to your computer or mobile device. It should also be connected to the WiFi network. If everything is okay, you can check your other cable connection.
Question 3: Which MacBook should I try with my Cricut?
Answer: I think the Apple MacBook Air (M2, 2022) is the best, in my opinion, as it is comfortable and portable in performance. Windows computers properly need to connect with each other. For this, users can check their system requirements and choose Mac accordingly. Besides, I prefer to have this MacBook Air laptop.
Visit: install cricut design space app
www.cricut.com setup login
cricut.com/setup
Source: https://cricutdesignappspace.wordpress.com/2024/05/21/how-to-connect-my-cricut-maker-3-to-bluetooth-easy-guide/
#cricut.com/setup#cricut design space#cricut explore air 2#cricut new machine setup#cricut.com/setup mac#cricut drivers#cricut.com/setup app#cricut.com/setup login#cricut.com/setup windows#install cricut design space app#install cricut design space#cricut install setup#install cricut explore air 2#cricut create connect to computer#cricut setup on computer#cricut new product device#cricut new product setup#cricut.com setup mac#setting up your cricut maker#Cricut Maker 3 to Bluetooth
0 notes
Text
How to Make Custom Shirts With Cricut: A Step-by-Step Guide
I am obsessed with my Cricut machine and create projects on it every day. You can call it my hobby or my big passion for crafting. Recently, I have made dozens of custom shirts with my Cricut Maker machine, and you can create some on your own, too. Following this guide, your guesswork will be reduced to zero, as I will share some of the easiest steps on how to make custom shirts with Cricut.
If you are interested in my tutorial, I would recommend you continue it till the end so as not to miss anything important. I have been creating unique stuff with my Cricut for more than 6 years now; it has been a beautiful journey for me.
Whether you are a beginner or a well-trained Cricut user, this post will help you get some ideas for starting something new. I hope you found this blog helpful and that you will come back for more Cricut-related blogs like this one. Let’s start learning how to design shirts with Cricut for beginners.
Which Is the Best Cricut for Making Shirts?
When you are making a custom shirt, you will have this doubt about which machine to choose. My answer would be to choose anyone you have. Whether you have Cricut Maker, Joy, or Explore, you can choose anyone with your iron-on vinyl to make a perfect custom shirt.
However, you will need to insert the fine point blades to cut this type of vinyl. I hope you got an answer to it. Let’s move forward with this guide on making your custom shirt.
How to Make Custom Shirts With Cricut Machine?
When you are clear about which machine to use and what design you wanna make, let’s get started with my steps. Well, you will need a few things before you move your hands on the desktop. So, gather up all the listed things here.
Cricut Explore Air 2
EasyPress 2
EasyPress mat
Shirt apparel
Weeding tool
Brayer tool
Scissors
Standard mat
Premium vinyl
Are you ready with all these? So you’re good to go. When you are ready, head to your Cricut Design Space and show some of your creativity. And follow all the steps carefully.
Step 1: Go to the Cricut Design Space App
In the first step, you should go to your Design Space and pick a design to print on your shirt. As the Cricut app is full of ready-to-make designs, fonts, images, and templates, you won’t have to hustle to make a design. I am using my Explore Air 2 machine; you can use a machine you’re familiar with.
Step 2: Adjust Your Design
Once you are ready with your final design, you can take some time to make that fit for you. For example, you can change the design’s color. On the Cricut Design Space canvas, you will get a few options on the right-hand side, from where you can choose your favorite color for the shirt.
Step 3: Change Vinyl Color
Here, you need to change your vinyl color as your shirt’s color may not be a good match with the vinyl’s color. In order to keep the color vibrant and not blend them, you have an option to change the color of your iron-on vinyl. To do this, you should click on the Layers option on the canvas. After that, you can click on the white box with the Layer option and pick a color for your vinyl.
Step 4: Final Your Design
If you find the color combo not as expected, you can change it. Once you have done all the updates, you are ready to save your design. You need to hit the Save button along with the name of your project to remember what this design is about. I am making a design that says “Cutest Bachelor.” Let’s check more steps on how to make custom shirts with Cricut.
Step 5: Load Your Material (Iron-on Vinyl)
In this step, you are ready to cut your project with your special Cricut machine. Don’t forget to load your vinyl on a Cricut cutting mat and then into the Cricut machine. Once you are done, you can start the cutting. Also, select the correct size of your mat on your machine so that your design fits the cutting mat. And the most important thing is to align the iron-on vinyl correctly to get an expected cut.
Step 6: Cut Your Design
When your design is ready, and you have checked all the settings, you can allow your Cricut machine to perform a cut for you. Once you hit the Go button on your machine, it will show you a preview of your final design. If you are satisfied with it, click the Continue button to get a cut. Once the design is fully cut, unload your cutting mat.
Step 7: Weed Out the Excess Vinyl
When you have a cut in your hand, take a weeding tool and take out excess vinyl to make the design clear and ready to be ironed. You can use your hands too, but a weeding tool is more convenient. Now, you have finally come to the main part of how to make custom shirts with Cricut.
Step 8: Ready Your EasyPress
When your design is ready, you can set your Cricut EasyPress to cotton or linen to get the desired results. So, now you need to put your weeded design on the shirt apparel and use a Cricut EasyPress 2 to heat it. However, before that, you must use a brayer tool to remove lint and fibers from the shirt’s fabric. Once you do that, for the next steps.
Step 9: Preheat Your Shirt
When your apparel is ready, use your EasyPress to preheat it for 15 seconds with moderate pressure to remove the moisture and wrinkling. For the final heating, you should consider a Cricut Heat Guide that will help you find the best setting for your design. After that, use the temperature and pressure accordingly.
Step 10: Apply Heat to Your Shirt
And the last step is to just apply the heat as the Cricut guide suggests. Use a towel to place on your vinyl design, and apply heat for 30 seconds. Using a towel will prevent your iron-on from getting damaged. Viola, you have just designed a perfect custom shirt with your Cricut.
Conclusion
You were all wondering how to make custom shirts with Cricut. And with my blog, you might have found this process a bit easier than before, I guess. Don’t worry; if you follow the instructions carefully, I can bet you can make a fabulous shirt.
However, be mindful of the heating setting as it can ruin your project and waste everything. It’s always better to use a household iron while making your first project. When you get familiar with the process, you can take one step ahead with an EasyPress.
Source Url :- how to make custom shirts with Cricut
Visit here for more Information:- · cricut design space log in
· cricut machine
· cricut machine setup
· how to make custom shirts
· step-by-step guide
· install cricut design space
#how to make custom shirts with Cricut#CRICUT DESIGN SPACE LOG IN#CRICUT MACHINE#CRICUT MACHINE SETUP#STEP-BY-STEP GUIDE#INSTALL CRICUT DESIGN SPACE
0 notes
Text

Why put so much effort and a lot of hard work and the same old traditional crafting method when there are machines to work at your fingertips for everything? Indeed? If you agree, the Cricut machine is suitable for all craft work. It helps you to manage and save your precious time and produce more DIY projects with its sharp edge rotational blades, which rotate in all directions to give you the perfect and smooth cut. It allows you to cut over 100 different types of materials. You can set up the Cricut machine on your mobile device and computer from Cricut Design Space to get started on your first project.
#Cricut Design Space#install cricut design space app#cricut design space app#cricut.com/setup mac#cricut explore 3#www.cricut.com setup login#cricut explore air 2#cricut.com/setup
0 notes
Text
Explore 8 Best Cricut Bundles for Your Crafting Needs in 2024
Want to take your crafting skills to the next level? If yes, then you need to have Cricut bundles as your companion. It's been more than 3 years since I have been using Cricut machines for making customized projects, and I have used various tools & supplies while creating DIY projects. The company keeps launching bundles frequently to meet their customer's needs and give them wings to touch the sky.
Inside the package, you get various crafting supplies that allow you to make new projects for business and personal purposes. Besides, these items are budget-friendly and can be purchased by beginners and professional crafters. If you're confused and unable to decide which item would be best, then check out this blog.
This blog contains not only the bundle names but also their features, which you can use to draw your favorite project.
1. Everything Materials Bundle
This Cricut bundle contains everything that a beginner should have before starting their crafting journey. It will help you start a variety of customized projects to explore your actual capabilities while making any DIY project. Also, the possibilities of making customized crafts are endless, and the bundle will be delivered directly to your doorstep.
2. Essentials Materials Bundle
Among the Cricut bundles, this is the most demandable Cricut product among DIYers. In this bundle, you will find selected machine tools, mats, and others that can help you create your ideal customized projects. All the products that are part of this product comfort the newbie while drawing new designs from the cutting machine.
3. Glue Gun Essentials Bundle
In addition to the bundles for Cricut, you will surely fall in love with one of these crafting supplies. With this Cricut glue gun, you are almost ready for any easy-to-create project. Its smooth trigger and small diameter tip will make your work easy while laying the glue on the material. Also, this impressive Cricut tool has an auto-on & off feature along with an LED indicator.
4. Removable Vinyl Everything Bundle
Nevertheless, you can now relax with this Cricut supply, which comes with a removable vinyl. You can easily place the cutting material on the compatible mat without any bubbling or tunneling during the crafting process. With these Cricut bundles, you can cut, weed out the material, and apply it easily on the surface.
5. Essential Tool and Pen Bundle
Equally important, give color to your white DIY dream by using pigment-rich hues and shimmering metallic hues. This Cricut product allows you to add a special touch by writing and drawing on your project, and you can easily create a perfectly color-coordinated project.
6. Cutting Essentials Bundle
You are most welcome to include the cutting essentials bundle in the Cricut bundles list. Inside this bundle, you will find all the tools that you will need to cut the material into the correct position while making any project. It permits the crafter to make straight and precise cuts with an easy glide system. In addition, this crafting supply is compatible with all the Cricut models.
7. QuickSwap Tools Tips Bundle
Meanwhile, expand your possibilities of creating a do-it-yourself project with these fabulous Cricut supplies. This bundle includes four different kinds of tips for engraving, debossing, perforating, and cutting the materials. You just need to insert any one of these tips into the housing and let your cutting machine do the rest of the work.
8. Sportflex Iron-on Bundle
Last but not least, this Cricut supply ensures long-lasting iron-on results that stick to the material. After the perfect placement on the surface, you can run, climb, walk, or pose without any worries that the design might be ruined. This Cricut stool is easy to learn and can be used anytime and anywhere to create DIY projects.
As a result of this blog, you must have gotten clarity on which Cricut bundles will be perfect for your coming project. Before getting started with any craft, you need to ensure that you are using the correct tools and using them properly without making any mistakes.
Frequently Asked Questions
Question: Will I Get a Discount on the Cricut Bundle?
Answer: If you have a Cricut Access subscription, you will surely get a discount when buying any Cricut machine bundle. You can also buy this Cricut tool from the official website at an affordable price or from an online platform. Also, the prices will decrease during the Black Friday sale, so you shouldn't lose any golden chance.
Question: Are Cricut Bundles Worth It?
Answer: Yes, buying Cricut bundles is actually worth a penny as it will motivate you to draw new designs. Also, it comes in various ranges, making you choose which one is going to select that which will be beneficial for you to make the project as per your choice. With this crafting tool, you will be able to draw many crafts within a few minutes.
Question: What Are Cricut Machine Bundles?
Answer: Cricut machine bundles are a set in which you get all kinds of crafting tools that help you perfect your craft. They are available in various categories and price ranges and come with different features. Before using this crafting supply, you need to be aware of how to use it and its importance while making a project.
Visit: install cricut design space app
www.cricut.com setup login
cricut.com/setup
Source: https://cricutdesignappspace.wordpress.com/2024/05/13/explore-8-best-cricut-bundles-for-your-crafting-ne
#cricut install setup#install cricut design space app#install cricut explore air 2#cricut.com/setup login#cricut.com/setup#cricut.com/create#cricut.com/register#cricut.com sign in#cricut.com design space#www.cricut.com setup login#cricut create connect to computer#setting up new cricut maker#setting up your cricut maker#cricut new product setup#cricut setup on computer#cricut new product device
0 notes
Text
Cricut Explore Air 2: A Smart Machine for Making DIY Projects

A Cricut machine is an electronic smart cutting machine that is designed to cut all sorts of different materials. The machine works similarly to a standard printer. The only difference is that Cricut doesn't print anything on paper but uses its blades to cut a design out of the paper. There are several Cricut machines with unique features and specifications. However, this blog will discuss Cricut's best-selling machine, i.e., Cricut Explore Air 2. We will talk about its features and specifications in more detail.
Features of Cricut Explore Air 2
We will begin with the specs, looks, and other features that made this machine. Let us begin.
Design
The Air 2 machine exposes the blades, and you can see how it moves, making it an attractive feature. It is where the user can see how the machine cuts the materials. It is a full-sized cutting machine that is perfect for any crafter. Also, the Cricut Explore Air 2 size is 5.91x22.17x7.01 inches and weighs close to 11 lbs.
Further, the machine can cut more than 100 materials, including paper, vinyl, cardstock, selected leather types, and fabric backed by a stabilizer. Moreover, it works with mats of 12 by 12 inches or 12 by 24 inches of mat size. So, the Explore Air 2 can easily be used to create full-size cuts on iron-on or large vinyl decals.
Double Speed
The Cricut Explore Air 2 is created to be faster and brings Fast mode. This machine becomes the perfect device to accomplish tasks for a crafter looking to work on complicated projects. Further, the double-speed mode is addictive; once you start using it, it will be difficult to cut to normal speed again.
Cutting Force
The cutting force of this machine is 350g, which makes it a stronger machine in its price range. Further, the machine with more cutting power means it can easily cut material. Along with its maximum cutting size of 11.5 by 23.5 inches. The Explore Air 2 can cut tougher and thicker materials like never before. Also, that is why it can cut upto 100 different materials.
Dual Carriage
The dual carriage is one of the attractive features of the Explore Air 2 machine. The two-carriage system means the machine can hold and use two tools simultaneously. So, if your projects contain drawing and cutting, this machine will do the dual task simultaneously.
Blades and Cutting Depth
The Air 2 can cut upto 2 mm thick material, which is the standard thickness. Further, the blade is made out of German carbide steel, which has high ultra resistance.
Connectivity
The Explore Air 2 machine comes with the ability to connect with computers and mobile phones. It can do that by using Bluetooth and USB cable. So, wireless connectivity helps to avoid extra wires, and your room will look more organized.
Pros and Cons of Cricut Explore Air 2
After briefly examining the machine's features, it is important to know the advantages and disadvantages of the Air 2.
Pros:
The Air 2 machine can cut, write, foil, and even score on the materials.
Further, the machine can cut more than 100 different materials. So, it allows you to work with any machine.
Another attractive feature of the machine is its ability to connect wirelessly using Bluetooth.
Also, with the fast mode, you can complete projects quickly.
If you want to cut a print design, the Cricut Explore Air 2 machine can do that.
Moreover, you will get free Design Space software to work with the machine.
Cons:
The Explore Air 2 machine is not compatible with the blades of the Adaptive Tool system.
Also, it requires a cutting mat since it cannot cut Smart materials, which can be cut without any mat.
Further, the maximum cutting length that a machine can cut is 23 inches.
If you are looking for a portable cutting machine, Explore Air 2 is not the one.
Conclusion
The Cricut Explore series machines are one of the best for beginners and experienced crafters. Especially the Cricut Explore Air 2 machine is a great machine that can cut at twice the speed as its older machines. If you are looking for a cutting machine that can cut precisely and accurately, then the Air 2 machine is the best. Also, the wireless connectivity makes it easier to work without getting trapped between the wires.
FAQs
What is included in the Explore Air 2 box?
The Explore Air 2 box contains many things to help you start crafting. You will get an Explore Air 2 machine and Premium Fine-Point Blade with its Housing. Also, you will get a Fine-Point Black Pen and a LightGrip Mat of 12 by 12 inches. You will get a Power Adapter and a USB cable for powering the machine to connect to the laptop. You will also see a Welcome Book, a Free Trial of Cricut Access, and 50 ready-to-make projects.
What materials can I cut with the Explore Air 2 machine?
The Cricut Explore Air 2 machine can quickly cut more than 100 different materials. So, you will be able to cut materials such as vinyl iron, bonded fabric, heat transfer vinyl, vinyl decals, normal paper, glitter paper, cardstock, or poster boards. If you want to cut tougher and thicker materials, the machine can cut leather, balsa wood, etc.
How to connect the Explore Air 2 to my computer?
You can connect the Air 2 machine to the computer in two ways. The first is with a USB cable, and the second is with Bluetooth. With USB, connect the respective ends of the cable to the machine and computer and let the computer detect the machine. Bluetooth is simple, like adding any other Bluetooth device to the computer.
Source: https://cricutair.wordpress.com/2023/08/04/cricut-explore-air-2/
For More Information Visit: Cricut.com/setup
how to setup cricut explore
Cricut.com setup mac
design.cricut.com/setup
Install Cricut Explore Air 2 setup
#Cricut Explore Air 2#Cricut Explore Air 2 Software#Cricut.com/setup#Cricut.com setup mac#Cricut New Machine Setup#install cricut design space app#design.cricut.com/setup#Install Cricut Explore Air 2#how to setup cricut explore
5 notes
·
View notes
Last Seen Blogs


rogermeaddows
hot space.

kimetsunoyaiba-giyuu
Kimetsu no Yaiba Lover
kimetsunoyaiba-giyuu
Kimetsu no Yaiba Lover

trans-coded-characters
All Ur Faves Are Trans