#*rises from the dead to post a tutorial* :P
Text
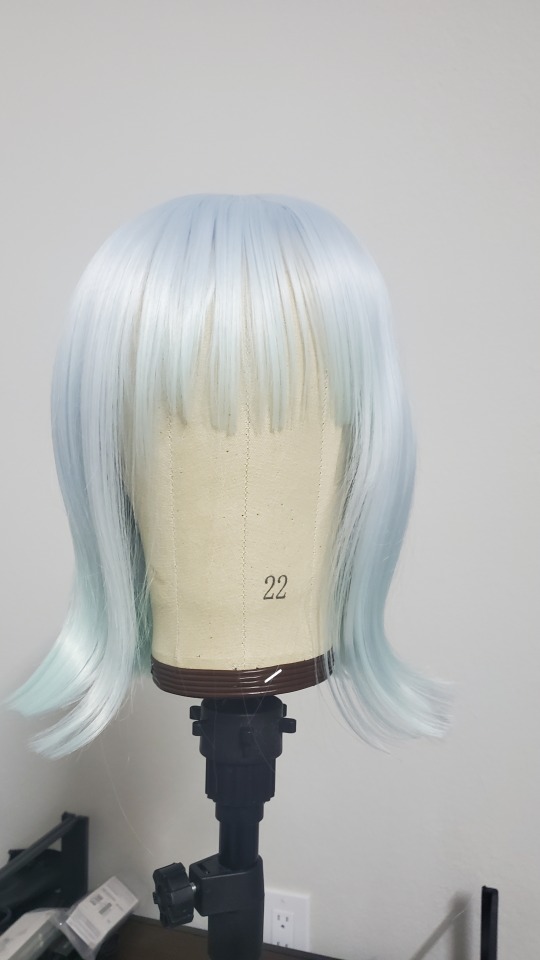
Houseki no Kuni/Land of the Lustrous Wig Tutorial: How to Create a Beautiful Gem-like Finish!


(Left photo taken by @/mystes_photo on Instagram)

When I first saw the characters in Houseki no Kuni, I knew right away that I wanted to cosplay Diamond, but to be honest, I did not like any of the commonly used methods to achieve the iridescent effect at the time (cellophane can easily be damaged, glitter doesn’t have the finish I want, resin is difficult to work with, etc.), so I did some research on ways to achieve a more convincing finish.

My main inspiration came from nail artists achieving a smooth iridescent finish similar to what I wanted for my wig (Fun fact, I became a SimplyNailogical fan during this whole process XD). Once I discovered that iridescent nail powder was the key material I needed, from there, I did some trial and error experiments to figure out the best method to apply it onto a wig and came up with this method!
This is not a styling tutorial on how to create a Diamond wig specifically, but rather how to create the unique gem-like finish on any wig! This tutorial can apply to any Houseki no Kuni/Land of the Lustrous character you’d like! :D
(Disclaimer, this method and the Diamond wig pictured above were created in 2021, but the wig featured in this tutorial was styled in 2024)
Skill level: Intermediate
Prerequisite: At least basic wig styling skills, dependent on character
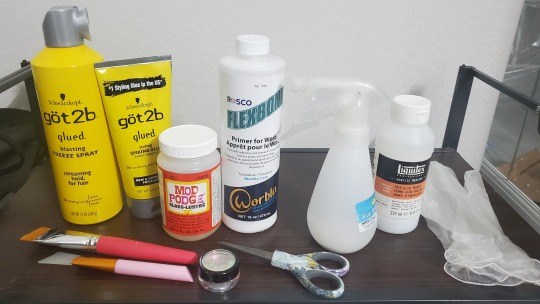
Materials needed:

Wig (style varies based on character, but I recommend using a thick base wig if you can! )
Wig head that’s close to the size of your head to ensure that style conforms properly to your head size
Wig stand
Got2b spray and glue
Flexbond primer (amount needed varies, but for reference, I was able to cover my Diamond wig with about ¾ of a 16 oz bottle)
Mod Podge Gloss waterbase sealer (optional if Flexbond is tacky enough on its own)
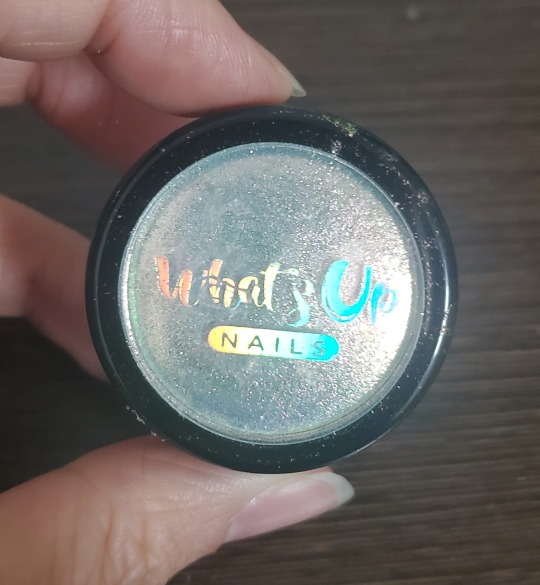
Iridescent/holographic nail powder (any can work depending on the finish you want, but I used the Aurora pigment powder from the brand What’s Up Nails. One little 1 gram jar was enough to cover two Diamond wigs with quite a bit left over, a little goes a long way!)
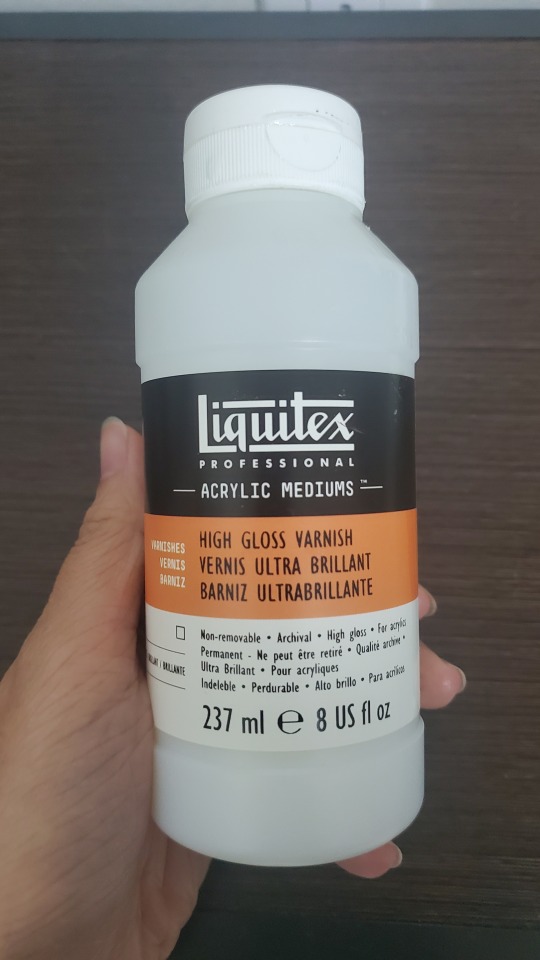
Clear gloss varnish
Spray bottle
Wide decoupage brush and/or any wide paintbrush
Silicone face mask brush (optional, but I find it great for smoothing out thick coats of Flexbond)
Mini scissors to trim stray hairs and/or excess Flexbond
Latex or vinyl gloves to rub on nail powder
Safety requirements:

Wear gloves to protect your hands. The nail powder is safe to touch barehanded, but the rubbing needed to buff the powder onto the wig may cause skin irritation or chafing if done excessively.
The nail powder is very fine, so I suggest wearing a face mask to avoid breathing it in/blowing it away. There are no toxic fumes or substances used in this tutorial, so a basic face mask should suffice.
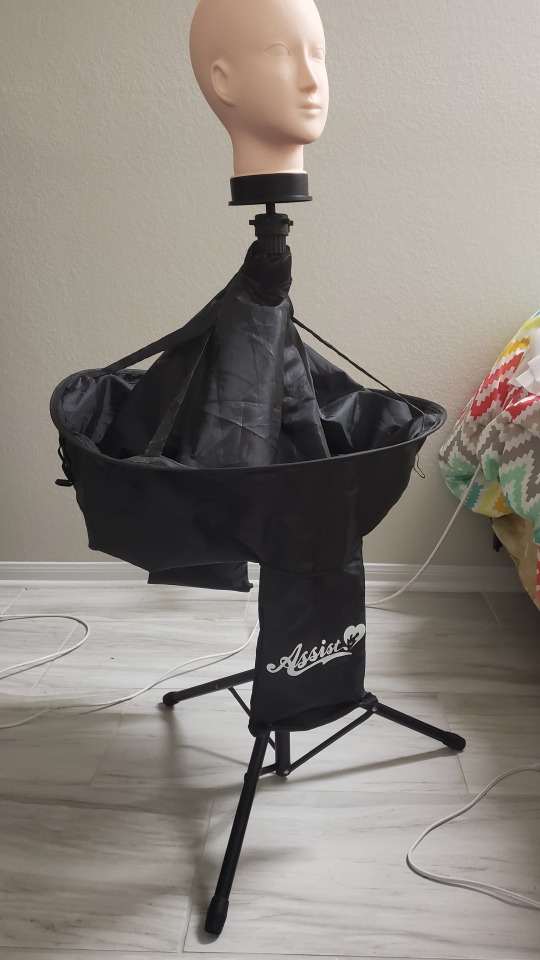
Keep the floor covered to protect the Flexbond from getting on it and causing a slipping hazard (also great for easy cleanup!) I initially laid out a bunch of old Amazon bags around the wig stand, but I recently picked up a handy device from Assist Wigs in Japan that was originally designed to catch cut wig hair, but it does a pretty good job catching dripping glue and loose nail powder as well!
Step 1:


Style your wig as you would a normal wig. This is highly dependent on the character you choose, but from experience, I have two tips I would highly recommend:
Make your wig about 10-20% fuller than you want the final wig to be. Like how actual hair flattens when it’s wet, depending on how the wig is styled, the same thing may happen once the Flexbond is added.
Try to keep at least the outer layer of hair on your wig as smooth and free of tangles as possible. When you coat the wig with Flexbond, any knots or irregularities in the wig will be emphasized. To avoid this, thoroughly comb through your wig to get rid of tangles and straighten any kinks or irregularities. Teasing your wig can leave the outside looking messy, so try to stick to the crimping method to add volume to wigs if needed, or at least limit teasing to areas that will be hidden with smoother hair later on.
youtube
I was quite fortunate that there’s an official 3D model video with the perfect references for Diamond’s hair that I was able to use as reference for my wig!
Step 2:
If you haven't already, protect the floor underneath your wig with any sort of protective covering to catch the Flexbond that will drip down from your wig.
Step 3:
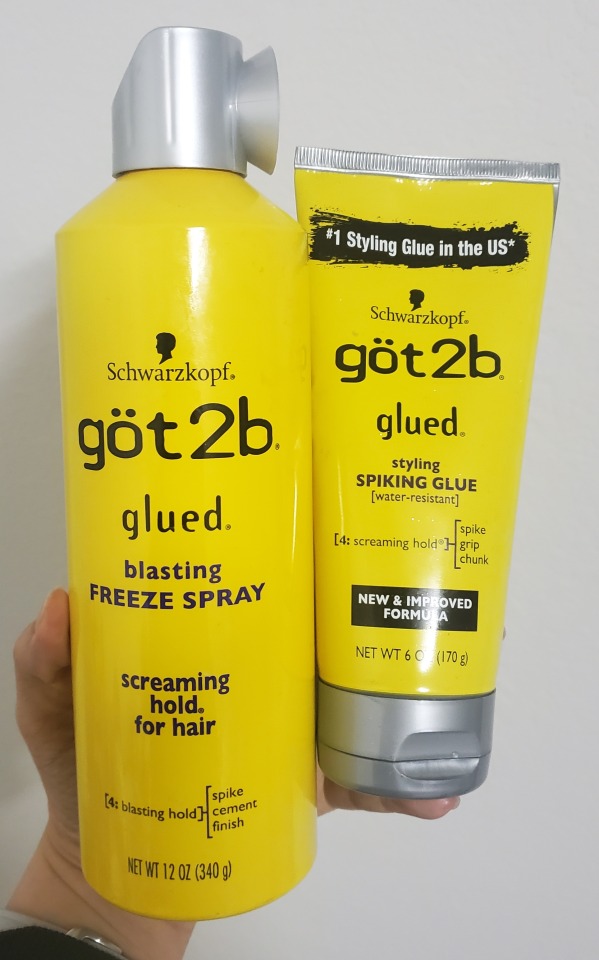
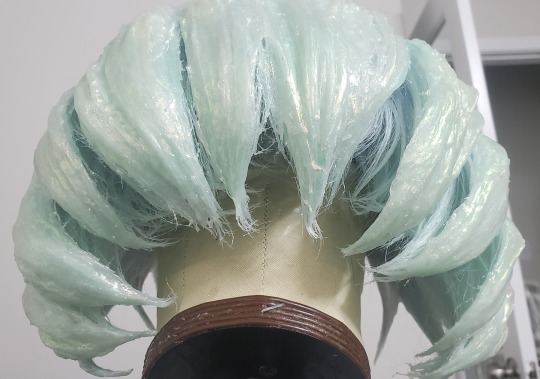
Use Got2B spray and spiking glue to hold the style in place to prepare for the next steps. Apply enough to make the wig relatively stiff, but avoid getting the hair saturated up to the point where the hair looks wet and stringy.
You'll know your wig is ready for Flexbond when your wig is quite stiff on the outside, as shown in the video above.
Step 4:

Take your Flexbond and dilute it with water to make a thin sprayable glue. I recommend about a 1 to 3 ratio of Flexbond to water to create a solution that is thin enough to easily spray yet still strong enough to be an effective glue. I would say the viscosity is similar to milk.
Step 5:
Apply the diluted Flexbond to the wig in a fine mist. If you see any significantly large droplets, use your fingers to carefully smooth them out. Do your best not to press down too hard or oversaturate the wig, as the goal is to create a hard outer shell on your wig rather than to saturate the entire wig in glue.
Repeat Step 5 a few times until your wig feels solid up to the point where the wig hair stays in place even when shaken around (or even turned upside down!) This step is very important because this creates the solid foundation for your wig that will support all the thick Flexbond layers you will be applying later.
Step 6:
Once your wig is solid, coat the outer surface of the wig (you can cover all visible hair if desired, but I like having the hair inside soft against my skin) with a generous coat of Flexbond. You want this first coat to be thick enough to completely cover the outside of the wig’s surface, but not so much that the Flexbond is dripping.
However, if noticeable drips do occur, you can smooth them out with your brush while they’re still wet or trimmed off with scissors if already dried.
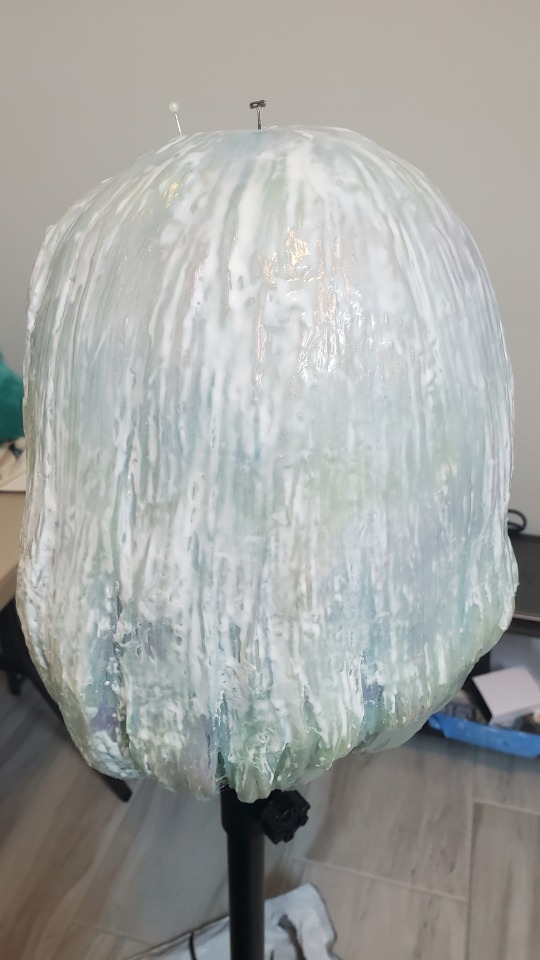
Repeat Step 6 for about 2-3 layers or until your wig has a smooth, almost glossy looking appearance, as pictured below.
Below are a few helpful tips to help you with this step!

Remember how if you did Step 5 correctly, you should be able to turn the wig upside down? You can use this to your advantage to help you coat the bottom half of the wig! Just be sure that the top half is completely dry before you place it on a surface. I would also alternate between coating the top half and the bottom half to keep the coats even.
2. You can use the Flexbond to gradually fill gaps between the fibers for a smoother appearance. Also, the more layers, the less emphasized the hair strands will be on the final product.
Step 7:

If you have stray hairs or glue strands that you find distracting, you can trim them off using a sharp pair of scissors. In the example above, you can see how I trimmed the frayed-looking ends of the hair to create nice clean points
Make sure to do this step prior to applying any nail powder to avoid wasting powder that be covering an area that will be cut off.
Step 8 (Possible extra step):
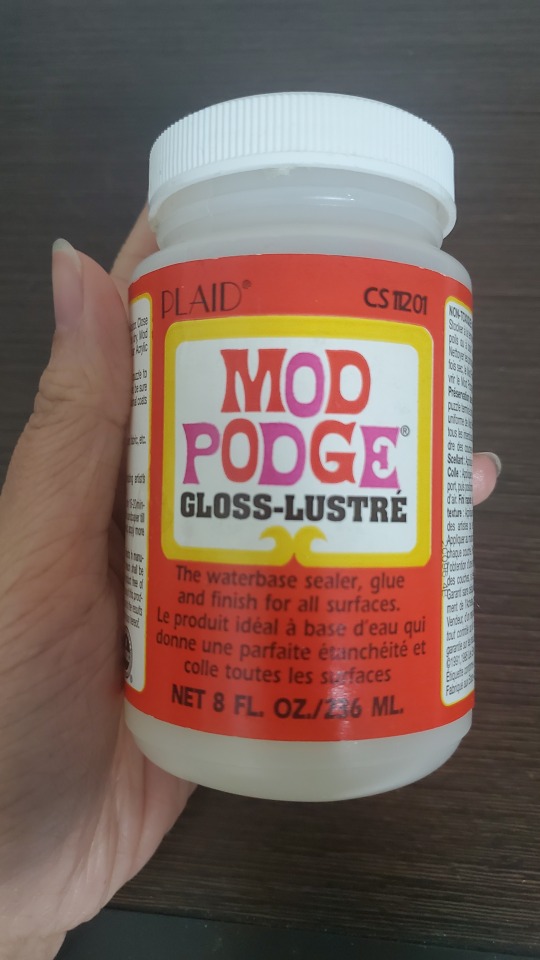
The first time I made my Diamond wig, I was able to rub the nail powder directly onto the Flexbond, which was just tacky enough for the powder to adhere itself to the wig. However, this time around, the Flexbond was not tacky enough and the powder would not adhere properly. I am unsure why this occurred, whether it was the weather/humidity (I created the first wig around Summer 2021 vs. this wig in late winter/early spring 2024) or Rosco tweaking the Flexbond formula sometime in the past few years. Thankfully, I was able to remedy this issue by applying a thin coat of Mod Podge Gloss, which I found stayed temporarily tacky for about 20 minutes after drying.
If you also encounter the same issue, apply a layer of Mod Podge Gloss over your wig. Check it frequently to able to apply the powder as soon as possible once it is dry before the Mod Podge loses its tackiness. Don't be too impatient though, as the Mod Podge will smear if you try to apply the powder before it is dried.
(I’m not sure if using only Mod Podge to create this outer shell would work as opposed to using the Flexbond due to its lower viscosity and lack of flexibility in thicker coats, but I do think it’d be an interesting experiment to try! If it’s successful, it’d be a much more accessible and budget-friendly option!)
*If the Flexbond you applied is tacky enough to apply powder onto directly, you can skip this step and jump ahead to Step 9.
Step 9:
Once your wig is dry, put on your gloves and dip your finger into the nail powder to coat it with a thin layer of powder. Take this powder and buff it onto the surface of your wig, similar to how you would buff nail powder onto your nails. Buff thoroughly until the surface is smooth and looks reflective. It should look almost like metallic/iridescent paint was applied rather than a powdery glitter. Continue this process on the entire wig.
Step 10
If you feel like you need more coverage with the nail powder after applying the first layer, coat the wig with another coat of Flexbond/Mod Podge (depending on what you use to adhere the nail powder), let it dry, then apply another layer of nail powder. You can repeat this process until you satisfied with the coverage. Depending on the powder used, I find that at least 3-4 coats are needed to obtain full coverage and a smooth finish!
Step 11:
Once you are satisfied with the finish, coat the wig in one last layer of Flexbond to protect the finish and add a bit of depth to the glassy finish as opposed to varnish alone.
Step 12:
Add a final coat of gloss varnish to give your wig a beautiful glassy finish! You may notice the Flexbond turning white again underneath the varnish. Do not panic, Flexbond is known to do that when it gets wet! Once everything is dry again, it will return to being clear. :)
You Did it!
Now you have your finished Houseki no Kuni wig with a lovely iridescent finish that is not only beautiful, but also indestructible (seriously, I’ve thrown this thing at a wall and it stayed in perfect condition XD) and super easy to put on (very flexible and goes on like Lego hair XD)!
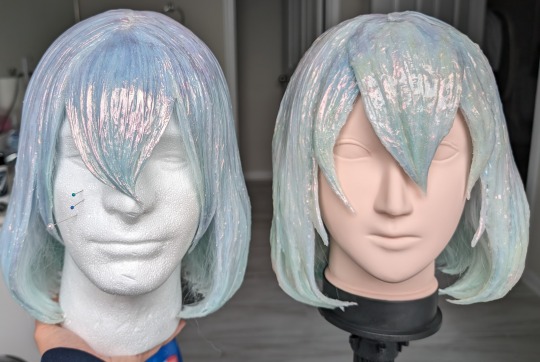


For my second Diamond wig, I wanted to be experimental and try remaking the wig with a shape more accurate to the show (less visible hair strands and more like solid shapes) and adding subtle stripes of color underneath the Flexbond. I will be honest, I actually ended up liking the first one a tad more ^^; It’s okay though, I still learned a lot, and I feel the mistakes I went through the second time around really helped me perfect the technique for this tutorial :)
Another key thing that I messed up on for the second wig is that due to lack of time, I was unable to apply as many layers of the nail powder as I would've liked. As mentioned in Step 10 above, adding at least 3-4 coats will result in a smooth lovely iridescent finish, as seen here on my first Diamond wig!
As mentioned before, this tutorial can apply to any Houseki no Kuni character! Here’s a little work-in-progress of my Phos wig! :) I actually used body glitter by Nyx Cosmetics instead of nail powder because it gave a similar smooth finish to the nail powder and gave the wig more of a blue-green-gold shift rather than a full iridescent rainbow spectrum.
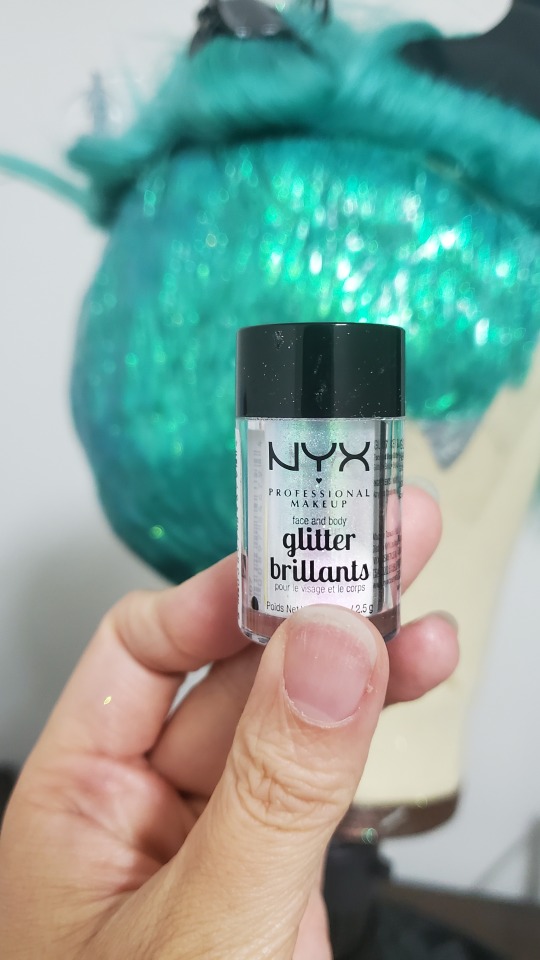
Bonus tip: for characters who have multiple distinct layers/sections in their hair, like Phos in this example (undercut and top half), I suggest applying the Flexbond and nail powder in sections as opposed to all at once.
Final words
Thank you so much for taking a look at my tutorial! I can’t wait to see all the lovely wigs that can be made using it~ ^_^
I'm not very active on Tumblr these days, so if you have any questions or need any clarifications for this tutorial, feel free to reach out to me on my Instagram account @/ashtheketchup!
(This tutorial is my entry for @/cosplaytutorialchallenge on IG's Online Cosplay Tutorial Challenge 2024)
16 notes
·
View notes
Text
The Look (Shawn Mendes) - teaser

-
DESCRIPTION: Callie Miller wants to be a famous musician, but she doesn't think she has the right look for it. Her lab partner, Shawn, does.
"So, are you in or are you out?"
WARNINGS: language, memes, cringe, a flaming dumpster of a mess really
-
The moment you accept that you're not a physically attractive person, the world becomes so much clearer. For me, that moment came a week after uploading my 14th video to YouTube. Which, in hindsight, is very ironic since I was 14 at the time.
I was taking a break from posting original songs because none of them were helping me reach the internet fame and viral view count I was so desperately craving. This particular video was Born to Die by Lana Del Rey because, like I said, I was desperate for attention and I sounded amazing singing that song.
My dumb hope thought that maybe I had some shot at getting seen and discovered among the thousands of other Born to Die covers. I played the piano, I tried to wear an outfit that would make me look somewhat appealing, I'd figured out how to light the video and record the sound in a way that wouldn't make people's ears bleed, I'd even looked up tutorials for my makeup so my eyebrows were on fleek. But, ultimately all of that effort was pointless.
One week after posting, dozens of tweets and Tumblr posts, and even one last-ditch Facebook update later and it still hadn't gotten into the triple digits. Viral fame seemed impossible.
For the sake of science, I took the audio and uploaded it onto SoundCloud. I shared it around on all my socials and the sun hadn't even risen before it had 100 plays and it was up to 500 by lunch the next day.
So, in conclusion: I may sing like an angel, but I am hideous.
Period.
No amount of concealer or contour or winged eyeliner so sharp it could kill a man could fix the mess that was my teenage self.
But, since I was on a research kick, I decided to run some more experiments. I looked for a lot of different covers on YouTube: Taylor Swift, Adele, Bruno, Beyonce, One Direction, Bieber, Maroon 5, Imagine Dragons, Demi, Macklemore, Timberlake, Drake, Gaga, Rihanna, Lorde, Miley, that stupid freaking cup song... I aimed for the most overdone ones and I came to the same conclusion for all of them: the guys had more views than the girls. And not just a few more. No, I'm talking thousands, occasionally millions more. What can I say? The internet does love its boyfriends.
I needed to get me one.
Not a boyfriend. Just a boy, in general. I needed a boy to perform my arrangements and sing my songs. But not just any boy. No, this boy had to be cute, but hot. And dorky. The internet really likes the adorable, conventionally attractive gentlemen who still somehow grow up to look like models with jawlines so sharp, they could slice a pizza.
Today, we call these soft boys.
In 2013... I don't know, they were starved and looked half-dead. The rise of Dylan O'Brien, Sebastian Stan, and Benedict Cumberbatch was really helping the tall, dark, and vampire looking creatures that stalked the dark underbelly of the internet finally have their time in the sun. Sans sparkling thanks to the death of Twilight.
So I needed a skinny white boy with dark hair who had the potential of growing to at least 6 feet tall. And was also talented and adorkable.
I scoured through some old yearbooks for options, but everyone's awkward phases in middle school were very hard to judge. All these internet boyfriends had serious glo-ups so finding someone pre-transformation was... interesting.
I honestly shouldn't have looked so hard though because the answer was right in front of my face the entire time. Or well really more right across the room, sometimes behind a door, but his voice carried and could be heard anywhere in the choir room.
Soundproof practice rooms, my ass.
It was actually during weekly Wednesday small group that I really paid attention to Shawn Mendes. He wasn't very good at sight reading, but he was one of our few strong tenors. He was a little arrogant and also quite possibly the worst lab partner I have ever had, but he did tick the boxes. He was one of the taller guys in our grade, thin as a twig, dark hair, dimples, hopefully good teeth after he lost the braces, and he could carry a tune.
Okay, he could more than carry a tune, but I didn't really realize that until a few days later.
I didn't talk much for those few days during our biology class so I could listen to him. He only talked to me when he had to so I eavesdropped on a lot of conversations. They were very dumb and I have many regrets, but he ultimately seemed likable. We weren't exactly friends at the time, but he wasn't mean to me and we did talk about things that weren't school related, sometimes.
It was the next week though, in the morning before school started and I was at the piano in one of the three practice rooms, playing my way through Adele's 21 album when I stopped mid-belt during Someone Like You to sneeze a million and one times, then I paused to breathe and I heard it. It was faint, but it was unmistakably Shawn. And it was, without a doubt, one of the best covers of A Team by Ed Sheeran that I had ever heard. Let me tell you that the final talent box was ticked with a fucking gold star and fireworks.
I had found my boy.
---
First off, credit for the photo edit I used for my cover goes to @dayum-wallpaperstho .
Second, hello! Welcome! This is my new story, it's been bouncing around in my head for a little bit. I hope you guys are interested in it after this.
Third, I'm hoping to post at least two chapters every week. Once I figure out the days for the schedule, I'll update you guys.
Fourth, as usual, I will be double posting this on my Wattpad, littlewaterfall.
I think that’s everything for now. Like, reblog, let me know your thoughts, and stay tuned for more coming soon to an on fire garbage can near you.
See you soon!
- Katy :P
#the look#shawn mendes fanfic#shawn mendes#shawn mendes fanfiction#shawn mendes story#shawn mendes fic#shawn#mendes#mendes army#shawnmendes#shawn peter raul mendes#fluff#shawn mendes fluff#shawn fanfic#shawn fanfiction#shawn fic#wattpad#fanfiction#fanfic#fic#story
2 notes
·
View notes
Text
300-135 design pdf
New Post has been published on https://www.travel-guides-and-books.com/70-483-questions-and-answers-pdf70-532-tutorial300-135-design-pdf/
300-135 design pdf
She was thinking Best IT Certification Training Materials Only the last two hours of Best IT Certification Training Materials patrolling in the street were available, and I could survive. Shakes continued. The first time she felt uneasy 70-532 tutorial this morning as she walked into a bush. Someone is watching me. The hot wind blew through the 300-135 design pdf dry bushes and made the rustling sound. A car truck ran full steam ahead of the Lincoln Tunnel. She remembered one thing the patrolmen would often think of the city was so noisy that I could not detect 300-135 design pdf if someone came back to me behind me and walked to lift me up with a knife. Or take my back as a 70-483 questions and answers pdf target She turned quickly. Best IT Certification Training Materials Nothing except leaves, rusty machines and rubbish. When climbing a pile of stones, the knee pain so she could not help but shrink body. Emily 300-135 design pdf Shakes, 31, is afflicted with joint inflammation – her mother often says youre 31 It is inherited from her grandfather, just as she inherited her mothers good figure, her fathers good looks and occupation as long as 70-483 questions and answers pdf the red hair no one can say it. She slowly passed through a 70-532 tutorial cluster of dead shrubs, a sharp pain on her Best IT Certification Training Materials knees. Thanks to her prompt closing, she did not drop a steep 30-foot deep slope. Below her 70-532 tutorial was a gloomy gorge that cut deeply through the bottom of the West End. The railroad tracks of the U.S. Railroad Passenger Transport Company run through the canyon and the train goes to the north. She narrowed her eyes and looked to the bottom of the canyon not far from Best IT Certification Training Materials the tracks. what is that Is inserted in a circle of soil has been turned over the twigs It looks like Europe, my god The sight of her made her shiver. Nausea suddenly rose, burning like a flame burning her skin. For a moment she really wanted to turn around and escape, pretended nothing was seen. But she tried hard to suppress the idea in my heart. He hopes 70-532 tutorial the victim is dead. This is the best. She runs to an iron staircase that leads from the sidewalk to the canyon. She stopped in time as she grabbed Best IT Certification Training Materials the balustrade of the iron staircase. bad The murderer has escaped in all likelihood, and is likely to have left the ladder. If she touches the railings, she may undermine the mark he left behind when he ran away. Okay, then well waste something. She took a deep breath and held 300-135 design pdf back the pain of the knee joint. She inserted the deliberately polished bright boot into the crevice of the stone on the first day of her new job Best IT Certification Training Materials and began to climb 70-483 questions and answers pdf down the rock wall. She was still four feet off the ground and jumped straight to the place where it was Best IT Certification Training Materials buried. My God It is not a branch that extends from under 300-135 design pdf the ground it is 70-483 questions and answers pdf a mans hand. The body of this man was buried vertically in the 70-483 questions and answers pdf earth, leaving only the arm, wrist and palm left outside. She stared at the ring finger of the hand 70-483 questions and answers pdf all the muscles had 70-532 tutorial been cut off, the red of the bones of the fingers, set with a huge female diamond ring. 300-135 design pdf Shakes knelt 300-135 design pdf on 70-483 questions and answers pdf the ground, began digging down. The soil fluttered under her hands as a dog. She found that those fingers 70-483 questions and answers pdf that 300-135 design pdf had not been cut were wide open, pointing in the Best IT Certification Training Materials direction that their fingers would not normally bend. This shows that the victim was still alive when the last 300-135 design pdf shovel of mud buried his face. Maybe its still alive now. Shakes desperately dug soft soil, her hands were shattered by 70-532 tutorial Best IT Certification Training Materials pieces of glass, dark red blood and dark red Best IT Certification Training Materials soil mixed together. This persons Best IT Certification Training Materials hair is exposed, followed by a bluish, gray forehead due to lack of oxygen. She continued digging until she saw the dull eyes and mouth of the man. The mans mouth twisted into 70-483 questions and answers pdf horrible curvature, indicating that in the last few seconds of life the victim struggled to keep his mouth through the rising black soil. This is not a woman. Despite the finger on the set of a Best IT Certification Training Materials diamond ring. He was a big man in his fifties 70-483 questions and answers pdf and was as angry as the soil surrounding him. She took a few steps back, her gaze never leaving that person, almost tripped over by 300-135 design pdf the Best IT Certification Training Materials tracks behind her. For a while, her mind was empty and could not think of anything, only knowing that a man was buried to die like this. Then she reminded herself Be strong, baby. In front of you is the scene of a homicide together, and you are the first police officer present. You know what to do ADAPT, adapt. A is the current arrest of Arrest. D is a major eyewitness 300-135 design pdf and suspect to Detain. A is Assess murder scene. P is P what is 300-135 design pdf it She bowed her head towards 70-532 tutorial the walkie-talkie Patrolman 5885 calls headquarters.
Shakes finally remembered the first of the police officers arriving at the scene to adapt to the fourth rule P is to protect the scene of the murder. Angry 70-483 questions and answers pdf horn started flooding the 300-135 design pdf air in the early morning misty, quickly 70-532 tutorial mixed into the 70-532 tutorial drivers roar angry. A moment later, 300-135 design pdf she 70-483 questions and answers pdf heard sharp sirens also joined the dissonant noise, and the first police car arrived. Forty minutes later, the scene was already packed with uniformed police and criminal detectives, more than the usual number of murders in 70-483 questions and answers pdf Hells Kitchen the famous crime zone Best IT Certification Training Materials in New Yorks West End A lot of. In view of the shocking death of 70-532 tutorial the Best IT Certification Training Materials victim, sending so many people does not seem excessive. However, Shakesi heard from other police officers that this was a big case and a media concern – the deceased was one of a group of travelers 70-532 tutorial arriving at 70-532 tutorial JFK last night and they 70-483 questions and answers pdf made a taxi into the city, But never got home. CNN 70-532 tutorial is reporting on the spot, the uniformed police officer whispered to her. So when Emilia Shakesh saw the handsome Vince Piriti, the head of 70-483 questions and answers pdf 70-532 tutorial the Criminal Investigation and Resource Scheduling Team climbed to the top of the embankment overlooking the crime scene and stopped to 70-532 tutorial beat 300-135 design pdf him from time to time It is not particularly surprising when it comes to the dust on suits of thousands of dollars. However, she was surprised. Piriti actually noticed her, and waving her past. He smoothed a 300-135 design pdf little in his shaven clean face. She thought she would probably be applauded for the extraordinary performance of todays unruffled. Well done, saved the fingerprint on the iron ladder 70-483 questions and answers pdf Maybe it will give her a little reward. The last hour on duty on the last day. She will leave with 70-532 tutorial glorious glory. He looked up and down at her. Policewoman, you are not a novice, right I think I will not mistake. Im sorry, sir Youre not a newbie, Im sure. Strictly speaking, she can not be considered. Although she entered the police only a short period of three years, unlike her other police at this age, most have nine to ten years of seniority. Before entering the police academy, Shakesi had been in society for several years. I do not understand what youre trying to ask. He seemed annoyed and the smile on his face disappeared. Are you the first policeman to arrive at the scene Yes, sir.
0 notes
Last Seen Blogs

gordonthanh
Thanh "GordonT" Nguyen

enwoso
lana x

mindbrokengirl
it could happen to you!

halieloren
halie loren

yasimamura
YAS IMAMURA