
itsheypretty
Hey Pretty Sims
Sims 4 architecture and design enthusiast.
45 posts
Don't wanna be here? Send us removal request.
Last Seen Blogs

endgametike
Sem título

mattelders
whats a blur?

shit-always-happen-to-me
5sos should marry me
shit-always-happen-to-me
5sos should marry me

jemthehistorian
Every story presents a new universe
Photo

Sims lover turned to doll lover.
10 notes
·
View notes
Photo

PSA - How to get HQ textures for CC objects.
In a recent patch, EA capped texture sizes making CC with HQ textures look blurry, but you can fix it to get your crispy textures back!
You can either download my HQ Mod (updated recently to include this fix), or fix it yourself by editing the graphicsrules.sgr - instructions are under the cut.
Keep reading
1K notes
·
View notes


Text
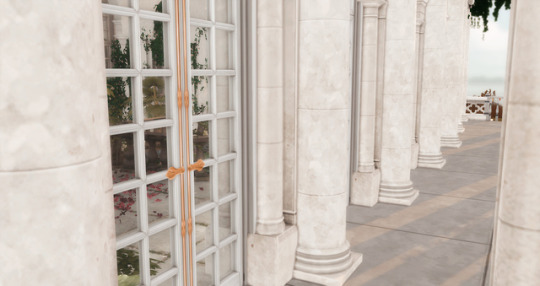
HOW TO FIX YOUR CC DOORS AND WINDOWS by Xineas
**NOTE: This is a tutorial written by my wonderful husband who got tired of hearing me complain about the broken CC windows and figured out how to fix them. Feel free to share this around. I am hoping for a batch fix but in the meanwhile, if you can calculate, you can fix the windows yourself. If you have questions, feel free to send me an ask and we will get back to you.**

The issue:
EA added a “ModelResourceCutout” item for every object that needs to cut out a piece of wall to show up correctly. The actual object is actually there, you can see the door handles in the example picture above. (beautiful doors by @peacemaker-ic )
The Sims4Studio developer is working hard to get a batch fix working so the creators don’t have to manually add the correct values for each item, but it’s unsure when this’ll be ready and if it will fix all windows and doors. Some are quite eccentric from a shape perspective, meaning ROUND, CURVED or otherwise not a rectangle.
All that is needed is a bit of math and a bunch of trial and error. Oh, and patience is useful. I’m warning you, doing this 40 times over is tedious, but once you get the hang of it, it’s easy. You just need to do a bit of basic math and to be able to think in 2 dimensional space.
The math
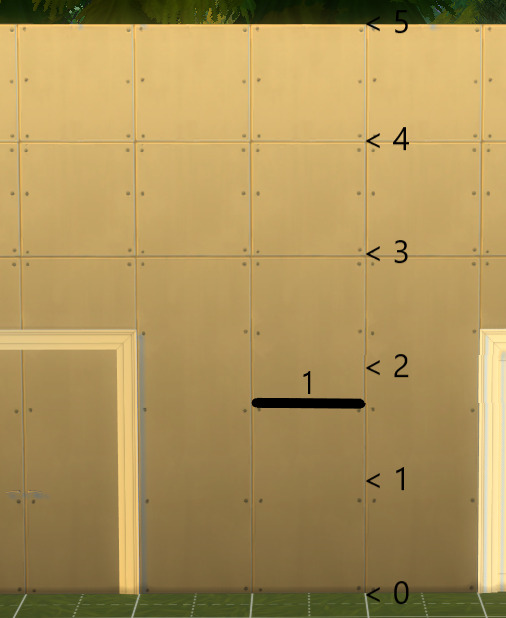
There are three height variants when it comes to walls.
Short = 3 units high
Medium = 4 units high
Tall = 5 units high
Regular walls are 1 unit wide, diagonal walls are Sqrt(2) wide (Pythagorean theorem), which is 1,414. When making these cutouts, 1 decimal place accuracy is generally plenty. The frames of the doors and windows give you a little wiggle room. When you are making more interesting shapes, use 2 or 3 decimal places to give yourself a bit more accuracy.

Let’s apply this magic to a real world example. EA wants you to add an item called “ModelCutoutResource” item to your object, which consists of any given number of lines in a 2D plane. Remember, this is a 2 dimensional cutout, depth is nonexistent, it just cuts out the whole wall, wherever we tell it to by connecting the dots.
Each line consists of two points, a start and an end. I could tell you how to do it all day long, but doing it and getting it are more important. On to the example.
This door with it’s entire frame is 2 units wide and about 2.4 units high. You want your cutout to be IN THE FRAME, however. If you put your cutout at the outside edge, you will have an ugly gap on the sides of the frame an nobody wants that. So guesstimate (or extract from Blender, but I have no 3D modeling knowledge so will not go into that) the correct values, place your objects in game on a blank wall, look at them from the side and put a ruler to your screen if that makes your life easier.
With our door here we need to make a rectangular cutout. This is easy, just 4 points to define. The points do in fact have a third value (x,y,z) but the z-value is always 0. Perhaps EA has wild plans with this in the future, but for now every single z-value is 0.

Using our gathered knowledge, we can now define 4 clear edges for our door. I always start bottom left, it’s a habit, it doesn’t matter, as long as you make a loop with your lines.
Your lines will now be as follows:
A to B, B to C, C to D and D to A. Let’s put this into Sims 4 Studio.
Editing the package:
Open your package in Sims 4 Studio.
Select the Warehouse tab.
Select the Model item (don’t do anything with it, just click it, this way S4S knows the “Instance” value and you don’t have to copy-paste it)
>>> projects which have a separate model for diagonal walls will have TWO model items, you will have to make a cutout resource for both, which their respective instance values.
Click the ADD button bottom left.
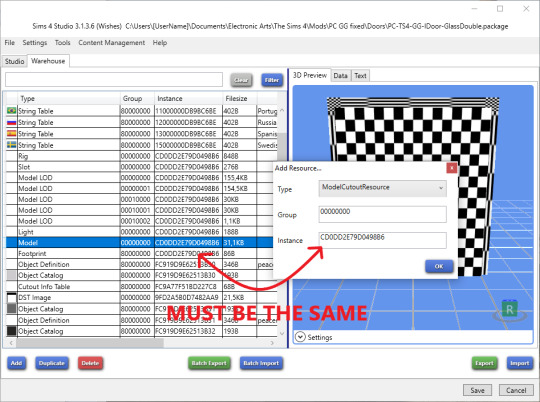
Select the type ModelCutoutResource, check that the Instance is the same as your Model and smash the OK button. You will now have a new Resource called “ModelCutoutResource”, all the way at the bottom. So scroll down and click it. ;)
You will see “Edges”, which we’ll be adding soon. But first, very important, your cutout will not work if this is not set correctly….. Set “Version” from 00000000 to 00000001.
Now click the “Edit items…” button so we can add the edges with our previously done math.
For objects that are rectangle, just click the add button 4 times, then we can fill them in.
Each “Edge” has a PointA and PointB, which I’ve shown in the image below for A, B, C and D.
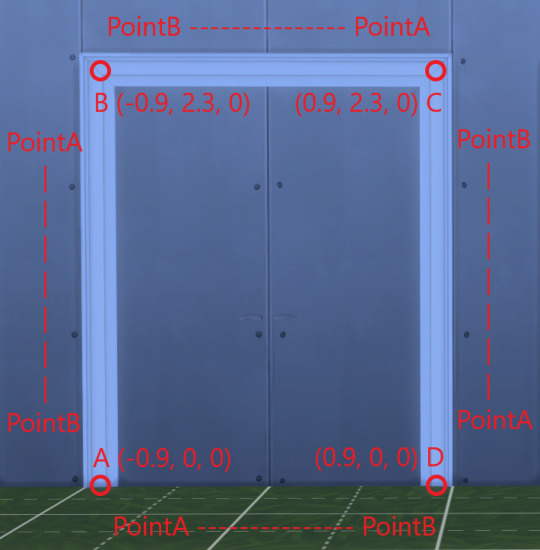
We can now fill in the values.

Make sure to destinguish commas and periods. Very important. Periods are used for decimal values, commas are used to separate values.
Click Save. Then click Save again.
If you have multiple doors/windows that are the exact same shape, LUCKY YOU, click the export button to export your “ModelCutoutResource” resource and save it as a binary. This way you don’t have to keep entering tedious coordinates into PointA and PointB. On your next door/window you can then select Model, add the ModelCutoutResource, select it and then click the import button to import your previously exported binary. This way you can skip all the other steps and make your life easy.
CHECK AGAIN:
- “Instance” value is the same for Model and ModelCutoutResource
- “Version” of your ModelCutoutResource is set to 00000001 and NOT 00000000
Test it in-game:
Did you do it correctly? Check it in game. When I fix a set for my wife’s simblr, I usually first place all items in my game, then scribble some calculations on a piece of paper, then edit the packages and then check in game at the end. Then you can do some minor adjustments if necessary and fix those before doing a final inspection.

Once you get the hang of it, it is easy. You get a feeling quite quickly for which numbers make sense and which don’t. Plus, if you do it wrong, it will just show you a weird cutout in the game and you learn from it.
Now on to the more interesting objects, curves and circles:
Windows, doors and arches which have curves are no different, they just have more points and thus more lines/edges you need to connect to make a loop. You can even make two loops if your window or door needs two cutouts.
For these more ‘advanced’ cutouts, it does help if you have at least some knowledge of Trigonometry. It certainly makes your life easier if you’re going to attempt this. I studied in Uni to become a Maths teacher, so that’s clearly an advantage. You at least need to understand how to find out points on a circle to make arches.
Alternatively, you can export the coordinates from Blender, but that’s not my cup of tea.
I’ll make a separate tutorial on round or arched cutouts.
**So again, all thanks to my husband for this tutorial… please pass it forward. You don’t need meshing knowledge, math will get you through it… oh and also, @peacemaker-ic if the batch fix doesn’t work out, let us know.**
@maxismatchccworld
2K notes
·
View notes
Photo
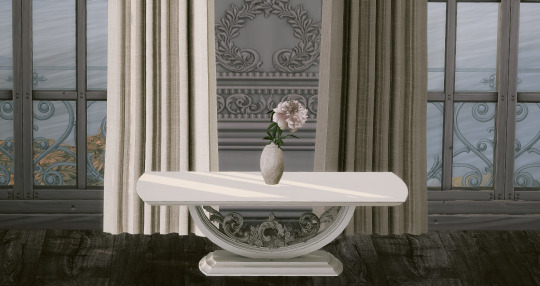
While I’m working on fuller bouquets and individual flowers to make DIY flower arrangements I thought I’d release this peony flower as I work on others.
If I were not a photographer, I’d be florist. They are beautiful and we should all be surrounded by flowers at all times.
Original mesh.
TOU: Do not edit. Do not claim as your own. Do not sell. <3
XdownloadX Peony Flower
Highly recommend you fallow @peacemaker-ic tutorial . I make high poly meshes so this will help with any funky shadows you may see.
125 notes
·
View notes
Photo

Working on making some modern style flower arrangements in blender. It’s not quite done yet but I’m happy with the outcome so far. The hardest part for me will be figuring out how to texture it for the sims game.
73 notes
·
View notes
Photo
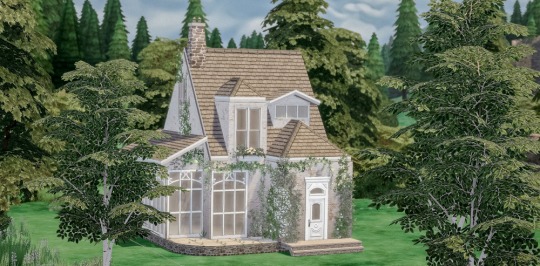
Just returned home today from the gem and mineral show in Tuscon AZ. I was surrounded by insanely beautiful rocks and gems and cactus galore! It’s inspired me for some more desert style builds and objects that I think I’ll be working on for the next week.
in the meantime, I wanted to give out the build I made in honor of cinerella moments dollhouses.
I don’t often play the game using sims so sometimes my builds don’t offer things that that style of play needs, such as washing machines and such.
It’s easier to view the attic in this particular build if you have the free cam mod by @twistedmexi. You can get that on their patron
Have fun with this dollhouse inspired build.
TOU-Don’t claim as your own. Do not sell.
XdownloadX
295 notes
·
View notes
Photo
There was an issue with my table missing its footprint so I had to update it! It should work now if you redownload it from this link below. The rar should have the word update in it, and if it doesn’t you are using the wrong one and it wont work in game. I also used a mesh from the outdoor retreat pack so have that installed.
X Download X (if you downloaded this prior to 1/28/2020 2:14pm PST, please download again. There was an issue with the table that should be fixed now) @little-miss-noble Thank you for the pointing out!
Thank you for being understanding and having patience while I still learn and figure out all the little odds and ends of turing my 3d objects into game objects.
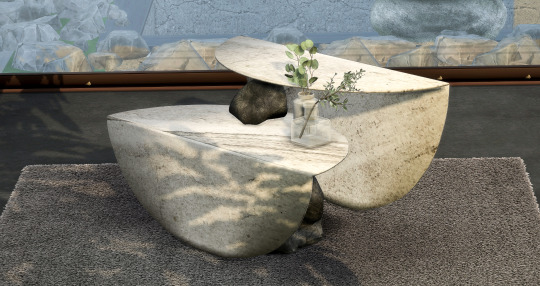
***This one is after a handcrafted table I found online called Primitive Physics Table. I really enjoy modeling IRL Haute Couture objects and furniture so I thought, id reale this one as one of my firsts for the sims.***
It’s a three piece table. Two rocks and the split table. The large rock is used to hold up the bottom piece, while the smaller rock is the stabilizer under the top. Use BB.moveobjects to place. search for Hey Pretty Sims or look in the living room tables to find it.
TOU: Do not sell. Do not claim as your own.
If you use it in a build tag me!! I want to see! <3

572 notes
·
View notes
Photo
I made my own mesh into a sims 4 object =) I’ve been doing a lot of archviz in blender so I thought I would turn some of my meshes into sims objects.
This one is after a handcrafted table I found online called Primitive Physics Table. I really enjoy modeling IRL Haute Couture objects and furniture so I thought, id reale this one as one of my firsts for the sims.
It’s a three piece table. Two rocks and the split table. The large rock is used to hold up the bottom piece, while the smaller rock is the stabilizer under the top. Use BB.moveobjects to place. search for Hey Pretty Sims or look in the living room tables to find it.
TOU: Do not sell. Do not claim as your own.
If you use it in a build tag me!! I want to see! <3
X Download X (if you downloaded this prior to 1/28/2020 2:14pm PST, please download again. There was an issue with the table that should be fixed now) @little-miss-noble Thank you for the pointing out!
572 notes
·
View notes
Photo

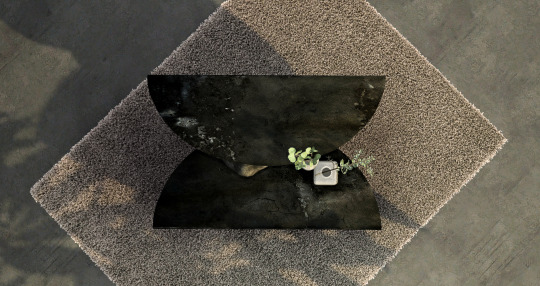
Working on modeling this 7 thousand dollar table I found on www.1stdibs.com. I’d love to get it to a point that I’m happy and then release it as a sims 4 object.
The last table I did I have been having trouble with. For some reason it had these really weird shadow lines through the object when placed in the game. I tried to get some advice on how to fix it but the only theory was that it was too high poly. Which, is interesting because I have been looking at some other peoples object cc and some of their meshes have even more polys than mine did. I’m really hoping I can get this one to work.
I don’t want to give up on my other mesh either so if you happen to read this and know of any things I can try or know what the issue is please let me know! It’s bugging me that I can not figure it out.
38 notes
·
View notes
Photo

When I got into the sims, I was in my early 20′s and it was like sims 2 or something. At that time I also was doing graphic design. I started a photography business and everything else stopped. I went to my 9-5 every day and came home to only work on building my business. 10 years later I am a full time photographer with a little bit more time on my hands. I was able to get back to playing sims and honestly the one thing that keeps me coming to the sims is the cc. If it were vanilla, I really wouldn't play because I can not stand the boring square media they put out. I spend my time in the sims building and decorating and really wanted to make my own cc for the game. I looked at the sims 4 studio and decided to spend time learning blender first. I fell in love with it!! I have been making more art than cc but that’s ok =) I do however want to make more cc so I have been watching a few tutorials on youtube regarding how to do it with the sims 4 studio. I tried reading their tuts but I learn better by watching than I do reading. So once I figure out how to actually make my models work properly in game, I’ll start releasing my own rather than just recolors. I’m practicing with this simple vase first. =)
22 notes
·
View notes
Photo

I am so excited for Tiny Living! I thought I would start practicing.This lot has one room up in the attic. However, I have no idea where the bathroom will fit yet.. But it’s pretty, so we have that going or us. lol!!
I got inspired after seeing some very amazingly done dollhouses online. Or miniature houses I suppose because I wouldn’t let any child play with them lol! Can we take a moment and give some very needed applauze to people who make miniature houses. They are like sims builders but times 3000!! The amount of talent and patience that goes into building those is incredible!
This #wip is my sims tribute to one of the miniatures I found online. I can not wait to finish it and share so my other tiny living loves can use it if they like =)
40 notes
·
View notes
Video
youtube
THE SIMS 4 : HOW TO FIX BROKEN CC AFTER THE LAST UPDATE |TEMPORARY SOLUTION |.
138 notes
·
View notes
Photo
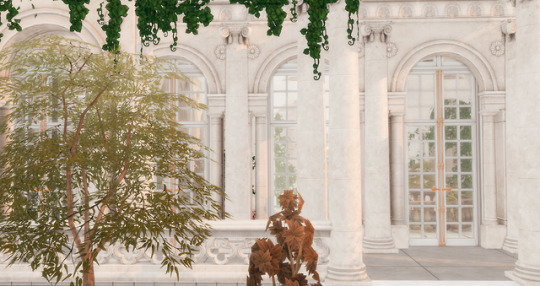
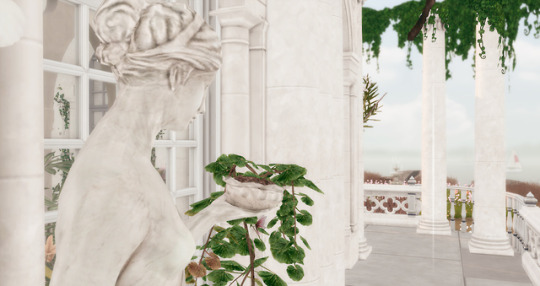
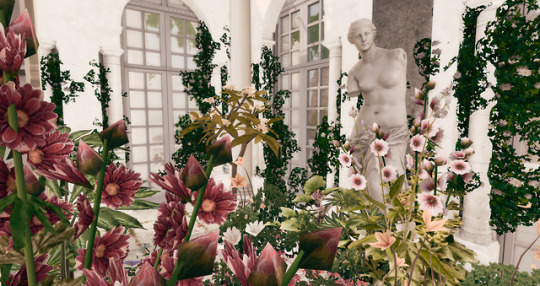
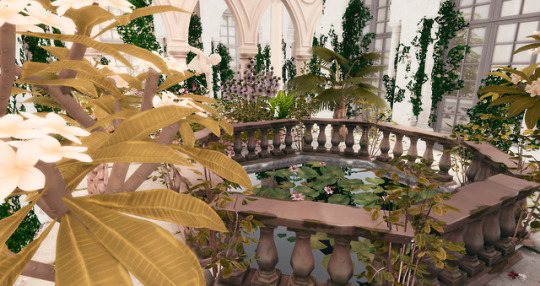
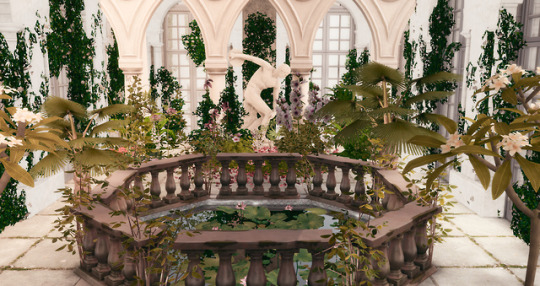


As promised, here is my Conservatory of flowers build. The last two images are what I used as inspiration. But I wanted more flowers so there is an abundance inside =)
I built this on a 30x30 lot. Actually It’s on the the Bluffs lot, which I’m not sure if I should have deleted lol! I will have to see if I can get that one back. But I wanted those views .. ha!
Fair warning before you instal! I made this for the sole purpose of using for photos and poses. If you want to use it for playing you’ll need to move things around inside just a bit so the sims can actually walk around. Also a big warning, A lot of the building is made with @felixandresims cc and wont be included inside. You’ll need to have his cc already or go and get his 20 buck patron package so you’ll have all his stuff.
Happy simming! And thank you to all the CC creators so we can all play and have fun with pretty content
Download X
161 notes
·
View notes
Photo
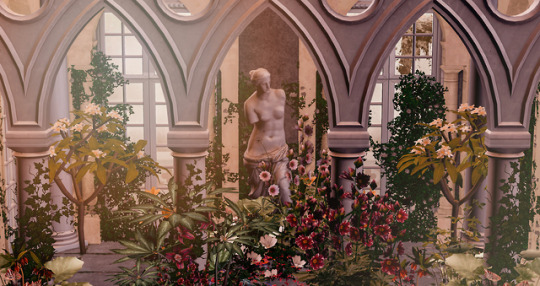
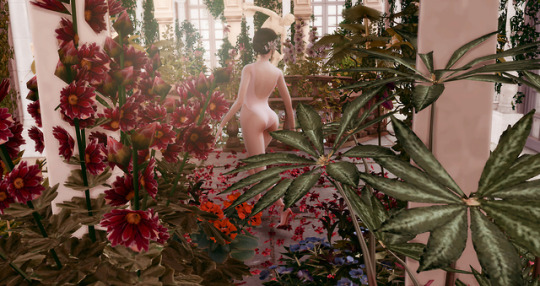
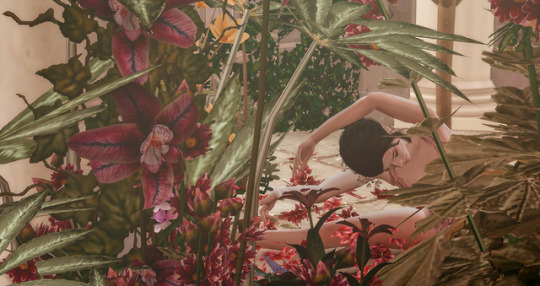
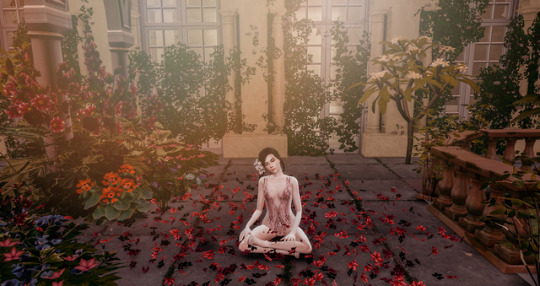
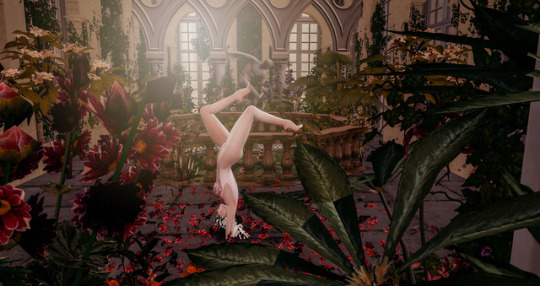


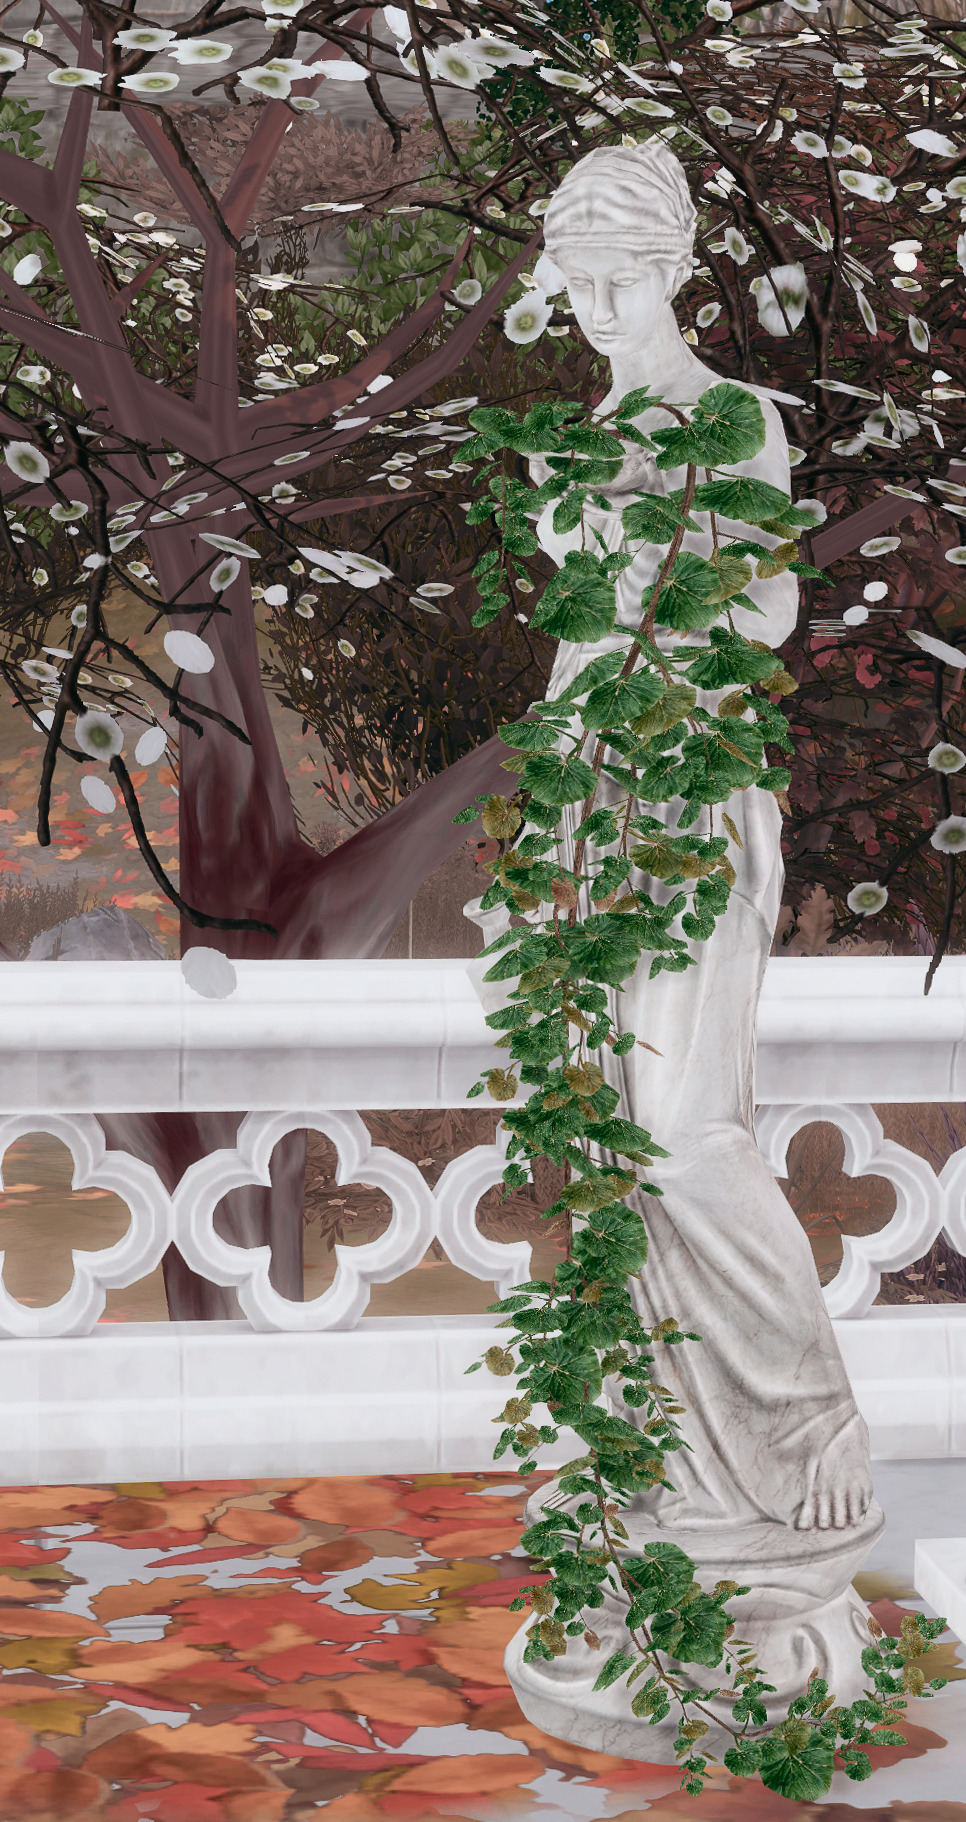
Early morning ballet practice in the conservatory of flowers. I will be releasing this build soon! It’s all done and I had so much fun making it! If you want it be sure to follow so that way you get notice once its released!
Reshade Patchouli Rose by @intramoon
Poses by @pandorassims4cc and @roundog
Building cc by @felixandresims
plus more and a million flower cc by a lot of amazing creators (Thank you!!)
All paid cc won’t be included in the lot.
#sims4#sims4 download#ts4 download#ts4 gameplay#ts4 lot#ts4 poses#ts4 edit#ts4 flowers#ts4 ballerina
97 notes
·
View notes
Photo

The twins
15 notes
·
View notes
Photo
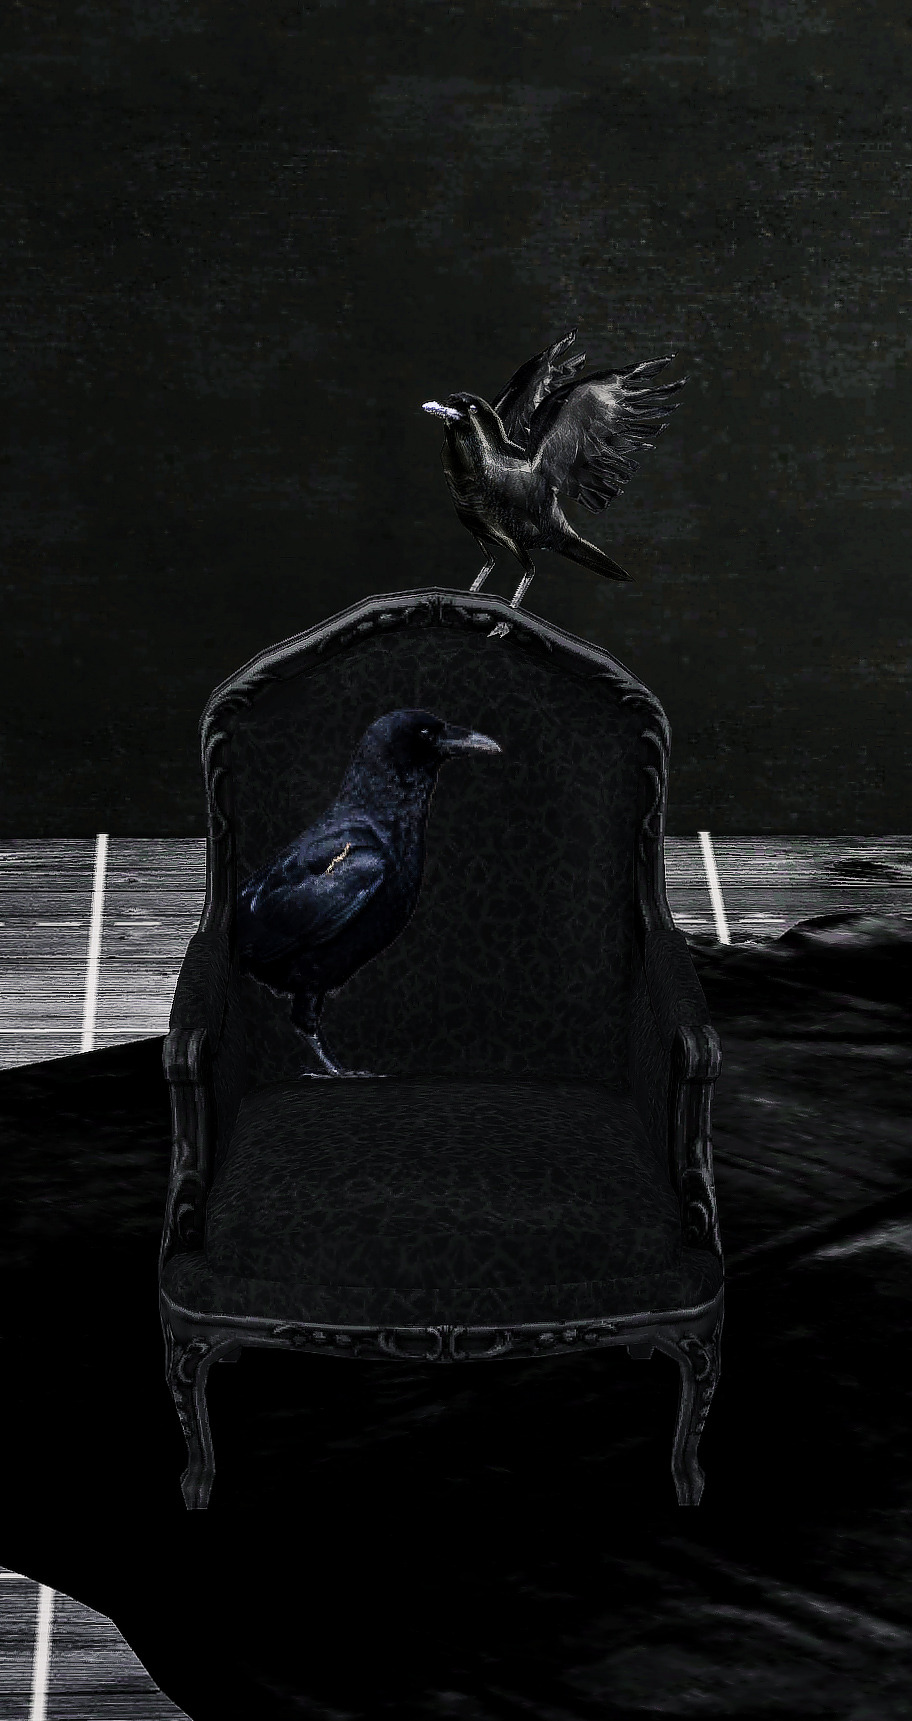
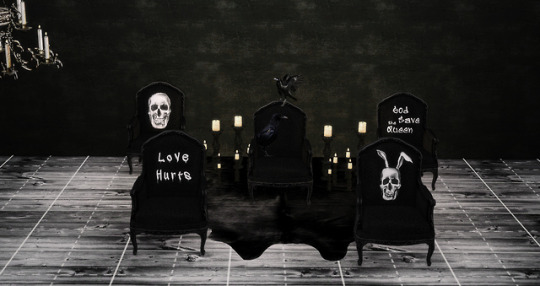
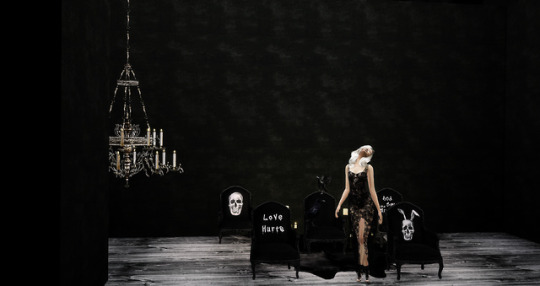
Inspired by both October vibes and the avant garde designer Jimmie Martin. I made these chair recolors after a few of his chairs. I really love bringing real designers work into game play and have so many more I’m working on from this designer and others.
A set of 12 chairs. The red lip one is not pictured and each chair also has a white frame match.
You will need #felixandresims mesh for this to work. I highly suggest you download the 20 dollar package from his Patron to receive all of his items. They are fab!
Download X
36 notes
·
View notes