Last Seen Blogs


Text
INTRODUCTION TO CREATIVE PLAY: EVALUATION
For my class ‘Introduction to Creative Play, I was asked to create small, animated projects, with each lesson focusing on a different medium and time constraint whilst giving our imaginations free reign in terms of subject matter. The aim is to play with the idea of what animation can be and learn to play with different ideas, techniques and materials. Much as a child will use their imagination whilst playing with different toys and environments. The purpose of this project is to give us young adult animators that same sense of imaginative play and widen our horizons in terms of the possibilities within our work. The freedom to play can often be lost over time as children move through life into adulthood.
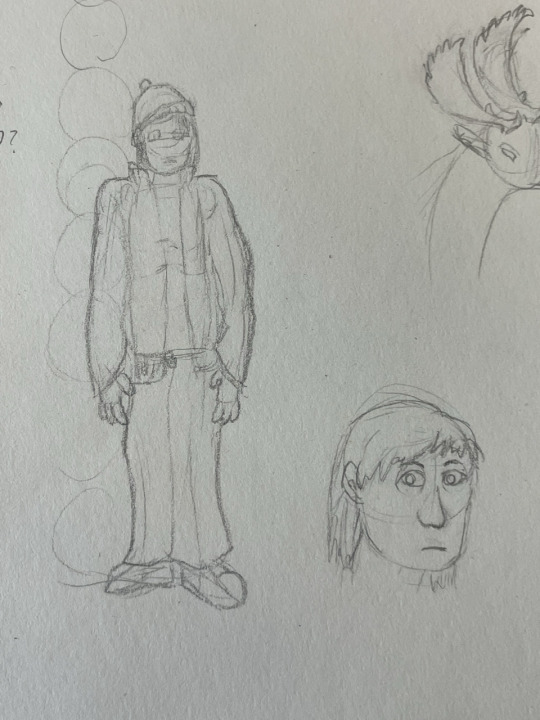
For the first lesson, I worked with a group to come up with, draw concept art, and pitch an idea for an animated short film. Being given a choice of six conflicts to choose from. These were: conflict & resolution, tension & release, mystery & revelation, losses & gains, setbacks & comebacks and peaks & troughs. My group chose the conflict of tension & release. We brainstormed a scenario where a character is hunted down by a monster in a spaceship. With this, we started sketching out Ideas for the characters. To make our hypothetical audience get invested in our main protagonists, a cat and a dog. One person did the concept art for the cat and dog, and I did the monster’s design, drawing a robotic being with a white mask like face and a body of wire arms. I was proud of my work here overall. Not only for my artistic contributions to story and character concepts but also for my ability to bounce off and work with a team.
The next lesson, we were given the activity to drawing a person or animal in the style of iconic pieces of animation by selecting a style and a subject via a spinning wheel website. Drawing the pieces within a time limit of a few minutes. The two style studies I created in the time were a T-Rex drawn in the style of the film Akira (1988) and a Skunk drawn in the art style of Spirited Away (2001). I'm proud of both. I'm especially proud of the Akira style T-Rex for the shading and detail I drew. This was a useful exercise as it encourages you to look more closely and analyse the work of different artists working in different genres. To break down the elements that make up the whole and to understand/appreciate those parts.
The lesson after that, we were given the task to rig and animate a 2d puppet character. We used the pre-made assets based on the character Finn from Adventure Time. On Adobe Premiere Pro, we separated each piece of Finn’s body into layers, connected or ‘parented’ those parts into a puppet rigg and animated it using a walk cycle chart as reference.
The process of learning was complicated at first due to the pace of the lesson and not having used After Effects in a while - so I wasn't able to make an entire animation in the lesson. I am happy I was able to gain an understanding of how to rig and animate a puppet in After Effects. I really do want to experiment with this method of animation more in the future so I can become more fluent using After Effects.
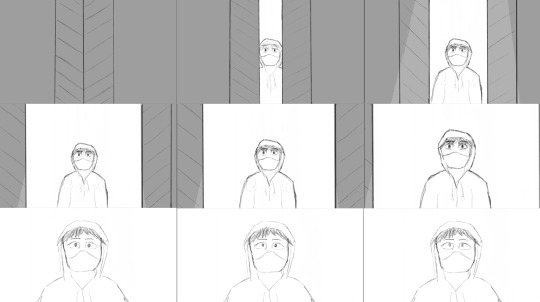
For my final project, I was tasked with a brief to make a short animation that was under a minute in length. After brainstorming a few ideas for stories, I decided on the story of a toy falling off a bed of a child who would then encounter a monster under the bed. I made concept art and a bullet point synopsis. I was proud of the story idea I was able to come up with. It is simple for a film that could fit into a minute, yet still has substance to it such as its creepier style/tone and its intriguing twist on the “monster under the bed” trope. Unfortunately, due to being busy with other artistic projects, I was unable to complete the short in the intended time. However, on a second attempt once I had this synopsis, I drew two pages of storyboards for the film. I originally had an idea for an opening establishing shot of the entire bedroom, but I eventually scrapped this idea to make the story more streamlined. Ultimately, I knew, due to the limited deadline I had, I would simply make a short animation test for the toy doll character.
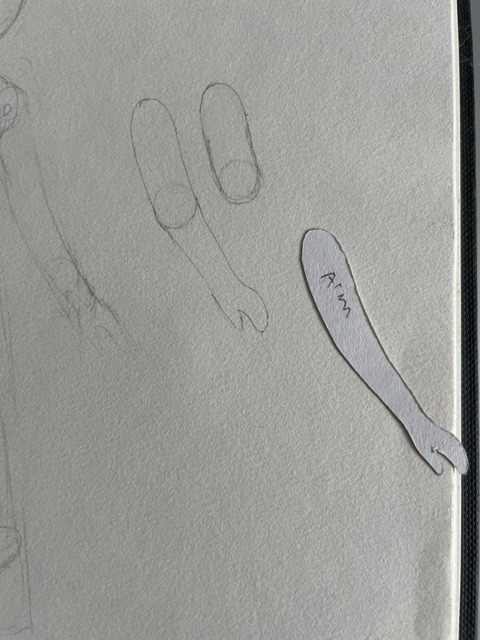
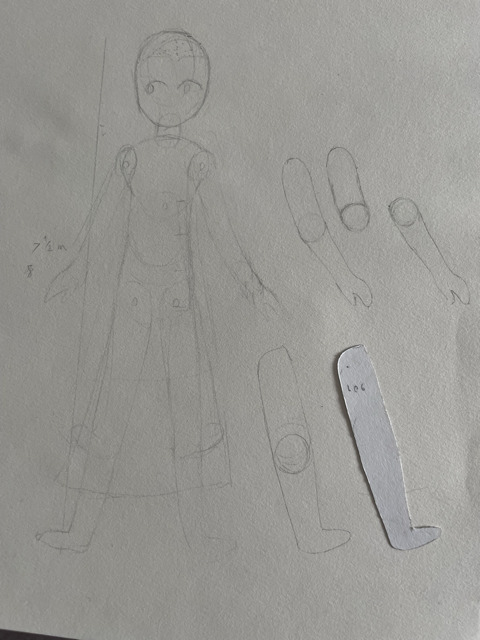
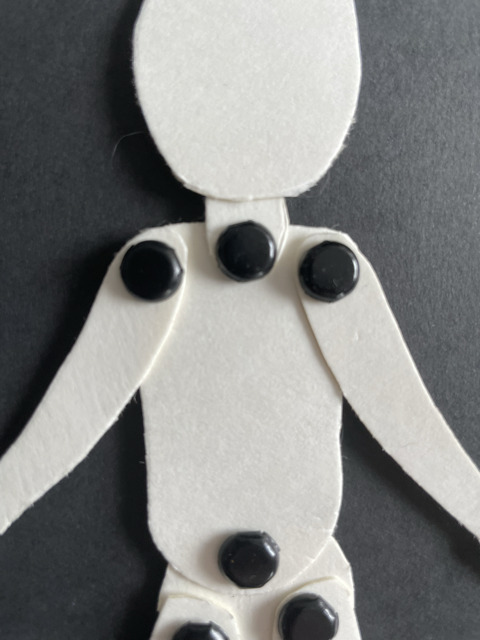
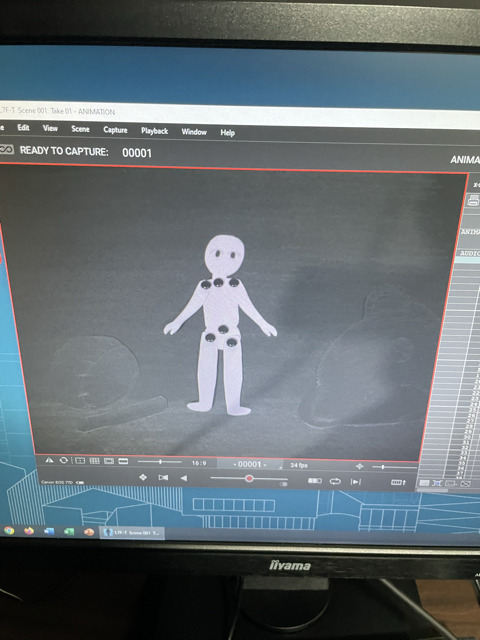
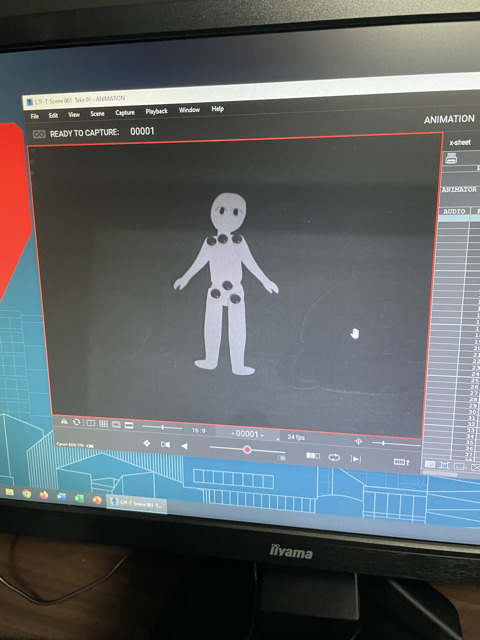
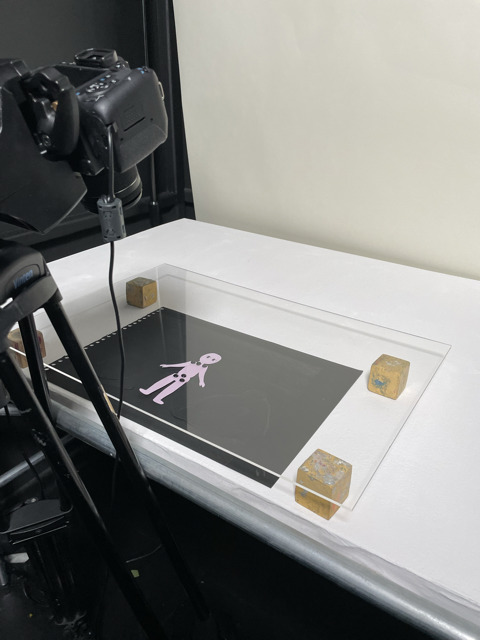
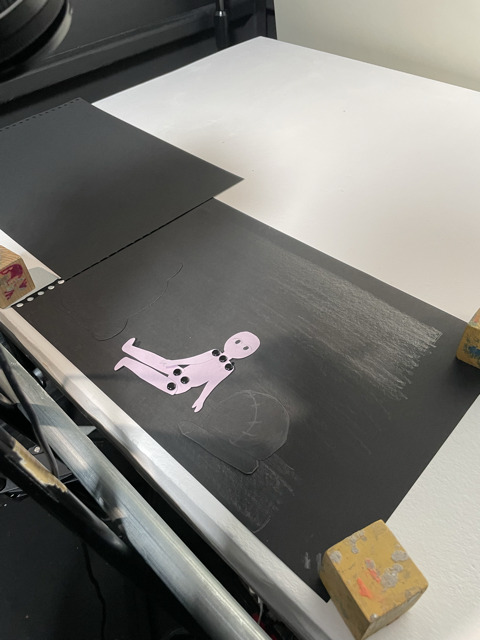
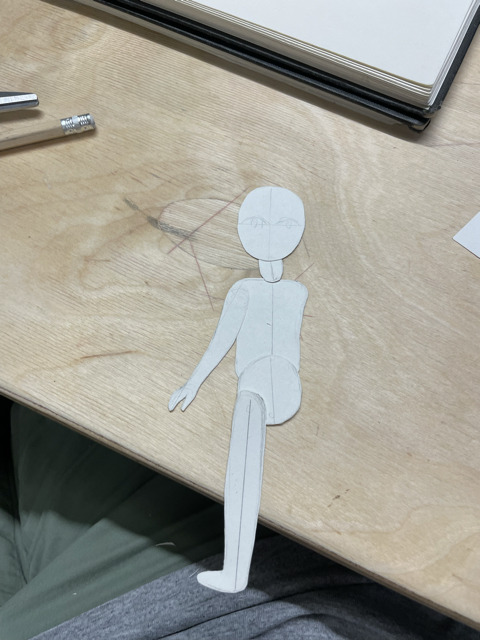
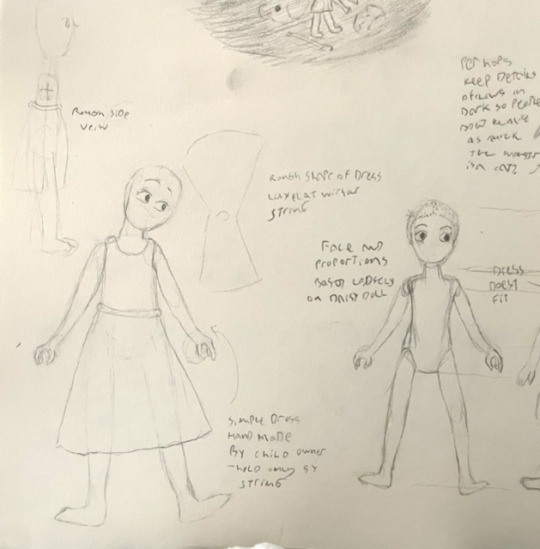
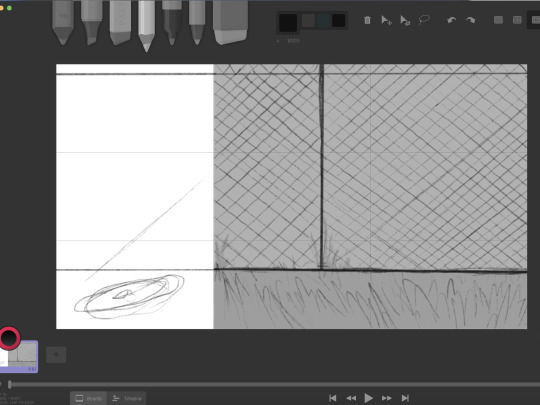
With the storyboards done, I set about making a puppet for my character, the doll. First, creating several prototypes from black card paper. I first drew blueprints of the doll and its proportions, broke those down into individual body parts and cut those parts out of white card paper to use as a guide to cut out Individual parts for each puppet. I ultimately created two prototypes with articulated points on their middle, legs, arms and neck. Using black split pins to attach each limb to the body. I also briefly experimented with making the puppet black in colour and having the details of it such as the outline and face painted in white. Ultimately though, I opted to have the final puppet be made of greyish periwinkle card paper, as it would stand out better against a black background.
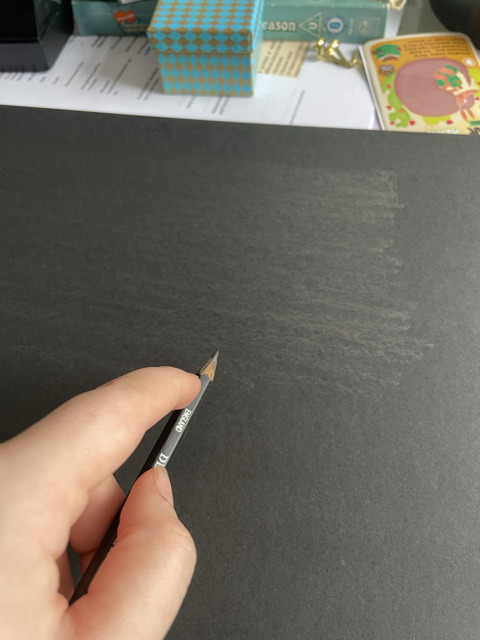
After the puppet was done, I made a background using a sheet of black card. Shading it and giving it texture with a BH pencil. I wanted to use charcoal to add further texture to the piece. However, I discovered I didn’t have any drawing charcoal in my home. If I had more time and known where to find it, I would’ve bought more charcoal before starting the background. Also, when I went to film my piece, I realised the details I had drawn onto the background elements like the teddy bear head didn't show up on the screen, even in the somewhat bright film lighting I was working with. If I Were to do this again, I would perhaps cut the background pieces out of a card paper that was a different colour, such as dark grey.
After this, I then went into the stop motion studio at my campus and animated the animation test with one of the tripod cameras and shot the film using the program Dragon Frame. I then exported the film as an mp4, saved the film on a USB and added titles and credits using Adobe Premiere Pro. Overall, I am proud of how the test came out. I think I managed to breathe a lot of life and character into the doll puppet and the movements conveyed the doll's personality well.
Overall, while I did have some setbacks, this was a rewarding and fun project for me. Working with a diverse range of materials, formats and art styles was not only engaging but helped me gain a better understanding of what materials I was most comfortable with using for animation, which turned out to be stop motion. I particularly enjoyed animating with the Lego and vinyl minifigures and with paper cut outs. These mediums I felt were the most intuitive for me to use and play around with.
Along with this, I found it surprisingly easy to work with a group. It was rewarding to come up with ideas to bounce off others whilst in turn, taking on board other people’s vision and ideas. I felt working with others in this way only strengthened my creative process and the projects we were working on.
Also, through the various timed exercises, such as the Lego minifigure animation in particular, this project helped me relearn and remember that sense of play and the joy and freedom there was to be found when working with different artistic mediums - without the constraints of adult sensibilities such as the fixation on making the piece perfect or high quality.
And along with all this, I was able to brush up on my skills with not just traditional mediums such as pencil on paper and stop motion animation, but also digital programmes such as Stop-Motion for iPhone, Adobe After Effects, Dragon Frame, and Adobe Premiere Pro.
1 note
·
View note
Text
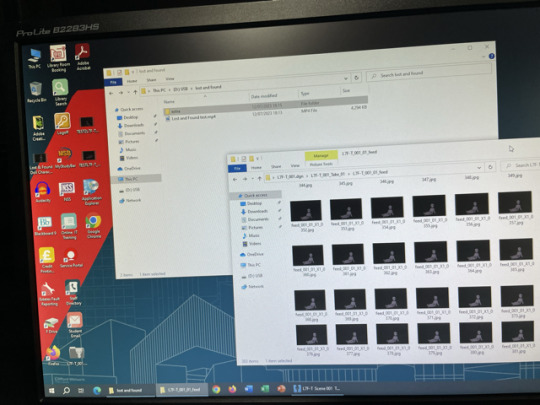
INTRODUCTION TO CREATIVE PLAY: LOST AND FOUND - CHARACTER ANIMATION TEST.
For the final stage of my project, I created an animation test to experiment with the 2D paper cut-out puppet I had made. I also created a background with moveable parts to go with it.
I briefly experimented with drawing blueprints for a puppet with articulated elbows and knees, which I drew using the template parts I'd made to make the prototype puppet parts. However, I ultimately scrapped this idea due to wanting to focus more on getting the background and animation test itself done and because I felt the character having non-articulated arms and legs would add to the feel of the character being a cheap children's doll and would give her a unique style of movement that I could experiment with.
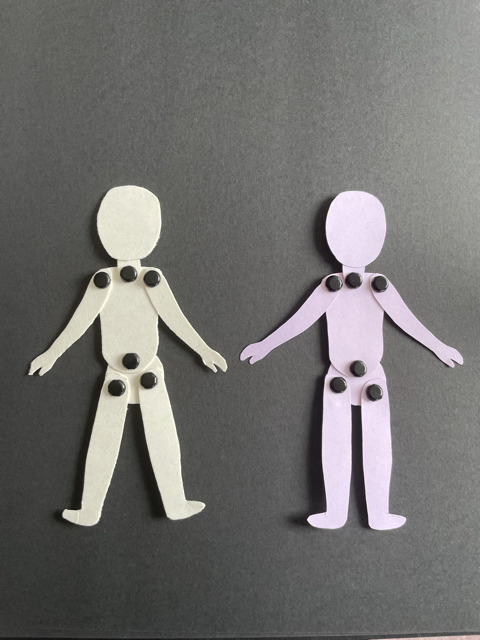
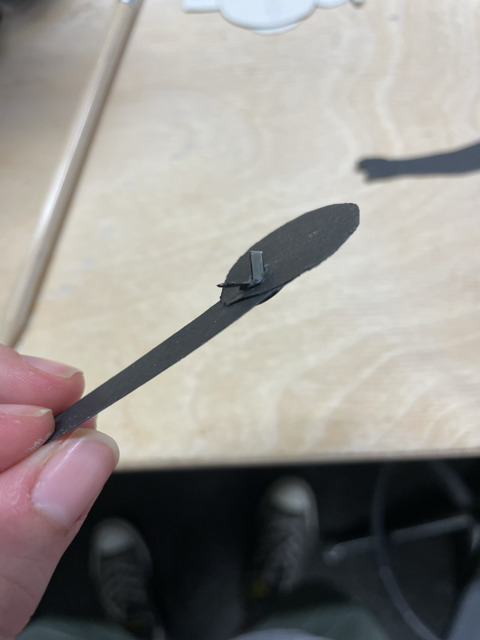
For my final puppet, I used the template parts to trace around lavender/periwinkle card paper. I believed using this light-coloured card, would not only help the doll stand out from the black background, but also give the piece a splash of colour contrasting with the dark monochrome colour palette.
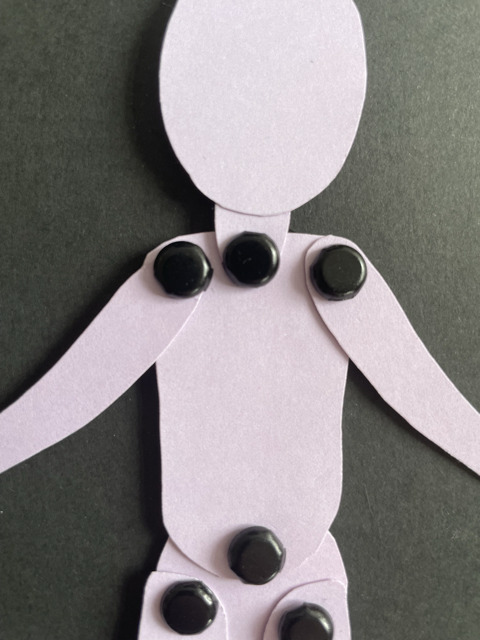
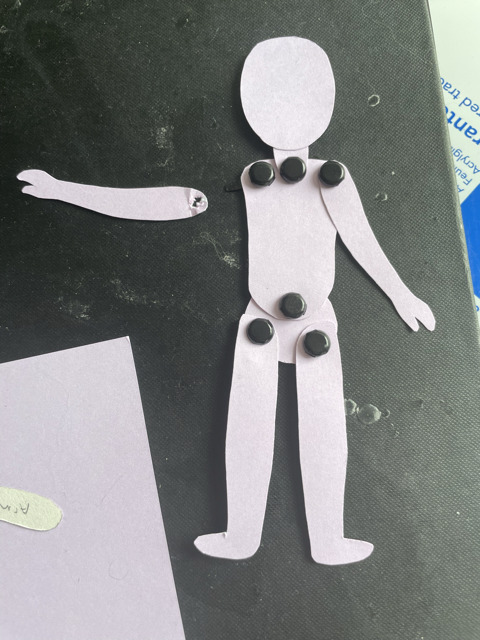
During the process I did make some mistakes with this puppet, like making the shoulder articulation point on the left side of the doll a bit too close to the chest, resulting in an unnatural and slightly lob-sided arm placement. Not to mention, the arm later breaking off as I had placed the articulation hole too close to the beginning of the arm. Therefore I had to make a second one with the arm hole slightly further down the arm. Had I made the puppet again, I would reference the points of articulation on my previous prototypes so that they would be properly placed and symmetrical.
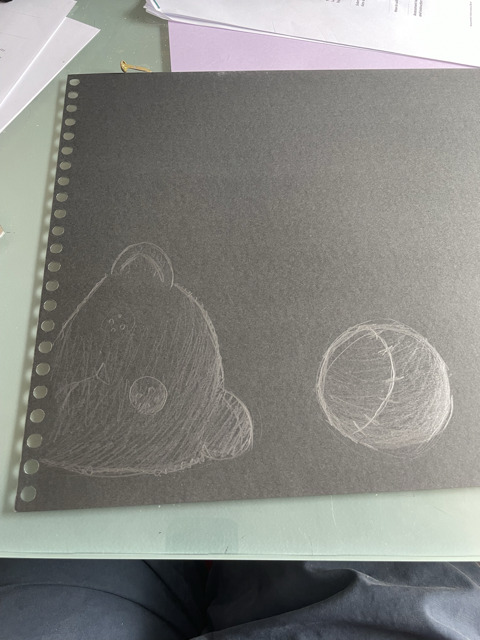
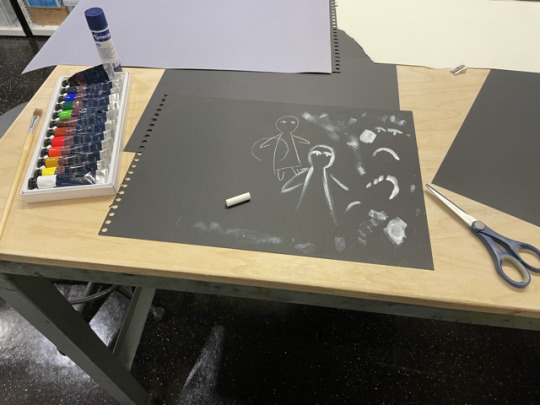
For the background, I used a black piece of paper and shaded it with a BH pencil. Adding and shading the floor and dust in the air, portraying the feeling of a dusty, dark underside of the bed.
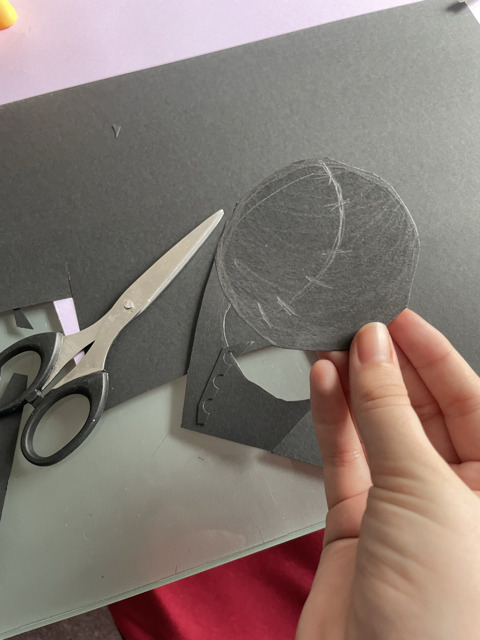
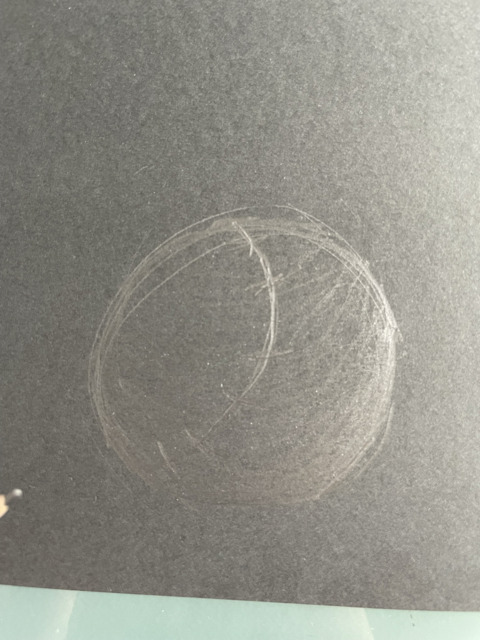
I also wanted to use charcoal in the shading to add further texture to the piece. However, I discovered I didn’t possess any drawing charcoal (likely to have gotten lost during a house move). If I had more time, I would have gone out to buy more charcoal before starting the background. Along with this, I also cut out shapes for the background dressing such as a lost teddy bear, a baseball and a discarded pencil, objects that could conceivably be found under a child’s bed. I shaded and drew in details with the pencil I had used for the rest of the background.
With these assets made, I went to the Media City Campus to film the test. I was hoping to use the down facing multi-plane camera in the Stop Motion Studio that is specifically designed for 2d animation such as paper cut-out animation. However, another student was already using the multi-plane camera and had already set up their project there. So Instead, I used a regular camera. I modified the position of the camera and tripod so it would face down at the table.
For the set-up of the background and doll, I initially wanted to experiment with placing a piece of Perspex on the background and some pieces of the dressing, to give the illusion of depth of space in the scene. However, when I placed the clear Perspex over the scene, I saw on the camera how the reflective surface of the Perspex showed the glare from the stage lights, which was very distracting and would break the illusion of the scene, so I ultimately decided not to use the Perspex.
I used the program Dragon Frame to animate the sequence, which overall took me a day and a half to animate. Once it was done, I exported the film to a USB, edited a title and credits into the film using Premiere Pro and exported that as an mp4.

Overall, I am proud of how the test came out. I think I managed to breathe a lot of life and character into the doll puppet and the movements conveyed the doll's personality well. I’m also glad I was able to complete the test under some of the circumstances and with the resources that were available to me.
#lost & found#creative play#stop motion#animation#stopmotion#paper cut out#video#dragonframe#animators on tumblr#intro to creative play
1 note
·
View note
Text
INTRODUCTION TO CREATIVE PLAY: LOST AND FOUND PAPER CUT-OUT PROTOTYPES.
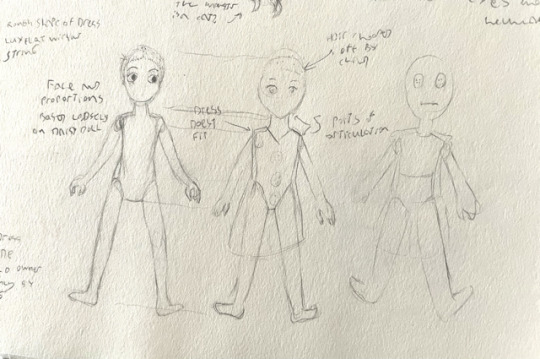
Continuing from my lost and found work, I then progressed on to creating prototypes for a paper cut out stop motion puppet for my film. Although realistically, I am aware that I may not be able to create and finish the final lost and found film in the time I have, I was told by my tutor, that the supplementary behind the scenes work and a short animation test with a puppet will be able to help me pass the grade. With this in mind, I set about making some puppets. I first sketched a rough blueprint of the doll puppet, playing around with the proportions.

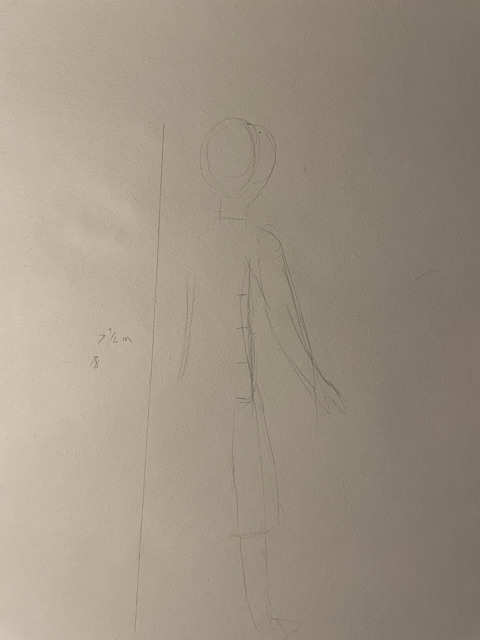
At first, I made the legs of the doll longer and the torso somewhat short. This gave the doll a tall and a more mature appearance like a barbie doll or a fashion model sketch. However, I did not think it fit the character well and wanted to make them look smaller and more childlike. This way would then raise the stakes when the doll is in danger under the bed with the monster and the audience would potentially better connect and feel the dolls vulnerability. Hence I shortened the legs.

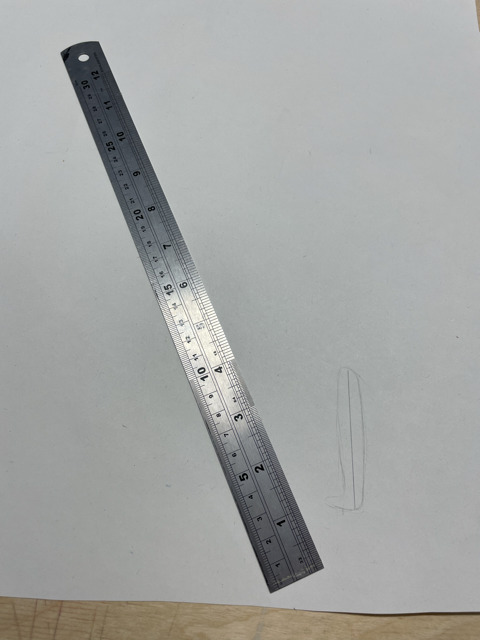
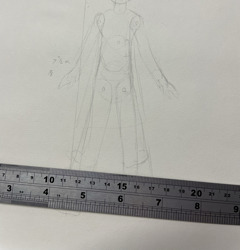


Once I was satisfied with the proportions, I took a pencil, a ruler and some paper and measured each piece of the figure, drawing them on another piece of paper and cutting them out individually. This way, I had templates to trace around for each piece of the puppet and I could make multiple puppet prototypes that were consistent in shape.
Before making my first puppet, with black card paper, I experimented with white mediums on black card. I wanted to give the figure a white outline to contrast with the black background I planned to have. The mediums I experimented with included white acrylic paint, white colour pencil and chalk.

One thing I realised though, was that having a black figure on black card would make the figure blend in too much with the background and take away from the clarity of the scene. I was also not satisfied with the effects of the mediums I used on the black paper, so I decided that the puppet I would use in the animation test would be white or grey to contrast with the dark background.
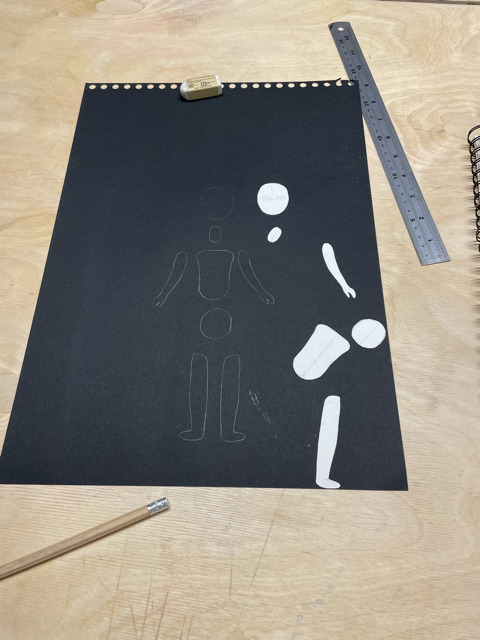

As I still had it on hand, I used the black card paper to make my first puppet prototype. I traced around the paper pieces I had made onto the black card paper with a pencil. Then, I cut out the pieces with scissors.


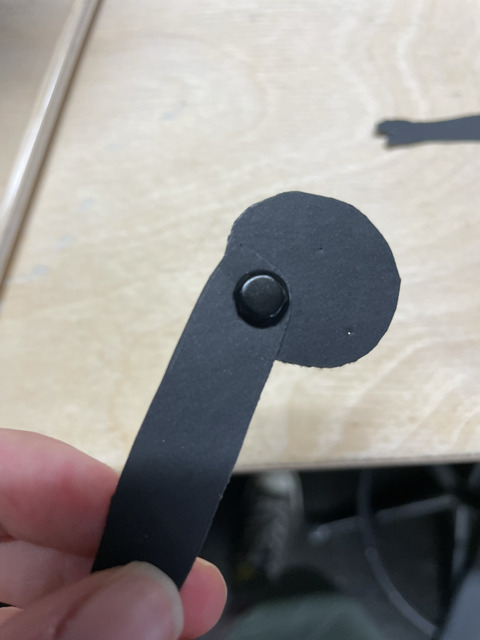


With the pieces cut out, I used the tip of a drawing compass to poke holes into the points of articulation on the hip, the beginning of the arms and legs, shoulders and neck. Making sure the holes of the corresponding parts were lined up, I then used split pins to connect the pieces together, by driving the pins through the holes and opening the split in the pins. Using wire cutters to trim off the ends of the pin so the ends wouldn’t stick out behind the doll.
I would use this same method to make my second prototype, using the card paper lids from my old take away dinner packets. But this paper was very flimsy and porous and not as strong or sturdy as the black card paper.
Overall, I am proud of how these first prototypes turned out. I will use the techniques I have learned here to make the final puppet for my test animation, perhaps experimenting with making a version of the puppet with articulated knees and elbows. However, for now, I will focus most on making a final puppet and a background for my animation.
#animation#lost and found#intro to creative play#creative play#stopmotion#stop motion puppet#paper cut out#stop motion
0 notes
Text
INTRODUCTION TO CREATIVE PLAY: LOST AND FOUND STORY IDEAS.
When I was first given the brief for lost and found, I set about brainstorming ideas for stories, with the help of a few colleges.
My initial story idea involved a bird egg falling from a nest and hatching a chick. Another animal would then find it and raise it as its own despite the obvious differences. The animation story itself would be simple and involve the chick’s foster parent teaching it a skill. I hadn’t decided on the parent animal’s species at that point, but if it were a frog, for instance, it would teach the bird how to hop or catch flies.
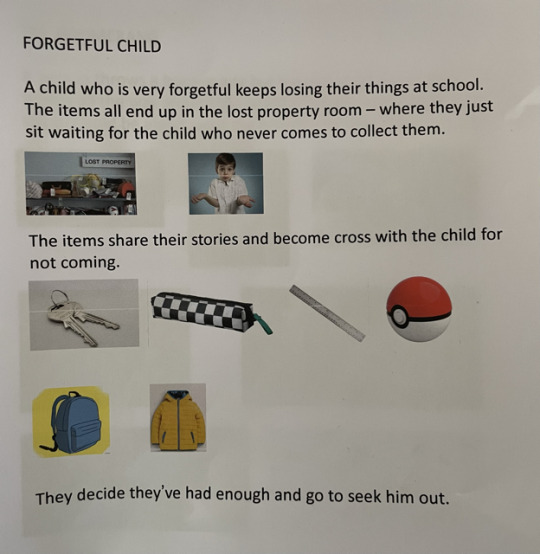
Another idea would involve a story about a forgetful child who loses his items at school which are handed into the lost and found. These items would then come to life and tell stories about the child to each other and before realising they’ve had enough, they would go seek out the child for themselves.

Another idea I had was that of a boomerang being thrown by someone, and instead of coming back, it would travel all the way around the world, seeing various strange and amusing sights along the way.
Although many of these ideas were good , they didn’t appear viable in terms of inspiration, as well as being limited and generic in terms of tone.
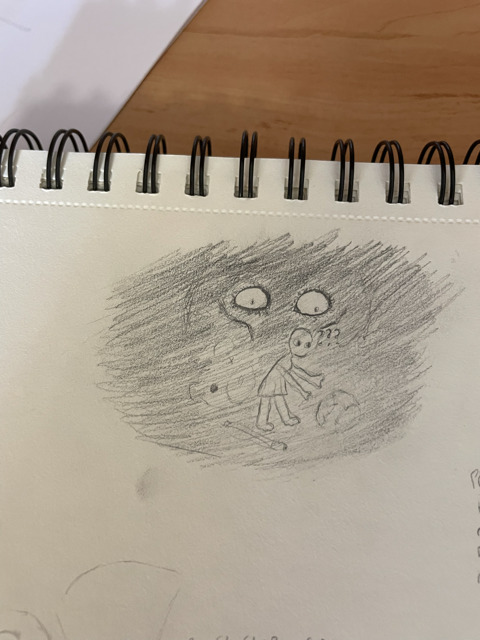
I then thought about an alternative story line of a toy falling under the bed of a child who would then encounter a monster under the bed. I was drawn to this concept, as it was spookier and darker tonally than those of the short films I had made previously. I thought that creating something that was creepier stylistically and tonally from my earlier work could be a fun and engaging exercise.
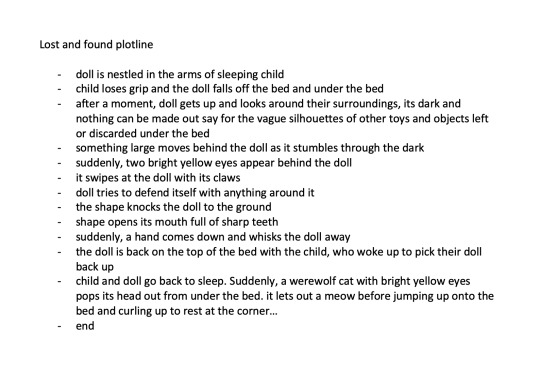
Once I settled on this idea, I set about writing an outline for the story. Typing up in bullet points the beats of the story. A notable way I expanded on the idea of the monster under the bed was to have the creature turn out to be the child’s pet cat. Adding another layer to a relatively simple story.
Overall, I am proud of the story idea I was able to come up with. It is simple for a film that could fit into 30 seconds, yet still has substance to it such as its creepier style/tone and its intriguing twist on the “monster under the bed” trope.
0 notes
Text
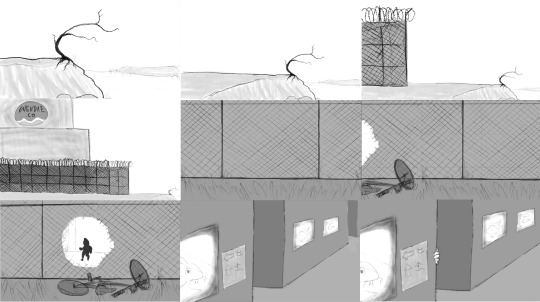
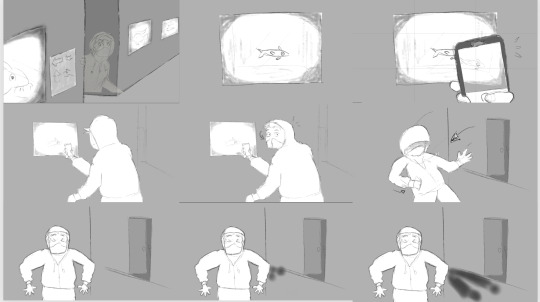
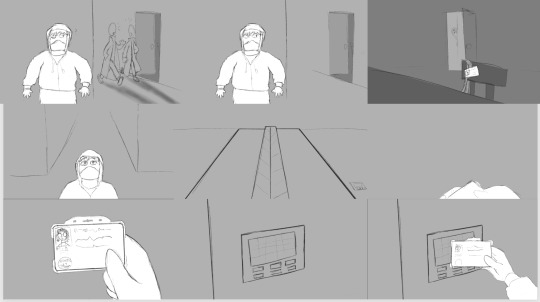
INTRODUCTION TO CREATIVE PLAY: LOST AND FOUND STORYBOARDS.
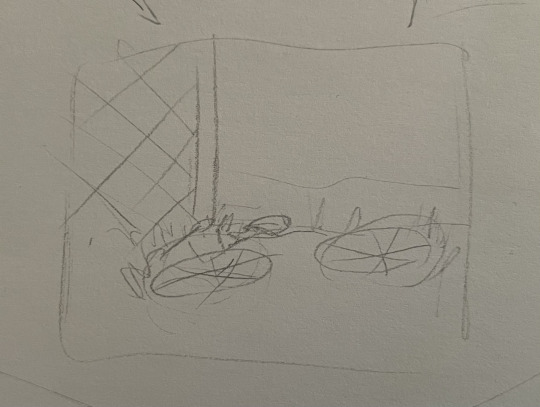
For my creative play project, I was tasked with creating materials for a one-minute short film that revolved around the concept of lost and found. I was given this brief in 2022 and produced some initial ideas, a story outline and some character concept art.


Unfortunately, due to having my hands full with other projects at the time, I was unable to work on the rest of the Lost and Found project and my short film. So during June and early July, I intend to continue working on this in order for me to complete and pass. This entails storyboarding my film, creating puppets for the characters and filming a character animation test.
When selecting the project, I began with the storyboard. Using the out-line I had written as reference, I decided to draw the panels in my sketchbook by hand, as I had previously done most of my storyboarding work for other projects. I believed this would allow me get back into the flow of creation by working on a physical task as opposed to a digital one. However, this took around two days which was longer than originally anticipated. On reflection for the future, If I was to do this again with more time, I would use a digital medium such as iPad Procreate or a ruler and pencil to make evenly sized and spaced panels of 3 by 3 for each page.

I wanted to try and simplify the shots somewhat, as I knew realistically, I couldn’t finish certain establishing shots near the beginning and end of the film due to time constraints. My Tutor suggested I start on the shot where the doll is being held by the child and making the part where she falls under the bed in one shot.
Whilst drawing, it was tempting to add high amounts of detail to the panels, which I did in some. However, in general I tried to keep the drawings simple not only for the sake of time management, but also to give the scenes clarity and ease of readability.
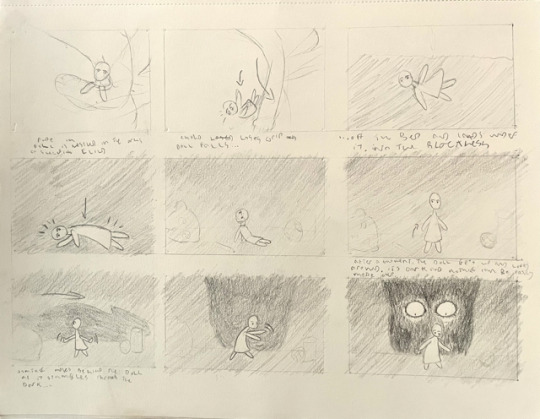

Overall, I am proud of the work I created for this storyboard. I feel it will be a good addition to the body of work I am producing for the Lost and Found project.
#Creative Play#intro to creative play#lost and found#lost & found#storyboards#storyboarding#animaion#concept art
0 notes
Text
Storytelling Script To Screen: EVALUATION
For my project, Storytelling: Script to Screen, I was tasked with coming up with a story for an animated short film, pitching a synopsis with concept art to my peers, writing a screenplay/script and creating a 90 second animatic of my story.
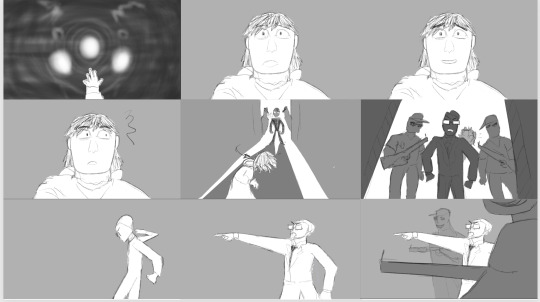
I first started by doing research into different philosophies of storytelling and the different types of story structure in order to get a good idea on how to make a well-structured story for a short film. Looking to creators like Andrew Stanton and his rules of storytelling, and Dan Harmon’s story circle – a narrative structure formula created by Harmon loosely paralleling Joseph Campell’s theory of The Hero’s Journey. I analysed several animated short films, taking note of how they fit into or, in some cases, subverted the steps of structures like Harmon’s story wheel, what that said about the types of stories being told, and how I could apply these types of rules to my own story.
With these theories in mind, I brainstormed possible ideas. After collaboratively brainstorming with my classmates and on my own - based on the prompts unrequited love, mysterious portal, obsession, and heist, I eventually came up with two ideas: a short where a bird becomes attached to a snail who she mistakes for one of her own eggs, and a plot where an activist breaks into an animal testing lab and discovers something sinister. After writing a synopsis and artwork for both, I pitched my ideas to my class and received their feedback which was more favorable for the serpent synopsis. I ultimately agreed and chose the second idea, as I felt the story had more potential for interesting visuals and would convey a message I felt more connected to.
I then made a second draft of my synopsis that refined some details and cut down the length significantly. That way it could fit into a shorter runtime for my animatic short film.
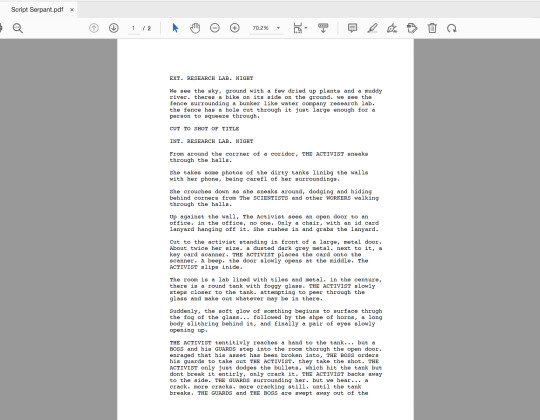
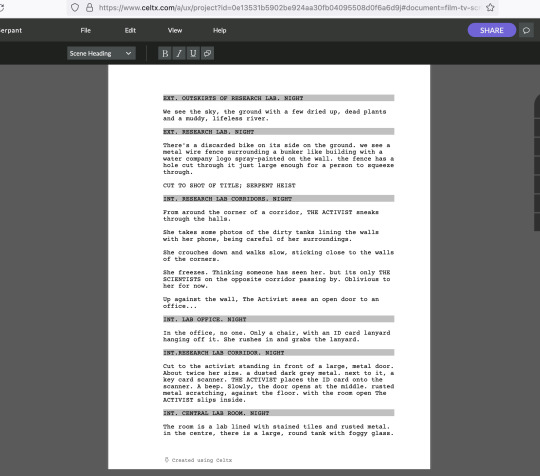
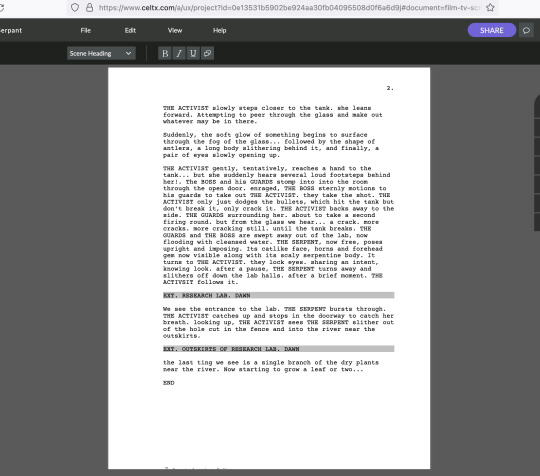
After this, I used the synopsis as the basis of a script which I wrote on the script writing website Celtex. I then edited and redrafted the original script and created a final script in which I added more location detail and refined its format.
With this script in hand, I set about drawing some concept art for the two main characters; Sam the activist, and the Uktena serpent Sam frees from the water company lab. I also drew concepts for maps of the film’s locations, such as the interior of the lab, some thumbnail sketches for storyboard shot compositions, and created a Pinterest board to gather reference material for inspiration. I also studied material such as Peter Loomis’s book ‘Figure Drawing for All Its Worth’, as reference for figure drawing and drawing multiple figures in a 3d plain with two-point perspective.
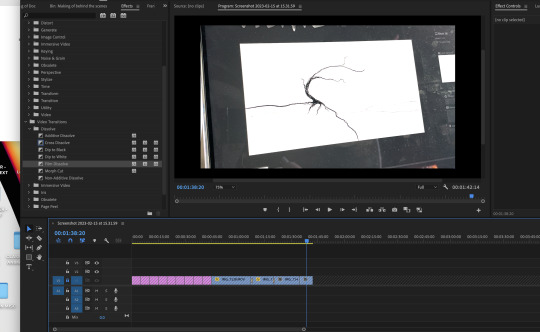
For the animatic, I used the storyboarding program Storyboarder on my laptop whilst using my iPad (connected to my laptop) as a drawing tablet using the app Astropad Studio. The storyboarding process was going well as I drew each shot. But at some point, the program crashed, and I lost a few drawings, even though I was saving frequently, and the program was supposed to save things automatically. So, to prevent these shots being lost, I started screenshotting each shot and saving them to a folder.
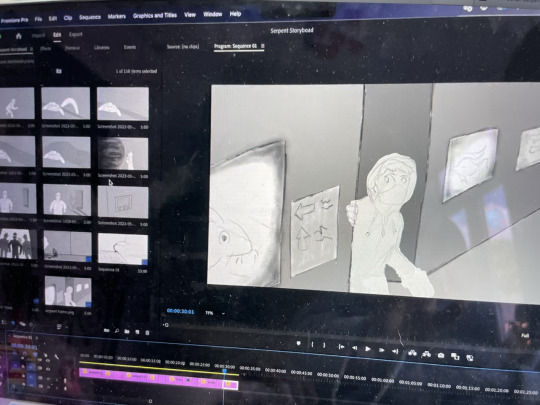
Once the animatic was completed, I took all the clips and screenshots and put them all together in Adobe Premiere Pro.
Some clips and frames did not fit into the 16:9 aspect ratio. So I selected the clips, set the frame to fit to scale and the image fit the screen.
I also sought out sound effects on Pixabay (royalty-free sounds/music site) and edited these into my film.
Originally, the animatic was two minutes and twenty-seven seconds in length. But the brief specified the animatic be ninety seconds to a maximum of 120 seconds. So I edited down the footage. Eventually being able to cut down to one minute and fifty-seven seconds, including the opening title and end credits.
After this, I exported the video as an MP4 and uploaded the whole thing onto my Vimeo page.
I also arranged the animatic shots on a PowerPoint in three-by-three rows, much like a professional storyboard. This way, I could put these frames in my visual portfolio.
I’m overall proud of the work I’ve done for this project. I gained a better understanding of the animatic short film production process. I gained valuable experience writing a well-structured narrative through studying theory and other short films, writing a synopsis and a properly formatted screenplay. I learned to use new software tools such as Celtex for script writing and Storyboarder to create my animatic. As well as gain more experience with editing an animatic on Adobe Premiere Pro. All these programs I will use in future creative projects. Most of all, I’m very proud of the film I created through this project, and I feel it’s one of the most high-quality short films I’ve produced so far.
7 notes
·
View notes
Text
STORYTELLING: SCRIPT TO SCREEN. ANIMATIC PRINT VERSION.
After finishing my animatic, I took all the screenshots of each shot and laid them out in a Microsoft PowerPoint document. This way, I could have all frames as images to share in a visual portfolio.
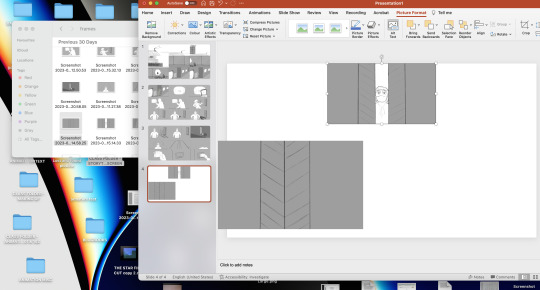
At first, the images were hard to format and fit onto the PowerPoint pages. However, I learned to place and resize the upper middle pannel of the storyboard first. That way, the left and right images could fit accordingly.


I'm proud of how these boards turned out, and I feel they will be an excellent addition to my visual portfolio.
#animation#animatic#storyboard#storyboarding#powerpoint#microsoft powerpoint#portfolio#storytelling script to screen
0 notes
Text
STORYTELLING: SCRIPT TO SCREEN. ANIMATIC CREATION.
As the next stage of my Storytelling: Script to Screen project - after writing the synopsis, screenplay, and drawing concept art to further flesh out the story, I began work on my animatic.
I used the program Storyboarder as I had learned how to use some of the tools in one of our previous classes. I also consulted the q&a page on the official Storyboarder site to see how to use some other tools of the software.

Once I'd familiarised myself with the tools I would need to use, I set up my computer, connected it to my iPad, so I could use it as a drawing tablet with the app Astropad Studio, and opened up Storyboarder. At first, I just played around with the paint and pen options to familiarise myself with the various tools before setting about drawing the first shot.

Using the composition graph filter, I was able to keep track of the shot composition and create visually appealing setups for each scene.
Drawing each shot was going well and I was saving often. As I took a break from my work I moved the Storyboard file to the folder containing my other work. However, when I later tried to reopen it, this pop-up window appeared. I was able to undo this by undoing my actions on the desktop.


After that, as I was drawing one frame, the program crashed. Once I reopened the file, the shot of the fence I was drawing was gone, even though I had saved it. I re-drew the frame, but it kept crashing multiple times after this. So to ensure I wouldn’t lose anything, I started screenshotting the frames to save them. So I’d have backups to edit together in case the program crashed again.

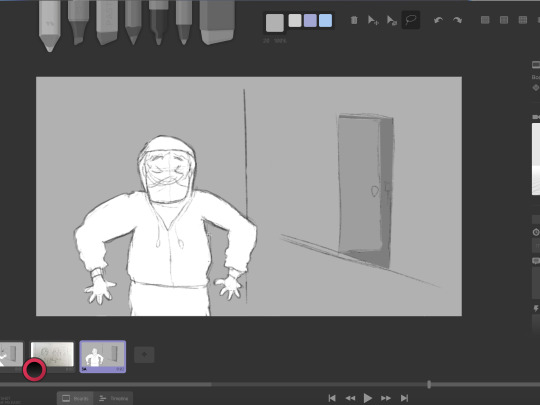
When drawing characters like Sam, I wanted the background of the lab to be one solid color of light grey, and Sam (and other characters in some shots) would be white or, in some cases, a darker shade of grey. This way, the character would stand out against the background and draw the eyes of the viewers to them.
Once I had drawn every frame and grabbed each screenshot, I uploaded every clip and screenshot into Adobe Premiere Pro. Putting them all in order. I then added the sound effects I had downloaded from Pixabay.
Initially, the film was 2 minutes and 27 seconds in length, but the brief required the film to be 90 seconds to a maximum of 2 minutes long, so I had to significantly cut down the runtime of each frame, which I managed to get down to 1 minute 57 seconds, including the opening title and end credits. I exported this film as an MP4 and uploaded it to Vimeo.
vimeo
Overall, I'm proud of how my animatic turned out. I was able to create a professional-looking and sounding animatic that told the story I wanted to tell clearly and effectively in a very short amount of time. I also learned how to use Storyboarder for the first time. Even though I struggled with some technical aspects, like the program crashing, I will look to this program again to use in future film projects. I hope I can further improve my skills with using Storyboarder and my animatic creation skills in general.
1 note
·
View note
Text
STORYTELLING: SCRIPT TO SCREEN. SCRIPT WRITING.

For my script-to-screen project, after refining my story synopsis, I went about writing my screenplay. I was initially recommended by my teacher to write my screenplay using Microsoft Word with the program's screenplay template. However, after doing some of my own research and realising the Word template would not be the ideal way to write my screenplay, I instead created a free account on the online screenplay writing website Celtex.
My first draft was short in length, as I worked under the rule of thumb that 1 page of a screenplay = one minute of runtime. As the brief specified that the film be 90 seconds or less, I, therefore, tried to fit the script into one page. However, I realised this strict method of writing greatly limited how I could describe and convey the mood of certain scenes, so for my second draft, I gave myself more freedom to write more detailed descriptions for certain parts of the story.
The first draft also had a limited number of scene headings. After some feedback, I put scene headings in whenever the main character entered a new room or area in the lab, as opposed to limiting the headings to just 'outside' and 'inside' the lab.
Overall I'm proud of how my script turned out. I gained some valuable experience in not only writing a professional script for a short film, but also in using the program Celtex. A writing programme I feel will come in handy for future film and writing projects.
1 note
·
View note
Text
MAKING OF: SEMESTERS 1 & 2. PROJECT EVALUATION
For the first semester of my class for ‘Making Of’, I was tasked with designing a character and fabricating a physical maquette of them. And in the second term, make an artistic project and create a behind the scenes documentary detailing the process.
SEMESTER ONE:
I had to create a character design based on one of four prompts, these were: ninja cat, independent robot, emotional demon, insect warrior. Of these, the one I was most drawn to was the ‘insect warrior’ prompt.
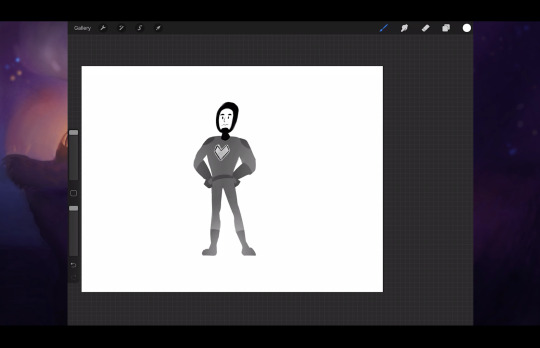
I started on the design in the class by sketching out a few different insect heads and body types. I didn't want a character based on a praying mantis, as this is an insect known for its fighting/prey-hunting abilities and would be predictable for a warrior character. I drew a face based loosely on crickets and katydid insect faces. I liked the rectangular shape of the head, the intense look of katydid eyes, and their tiny ‘pupils.’ I then focused on the anatomy and proportions of the character, creating several iterations until satisfied with the body.
I used my light box to trace over drawings from my sketchbook in order to maintain my character's proportions when moving on to costume design. As I was designing a character based on crickets, I thought about the real-life biology of the insects and how I could use that as inspiration for what kind of warrior specifically they'd be. Given that crickets emit a chemical that turns them into locusts when they come into physical contact with each other, I decided to make him a long-range warrior, such as a lone sniper.
When designing the costume, I used images of actual sniper uniforms and fictional characters' outfits, such as Ana from the Overwatch games and Furiosa from Mad Max: Fury Road. Designing several before combining the best elements from each. After doing basic turnarounds, I drew more dynamic poses for the character sheet. For the sniper's weapon.
Once these sketches were done, I began fabricating the physical maquette. I first made an armature made from wire and tin foil. Once I was satisfied with this armature skeleton, I drilled the feet into a wooden base. It was here I made the mistake of screwing the feet in facing forward, when in my concept art, the feet were to point backward, like real crickets. I should have more heavily referenced my character models and paid attention to details. I then built up the figure with plasticine.
One difficulty was the figure's lack of support in the knees. The figure was prone to wobbling and was not structurally sound. I attempted to counter by adding kneepads and boot cuffs in these areas. If I were to remake this maquette, I’d make the legs thicker for more structural integrity.
I then digitise my character sheet in Adobe Photoshop. I used the app Astropad Studio for iPad – which turns your iPad into a touchscreen drawing tablet that connects to the laptop.
Overall I was pretty happy with my Maquette and learned valuable lessons in designing characters and how to turn them into a 3D form such as a maquette. I also utislised new tools such as Astropad Studio for 2D digital drawing.
SECOND SEMESTER:
For my second semester I was tasked with making a creative project of my choosing and documenting it in a 3-5 minute behind the scenes video.
In my classes, we learned about all kinds of techniques and subjects for inspiration, such as virtual reality, 3D printing, colour theory, and prop making, to name a few. I decided to focus my documentary on the production of my animatic for the brief ‘Storytelling: Script to Screen.’ While I was making my animatic, I made sure to heavily document my production materials, including concept art, screenplays, scene layouts, thumbnail sketches, etc. When it came time to make my animatic on the program Storyboarder, I also filmed some clips of me working on it with my phone.
After the animatic was completed, I then took this footage and some images of my production assets and put them together on Adobe Premiere Pro.
After putting the images and clips together in consecutive order, I then wrote a script talking about my process of production for River Snake - my animatic for ‘Script to Screen.’ To do this, I watched the film footage several times, adjusting the narrative so it was cohesive with the footage, was a clear explanation of the process, and would fit within the frames as much as possible. I recorded these lines on my voice memos app on my iPhone, making notes on the script showing the length of each sound clip, and then airdropped them to my laptop to edit them into the film. Elongating the footage and images to adjust for the audio clip length.
One problem I ran into while editing the sound was when I accidentally used an audio clip twice. I deleted this second clip and replaced it with the proper audio clip. However, when I put the clip in, it was silent. Eventually, I learned this was because the audio clip I deleted and the audio clip I replaced it with had the same name. So, I renamed the audio clip, and it worked perfectly.
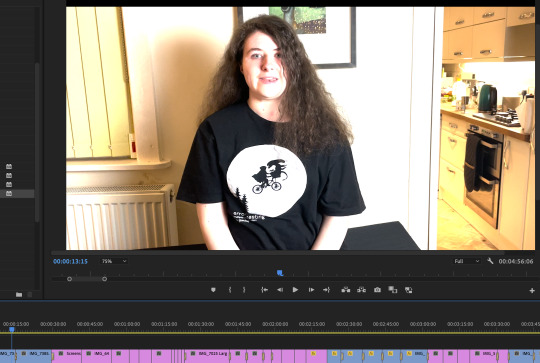
Along with these audio tracks, I filmed two brief clips of myself talking to camera for the opening of the film.
Another problem I couldn’t figure out how to fix was the brightness of the clips I filmed. On my phone, they had the appropriate brightness. But when put into premiere pro, the brightness was for some reason turned up significantly. Giving the footage this glare effect that made some images on screen hard to make out. I didn’t notice this until after the film was exported to MP4. Had I had more time and was able to make the documentary again. I would try and find a way to turn down the brightness on these clips.
Once the editing of the clips and narration was done, I added some royalty-free music I got from the website Pixabay and exported the film as an MP4.
Overall I’m proud of how my making of the documentary turned out. I was able to not only expand my knowledge of editing in Premiere Pro but also had new learning experiences with writing a script for and narrating for behind-the-scenes videos as well as being on camera. Plus the ability to heavily document and film my production process and put it together in a cohesive, easy-to-understand way. I will carry over this knowledge to future creative projects.
1 note
·
View note
Text
SCRIPT TO SCREEN: THUMBNAIL SKETCHES.
As part of my process for making an animatic, I drew some small thumbnail sketches for the animatic. Sketching different panels and planning out a rough idea of what I wanted the various settings and characters of my animatic to look like.
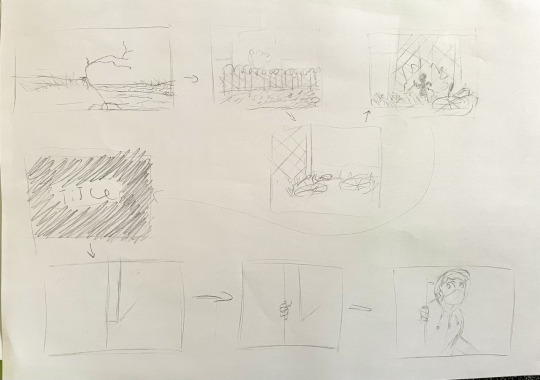
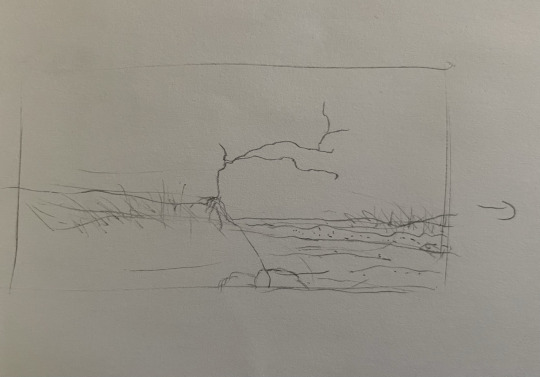
Overall, I'm glad I drew these as they will help me get a clearer idea of how I want to draw the composition for specific shots of my animatic.
1 note
·
View note
Text
MAKING OF: THE MAKING OF THE STORYBOARD DOCUMENTARY.
For my Making Of project, I decided to create a documentary for the creation of my Script to Screen animatic.
When I made my animatic, I used Adobe Premiere Pro to put together the clips I filmed of myself creating the animatic shots, along with some images of pre-production assets such as the screenplay and concept art.

After putting the images and clips together in a consecutive order, I then wrote a script talking about my process of production for River Snake - my animatic for Script to Screen. To do this I watched the film footage several times, adjusting the narrative to ensure it was cohesive with the footage, was a clear explanation of the process and would also fit within the frames as much as possible. I recorded these lines on my voice memos app on my iPhone, making notes on the script showing the length of each sound clip, and then airdropped them to my laptop to edit them into the film. Elongating the footage and images to adjust for the audio clip length.

One problem I ran into while editing the sound was when I accidentally used an audio clip twice. I deleted this second clip and replaced it with the proper audio clip. However, when I put the clip in, it was silent. Eventually, I learned this was because the audio clip I deleted and the audio clip I replaced it with had the same name. So I renamed the audio clip, and it was perfectly audible.
Along with these audio tracks, I filmed two brief clips of myself talking to camera for the opening of the film.
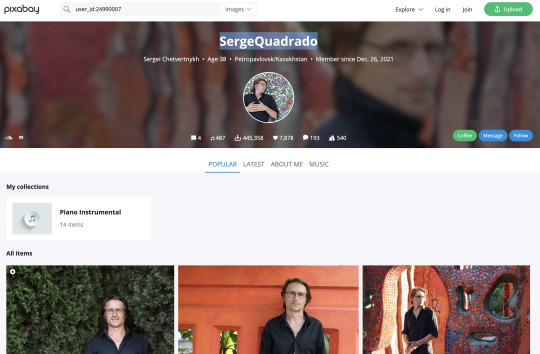
With the narration and footage put together, I then added title frame and end credit frame. I then finished by adding some royalty-free music tracks. After searching through some mellow, atmospheric jazz tracks on Pixabay, I eventually found the work of the artist Serge Quadrado. Deciding that some of his tracks were fitting for this piece, I downloaded some and chose two to use in my final documentary.

With this, I finally exported the documentary as an MP4 file.
Overall I am happy with how the documentary turned out. It was an, at times, frustrating but fulfilling learning experience, particularly with filming the many takes of narration audio and filming myself on camera (not something I am usually comfortable with). I hope if/when I decide to create another behind-the-scenes film of this nature, I'll be able to learn from this documentary and improve my skills in recording my own voice and speaking on camera. This process has been helpful in making me think about what I am doing as I do it, deciding what is worth recording as I go through the process and how to choose what to put in the documentary in order that it best explains the process to someone else. These are all excellent research and editing skills to learn.
0 notes
Text
MAKING OF: CHARACTER TASK - Week 5: COLOUR THEORY


For my Character task for my second semester of Making Of, I and my class were given a discussion on the topic of colour theory. We looked at how 'value' (the lightness and darkness of a colour) can be used to create focus and emphasise on certain parts of a composition or character design.
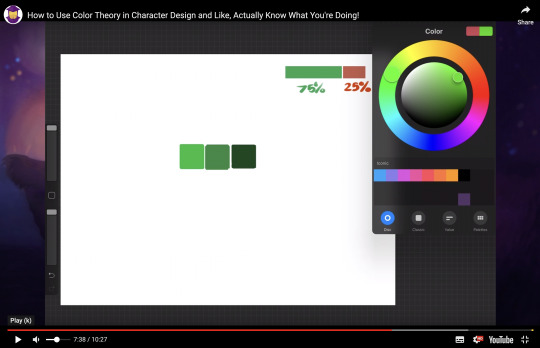
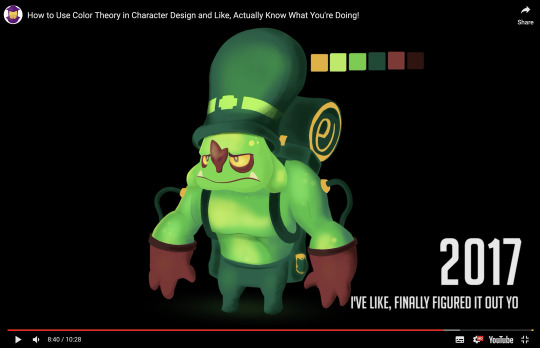
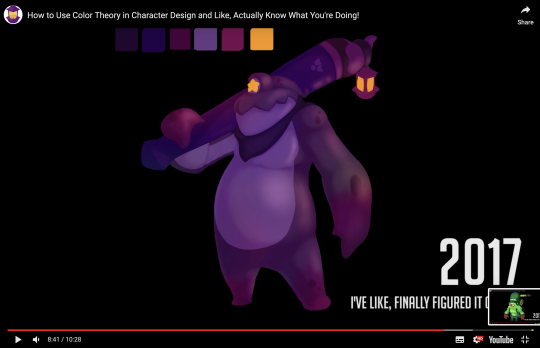
We also learned about using hues and how to create appealing-looking colour palettes for character design, scene compositions, and environments.
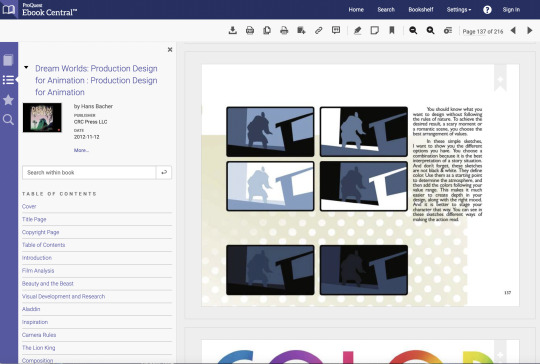
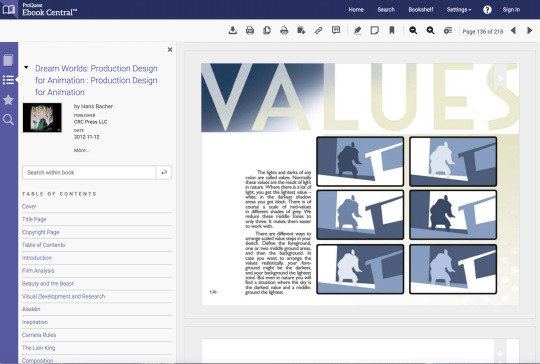
I found this class very useful in adding to my knowledge of colour theory. Of particularly interest was the resources of Character Design Forge youtube channel (of which I was already familiar with) and the book Dream Worlds: Production Design for Animation (which I was not familiar with). These materials and the knowledge they provide regarding colour and value will prove useful in my creative projects. Especially the principles regarding value, as this could be helpful to know when I work with making strong compositions for colorless animatics, for example.
0 notes
Text
MAKING OF: 3D PRINTING AND FABRICATION.

During week 5 of the second semester of my Making Of class, we were given a tour of the New Adelphi campus's 3D printing workshop. Here we were not only given examples of what could be created in the Fab Lab, such as stop-motion armature heads, film props, and maquettes, but we also learned several tips and tricks in CAD design (as seen above).
I enjoyed this brief tour around the Fabrication Lab. It gave me a lot of creative inspiration and inspired me to want to learn more about the software and printing process. This is something I will seek to do as soon as possible - either through the Lab or in a 3D printing course. Being conversant with this technology would be incredibly useful in my work - especially for stop-motion and the professional results that can be achieved with 3D printing really excites me.
2 notes
·
View notes
Text
SCRIPT TO SCREEN: PERSPECTIVE, PORTRAITS AND THE LOOMIS MANNEQUIN.
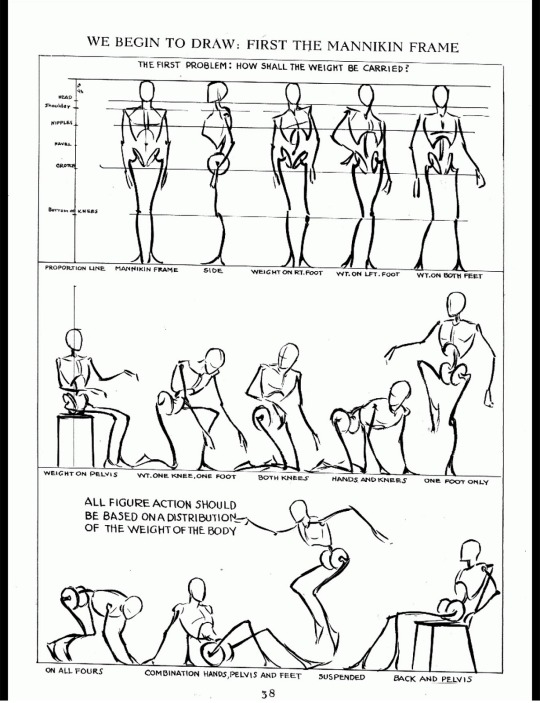
As part of my storytelling script to-screen class, we were tasked with practicing our anatomy, figure drawing and perspective with the Loomis Mannequin model of anatomy and gesture drawing. The technique was coined by artist Andrew Loomis, the author of the highly influential drawing book 'Figure Drawing For All Its Worth', originally published in 1943. I myself was familiar with the book and some of its techniques. As my sister owned a copy and I was aware it was a significant influence on the artist, animator and Steven Universe creator Rebecca Sugar.
With the mannequin technique, we learned and practiced two-point perspective drawing with multiple figures. One trick we learned from our tutor was that when multiple figures are standing in frame but in different placements in the scene at varying distances from the camera, one part of the figures usually line up with the horizon line, such as the knees, thighs etc. depending on the angle and perspective.

With this in mind I drew my figures at varying distances and lining up the top of their knees/thighs with the horizon line. I think it turned out looking accurate.
Another exercise we learned was a technique in portraiture that involved drawing over a face with a square surrounding the head, blacking out the outline of the head and neck, and outlining the facial features such as the mouth, end of the nose, eyeline, hair, hairline, and brow. I initially drew an eye line and nose shape in the first portrait practice, but my tutor told me only the brow line and a small line under the nose was necessary.


Overall, I enjoyed brushing up on my perspective, figure and portrait drawing. I am proud of the drawings I was able to produce and I feel these techniques will be very useful for me when drawing my storyboard as well as in other future projects.
#storytelling script to screen#script to screen#drawing#sketches#portraits#perspective#perspective drawing#figure drawing
5 notes
·
View notes
Text
SCRIPT TO SCREEN: CONCEPT ART AND INSPIRATION

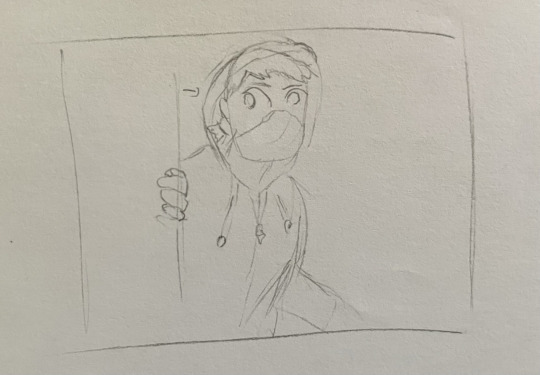
For my script-to-screen project, in preparation for my storyboard, I drew several pieces of concept art for my main characters - the activist and the serpent. Exploring character designs in my sketchbook.

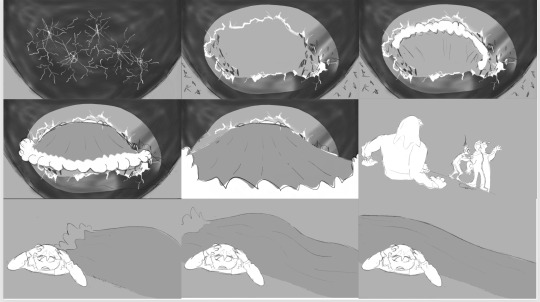
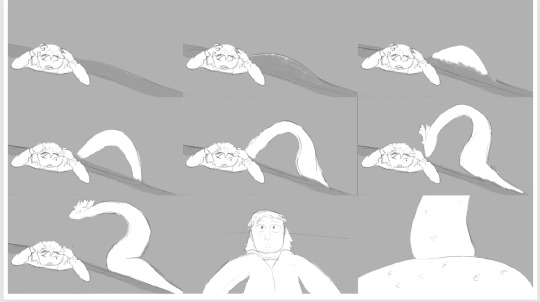
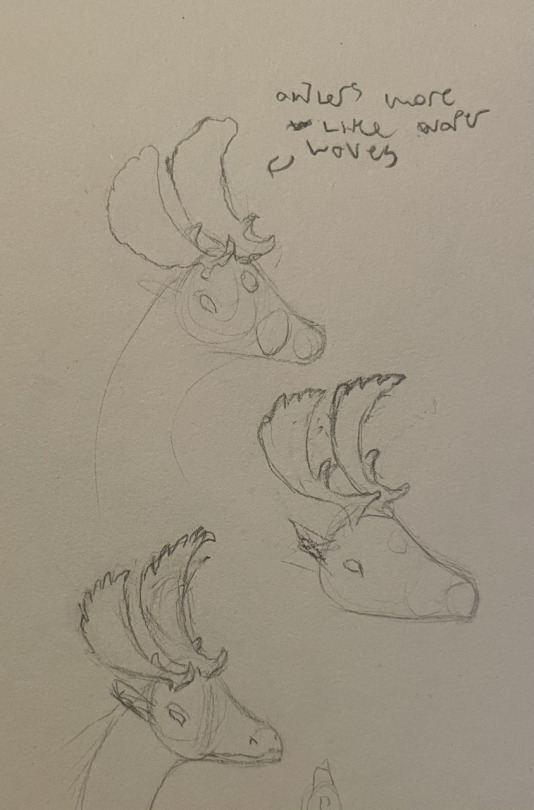
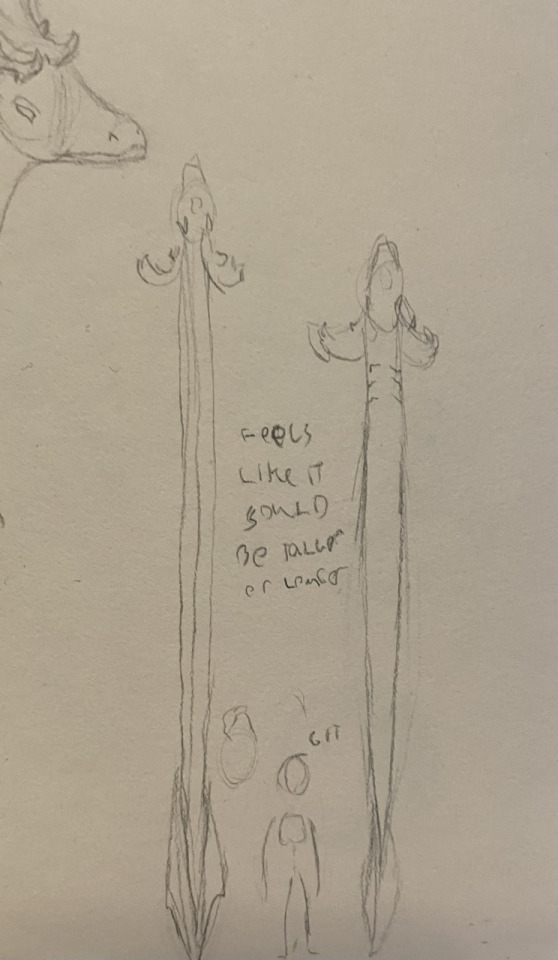
The serpent is based on descriptions and other depictions of the Uktena in Cherokee folklore. Described as a giant serpent with shimmering scales, a pair of deer-like antlers, and a gem in the center of its forehead. I played around with many aspects of the Uktena's design while staying true to its original descriptions. As the Uktena is described as a river-dwelling creature, I wanted to imply a close connection between the serpent, the water, and the wildlife of the area through visual motifs that suggested a water-dwelling lifestyle for the serpent and visual motifs relating to water. Such as the gills on its neck and some variations of the antlers I explored being shaped like waves of water. As well as the gem on its forehead being similar to that of a pearl or opal, gems that organically grow in or around water.

For the activist character, who for now I have decided to call Sam, I thought since the serpent is itself based on the folklore of native people, it would be fitting to make the human character who frees it from its industrial prison a native person.

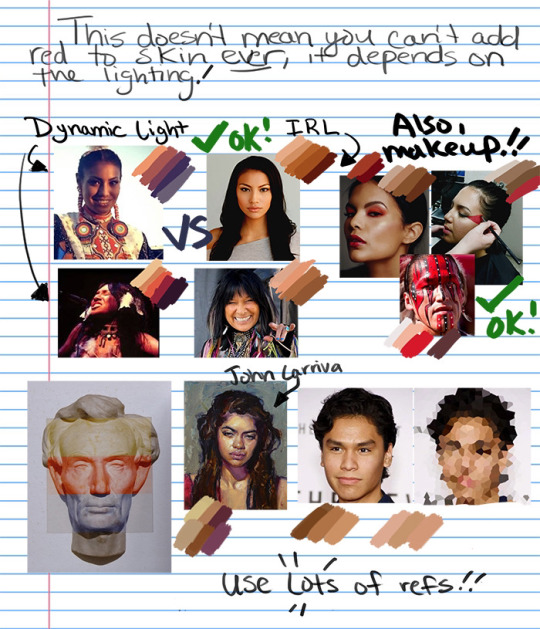
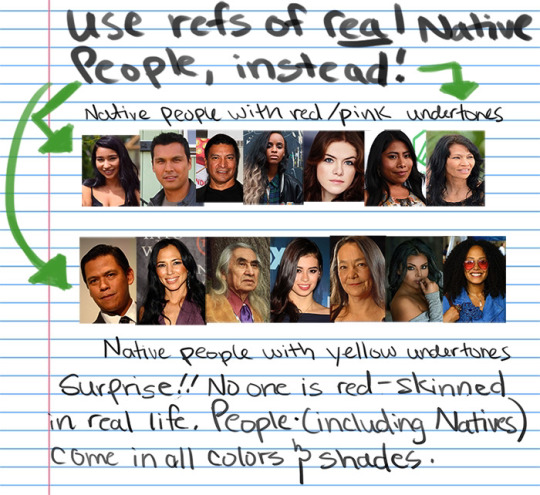
I looked up several photos of native people and referenced artist @neechees tutorial on drawing native people. Who themselves is a native Cree person. Though the animatic will not be in colour, so painting skin tones would not be an issue for the project, I did take into account the ethnic features that would imply Sam as being native, such as the hair, the eyes and nose shape etc.


Along with this, I've also been gathering references for clothing, designs, environments, etc, on Pinterest through a special Pinterest board.

Overall, I'm proud of these character explorations. And I hope these designs translate well to the final storyboard.
0 notes
Text
ANIMATION 101 and 102:
EVALUATION
101
In Semester 1 we looked at how to animate the movement of objects and how the weight, density, material and size - of an object must be considered in order to create natural and realistic movement.
I was tasked with animating a ball tempo, the movement of a pendulum and a wind-up animation. For the wind-up exercise, I tried using the 3D program Maya. I wanted to add a rig allowing me to stretch and warp the size of the cube in order to implement squash and stretch into the model. However, I couldn’t figure this out so I had to leave it as it was. My confusion with using Maya and lack of confidence asking others for help was frustrating. For the next exercises, I used digital 2D and stop-motion mediums. I will practice using Maya and better acquaint myself with the basics and going forward I will need to overcome my reluctance to ask for help.
For the ball tempo, I used Procreate for iPad which I’ve used in the past. I made two variations on the test: a pink orb moving from point A to B at 12 frames per second, and another at 24 frames per second. While exporting the 24-frame test as a gif/mp4, I noticed a flickering effect with circles jumping to different parts of the screen for a frame or two. I discovered the frames were out of order, so I rearranged them. This error was me not adjusting the opacity of the layers temporarily so they could be distinguished from the new frames drawn, then resetting the opacity to full when finished. I’ll remember to do this in future.
I animated the pendulum using paper cut out stop motion on a light box. Filming frames and animating on my iPhone with the app Stop Motion. One was a looping animation, the other a pendulum coming to rest. I'm happy with the result, especially the looping one. I do wish the moment where the pendulum was losing momentum was slightly quicker and less drawn out; my attempt looked unnatural to me. In future, I will keep in mind how long the last few lingering swings of the pendulum should be.
The next part of the course was animating balls bouncing using live action reference footage. I filmed videos of three different balls bouncing. This showed how the weight, size and material of each ball impacts the way it moves. A soft, rubbery, bouncy ball will have more squash and stretch to its movements on a hard surface. A firmer, larger basketball won't squish against the contact point. If a ball is dense and heavy like a bowling ball, it will not squash and stretch, and will give only a few low-level bounces. The three balls I used were a ping pong ball, a tennis ball and a football.
Whilst animating the bounces on procreate, I used reference videos/gifs and went through each frame to make sure the movement felt accurate.
One challenge with the animations was keeping the shapes of the balls consistent. As I was animating frame by frame. I initially just redrew the ball using the frame before it as a guide. Eventually though, I decided to copy the previous layer, paste it to a new one and move it slightly according to the movement. For solid objects such as bouncing balls, I will utilise the copy and paste option in future to keep the shapes consistent and solid.
For Halloween, we were asked to animate either a pumpkin or a spider swinging like a pendulum. I chose the spider. I assumed the exercise was supposed to be done exclusively in Maya. Once again, the program was confusing and hard to navigate, but I did complete it. I later discovered we could have used any medium. If I had time, I would’ve made a 2D version with a frame-by-frame animated spider. I need to communicate better and ask my tutors more questions.
Creating a showreel. I had HD footage of all my animations except those made on Maya. I couldn't find all the Maya files I’d worked on, and some wouldn't open. So, I used a lower-quality version I filmed using my phone. I was also required to download graphics from Blackboard to mark the different clips. The download didn’t work possibly due to my version Premiere Pro not being compatible with the graphic. So, I created a similar graphic from scratch using the Premiere Pro shape tool. For music, I used the royalty free site Mixkit.com, which had free songs I could download that complimented the video and gave it a sense of professionalism without sounding corporate and lifeless. I’m happy with the music I chose.
Overall, I was happy with my 101 showreel. I was not only able to brush up on my Premiere Pro editing skills but also my animation clip editing skills. Learning how to use tools such as the shape tool to create professional looking graphics and discovering useful resources such as Mixkit.com, which I will use again in future projects.
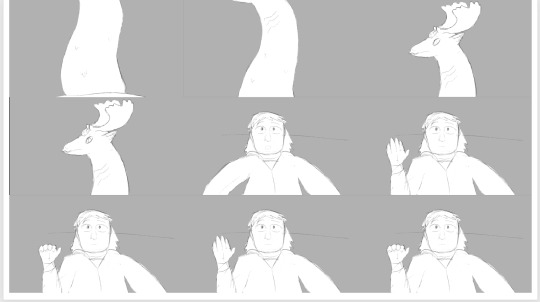
102
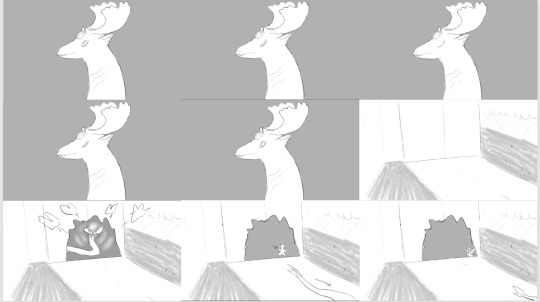
Our 1st task for Animation 102, was to create character expression poses. Initially I used Maya, but I encountered difficulties accessing the files from home, so decided to create poses using a stop-motion armature. I made reference videos of myself in the poses and drew them on paper. Then I worked on posing and photographing the armature in the stop-motion booths. I really enjoyed this process as it was less technically demanding and fickle compared to working with the Maya 3D models and, up to now, I had no experience working with a professional metal, ball and jointed, magnet-anchored stop-motion armature before, so it was a great experience.
The second exercise involved our characters transitioning from one expression to another. I decided my character would transition from curiosity/inquisitiveness to surprise/fear. Using hand drawn key poses and enacting the movements myself, I was able to see how natural movement would occur. For example, if the character was going to raise one leg during the surprised/scared pose, I acted out the movement from leaning in curiously to jumping in surprise to see which leg I would naturally lift, which leg would be on the ground, etc. I animated this sequence and the sitting/standing animation using the Stop Motion app on my iPhone and a small phone tripod. The result was good, but I realised I should have done live action videos of these sequences to use as reference and that the finished film was slightly shaky due to the basic tripod and iPhone set-up. If I were to reuse this set-up, I would need to stabilise the camera and tripod better.
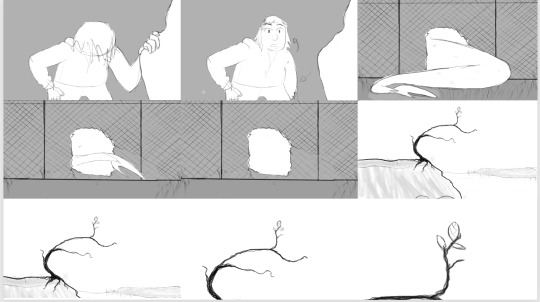
For the third animation, I sought the help of the stop-motion tutor, Owen who showed me how to use Dragon Frame. Using this, I made the walking and sneaking animations. As first attempts, these both looked slightly awkward, but it was excellent practicing using this new software and camera.
Using Dragon Frame, I then completed four further animations; lifting a heavy object, lifting a light object, pulling an object and pushing an object. There were a few practical issues such as, my armature did not have fingers to grasp the paper and lift it – I used blue tac to attach the paper to the hand. Another issue was sourcing a heavy looking weight, so I made one using magnets designed for keeping metal armatures feet in place.
Another problem was the armature couldn’t hold the weight in the air - I realized I needed to tighten the joints of the figure. I also accidently brushed against the camera causing it to zoom in during filming the ‘pull’ sequence - I will need to be aware of my movements when working in the booths.
My final animation was a short story. I wrote a brief synopsis of mysterious lidded box, armature removes lid and slug creature emerges. One problem I encountered was when I exported the frames to video, the lower half was cropped, and my hand was in shot despite me having deleted these. I asked Owen to help me identify the problem. Seems I had edited the wrong cache of photos, so I edited the correct set and removed the hands
Sequences complete, I edited the work into a showreel on Premiere Pro - adding titles and music then uploaded to Vimeo.
Overall, I'm very satisfied with the work I produced in Animation 101/102 so far. I’ve gained experience in stop-motion and learned the basics of Dragon Frame. I have problem solved practical issues. I am honing my skills in using the metal armature to breathe life into a character. I feel I’ve improved in my ability to animate these professional armatures and have come far in a short amount of time. I hope to have the opportunity to work with 3D stop-motion animation in future. I feel I have great potential in that field. I want to learn/improve my skills in Maya 3D. Apart from difficulties with Maya I’m still happy and satisfied with my work in 101/102. I have learned many valuable techniques in a range of mediums and software.
Word count: 1532
0 notes