
athenacodes
athena codes
“My darlings, fear not the fire of change. Let it burn away the old to bring growth. It hurts, but it is necessary for new life.”
Buy me a coffee
263 posts
Last active 3 hours ago
Don't wanna be here? Send us removal request.
Last Seen Blogs

oritani
ORI☆TANI

m0sterloveu
Untitled

lilgo
Justus Bruns Blog

evolvedchargers
Evolved Chargers

allanimemag
Tessa L Davies
Text
Using Neural Filters to colour correct
i’ve had a couple of people ask about how i’ve coloured the pocket dimension scenes so i thought i’d just do a run-through tutorial kind of thing to show it, rather than going through it with everyone separately.
so this is a tutorial for how i made this:

from this:

follow along under the cut:
Keep reading
2K notes
·
View notes
Text
De l'influence des RPG sur les PAL
J'ai commencé les RPG il y a 18 ans. Et forcée de constater que les forums qui m'ont le plus marqués m'ont aussi ouvert la voie de la lecture, de romans, de saga, de série que j'ai eu beaucoup de plaisir à dévorer. De Twilight à Harry Potter (j'avais les livres depuis longtemps mais c'est en jouant sur un rpg HP que j'ai décidé de les lire), en passant par Hunger Games, ou Eragon, les forums RPG ont toujours influencé ma Pile A Lire pour me plonger dans des univers toujours plus fantastiques et magiques.
Ma bibliothèque est bien remplie, mais je me rends compte que les livres que j'apprécie le plus - encore aujourd'hui - ce sont ceux qui ont un potentiel de role play. S'il est de plus en plus difficile de voir des forums émerger sur des nouvelles idées, il m'est aussi de plus en plus difficile de me plonger dans de nouveaux bouquins.
Alors j'envoie cette bouteille à la mer, espérant voir ma PAL s'agrandir encore, et - peut être - des forums s'inspirer de nouveaux univers prochainement :
Quel est le dernier livre qui vous a fait dire un forum sur ce thème ça serait fou ?
Quel est le dernier livre que vous ayez lu parce qu'un partenaire de RP vous a dit tu dois lire ça ?
Quel est le dernier livre qui vous a inspiré un contexte, un personnage et/ou une intrigue ?
25 notes
·
View notes
Text
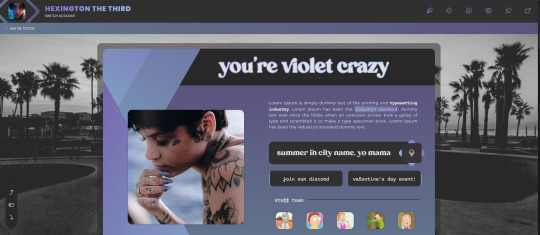
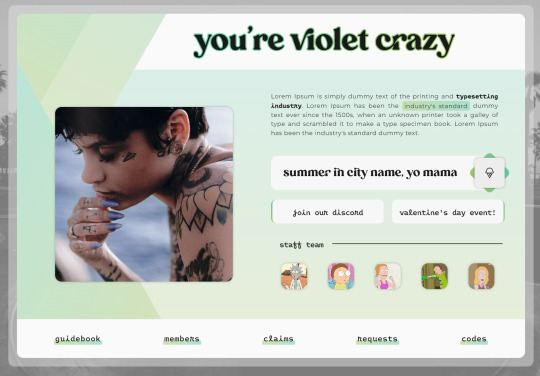
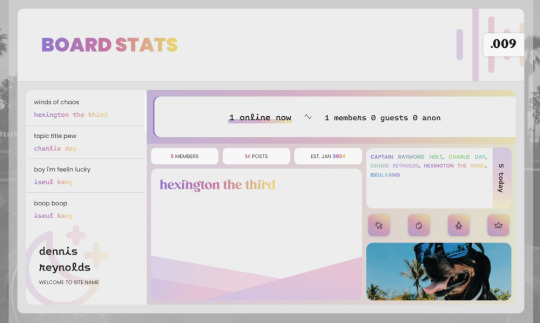
VIOLET CRAZY Jcink Skin - $60 CAD
VIOLET CRAZY is a fully responsive, mobile-friendly Jcink skin. I’ve made it as user-friendly as possible with easy-to-edit variables and cues within the HTML which are also in the installation guide. Template Set #1 and Freestyle Profile Templates are fully functional with this skin.
Please read my terms of service before purchasing:
https://hexxincodes.tumblr.com/post/721896465243537408/terms-conditions
Purchase on my kofi: https://ko-fi.com/s/fe74d1a98b
DETAILS -
All colors, fonts, and images set as variables for easy editing
Dark/light toggle
Full HTML templates
Isotope member list
Guidebook with 6 tabs set
Skin changes colors according to member group (10 set up)
Profile app with room for unlimited fields
Automatic tracker in profiles
Forums change accents w/ last poster
Full installation guide
UPON PURCHASE -
Full xml file
HTML templates xml file
Profile fields json
Installation guide pdf
Guidebook txt file
CREDITS -
Isotope memberlist script is by Essi, the dark/light toggle script was created by Yuno, #CODE script is by Nicole/Thunderstruck, icons are from Phosphor Icons, automatic tracker by FizzyElf.


#hex stays slaying the game#and they are genuinely ridiculously cool to work with#highly recommended
26 notes
·
View notes
Text
A Word of Advice About Critique Groups, Beta Readers, and Other Peer-Based Feedback on Your Writing
In my time as a professional editor, I've have many writers come to me with stories they've been trying to improve based on suggestions from critique groups, beta readers, or other non-professional feedback sources (friends, family, etc.). The writers are often frustrated because they don't agree with the feedback, they can't make sense of the comments they've gotten, or they've tried their best to implement the suggestions but now they've made a big mess of things and don't know where to go from here.
If this happens to you, you're not alone. Here's the deal.
Readers and beginning writers are great at sniffing out problems, but they can be terrible at recommending solutions. For that reason, critique groups can be a disastrous place for beginning writers to get advice.
Here's a good metaphor. Imagine you don’t know the first thing about cars. Someone tells you, “There’s oil leaking onto the driveway. You should cover the car with a giant garbage bag.” Alarmed, you oblige, only to be told the next day that “now the car smells like burning plastic and I can’t see out the windows.”
A mechanic would’ve listened to the critic’s complaint and come up with their own solution to the leaking oil, ignoring the amateur’s ridiculous idea, because they know how to fix cars and can use their skills to investigate symptoms and find the correct solution.
Critique groups actually aren’t bad places for experienced writers, because they can listen to the criticism, interpret it, and come up with their own remedies to the problems readers are complaining about. Beginning writers, on the other hand, can end up digging themselves into a deeper hole.
There's a great Neil Gaiman quote about this very conundrum:
Remember: when people tell you something’s wrong or doesn’t work for them, they are almost always right. When they tell you exactly what they think is wrong and how to fix it, they are almost always wrong.
So what to do?
First, try to investigate the reader's complaint and come up with your own solution, instead of taking their solution to the problem. Sometimes, in the end, the reader's solution was exactly right, which is lovely, but don't count on it. Do your own detective work.
Second, take everything you hear with a huge grain of salt, and run the numbers. Are 9 out of 10 readers complaining about your rushed ending? It's probably worth investigating. Does nobody have an issue with your abrasive antagonist except your cozy mystery-loving uncle? Then you might not need to worry about it.
Third, give everything you hear a gut check. Does the criticism, while painful, ring true? Or does it seem really off-base to you? Let the feedback sit for a week or so while you chill out. You might find you're less sensitive and open to what's been said after a little more time has passed.
Lastly, consider getting professional feedback on your writing. Part of my job as an editor is to listen to previous feedback the writer has gotten, figure out whether the readers were tracking the scent of legitimate problems, and offer the writer more coherent solutions. Of course, some professional editors aren't very good at this, just like some non-professional readers are amazing at it, so hiring someone isn't a guarantee. But editors usually have more experience taking a look under the hood and giving writers sound mechanical advice about their work, rather than spouting ideas off the top of their head that only add to the writer's confusion.
Hope this helps!
1K notes
·
View notes
Text
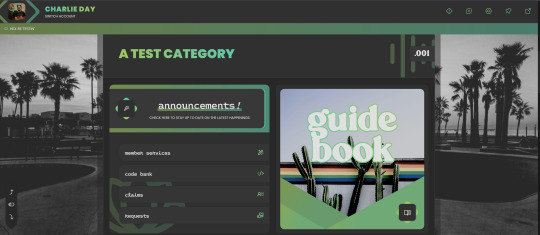
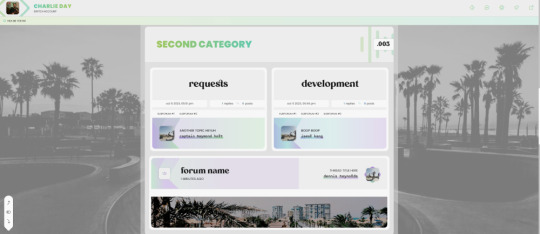
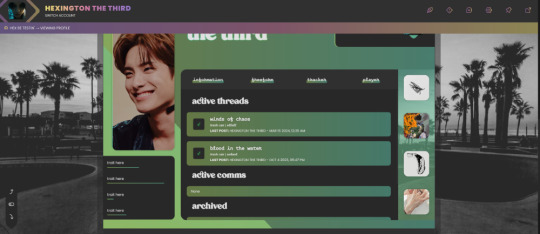
Always my pleasure to work with trav and help his vision come to life!
Aesthetic Previews
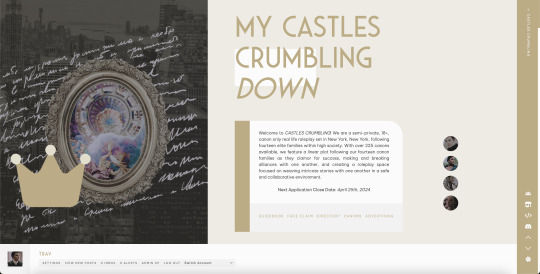

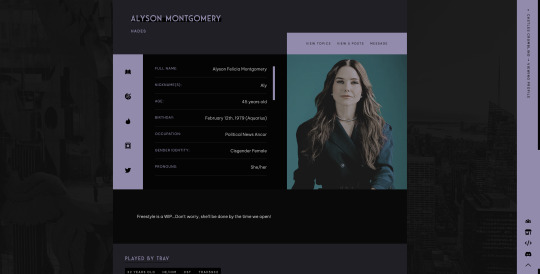
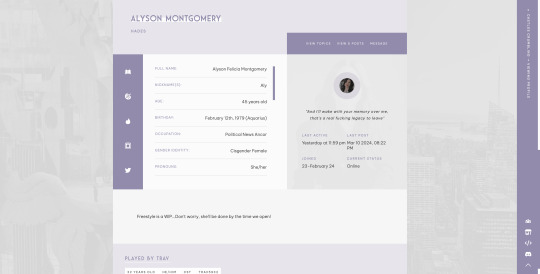


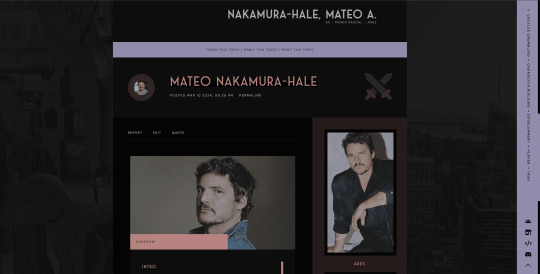


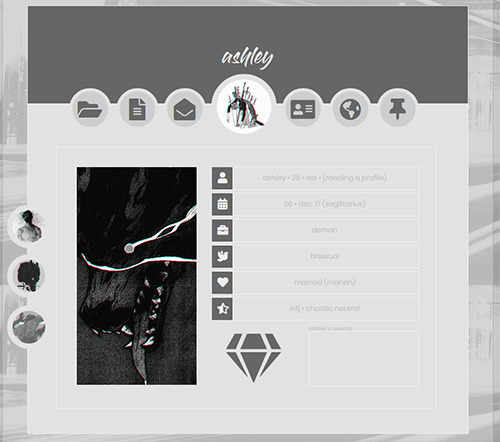
Here are some aesthetic previews of the site, with a beautiful skin by Hanna of @hannacodes and additional fabulous templates by Sibyl, with skin edits from Athena of @athenacodes and myself! Please note things are still being worked on and may be subject to change by opening. For graphics on site, you will need the following:
Avatar: 220x400
Profile Image: 400x450
2 Icons: 50x50 (will resize)
Shipper Image: 550x320
There will also be various templates to use on site (Tinder, Instagram, Twitter, etc) that will require other graphics based on which templates you're using. Upon membership acceptance, writers will have 7 days to complete their on-site freestyle profile application (minimum word count of 250 words, with premade templates/prompts including aesthetic images, color palettes, likes/dislikes, etc and code stylings available on site) and shipper (standard character blurb/overview and relationship sections).
We're keeping things nice and easy folks! Enjoy these aesthetic previews, and as always, if you have any questions please do not hesitate to reach out and I'll get back ASAP!
15 notes
·
View notes
Text
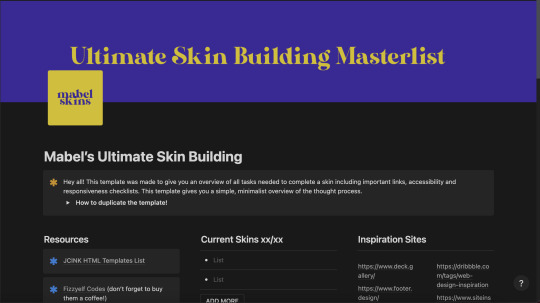
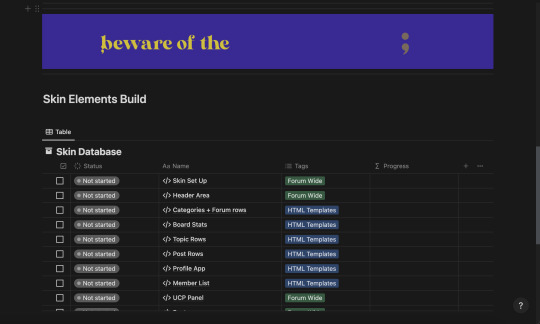
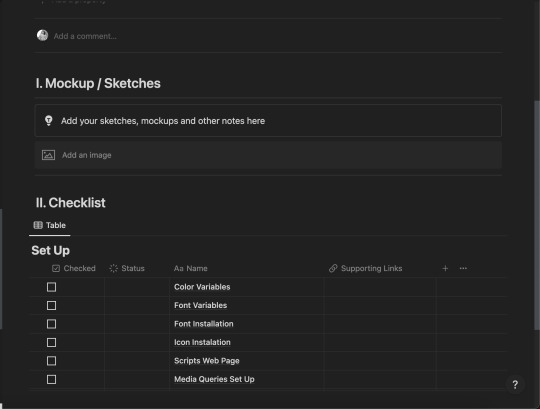
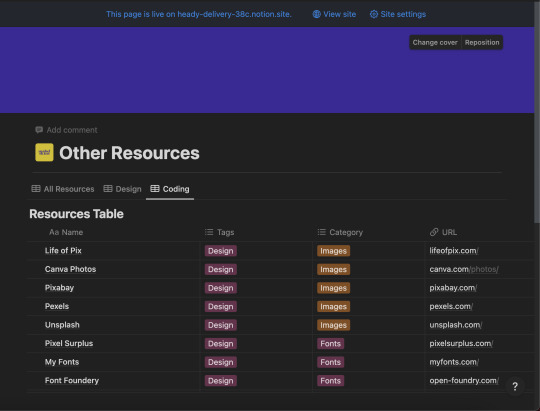
Notion Skin Building Guide - Free
get now on my ko-fi
[EN] Soooo, I did a thing! I've fallen completely for Notion and have been using like crazy. I decided to make an ultimate masterlist to keep track of my commissions and premade and thought - why not make it available? So this is a guide containing resources, to-do lists and much more.
It's free for use! So please, like and reblog if you use it.
[PT] Entããão, eu fiz uma coisa! Virei a doida do Notion! Decidi fazer uma masterlist das masterlists pra me organizar com minhas skins e pensei - por que não disponibilizá-las? Portanto, este é um guia que contém recursos, listas de tarefas e muito mais.
O uso é grátis! Se utilizar, por favor goste e compartilhe!
88 notes
·
View notes
Text
Accessibilité, design, codage… : par où commencer pour le (re)design de mon forum ? (1/2)
Bonjour, c'est mon premier post, et comme prévu, il est trop long pour rentrer en un seul message ! 😁
Je sors de ma cave pour contribuer à ma manière aux dernières conversations de la sphère au sujet des capacités des admin et créateur.rices lorsqu’il s’agit d’avoir la main sur l’interface et l'accessibilité de leurs forums rpg.
Disclaimer :
Ce n’est pas poussé très loin, c’est plutôt un vrac de questions et d’amorces de réflexion des premières étapes du UX design et du design thinking, qui font partie de mon travail au quotidien.
Outre les quelques ressources en fin de post, tout mon blabla ne propose évidemment pas de tutoriels pratiques sur des thèmes précis, principalement parce que les questions évoquées n’auront peut-être pas les mêmes réponses d’un forum ou d’un admin à l’autre.
C'est un processus de pensée qui guide un long travail, et ce que j'écris ici ne règlera aucun vrai problème par magie. Surtout, je n’ai pas la science infuse ni l'ambition d'écrire une bible ! Il est fort possible que ça ne vous parle pas du tout, que vous ne soyiez pas d'accord, ou que ce ne soit pas très clair.
Mais si ça peut en aider quelques un.e.s à s’organiser pour se lancer dans des améliorations qui auront même juste un tout petit peu plus de sens pour l’expérience utilisateur, alors tant mieux ❤️
Attention : c’est long. Je sais. C’est un de mes plus gros problèmes… (j'angoisse déjà avant de poster, send help). Je ne prétend pas non plus incarner un parfait exemple de ce que je prêche (mon forum a aussi son lot de jolis problèmes ! - j'y reviendrai en fin de post).
Mais également, si il y a la moindre chose que vous jugez mal formulée ou pouvant prêter à confusion sur l’intention ou le sens, n’hésitez pas à me le faire remonter et je tâcherai de revoir ma rédaction ou de clarifier si nécessaire !
Constat Initial
Dans le monde des forums rpg, nous ne sommes pas tous.tes égaux.les en termes de connaissances et de maîtrise de ce que ça nous demande comme compétences. C’est normal - c’est un hobby, nous ne sommes pas tous.tes du métier, et croyez moi - même l’être, ça ne veut pas toujours dire grand chose… (je bosse au Japon. vous avez vu la tronche du site web lambda au Japon ?! bref, voilà .)
Pour ces mêmes raisons, on tombe tout naturellement facilement dans le vortex de la course aux dernières modes et des design principalement motivés par une simple recherche d’esthétique - pour son propre fun sans se prendre la tête avant tout, ce qui est très bien en soi et le droit de chacun.e, mais peut-être pas toujours adapté à une utilisation en communauté !
À constater les choses sur lesquelles on semble accorder le plus d’attention dans les conversations actuelles, et en tant que professionnelle irl, il y a une chose qui m’a frappée : à mon sens, on ne prend peut-être pas les choses dans le “bon” ordre.
Attention, les guillemets sont là non pas pour dire que l’accessibilité n’est pas la priorité, au contraire, c’est l’objectif ultime ! - c’est la manière dont on essaie de régler le problème du manque d’accessibilité qui me semble parfois pas toujours très efficace.
Hier, c’était le fameux plug-in Userway, aujourd’hui, une taille de texte - demain, peut-être encore autre chose ! Tant mieux : ça met en lumière des petites actions qui contribuent à une amélioration collective. Mais si toutes ces initiatives sont évidemment importantes, uniquement se concentrer sur une action isolée sans réfléchir pourquoi on la fait, essentiellement, c’est un peu comme mettre un pansement sur une fracture ouverte.
Toutefois, et parce que rien n'est tout blanc ou tout noir, si tu n’as pas beaucoup de temps ni de ressources (ou d'envie) à investir dans un gros redesign qui n’est pas donné à tout le monde, tout ce blabla ne te sera pas très utile - auquel cas, en effet, se concentrer sur les actions tangibles simples et les “quick fix” mentionnés à de nombreuses reprises par mes collègues seront la meilleure option pour améliorer l’accessibilité de ton forum ! Ce ne sera peut-être pas vraiment profond, et ça n’apportera peut-être que des solutions temporaires, mais c’est déjà mieux que de ne rien faire du tout.
Pour celleux qui sont prêt.es ou ont envie de faire un plus ou moins gros ménage de printemps et de prendre le problème à la racine, je vous partage simplement quelques lignes de pensée de la manière dont, personnellement, je réfléchis à mes modifications, ou à la construction de tout produit d’un point de vue UX.
Commencer le processus de UX Design
L’UX Design est une approche user-centric qui doit s’appliquer à tous les produits et services interactifs et numériques. Son objectif est de concevoir une expérience utilisateur optimale en se basant sur les besoins de celui-ci.
Source : La Grande Ourse
Pour t’aider à prendre toute décision quant à comment réaménager ton forum, il est crucial de se mettre dans la peau de celleux qui l’utilisent au quotidien pour comprendre leurs besoins et leurs problèmes.
Ça implique tes membres, qui ont un certain angle de vision du forum, mais aussi toi, en tant que staff, qui peut aussi bénéficier de ces modifications pour te simplifier la vie par la même occasion. Toi aussi, tu es un.e utilisateur.rice !
Ces besoins te permettront ensuite d’extraire tes objectifs et de définir ce qui est vraiment important pour les atteindre, tout en établissant un ordre de priorité selon l’importance du problème.
Compatir : Qui ?
Pour qui est-ce que tu veux proposer ton forum ? Quelle est la cible principale de ces modifications, pour qui les fais-tu ?
C’est le U de UX : on design pour les Utilisateurs avant l’esthétique. Les réponses au “qui” sont sans doute assez faciles dans le monde des forums rpg : les membres en priorité, bien que le fun des staff soit aussi important dans le cadre d’un hobby. Mais les membres constituent néanmoins la majorité lambda des utilisateurs, et te permettent d’avoir des avis divers et moins biaisés par rapport à l’interface et l’utilisation “classique” de ton forum.
Pose leur des questions ! Prépare toi peut-être à des critiques plus ou moins délicates (on se sait), mais qui sont des critiques tout de même - de toutes manières, si tu lis ce texte, à ce stade, tu devrais être prêt.e à les entendre (ou du moins, la plupart d’entre elles - et à condition qu'elles arrivent au bon moment).
Tu recevras aussi peut-être des avis personnels, des avis divergents de la vaste majorité, ou des choses qui relèvent plus des goûts et des couleurs, mais c’est normal ! Tout retour, même un retour avec lequel tu n’es pas d’accord personnellement, vient forcément de quelque part. Si tu ne peux évidemment pas satisfaire absolument tout le monde, c’est parfois très intéressant de discuter pour essayer de comprendre d’où ces avis viennent.
Note tout ça sans essayer de rien justifier ou négocier, ce n’est pas le moment - ensuite, ce sera à toi de trier les retours utilisables et constructifs pour l’expérience de la communauté des opinions peut-être plus subjectives.
Compatir : Pourquoi ?
Quels sont tes objectifs ? Pourquoi remets-tu en question l’interface de ton forum ?
Pourquoi est-ce que tes membres te font tel ou tel retour ? D’où viennent ces critiques ? Est-ce que tu les comprends ?
Mais aussi, pourquoi ton forum est-il ce qu’il est actuellement ? Pourquoi as-tu fait les choix qui l'ont mené où il en est aujourd'hui ?
C'est un peu vaste, mais l'idée est de remettre en question les habitudes qu’on a intégrées depuis des années dans la communauté.
On veut ici comprendre avant tout pourquoi (et pour qui) on cherche des solutions, plutôt que d'appliquer des principes généralistes sans vraiment savoir pourquoi on en a besoin.
La réponse au “pourquoi” semble évidente en surface - l’inclusion, of course, pour la question d’accessibilité, mais pas que. Se demander pourquoi à chaque étape te permet de faire le tri dans tes priorités d'abord et prendre confiance en ta démarche et tes modifications - et, ensuite, plus factuellement, de te débarrasser de ce qui n’est pas réellement utile pour ton forum !
Définir : Quoi ?
(feur, sans doute)
Quels sont les principaux problèmes soulevés sur ton forum ? Que veux-tu réparer ou améliorer en priorité ? Quelles ressources peux-tu aussi allouer à cette initiative ?
C’est le moment d’évaluer tes capacités et ton temps libre, pour t’aider à établir des priorités et un plan d’attaque ! Les retours de tes membres dans la question précédente peuvent t’aider aussi à déterminer ce qui est important et sur quoi te concentrer en premier si jamais tu es indécis.e ou si tu as un temps libre limité.
En tant que joueur.se, quelles actions est-ce que je fais au quotidien sur mon forum, quelles informations ou fonctions me sont utiles en priorité chaque jour ?
En tant que joueur.se, quelles difficultés est-ce que je rencontre lorsque je navigue ou utilise mon forum actuellement ? Est-ce qu’il y a des petites choses qui me frustrent lorsque j’utilise le forum, qui m'empêchent de créer/écrire librement, ou qui me dissuadent de passer plus de temps dessus ?
En tant qu’admin ou modérateur.rice, quelles difficultés est-ce que je rencontre lorsque j’administre/je modère mon forum ? Qu’est-ce qui me prend le plus de temps au quotidien ?
Pèse aussi le pour et le contre de chaque fonction de ton forum : est-ce que ce script supplémentaire apporte réellement une vraie plus-value pour l’effort nécessaire, ou est-ce que je peux m’en débarrasser facilement pour ne pas entâcher l’efficacité des autres fonctions plus essentielles ?
Si une fonction est peu utile et implique beaucoup d’efforts de mise en place/ralentit ton forum, alors peut-être qu’il vaut mieux la laisser de côté dans un premier temps.
On arrive ensuite au questionnement final avant de remonter ses manches et attaquer la construction, mais ce sera pour le prochain post...
42 notes
·
View notes
Text
Okay so here we have the quickest of quick run throughs on how to utilize variables. Here's the basics:
Whatever --variable: ###; says, you can pull it with var(--variable) and it will keep you from having to repeat color codes, as well as make things easier to switch based on light and dark mode, text size changers, member groups, any and everything.
Feel free to check out the example I was playing with here but this comes with the same contingencies as the grid tutorial base I created which is: the template i’m using as an example is free to use as a base, without credit, same with all the others in my tutorials so far, so long as you are using it to actually make your own. With this one, please don’t use it with no significant changes and try to claim it as your own, that would be pretty dishonest. It's also really quickly and shoddily made so again, not something you want to use without changes anyway which is why I made it [Needs Permission] to denote this stipulation. If you do that, throw some credit in your guidebook or something, i don’t mind, just throw a bone on that one because at that point it is solely my template and not the tutorial itself you are using. But even then, you’re free to use it with credit.
Anyway! If I didn't explain anything well (I probably didn't, this is very quick, I recognize I could definitely be more thorough here but this was created as the most basic of basic overviews of variables and so you could see it in action) let me know your questions and I will answer them as best I can.
And, for anyone who cannot listen to the tutorial, here's a quick overview of what I was basically saying:
Basically, variables are shorthand. instead of ###, ###, ### for the accent color, you just put var(--accent1RGB) or instead of #hexcode you'd put var(--accent1) or however you name them, but the --accent1: #hexcode means that anywhere you are trying to pull that hexcode you'd put var(--accent1).
So for any color you're using, versus repeating it, you can just do something like --bg1: #dedede; and then you don't have to type #dedede ever again, it automatically pulls it in with var(--bg1).
Once you understand it, it's super simple, but again if you need anything further explained or you're more of a hands on learner and wanna walk through it with me, feel free to just reach out, I really don't mind.
Hope this helps! Have a great day, y'all.
27 notes
·
View notes
Text


Neural Filters Tutorial for Gifmakers by @antoniosvivaldi
Hi everyone! In light of my blog’s 10th birthday, I’m delighted to reveal my highly anticipated gifmaking tutorial using Neural Filters - a very powerful collection of filters that really broadened my scope in gifmaking over the past 12 months.
Before I get into this tutorial, I want to thank @laurabenanti, @maines , @cobbbvanth, and @cal-kestis for their unconditional support over the course of my journey of investigating the Neural Filters & their valuable inputs on the rendering performance!
In this tutorial, I will outline what the Photoshop Neural Filters do and how I use them in my workflow - multiple examples will be provided for better clarity. Finally, I will talk about some known performance issues with the filters & some feasible workarounds.
Tutorial Structure:
Meet the Neural Filters: What they are and what they do
Why I use Neural Filters? How I use Neural Filters in my giffing workflow
Getting started: The giffing workflow in a nutshell and installing the Neural Filters
Applying Neural Filters onto your gif: Making use of the Neural Filters settings; with multiple examples
Testing your system: recommended if you’re using Neural Filters for the first time
Rendering performance: Common Neural Filters performance issues & workarounds
For quick reference, here are the examples that I will show in this tutorial:
Example 1: Image Enhancement | improving the image quality of gifs prepared from highly compressed video files
Example 2: Facial Enhancement | enhancing an individual's facial features
Example 3: Colour Manipulation | colourising B&W gifs for a colourful gifset
Example 4: Artistic effects | transforming landscapes & adding artistic effects onto your gifs
Example 5: Putting it all together | my usual giffing workflow using Neural Filters
What you need & need to know:
Software: Photoshop 2021 or later (recommended: 2023 or later)*
Hardware: 8GB of RAM; having a supported GPU is highly recommended*
Difficulty: Advanced (requires a lot of patience); knowledge in gifmaking and using video timeline assumed
Key concepts: Smart Layer / Smart Filters
Benchmarking your system: Neural Filters test files**
Supplementary materials: Tutorial Resources / Detailed findings on rendering gifs with Neural Filters + known issues***
*I primarily gif on an M2 Max MacBook Pro that's running Photoshop 2024, but I also have experiences gifmaking on few other Mac models from 2012 ~ 2023.
**Using Neural Filters can be resource intensive, so it’s helpful to run the test files yourself. I’ll outline some known performance issues with Neural Filters and workarounds later in the tutorial.
***This supplementary page contains additional Neural Filters benchmark tests and instructions, as well as more information on the rendering performance (for Apple Silicon-based devices) when subject to heavy Neural Filters gifmaking workflows
Tutorial under the cut. Like / Reblog this post if you find this tutorial helpful. Linking this post as an inspo link will also be greatly appreciated!
1. Meet the Neural Filters!
Neural Filters are powered by Adobe's machine learning engine known as Adobe Sensei. It is a non-destructive method to help streamline workflows that would've been difficult and/or tedious to do manually.
Here are the Neural Filters available in Photoshop 2024:


Skin Smoothing: Removes blemishes on the skin
Smart Portrait: This a cloud-based filter that allows you to change the mood, facial age, hair, etc using the sliders+
Makeup Transfer: Applies the makeup (from a reference image) to the eyes & mouth area of your image
Landscape Mixer: Transforms the landscape of your image (e.g. seasons & time of the day, etc), based on the landscape features of a reference image
Style Transfer: Applies artistic styles e.g. texturings (from a reference image) onto your image
Harmonisation: Applies the colour balance of your image based on the lighting of the background image+
Colour Transfer: Applies the colour scheme (of a reference image) onto your image
Colourise: Adds colours onto a B&W image
Super Zoom: Zoom / crop an image without losing resolution+
Depth Blur: Blurs the background of the image
JPEG Artefacts Removal: Removes artefacts caused by JPEG compression
Photo Restoration: Enhances image quality & facial details
+These three filters aren't used in my giffing workflow. The cloud-based nature of Smart Portrait leads to disjointed looking frames. For Harmonisation, applying this on a gif causes Neural Filter timeout error. Finally, Super Zoom does not currently support output as a Smart Filter
If you're running Photoshop 2021 or earlier version of Photoshop 2022, you will see a smaller selection of Neural Filters:


Things to be aware of:
You can apply up to six Neural Filters at the same time
Filters where you can use your own reference images: Makeup Transfer (portraits only), Landscape Mixer, Style Transfer (not available in Photoshop 2021), and Colour Transfer
Later iterations of Photoshop 2023 & newer: The first three default presets for Landscape Mixer and Colour Transfer are currently broken.
2. Why I use Neural Filters?
Here are my four main Neural Filters use cases in my gifmaking process. In each use case I'll list out the filters that I use:

Enhancing Image Quality:
Common wisdom is to find the highest quality video to gif from for a media release & avoid YouTube whenever possible. However for smaller / niche media (e.g. new & upcoming musical artists), prepping gifs from highly compressed YouTube videos is inevitable.
So how do I get around with this? I have found Neural Filters pretty handy when it comes to both correcting issues from video compression & enhancing details in gifs prepared from these highly compressed video files.
Filters used: JPEG Artefacts Removal / Photo Restoration
Facial Enhancement:
When I prepare gifs from highly compressed videos, something I like to do is to enhance the facial features. This is again useful when I make gifsets from compressed videos & want to fill up my final panel with a close-up shot.
Filters used: Skin Smoothing / Makeup Transfer / Photo Restoration (Facial Enhancement slider)
Colour Manipulation:
Neural Filters is a powerful way to do advanced colour manipulation - whether I want to quickly transform the colour scheme of a gif or transform a B&W clip into something colourful.
Filters used: Colourise / Colour Transfer
Artistic Effects:
This is one of my favourite things to do with Neural Filters! I enjoy using the filters to create artistic effects by feeding textures that I've downloaded as reference images. I also enjoy using these filters to transform the overall the atmosphere of my composite gifs. The gifsets where I've leveraged Neural Filters for artistic effects could be found under this tag on usergif.
Filters used: Landscape Mixer / Style Transfer / Depth Blur
How I use Neural Filters over different stages of my gifmaking workflow:
I want to outline how I use different Neural Filters throughout my gifmaking process. This can be roughly divided into two stages:
Stage I: Enhancement and/or Colourising | Takes place early in my gifmaking process. I process a large amount of component gifs by applying Neural Filters for enhancement purposes and adding some base colourings.++
Stage II: Artistic Effects & more Colour Manipulation | Takes place when I'm assembling my component gifs in the big PSD / PSB composition file that will be my final gif panel.
I will walk through this in more detail later in the tutorial.
++I personally like to keep the size of the component gifs in their original resolution (a mixture of 1080p & 4K), to get best possible results from the Neural Filters and have more flexibility later on in my workflow. I resize & sharpen these gifs after they're placed into my final PSD composition files in Tumblr dimensions.
3. Getting started
The essence is to output Neural Filters as a Smart Filter on the smart object when working with the Video Timeline interface. Your workflow will contain the following steps:
Prepare your gif
In the frame animation interface, set the frame delay to 0.03s and convert your gif to the Video Timeline
In the Video Timeline interface, go to Filter > Neural Filters and output to a Smart Filter
Flatten or render your gif (either approach is fine). To flatten your gif, play the "flatten" action from the gif prep action pack. To render your gif as a .mov file, go to File > Export > Render Video & use the following settings.

Setting up:
o.) To get started, prepare your gifs the usual way - whether you screencap or clip videos. You should see your prepared gif in the frame animation interface as follows:

Note: As mentioned earlier, I keep the gifs in their original resolution right now because working with a larger dimension document allows more flexibility later on in my workflow. I have also found that I get higher quality results working with more pixels. I eventually do my final sharpening & resizing when I fit all of my component gifs to a main PSD composition file (that's of Tumblr dimension).
i.) To use Smart Filters, convert your gif to a Smart Video Layer.
As an aside, I like to work with everything in 0.03s until I finish everything (then correct the frame delay to 0.05s when I upload my panels onto Tumblr).
For convenience, I use my own action pack to first set the frame delay to 0.03s (highlighted in yellow) and then convert to timeline (highlighted in red) to access the Video Timeline interface. To play an action, press the play button highlighted in green.

Once you've converted this gif to a Smart Video Layer, you'll see the Video Timeline interface as follows:

ii.) Select your gif (now as a Smart Layer) and go to Filter > Neural Filters

Installing Neural Filters:
Install the individual Neural Filters that you want to use. If the filter isn't installed, it will show a cloud symbol (highlighted in yellow). If the filter is already installed, it will show a toggle button (highlighted in green)

When you toggle this button, the Neural Filters preview window will look like this (where the toggle button next to the filter that you use turns blue)

4. Using Neural Filters
Once you have installed the Neural Filters that you want to use in your gif, you can toggle on a filter and play around with the sliders until you're satisfied. Here I'll walkthrough multiple concrete examples of how I use Neural Filters in my giffing process.
Example 1: Image enhancement | sample gifset
This is my typical Stage I Neural Filters gifmaking workflow. When giffing older or more niche media releases, my main concern is the video compression that leads to a lot of artefacts in the screencapped / video clipped gifs.
To fix the artefacts from compression, I go to Filter > Neural Filters, and toggle JPEG Artefacts Removal filter. Then I choose the strength of the filter (boxed in green), output this as a Smart Filter (boxed in yellow), and press OK (boxed in red).
Note: The filter has to be fully processed before you could press the OK button!

After applying the Neural Filters, you'll see "Neural Filters" under the Smart Filters property of the smart layer

Flatten / render your gif
Example 2: Facial enhancement | sample gifset
This is my routine use case during my Stage I Neural Filters gifmaking workflow. For musical artists (e.g. Maisie Peters), YouTube is often the only place where I'm able to find some videos to prepare gifs from. However even the highest resolution video available on YouTube is highly compressed.
Go to Filter > Neural Filters and toggle on Photo Restoration. If Photoshop recognises faces in the image, there will be a "Facial Enhancement" slider under the filter settings.

Play around with the Photo Enhancement & Facial Enhancement sliders. You can also expand the "Adjustment" menu make additional adjustments e.g. remove noises and reducing different types of artefacts.

Once you're happy with the results, press OK and then flatten / render your gif.
Example 3: Colour Manipulation | sample gifset
Want to make a colourful gifset but the source video is in B&W? This is where Colourise from Neural Filters comes in handy! This same colourising approach is also very helpful for colouring poor-lit scenes as detailed in this tutorial.
Here's a B&W gif that we want to colourise:

Highly recommended: add some adjustment layers onto the B&W gif to improve the contrast & depth. This will give you higher quality results when you colourise your gif.
Go to Filter > Neural Filters and toggle on Colourise.

Make sure "Auto colour image" is enabled.
Play around with further adjustments e.g. colour balance, until you're satisfied then press OK.
Important: When you colourise a gif, you need to double check that the resulting skin tone is accurate to real life. I personally go to Google Images and search up photoshoots of the individual / character that I'm giffing for quick reference.
Add additional adjustment layers until you're happy with the colouring of the skin tone.

Once you're happy with the additional adjustments, flatten / render your gif. And voila!

Note: For Colour Manipulation, I use Colourise in my Stage I workflow and Colour Transfer in my Stage II workflow to do other types of colour manipulations (e.g. transforming the colour scheme of the component gifs)
Example 4: Artistic Effects | sample gifset
This is where I use Neural Filters for the bulk of my Stage II workflow: the most enjoyable stage in my editing process!
Normally I would be working with my big composition files with multiple component gifs inside it. To begin the fun, drag a component gif (in PSD file) to the main PSD composition file.
Resize this gif in the composition file until you're happy with the placement

Duplicate this gif. Sharpen the bottom layer (highlighted in yellow), and then select the top layer (highlighted in green) & go to Filter > Neural Filters

I like to use Style Transfer and Landscape Mixer to create artistic effects from Neural Filters. In this particular example, I've chosen Landscape Mixer
Select a preset or feed a custom image to the filter (here I chose a texture that I've on my computer)

Play around with the different sliders e.g. time of the day / seasons
Important: uncheck "Harmonise Subject" & "Preserve Subject" - these two settings are known to cause performance issues when you render a multiframe smart object (e.g. for a gif)

Once you're happy with the artistic effect, press OK
To ensure you preserve the actual subject you want to gif (bc Preserve Subject is unchecked), add a layer mask onto the top layer (with Neural Filters) and mask out the facial region. You might need to play around with the Layer Mask Position keyframes or Rotoscope your subject in the process.
After you're happy with the masking, flatten / render this composition file and voila!

Example 5: Putting it all together | sample gifset
Let's recap on the Neural Filters gifmaking workflow and where Stage I and Stage II fit in my gifmaking process:
i. Preparing & enhancing the component gifs
Prepare all component gifs and convert them to smart layers
Stage I: Add base colourings & apply Photo Restoration / JPEG Artefacts Removal to enhance the gif's image quality
Flatten all of these component gifs and convert them back to Smart Video Layers (this process can take a lot of time)
Some of these enhanced gifs will be Rotoscoped so this is done before adding the gifs to the big PSD composition file
ii. Setting up the big PSD composition file
Make a separate PSD composition file (Ctrl / Cmmd + N) that's of Tumblr dimension (e.g. 540px in width)
Drag all of the component gifs used into this PSD composition file
Enable Video Timeline and trim the work area
In the composition file, resize / move the component gifs until you're happy with the placement & sharpen these gifs if you haven't already done so
Duplicate the layers that you want to use Neural Filters on
iii. Working with Neural Filters in the PSD composition file
Stage II: Neural Filters to create artistic effects / more colour manipulations!
Mask the smart layers with Neural Filters to both preserve the subject and avoid colouring issues from the filters
Flatten / render the PSD composition file: the more component gifs in your composition file, the longer the exporting will take. (I prefer to render the composition file into a .mov clip to prevent overriding a file that I've spent effort putting together.)
Note: In some of my layout gifsets (where I've heavily used Neural Filters in Stage II), the rendering time for the panel took more than 20 minutes. This is one of the rare instances where I was maxing out my computer's memory.
Useful things to take note of:
Important: If you're using Neural Filters for Colour Manipulation or Artistic Effects, you need to take a lot of care ensuring that the skin tone of nonwhite characters / individuals is accurately coloured
Use the Facial Enhancement slider from Photo Restoration in moderation, if you max out the slider value you risk oversharpening your gif later on in your gifmaking workflow
You will get higher quality results from Neural Filters by working with larger image dimensions: This gives Neural Filters more pixels to work with. You also get better quality results by feeding higher resolution reference images to the Neural Filters.
Makeup Transfer is more stable when the person / character has minimal motion in your gif
You might get unexpected results from Landscape Mixer if you feed a reference image that don't feature a distinctive landscape. This is not always a bad thing: for instance, I have used this texture as a reference image for Landscape Mixer, to create the shimmery effects as seen in this gifset
5. Testing your system
If this is the first time you're applying Neural Filters directly onto a gif, it will be helpful to test out your system yourself. This will help:
Gauge the expected rendering time that you'll need to wait for your gif to export, given specific Neural Filters that you've used
Identify potential performance issues when you render the gif: this is important and will determine whether you will need to fully playback your gif before flattening / rendering the file.
Understand how your system's resources are being utilised: Inputs from Windows PC users & Mac users alike are welcome!
About the Neural Filters test files:
Contains six distinct files, each using different Neural Filters
Two sizes of test files: one copy in full HD (1080p) and another copy downsized to 540px
One folder containing the flattened / rendered test files
How to use the Neural Filters test files:
What you need:
Photoshop 2022 or newer (recommended: 2023 or later)
Install the following Neural Filters: Landscape Mixer / Style Transfer / Colour Transfer / Colourise / Photo Restoration / Depth Blur
Recommended for some Apple Silicon-based MacBook Pro models: Enable High Power Mode
How to use the test files:
For optimal performance, close all background apps
Open a test file
Flatten the test file into frames (load this action pack & play the “flatten” action)
Take note of the time it takes until you’re directed to the frame animation interface
Compare the rendered frames to the expected results in this folder: check that all of the frames look the same. If they don't, you will need to fully playback the test file in full before flattening the file.†
Re-run the test file without the Neural Filters and take note of how long it takes before you're directed to the frame animation interface
Recommended: Take note of how your system is utilised during the rendering process (more info here for MacOS users)
†This is a performance issue known as flickering that I will discuss in the next section. If you come across this, you'll have to playback a gif where you've used Neural Filters (on the video timeline) in full, prior to flattening / rendering it.
Factors that could affect the rendering performance / time (more info):
The number of frames, dimension, and colour bit depth of your gif
If you use Neural Filters with facial recognition features, the rendering time will be affected by the number of characters / individuals in your gif
Most resource intensive filters (powered by largest machine learning models): Landscape Mixer / Photo Restoration (with Facial Enhancement) / and JPEG Artefacts Removal
Least resource intensive filters (smallest machine learning models): Colour Transfer / Colourise
The number of Neural Filters that you apply at once / The number of component gifs with Neural Filters in your PSD file
Your system: system memory, the GPU, and the architecture of the system's CPU+++
+++ Rendering a gif with Neural Filters demands a lot of system memory & GPU horsepower. Rendering will be faster & more reliable on newer computers, as these systems have CPU & GPU with more modern instruction sets that are geared towards machine learning-based tasks.
Additionally, the unified memory architecture of Apple Silicon M-series chips are found to be quite efficient at processing Neural Filters.
6. Performance issues & workarounds
Common Performance issues:
I will discuss several common issues related to rendering or exporting a multi-frame smart object (e.g. your composite gif) that uses Neural Filters below. This is commonly caused by insufficient system memory and/or the GPU.
Flickering frames: in the flattened / rendered file, Neural Filters aren't applied to some of the frames+-+
Scrambled frames: the frames in the flattened / rendered file isn't in order
Neural Filters exceeded the timeout limit error: this is normally a software related issue
Long export / rendering time: long rendering time is expected in heavy workflows
Laggy Photoshop / system interface: having to wait quite a long time to preview the next frame on the timeline
Issues with Landscape Mixer: Using the filter gives ill-defined defined results (Common in older systems)--
Workarounds:
Workarounds that could reduce unreliable rendering performance & long rendering time:
Close other apps running in the background
Work with smaller colour bit depth (i.e. 8-bit rather than 16-bit)
Downsize your gif before converting to the video timeline-+-
Try to keep the number of frames as low as possible
Avoid stacking multiple Neural Filters at once. Try applying & rendering the filters that you want one by one
Specific workarounds for specific issues:
How to resolve flickering frames: If you come across flickering, you will need to playback your gif on the video timeline in full to find the frames where the filter isn't applied. You will need to select all of the frames to allow Photoshop to reprocess these, before you render your gif.+-+
What to do if you come across Neural Filters timeout error? This is caused by several incompatible Neural Filters e.g. Harmonisation (both the filter itself and as a setting in Landscape Mixer), Scratch Reduction in Photo Restoration, and trying to stack multiple Neural Filters with facial recognition features.
If the timeout error is caused by stacking multiple filters, a feasible workaround is to apply the Neural Filters that you want to use one by one over multiple rendering sessions, rather all of them in one go.
+-+This is a very common issue for Apple Silicon-based Macs. Flickering happens when a gif with Neural Filters is rendered without being previously played back in the timeline.
This issue is likely related to the memory bandwidth & the GPU cores of the chips, because not all Apple Silicon-based Macs exhibit this behaviour (i.e. devices equipped with Max / Ultra M-series chips are mostly unaffected).
-- As mentioned in the supplementary page, Landscape Mixer requires a lot of GPU horsepower to be fully rendered. For older systems (pre-2017 builds), there are no workarounds other than to avoid using this filter.
-+- For smaller dimensions, the size of the machine learning models powering the filters play an outsized role in the rendering time (i.e. marginal reduction in rendering time when downsizing 1080p file to Tumblr dimensions). If you use filters powered by larger models e.g. Landscape Mixer and Photo Restoration, you will need to be very patient when exporting your gif.
7. More useful resources on using Neural Filters
Creating animations with Neural Filters effects | Max Novak
Using Neural Filters to colour correct by @edteachs
I hope this is helpful! If you have any questions or need any help related to the tutorial, feel free to send me an ask 💖
368 notes
·
View notes
Text
Je crois pas qu'on fera avancer les choses en lançant une énième chasse aux sorcières ou en s'indignant encore et encore des problèmes de fonctionnement, visibilité, activité, accessibilité, ... des forums.
J'ai appris grâce aux partages et aux tutoriels des rpgistes qui prenaient le temps de transmettre leur savoir ou les choses qu'iels avaient apprises. Parce que l'idée c'était d'améliorer l'ensemble de la communauté et faire en sorte que les trucs et astuces qui rendent les forums plus agréables soient disponibles à tous.
Plus personne fait ça.
Ca fait des semaines que je communique sur une section tutoriel ouverte à tous. J'appelle à partager les ressources, les bouts de code, les solutions diverses pour améliorer son forum... rien.
Si l'énergie dépensée à dénoncer et critiquer les autres était mise dans une nouvelle vague de partage et d'initiative, peut-être qu'on pourrait obtenir de meilleur résultat.
En tout cas il y a longtemps que ça a pas été fait, ça nous couterais rien d'essayer.
#this is a point#some of the issues we keep discussing aren't just english speaking issues#so i wonder what that says
84 notes
·
View notes
Note
do you commission graphics too or just codes? or do you have any suggestions for someone who commissions graphics?
i do graphics and codes, but honestly if you want graphics i would personally recommend @summercreates! as of right now, my commissions are closed.
0 notes
Text

Suburbia Susan - submitted by hibiscusbabyboy
#D7A69E #E8BDAD #B37E84 #E9E1CC #39A6B6 #7FA0A7
2K notes
·
View notes
Note
hello, your codes are beautiful! that's it, that's the entire message lol. and have a wonderful day <3
thank you so much!! i really, really appreciate it <3 and i hope you have a wonderful day too!
0 notes
Note
How much do you charge for commissions and how much would you charge for the skins you have or are working on?
I do not do skin commissions and I never will, tbh.
For the skins I have/am working on, I'm honestly not sure. It really depends when I finish them and what the end is as well as what all is included in it.
I know this is sort of a non-answer, and I apologize for that.
If you're looking for something specific, let me know that and I can give you a better idea. In addition to that, if you want a template commission or skin edits/add ons I can price that out but I always do sort of a base price for each element you specifically want and then round down a little bit from there for it being a package. For instance I'd probably say something like if you want just one posting thread template, three USD for that commission. But If you want five, only ten USD.
Not sure if it helps! Sorry I can't be more clear. Additionally, I need to edit things here but my commissions are closed at this time as I finish a personal project skin and revamp.
0 notes
Text


DYING IN LA (free skin)
link to templates and installation instructions
this skin was the very first skin i made and has been free to use for 5 years without question. with caution closing, i want to continue to provide it for those who want it. my usual terms of service do not apply to this particular skin - you are free to piece it apart and put it in other skins, you don't even have to credit me (i like to pretend this monster doesn't exist anyway). with the link provided above, there is no need to message me asking for the files, they are all provided within that link.
my dream is for other people who are just starting their coding journey to use this skin to learn from; with dwindling resource sites (yes, i know there are resource discords, but those feel more ephemeral than a site), i feel it's important we preserve learning opportunities for future jcink coders as best as possible. bear in mind that, for some inexplicable reason, i used position: absolute to position everything on this skin, so i make no guarantees that edits you wish to make to this skin won't horribly break it.
this skin includes:
color changes on main & mini profile
mostly custom html templates
the joy of a nerd's first full skin coded in every line <3
enjoy! please don't ask me for help on this one, you're on your own!!
51 notes
·
View notes
Photo
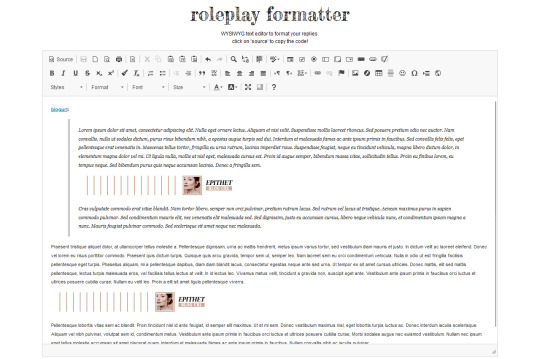
i’ve found i need a bigger text box than the one in the spacing generator by byluna, though this was most definitely inspired by it. other sites with text editors have distracting colors and look very cluttered so i decided to do something about it ^^
this is a full sized editor, simple and minimal to avoid any distractions with a wide text box and adjustable height.
the options supported by tumblr / that you can use to format your replies are:
source: copy and paste the code for your reply
B I U S : bold, italics, underlined and strike
styles > small : make text small
format: headline 1 and headline 2, h2 is the most commonly used headline
text color: like this. find the hex code for any color you want here.
numbered / bullet points
blockquotes
image (it has to be uploaded to tumblr!)
formatter mobile friendly

important note! (legacy posts only, npf posts do not have this issues)
if your reply includes a @ mention or color text do not switch back to the rich editor, the color will be gone and the @ mention may or may not work at all.
if you want to preserve color text in your partner’s reply, click on edit reblog and switch to the html editor without touching anything. copy the code, paste it in the rp formatter to trim, write and format your reply as usual. this post explains it in detail.
i hope this is helpful ! liking and reblogging to share is appreciated ♡
updates logs:
sept 7, 2022: general updates + night mode toggle + 2 text box options. log here.
sept 29, 2022: created a new version hosted on carrd instead of tumblr, which provides a better mobile responsive layout but can be used on desktop as well.
feb 10, 2023: mobile and desktop versions have been merged into one. read post here.
use it here.
2K notes
·
View notes
Text
we all know that giffing can be a pain in the ass sometimes. it is time-consuming, tiring, and annoying. but highly addictive, too. there's no cake recipe for making gifs, but everyone has some tips and shortcuts developed through time and hard work, the same way as our nanas have their special chocolate cake recipe.
that being said, welcome to my crazy attempt to make a comprehensive tutorial. this is how to make gifs for dummies, my name is nare and i'll be your host during this extensive ramble dressed as a tutorial.
my giffing process (and this tutorial) is divided into 5 phases:
downloading the footage;
cropping the scenes;
extracting the frames from said videos;
organizing the frames into the folders;
and making the actual gifs.
at google docs i'll provide every link you might need, and will try to explain everything you need to start making your own gifs. thank you!
473 notes
·
View notes