
torial
Such Impossible Bliss
Forrest|20|Girl| I'm an animation major at SCAD and this is my blog of mostly text posts, cartoons, my dum art, and other junk. My oc tag is #OC!
Dream Address: 4C00-0020-F5F2
75515 posts
Don't wanna be here? Send us removal request.
Last Seen Blogs

rottengh0st
meatworm

potato-girl33
elle

kemkem420
www.truth.com

alphachromeyayo
Alpha Chrome Yayo

dorkydorkydorky
Mr. Moto, The Cisco Kid, and Me
Note
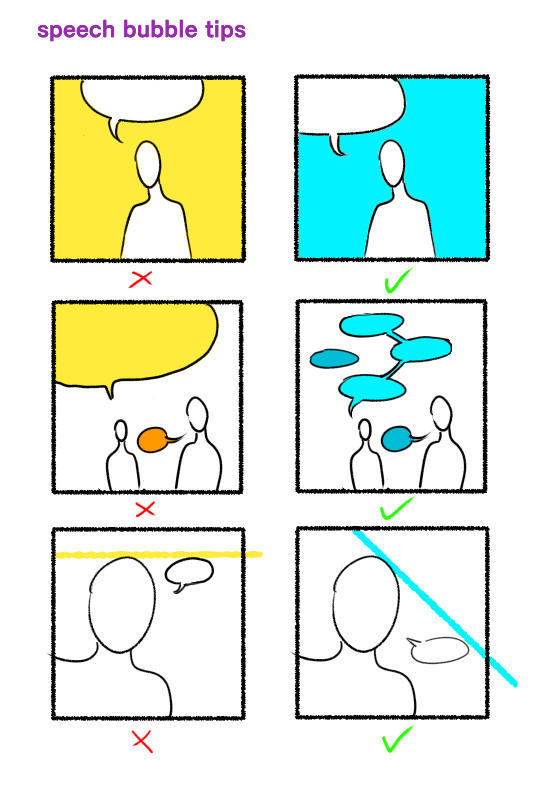
hello!! i know youve already done a tutorial on eyes but are there any tips you can give about?? eyes in?? different angles?? i always have a lot of trouble making them look right ; - ;
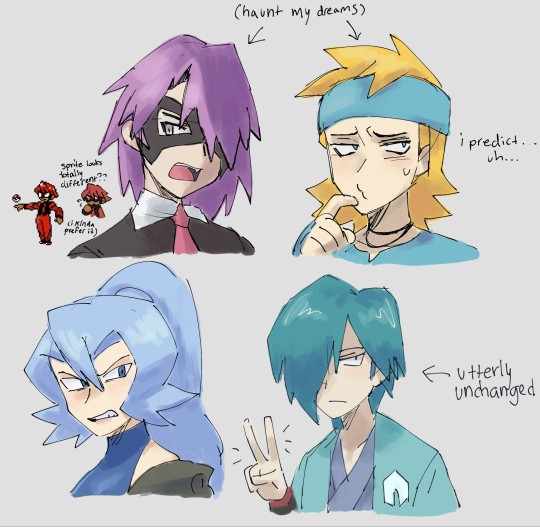
IS THIS WHAT U MEAN ANON omg im not suure ;;
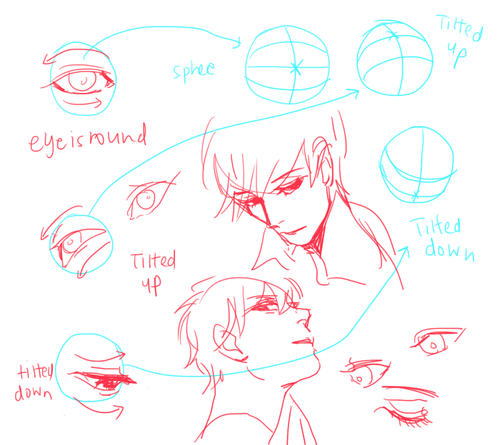
or do u mean like in ¾ view…
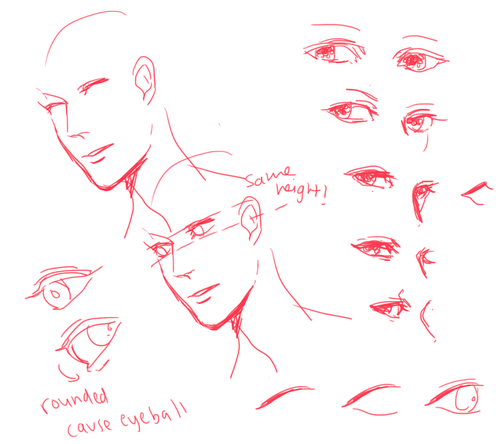
i HOEP THIS HELPS!!
1K notes
·
View notes
Text
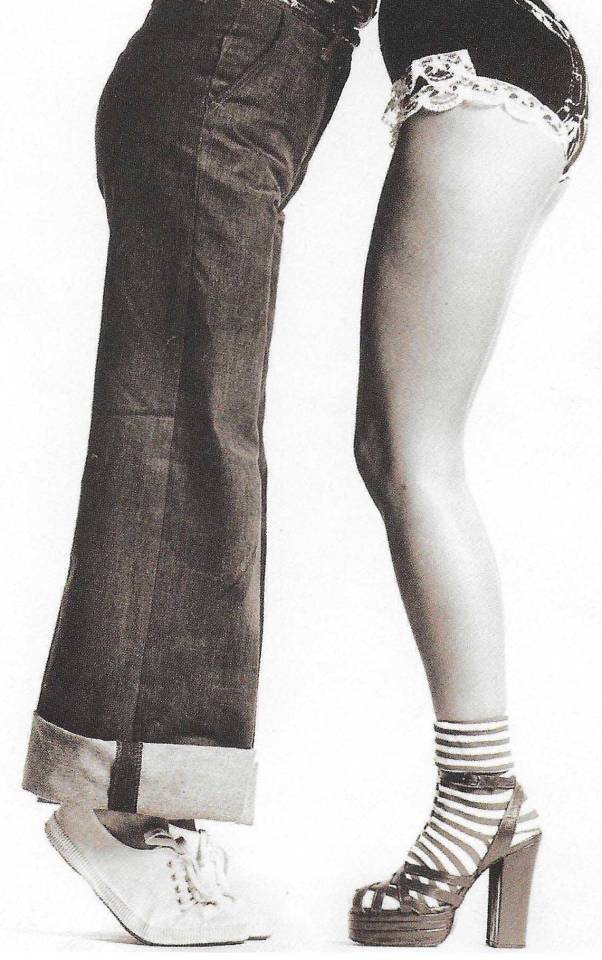
'jeans + shorts, sneakers + platform sandals, london 1970' in pants: a history afoot - laurence benaïm (2001)
5K notes
·
View notes
Photo
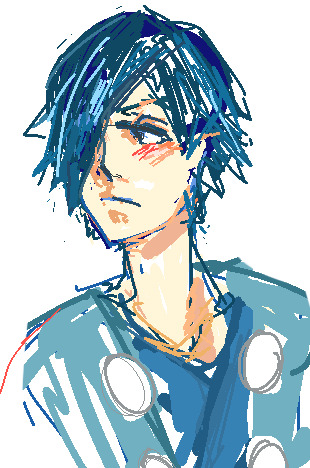
it doesnt even look like him wow pisses on tablet
37 notes
·
View notes
Text
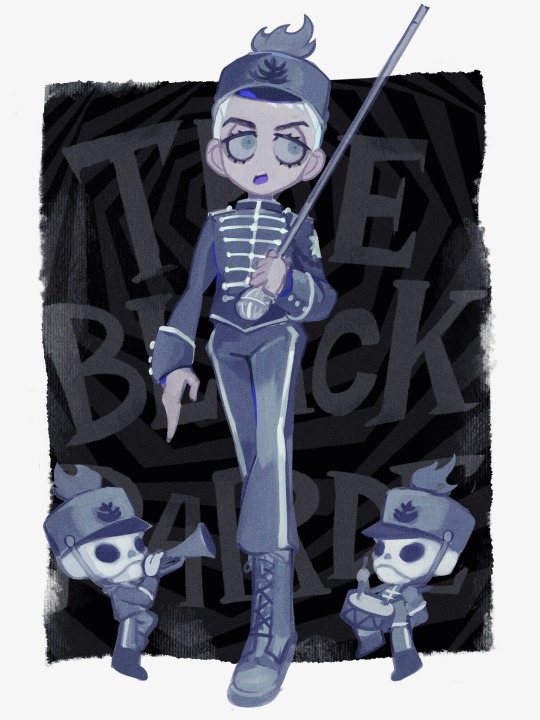
gerard in the studio be like yeah thats gonna make people lose their minds drop it
2K notes
·
View notes
Photo
Animator Tim Rudder shares some great insight and research on how to break up movements to avoid “stiff” animation. Head over to his site for more!
Link here:
http://www.timrudder.com/animationme…/breaking-up-movements/
19K notes
·
View notes
Text
(3) 2d character animation - Keying
One of the most important things you need to worry about when you create an animation is the keyframes. Keyframe animators, are usually considered senior animators (in a professional studio) that decide on critical aspects of the animation. Each studio has different roles that keyframe animators have to fill, but generally speaking they are in charge of translating the storyboards into a fluid animation. Depending on the size of the studio, you may also find “regular” animators and in-betweeners. Since I come from a position of someone who does everything from the beginning to the end, you’ll be getting a more holistic view. Going into the animation hierarchy is really beyond the scope of this mini-lesson. I’ll be focusing on how you would want to handle yourself when you are creating keyframes for your animation, specifically keyframing characters.
First you would ideally have a character sheet (to make your life easier, to make it more accurate to the vision of the designers or directors or… to yourself)
I didn’t make one, but you’ll have to forgive me.
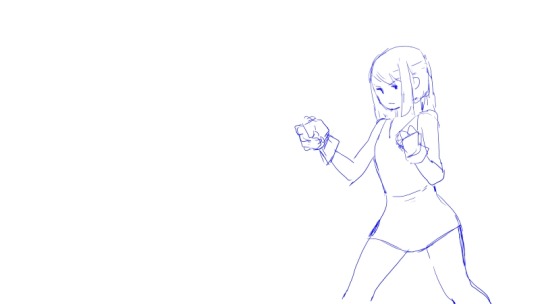
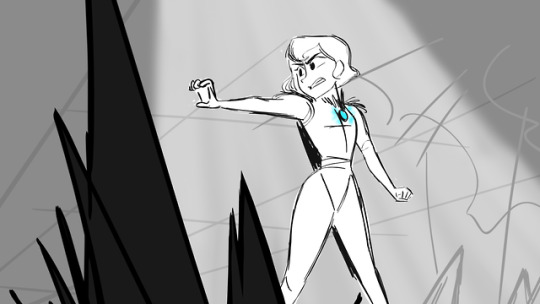
I like martial arts, so I wanted to try animating a “jump spinning hook kick”.
The first thing you need to do is to make the “keys,” or keyframes. For those who don’t know what keyframes are, they are just points in the animation that define major movements and/or change in movements of objects (in our case characters).
So here we have the character:
We definitely want the point of contact to be a key.

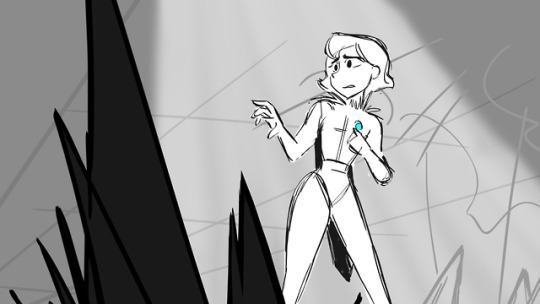
And the landing.

Now that we have the major keys down, we can start breaking them up into smoother and more refined movements. We have to ask ourselves how does the human body move when performing this kick and to answer that question you would have to get references!
Keep adding keyframes at important positions in the movement, this you really need to develop a feel for.
I added another element to the animation to have the character seemingly be reacting to something (just to make it more interesting).

Expand on what the element is by laying out important keys (as you did before)
Now as a key animator you are in charge of laying out the length of exposures each frame has. If you’re working in a professional setting, you will probably get an X-sheet (or exposure sheet). This is a good time to start thinking which frames need to be extended and which need to be shortened.
I wanted to exaggerate the kick so I extended the exposure of the kick.

Now that you have a blueprint of where you want to go, you can start filling in the spaces where extra frames are needed.
Really once you have your point A and point B set, it’s fairly simple to fill in the blanks. The important part is getting point A and point B just right. Having a smooth animation is not as important as having good movement (imo). Part of the charm that Japanese animation has is the interesting choice of shots/angles/poses that make up for the lack of frames (in comparison to the fluid frames you would normally see in a Disney animation).
Keyframes can also be used for changing the backgrounds, and perspective lines more broadly. Although seeing hand-drawn backgrounds has become rarer and rarer these days because of how much easier it is to generate it with 3d software.
Hope that helps, I realize these are very basic but hopefully I can expand into more complicated stuff in the future.
10K notes
·
View notes
Note
What advice do you have for a 14 year old who's trying to learn how to animate?
There’s a LOT of things that go into animation and I definitely can’t cover everything all at once (im sure you dont want me to either) so I’ll try to keep it simple!
But for forewarning, I take animation very seriously and can’t help but info dump.
1. Your animation isnt going to work immediately. it’s going to be awful. accept that and move on.
2. Don’t give up when your animation doesn’t work!!! i swear ive seen people try to animate for their very first time with like a walk cycle and immediately after the first test shoot they played they just dropped it and i was like honey!! honey no you made half of a single step and didnt in-between it. You aren’t done, thats why it looks bad! You don’t say a drawing sucks and throw it out halfway through drawing a single eye, you draw the rest of the face and see how it looks in the end. that’s how you have to look at making animation.
3. It’s a lot more work than you think it’s going to be. animation runs at 24 frames per second, that’s 24 drawings a second. some people do it 12 drawings or even 8 drawings a second, but no matter what it’s a lot of dang drawings.
4. Rough drawing rough drawing ROUGH DRAWING! when you start animating things, don’t even THINK about detail! for example, if you want to animate someone walking, animate a circle for the head and a rectangle for their body, that’s all the detail you need to start with. once that is COMPLETELY and i mean completely entirely animated to a point where you are satisfied, THEN you can start to add detail.
5. References!!!! they’re everywhere! and you need to use them! if you want to animate a bird flying, you either look out your window, find a video on youtube, or get a diagram but don’t just try to guess or it won’t work, i promise you
6. Try as many different methods as you can! everyone animates differently. maybe my advice won’t apply to you at all, these things are just what works for me! I have friends who animate from the roughest of rough drawings and others who start every drawing completely detailed. some friends animate from major pose to major pose and others animate frame by frame.
7. HAVE FUN! if you aren’t having a fun time animating, then what are you doing? Ask yourself this question and then figure out what you need to do to MAKE it fun! It makes the work better for everyone in the end!
Now get ready for a link dump!
other animation advice from yours truly! which will be somewhat repetitive
tips for beginners
basic tips
12 principles of animation
living lines library: archive of old animation tests for many movies
really good animation books (links to amazon)
animators survival kit
the illusion of life: disney animation
cartoon animation
elemental magic: the art of special effects animation
animation programs
tv paint (indefinite free trial, does not allow saving or exports)
toon boom has 21 day free trials
pencil 2d is free to use
adobe photoshop and flash also work
if you have any other questions, feel free to ask! some things here might sound like nonsense to someone with no prior animation knowledge and I will GLADLY explain in better detail
9K notes
·
View notes
Photo
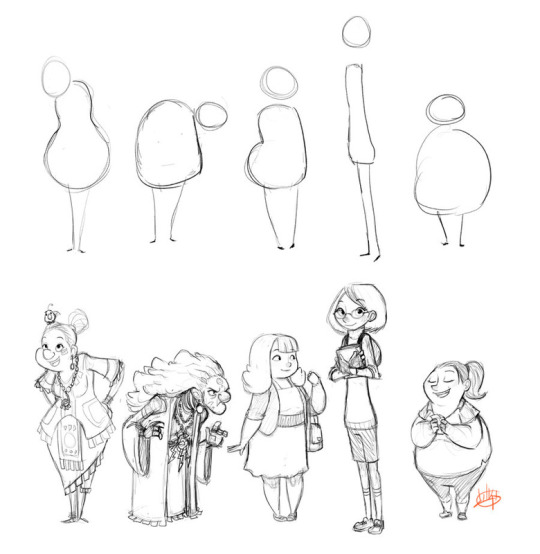
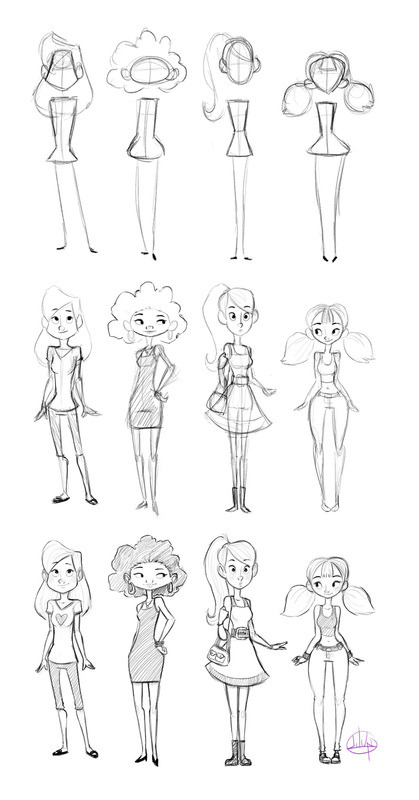
When I asked for suggestions for video ideas, there were a lot who asked about timing charts and inbetweening. Here’s a little preview of what could be the next entry for the SB Workshop!
Also, I am open to using other people’s character designs (these designs are actually my friend Thahn Dang’s designs) to keep the diversity of drawing styles up! This is another way I can interact with my followers. So yeah, hit me up with some of your original character designs in the future! I’ll probably make an update on how to prepare model sheets!
9K notes
·
View notes
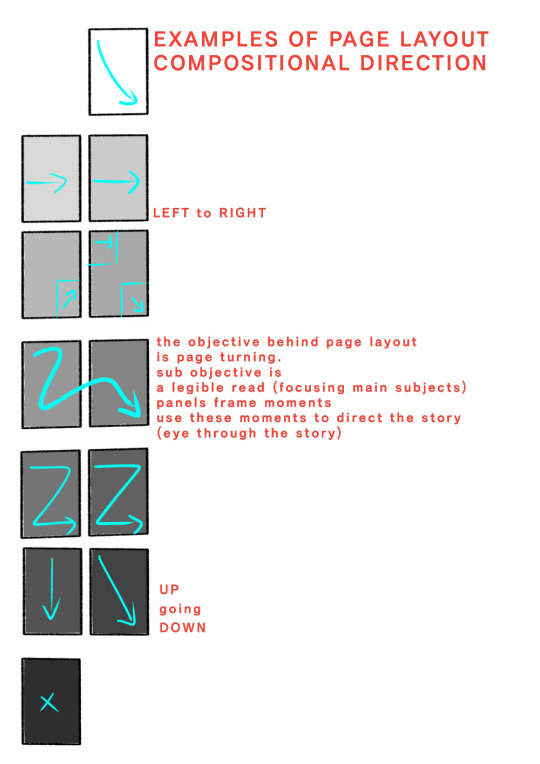
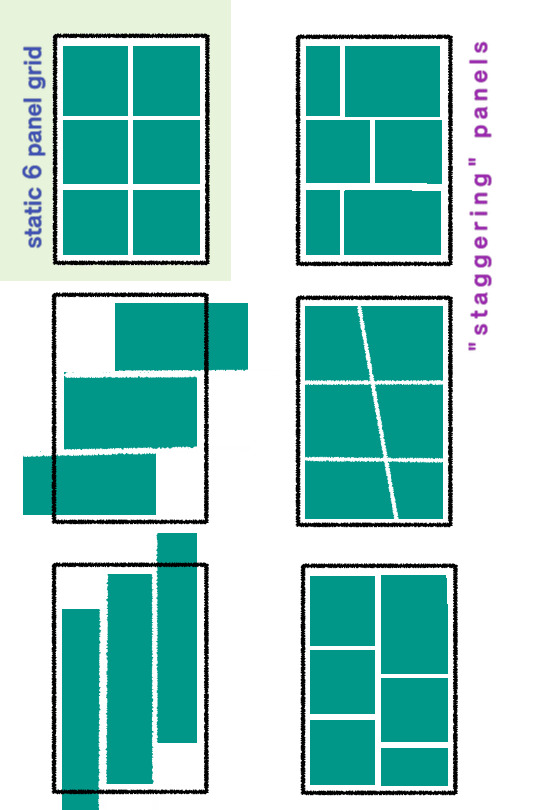
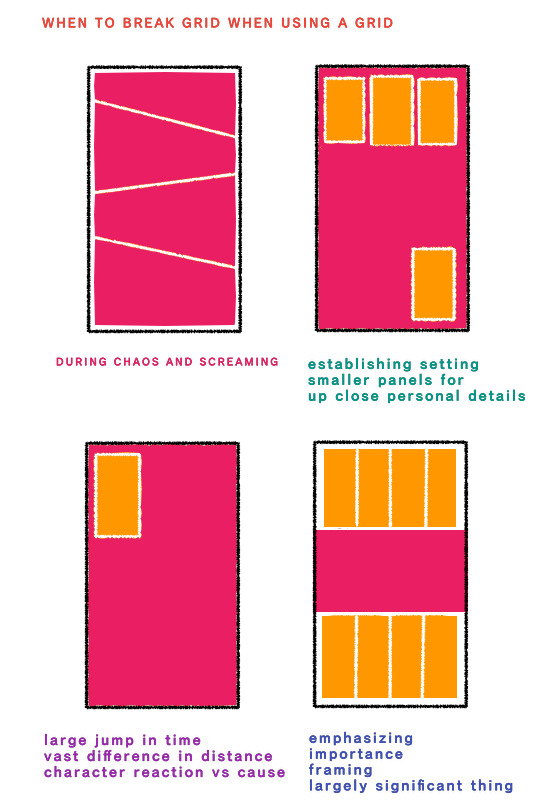
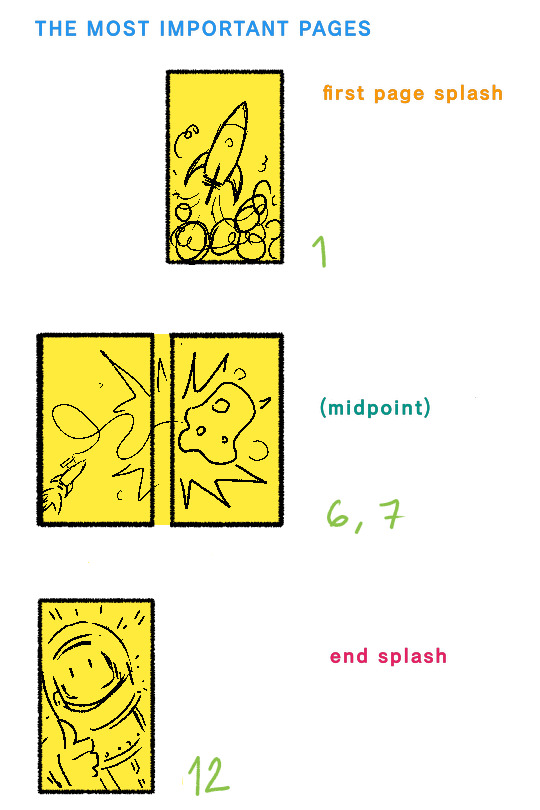
Photo


Click to enlarge)
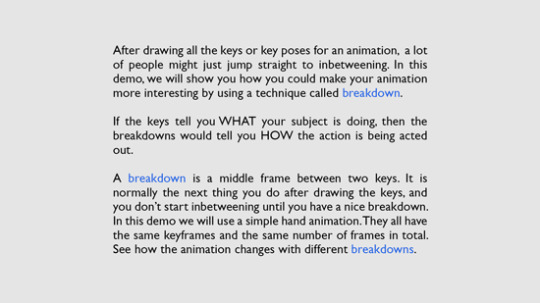
Breakdown / Accent / Arc
To thank for the support for our film so far, we are posting some notes on animating originally made for our animation assistants. Breakdown is a very crucial technique of animating. It is a guideline of how every action should be acted out. It involves a thinking process of “hmm, I want my character to move in this way particularly, because of the context/situation/emotion/thought… etc”
Last but not least, breakdowns are the playground for animators. If you find these notes useful, also check out our film We Have Plenty. It’s a 2D animated film created by the students of SCAD and RISD. Please support us on Kickstarter and help usspread the word! We will be back for more notes on animation!
34K notes
·
View notes
Text
Sai Animation Assistant 2
Here we goooo!
I finally got around to this last week.
New features:
Program can now export .gifs! Exporting supports 4 quality levels, custom resizing, and fps control.
Preview window resizes as you scale the overall program window. Your preview can be as big or small as you’d like.
Frames are now quicksorted instead of using the native default ordering. This means no more of that 1, 10, 2, 3… 8, 9 order crap. Filenames are weighted by their character ASCII values plus a base 10 positioning modifier. See this Spongebob? This is science.
Since frames are not re-loaded externally on each rendition, those of you running toasters shouldn’t get preview lag any more.
Step forward/step backward buttons.
Specifiable file types for those of you too cool for .png’s.
Refresh button.
The goal is to give those of us who would rather sketch in Sai (or any other program that lacks a timeline) a way to preview our animation frames without jumping through Photoshop hoops.
Basic Walkthrough:
-Draw your frames in Sai.
-Export each frame to a folder and name them something orderable like:
1.png, 2.png…
a.jpg, b.jpg…
Midna Frame 1.png, Midna Frame 2.png…
-Put the program into the same folder, or launch the program and go to File >Set Source Folder.
If you load the program from the same folder, it will automatically load the animation. Otherwise it will be loaded when you set the source.
Click play to loop the frames back to you, producing the animation. Adjust the FPS as needed. The FPS can be adjusted while the preview is playing.
The step forward/backward buttons will advance or regress the current frame, they can be used while the preview is playing or while it’s stopped. Stepping to a frame and then clicking play will play the animation from that frame onward.
Once the preview is in place you can make edits to the individual frames in Sai, and update the files as needed. To update the preview, click the Refresh button in the upper right.
Say I wanted to change an arm in Frame 2. I would make my changes in Sai, export the frame as 2.png - replacing the old one - and then click Refresh. You can refresh without stopping the preview animation. If I wanted to add an entirely new frame, I would do the same process only without overwriting 2.png.
Information about the current frame is displayed in the bottom left. Right clicking on a frame will take you to that image file in Windows Explorer.
Exporting .gifs:
I tried to make this as simple as possible. Just go to File > Export Gif. From there select your file name, desired quality, and you can resize the end image as needed. “Constrain proportions“ being checked simply means that if you have a file that’s 200x300, and you change the width to 100, then the height value will automatically change to 150.
Export Gif To… does the same thing only it lets you navigate to where you want the gif saved before prompting for file options.
Big, high quality gifs will take some time to construct, so be patient if you’re exporting something large.
——-
If you have any trouble launching it, make sure your .net is up to date.
.RAR Download
Source Files
Old version.
7K notes
·
View notes


Photo

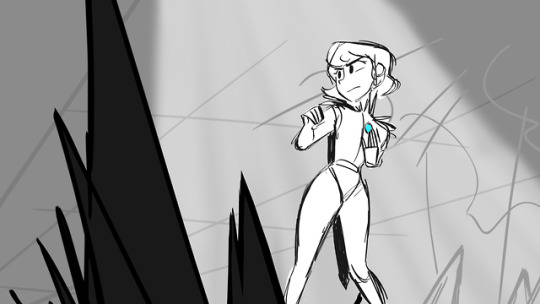
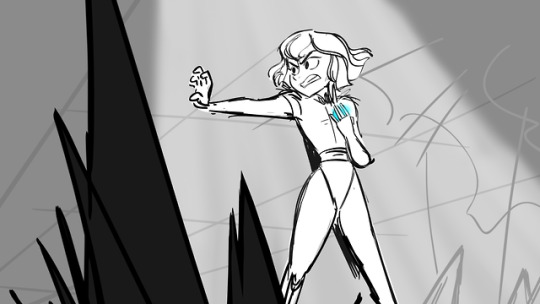
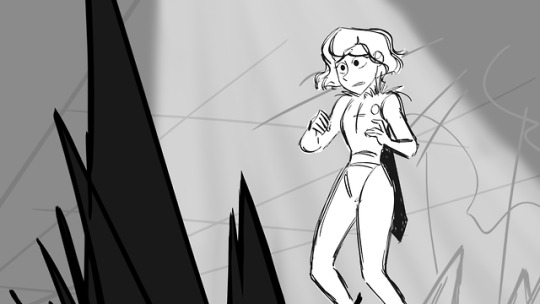
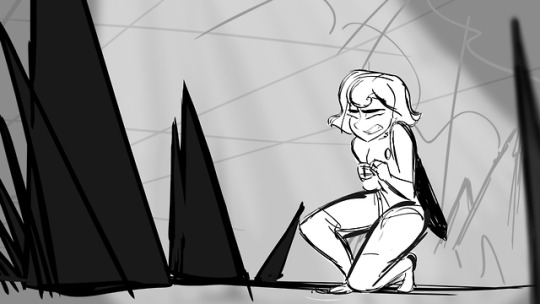
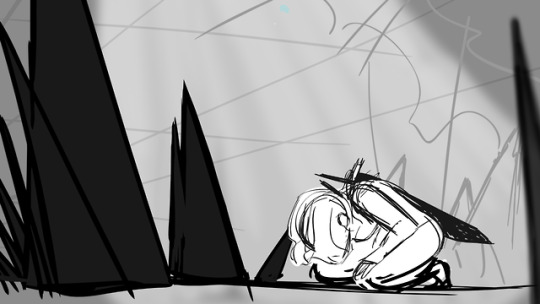
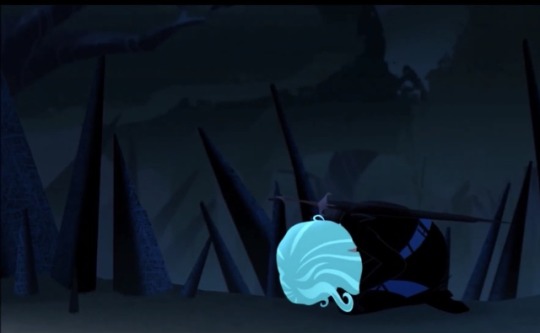
Return of the King is an amazing book and movie but it’s also a super great #rapunzelstangledadventure episode!! This episode marks the first episode directed by Philip Pignotti, one of the kindest directors ever, and the Tangled storyboard debut for my friend Jenessa Warren (we’ve known each other from CSSSA where she was my RA EIGHT YEARS AGO!!!)!! She and Diana Kidlaied KILLED IT AS A TEAM 💕💕
I had the absolute honor of revising Diana’s scene of Cassandra at the end of the episode; the chance to go all out on Cassandra’s emotions was an absolute delight, I love my misguided angel 🖤💙🖤💙
also i looove seeing the comparison between the drawing and the animation like AHHHH
715 notes
·
View notes
Photo


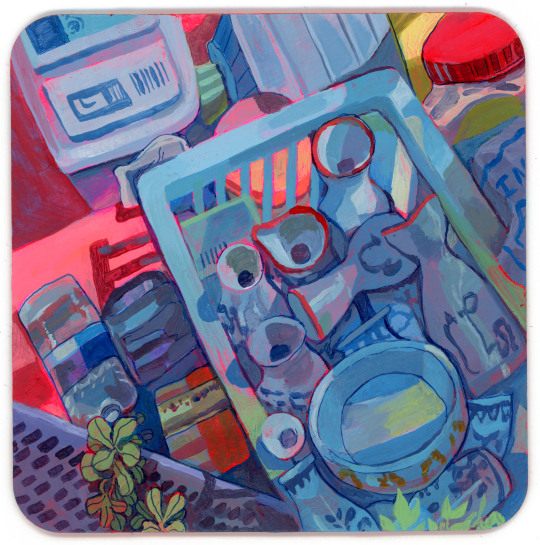
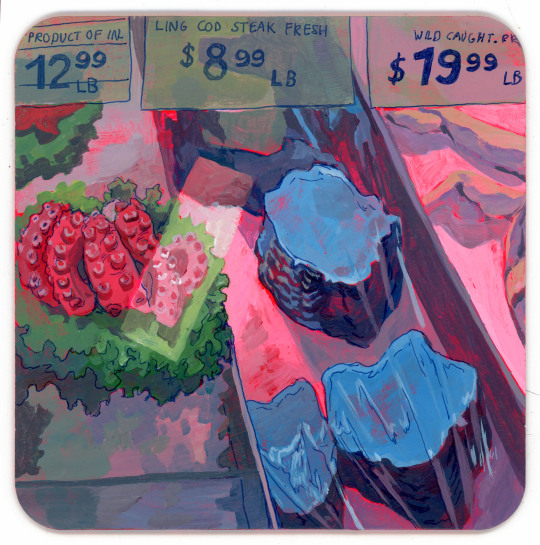
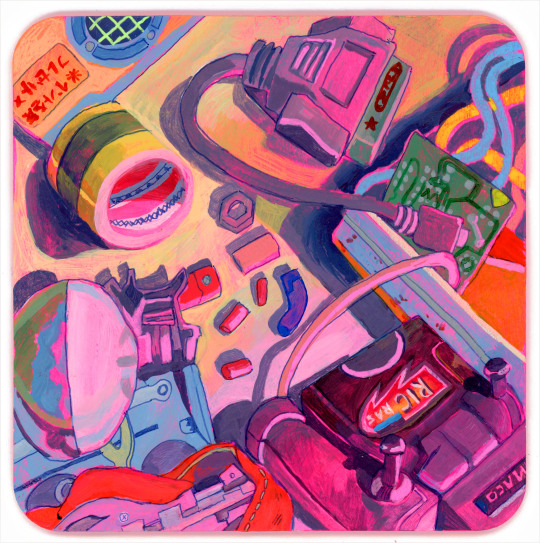

coasters for gallery nucleus side by side!
instagram | site
21K notes
·
View notes