
tompumpupboats
PumpUpBoats on Tumblr
Guiding your inflatable boat on troubled seas of knowledge
42 posts
Don't wanna be here? Send us removal request.
Last Seen Blogs

electrospares
Untitled

zeldawisesnake-blog
Zelda Wisesnake

fearlessfuckingfemale
FearlessFucking Female.

universalgroupinstitutions
Universal Group of Institutions

claredevliin
food for the worms.
Text
Top 5 Benefits of Foldable Kayaks for Travelers

Kayaks saw a surge in popularity along with other outdoor activities over the last three years, but while kayaking is largely seen as a leisure or sporting activity now, it was once a vital part of survival for some people.
Roughly 4,000 years ago, the Inuit invented the kayak to aid their daily activities. This vessel was designed to help the Arctic dwellers with hunting and fishing expeditions. These kayaks had frames made from bones and wood with animal skins stretched across to enable them to float. Over the years, kayak designs have been modernized until today where there are vessels designed for sea, whitewater rapids, or for touring.
With passing years, more innovation has occurred in kayak design to the point where there are now inflatable and foldable versions available as well as the more recognizable hard-shell vessels.
A brief explanation of what a foldable kayak is
Sometimes, these foldable boats are called origami kayaks, and once you lay eyes on one you will understand why. A foldable kayak has a frame that collapses and opens and is made from a combination of materials such as aluminum, wood, and plastic. Instead of animal skin, a tough waterproofed fabric is used to cover the kayak’s frame.
For a clearer picture, you can check out these foldable origami kayak reviews and get a better understanding of how these vessels work. But, basically, foldable kayaks are designed to perform the same role as a hard-shell kayak but are more compact.
What are the major benefits of a foldable kayak?
Standard kayaks are great, and they offer a unique way to combine exercise with leisure and relaxation. You can use a kayak to traverse white water in Snake River Canyon or you can get a kayak for two and spend an afternoon paddling the waters in Lady Bird Lake, Texas.
Water-based activities are becoming more popular. Kayaking is gaining new fans constantly, and many others are discovering the fun of inflatable rafts and pontoons. Inflatable boats are selling more as they are easier to transport to lakes and rivers.
And foldable kayaks are gaining traction now too due to the many benefits they have.
Below you have five benefits of foldable kayaks.
1. Foldable kayaks are lighter
An average hard-shell kayak can weigh anything from 20 pounds to 80 pounds. Some kayaks even weigh more than this and can be 100 pounds even. But, foldable kayaks weigh vastly less.
Depending on which brand and model kayak you buy, you could expect it to weigh no more than 20 to 40 pounds, with 30 lbs being a good benchmark.
Despite foldable kayaks being light, they can still carry everything you need for a trip on the water. You can find origami kayaks that can easily carry 300 pounds of distributed weight with some going as high as 400 pounds.
2. Foldable vessels are perfect for solo kayakers
Carrying a heavier hard-shell kayak solo can be awkward especially if your car is parked someway from the launch point. There is also some effort needed to get the kayak onto the roof rack of a vehicle and down again.
With a foldable kayak, however, there is no need to even have roof space as the vessel can collapse and fold up. Foldable kayaks can be as small as half the size of a hard-shell kayak when collapsed, allowing them to fit inside a small vehicle easily.
They can be carried to the launch point and assembled in no time at all. When it is time to go home, the kayak can be broken down quickly, carried to your car, and stored away.
3. They are perfect for leisure activities or for beginner kayakers
Foldable origami kayaks work perfectly on flat water such as lakes and ponds. You can take a foldable kayak out in a bay also, so they suit beginners who should get used to paddling on bodies of water such as these.
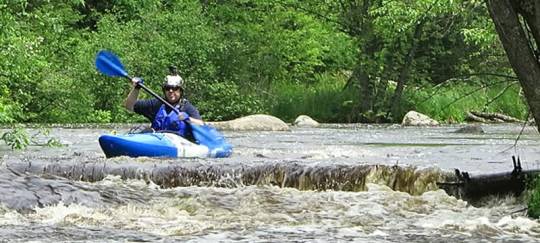
While some foldable kayaks are not recommended for whitewater, many models are suitable for windy conditions and open waters. Some foldable kayaks can be used on Class II or Class III rapids under the International Scale of River Difficulty.
4. Foldable kayaks are quick to ready and launch
Not only can you carry a foldable kayak direct to the launch point with ease, but the process of setting one up is also simple. After a bit of practice, a foldable kayak can be assembled in just 3 or 4 minutes.
https://www.youtube.com/watch?v=F9eQouzTOzk
Despite the appearance of an origami kayak, they are very durable. Foldable kayaks are tested and proven to last thousands of folding cycles. It is very common to see these kayaks approved for 20,000 folding cycles, and treated with UV protection guaranteed for a decade.
If you are wondering about the safety of inflatable kayaks and their folding cousins, then you’ll be pleased to note foldable kayaks can also take the same type of knocks and abuse that hard-shell vessels do.
5. Storage is never a problem with a foldable kayak
No matter how small your home is, you can store a foldable kayak easily under the bed, in a closet, and inside a small car when traveling.
Many people are put off buying their own kayaks due to storage concerns, but foldable or inflatable kayaks overcome this problem. Even the smallest apartment should have space for a foldable kayak.
Summary
Foldable kayaks are lightweight, easy to carry, and extremely convenient. Transporting a foldable kayak is far easier than with a traditional model, and this means they can be taken almost anywhere where you are able to launch from.
Foldable kayaks might make the best choice for beginners as they are ideal for leisurely paddling and don’t require loads of storage space. Indeed, foldable kayaks need no roof space on vehicles at all.
And despite having to be folded and collapsed, they are guaranteed for thousands of folding cycles, treated for UV, and are highly reliable.
Read the full article
0 notes
Text
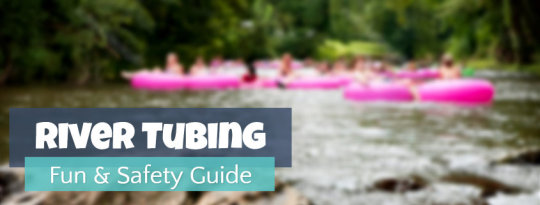
15 Best Rivers to Go River Tubing in the USA
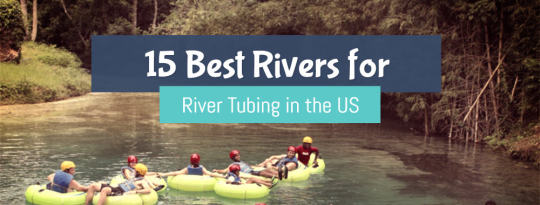
River tubing is an insane amount of fun. If you have ever done it, you can't help but rave about it. It is the perfect activity for friends and family, or even just for a date night.
If you want to go river tubing, you need to make sure that you go to the right river. The United States provides the best river tubing in the world, but there are around 250,000 rivers in the US...
To help you pick out the best rivers to go river tubing in the United States, here are 15 of the most popular ones.
Salt River tubing - Arizona
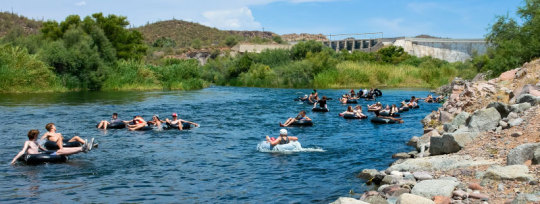
A trip down this 67-degree river on a hot 98-degree day is the perfect way to cool off. Just pack all you need, then take the bus to any higher elevation, rent some inner tubes and enjoy your trip down the river.
The best time to go tubing on the river is in May; it's usually open seven days of the week until Labor Day.
Most people float on the Lower section of the river, near Phoenix, though this section does not always have much water or any whitewater.
Depending on where you launch and stop and how the river flows, trips can take up to 6 hours. Pack sunscreen and enough drinks, but know that glass containers are prohibited.
Read the full article
0 notes
Text
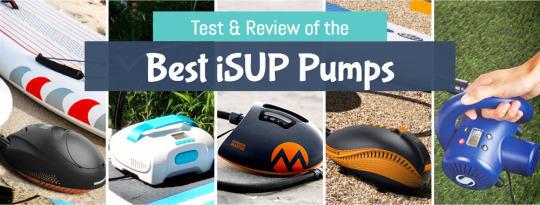
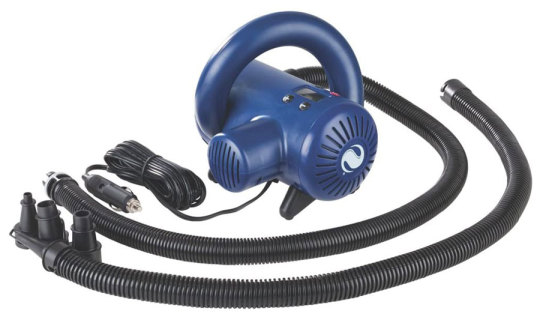
[year]'s TOP 5 Electric Pumps for iSUPs
If you own an iSUP, you know that inflating it can be a struggle. It's hard work, and having a bad pump makes it even harder.
There are some pumps that just won't get the air into your board. Some have too much resistance, while others are inefficient. Not to mention the strength you need to pump with as the pressure increases.
If you have an iSUP, you know exactly what I'm talking about...
Luckily, there are some great options out there for efficient inflatable SUP pumps!
I've used many of them over the years, and I have compiled a list of the 's top 5 air pumps for inflatable paddle boards to help you find the perfect match.
You’ll be able to use these pumps with any type of inflatable SUP. So whether you want an affordable option or are willing to spend more money on a pump with more features, have a look below!
Reviewing the Best Electric Pumps for SUPs in
We all know that inflatable SUPs are great for watersports, but they can be hard to pump up with a manual pump. It's not just the time it takes to pump up your board that is frustrating. It is tiring, especially on a hot, sunny day.
The best way around this problem is an electric air pump.
Electric pumps are fast, easy to use, and don't require any pumping effort at all!
Using an electric air pump to inflate your SUP is super simple:
- Just plug it in ( or don't if it is battery powered)
- Attach the air hose and nozzle
- Set your target PSI
- And switch it on. That's all there is to it!
Here are my top picks for electric SUP pumps. I've used them all, they performed great, which is why I am confident in including them in this review.
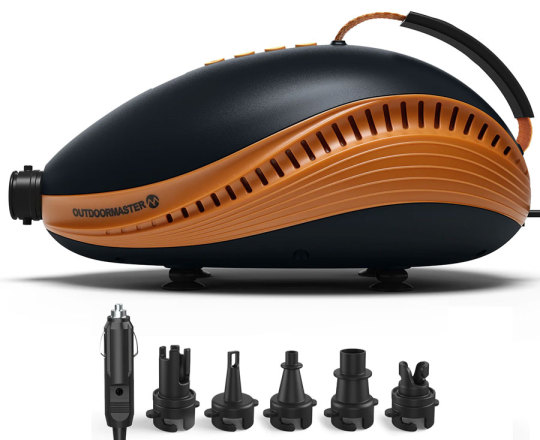
OutdoorMaster Whale Pump
The OutdoorMaster Whale Pump is a battery-powered air pump that is designed for use with inflatable SUPs. This one is definitely my favorite in .
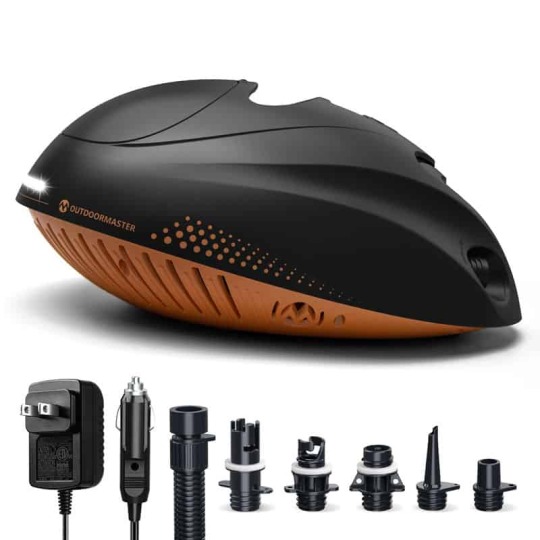
Pros
Built-in 6000 mAh battery pack for use without power outlet
Can inflate 2 SUPs to 15 PSI, or 3 SUPs to 12 PSI
6 nozzles included
Doubles as a USB charger and flashlight
Cons
Costs more than non-battery pumps
Heavier due to battery
No storage bag
OutdoorMaster Whale specifications
- Speed: stage 1 @ 350LPM, stage 2 @ 70LPM
- Max PSI: 16
- Auto shutoff: yes
- Digital display: yes
- Portability: handle
- Nozzles: 6
- Deflation: yes
- Size: 14.56" X 8.66" X 6.69"
- Weight: 5.2 lbs
- Powering: 12V cigar lighter, AC adaptor, 6000 mAh battery
- Warranty: 1 year
This pump is made of high-quality materials and like all of the pumps on this list, features a built-in pressure gauge that makes it easy to determine when the desired level of inflation has been reached.
But the most important feature of the Outdoormaster Whale SUP pump is undoubtedly the 6000 mAh battery that is built into the body of the pump. This allows you to inflate a SUP without having to use a power outlet. This feature can be extremely useful when you are using the pump away from your car or in remote locations, where you do not have access to a power supply.
You can also plug the pump into your car's 12v socket, or even use the included AC adapter.
The Whale has active cooling, so you can inflate several paddleboards in succession. If you are using the battery on a full charge, you can fully inflate 3 paddleboards to 12 PSI, or 2 paddleboards to 15 PSI.
The pump also features a deflation function which allows you to release air quickly.
Additionally, the Whale Pump comes with a variety of adapters that make it compatible with most types of inflatable SUPs.
OutdoorMaster Shark II Pump
The OutdoorMaster Shark II SUP Air Pump is a powerful, portable, and sleek pump for inflatable SUP boards.
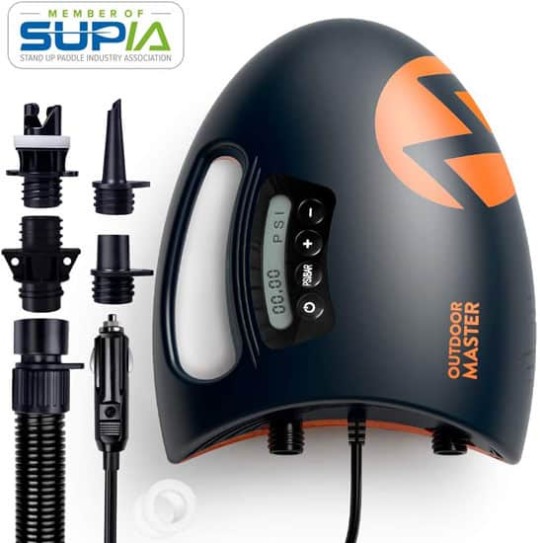
Pros
Can inflate 3 SUPs in a row
Lots of nozzles
Max 20 PSI
Good value for money
Cons
No storage bag
OutdoorMaster Shark II specifications
- Speed: stage 1 @ 350LPM, stage 2 @ 70LPM
- Max PSI: 20
- Auto shutoff: yes
- Digital display: yes
- Portability: handle
- Nozzles: 5
- Deflation: yes
- Size: 11.9" x 9.45" x 4.84"
- Weight: 3.6 lbs
- Powering: 12V cigar lighter
- Warranty: 1 year
The Shark II is very popular among paddleboarders. It is a dependable pump and represents good value for money if you use the discount code below.
Its 1st stage compressor is fast at 350L/min and 2nd stage high PSI compressor for maximum pressure at 70L/min, which is a good value.
It’s easy to use, with an automatic shut-off feature once the desired PSI has been reached.
It was one of the first pumps with an Active Cooling System. This prevents it from overheating so you can enjoy a refreshing drink while inflating up to 3 boards in a row. Try to keep the pump in the shade while inflating though, as it can get very hot in the Sun during pumping.
Loads of nozzle adaptors are included to suit any valve type and deflation is also possible if you're in a hurry to pack up.
All of these features make this product one of the best on the market today!
Nixy Ventus Pump
The Nixy Ventus SUP Pump is a powerful and versatile inflatable pump that can handle any type of board.
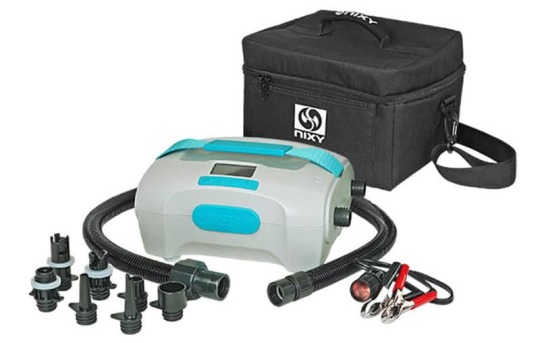
Pros
Inflate 10+ SUPs in a row
Powerful cooling system
Seven different nozzles for eve
Storage bag included
12V Battery clamps
Cons
Expensive
Optional battery pack adds $100 to price
Nixy Ventus specifications
- Speed: stage 1 @ 350LPM, stage 2 @ 70LPM
- Max PSI: 20
- Auto shutoff: yes
- Digital display: yes
- Portability: handle
- Nozzles: 7
- Deflation: yes
- Size: 10” (25.4cm) x 8” (20.32cm) x 5” (12.7cm)
- Weight: 4 lbs (1.8 kg)
- Powering: 12V cigar lighter, car battery clamps
- Warranty: 1 year
Its best feature is the powerful cooling system Nixy designed for this pump. It can inflate 10+ SUPs in a row! I tested it with 5 boards, you can watch my video review of the Nixy Ventus here.
Granted, not many people will ever need to inflate that many SUPs at one time, but it is still an impressive feat.
The pump has a 10-foot cord, active cooling, seven different nozzles for every type of inflatable out there, and a storage bag to neatly pack it away.
The deflation feature makes it easy to deflate your board after a day out on the water.
You can buy an optional battery pack for the NIXY Ventus pump that can inflate 3 SUPs. This costs an extra $100.
Outdoormaster Dolphin Pump
The Outdoormaster Dolphin SUP Pump is the lightest and most compact electric SUP pump on the market.
Pros
Super small to fit anywhere
20 PSI max pressure
Very affordable
Cons
No deflation
No carry bag
OutdoorMaster Dolphin specifications
- Speed: stage 1 @ 350LPM, stage 2 @ 70LPM
- Max PSI: 20
- Auto shutoff: yes
- Digital display: yes
- Portability: handle
- Nozzles: 5
- Deflation: no
- Size: 10.23" X 6.29" X 5.11"
- Weight: 3.6 lbs
- Powering: 12V cigar lighter
- Warranty: 1 year
The thing I love most about this pump is its portability. It is tiny compared to any other SUP pump. I keep it in my SUP bag, and it fits perfectly. Other, larger SUP pumps do not. This means that there is 1 less bag I need to have with me, which is nice.
The Outdoormaster Dolphin pump will inflate your SUP to 20 PSI. It has auto-shutoff (as all modern SUP pumps do).
Even though it is tiny, it still pumps at the same speed as the bigger SUP pumps, so there is no compromise in this respect.
This pump does not have a cooling system though, so I don't think it will be able to fully inflate 2 SUPs without letting it cool down between boards. I only tried it with a single board, and it was perfect. Surprisingly quick actually.
As with most Outdoormaster pumps, the Dolphin is CE certified as well.
OutdoorMaster Dolphin

Small, but powerful
Portable
If you are looking for a small, portable iSUP pump that doesn't cost an arm and a leg, the Dolphin from OutdoorMaster is your best bet.If you are looking for a portable electric pump that you can take anywhere, you need the Whale. Its 6000 mAh battery is powerful enough to pump 3 SUPs to 12 PSI right on the beach.
The Whale is the cheapest direct from Outdoormaster.com with this unique 20% coupon code they gave us!
Use this 20% discount code now while it's still valid:
OMTOM20
OutdoorMaster.com
Sevylor Water Sport Pump
The Sevylor Water Sport Pump is an inflatable SUP pump that features a maximum of 15 PSI and is the cheapest of all of the air pumps on this list.
Pros
Cheap price
Cons
2 inflation nozzles for low and high-pressure pumping
Hose prone to failure
No deflation
Unreliable warranty
Sevylor Water Sport Pump specifications
- Speed: stage 1 @ 350LPM, stage 2 @ 70LPM
- Max PSI: 15
- Auto shutoff: yes
- Digital display: yes
- Portability: handle
- Nozzles: 5
- Deflation: yes
- Size: 7.7" x 7.36" x 7.17"
- Weight: 3.48 Pounds
- Powering: 12V cigar lighter
- Warranty: ?
The pump itself has a durable design and is portable, making it easy to transport from one place to another. However, the air hoses supplied are not of the best quality, and will break/leak.
Also, this pump has two inflation nozzles for low and high-pressure inflation for some reason. This is very inconvenient, as you need to change the nozzle in the middle of pumping.
The other downside is that it does not have a deflation feature.
The only reason I included this pump in the list is that it is the lowest-priced SUP pump, but in all honesty, I would avoid it and pay a few more dollars for the Outdoormaster Dolphin above if you are looking for a low-priced iSUP pump.
Are electric pumps better for inflatable SUPs than manual pumps?
Yes, electric pumps are easier to use and quicker than manually pumping your SUP.
- The latest generation of electric pumps take about 8-10 minutes to inflate a SUP, making it much quicker and easier than manually pumping for 10-20 minutes.
- Many electric pumps come with built-in pressure gauges that display the air pressure inside the SUP while inflating it, so you know when the process is done.
- They integrate this with automatic shutoff, so the pump turns off when it reaches a predefined PSI.
- Electric-powered pumps require less labor since feet and arms don't need to be used to pump, saving your energy for paddling later!
If you're looking for an easy way to inflate your SUP, then an electric pump is the way to go!
How to Choose the Best Electric Pump for Your iSUP
If you're looking to inflate your iSUP by yourself, an electric pump is the best way to go.
There are many options on the market, but it's important to select one that fits your needs and budget so you spend less time struggling with inflating your board and more time enjoying it! The pumps listed by OutdoorMaster and Nixy are all high quality.
Here are some important things to keep in mind when shopping around for an electric iSUP pump:
- Inflation speed - How quickly the pump inflates the SUP is measured in liters per minute or LPM. A higher LPM rate will inflate your board much quicker, so if you're in a rush this may be the most important factor for you.
- Maximum PSI rating (pounds per square inch) - PSI is the amount of pressure that's pushing down on your board once it's inflated. A higher PSI can mean a stiffer board. For most boards, the sweet spot is around 12-15 PSI. However, some inflatable stand-up paddleboards are more rigid and can handle up to 30 PSI.
- Automatic shutoff feature - This is a nice feature to have if you don't want to overinflate your board. With an automatic shutoff, the pump will stop inflating as soon as the board reaches the desired pressure. All of the pumps on the list above have this feature built-in.
- Digital display - If you want to be able to track the PSI while inflating, look for an electric pump that has a digital display. These are more accurate than old-school analog dial pumps.
- Portability, carry case - Some iSUP pumps have separate cases, making them easy to carry around with their accessories. Other pumps simply have a handle on the body of the pump, so you will have to put them in your iSUP bag, along with their nozzles.
- Nozzles & valve compatibility - Most iSUPs have Halkey Roberts valves, which is a standard nozzle type included with all SUP pumps. However, it's nice to get more nozzles with the pump, so you can pump air into other inflatables (kayaks, boats, floaties) as well.
- Deflation feature - Even though this isn't a necessary feature, it's definitely convenient to have. This allows you to deflate your board and pack it away quicker, than if you would have to squeeze the air out of it yourself. Most electric pumps allow for deflation by connecting the inflation hose to a deflation nozzle.
- Powering the pump - Most electric pumps are powered by AC adapters, 12v cigarette lighter adaptors, or car battery clamps, but some have rechargeable batteries. If you're looking for portability, it's nice to be able to power the pump with batteries.
- Warranty - Some manufacturers offer better warranties than others, so it's always good to check what kind. Do not buy a pump that has less than a 1-year warranty.
When it comes to choosing the best electric pump for your iSUP, there are a few important factors you need to keep in mind. Inflation speed, maximum PSI rating, carrying case, valve compatibility, and automatic shutoff are all key considerations when making your purchase.
All of the pumps on our list have these features, so you can't go wrong with any of them!
Tips on Using Electric Pumps for iSUPs
- Put your pump onto your SUP while inflating - Electric pumps suck in air from their environment, so you'll need to make sure that air is free of debris, sand, etc. If your SUP is clean, free of dirt, debris, or sand, you can safely place your pump onto it as it inflates your SUP.
- Do not exceed the PSI limit of your SUP - If you're inflating your SUP to its recommended PSI limit, it may feel stiff before blowing up completely. Don't worry! This is totally normal. You can continue pumping until you reach your maximum PSI rating, but do not exceed it. Each SUP will clearly state its working PSI rating.
- Deflating a SUP is easy with an electric pump - When you're finished paddling, just use the deflate function of your electric pump to suck the air out of your SUP. Your pump will deflate it quicker and more efficiently than you can with your hands and body weight.
- Keep the pump away from water - When you're not using your electric pump, make sure that it is completely dry before you put it away. Water damage will shorten its lifespan and could potentially damage its inner workings. Air pumps are generally safe for use on inflatable SUPs.
- Avoid overheating your SUP pump - If your pump is overheating during use, you may need to let it rest for a little bit. Overheating damages the internal components of an electric pump, which will shorten its lifespan and could potentially damage the SUP that you're inflating. Some of the pumps on this list have active cooling, making them safe to use for multiple paddleboards. The ones that do not have a cooling system are generally meant to inflate a single board, with a 20-30 minute pause before using again.
FAQ
What PSI should a paddleboard be pumped toMost paddleboards have a working PSI of rating of 12-15. Your model will tell you exactly what PSI you need to inflate it to.
Will the electric pump's nozzle be compatible with my iSUPs air valve?
Will the electric pump's nozzle be compatible with my iSUPs air valve?Yes. Inflatable paddle boards use Halkey-Roberts valves, or Bravo valves. All electric pumps made for inflating SUPs come with these nozzles, so you will be able to inflate any SUP.
How long does it take to inflate a SUP with an electric pump?Depending on the strength of your pump and the working PSI of your paddle board, it will take between 7-12 minutes for an electric pump to inflate an iSUP.
What happens if I overinflate my SUP?Many air valves nowadays have a safety mechanism, that does not allow for overinflation. In case yours does not have this, make sure you check the working pressure of your SUP and don't exceed the recommended PSI. Overinflation can cause damage to the seams of your SUP.
Can an electric SUP pump be used with other inflatables?Yes, the various nozzle attachments that come with the pumps will enable you to pump up any inflatable, like boats, kayaks, floaties, mattresses, etc.
Can I use a tire pump/compressor to inflate a SUP?No. Only an electric pump designed for SUPs will work to inflate your board.
Read the full article
0 notes
Text
Is Kayaking Good Exercise? Let's See the Truth
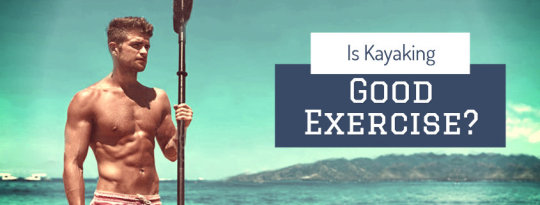
Kayaking is up there with baseball and family game night as one of America's great pastime activities. Every summer, millions of kayakers head out to enjoy a quiet afternoon of undisturbed tranquility and soak in the wonders of America's countryside majesty.
But being so much fun, is kayaking good exercise as well? Let's find out.
What kayaking does to your body and overall health
Paddling a kayak (or canoe for that matter) is a recreational activity that builds muscles, lifts your mood, and gives you a cardio workout just like cycling or walking. In fact, data shows that 27 minutes of light paddling is equivalent to taking 2,000 steps.
It is a low-impact exercise that can build your strength, enhance your flexibility and aerobic fitness.
Read the full article
0 notes
Text
11 Fantastic Benefits of Kayaking
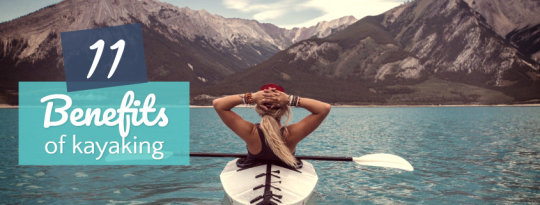
Regardless of whether you're clenching your paddles while white water rafting or cruising along the glassy, calm surface of a lake, kayaking is an excellent way to maintain your physical & mental fitness.
Kayaking is one of the most beneficial forms of exercise, since it:
- improves strength,
- increases fitness,
- helps maintain flexibility,
- has a multitude of mental health benefits.
Here is a list of the main mental health benefits of kayaking, followed by the physical benefits:
It helps you stay balanced and calm
Everybody knows that emotions can quickly spill over and, in the worst-case scenario, escalate into unrest.
It is not always easy to be calm and serene, which is where kayaking comes in.
Kayaking on calm waters causes a meditative balance for many people. It helps put you into the right state of mind for a feeling of serenity and calmness. You can forget everything, all doubts, and worries, all negative thoughts evaporate while you discover nature.
Kayaking reduces stress
If you face stress at work or in your private life, doing sports is the best way to reduce it.
Kayaking has been proven to reduce stress levels better than most other sports, and I think the reason is obvious:
Kayaking is good for the body, mind, and soul at the same time.
How does kayaking achieve stress relief?
- Kayaking is all about discovering new things and places, which keeps your mind on the present. Be it calm waters, tranquil areas, or raging rapids, a similar activity with such a degree of serenity is hard to find. It is hard to beat the relaxing sounds of nature and trickling water.
- Kayaking is a physical activity, and as such, it bumps up the production of your brain's endorphins, which are effectively feel-good neurotransmitters.
It improves your mental health and focus
Other than reducing stress, paddling has other mental health benefits as well.
Since kayaking requires the body and mind to work together, it helps develop a better sense of self.
While you focus on being the best kayaker you can be, there is little room or time for unwanted or negative thoughts. Engaging in such activity positively affects your metabolic rate and creates a sense of well-being, self-confidence, and a good mood.
The challenge you face on the water, coupled with the serenity of mind and connection to nature, stimulates a sense of well-being; hardly any other outdoor activity can accomplish that.
Quality time with your family on the water
With the constant rush of modern daily life, many people have less and less quality time to spend with their family.
This is especially true for families with children. In between school, homework, and after-school activities, there is far too little time to spend together.
Instead of spending the weekend at home watching TV and playing video games, go on a kayaking trip.
Your kids will enjoy an exciting activity, you'll explore new places, and best of all, you will spend quality time together as a family. No interruptions, no screens: just your loved ones, you, and nature.
Build a community
Kayaking is a terrific way like-minded people can come together and enjoy a common hobby.
People of all ages and all levels of fitness can join kayaking groups, where they can socialize and make new friends.
For example, the kayaking groups on meetup.com has close to 3 million members spread out among 2000+ groups all over the world.
Now lets move on to the main physical health benefits of kayaking:
Kayaking helps you lose weight and improve your conditioning
Kayaking can help improve your endurance and help you lead a more active lifestyle. With all the extra exercise and strain on your muscles, you'll enjoy easier weight loss and more strength.
How many calories does kayaking burn?
Since kayaking is a full-body exercise working every muscle in your body, you will burn around 400 calories per hour of kayaking (Source: Harvard Medical School).
You strengthen and define every muscle in your body
Although it may seem like you are only working with your arms when paddling, you are actually using every muscle in your body.
- Your core muscles provide the balance needed while directing power with your paddle.
- When paddling a kayak, you have to move the paddle from side to side. This encourages, strengthens, and defines the abdominal muscles.
- By pressing your legs against the inside of the kayak and the footpeg, you balance yourself in the kayak. This is an isometric exercise with continuous muscle tension, which strengthens your legs.
- Your chest, shoulders, arms, and back do the actual paddling, creating an all-in-one exercise for your upper body muscles.
Using a strong paddle stroke challenges every muscle in your upper body. At a speed of 3mph, you can expect to have completed around 1500 reps of a light low-impact upper body workout in an hour.
Make no mistake. Paddling can increase your muscle strength dramatically if you approach it as a rigorous form of exercise.
It can be an alternative to aerobics in achieving general fitness
We all know that aerobic exercise is one of the best workouts for the body.
Why?
Because it lowers sugar levels, improves heart rate, lowers cholesterol levels, lowers blood pressure, and strengthens lung function.
Still, not everyone likes aerobics. I know I don't! But then, what is the answer?
Kayaking! It is an excellent alternative to aerobic fitness workouts.
Ultra low-impact workout
High impact exercises like running, aerobics, CrossFit, etc., may not suit everybody because of their toll on their bones and joints.
On the other hand, kayaking with proper paddling technique is a low-impact activity with minimal effect on your connective tissues, joints, and bones.
At the same time, this is not to say that it is a good option for people who already have problems with their hips, knees, or back. Make sure you use proper kayaking form to take full advantage of the benefits of kayaking and avoid kayaking back pain.
Great source of vitamin D
Even though scientists are publishing more and more research papers on the importance of vitamin D, the deficiancy of vitamin D is a serious problem in todays modern (indoor) society.
Kayaking in sunny weather is great for helping your body make vitamin D, making your bones stronger and boosting your immune system to keep you from getting sick.
Make sure to use sunscreen, sunglasses, and head protection in periods of high UV though, you don't want to get too much of a good thing.
It's good for your heart health & circulatory system
We all know that a strong heart is vital for our overall well-being, and kayaking is exceptional for steadily improving the health of our cardiovascular system.
How does kayaking affect your heart health?
Think of it as a no-impact form of aerobics. As with all cardiovascular exercises, your heart rate increases pumping your blood more forcefully, which dilates (opens) your blood vessels. You start breathing quicker to get more oxygen into your bloodstream, making your lungs stronger as well.
Your cardiovascular health improves with each stroke and the continuous movement of paddling, which may be one of the most overlooked physical benefits of kayaking.
After reading through the above points, I hope you can see why I believe it is one of the best activities in the world. Modern inflatable kayaks like these make paddling accessible to everybody, so there are no excuses not to get into this fantastic sport.
Read the full article
0 notes
Text
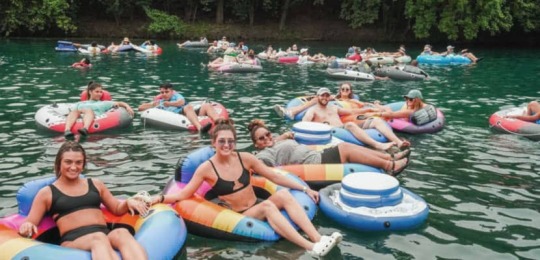
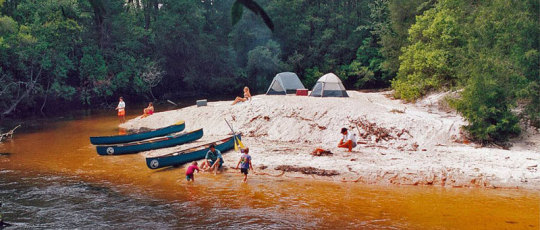
River Tubing Guide for Fun & Safe Summer Adventures
When Mr. Sunshine is up and smiling during the warm months, most rivers in America are open to river tubing enthusiasts to kick back in the cold waters and let currents push them downriver.
Floating on a lazy tube down a scenic river is a relaxing and fun way to spend an afternoon.
But tubing isn't just about picking up your equipment and heading for the river nearest your home. You need to have a game plan.
In this guide, we look at what river tubing is, why it's popular and how to prepare for a tubing trip, so you are safe in the river.
What is river tubing?
River tubing is a recreational activity that involves floating down a river on an inner tube.
The tube itself is usually donut-like and outfitted with skin fabric over the bottom, sides, and inner diameter, leaving room for a person to sit and ride waves.
You can either do towed or free-floating tubing:
- Towed tubing involves tethering one's tube to personal watercraft or motorboat and letting it pull you through the water producing a wake pattern.
- Free-floating tubing involves riding the river untethered. You have very little control over the tube's movements. You get moved by the river currents only. You may use your hands or webbed gloves to steer.
Why river tubing is so much fun
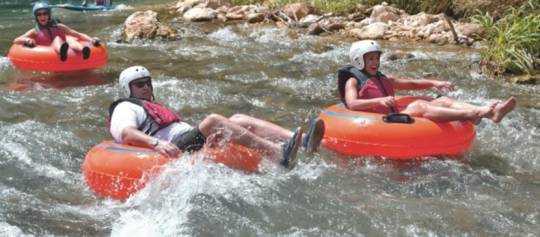
Tubing on whitewater river sections is be pleasurable and exhilarating.
The fact that you have limited control over the movement makes it more exciting. For a few hours or so, you are at the mercy of the water. You may float on a calm, lazy river, then quickly pass over waves that may send you airborne with your tube. How cool!
The tube size also allows people to ride in a wonderfully relaxing way, which is impossible with rafters and kayaks. In most cases, the tube covers have pockets and handles, allowing a person to pack drinks and snacks and kick back with refreshments and nourishment.
How to pick a river for a tubing trip?
Not every river is safe for tubing activities.
Depending on the flow rate and water level, the river may be too high and fast-flowing for safe floatation activities or too low and slow-flowing for exhilarating and fun tubing.
- Start with an online search of the specific river flow rate guidelines.
- Make sure the river has access points.
- Check the water conditions on the tubing day. You can even consult with local outfitters.
- Choose between DIY or full service from local tubing outfitters. The advantage of going with local tubing service providers is that you will be able to rent gear, and the tube is transported upriver to the launch point for you.
- The only negative is that their tours may be limited to specific sections of the river only.
- Pack adequately for the trip.
River classification
Some rivers offer a mellow trip suitable for young children, and some rivers will have mild rapids that will throw your tube around.
The American Whitewater Association created a river classification system to scale the difficulty of navigating a stretch of a river or rapid. The scale goes from Class I (easy) to Class VI (extreme).
With that said, class designation of a river may vary based on several factors, such as:
- fluctuating water levels
- type of boat used
- weather conditions (rain, wind)
Before you choose a river, make certain its classification is what you are looking for.
What to pack and wear for river tubing
To ensure you are safe and comfortable for fun times down the river, you will need:
Sun protection
You don't have to get burned to enjoy the summer heat. No matter your skin complexion, sunscreen is a must-have if you plan to spend a day in a lazy tube.
The best sunscreens are broad-spectrum, high SPF waterproof products:
- Broad-spectrum means they protect against both UVB and UVA radiation.
- High SPF means they provide longer-lasting protection.
Use sunscreen on all areas that your clothes don't reach, and make sure to use it before and during the tubing trip.
A hat (preferably with a large brim) is also essential on a sunny day to protect your head. Spending hours in direct sunshine can lead to sunstroke, a severe medical condition.
Broad-spectrum sporty wraparound sunglasses with polarised lenses will protect your eyes and make the trip much more comfortable. It would be best if you used a safety strap to keep them from falling off.
Clothing options for river tubing
For clothing options, go for water-safe apparel that is quick-drying, so you don't walk back from the river soaking wet. Stay away from heavy, baggy jackets and dresses. Also, don't go for anything that will restrict your arm and leg movement.
- Wear a bathing or swimsuit suit to keep you comfortable and relaxed.
- Wear a wetsuit, socks, and water shoes in case the water is colder. Neoprene wetsuits will insulate from the cold. The socks and water shoes also protect from rocky bottoms.
- Tight-fitting apparel is best, so you can swim comfortably in case you fall into the water. A white T-shirt is perfect.
- Have a towel ready.
- Snacks and drinks are good to have on long- lazy rivers. Pack some snacks such as crackers, chips, pretzels, and sunflower seeds. Don't forget cold drinks, including water.
Toys for kids
If you plan on bringing kids along, you might want to pack a few toys to keep them entertained during the river excursion.
These include:
- Squirt guns
- Blow-up doll
- Water toys
Life jackets
Always wear a PFD when you go river-tubing, no matter your swimming experience. Some rivers also warrant wearing a helmet.
Keep your young ones in them throughout the tubing trip, too.
Here is a list of the most reliable life jackets for inflatables.
Cellphone and camera
Don't forget your cellphone and camera! Your phone will come in handy in case of emergencies. Keep it in a dry bag to protect it from the water.
If you take a separate camera, use a waterproof case.
Rope
If you plan on the tubing as a crew, you can join your tubes using a rope so that you'll remain close together. A nylon rope is the best; it resists rotting better.
Carry a pair of scissors or utility knife in case you need to cut the rope.
Portable air pump
Having an air pump handy is always a good idea. Not just for inflating your tube before you set off for the adventure but also to top it off during the trip if you need to.
What kind of tubes are suitable for river tubing?
Now that you've packed everything, don't forget the tube (unless you plan on renting one).
Investing in your own tube is a good idea because you can explore different river sections safe for tubing. You can get an acceptable tube for as low as $30, but if you plan on using it more often, you should spend around $100 on a good one.
Here are a few things you want to look for when choosing a river tube:
- Get one with a mesh bottom; they are the most comfortable to sit in for hours.
- Make sure they have handles and structures to tie ropes into.
- A tube with a headrest is best for long trips.
Best river tubes
Here are some of the most popular inflatable river tubes you can use on your next tubing adventure.
Intex River Run I

Price check
This is a good beginner tube for river floating, and even for going on light rapids. It is especially comfortable due to the backrest, so you don't have to hold your neck and head up during your float.
The size is just right for using your arms to paddle, and the grips do not get in the way at all.
- 53" diameter
- 2 cup holders
- 2 handles
- built-in backrest
- mesh bottom
- wrap around safety rope
Renting river tubes
You'll find river tubing outfitters along the more popular rivers, such as the Salt River in Arizona, Delaware River in New Jersey, Guadalupe River in Texas, etc.
You can rent river tubes from specialized outfitters for around $20-$25 per tube.
These outfitters usually offer a shuttle service included in the price of the tube, meaning that they will bring you back to their parking lot from their river exit point. This is a very convenient way of enjoying a few hours of river tubing, but it adds up quickly if you go often.
Is river tubing dangerous?
River tubing is a fun way to spend an afternoon, but since the tube does not give riders control over movements, it's not without risks. River tubing accidents can happen and some result in various life-altering injuries.
Most common injuries and outcomes from river tubing accidents include:
- Sprains, strains, and other soft tissue injuries, if you are lucky
- Dental injuries
- Arm and hand trauma if you hit a solid object
- Drowning, when your tube gets stuck against a submerged tree, or you get entangled in a rope joining two tubes and get dragged under the water.
How to prevent tubing accidents?
There are precautions you can take to keep safe on your tube in the river. These include:
- Use life jackets. No matter your swimming skills, always wear a life jacket. Sometimes currents get aggressive, and even skilled swimmers can get overwhelmed.
- Inspect your tube, making sure it's in good condition without visual signs of damage. Listen closely to the tube after inflating it for any hissing noises, which signal punctures.
- Have a plan on dealing with an emergency, and if you are going tubing as a group, bring everyone to speed.
- If you use a boat to pull your tube, do it carefully to avoid falling over.
- You may want to start with training from a professional before taking on the waters on your own.
More tips for river tubing
Here are some more tips for river tubing:
- Don't bring expensive items to the river unless you are OK with losing them. You will be embarking on a casual, relaxing experience — no need to ruin a great day by losing something of value.
- Leave your jewelry at home.
- And when it comes to sunglasses and hats, they don't have to cost a fortune.
- Look up your local area tubing rules to avoid falling on the wrong side of the law. Some locations prohibit drinking as well as the use of styrofoam and balls in the waterways.
Knowing the rules will keep you on the right side of the law.
If you've gone river tubing before, please share your experience in the comments below. Thanks!
Read the full article
0 notes
Text
11 Best Places to Kayak in Wisconsin

Traveling to Wisconsin for summer paddling is a great, active way to spend a vacation in nature.
There is LOTS of water in the state:
- 43,000 miles of rivers
- 15,000 lakes
- 659 mile of Great Lakes shoreline
You can find a complete list of water trails and paddling locations on travelwisconsin.com, but I wanted to give a teaser of what you can expect. Here is are some of the best places to go kayaking in Wisconsin.
Lower Wisconsin State Riverway
The Lower Wisconsin State Riverway runs 92 miles from Sauk Prairie to the Mississippi River confluence. It is one of the longest free-flowing stretches of river in the area.
The Riverway is great for beginner or experienced paddlers looking for a calm, scenic trip. Even though it is a river, it provides a flatwater kayaking experience. Best of all, there are no rapids or dams to go around.
There is a lot to see on Lower Wisconsin State Riverway. You'll pass through dense forests, sandbanks, savannahs, open prairies, and sloughs. There are hundreds of sandbars and dozens of islands to explore as well. You'll see (and hear) an amazing variety of birdlife, estimated to be around 250 species in total. Even bald eagles are common.
The riverway has many entry points, shuttles, free parking, and kayak rentals. You should definitely stay for at least an overnight camping trip if you're in the area.
More info on the Lower Wisconsin State Riverway
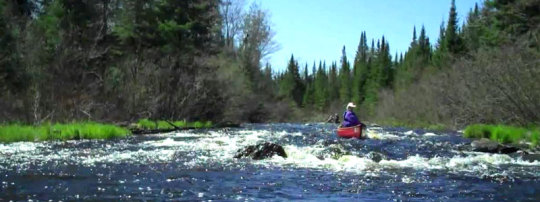
Flambeau River
https://www.youtube.com/watch?v=0RnlwTDm_4g
The Flambeau River, located in northern Wisconsin, descends from 1570 feet to a 1060 feet elevation as it flows to meet the Chippewa River. It is a tremendous recreational waterway, known for the diverse wildlife, fishing, and forests of Hemlock-Hardwood majesty.
You can paddle the northern or southern sections of the river.
The river and its two forks have a few different possible expedition lengths, from short day outings to multi-day camping and even voyages that may last several weeks.
The northern section is mainly preferred by beginners or those who are looking for a leisurely paddle, while the southern section offers aggressive waters for thrill-seekers.
Both the northern and southern forks are surrounded by a diverse forest of trees, including red oak, sugar, red maple, yellow birch, and white ash. The banks are also lined with stands of conifers.
This ecosystem boasts of wildlife such as black bears, white-tailed deer, wolves, and coyotes.
Fishing is significant, too, with smallmouth bass and muskie living in the water.
More info on Flambeau River
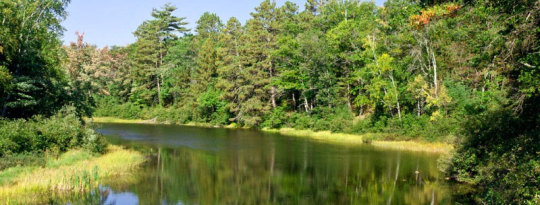
La Crosse River
https://www.youtube.com/watch?v=xHlaimJZNWA
The La Crosse River flows through expansive meadows and wooded bluffs in Southwestern Wisconsin on its way to the confluence with the Mississippi River. The river is fed by a spring and thus maintains a good water level throughout the year. The water is clean and clear, and the bottom is sandy.
There's a section of the river from Sparta to Rockland that offers paddlers the most scenic views, wildlife, and fishing. Put your kayak in at Fisherman's Park in Sparta and follow the river as it roams through wetlands and prairies. Expect some riffles and four moderate ledges that will be delightful to take on.
The river is a habitat for diverse wildlife, including white-tailed deer, waterfowl, blue heron, snakes, and trout. You can bring your own kayak or get one from local outfitters.
More info on La Crosse River
Namekagon River
The Namekagon River is also located on the northern side of Wisconsin and forms part of the National Wild and SCENIC River System. Its name is Ojibwe for "plenty of sturgeons", a type of fish.
But cold water fishing is not the only activity to attract you here; the river stretches and meanders through various small islands and towns, offering a good look at the rural and forested Wisconsin landscape.
Paddling the river shouldn't be an issue. The rapids are rarely of Class II. However, paddling near its head gets a bit difficult late in the season when the water gets shallower.
Other stretches to paddle include the Namekagon Dam to Cable Wayside, the Phipps Landing to Hayward Landing, and Howell Landing to the Riverside Landing.
There are many camping spots along the waterway, so you can arrange multi-day trips and get a satisfying feel of the area.
More info on Namekagon River
Manitowish River
Manitowish River is one of Wisconsin DNR's top paddling routes. It flows through the Northern Highlands-American Legion State Forest and connects to several lakes before forming the Flambeau River's North Fork.
With several access points and campsites, you can design any trip length. Downstream, the river has a reliable current that appeals to quiet water enthusiasts to follow as it meanders through prairie and marshland.
It is excellent for people of all skill levels, and even though it connects with several lakes, the paddling is an authentic river-like experience. The flow is gentle, with a calm current and only occasional riffles.
The first half of the river is slim and wooded and offers the best views as the river flows through marsh grasses, pines, and tall wooded banks. Then past high 47, it veers south and becomes even more secluded. There's no landing until Murray landing on Turtle-Flambeau Flowage. The river is a habitat for beavers, eagles, deer, mergansers, herons, and minks.
More info on Manitowish River
Bois Brule River
https://www.youtube.com/watch?v=HtU-efVRmXo
The Bois Brule River flows from Stone Bridge to Lake Superior and offers paddlers one of the most consistent water flow and scenic beauty. If you want to experience a quiet stretch of the river, consider paddling the upper section. The water here is calm and flows through a narrow, serene setting with small lakes and quiet pools before incorporating several fun chutes and rapids in its way.
The water then flows through another quiet setting before roaring over a series of aggressive rapids and ledges and then winding through a narrow valley. As the river approaches Lake Superior, it gradually widens and slows.
Most of the river passes through Brule River Forest, a habitat for numerous songbirds, deer, beavers, and otters. You'll also spot eagles and ospreys.
For fishing, brook and rainbow trout are the most common species.
More info on the Bois Brule River
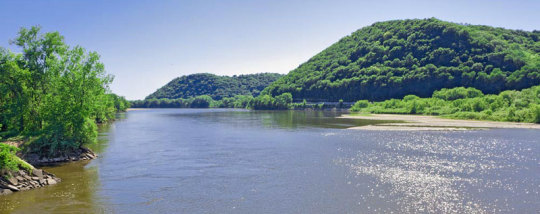
Wisconsin River
From its origin in the north to its confluence with the Mississippi in the South, the Wisconsin River flows through glacial plains, hills, and rapids and has several kayakable sections.
The lower section of the river appeals to those looking to paddle vast waters. It's flat and over a hundred yards wide. It offers quiet paddling as there are no dams and rapids to struggle with. Put your kayak in at Prairie Du Sac and follow the river to Sauk City. Expect dense forests, wildlife, and tall cliffs.
For aggressive waters, head over to the section of the river near Wausau. There's a whitewater park that attracts the best boaters and even holds competitions. Join the races and showcase your skills.
Some of the wildlife you'll likely see here include white-tailed deer, coyotes, fox, otter, beaver, and muskrat. You can also catch a few walleyes, muskellunge, and northern pike.
More info on The Wisconsin River
Peshtigo River
The Peshtigo River is famous for two reasons: it's got the most and largest rapids in the state, and secondly, it's where the deadliest fire happened in 1871, killing an estimated 1500 – 2500 people.
So as you paddle the take on class I to IV whitewater to enjoy the scenic surrounding and invigorate, please pay your respect to the dearly departed.
The water trail on the upper section of the river from Dam Landing is the most challenging, except for unforgiving rapids, narrow chutes, large waves, and sizable boulder gardens. Indeed, the stretch is referred to as the Roaring Rapids section. Don't take on the waters unless you are sure of your skills. Experts will find it a paradise,
For people with intermediate skill levels, try the Goodman Park to Farm Dam water stretch; and for beginners, the Big Joe to CC Bridge stretch is for you.
More info on paddling the Peshtigo River
Pine River
Pine River is a scenic stream that makes its way through the rocky bluffs of Richland County.
You can put your kayak in at Rockbridge in Pier County. There are local outfitters to rent from if you didn't bring your own.
The stretch from Rockbridge to Richland Center is popular among kayakers. It's about 30 feet wide and very windy. It's also known for spectacular rock outcroppings that'll make you feel you've been transported back to ancient times when everything was undammed by human activity.
As you approach Richland Center, the river slows down. The views of the town from the waters are magnificent. This spot is also suitable for beginners to learn how to kayak.
Exit your kayak at County Road AA. You can spot kingfishers, great blue herons, colorful butterflies, and even farm animals.
The approximate time to complete the trail is 6 hours at most.
More info on Pine River
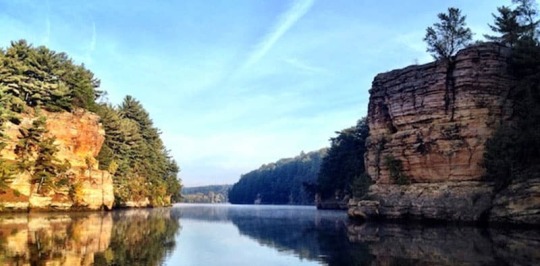
Kickapoo River
The Kickapoo River in Wisconsin's Driftless area flows through the deep valleys and cliffs of towering limestone rocks. If you want to catch the most scenic view, put your kayak in at Ontario and paddle the river as it winds through Wildcat Mountain State Park and then the Kickapoo Valley Reserve towards La Farge. Visit the trail during fall, when it is even more beautiful.
The water here is clean and calm as well. The current is neither weak nor strong, making it great for all the skill levels.
There is only one damn, located near Gays Mills. Because this is the most popular section of the river, it is best you plan your trip for sunrise or sunset to avoid congestion.
More info on the Kickapoo River
Red Cedar River
The Red Cedar River flows in the Southwestern direction from Northeastern Wisconsin to the confluence with the Chippewa River in the South.
It has many sections perfect for kayaking, but the trail stretch from County Road W to the Boat Launch at Colfax Park is the most popular one.
This section of the river offers stunning sequences of gorgeous rocks, hills, and gorges. Both beginner and experienced kayakers can paddle the trail. You'll spend a day relaxing on the waters and enjoying views of mysterious creatures such as sandhill cranes, geese, bald eagle, and also red fox.
You can also paddle the lower section of the river from Menomonie to Dunnville and enjoy a hustle-free ride through rolling hills, the remarkable Accordion cliffs, and the pristine sandbank.
More info in the Red Cedar River
The locations above are some of the best places to go kayaking in Wisconsin. If you know of any amazing water trails or sighs only accessible to paddlers, please let me know in a comment below.
Also, if you are a kayak outfitter at any of these spots and would like to be featured on this page, feel free to get in touch.
Read the full article
0 notes
Text
Yak Back No More - Kayaking Back Pain Solution

Kayaking is a fun form of exercise, where you get to explore nature. However, if you are not careful, you will get "yak back" and curse at your kayak for days. Or even weeks.
I have mild lumbar scoliosis (curvature of the spine), so I've had my share of back pain. You could say, I've been there, done that.
This post will explore what causes kayaking back pain, how to avoid it, and how to make it better if you already have yak back.
What Causes Kayaking Back Pain?
The main culprit for back pain after kayaking is the traditional "L" paddling position.

A combination of two things causes the problem in the L kayaking position:
- Sitting in a non-ergonomic position: The weight of your torso exerts vertical pressure on your lower vertebrae. At the same time, your legs (the most powerful muscles in your body) press against a foot brace and exert horizontal pressure on your lower spine.
- Not shifting position: You are stuck in a tiny seat for a long time without switching to position to release the tension in your legs/back and to stretch.
You might be thinking, don't the foot pegs and back support help you avoid problems from improper posture?
While they might provide you with proper support and allow you to remain in place, they also have certain limitations:
- Restrict your movement
- Result in excessive pressure on your lower back
Make your legs numb
Combining all of the above can easily result in lower back pain, affectionately termed "yak back".
8 ways to treat and prevent kayaking back pain
Over the years, I've found several ways to deal with back pain during & after kayaking. Doing these exercises and stretches regularly will even help you avoid any pain.
Here's are 9 of the most effective ways to alleviate paddler's back.
Maintain proper posture to protect your lower back
Kayak seats provide direct back support, but they do not help you maintain proper posture for long. Time and again, you will be slouching or leaning in one direction.
You have to be self-conscious and try to maintain proper upper body posture and perfect stroke throughout the trip.
Proper posture helps avoid excessive pressure on your back.
Use good paddling technique
The best way to paddle is to treat the kayak as an extension of your body. Rather than using your arms and shoulders to paddle, you have to use your entire body, emphasizing your torso and legs.
Paddling properly and having good posture keeps your entire body moving, disperses pressure from your back and legs, and helps avoid pain after kayaking.
In a nutshell, the proper way to paddle is:
- Leaning slightly forward from the hips, sit tall with your spine long and head high.
- Keeping your arms as straight as possible, hold the paddle out in front of you.
- Drop the paddle blade into the water as perpendicular to the water as possible, and pull back on it. The pulling motion should happen by twisting your torso and using your legs for support. Your arms should remain relatively straight throughout the motion.
- Pull back until the paddle blade is level with your hips.
- Lift the paddle from the water, drop the opposite side into the water, and repeat the motion there.
https://www.youtube.com/watch?v=rUYEH2cOA7c
Stretch before you get into your kayak
Stretching is one of the most important things you can do to help with back pain.
Just 5-6 minutes of targeted stretching will help warm up your muscles and get them ready for the repetitive motion of paddling. Hold each position for at least 15 seconds.
Warning: As with any sport or physical activity, you should get your physician's approval before trying these stretches. Enter each stretch slowly and gradually. If you feel pain with a stretch, stop.
Here are effective stretches targeting the nerves and muscles you use during kayaking.
Sciatic nerve stretches and gliding
The sciatic nerve is a large nerve that runs from your hip joint down to your lower limb. If you slump in your kayak with your feet supported against a foot brace, you are placing excess tension on the sciatic nerves in both of your legs.

This nerve is the root of a widespread kayaking problem called sciatica, which causes the sensation of numbness and pins & needles in your legs.
Stretching and nerve gliding are effective in improving the mobility of your sciatic nerves.
Here are some exercises which help in easing your sciatic nerve.
Knees to chest
This exercise involves lying flat on your back on the ground.
- Your knees should be bent, and the soles of your feet should be on the ground.
- Slowly lift your bent legs so that your thighs touch your chest and you can wrap your arms around them.
- Lengthen the back of your neck by tucking in your chin.
- Hold this pose for at least 30 seconds, up to 1 minute.
- Return to the starting position slowly, and repeat 2 or 3 times.
Standing hamstring stretch
To carry out this stretch, you need a ledge or table in front of you that is just under your hips' height.
- Stand straight.
- Lift one of your legs straight out in front of you, resting the heel on whatever you're using.
- Keeping your spine straight, bend forward at the waist onto your straight leg until you feel the stretch in the back of your leg.
- Repeat with the other leg.
Sciatic nerve gliding exercises
Sciatic nerve gliding is also called nerve flossing.
These exercises do not stretch the sciatic nerve at all. They slide it back and forth, encouraging normal neurodynamics.
The net effect is a loosening of protective muscle tone that restricts movement of the nerve.
https://www.youtube.com/watch?v=tr88uGR5w80
Quadratus Lumborum (QL) stretches
The QL is a paired muscle located on the left and right sides of the posterior abdominal wall, deep in the back of your waist on both sides of your lower spine (lumbar vertebrae).
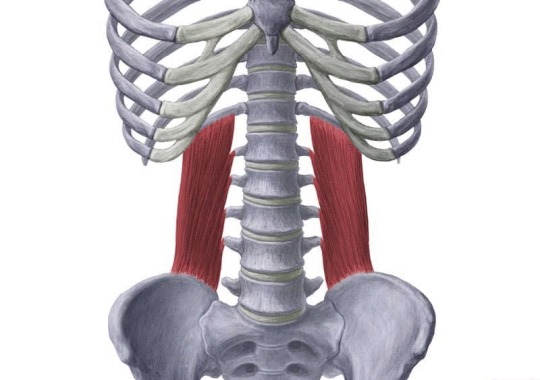
As you paddle, you raise and lower your hips to control your kayak, which can overwork the QL muscle. This may cause lower back pain.
If this muscle is too short, it can result in excessive pressure on your spine as well.
You can find many QL stretches on this page at Healthline, but I've found the following 3 to work best for me.
Knee rolls
I first started doing this stretch in yoga class 15 years ago. It is very beneficial and feels great, not just for kayaking.
- Lay on your back, spread your arms straight out to the side with your palms facing down.
- Bend your knees so your soles are flat on the ground.
- Slowly tilt your legs down towards the ground in one direction while turning your head the other way.
- Relax into the pose for a moment.
- Slowly return to the starting position, and repeat the stretch in the other direction.
- Repeat this 8 times in both directions.
Child's pose stretch
- Lower down onto your hands and knees.
- Bring your hips back in the direction of your heels as far as you can. You may even be able to sit on your heels.
- With your palms on the floor, stretch your arms out forward as far as possible.
- Hold this pose for 15 seconds.
- Walk your hands to the left and move your bumm towards the right. This should stretch your right side.
- Repeat in the other direction.
Side stretch
This is another one from my old yoga class, which the Yogi called leaning palm tree.
- Stand straight, spread your legs shoulder-width apart, and raise your arms above your head. Interlace your fingers.
- From a standing position, raise your arms overhead and interlace your fingers.
- Lean to the left slowly as far as you can, and return to the center position.
- Repeat this in each direction 8-10 times.
Hamstrings stretches
The long muscles in the rear of your upper leg running from between your knee and hip are called hamstrings.

Many people have tight hamstrings. The main goal of stretching your hamstrings is to loosen them.
But you need to be careful.
Folding forward as you did in elementary school might be asking for trouble, as it might cause disc problems. If you're going to attempt sitting or standing forward folds, make sure you keep your spine straight. Don't go any further if you need to hump your back.
A better way of stretching your hamstrings is doing so while laying on your back. This method keeps your back straight as an arrow.
You will need a strap or a belt for the following hamstring stretch.
- Lay down straight.
- Place the strap around the ball of one foot and hold each end of the strap with one hand.
- Lift your leg straight up.
- Flex your foot and pull it toward yourself by simply pulling on the strap. You will feel the back of your leg stretching.
- Hold this position while keeping your leg straight.
- Slowly lower your leg to the ground, and repeat with the other leg.
This stretch does it for me, but here are some more if you need them.
Here is a video on what you can do with backpain after kayaking.
https://www.youtube.com/watch?v=-eHp8y45ar8
Strengthen your core muscles
Many people think paddling comes from the arms and shoulders, but as you now know, correct use of the kayak paddle relies on your torso and legs.
The strength of your midsection (your core) is way more important than your arm strength.
There are many fancy core strengthening exercises you can do, but sticking with an old-school core workout works perfectly. If it's good enough for Nick Troutman (pro freestyle kayaker), it's good enough for me.
Here are the things he does.
- Crunches
- Side crunches
- Out-ins
- Butt lifts
- Leg lifts
- Toes touches
- Windshield wipers
- Bicycles
The key, just like with any exercise, is consistency. You need to work on your core several times a week to get results.
Is your paddle long enough?
If your kayak paddle is too short for your height, you probably bang your hands on the edge of your boat and lean sideways with your strokes. No bueno.
Here is a detailed article on how to choose kayak paddles.
Get proper seat cushioning
When you consider that kayaking involves sitting 100% of the time, you will agree that a good kayak seat and proper cushioning are just as important as a good paddle.
Proper cushioning is very important, especially in hardshell kayaks and high PSI dropstitch-floor inflatables.
Take breaks
Since you cannot switch positions while paddling, get out of the kayak now and then to stretch and walk around.
Stay Hydrated
Kayaking in the sun can cause dehydration if you don't replenish your fluids.
Staying hydrated also protects the discs in your spine and gives you the energy to keep going and feel good tomorrow.
The recommended daily minimum water intake for men is 3 liters (101 ounces) and 2.2 liters (74 ounces) for women.
But since you're paddling in the sun all day, you need to increase this minimum level.
Is kayaking bad for your back?
Everybody's body is different. Kayaking involves sitting and rotation of the spine, which may not agree with some people and cause back issues. If you have previous back injuries or just a bad back in general, you should probably talk with your doctor or physical therapist before you start kayaking.
However, using the proper paddling technique, creating good ergonomics, conditioning your core, and stretching will prevent most injuries. It is a no-impact exercise that uses smooth, controlled movements. Limiting your spinal rotation until your core is strengthened and your stretching routine is in place will help keep your back pain-free.
I have lumbar scoliosis, which can act up at times. I've found that the combo of core strengthening exercises and paddling actually makes my back stronger. Of course, I am mindful of all of the ways you can avoid back pain from kayaking (as I listed above).
Lifting a heavy hardshell kayak is more dangerous than paddling. If you have a bad back, getting a lighter inflatable kayak like these helps.
Conclusion
Kayaking is a very beneficial form of exercise:
- It is a no-impact exercise that does not wear on your joints
- It develops cardiovascular fitness
- It increases strength and builds your back, torso, leg, chest, shoulder, and arm muscles
However, kayaking can result in stubborn back pain if you're not careful.
Take care of your body! The exercises and stretches in this article can help avoid or even overcome yak back, so you can enjoy the kayaking experience rather than worrying about back pain.
Read the full article
0 notes
Text
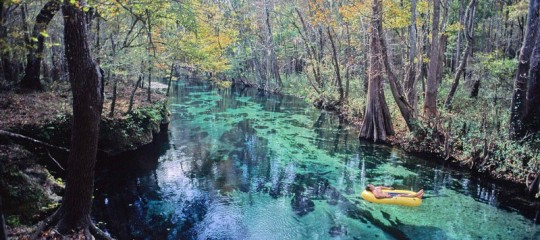
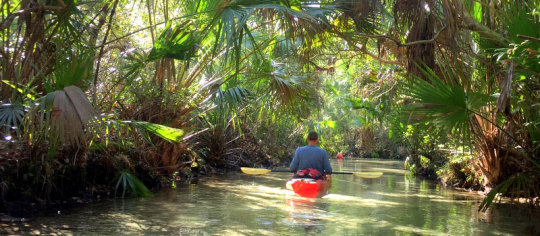
13 Best Places to Kayak in Florida
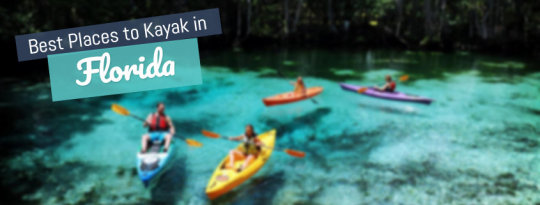
There is no shortage of incredible kayaking trails in Florida. Nature lovers will love the lush landscapes and wildlife you can spot during paddling.
Kayaking is a large industry in Fl, you will find many tour operators all across the state.
Here are some of the most beautiful places to go paddling in the state of Florida.
Suwannee River Paddling Trail, North Florida
Ask anyone who has kayaked a few places in Florida, including the Suwannee River Paddling Trail, and they will tell you it's the most beautiful and fun place in North Florida.
The trail lies between the White Springs and the Gulf of Mexico, dotted with abundant springs, wildlife parks, and historic sites in between. Indeed, there are approximately 200 springs in the region and most lie in the trail.
When the water level is normal, and the current is moderate, it doesn't take much effort to paddle along, but you'll face stronger currents in high water levels. It's common to see shoals of fish pulling over close to your boat during low water level periods. If you have your Florida freshwater license, you can return home with a good catch. Expect a quiet trail full of beautiful scenes and wildlife. The river's location, far from the noisy city, makes the trail pleasant.
More info on the Suwannee River Paddling Trail.
Wakulla River, North Florida
Teaming with beautiful wildlife, including gators, fish, and turtles, the ten-mile stretch between CR 365 Bridge on Wakulla Springs and US 98 Bridge makes for a great kayaking trail. Indeed, the Wakulla Springs are among the deepest and biggest freshwater springs on the planet.
It is a great kayaking spot for amateurs and experienced paddlers. Being a tidal river means you’ll be going against the current quite a bit. Most people choose to paddle on the weekends or warm summer months. The river temperatures remain below 70 Celsius, making it a great escape from the warm Florida temperatures.
You can charter a kayak or bring your own, and you can also bring your dog along but beware of motorboats and gators if you plan to let him/her swim. Tour boats can start inside the Edward Ball Wakulla Springs State Park.
More info on the Wakulla River.
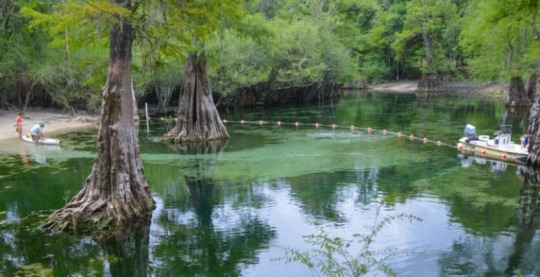
Ichetucknee Springs, North Florida
The Ichetucknee Springs State Park is characterized by supreme crystalline clear waters courtesy of the nearby freshwater springs. Indeed, it's been designated a National Natural Landmark.
The park is open every day of the year for kayaking and canoeing activities. The river is about 6 miles long, with the upper portion lying within the state park and best for kayaking during cooler months.
There are also nature trails that go through a flourishing forest or magnificent sandhill environment characterized by gigantic longleaf pines. This hiking trail is a wildlife haven for softshell turtles, wild turkeys, beavers, and wood ducks. Expect little resistance as you glide downstream.
More info on Ichetucknee Springs.
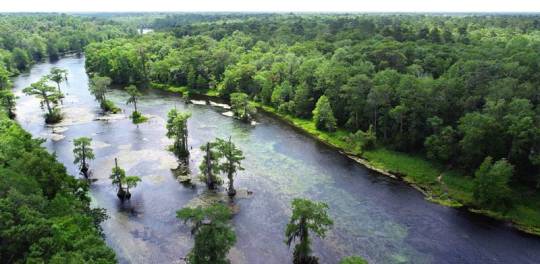
Blackwater River, Northwest Florida
The tannic summer waters that characterize the Blackwater River make for a fantastic kayaking trail in North-western Florida. Start near the Okaloosa County, where Florida meets Alabama, and end at the Blackwater State Park.
It's 31-miles of relaxing, breath-taking adventure. The trail is a haven for flora such as water fern, bladderwort, water lily, tupelo, and fauna such as white-tailed deer, turkeys, otters, bobcats. You will also see an array of colorful birds such as red-headed woodpeckers, hawks, Mississippi kites, and warblers.
You won't see any gators, though, because of the cool temperatures and the river's sandy bottom. Anyway, expect an exciting adventure; the river flows 2-3 miles/hour, so the current is swift. The park offers restrooms, outdoor showers, and large pavilions.
More info on the Blackwater River.
Juniper Run, Central Florida
Enjoy the crystalline waters and the cool fresh air as you paddle through the Ocala National Forest along the Juniper Run.
This waterway is among the top 25 places to paddle in the US. It’s a whole 7-miles of pure adventure. Expect to see diverse fauna in the Ocala National Forest. You will also see lush rows of palm trees and cypress as you glide through the slim and meandering river.
However, the difficulty level is high because of strong currents and submerged logs combined with the meandering and twisting around vegetation and trees. It can take about 5 hours to complete. Also, bring your inflatable kayak because there are no local outfitters.
More info on Juniper Run.
The Beaches of Destin, Northwest Florida

Florida's coastal area gets its Emerald Coast nickname from the turquoise waters, white sands colorful array of fauna that populates Destin Beaches. For a full experience of these pretty beaches, go on a kayak trip from Destin Harbour to Crab Island.
You can rent a boat from local outfitters or bring yours. Dustin harbor is always busy with boat rental companies, restaurants, and curio shops.
Some of the wildlife you’ll see as you cruise through the island include dolphins, manatees, and sea turtles. You will also have to deal with a lot of boats and powerful currents. At the end of the cruise, congregate on the island for food, drinks, and music with the locals!
More onfo on the Beaches of Destin.
Coastal Dune Lakes, Northwest Florida

There are many freshwater lakes alongside the ocean in Florida, but the 15 coastal dunes on the Northwest side are the best for kayaking in tannic brown waters surrounded by dunes.
Snuggled among sea-grass-covered dunes beyond the Gulf of Mexico, the 15 lakes extend over 42km of coastline from the Topsail Hill Preserve to Rosemary Beach State Park.
The trail is totally navigable by kayak, stand-up paddleboard, or canoe. Each of the coastal dune lakes differs in size, but they are all very easy to paddle, even for beginners. Expect diverse wildlife, fantastic scenery, and calm waters, but you can't bring your dog along!
More info on the Coastal Dune Lakes, Northwest Florida.
Pellicer Creek, Northeast Florida

The Pellicer Creek Aquatic Preserve is an undisturbed salt marsh drained by small branches and creeks, flowing into the nearby Matanzas and Pellicer Flats.
This pristine estuarine system has a rich history, and the estate boasts having the county's oldest lodge and the first in-ground swimming pool.
The Pellicer kayaking trail starts from the Princes Place Preserve to the US 1 adjacent to the Palm Coast. It's a 6-mile long trip that's very easy to paddle, expect gentle currents, with lots of picnic areas and wildlife such as deer, bobcats, and otters.
Remember to bring sunscreen!
More info on the Pellicer Creek, Northeast Florida.
Winter Park Chain, Central Florida

The Winter Park Chain of Lakes in Florida boasts 6 freshwater lakes that promise an unforgettable kayaking experience. Bring your camera along because there's plenty of the city's architectural history to capture as you paddle through the sophisticated canals. Wildlife in the kayaking trail; includes herons, turtles, and ospreys. It's also commonplace to see a shoal of fish as they swim around searching for food in the lakes.
Expect a relaxing, breath-taking experience. The canal is well shaded, preventing wind and sweltering heat. This kayaking trail is very easy, even for beginners. Start at Dinky Dock Winter Park or Fort Maitland Park because you'll find good parking spots.
More info on the Winter Park Chain.
Indian River Lagoon, Central Florida

The Indian River Lagoon in Central Florida is best for kayaking during the dark so that you can capture photos in the bioluminescent waters because of glowing algae.
Start at Haulover Cabal, Titusville, and remember to bring bug spray, sea footwear, towel, etc. You will pass Mullet Head Island and see the federally protected Rookery. You will also see different types of birds, including Anhinga, Ibis, and Herons, and depending on the wind direction, you can hear them sing. Other common wildlife on the island includes Bottlenose Dolphin, manatee, gators, and even sharks!
More info on the Indian River Lagoon.
Little Talbot Island State Park, Northeast Florida

The waterways between Little Talbot Island State Park and Amelia island on Northeast Florida boast of tidal creeks, and salt marshes are a favorite among paddlers.
This spot offers plenty of route options that boast diverse wildlife, including rare birds. It's a great kayaking spot for both beginners and experts. Depending on the wind and tides, the journey can be challenging or easy. In any case, it's a fun way to explore the water channels around Little Talbot and Amelia Island.
More info on the Little Talbot Island State Park.
Indian Key, Florida Keys
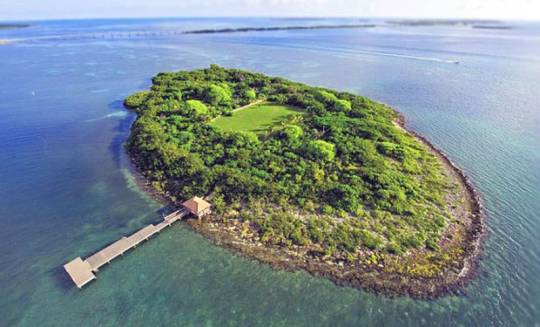
If you're looking for a private kayaking spot that's also easy to access, the Indian Key Historic State Park won't disappoint. This uninhabited island off the Overseas Highway is easily accessible from Islamorada and only 20 minutes away via kayak.
It offers plenty of marine wildlife sightings. Kayakers also come here to explore the ruins of Ghost Town, where the remains of a lost village from the 1800s rest. It's also a great sunbathing spot or just a place to enjoy the emerald waters. Expect to grass flat mash of low water. Depending on the wind and heat, it can be a tough 30-minute trip!
More info on the Indian Key.
Weeki Wachee, Central Florida

It wouldn't be a complete list without including the Weeki Wachee. A trip down the Weeki Wachee blue waters is effortless as the current is friendly and helps paddle the boat greatly. The Weeki Wachee trail boasts of the biggest freshwater cave system in the country. Also, the river is surrounded by streams from nearby floodplain forests and boasts of blue sapphire waters.
Enjoy wildlife sightings, including herons, gators, raccoons, manatees, otters, and ibis, and visit the nearby state park for mermaid shows. This trail offers various paddling routes for both beginners and experts. If you want it easy, start at Weeki Wachee Springs and paddle to Rogers Park. If you want it hard, take the Bayport route to Rogers Park. In all cases, pets are not allowed. Remember to bring a lot of sunscreens!
More info on the Weeki Wachee.
Here are some of the most frequently asked questions about paddling in Florida.
Is kayaking in Florida dangerous because of alligators?Alligators usually do no pose a threat to humans. As long as you don't try to feed alligators or disturb them (especially after mating season), they will ignore you. They feed from dusk till dawn, which is when they are more active. Alligators are usually scared of humans and do not approach us... but it's still best to stay away if you see one.
Do you need a license to kayak in Florida?No, you do not need a license to go kayaking in Florida. Kayaks and canoes are considered non-motorized boats, which do not require registration in Fl.
What are the rules of Kayaking in Florida?There are a few rules and regulations if you want to go paddling in Fl:
- Boats under 16' need something to produce a loud sound, such as a whistle.
- After sunset, kayakers need to have a flashlight.
- The Florida boating under the influence law allows blood alcohol levels of under 0.08% for kayakers.
Are there specific kayaking vacations in Florida?Yes, there are many kayaking tours and adventure operators in Florida that offer complete kayaking vacations with kayak/tent rentals and tour guides.
If you know of any other great kayaking locations or have a kayaking tour business you would like featured here, please leave a comment below.
Read the full article
0 notes
Text
13 Best Places to Kayak in Florida

There is no shortage of incredible kayaking trails in Florida. Nature lovers will love the lush landscapes and wildlife you can spot during paddling.
Kayaking is a large industry in Fl, you will find many tour operators all across the state.
Here are some of the most beautiful places to go paddling in the state of Florida.
Suwannee River Paddling Trail, North Florida

Ask anyone who has kayaked a few places in Florida, including the Suwannee River Paddling Trail, and they will tell you it's the most beautiful and fun place in North Florida.
The trail lies between the White Springs and the Gulf of Mexico, dotted with abundant springs, wildlife parks, and historic sites in between. Indeed, there are approximately 200 springs in the region and most lie in the trail.
When the water level is normal, and the current is moderate, it doesn't take much effort to paddle along, but you'll face stronger currents in high water levels. It's common to see shoals of fish pulling over close to your boat during low water level periods. If you have your Florida freshwater license, you can return home with a good catch. Expect a quiet trail full of beautiful scenes and wildlife. The river's location, far from the noisy city, makes the trail pleasant.
More info on the Suwannee River Paddling Trail.
Wakulla River, North Florida

Teaming with beautiful wildlife, including gators, fish, and turtles, the ten-mile stretch between CR 365 Bridge on Wakulla Springs and US 98 Bridge makes for a great kayaking trail. Indeed, the Wakulla Springs are among the deepest and biggest freshwater springs on the planet.
It is a great kayaking spot for amateurs and experienced paddlers. Being a tidal river means you’ll be going against the current quite a bit. Most people choose to paddle on the weekends or warm summer months. The river temperatures remain below 70 Celsius, making it a great escape from the warm Florida temperatures.
You can charter a kayak or bring your own, and you can also bring your dog along but beware of motorboats and gators if you plan to let him/her swim. Tour boats can start inside the Edward Ball Wakulla Springs State Park.
More info on the Wakulla River.
Ichetucknee Springs, North Florida

The Ichetucknee Springs State Park is characterized by supreme crystalline clear waters courtesy of the nearby freshwater springs. Indeed, it's been designated a National Natural Landmark.
The park is open every day of the year for kayaking and canoeing activities. The river is about 6 miles long, with the upper portion lying within the state park and best for kayaking during cooler months.
There are also nature trails that go through a flourishing forest or magnificent sandhill environment characterized by gigantic longleaf pines. This hiking trail is a wildlife haven for softshell turtles, wild turkeys, beavers, and wood ducks. Expect little resistance as you glide downstream.
More info on Ichetucknee Springs.
Blackwater River, Northwest Florida

The tannic summer waters that characterize the Blackwater River make for a fantastic kayaking trail in North-western Florida. Start near the Okaloosa County, where Florida meets Alabama, and end at the Blackwater State Park.
It's 31-miles of relaxing, breath-taking adventure. The trail is a haven for flora such as water fern, bladderwort, water lily, tupelo, and fauna such as white-tailed deer, turkeys, otters, bobcats. You will also see an array of colorful birds such as red-headed woodpeckers, hawks, Mississippi kites, and warblers.
You won't see any gators, though, because of the cool temperatures and the river's sandy bottom. Anyway, expect an exciting adventure; the river flows 2-3 miles/hour, so the current is swift. The park offers restrooms, outdoor showers, and large pavilions.
More info on the Blackwater River.
Juniper Run, Central Florida

Enjoy the crystalline waters and the cool fresh air as you paddle through the Ocala National Forest along the Juniper Run.
This waterway is among the top 25 places to paddle in the US. It’s a whole 7-miles of pure adventure. Expect to see diverse fauna in the Ocala National Forest. You will also see lush rows of palm trees and cypress as you glide through the slim and meandering river.
However, the difficulty level is high because of strong currents and submerged logs combined with the meandering and twisting around vegetation and trees. It can take about 5 hours to complete. Also, bring your inflatable kayak because there are no local outfitters.
More info on Juniper Run.
The Beaches of Destin, Northwest Florida
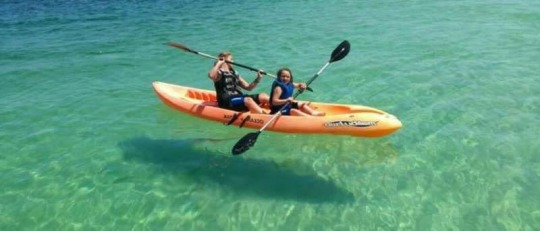
Florida's coastal area gets its Emerald Coast nickname from the turquoise waters, white sands colorful array of fauna that populates Destin Beaches. For a full experience of these pretty beaches, go on a kayak trip from Destin Harbour to Crab Island.
You can rent a boat from local outfitters or bring yours. Dustin harbor is always busy with boat rental companies, restaurants, and curio shops.
Some of the wildlife you’ll see as you cruise through the island include dolphins, manatees, and sea turtles. You will also have to deal with a lot of boats and powerful currents. At the end of the cruise, congregate on the island for food, drinks, and music with the locals!
More onfo on the Beaches of Destin.
Coastal Dune Lakes, Northwest Florida
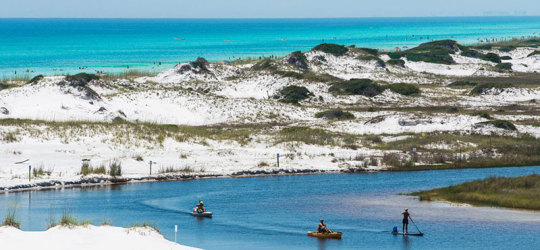
There are many freshwater lakes alongside the ocean in Florida, but the 15 coastal dunes on the Northwest side are the best for kayaking in tannic brown waters surrounded by dunes.
Snuggled among sea-grass-covered dunes beyond the Gulf of Mexico, the 15 lakes extend over 42km of coastline from the Topsail Hill Preserve to Rosemary Beach State Park.
The trail is totally navigable by kayak, stand-up paddleboard, or canoe. Each of the coastal dune lakes differs in size, but they are all very easy to paddle, even for beginners. Expect diverse wildlife, fantastic scenery, and calm waters, but you can't bring your dog along!
More info on the Coastal Dune Lakes, Northwest Florida.
Pellicer Creek, Northeast Florida
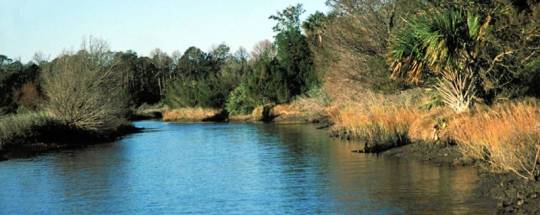
The Pellicer Creek Aquatic Preserve is an undisturbed salt marsh drained by small branches and creeks, flowing into the nearby Matanzas and Pellicer Flats.
This pristine estuarine system has a rich history, and the estate boasts having the county's oldest lodge and the first in-ground swimming pool.
The Pellicer kayaking trail starts from the Princes Place Preserve to the US 1 adjacent to the Palm Coast. It's a 6-mile long trip that's very easy to paddle, expect gentle currents, with lots of picnic areas and wildlife such as deer, bobcats, and otters.
Remember to bring sunscreen!
More info on the Pellicer Creek, Northeast Florida.
Winter Park Chain, Central Florida
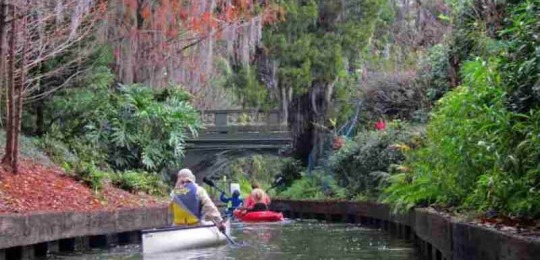
The Winter Park Chain of Lakes in Florida boasts 6 freshwater lakes that promise an unforgettable kayaking experience. Bring your camera along because there's plenty of the city's architectural history to capture as you paddle through the sophisticated canals. Wildlife in the kayaking trail; includes herons, turtles, and ospreys. It's also commonplace to see a shoal of fish as they swim around searching for food in the lakes.
Expect a relaxing, breath-taking experience. The canal is well shaded, preventing wind and sweltering heat. This kayaking trail is very easy, even for beginners. Start at Dinky Dock Winter Park or Fort Maitland Park because you'll find good parking spots.
More info on the Winter Park Chain.
Indian River Lagoon, Central Florida
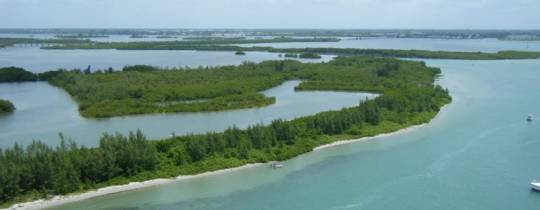
The Indian River Lagoon in Central Florida is best for kayaking during the dark so that you can capture photos in the bioluminescent waters because of glowing algae.
Start at Haulover Cabal, Titusville, and remember to bring bug spray, sea footwear, towel, etc. You will pass Mullet Head Island and see the federally protected Rookery. You will also see different types of birds, including Anhinga, Ibis, and Herons, and depending on the wind direction, you can hear them sing. Other common wildlife on the island includes Bottlenose Dolphin, manatee, gators, and even sharks!
More info on the Indian River Lagoon.
Little Talbot Island State Park, Northeast Florida
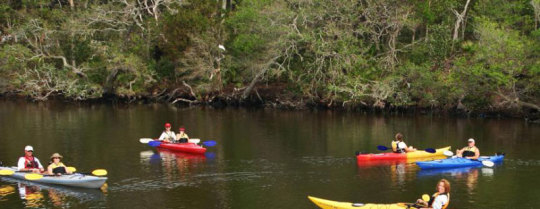
The waterways between Little Talbot Island State Park and Amelia island on Northeast Florida boast of tidal creeks, and salt marshes are a favorite among paddlers.
This spot offers plenty of route options that boast diverse wildlife, including rare birds. It's a great kayaking spot for both beginners and experts. Depending on the wind and tides, the journey can be challenging or easy. In any case, it's a fun way to explore the water channels around Little Talbot and Amelia Island.
More info on the Little Talbot Island State Park.
Indian Key, Florida Keys

If you're looking for a private kayaking spot that's also easy to access, the Indian Key Historic State Park won't disappoint. This uninhabited island off the Overseas Highway is easily accessible from Islamorada and only 20 minutes away via kayak.
It offers plenty of marine wildlife sightings. Kayakers also come here to explore the ruins of Ghost Town, where the remains of a lost village from the 1800s rest. It's also a great sunbathing spot or just a place to enjoy the emerald waters. Expect to grass flat mash of low water. Depending on the wind and heat, it can be a tough 30-minute trip!
More info on the Indian Key.
Weeki Wachee, Central Florida
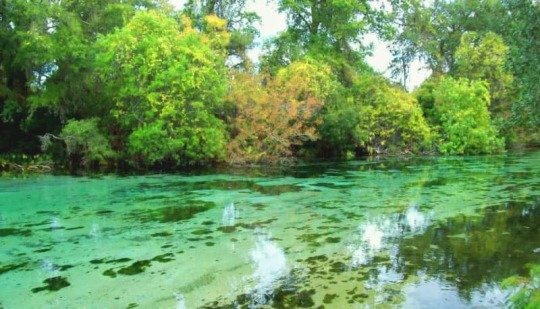
It wouldn't be a complete list without including the Weeki Wachee. A trip down the Weeki Wachee blue waters is effortless as the current is friendly and helps paddle the boat greatly. The Weeki Wachee trail boasts of the biggest freshwater cave system in the country. Also, the river is surrounded by streams from nearby floodplain forests and boasts of blue sapphire waters.
Enjoy wildlife sightings, including herons, gators, raccoons, manatees, otters, and ibis, and visit the nearby state park for mermaid shows. This trail offers various paddling routes for both beginners and experts. If you want it easy, start at Weeki Wachee Springs and paddle to Rogers Park. If you want it hard, take the Bayport route to Rogers Park. In all cases, pets are not allowed. Remember to bring a lot of sunscreens!
More info on the Weeki Wachee.
Here are some of the most frequently asked questions about paddling in Florida.
Is kayaking in Florida dangerous because of alligators?Alligators usually do no pose a threat to humans. As long as you don't try to feed alligators or disturb them (especially after mating season), they will ignore you. They feed from dusk till dawn, which is when they are more active. Alligators are usually scared of humans and do not approach us... but it's still best to stay away if you see one.
Do you need a license to kayak in Florida?No, you do not need a license to go kayaking in Florida. Kayaks and canoes are considered non-motorized boats, which do not require registration in Fl.
What are the rules of Kayaking in Florida?There are a few rules and regulations if you want to go paddling in Fl:
- Boats under 16' need something to produce a loud sound, such as a whistle.
- After sunset, kayakers need to have a flashlight.
- The Florida boating under the influence law allows blood alcohol levels of under 0.08% for kayakers.
Are there specific kayaking vacations in Florida?Yes, there are many kayaking tours and adventure operators in Florida that offer complete kayaking vacations with kayak/tent rentals and tour guides.
If you know of any other great kayaking locations or have a kayaking tour business you would like featured here, please leave a comment below.
Read the full article
0 notes
Text
Full Dropstitch Inflatable Kayaks (Perform Like Hardshells?)
Inflatable kayaks have always been a portable, storage-friendly alternative to hardshell kayaks, but they were lacking in one department: handling and performance.
Why?
As you might know, the air bladders of traditional inflatable kayaks cause the boat to sit high on the water. Even though their performance is adequate for most paddlers, it is not on par with that of hardshell kayaks.
With the evolution of dropstitch technology, this has changed.
High-pressure drop-stitch floors and SUPs have been around for a while...
But manufacturers now make full drop-stitched inflatable kayaks (termed FDS) that resemble and thus perform as hardshell kayaks do.
Pros and cons of dropstitched air chambers in kayaks
Drop-stitch air chambers are held tightly together by tens of thousands of threads. These chambers are made to be flat, instead of round.
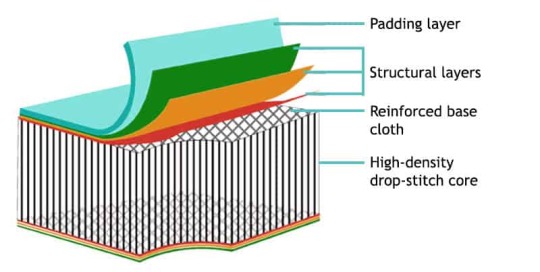
Using drop-stitch technology has a number of advantages compared with traditional air bladders:
- Can be inflated to rock-hard rigidity (~10 PSI as compared to 1-3 PSI), eliminating longitudinal sagging
- Less width, therefore smaller profile -> faster
- More complex body shapes can be created
- And as a result, you have an inflatable kayak that performs like a hard-shell kayak.
However, there are a number of disadvantages to dropstitch kayaks as well:
- The main drawback is that drop-stitch tech is much more expensive ($1,000+).
- Many paddlers feel that fully dropstitch kayaks are "tippy", not as stable as traditional inflatable kayaks. I've found this to be somewhat true, they definitely need some getting used to, but it can be done.
- They are hard to reenter if you capsize. This is true since they are not as stable as wider inflatable kayaks. Taking a paddle float is recommended.
- Full dropstitch kayaks are heavier than comparable inflatable yaks, because of all the space yarn holding the high PSI chamber together.
This all means that advanced paddlers will get the most benefit out of these kayaks.
Best Fully Dropstitch Inflatable Kayaks in
Innovative manufacturers like Sea Eagle and Advanced Elements have started making inflatable yaks with bodies made entirely of drop-stitch air chambers. This is a huge innovation in the market!
It brings all of the advantages of inflatables and adds the tracking and handling of hard-shell kayaks.
Here is a list of the fully drop stitched inflatable kayaks I know of (updated ). While the list is not long yet, it is growing as more boat manufacturers enter the niche.
Sea Eagle Razorlite - 393rl & 373rl
Sea Eagle was the first company to create an FDS kayak in 2015, called Razorlite. Since then, they have improved upon the initial design to make it more stable.
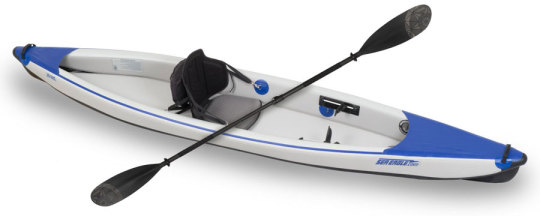
The boat uses 4" dropstitch material for the sidewalls and 3" dropstitch material for the floor. There are 3 air chambers to inflate, which should take no more than 7-10 minutes.
This new version of the Razorlite has a built-in adjustable footrest, which makes controlling your boat easier and longer trips more comfortable.
You can see by the shape of the hull that the Razorlite is very sleek and sculpted to perform like a hardshell. The sharp, rigid bow and stern are molded, the hull is concave, and the large skeg all play together to enable the Razorlite to cut through waves and track straight. You can reach speeds of up to 6 MPH when paddling hard with this kayak.

The Razorlite comes in 2 lengths:
- Razorlite 393 - This is the single paddler version at 393 cm long and 71 cm wide.
- Razorlite 473 - This is the tandem kayak at 473 cm long and 76 cm wide.
You can easily go on multi-day trips with this kayak. The capacity of the 393rl is 225 kg, and that of the 473rl is 340 kg!
https://www.youtube.com/watch?v=hoPbEWoeETs
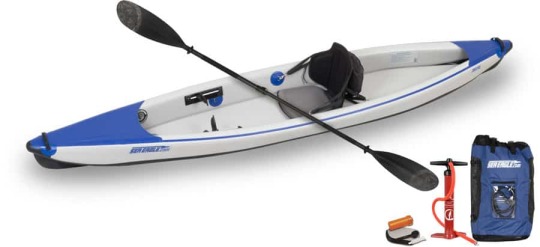
Sea Eagle Razorlite

Sea Eagle quality and performance
Best FDS kayak
The Razorlite was the first-ever fully dropstitched kayak. The kayak is stable and easy to paddle, you can use it as a canoe as well. It tracks just like a hardshell kayak, which is a big deal! It comes in 2 versions: one-person and 2-person.
Check today's prices for both:
393rl
473rl
Advanced Elements Airvolution - AE3029 & AE3030
Advanced Elements is sure to be in the innovation game. They have also created a FDS kayak model called Airvolution, which comes in 2 sizes: the AE3029 at 396 cm and the A3030 at 442 cm.
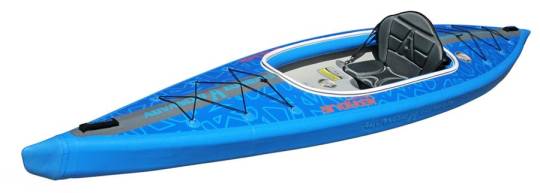
The Airvolution only has 2 air chambers to inflate (hull and floor), which makes the job a little bit quicker.
This boat also has a removable skeg for hardshell-like tracking, and molded bow & aft nose caps to cut through the water.
The Airvolution is wider than the Razorlite though, at 84 cm for the shorter model, and 94 cm for the longer one. This make it the widest full dropstitch kayak in this list. This makes it stable, but also sacrifices some of the advantages of sleek, narrow design. In fact, it is wider than their popular AdvancedFrame model.
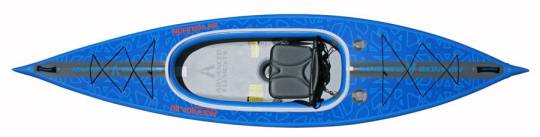
This kayak has an inflatable footbrace instead of the adjustable footpegs in the Sea Eagle Razorlite. The footpegs are way more advanced and provide more comfort.
The Airvolution was relased in 2020, and updated for the 2021 season. I have a feeling they will continue perfecting it.
https://www.youtube.com/watch?v=7nlo2meNX6s
Advanced Elements Airvolution
Stable touring kayak
Runner-up
The Airvolution is a little wider, thus stabler than the other full dropstitch inflatable yaks on this list. You could even use it as a SUP if you wanted to. The kayak is full of features that make it a great touring kayak, but it's not as good at making the most out of the dropstitch technology as the Sea Eagle Razorlite.
Check today's prices:
AdvancedElements
Itiwit Strenfit X500 (Decathlon)
Itiwit is a sub-brand of Decathlon, a sporting goods store. It developer the Strenfit X500 for intermediate-advanced kayakers who are looking for an inflatable sit-inside kayak that performs like a sit-inside hardshell kayak.
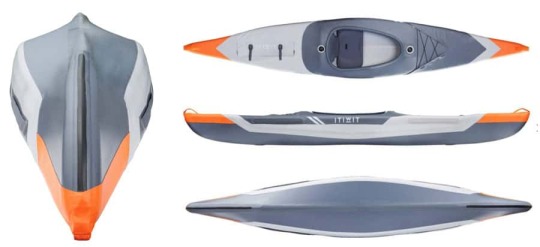
You have to give it to them, this is one great looking kayak!
It is a sit-inside kayak supported by inflatable arches inside. Alltogether, there are 5 chambers to inflate: the bottom, 2 sides, and 2 arches.
It has a coaming, which can be fitted with an Itiwit spray skirt in case you decide to go in whitewater.
Interestingly, the capacity of this kayak is rather low at 125 kg. Compare that to the 225 kg capacity of the Sea Eagle Razorlite.
The Strenfit X500 is a high performance kayak made for experienced paddlers. Many users comment on how "tippy" it is, which is evident by the design of its hull. The Itiwit website states that inflating the bottom air chamber to only 5 PSI will make the kayak more stable.
https://www.youtube.com/watch?v=UJhSJvg1f8k
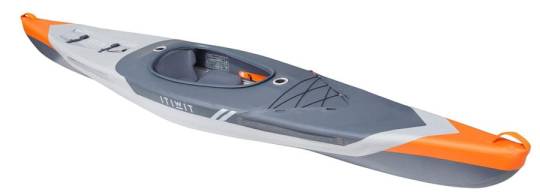
Itiwit Strenfit X500
Robust and light
For advanced kayakers
The Strenfit X500 is a sit-inside kayak that performs like a hard-shell would. It is not as stable a other inflatable kayaks though, which is the reason I would only recommend it to advanced kayakers.
Check today's prices on:
Decathlon
Sea Eagle Razorlite vs Advanced Elements Airvolution
If you're hung between which FDS inflatable yak to choose, here is a great video comparing 2 of the most popular models.
https://www.youtube.com/watch?v=7ANvYTM2Pck
The results of the comparison between the Razorlite and the Airvolution are what you would expect:
- The wider Airvolution is more stable,
- The Razorlite is faster, but a bit tippier,
- The Razorlite has more room to pack your gear if you go on multi-day trips,
- The seats of the Razorlite are more comfortable.
All in all, the Razorlite wins out over the Airvolution. Here are the details of the Razorlite kayaks:
https://SeaEagle.com/RazorLite
Should you get a full drop-stitch inflatable kayak?
Drop-stitch manufacturing processes are labor-intensive and complicated. This means products made using drop-stitch elements will always be more expensive.
Whether you should get a fully drop-stitch inflatable kayak depends on how you plan on using your boat. And your budget of course.
- Beginner recreational paddlers will be just fine with traditional inflatable kayaks.
- Intermediate paddlers looking to go on longer trips can start flirting with the idea of buying an FDS inflatable kayak, but even they will be OK with a high-performance kayak like the AE AdvancedFrame or the Expedition.
- Advanced kayakers with a large-enough budget will get the most benefit out of fully drop-stitch kayaks.
If you have experience with FDS kayaks or know of any good ones not on this list yet, please leave a comment below.
Can a full dropstitch kayak replace a hardshell kayak?
Yes, a quality dropstitch kayak like the Sea Eagle Razorlite is just as good as a hardshell kayak, with the added benefit of easy portability.
No more messing around with roofracks and figuring out where you are going to store the hardshell during winter.
Inflating and deflating a dropstitch kayak takes 10 minutes, and the boat is half the weight so you don't need 2 people to carry it.
Read the full article
0 notes
Text
Why you should cover your inflatable boat
Buying an inflatable dinghy is your first step to having loads of fun on the water. However, the purchase represents an investment, and as such, protecting it with an inflatable boat cover when you're not using it is a good idea.
How can an inflatable boat be damaged when not in use?
Rocks and branches in the water are generally not the biggest enemies of inflatable watercraft.
Nature is.
Inflatables are vulnerable to the wear and tear that nature and our environment can cause:
- UV rays when left out in the sun.
- Bad weather conditions like rain and snow.
- Pollutants in the air.
- Things that might collect on/in the boat like bird poo, leaves, flying sharks, etc.
Do you need a cover for an inflatable boat?
Although inflatable boats are durable, we must protect them from nature's ravages. If you plan on leaving your inflatable boat outside while not in use, you should buy a cover to shield it from the elements.
Even though the best inflatable boats are made with high-quality materials, they do not resist the wear and tear of UV rays like fiberglass. An inflatable boat cover will protect your inflatable boat from the sun, as it prevents UV rays from damaging it.
Without a cover, a PVC inflatable boat left out in the sun will degrade very quickly. The lifespan of a SIB that is well cared for is 10-20 years, but if you leave it out in the sun, it will start falling apart in 2 years.
Synthetic rubber boats (like Hypalon) are more resistant to UV rays, but they are also more expensive. You should cover Hypalon boats as well when not in use.
If you plan on taking your inflatable boat on a trailer, getting a cover is a wise choice. You will protect the boat's material and anything you put inside of it while on the road.
What to consider when buying an inflatable boat cover
Choosing a cover for an inflatable boat is different than for a traditional fiberglass boat. It is not as complex as choosing a boat, but there are several things you need to know about boat covers beforehand.
Types of dinghy covers
You can use several types of covers to protect your boat, depending on what kind of boat you have.
All of them are inexpensive, easy to put on, take off, and store.
I will list each type of cover, just so you are familiar with all of them.
Inflatable boat cover: These covers are ideal for inflatable boats and dinghies. They are easy to use and secure since you can put them on and take them off in just a few minutes.
Using either integrated elastics or drawstrings and straps, you can secure the cover tightly.
Pro tip: Trailing covers will collect rainwater in the center. This is called pooling. If you're leaving it on for a long time, it's a good idea to place a support pole or something similar in the middle of the boat that elevates the cover center, allowing the water to flow off.
Trailerable cover: As the name suggests, a trailing cover, also known as towing cover, can be used while you are towing your boat on a trailer. It will keep all your accessories safe inside the boat, and won't flap around if you get the right size.
How fast can you go with a trailerable boat cover?
The maxium speed you can go with varies from cover to cover, but is around 40 MPH (65 km/h) in general.
Flat cover: This type of cover is used on sailboats. It has openings for the shrouds, mast, and forestay. Its design incorporates a tie-down on the main halyard, which prevents water from collecting.
Overboom cover: This type of cover is intended for sailboats and should be used when you will leave the boat somewhere for the winter. Overboom covers have a unique design that incorporates an opening for the mast and is shaped to cover the boom completely.
Under cover: As the name suggests, these covers are ideal for protecting the boat's underside when it is being moved on a trailer. Generally, they are made of durable materials such as nylon and have straps and cords to secure them to prevent damage during the trip.
Inflatable boat cover materials
Acrylic: When it comes to boat covers, acrylic is considered one of the best:
- They are breathable, which reduces the humidity and mildew that may occur under the cover.
- They are resistant to ultraviolet rays and will retain their shape.
- Another positive aspect of this material is that you can choose from a wide range of colors.
- Acrylic boat covers have a longer warranty.
On the negative side, though, they have less resistance to wear and tear, and you need to waterproof them every 1-2 years.
Polycotton: Boat covers made out of polycotton are a great option as well. The material is a blend of cotton amd polyester, which effectively combines the strenth of polyester with the breathability of cotton.
- When the material comes into contact with water, the cotton fibers swell, making them more waterproof.
- As the material dries, the cotton fibers shrink. This lets any moisture trapped under the cover out as well.
Polycotton is heavier and more expensive that other materials, but it is a great choice.
Polyester: These covers are coated with PVC or vinyl, making them much more durable against nasty weather. Also, polyester covers are flexible, do not shrink, and are very easy to handle and wash.
Their disadvantage is that when it rains or it is cold, the vinyl coating tends to wrinkle. This makes the cover look very messy. But if this doesn't bother you, polyester is a good choice.
Nylon: Covers made out of nylon are the cheapest option. While they will protect your boat from debris, their problem is that the material is not highly resistant to ultraviolet rays.
In general, nylon covers have a much shorter lifespan than other types of more potent and more durable materials.
If you need to use the cover to protect against strong UV, I do not recommend getting a nylon cover. You will end up replacing it in 2 years.
Breathable vs. non-breathable boat covers
Breathable: Breathable boat cover materials like acrylic are perfect if you want to keep humidity away from your boat.
Breathable covers inhibit molding underneath them because they allow moisture to escape. As you know, this is important for inflatable boats.
They are commonly used on older boats with wooden hulls as well.
Non-breathable: Non-breathable boat covers like PVC-covered polyester are highly resistant to harsh weather conditions. They do not allow rain to enter the boat but do not allow air to circulate inside either. This might lead to molding under the cover.
Glued vs. sewn seams
Whether the cover is stitched or sewn will depend on what type of material it is made of.
Glued seams: Generally, PVC covers are glued, not stitched. They are much easier to repair, but glued seams will fail with exposure to the Sun's UV rays.
Sewn seams: Acrylic and cotton seams are double-stitched, not glued. They are easy and flexible to work with and offer good resistance and strength. They have a cleaner appearance and can be restitched if they tear.
The disadvantage of this type of stitching is that it takes skill to fix; you can't just use a thread and needle yourself.
Stretch cord vs. rope
How you attach a cover to your boat is significant in keeping the inside protected and not allowing the cover to fly off when used on a trailer.
Stretch covers: Stretch covers are sized and shaped for your boat. They provide a watertight seal and offer good protection. They are made of an elastic material that is easy to install and take off.
The problem with stretch covers is that the elastic tends to wear out, which causes it to lose its elasticity. This can loosen the cover to such an extent that you may need to replace the whole thing.
Rope fasteners: Covers that are fastened with a rope running around the material's edge are a bit harder to use than stretch covers. However, they last longer since you can replace the rope if it tears.
The disadvantage of rope fasteners is that they are not 100% watertight, which means some water can get in. This might lead to mildew over time.
Extra features of inflatable boat covers
Support posts: These posts raise the center of trailing covers, effectively making water run off instead of collecting in the middle of the cover. You can buy a support post like this one, or just place something in the middle of your boat.
Mold protection: Mold is a big problem with boats. I would advise that you get a cover that is treated to protect it against mold. Keep in mind that even if you have this protection, it will diminish over time. You will probably need to apply some form of protection every 1-2 years.
Water resistance: You would think that all boat covers are water-resistant, but the low quality ones are not.
Stitched ventilation: Some boat covers have sewn-in vents that help circulate moist air out of the boat. This helps in keeping the internal surfaces dry. The openings of the vents face downward, so rainwater cannot get in.
Reinforced seams, corners, and edges: Putting a boat cover and taking it off a lot can degrade the integrity of the cover. This is most apparent along the seams and edges of the cover. The best covers are reinforced with multiple layers of fabric in these areas, increasing their overall lifespan.
Motor cover: Some covers are made larger in the back to fit an outboard motor. If you have a dinghy with an outboard, you can either find a cover that can fit the motor under it, or get a separate cover for your motor.
Console cover: If you have a RIB with a console, you will usually need to buy a cover that is 1 size larger than what would otherwise fit your boat based on it's measurements.
Taking measurements for an inflatable boat cover
Boat covers come in many sizes, so you'll need to choose one that will be just the right size for your boats.
Let's look at how to measure your boat for a cover.
You will only need to take 2 measurements and know the hull style:
- The length of the boat in a straight line at its longest point
- The width of the boat at its widest point
- Specialized covers account for the hull style as well, so you'll want to know the shape of your boat. While the bow of most inflatable boats and dinghies is similar, the aft is not. Dinghies, in particular, need an open stern cover that reaches out to cover the chambers behind the stern.
You will need to add to these measurements if you have anything protruding out from the body that will be covered.
If the cover is too large, it will sag and billow in wind.
If the cover is too small, it will simply not fit, or overly stretch the fabric leading to reduced lifespan.
Taking care of your boat cover
Depending on what material your cover is made out of and what chemicals it has been treated with, you will need to occasionally retreat it with and or all of the following:
- UV protectant
- Mildew remover
- Waterproofer
Taking care of your cover will 3x its lifespan. Sooner or later, the cover will irrepearibly tear, but don't let it be your fault.
How often do you need to reapply the chemicals depends on how quickly they degrade. For example, in the Florida sun, you might need to reapply the 303 UV protectant every 3-4 months.
Read the full article
0 notes
Text
The Only 9 Boating Knots You'll Ever Need
An important skill you'll need to learn for boating is how to tie sailors' knots.
Why?
For any given situation at a marina or out on open water, you will need to choose a knot to effectively and safely accomplish a task.
Nautical Knot Dictionary
First, know that you may use the terms nautical knots, sailors' knots, and boating knots interchangeably. They all mean the same thing.
There are a few sailors' terms you need to know before learning how to tie nautical knots. Here is the most important terminology you'll run into when learning to tie knots.
- Rope vs line: A rope is just a plain-ol' rope, but a rope becomes a line when it has a knot on it and has a purpose on a boat.
- Working end of a line: You can refer to the end of a line as either a working end or a standing end. The working end is the end that is being used to tie a knot.
- Standing end of a line: The end of a line not being used to tie the knot. The standing end is the opposite part of the working end.
- Bight: A curved section in a line, attained by simply folding a rope so that each part lays next to the other.
- Loop: When a ropes cross itself to form a partial circle, a bight becomes a loop.
- Overhand loop: When you cross the working end OVER the standing part.
- Underhand loop: When you cross the working end UNDER the standing part.
- Elbow: Two or more ropes next to each other.
- Cleat: A device used for securing a rope. Cleats are usually used to secure a boat at a marina.
- Noose:
Read the full article
0 notes
Text
Sit-Inside vs. Sit-On-Top Kayaks - 4 Reasons One is Better
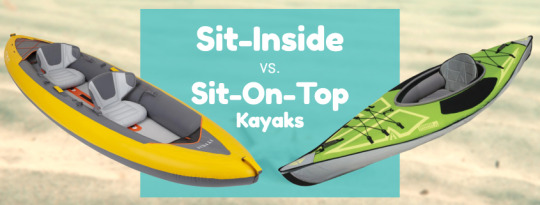
Both hardshell and inflatable kayaks can be categorized into two different styles:
- Sit-on-top kayak (SOT) and
- Sit-in kayak (SIK)
The two designs differ drastically from one another, and each suits a different purpose.
Let's look at how they are different and the pros and cons of each design.
The differences between sit-on-top vs. sit-in kayaks
The most apparent distinction between sit-inside vs. sit-on-top kayaks is that SIKs have an enclosed cockpit that positions the paddler inside the boat at or below the water level. In contrast, SOT kayakers sit on top of the kayak above the water's surface.
This fundamental divergence of design affects every aspect of their use and purpose.
The sit-on-top model is the most popular design among beginners and recreational kayakers because it does not make the paddler feel like they are trapped inside of the kayak's cockpit if they capsize.
If they do tip over for some reason, they are far easier to reenter than a SIK.
The sit-inside model is more prevalent among intermediate and advanced paddlers because its design provides a significantly lower center of gravity, resulting in enhanced secondary stability during specific activities (which I'll talk about later).
The cockpit of a SIK kayak is surrounded by a rim for attaching a spray skirt to keep water out.
They have similarities as well
Even though there are some significant differences between the two styles, their main parts are similar:
Read the full article
0 notes
Text
Do Kayaks Need a Skeg or Rudder? Let's see!

Most hard-shell and inflatable kayaks have the option for a skeg or a rudder. But what are they and what do they do?
What is a Kayak Skeg and How Does It Work?
A skeg is a fin (also called a tracking fin) that is either built-into your kayak's hull or can be attached to it.
It is used to help keep your vessel going straight (tracking) with minimal effort when the wind and waves would affect the boat's handling. It achieves this by trimming the boat.
Some touring kayaks have adjustable skegs that can be lowered and raised in various increments from the cockpit. Small adjustments in how far it is lowered into the water help trim the boat to handle quartering or crosswinds better.
What is a Kayak Rudder and How Does It Work?
Rudders can be attached to the stern of a kayak or come built-in as through-hull rudders, and are controlled with cables connected to foot pedals. They can be lowered into the water or raised back out as needed.
The main purpose of the rudder is to assist in the tracking (going straight) of your boat, but of course, you can use it to steer as well.
Read the full article
0 notes
Text
6 Best Kayaking Shoes for Winter [To Stay Warm & Dry]
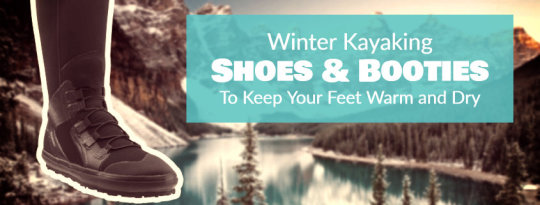
Kayaking shoes/booties are different from ordinary footwear. They need to be light, flexible, provide good traction, and hard enough for launching and walking on sharp rocks and gravel. And of course, shoes made for winter kayaking also help keep your feet dry and warm in the cold.
In this article, I will help you find the perfect kayaking shoes for paddling in cold weather.
First I'll list the best ones, then I'll teach you how to choose a pair that is suitable for your needs.
Best Winter Kayaking Shoes
Here is a list of the top shoes and booties you can get for winter kayaking.
NRS ATB Wetshoes
https://www.youtube.com/watch?v=LVe94WBdILs
The NRS ATBs are ultra-rugged wetshoes you can use for kayaking, if you plan on hiking on rough terrain as well.
They have thick workboot soles that give your feet protection and reliable traction in the water and on land. They are great when you need to walk over sharp rocks, and perfectly protect your drysuit's drysocks.
The shoes have 7mm neoprene insoles, which provides a nice cushion from any impact.
But this, of course, comes at the expense of extra bulkiness, something that is not ideal on simple kayaking trips where you won't be hiking much. NRS also put a tab on the back for swimming fins. These are good if you need them, but if not, just add to the bulkiness of the shoes.
Don't think the ATBs are proper hiking shoes though.
Read the full article
0 notes
Text
5 Best Kayaking Drysuits That Actually Keep You Dry!
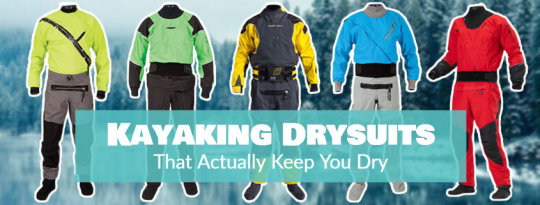
Kayaking drysuits open up new horizons, as they allow for year-round paddling and fishing even during the cold months of winter. They are a true game-changer for passionate kayakers.
I started winter kayaking several years ago, it is an awesome hobby that is hard to stop once you start.
Having tried many drysuits during the years (rentals and own), in this article, I will give my opinion on the best drysuits you can use for kayaking. Also, I will explain how they work and what you need to look out for if you buy one.
Read the full article
0 notes