#the quality of the video was horrible like a 720p twitter video will never have great quality but this was something else
Text
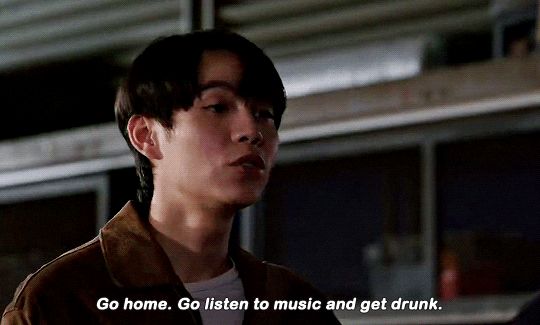


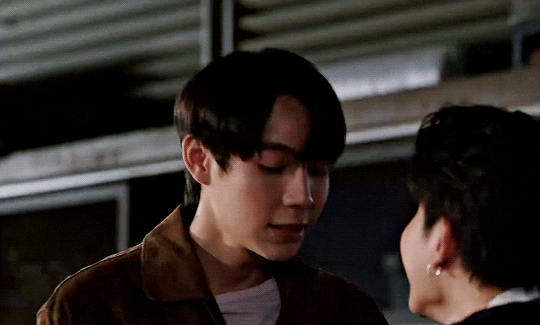
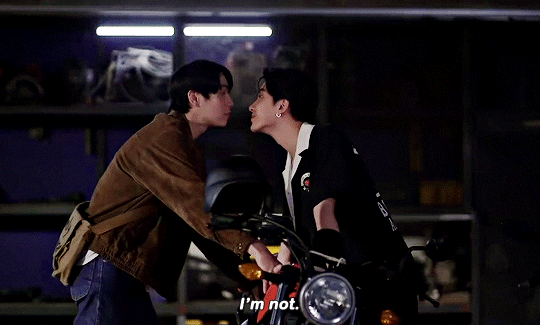

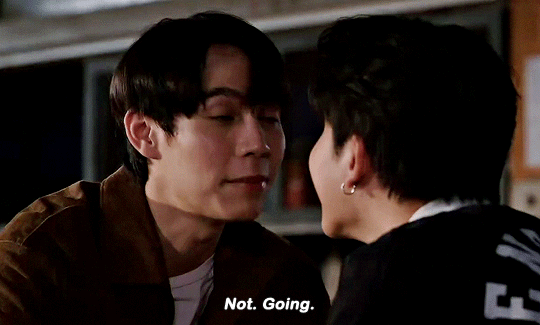
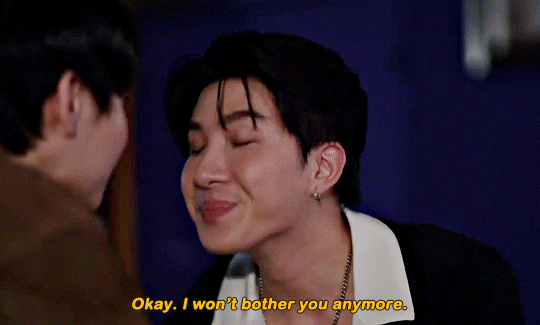


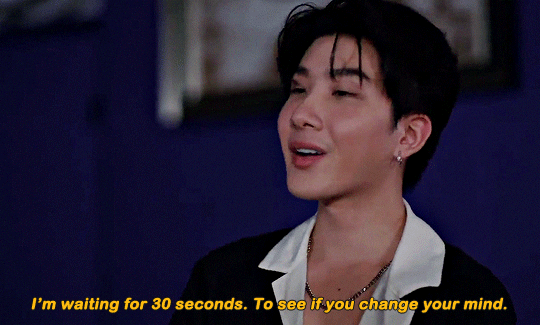
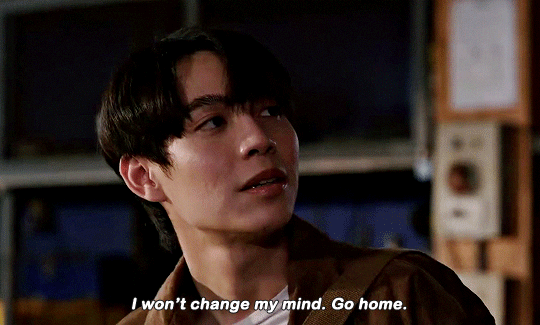
I have to go now, though. [...] You're not gonna come with me anymore? Want to go to my place and listen to music? I love the songs you play for me. I bought a lot of vinyls. Come on. See? You can't get enough. No thanks. I have to go back home. As for you...
ONLY FRIENDS | Deleted Scene
#only friends the series#ofts#only friends#first kanaphan#khaotung thanawat#raysand#sandray#my edits#the quality of the video was horrible like a 720p twitter video will never have great quality but this was something else#and i'm not talented enough to make gifs look pretty and crisp#so it is what it is ig#onlyfriendsedit
850 notes
·
View notes
Note
heya! I know you've probably been asked this before, but how do you make your gifs? :D They're super duper cool and I was thinking about making some gifs myself. Thank you and have a lovely day!
Hey!! I’ve been asked this before, but I don’t think I’ve ever really made a tutorial about it, so I suppose this would be a good time to do it, huh? And thank you sO much ahhHH!!! I really appreciate it :”)) I hope you have a wonderful day as well! xx
Okay so there are two different ways I make gifs, depending on what I’m giffing. I will go through both processes under the cut.
Programs I use:MacPhotoshop CC 2017UMPlayeruTorrentMiro Video Converter
Alright, let’s get started!
Gif Process 1: DVDs
For this process, I use UMPlayer to take screencaps from DVDs. UMPlayer is basically the Mac version of KMPlayer for PC. You can find a tutorial on how to use UMPlayer here. Make sure you understand how to take screencaps before continuing. From this point on, I’m gonna put everything into steps :)
Step 1: Load screencaps into photoshop by going to File > Scripts > Load Files into Stack

this window will pop up:

Step 2: Click browse, go into the folder you saved your screencaps in, select the ones you want to use for your gif, and they will load into the box like this:
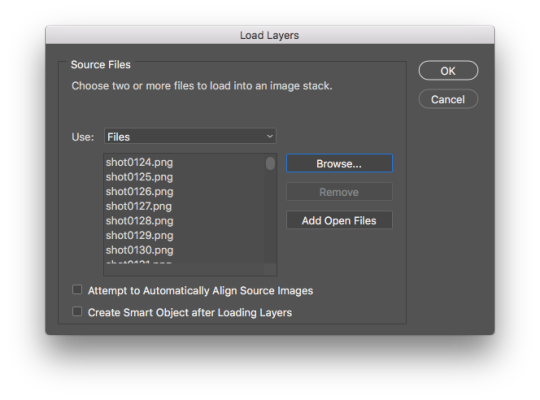
Press OK and wait for the layers to load. This may take a while, depending on how many screenshots you’re uploading. I try to never exceed more than 120 layers at a time at the very most.
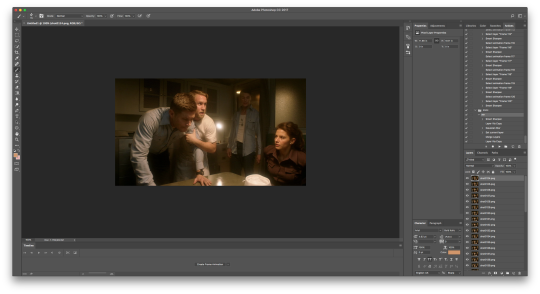
Step 3: Once your layers have finished loading, make sure your timeline is showing so you can work with your frames. Go to Window > Timeline (or Animation, depending on your version of ps) to open it up
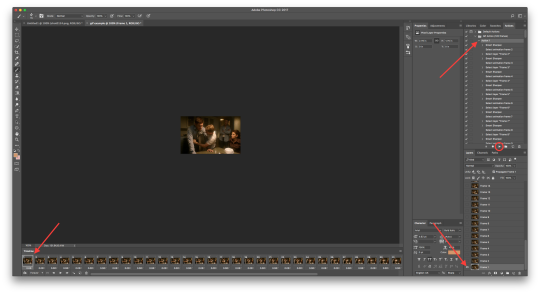
now your window should look something like this:
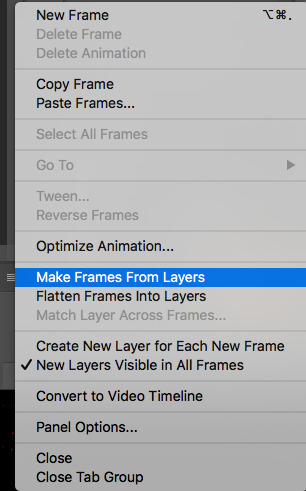
Step 4: Click Create Frame Animation in your timeline, and one frame will appear. Then click that little paragraph-looking button to the right of your timeline and select Make Frames From Layers
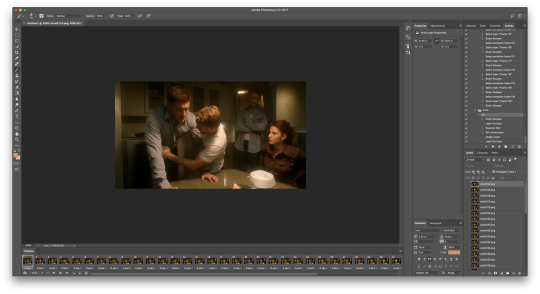
now your timeline should look like this:
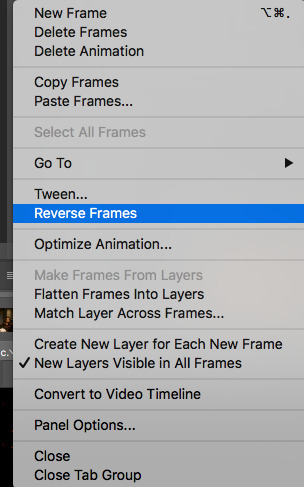
Step 5: *THIS STEP IS IMPORTANT* Your screenshots upload in reverse order. So you need to select that little paragraph-looking button again and click Select All Frames then Reverse Frames.
Step 6: This is when I move my frames to a new canvas. So you’ll want to make sure all your frames are selected, then click Copy Frames in that same dialogue box as before.
Step 7: Create a new file and enter the dimensions you want to use. For gifsets with two columns, I use 268px x 168px. For single column gifsets, I vary in height but be sure to keep your width at either 500px or 540px. That’s what matters.
Step 8: Paste your frames into your new canvas. They will load at the same size they were before, so you’ll need to adjust that by selecting all your layers on the righthand side of your photoshop window, press cmd (or ctrl) + T to transform the layers, hold down the Shift button to keep the proportions in place, then scale your layers to your new canvas.
This is similar to how it should look now:

Step 9: Set your timing for each frame and duration of the gif while you have all your frames selected. On the bottom left of your timeline is where you can adjust all these things.
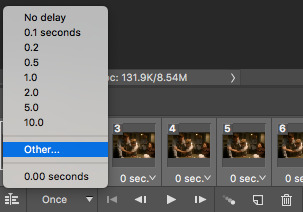
Change Once to Forever so that your gif loops continuously. For the timing of each frame, I usually keep it around 0.06 seconds. You can select Other to type in your preferred timing.
Step 10: Now is when I make sure my gif is looking the way I want. You can click the play button on the bottom left there to preview your gif. Watch for any glitches or anything in case the video paused or skipped while you were taking screencaps. You also want to keep the number of frames in mind, because the more frames you have, the larger your file size will be.
Step 11: Okay so next is when I do my sharpening. I know there are several ways you can do this, but I usually use a sharpening action for my gifs. To do that, click Flatten Frames Into Layers in that dialogue box on the upper right of your timeline. You’ll notice that in your layers window on the right, you will have a duplicate of your layers on top of one another, only now they’re called frames. I delete the old layers when I do this to keep it organized, but you don’t have to.
NOTE: You can find sharpening tutorials here for other ways to do it, and you can find sharpening actions here.
When using a sharpening action, make sure you flatten your frames into layers as I just mentioned. Then make sure your first frame in your timeline and your first frame layer on the righthand side are both selected. Then select the action you want to use in your actions window and click play.
Gif sharpening actions will vary in length as far as how many frames it will sharpen. Mine sharpens 120 frames at a time, so once it reaches that 120 frame limit, the action will stop. If there are less than 120 frames, a dialogue box like this will pop up:
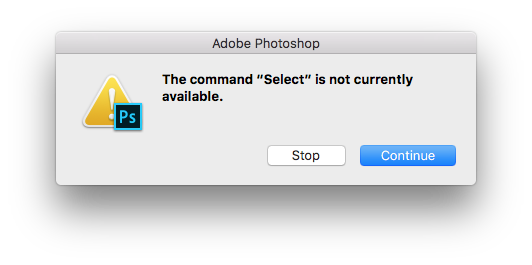
click Stop.
Step 12: Coloring! From here, it’s all up to you how you color your gifs. You can find all sorts of PSDs all over the place, like here. Look through resource blogs to find and collect PSDs you like. Remember that the same coloring won’t be compatible for everything, so you’ll have to do some tweaking here and there. Or, if you’re good at coloring, you can make your own! I’m horrible at coloring from scratch omfg so PSDs are super helpful lmao :)
Step 13: Once you’ve finished coloring the gif to your liking, save it by going to File > Export > Save for Web
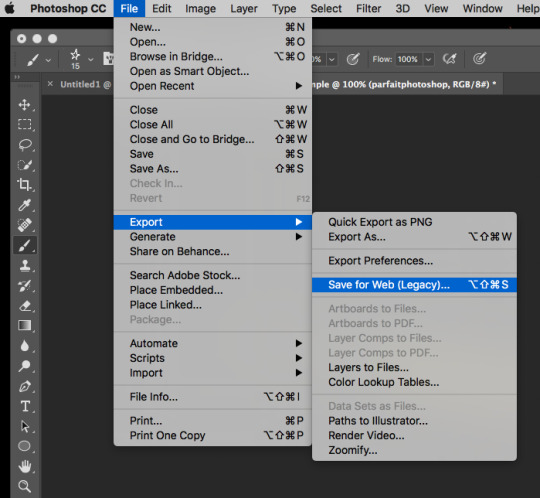
this box will pop up:
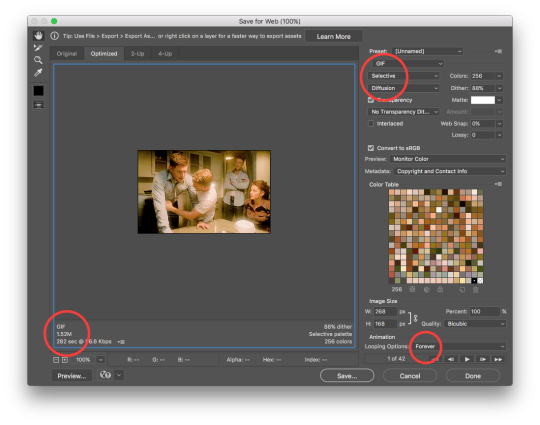
The things circled in red are the things you want to pay special attention to in order to make sure your gif works and saves properly. I always preview my gif and make tweaks as needed. The tumblr file size limit for gifs is 3M now (hECK YEAH) so be sure your gif is under that limit, otherwise it won’t work.
Step 14: Upload your gif to tumblr and BAM, look at that! All done! Great job, fam :)
Gif Process 2: Importing Videos
I use this gif process for anything I don’t own on DVD (so new episodes that have just recently aired, youtube/twitter/instagram videos, etc).
Step 1: For new episodes, I find torrents on sites like thepiratebay, extratorrent, or wherever I can find one with good dimensions (always pay attention to that, 720p is usually your best bet for quality). I click the magnet link, which opens uTorrent, and the episode downloads to my computer in mkv format.
Step 2: Then I convert the video from mkv to mp4 format using Miro Video Converter, because mkv is not compatible with photoshop. mp4 is pretty much compatible with anything, so it’s helpful to have it in this format anyway. The conversion will take quite a while, so now’s a good time for a break! Go pee, pet ur cat, grab some cereal. Stretch it out, you’ve probably been sitting a while, right?
Step 3: Once the video is converted, now you can upload it to photoshop to gif it! Go to File > Import > Video Frames to Layers

Find your converted video and open that. Then this box will pop up:
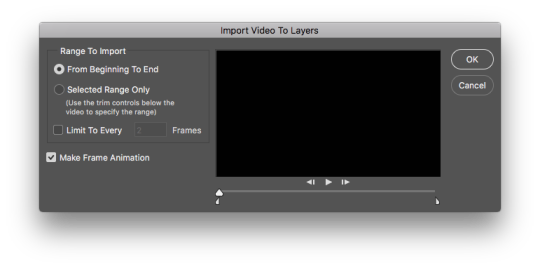
Step 4: Move the arrows below the timeline to select the scene you want to gif and click OK. (You’ll want to keep the arrows really close together for long videos like episodes.) It may take a while for the frames to upload, so be patient.
Step 5: The frames upload in order, so no need to reverse them this time. Go through your frames and cut out the ones you don’t want/need to keep your gif at a reasonable file size.
Step 6: Everything is the same from here on out, so refer to steps 6-13 in the previous process :) And then you’re done! BOOM, nailed it.
At the end of it all, you can show off a pretty gif like this:

So that’s what I’ve got for ya! The biggest thing with gifmaking, in my opinion, is patience. It takes a lot of patience to sit through and find ~just the right~ scenes and screencap it all, wait for things to load, color things ~just right~, etc. It can be a huge pain in the butt, but once you get the hang of it, it’s not so bad. I hope this has been helpful! If you have any further questions, feel free to ask :)) Best of luck in all your gif endeavors!
#completeresources#itsphotoshop#chaoticresources#yeahps#gif tutorial#thespngraphicmakersnet#visualresourcesnet#multifandomgraphicmakersnet#spneditsnet#my tutorial#anonymous#answered
20 notes
·
View notes
Last Seen Blogs

monsta-x-biased
Monsta X Biased

ruffly1122
ruffly

smiles-bunny
twf !!

watt24-blog
Untitled

grinoir
Grinoir