#tele photo lens
Video
000060130008-edit by Simon Hartmann
Via Flickr:
09/30/2023 10:53am 1/125 f16 little bush against lake view 41.54304° N, 81.63801° W
#analog photography#film photography#analog#film#35mm#Nikon#Nikon film camera#Nikon SLR#Nikon F2#Nikon F2 Photomic#Auto Panagor Tele Zoom lens 85-205mm f3.8#tele photo lens#Panagor#Fujifilm#Fujicolor#Fujicolor Superia HQ 200#Superia#Fujicolor Superia#200 ISO#grain#Memphis Film Lab#Cleveland Metroparks#Lakefront Nature Preserve#Cleveland#OH#Ohio#flickr
8 notes
·
View notes
Text
Experienced a moment and decided to go out to find funny critters.
Found this guy (presumably a common drone fly?) :

(still havent charged the camera with the right lens but at least this time i had a camera at all)
Lou also found this very important little guy:

#taking fly photo with 600mm tele lens: half-success#like. it didn't work /great/ but it somewhat worked. a little. for a moment.
7 notes
·
View notes
Text
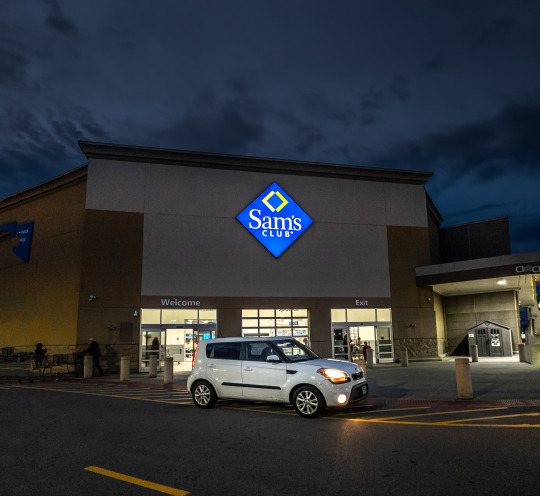
Mental Health Sushi
My brain was a bag full of cats today and I really needed to get out of the house. I was also craving sushi.
Or maybe I was craving sushi because of the brain cats?
I don't get paid until Saturday so my friend told me he would buy me dinner to help me calm the cats.
I still don't have my new lens. They said it would be in stock by "end of week" so hopefully that means tomorrow. But my brain cats were also desiring photography.
Some demanding-ass cranial felines to be sure.
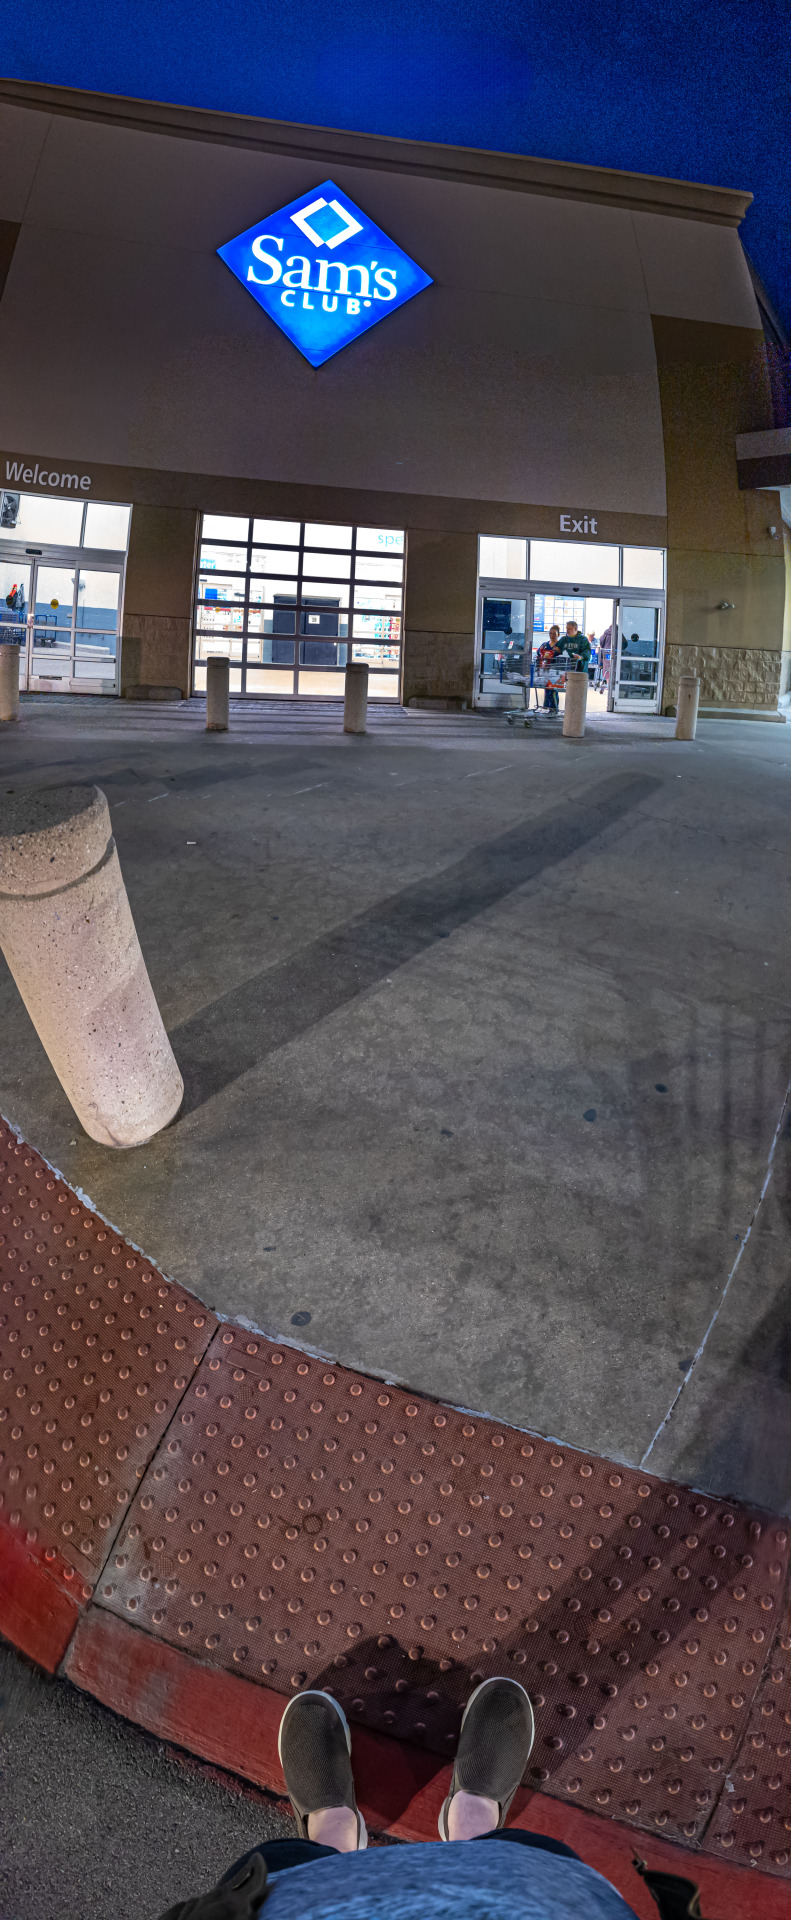
I headed across the river to Nice Sam's and I challenged myself to take some photos as I acquired sushi.
Sam's is a challenging place to get cool photos so I thought I would do something experimental to make things more interesting. I love panoramic photos but most people look at stuff on their phones and horizontal panos always look like a tiny sliver. So I wondered if it would be cool if I did vertical panoramas.
I started looking straight down and took 5 photos gradually raising my camera upward.

To all of the grade school bullies who made fun of my belly... I can totally see my feet.
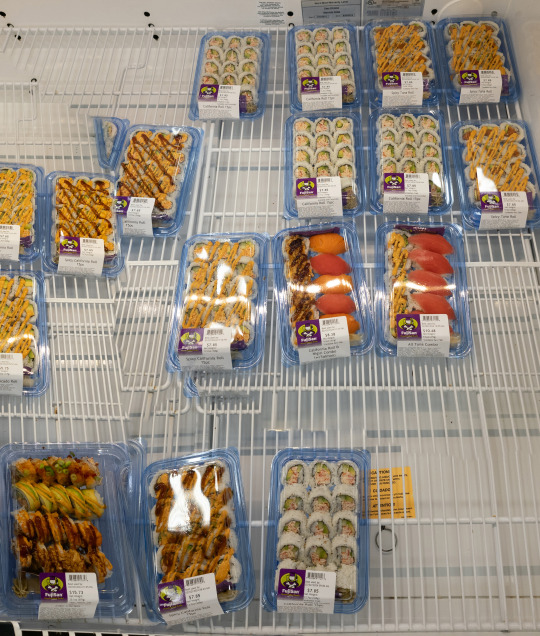
I found the sushi and they had some interesting things. I tried doing a giant sushi panorama but my lens had way too much barrel distortion and the way I shot it caused... issues.

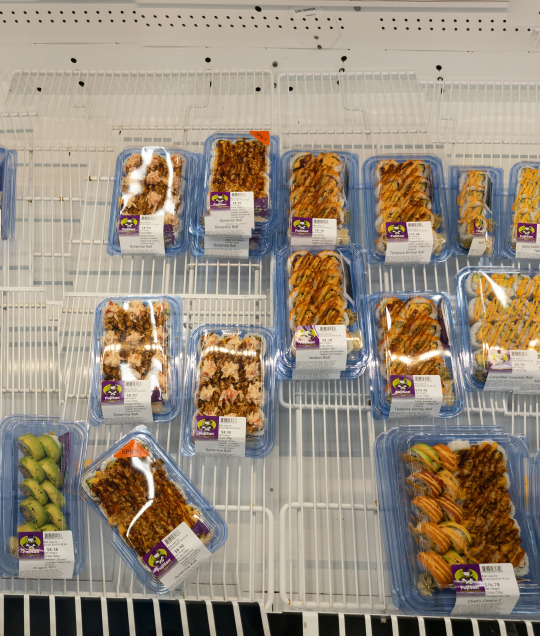
All of those vertical lines didn't help the situation.
If you use a wide angle lens it is best practice to rotate the camera around a nodal point.
This helps eliminate parallax artifacts and helps Photoshop get a better stitch. It can sort of unwrap and flatten your photos like the label on a soda bottle. But when I took a photo, I moved to the left, took a photo, moved to the left, took a photo. That's a better technique when you have a more tele lens with less distortion on the edges.
In any case, I grabbed some spicy tuna roll, a "dynamite" roll (which I had never tried before), and a variety pack.
Once I got my sushi I tried a few more vertical panoramas in the parking lot.
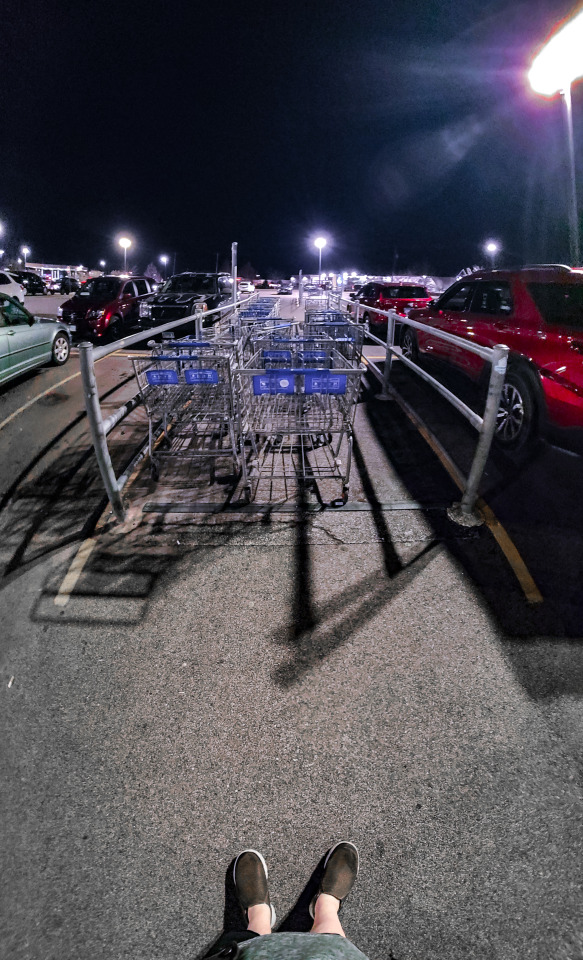
These two are kinda neat when you switch back and forth rapidly. My belly and feet line up. And I totally planned that. Definitely not a coincidence.
Hey PandaKhan! Put your cart back in the corral!

I was trying to look cool and roll my cart so it buttsex'd into the next one... but that just inched it forward. So I had to buttsex them the less cool way.
Which is a reminder to all you buttsexing folks to use a quality lubricant.
Oh, and I was also test driving my new jacket. I haven't needed to outstretch my arms like Superman as of yet, so the sizing might be okay after all.
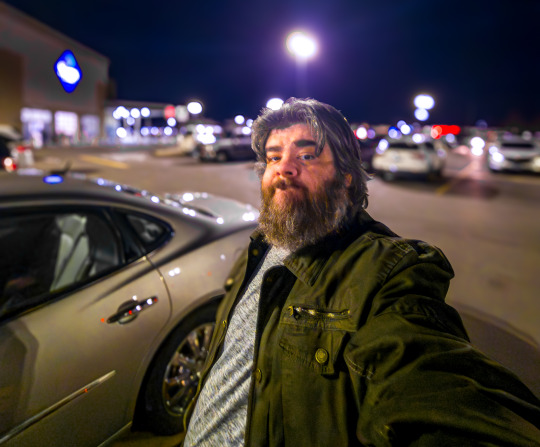
Though, do those shoulders look a bit bunchy to you? I'm getting linebacker vibes from this photo. I dunno. I'm going to take better pictures later so I can evaluate the fit a little better. It's hard to tell from the mirror shots.
When I got home I started with the Dynamite Roll.

The crunchy onions on top were very tasty.
I don't know if my brain cats are any better but at least I'm not hungry anymore.
97 notes
·
View notes
Text
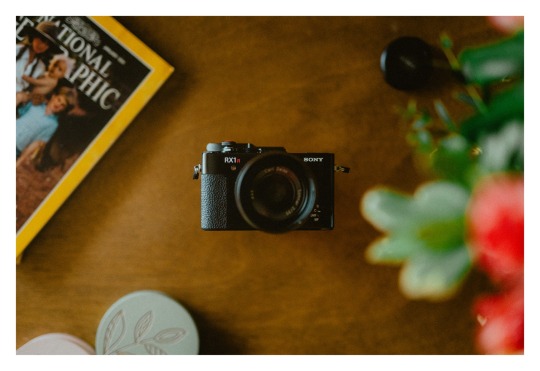


Hi i want to talk about my all time favorite camera 📸
pls ignore all my grammar mistakes, i’m not professional reviewer 😂 i just wanna talk about this camera.
This is the Sony RX1Rii, this is the third and “most recent” version of this camera. i put “most recent” in quotes because this camera is almost 10 years old. don’t like the old age fool you because this camera can keep up with the newest cameras in its niche.
This little point and shoot sports a 42mp full frame sensor. YES, F U L L F R A M E!! This tiny camera is actually smaller than all the x100 series (minus the lens on it). The camera has an incredibly sharp Zeiss Sonnar 35mm f2 glued to. This camera has 399 af points, with eye AF. The camera is incredibly fast and accurate!! the camera is pretty much a tiny packaged Sony A7Rii!
One of my favorite features of this camera is the pop-up EVF! This is a feature that was added to only this version of the camera and it’s a feature that i wish sony continued to incorporate into some of their other smaller cameras like the A7c or a6k series!

The camera does shoot video up to 1080 120fps, but does not have picture profiles such has S-log or HLG. This was a camera made strictly for photos, which is probably for the best because the battery life on this camera is terrible, any kind of prolong video shooting would absolutely burn through these batteries in minutes.
That brings me to my next point, my cons. There’s not many but i figured i’d point them out anyways for those who are interested in this camera. these aren’t make it or break it cons, these are just issues that hinder it from being the greatest camera ever released (IMO)
1) battery life, i believe it’s rated for like 220 shots. Ive definitely gotten it to last twice than that. That tiny body processing all that data on some of the tiniest batteries makes sense why it’s so bad. Luckily batteries are cheap and like i said they’re tiny, so they’re pretty easy to carry around!
2) no picture profiles in video. i know i touched on it briefly up above and this camera is mainly a photo camera AAAAAND hybrid cameras were just beginning to grow in popularity around the time this camera came out but it would’ve been amazing to have s-log in this camera for little snippets here and there. i know at the time IG and other photo sharing apps were mainly photo sharing apps, and a camera that was built strictly for photo has no business having usable picture profiles in video.
3) no crop mode in RAW. this one is weird to me because i know the A7Rii has an APS-C mode where you can shoot RAW photos with an inbody crop and there’s times that i’d love to shoot something at 50mm (35mm + sony’s 1.5x aps-c crop). there is a digital zoom option but that’s for jpg only.
4) PRICE!!!! why the fuck is this camera still being sold for $3200??!! this is a 10 year old camera with outdated tech. i bought mine used for $1900 (which is about the price of the fuji x100V at the time of purchase) and i still think that’s a little too much.
that’s really about it aside from minor complaints of not having tele/ wide converters. i’m also sure all of those cons stem from the small battery. I’d love to see all of these corrected in a Mk3 one day, but as of a couple weeks ago sony just discontinued the Rx1rii’s production. I’m being a little hopeful but maybe that means we’re getting a successor, i doubt it but a boy can dream.
I don’t really do reviews or anything but this camera has had my heart for the past 9 months so i had to show it off/ talk about it. this to me in the perfect everyday camera. it never leaves my side and comes with me to any and every trip! Im always blown away by the photos i create with this little camera and i know whenever a mk3 comes out im going to hop on the chance to buy on immediately!
#Sony#Rx1rii#sony rx1#fujifilm#fujifilm x100v#fuji x100v#x100v#fuji x100vi#x100vi#lookslikefilm#original photographers#photographers on tumblr#new tumblr#artists on tumblr#photogram#35mm#photography#film#point and shoot#point and click#reviews#tumblr
36 notes
·
View notes
Note
What equipment do you use? Especially camera and lens?
My answer will probably be disappointing because my equipment is old and boring. 😅
Most of the photos on this blog have been taken with either Nikon d5000 or a hybrid camera Fujifilm X-A2. I use Fuji's kit lens. I bought my Nikon (14?? years ago!) as a double VR zoom kit, then later I upgraded to Tamron lenses (Tamron 18-270mm f/3.5-6.3 Di II VC PZD and Tamron af 70-300mm f/4-5.6 tele-macro full frame) and have been using them for years.
#about me#I don't use filters or anything#ok I have one polarizer but it only fits my kit lenses#tripod isn't my friend either coz I hate carrying a lot of stuff with me#so I only use it for night photos
13 notes
·
View notes
Text
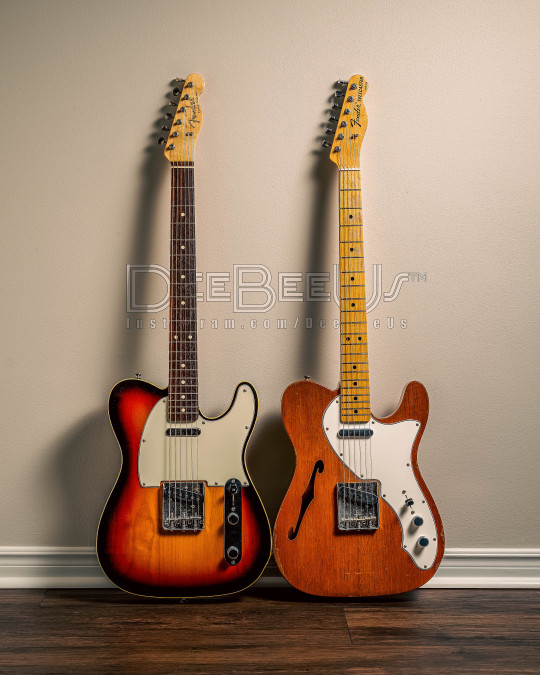
1998 #Fender#CustomShop '60 #CustomTelecaster NOS
2020 Custom Shop '68 #ThinlineTelecaster Journeyman Relic
This is a quick snapshot I took to 1) check the #TeleTuesday box for this week 🤣, and 2) show off my new Godox AD200 flash.
For anyone following my LONG litany of flash issues, I did end up being able to send back the AD600 Pro that broke. Amazon has not given me my money back yet...but I assume that is coming! In the meantime I had a photoshoot for ES Believers last weekend and needed a flash so I went to my local camera store and after some discussions with the salesperson decided to buy ANOTHER AD600 Pro. Why would I do that after having one that failed on me, you ask? Well because all my accessories fit it. I know that sounds crazy...but I have about 750 bucks worth of accessories that work with the Godox wireless and mounting systems. Not only would I need to spend double to get a comparable power Profoto flash but I would have to spend double again to buy all the accessories for it. So muggins here bought ANOTHER AD600. With the assurance of the shop that if it breaks they do NOT need to send it to China for repair! 🤣
However: to mitigate the risk of future flash failure, I also ordered a backup flash at the same time, and that flash is now here, hence this photo! Lighting is 100% from the AD200 (no natural light...this was my dark basement) on a stand through a plain softbox and the flash set to 1/4 power. Camera: z6ii, Lens: Z mount 24-120 f/4. ISO 100, f/5.6. 1/125th of a second exposure.
The Godox AD200 Pro is about 1/3 the power of the 600, but it is still 2-3 times more powerful than a speedlite. Plus it is so much more portable than the 600 and doesn't need a heavy C stand. It will be perfect for shooting outside the "studio" (aka my house)!
Excitingly, I get to test the new flash out on location shortly as I have been asked by Jason, head honcho at @fretboardjournal, to take some photographs for an upcoming article on a local Toronto artist. Can't say any more about the article yet, but stay tuned!
#guitar#guitars#electricguitar#fenderguitars#reissue#relic#guitarphotography#tele#telecaster
44 notes
·
View notes
Note
Hello! Sorry to bother you, but I saw your picture of Philemon and started poking around your photography blog... and loved how you were able to capture the moment in a lot of them.
I'm going to be attending my first con ever in about a month, and am looking for tips/advice partly because while I have done some manual shooting for sports/street, it's been predominantly outdoors and during the day and also partly because I love your photos and would love to hear some of what works for your if you are willing to share (please don't feel obligated to share if you don't want to or don't have the energy!).
While I have a ton of questions, maybe the one I'm most curious about is if you've found the lighting at cons hard to work with. I don't have a particularly fast tele zoom lens (f4-5.6), and pretty much all I've seen online (besides up iso) is to buy a fast lens. I have a 56mm f1.4, but I'm pretty sure I'll be sitting too far away to get the detail and dof I want with that. Is it worth bringing a slow telephoto zoom lens for the con though or will the lighting just make taking my 56mm make more sense? I don't want to buy a new lens that I don't need otherwise for this, and I also am a bit unsure about what/how much to pack given that I've never been to a con and am not experienced enough shooting indoors to guess based on the con videos how bad the lighting is.
I know it's not only the gear that makes the photo, but if you have any advice for a novice, I'd be happy to hear it. Thank you for making it through my ramble ask. Sorry again for bothering you...
First of all, thank you so much for your comments in my photos! I consider myself one of the least experiences photographers you'll find at a con, so Knowing that someone likes my work really makes my day! 😍😍😍
Gonna put the rest of this under a cut cuz it got long. lol
To give you an idea of what I'm working with, I was in seat B40 this year. That's all the way on the side aisle. My camera is a Canon EOS Rebel T6i, and the lens I used was a Canon EF 70-200mm f/2.8 lens. Occasionally, I sat in empty seats that were closer and snapped a few shots, but not many. (I sat in the front row for the shots I posted of Tom Welling and Michael Rosenbaum. Tom was on stage, Michael was just... EVERYWHERE. 🤣)
The lighting at Creation cons is not great. Also, it can change from panel to panel. It would be lovely if they could mount their lights higher so the guests don't get blinded and ask for the lights to be brought down. But, since that will probably never happen, we work with what we've got.
Personally, I love a zoom lens because I'm always zooming in and out, trying to catch different things. I know other photographers favor not zooming because they get better quality photos in other ways, but I'm not clear on how that works.
Now, for my first suggestion: rent a lens. It's fairly inexpensive to rent a lens, and you get to try different lenses out without spending a fortune on lenses you later figure out aren't what you want. I believe a few of the other con photographers use a site called lensrentals.com. I rented a lens last year from Unique Photo in Philly, since they're not too far from me. You can also rent from UP online at uniquephoto.com. I went in person to talk to one of their experts to help me decide what kind of lens I wanted to try since I'm so new to this. They also have a store in Fairfield, NJ, so if you're close to either of those places, I would definitely suggest you head in there and check them out!
The reason why I'm suggesting that you rent a lens is because I think you'll want a lower f-stop than your zoom lens has, and if you're further away than the first 3-4 rows, you're going to want to zoom. (Gotta get up close and personal with the pretty!!! And good lord, but they're all so freaking pretty.) Renting a lens is a relatively cheap way to test things out. It's possible you may rent a lens and then later realize that your own lenses would have done the job. You'll only be out a hundred bucks or so by renting. (UP did require a deposit of half the retail value of the lens, but they were great about getting that back to me quickly.)
ISO - I'm always trying to use the lowest ISO I can get away with because noise is a pet peeve of mine. (I adore Lightroom's new Denoise AI!!!!) I know other photographers aren't as picky about noise and raise their ISO. I try to keep mine at or below 3200. One of my friends shoots at an ISO I didn't know existed, it's so high. (She yells at me. "You need to increase your shutter speed and your ISO, Michelle!") She's got a Nikon, though, and I sometimes wonder if camera make and model might also affect things like that.
As far as packing is concerned, I'm a bad person to ask. I bring freaking everything, even when I know darn well I'm not gonna use it. Seriously, the only thing I left at home this con was my lens balls. I'm terrible.
The biggest thing I learned early on is that you can always lighten dark photos in processing, but it's really hard to darken overly light photos.
Renting a lens and shooting darker are the two big suggestions I have. Every photographer I know at cons does things a little differently though. Most are willing to stop and chat about what settings they use, too. @mandileaphotography, @brooksba, and @ditchlilytiger are three awesome photographers and people that I know are here on Tumblr and I can tag them. lol! They each may have their own tips and tricks to suggest! Mandi has helped me and countless other newbie photographers over the couple of years I've known her.
Something that Chris Schmelke said to me about editing, but I use it when shooting, too: If you're not sure where to start, see what Auto does, and then make changes from there until you're happy. If I'm really not sure where to start with my camera settings, I take a burst or two of photos in auto mode and see what settings the camera thinks are right. Then, I adjust until I'm happy.
Non-photography tips for your first con: Take snacks because forgetting to eat is totally a thing. Hydrate hydrate HYDRATE. Have a binder or something to keep your photo ops in. Drink more water. Wear comfortable shoes. Take a water bottle with you. Take Chris Schmelke's photography class because he's a sweetie and loves to answer any questions you might have about photography of all kinds. And don't forget to drink plenty of water. Have I mentioned staying hydrated? You think I'm kidding, but I failed at both eating and drinking water last weekend and then wondered why the room started spinning. And that was my 9th Creation con. I know better and I still did it! More tips like this can be found at @spncontips!
If you're on Twitter, check out @spnconphotogs there. A bunch of us run that account and we have lists of con photographers you can follow and get to know. We also have a Discord server that we don't use much, but it's there if the ex-bird app ever truly dies. DM me or one of the others for an invite!
Sorry for the babbling, but this is everything I can think of off the top of my head to help you out! Even the "big name" fandom photographers are all nice and sweet as pie and willing to help you out if they're not running from one place to another. Just find someone with a really big lens and say hi!!

2 notes
·
View notes
Photo
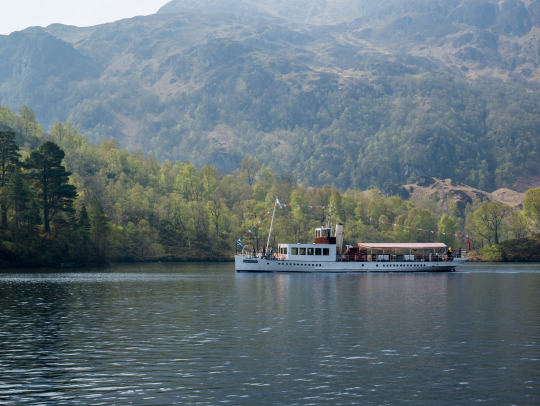
SS Sir Walter Scott (digging through the archive)
Digging through the archive: Steamboat SS Sir Walter Scott at Loch Katrine.
Trip to Scotland, late April 2019.
Steamboat Sir Walter Scott measures 115 gross register tons, is 110 feet (34 metres) long and has a 19-foot (5.8-metre) beam. She is powered by the original three-cylinder triple-expansion steam engine made by Matthew Paul & Company, Dumbarton, and has two locomotive-type boilers which until the end of 2007 were fired by solid fuel fed into the firebox by a stoker. In a refit at the end of the 2007 season, the boilers were altered to run on biofuel. During this refit, the superstructure was rebuilt and a forward deck cabin was added. The vessel has a crew of five. Read more about the boat on Wikipedia.
Loch Katrine (Gaelic: Loch Ceiteirein or Loch Ceathairne) is a freshwater loch in the Trossachs area of the Scottish Highlands, east of Loch Lomond, within the historic county and registration county of Perthshire and the contemporary district of Stirling. The loch is about 8 miles (13 km) long and 1 mile (1.6 km) wide at its widest point and runs the length of Strath Gartney (Gaelic: Srath Ghartain). Read more about the loch on Wikipedia.
Taken with Panasonic GX7 digital mirrorless camera and Panasonic G Vario 35–100mm F4–5.6 compact tele-zoom lens.
#IFTTT#Flickr#travelphotography#travel#scotland#2019#april#spring#uk#beforethebrexit#nature#digital photography#steamboat#lake#Loch Katrine#microFourThirds#Panasonic#Lumix
2 notes
·
View notes
Video
flickr
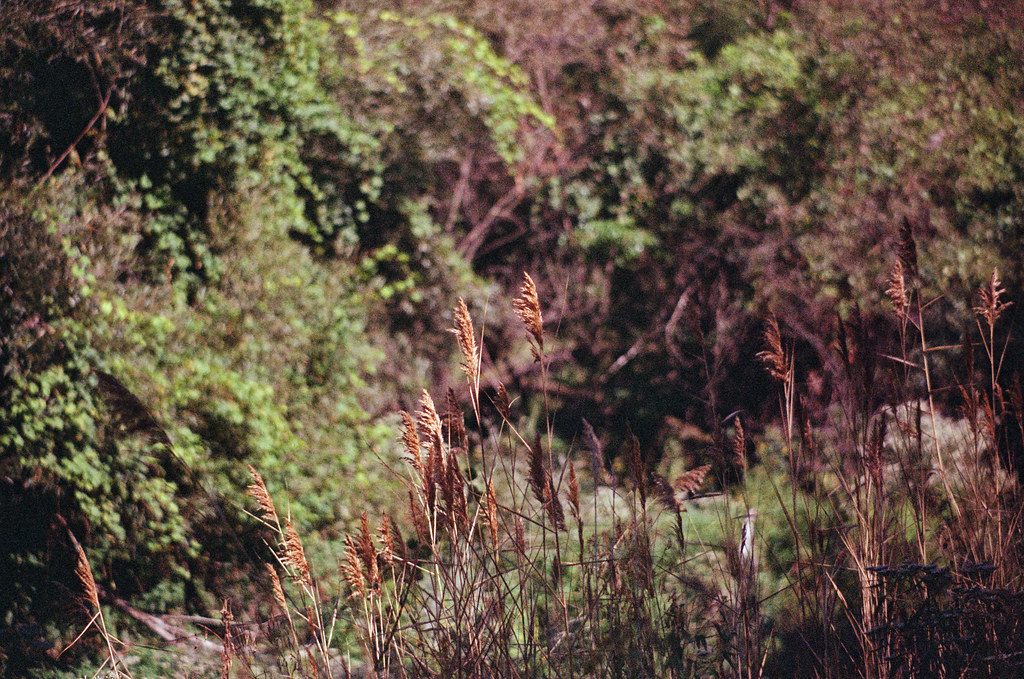
000060130024-edit by Simon Hartmann
Via Flickr:
09/30/2023 12:20pm 1/1000 f3.8 vegetation in the sunlight
#analog photography#film photography#analog#film#35mm#Nikon#Nikon film camera#Nikon SLR#Nikon F2#Nikon F2 Photomic#Auto Panagor Tele Zoom lens 85-205mm f3.8#tele photo lens#Panagor#Fujifilm#Fujicolor#Fujicolor Superia HQ 200#Superia#Fujicolor Superia#200 ISO#grain#Memphis Film Lab#Cleveland Metroparks#Lakefront Nature Preserve#Cleveland#OH#Ohio#flickr
0 notes
Text
Telephotography with the 5x7 RB Cycle Graphic by Thomas Evans
Published in the Graflex Journal, Issue 3, 2022
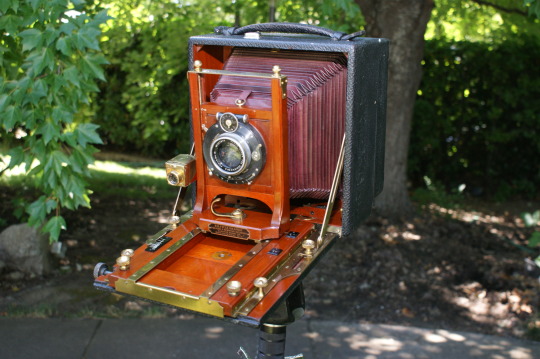
5x7” RB Cycle Graphic, with f6.8, 8 ¼” Goerz Dagor lens.
I recently received a 5x7” RB Cycle Graphic outfit, which included several very interesting lenses, including an f:6.8, 8 ¼ –inch Goerz Dagor, a wide-angle 6 ½ x 8 ½” Bausch & Lomb Zeiss Protar V, with a Supplemental wide-angle bed, and an early Goerz telephotographic tube with a 3 ½-inch Goerz tele-negative lens installed.
The Cycle Graphic was first introduced in 1900, with a reversible back, in five formats from 3 ¼ x 4 ¼” to 8x10”. An accessory focal plane shutter was made available for each format in 1902. The design was made sturdier in 1904, and included front shift and a double-swinging back, and a dropping bed, in both 5x7” and 6 ½ x 8 ½” formats. The Revolving Back Cycle Graphic was introduced in 1907, in four formats from 4x5” to 8x10”, and was made through 1922. The 8x10” model was only available with the reversible back, and it and the 4x5” model were discontinued in 1920. The 6 ½ x 8 ½ RB Cycle Graphic was used as the basic camera in the panoramic Cirkut No. 8 outfit.
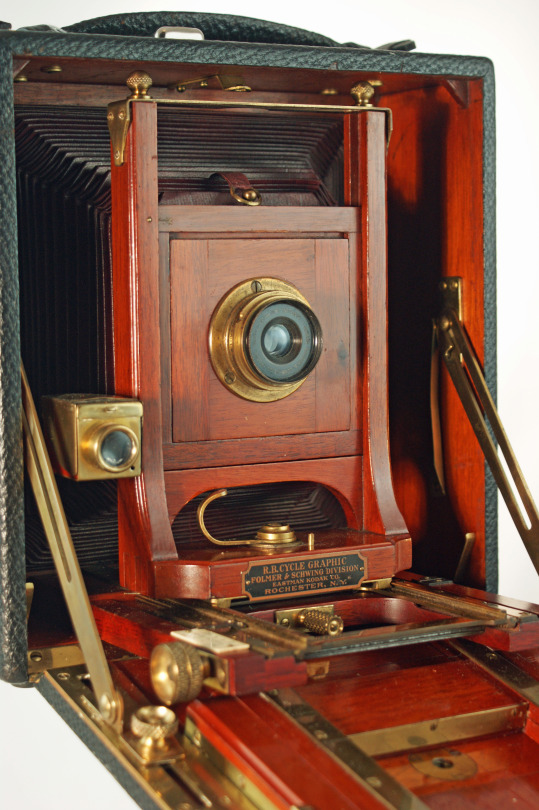
5x7 RB Cycle Graphic with B&L Zeiss Protar Series V wide-angle lens and supplementary WA bed.
The Cycle Graphic Supplemental wide-angle bed was introduced in 1912, and, with consideration of the low serial number on the camera, 1912 or 1913 are good, educated guesses for the year of manufacture. This RB Cycle Graphic also came with a revolving back Graflex focal plane shutter, which facilitates the use of barrel lenses, such as the Protar Series V.

5x7” Folmer & Schwing Auto Graflex Focal Plane Shutter attachment for revolving back.
The 1913 Graflex Catalog described the RB Cycle Graphic as being the foremost camera of its type:
“For the technical worker the Revolving Back Cycle Graphic is particularly valuable, as its ridged construction and accurate adjustment make it indispensable for those engaged in scientific research, involving the application of photography. … the rigidity of the Graphic – due to the most careful, accurate and thorough construction ever incorporated in photographic apparatus – is still a Graphic feature which will bear particular emphasis, and is one of the features which has given the Graphic its prestige with scientific and advanced photographic workers.”
“To allow the use of long focus lenses, ample bellows capacity is provided. The front runs out on telescopic framed tracks, reinforced by angle-brass guides with milled head binding screws, which lock the bed rigidly in place. The extension tracks being in the form of frames allow extra large lens space when closed. The construction of these tracks affords a wider base for the lens support and prevents any lateral or oscillating movement, thus rendering the Cycle Graphic particularly adaptable for tele-photo and other extremely accurate work.”
Such description of the Cycle Graphic may well have influenced the photographer who originally purchased this outfit, as they were clearly interested in good optics, and wide-angle and telephoto photography.
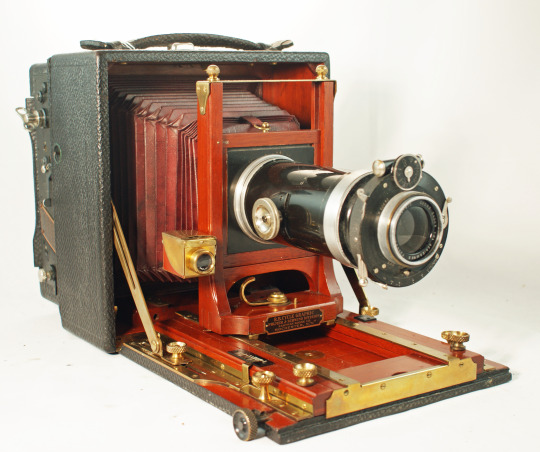
5x7 RB Cycle Graphic with Goerz 8 ¼” Dagor and Goerz Xa Tele-tube and tele-negative lens.
Telephotography
I have read some about the early designs of telephoto lenses, which combined a negative lens of the photographer’s choice at the rear of the ‘tele-tube’, and used the photographer’s preferred ‘ordinary’ taking lens at the front of the tube. This is the first time that I have actually seen one of these, and have been able to experiment with it, so I will be concentrating on this telephoto. This tube came with two adapting rings that screw onto the front of the tube, to receive the positive lens. One of these rings, marked “Compound” fits the Compound shutter of the Dagor lens. The other ring is marked “Barrel” and must have been meant for a barrel lens, perhaps a faster lens, which is no longer present. I tried several barrel lenses in this ring, and found a Kodak Anastigmat #31, 5 ½-inch lens fits, but this focal length seems to be too short to combine effectively with the 3 ½-inch negative lens. The rule-of-thumb appears to have been that the focal length of the negative lens should be about half, or less than half, of the focal length of the positive lens.
The idea of using a negative component at the rear of a tube to magnify the image produced by a positive component in front has long been used in telescopes, and both Galileo Galilei, in 1610, and Johannes Kepler, in 1611, developed refracting or dioptric telescopes based on this principle. In 1834, Peter Barlow designed a diverging rear lens component for telescopes which is still in wide use today. However, it was not until the end of the nineteenth century that this principle was applied to photography.
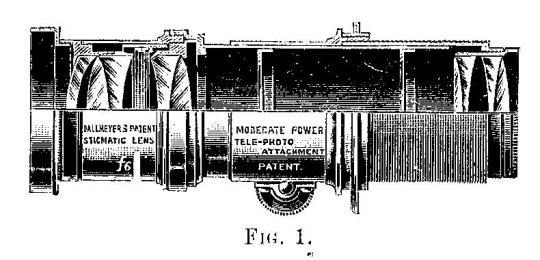
T. R. Dallmeyer Telephoto lens of the 1890s
In 1891, Thomas R. Dallmeyer of England, A. Duboscq of France, and Dr. Miethe of Germany developed telephoto lenses for photography. The designs by Dallmeyer and Miethe were nearly identical, but, communicating through the British Journal of Photography, they could not establish who had primacy, and so no patent was granted. Dallmeyer introduced an improved version, the Simple Telephoto Lens, in 1892, and was granted a patent. By 1896, the design had been improved to include a well-corrected positive lens, and a better-corrected negative lens made up of a pair of doublets. It was recognized early-on that magnifying the image also magnified the positive lens’s optical aberrations. It was eventually recognized that it was very difficult to correct a negative lens for use with a wide range of different positive lenses, and by 1899 Dallmeyer had introduced the Adon Telephoto lens, which had a dedicated set of lenses, so that the aberrations could be fairly well balanced throughout the system. This lens still allowed the separation to be adjusted, and this adjustment away from an optimally corrected position introduced increasing aberrations.
However, the telephoto attachment for an ordinary positive taking lens remained popular among photographers, because of its great versatility. Because the separation between the positive and negative lens could be adjusted, when used on a camera with generous bellows extension, it was possible for the photographer to adjust the lens to provide the image magnification and field of coverage desired. That is, decreasing the separation between the lenses increases the focal length and magnification of the image. This also required increasing the bellows extension to bring the new image into focus. The photographer could also increase the image magnification by swapping-out the negative lens with one of a shorter focal length, thus increasing the ratio between the two lenses, and so increasing the power of the telephoto, also thereby increasing the image scale, but at a shorter bellows extension. The field of coverage can be increased by extending the bellows, and then re-focusing the image by adjusting the separation between the positive and negative lenses.
In theory, if the telephoto lens allows for sufficient adjustment, and the camera allows for sufficient bellows extension, any magnification up to ‘infinity’ can be reached. Small changes in the separation result in large differences in the focal length of the telephoto lens, and larger differences bellows extension. The brightness of the image diminishes by the square of the distance (extension), and so the length of exposure soon becomes inconvenient.
In practice, especially after the introduction of well-corrected anastigmatic lenses during the first decade of the 1900s, some photographers were able to produce successful images with magnifications up to 40 times the size of the image produced by using the ordinary taking lens alone. Telephotographs made of mountain peaks twelve miles away or more could show such details as rocky ridges and snow patches not visible to the naked eye at that distance.
This capacity for magnification also proved useful for studio portraiture, providing images with better perspective, and without the disproportionate size of hands and legs caused by using a normal lens close to the sitter. And the telephoto lens also proved useful for taking close-up, one-to-one or greater macro images of near objects, such as flowers, insects or birds.
The Telephotographic Attachment in Use.
Early authors of telephotography how-to books clearly put a lot of thought into how to use the telephoto lens. Here are some of their helpful hints.
It is important to use a long lens hood in order to reduce internal reflections in the lens, and thus reduce flare and fogging, which can veil the image in a dull gray. This was a major source of disappointment in the early years.
When the separation between the positive and negative lenses is equal to the focal length of the positive lens, then the image produced is the same size as that produced by the positive lens alone. As the separation is decreased, the magnification is increased, in theory to infinity. The minimum ‘useful’ separation is found by subtracting the focal length of the negative from the focal length of the positive. That is, for a telephoto system made up of an 8 ¼ inch positive and 3 ½ inch negative, 4 ¾ inches is the minimum separation at which, in theory, an image can be formed. In reality, dealing with very large magnifications is impractical, due to the rapid loss of the intensity of the light.
The magnification of a set-up can be calculated by dividing the camera bellows extension by the focal length of the negative lens, and adding 1. Some early authors measured the bellows extension from the ground glass to the face of the lens mounting flange, while others measured from GG to the rear surface of the negative lens, so this is at best an estimation.
When the separation between the positive and negative lens has been adjusted to produce the desired magnification, the equivalent focal length of the telephoto system can be found by multiplying the focal length of the positive lens by the magnification.
To find the effective aperture of a telephoto system, multiply the aperture (f stop) set on the positive lens by the magnification. That is, if the positive lens is set to f/11, and one is working at a magnification of 4 diameters, the effective aperture of the telephoto system is f/44.
The above recommendation about exposure can be compared to the recommendation that the telephotographic exposure can be calculated by multiplying the exposure that would be given with the positive lens alone by the square of the magnification. That is, if the positive-lens exposure called for is 1 second at f/11, and the telephoto is set to produce 4 diameters of magnification, the photographer would square the magnification of 4 (4x4 = 16) and multiply the exposure by the product: 16 x 1 second = 16 seconds. An exposure of 1 second at f/11 is a very close equivalent to 16 seconds at f/45.
The authors writing during the early part of the 20th century were using plates and films that were overly sensitive to ultra violet and blue light, and so, when using a telephoto lens on a hazy day, they cautioned against overexposure due to the inherent luminosity of the atmosphere. Yellow filters were recommended, such as the Wratten K2, K3 and G filters.
Whether a specific telephoto lens set-up will cover your film depends on the focal lengths of the positive and negative lenses, the aperture of the positive lens (because the positive lens diaphragm is in front, stopping down can cause vignetting), the magnification, and the clear diameter of the negative lens. The circle of illumination is smaller at lower magnifications, and quickly increases as the magnification increases. Generally speaking, to cover a 4x5-inch film with a magnification of 3 diameters, a negative lens of 3-inches focal length would be needed, and at 4 or 5 magnifications, a negative of 2 ½-inches should work. To cover 5x7-inch format at a magnification of 3 diameters, a negative lens of 3 ½” inches would be needed.
Conclusion
One can see how the ambitious photographers of the 1890s and 1910s would have been intrigued by the idea that they could use their cameras to reach out into the distance, and bring in fine detail not otherwise available to the eye. And one can see how the actual results might not have measured up to the expectations. The surprising versatility of a lens that could be configured to provide a lens of the local length and magnification desired, without excessive bellows extension or the large mass of a non-telephoto long lens, is attractive. The calculations needed, the careful measurements, the rigorous set-up on a stout tripod, the issues with haze, flare, and camera vibrations during long exposures, and so forth, no doubt led to many disappointments. Before the relatively well-corrected anastigmat lenses, such as the Goerz Dagor, were commonly available, the lenses used were likely to be the fairly fast Rapid Rectilinear and a Petzval type portrait lens, and the negative lenses would magnify their uncorrected aberrations as well as their images. As lens correction improved, and as the telephoto lens was simplified to the fixed-focal-length type, telephotography may have become less intriguing, but it has certainly become easier, and more widely appreciated.
References.
Dallmeyer, Thomas. R. 1899. Telephotography, an Elementary Treatise on the Construction and Application of the Telephotographic Lens. William Heinemann, London. Reprinted by Scholar Select.
Early Photography, Telephotography http://www.earlyphotography.co.uk/site/entry_L72.html
Kinglake, Rudolph. 1951. Lenses in Photography, The Practical Guide to Optics for Photographers. Case-Hoyt Corporation, for Garden City Books, Garden City, New York.
Kingslake, Rudolph.1989. A History of the Photographic lens. Academic Press Inc., Harcourt Brace Jovanovich, Publishers, Boston, San Diego, New York, Berkeley, London, Sydney, Tokyo, Toronto.
Kinglake, Rudolph, 1992. Optics in Photography. SPIE Optical Engineering Press, Bellingham, Washington, USA.
Lan-Davis, Cyril E. 1912. Telephotography. George Routledge & Sons Limited, London. E. P. Dutton & Co., New York.
Lockett, Arthur. 1925, 1947. Camera Lenses. Sir Isaac Pitman & Sons, LTD. London. [Pages 68 – 82.]
Marriage, Ernest. 1901. Elementary Telephotography, Iliffe & Sons, London
Pierce Vaubel RB Cycle Graphic Revolving Back Cycle Graphic, Folmer & Schwing Mfg. Co. (piercevaubel.com)
Schriever, J. B. editor, 1909. Complete Self-Instructing Library of practical Photography. Volume VI At-Home Portraiture, Flashlight, Interiors, Lenses. American School of Art and Photography, Scranton, PA. [Volume VI, Chapter XLII Telephotography.]
Wheeler, Captain Owen, 1910. Modern Telephotography, A Practical Manual of Working Methods and Applications. Ross LTD., Optical Works, Clapham Common, London.
Wikipedia, History of Photographic lens Design
https://en.wikipedia.org/wiki/History_of_photographic_lens_design
3 notes
·
View notes
Text
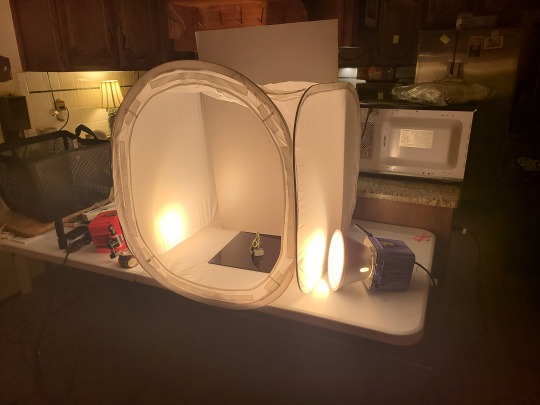
How to build THE CUBE
I got this reply about my product photography light cube.

@nimrella and all other interested parties, I can definitely help you with that.
THE CUBE Ingredient List
The actual cube
2 Identical lights
Black plexiglass
A roll of gray seamless paper
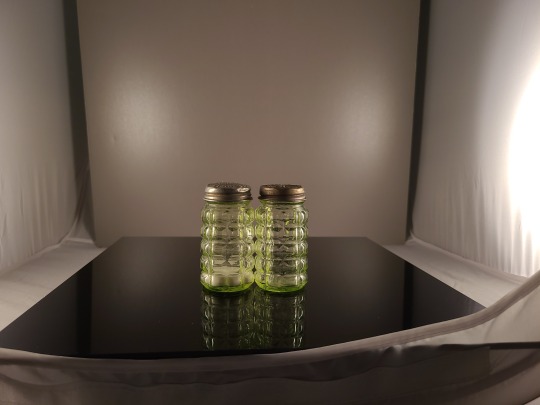
The links above would probably be the cheapest ingredients that would allow you to get a similar shot as below.

These are *suggested* ingredients. If you have two desk lamps, you could get identical LED bulbs. You can get bigger plexiglass if you need it. You can try white plexiglass or even a mirror. I also like using things like a wooden cutting board as a base. You can also get different colored seamless paper for the background. Colored poster board works okay too, but the seamless paper allows for a nice transition from base to background.
Some tips for using THE CUBE.
First you'll want to cut the seamless paper to size and then place it in the cube so it has a gentle curve. As stated, this will give you a gradual transition from the base to the background. You can set object directly on the gray paper and get a nice effect. Or you can use the plexiglass trick like above for a cool reflection shot.
If you use the plexiglass, place it as far forward in the cube as you can and elevate it a bit with a book or something. This will help with background separation.

You want to put lights on either side. You can play with positions and brightness to taste. You can make one light brighter than the other or just use them full blast. The brighter you set the lights, the lower the ISO on your camera, the cleaner the noise will be. It will also help to take photos in a darker area so only the photo lights are contributing to the image. But if they are bright enough lights, that won't matter as much—they will overpower any ambient light.
If your phone has a decent telephoto lens, that will help you avoid distorting the object. But on my phone, the tele lens gets oversharpened to death. So I use the main camera and take the photo from a bit farther away and then crop in.

Basically, the closer you get with a wide angle lens, the more pronounced the distortion is.
This distortion is actually caused by distance rather than the focal length. With a wider lens you have to get much closer to get the object the same size in the frame. So if you keep the object in the center of the frame and back up a bit, it won't get distorted. You'll have to crop later, and you'll lose some resolution, but it should still be good enough for displaying on the web.
One thing you might also notice is the hotspots from the lights on the background. I'm afraid that is one of the disadvantages of the cube. You can try to block that with some black card or just try to position the lights so the hotspots are out of frame. If I were in a studio, I would have my background several feet behind the object to prevent this.
In any case, once you have everything set up, you can basically flip on the lights, and take a picture. Easy peasy.
128 notes
·
View notes
Note
Hello! What is your favorite lens to use and why?
OK, my answer won't be very helpful or insightful. Why? Because my favorite lens is my favorite not because it's the best lens out there or the best lens for my needs, but because it's the one I have. 😆
I haven't upgraded my tech in a while (by while I mean, years), so I've been mostly using Tamron 18-270mm F/3.5-6.3 Di II VC PZD, although my favorite is actually a budget lens - Tamron AF 70-300mm f/4.0-5.6 Di LD Tele Macro lens. It lets me zoom in on far objects and also get close to small objects like insects, flowers, mushrooms without crawling on my belly. The downside of this lens, though, is that I also have to step back to take photos and it's definitely not meant for wide scenery shots.
#about me#sin1st3rsuccubus#sorry I can't give a helpful advice#I'm broke and have no money for fancy stuff#thank you for your ask though!
9 notes
·
View notes
Text
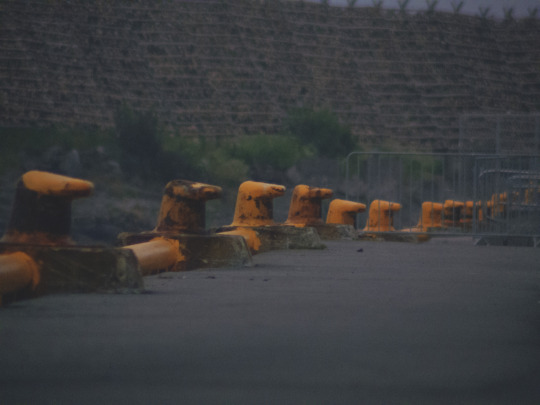
Shot with a Pentax Q and Canon 8-120mm CL VL Lens.
It's just neat taking extreme tele photos of repeating objects. Such an unfamiliar way to view the world. 😳
0 notes
Text
The Samsung Galaxy S24 Ultra with Galaxy AI

Samsung Galaxy S24 Ultra: Discover new avenues for creation, connection, and more. The mobile AI era has arrived.
Primary Features of Galaxy S24 Ultra mobile
Circle to Search
Instantly satiate your curiosity
Real-time Translation
Simple, instantaneous translations
Take Note Assistance
Think harder, not smarter.
Editing in Generative
Take a fantastic picture. Next, improve it.
Chat Support
Quickly find the appropriate words.
Design
Simple in design. Powerful and breathtaking.
Titanium is the next level of tough. Discover S24 Ultra on a 6.8″ flat screen that has an integrated S Pen.
Put on titanium armor
Look at the improvement: A brand-new, robust titanium shield integrated directly into the frame.
Increased resistance to scratches with Corning Gorilla Armor
No matter what your day throws at you, Corning Gorilla Armor helps shield your screen from scratches so your gadget always looks gorgeous.
Worry-free resistance to dust and water
Don’t allow the water bring you down. With the IP68 water and dust resistance of the Galaxy S24 Ultra, you’re prepared for any adventure, puddles and all. The Galaxy S24, S24+, and S24 Ultra have an IP68 rating. based on laboratory test parameters for immersion in freshwater for a maximum of 30 minutes at a depth of 1.5 meters. Avoid using the beach or swimming pools. The device’s resistance to dust and water is not indestructible and could erode with time due to normal wear and tear.
What AI features does Galaxy S24 Ultra have?
Exclusive colors for online use, naturally inspired Galaxy AI
Find it and circle it
Circle to Search with Google is a new search method available. Use the S Pen or your finger to circle items while scrolling or watching videos to see Google Search results.
Found a picture of a plant that is so exquisite you must know what it is? Once you circle it, Google Search results will appear. You can now rapidly obtain a response without ever leaving your feed.
LIVE TRANSLATION
Never let translation get in the way of you.
Use Live Translate to overcome language barriers when chatting on the phone or sending texts.
CHAT HELP
Quickly find the correct words
Get instantaneous tone recommendations to help your writing sound more conversational or professional.
NOTE SUPPORT
Quickly summarize in a flash AI
A long story is made short by Note Assist. Just begin writing, and Artificial Intelligence will format your notes into an understandable synopsis.
Amazing for business, in that sense
With the most epic Galaxy yet and the ability to change the game thanks to Galaxy AI, elevate your work. Discover new methods to work together, stay productive, and more. From doing quick research to documenting every detail of your projects day or night, use these strategies.
Camera Features
Magnificent images enhanced by AI Capture details with 200MP that surpass reality.
Achieve the highest megapixel count on a smartphone while meeting the industry standard for camera quality. Every photo is enhanced in terms of color tone and detail by the ProVisual engine.
Use Nightography to see farther into the night
Space Zoom produces incredibly beautiful images and videos of even far-off, dimly lit subjects thanks to its 1.6x larger pixels and wider Tele OIS.
Galaxy S24 Ultra best zoom to date
Gain close-ups at 2x, 3x, 5x, and even 10x using an optical or optical-quality zoom lens. With less blur in stabilized shots, the new Tele OIS is wider than the previous model.
Retouch and resize it. Similar to that, AI editing tools assist you in obtaining the ideal shot by repositioning objects and intelligently filling in blank areas.
Galaxy S24 Ultra Achievement
Power and speed combine to change the game.
Galaxy Snapdragon 8 Gen 3 lets you win. Ray tracing renders graphics in real time, creating realistic shadows and reflections.
The Vapor Chamber has been almost doubled in size to enhance heat dissipation and provide smoother graphics.
Long-lasting battery for endless playback
When it counts most, like the epic boss battle you’ve been preparing for, Ultra’s battery gives you extra life thanks to its massive capacity and greater energy efficiency.
See films for up to thirty hours.
Enjoy music for up to 95 hours.
Galaxy S24 Ultra’s most brilliant mobile display with adaptive viewing
Even in bright sunlight, Corning Gorilla Armor reduces reflections and enhances visual clarity. Better Vision Booster amplifies color and contrast for a distinctly outstanding experience.
The built-in S Pen opens a brand-new chapter
The Galaxy Note brand is still very much in use today. With the new fully-flat display, you can write, tap, and navigate with accuracy.
Making the switch to Galaxy is simple.
Easily transition from iOS
Even if you migrate from iOS Features, you can still use Smart Switch to preserve your contacts, calendar, photos, and apps.
Lead the way in artificial intelligence
Move to Samsung and take advantage of the ground-breaking capabilities of Galaxy AI to unlock new opportunities.
Forget about divides between devices
Make the switch to Galaxy to discover seamless ways to live, work, and play across all of your devices.
Distribute it. Maintain the caliber.
Do you need to share content quickly? Large files can be sent with remarkable quality and ease.
Fast Share
Share immediately from your S24 Series phone with any iOS or Android device.
Samsung has secured Knox
You can relax knowing that your phone is protected with our unmatched protection, which is reinforced by the unbreakable Knox Vault and Samsung’s multi-device security vision, Knox Matrix.
Small steps are the first stage of change
Step by step, Samsung were heading toward a sustainable future. Their belief is that minor adjustments can have a significant impact in creating a sustainable path.
Galaxy S24 Ultra Storage
1TB or more of storage
Choose from 256GB, 512GB, or 1TB to store everything.
Why is Galaxy S24 Ultra good for gaming?
Galaxy S24 Ultra’s powerful processor, efficient heat dissipation system, high-visibility display, and long-lasting battery make it a gaming powerhouse. In addition to advanced performance, ray-tracing adds shadows and reflections to gameplay graphics.
Is S Pen built in to Galaxy S24 Ultra?
Really, an integrated S Pen is included with the Galaxy S24 Ultra.
What colours does Galaxy S24 Ultra come in?
Titanium Gray, Titanium Black, Titanium Violet, and Titanium Yellow are the available colors for Galaxy S24 Ultra. The unique colors Titanium Orange, Green, and Blue are only accessible on Samsung.com.
Read more on Govindhtech.com
0 notes
Last Seen Blogs

lightningcrown
Lightning Crown

mll26
𝕸

mikitheswiftie
MikitheSwiftie

nijaded88
𖧷·:*༺☽ꨄ☾༻*:·𖧷

appalachianapologies
Hey there!