#like how powerful someone important to Madoka is depends on her own potential
Text
The way your potential for magical power in PMMM is based off how much influence you have to change the fates of others
Yet Mami (lived alone with no family, no friends that we know of, died like a week after meeting three of the protags and never met the fourth afaik, people didn't notice she was even missing until Sayaka died) was naturally far more powerful than Sayaka (interacted a ton with all the other protagonists, had a family, had friends including Madoka- who was powerful enough to become god and repeatedly tried to unlock her powers for Sayaka's sake)
Idk it just really ties into my thoughts about how deeply ingrained survivor's guilt over Mami is in Sayaka's character especially
Like lots of plot stuff is about Sayaka, but on a deeper level everything about Sayaka is actually about Mami yk?
#obviously this wouldn't be true of Sayaka's character in timelines where Mami didn't die but like#given how Madoka's potential drastically changed with every timeline one must assume this had a ripple effect on those around her#like how powerful someone important to Madoka is depends on her own potential#bc if she's rlly powerful having control over her would make u more important than if she's weak yk#adrien says stuff#pmmm rewatch#Madoka Magica#Sayaka Miki#Mami Tomoe#headcanons analysis au ideas and such
11 notes
·
View notes
Text
Kyoko Sakura

Kyoko Sakura is one of the main protagonists of Puella Magi Madoka Magica, introduced a few episodes into the series to show someone taking the magical girl job far more cynically than the non-mystery shrouded leads had until that point. Not interested in killing witches just to keep them from hurting people, she's more invested in just keeping herself in top form by leaving them around until the optimal point to kill them to keep herself and her soul gem in top shape. This clashes rather fiercely with Sayaka's somewhat less practical but more moral "kill every witch on sight" stance, and the two clash over it early on. While she initially looks down on Sayaka, as time goes on she comes to want to help the less experienced girl as she realizes there is way more wrong with the system than either of them thought, with the handicaps and downsides of their bargain with Kyubey becoming ever more clear. That, and Sayaka begins to undergo a period of strongly regretting the wish she had made, something Kyoko finds she can relate too.
As the daughter of a preacher living in poverty, she desperately wanted her father's word to get out and have what they would need for her family to eat. Wishing to Kyubey for help, she got what she wanted, only for it to backfire horribly when she admitted how she did it. Kyoko was decried as going against the faith and using magic to bring people to him, and once his church collapsed ended up killing himself and Kyoko's little sister, leaving her to come back to the horrid sight. Seeing Sayaka regretting her own wish, Kyoko just tried to help her rebound, only to fail and have Sayaka succumb to her mental state and transform into a witch. Kyoko ended up having to put her down at the cost of her own life, but unlike Mami and Sayaka she at least managed to go out on her own terms.
StatsKyoko is not an especially large character, being about the same height as Pit with a slightly less wide hurtbox. Unfortunately, she's rather frail even for her size, having only 80 weight units, the same as Meta Knight and Zero Suit Samus, so she gets KO'd fairly early. Her jumps are quite good and her gravity is about average, giving her a fairly strong basis for her recovery, and both her air and ground speed are also on the high end. She's in the 12th-16th tie for fastest air speed with Mario, Sonic, and a couple others, while her run speed of 2.35 actually puts her in sixth place overall. She has a wall cling and wall jump, a reasonably low crouch, and a crawl, so on the whole her mobility is very good. While her traction is among the worst in the game, everyone in Ultimate has good enough traction that this isn't really going to have her sliding around.
Specials
Neutral Special - Surging Spear
Pointing her spear at the ground at first, Kyoko's spear breaks into segments and begins to wrap in circles around her a short distance away from her body, as she clasps her hands together and focuses. The tip of the spear, now pointed upward forward over her and enlarged to about double its normal size, then smashes into the ground in front of her, dealing 13% and diagonally upwards knockback that KOs at 150%. Kyoko's spear reverts to normal in her hand afterwards with surprisingly low end lag, its parts all just snapping back into place. This has a bit less start lag than the animation might sound like it has, the chain breaking into segments being an almost instantaneous visual, but its still not a fast move and a bit too slow to be worth its startup lag at first. The move covers a pretty big area in front of her due to the enlarged size of the spear point.
You can charge this move, as energy flares off the tip, like a flame but a darker red color rather than orange. This also slightly increases the size of the end of the spear over time, eventually about doubling it at full charge, which takes 1.4 seconds. The chain link coils also rise higher into the air, giving the move more vertical range in addition to more horizontal range. The power increases at a consistent rate of 1% every 0.1 seconds, capping out at 27% and being able to kill at about 55%. Given the size of the hitbox and the impressive maximum power this move reaches, its a pretty stellar kill move, but charging 1.4 seconds for it is not something most opponents will allow you to do outside of a shield break situation.
The good news is the charge can be cancelled like Giant Punch or Samus' charge shot, but at a bit of a price, you only get to keep half the charge. The half charged version of this move still deals 20%, has nice range, and KOs at about 100%, so its not a bad consolation prize, but it does make the move a bit worse than Giant Punch at the same niche. It does have a few advantages, which we'll go over.
The first is that you can actually change the impact point of the spear by pressing forward at any point during the start lag or charge. This will cause the spear to instead lurch forward and slam down about 1.5 battlefield platforms in front of Kyoko, dealing only 0.7x its usual damage and 0.8x the knockback as it launches forward before slamming down. The hitbox where it slams down has the same power as the original move. This version has noticeably more end lag as it takes longer for the spear to retract back to its default state, but the start lag remains the same, giving Kyoko a pseudo-projectile to harass people at a range.
There's another layer of pressure to this move if it has half charge or more, as a red shockwave is emitted from the impact point. At half charge, it goes a battlefield platform in each direction from the impact point, traveling at a speed that means the wave will still have the last quarter of its path to cover when Kyoko comes out of lag. Unfortunately the wave only deals 4% and a flinch at half charge, but it adds another layer of pressure to the half-charged version of this attack, as at close range it covers Kyoko's longer range spear attacks, and at long range it will help cover her shorter ranged ones. The red wave goes further at a slightly higher speed with higher charges, though the speed only increases to about 1.2x its base amount at full charge so its not much. The distance, however, is doubled to 2 battlefield platforms in both directions, and the damage and knockback spikes up quite a bit, capping out at 14% and upward knockback that KOs at 140%. This is a pretty scary projectile to have as additional pressure to Kyoko's game at all ranges, and it comes out on top of an already threatening hitbox, but you only get it if you use half charge or better.
In the air this move switches to a slightly less flashy version, with the spearhead simply stabbing forward at the end of the charge, either right in front of Kyoko or launching further away depending on if you tilted the control stick forward or not. It deals 2% less than it does on the ground, but due to the slam being less dramatic, the start lag is actually cut noticeably. The half charged version is, even with the slight damage reduction, pretty alarming in this context given you can use it relatively close to the blast zone if you set it up, and that 100% KO percent of the base version is from center stage. Having a decent amount of charge in this move makes Kyoko very scary in the air, given this move comes out considerably faster than Giant Punch in the air rather than slightly slower on the ground. That said, you lose the shockwave and a bit of punch, so there is a tradeoff, and the end lag is actually a bit worse in the aerial version, which adds up to be extremely punishable if you whiff the long range version of this move.
In the end, this move serves a couple functions. In the air, its a potentially powerful kill tool that comes out pretty fast, but needs stored charge for you to get much mileage out of. On the ground, it has more power but is less practical to actually hit with, in exchange for creating a projectile if you whiff. The projectile helps a pretty important part of Kyoko's play pattern, however, it allows her to transition from fighting at long range to fighting at short range and vice versa. Given Kyoko is at her best when knocking the opponent back and forth long and short ranges, this is a powerful tool to have wrapped up in just one input.
Up Special - Impale
Pulling her spear back with red energy forming at the tip, Kyoko's spear breaks into segments once again and launches forward with the tip faintly blazing with the energy. You can angle this move in all eight cardinal directions during the start lag similar to Fire Fox, but the move will default to 45 degrees upward in the air and directly forward on the ground. The spear goes out a similar distance to Fox's recovery, actually, and has quite a bit of start lag. For most of its flight, it deals 9% and pretty underwhelming knockback that doesn't KO until basically irrelevant percents, unless it hits pretty close to a blast zone. At the end of its range, however, the tip of the spear ignites with red energy, and if you hit the opponent with this hitbox, they take 15% and are trapped in a state similar to Corrin's pin. If it hits a ledge, Kyoko will tether to it, so this functions as her primary(and admittedly somewhat underwhelming) recovery move.
There are a couple differences, with the big one being that Kyoko doesn't need to pin the opponent against a surface, so it functions a bit closer to a grab hitbox. The amount of time the opponent is impaled for is much less than Corrin's on account of being able to do this in the air, but you'll still have time to use the inputs you have available out of this move. Kyoko has three options out of this move, pressing forward, pressing up, or pressing backwards. As an aside if you do manage to pin an opponent against a surface, this deals an extra 7% to that opponent, which pushes the damage once you factor in the follow up to a pretty astonomical value. Given you need to sweetspot this move that's not especially fast to pull it off, however, its a reasonable payment for the risk involved.
The forward option simply has Kyoko pull herself to the opponent, yanking the spear out and dropkicking the opponent once she gets into close range. This deals another 9% and weak horizontal knockback that scales poorly as well, so it serves as a pretty solid combo setup. If Kyoko fired the spear straight upward, she'll kick off to be a bit below the foe and the weak knockback will be vertical, and straight downward she will kick off above the foe and deal weak downward knockback, but the damage will remain the same. The upward version has her flick the chain upwards, sending the foe flying up off the tip of the spear with low vertical knockback that scales poorly, and only deals 6%. What's nice about this, however, is that you can use it to set up Kyoko's other long range attacks to follow up on her pressure at an extremely safe distance. These moves both remain the same on the ground and in the air.
The backward option is different depending on if you're on the ground or in the air. If you're on the ground, Kyoko will swing the chain spear overhead and smash the opponent into the ground on the other side of her, dealing 13% and initially weak knockback that scales quite well, killing at about 135%. An important thing to note about this is it will send the opponent flying at a point of impact far behind Kyoko, This actually makes the KO power even better than you'd expect... provided the opponent lands on solid ground. If they just reach the end point of the slam and are in the air, they instead get a pretty weak spike that won't kill until 150% and take 7%, but that still sets up a pretty solid edgeguarding scenario. While this option is definitely the most powerful of the three chain spear tools, keep in mind its also not very easy to follow up on unless you've set up a few specific situations, such as an edgeguard or using the Down Special which we're about to get to.
Both Kyoko holding the spear and the opponent will continue to fall at their normal fall speeds in the air. If one falls faster than the other they can't go past the end of the chain spear, which functions as a bit of a tether, and as such will become horizontally closer to Kyoko as the spear bends downward to keep them impaled. If Kyoko or the opponent end up the full spear length below the other, they'll just dangle there. Kyoko will straighten out the spear in front of her before performing a throw, so it'll always be performed from her height, so this stuff is only really relevant in some pretty big corner cases. Given the impale will not hold for very long, pulling off suicide kills with this is pretty difficult. The back throw does allow for some potential gimps, however, and the forward variation can also lead into a gimping attempt off stage, although considering this move is not a particularly great recovery that could easily backfire. Your Side B can compensate for that a little, but not enough that going off stage is great for Kyoko.
As a final note, this move has pretty bad end lag if you whiff, but Kyoko resets the spear back to its normal state pretty quickly if you do hit.
Down Special - Barrier
With a pulse of red energy from her soul gem and a wave of her hand, Kyoko manifests a wall made of red chains, each link a red diamond-shaped object. This wall is about 1.4x Ganondorf's height, and appears a single stage builder unit in front of Kyoko. If you're looking for a durable construct to protect you from projectiles, prepare to be a bit disappointed. The wall will only take two hits to destroy from attacks that deal less than 8%, and one hit from an attack that deals more than that. The rare non-flinching move that also happens to deal less than 5% will take three hits to destroy it, so Fox won't have quite as much luck breaking through, and its not terribly hard to set up given the lag is average. If the first two below 5% and no flinching hits are dealt to the wall, that will allow it to be destroyed by a subsequent hit of less than 8%. That said, you're not really using this as a defensive tool, but it has its niche uses as one to help Kyoko play her longer ranged game if you want to go down that road.
Kyoko's spear goes through the wall without damaging it, so it can serve as a sort of "armor" move to defend her while abusing the sheer amount of range her spear has, making life a bit difficult for opponents destroying the wall. The thing is most characters have an aerial or tilt that can smash through it in one hit, and if they do the attack will still go through and hit Kyoko potentially. There is a bit of impact stall upon destroying the wall, however, and the attack's damage is reduced by 8% with a corresponding knockback reduction from the damage lost. This loss of power can sometimes result in an attack being punishable on hit when it otherwise wouldn't be due to just flinching Kyoko rather than doing something more effectual, and combined with the impact stall it allows you to sometimes punish a foe in mid attack or on hit.
The real meat of this move is what happens if you hit the opponent and they get knocked flying into a wall. They will be caught on the barrier, causing some of the bindings holding it together to snap but enough will stay around to hold the opponent in place. They will be trapped in hitstun on the barrier for as long as they would take knockback, effectively turning high knockback moves that hit foes into the wall into ridiculous combo setups. If you hit them with something that might KO them but it got intercepted by the wall, don't worry, this is the perfect time to charge a Neutral Special or Smash Attack to get the kill anyway. With less knockback than that it can still prove incredibly useful for combo setups, allowing you to link what would normally be combo finishers into a longer string or turn a KO move into a stellar combo starter. Flinching and weak knockback will not catch the opponent against the wall, rather they will bounce off it and deal the equivalent of 1 of the 2 hits of less than 8% required to destroy it. The wall will crumple completely after the opponent's hitstun ends or Kyoko lands another hit on them, using it up.
If Kyoko is hit into this wall, rather than the opponent, it will crumple to catch her fall, reducing the knockback to almost none no matter how much it was initially an immensely reducing the hitstun. This can save Kyoko from death situationally, or interrupt an opponent's combo as Kyoko catches herself out of her hitstun just well enough to reverse it on the opponent. Kyoko can also tether to this wall with her Up Special, as unlike the rest of your spear attacks it will actually hook onto the wall. This does hurt your ability to latch onto foes behind it unfortunately, but it can allow you to get yourself to a nice aerial vantage point with your back to a wall that will cushion you against combos and KO moves. You can also wall cling on this wall, which is a niche but useful ability for amplifying Kyoko's air game.
The wall will fade after 12 seconds, giving you a decent amount of time to work with it in all its varied uses. It serves as a powerful reward for Kyoko winning control of the stage, as its a great thing to be backed against in disadvantage state, and a great thing to pressure the opponent into at an advantage state, and is best set up when you've gotten a large amount of space from the opponent. Your Neutral and Up Special give Kyoko powerful repositioning and zoning options to make setting this wall up at an ideal point for you at whatever stage of the game you're in a reality.
Side Special - Chain Dance
Kyoko swings her spear up in a small arc in front of her, a look of concentration on her face. This deals only 2%, and comes out on Frame 10, one frame slower than Marth's dancing blade, but the sweetspot at the pointy part of the spear deals 3.5% and increased hitstun. This has better range than Dancing Blade's first hit, albeit by a small margin, and I keep comparing them because this move works a lot like dancing blade, with three subsequent follow ups that can each be angled in three directions. Note that the down option comes out a bit slower than the other two after this first hit, and as such it will not true combo out of hitting with the spear's shaft. If you hit with the tip, however, all three hits will true combo, which is a very useful property to have.
The forward hit has Kyoko rapidly stab forward twice, once at a slightly downward angle and the second time at a slightly upward angle, dealing 2 hits of 1% and then 3%. This launches the foe forward with moderately strong base knockback that scales extremely slowly, only killing around 300%. This poor scaling is actually pretty important, because subsequent hits of Chain Dance actually transition into much longer range options that can be landed at foes on a wider range of percentages because of this. It also sets the opponent up nicely for the long range version of Neutral Special, not true comboing into it but because Kyoko has a couple options to follow up at that range including other hits of Chain Dance, a charged Neutral Special becomes a very scary alternative option for Kyoko to use out of this. Used in relatively close proximity to a wall the fact that the base knockback is this good also makes it an excellent combo tool, given the foe will be stuck in hitstun for a fair bit longer than most moves would leave them at a low percent.
The upward version has Kyoko sweep the spear over her head in an arc from front to back, dealing 3% at the shaft and 4% at the tip of the spear. This move hits in enough of an arc in front of her it will catch people hit by the first strike. If you hit with the shaft of the first hit, you'll hit with it on the second hit, and the same will be true for the tipper. The shaft only deals weak upward knockback that pops the opponent up into the air a bit too high for melee ranged combos, but not far enough for Kyoko's long ranged options. It gets the foe out of your face for a moment at least, but you're not aiming to hit with it. The tipper hit will send the opponent a fair bit further upward, dealing similar knockback to the forward second hit but with slightly decreased base knockback, and at a slight forward angle away from directly above you. Aside from being a good range to put the opponent at for Kyoko's longer ranged upwards options, it also is a good range to play off by jumping up near the top of your wall with your wall cling, as that provides you a fallback point if you want to go into an aerial pursuit of an opponent.
The downward hit has Kyoko swing the spear down and stab it into the ground in front of her at an angle, dealing 6% and noticeably increased hitstun. This is a stellar move for setting up melee combos, probably Kyoko's actual best combo starter, but you won't be able to confirm it out of Side Special unless you specifically hit with the tipper. That, being able to start a close range combo is a useful thing to have out of this move, as the long range combo options have a lot greater possibility of failure due to the percentages of the opponents being off from what you need. This is a good place to stop your chain dance if you're not in the right situation for some of the stronger payoffs, and for what its worth you can land this out of a sourspot first hit if the opponent reads you wrong.
Once the third hit starts, Kyoko's expression will change from a concentrated one to a visible grin, pleased to have gotten to such an advantage. Her expression will sour greatly if she misses any of these hits however, and she'll audibly grunt in frustration.
The third forward hit is where this move gets a little crazier, as Kyoko's spear extends outward, aimed directly at an opponent struck by the previous hit. If the opponent is "pinned" at close range by the downward version, it will just extend to the floor through the opponent for this hitbox. If an opponent was not struck by the previous hit it will just extend forward, as you'd probably expect. It can extend out up to 1.3 battlefield platforms, with the tip of the spear flaring up with red energy around it after its traveled a platform. This deals 5%-12% and knockback that KOs at 250%-160%, growing more powerful the further away from you the opponent was knocked. This is a good combo starter out of the downward variation if you want a foe a bit further forward rather than right at the tipper range of Side Special for subsequent hits, as the end lag of this hit is low if canceled out of at close range. At longer range, the ending lag gets worse and worse, and while its usually a true combo out of the up or forward hits due to its homing properties and fairly fast start lag, the gravity or percentage of the opponent will sometimes mess up the ability to true combo this, and if you whiff its pretty bad. Primarily at high percentages you'll want to be careful of using this as that's when the combos are more liable to not work. That said, given the foe will already be spaced away even before this hit this can get you a massive amount of distance from them to allow you to reset stage positioning. Sometimes in the air, this can also work as a pretty good gimp, as the way the knockback of the 2nd and 3rd hits will stack up in the air becomes a lot scarier closer to a blast zone, and you have to worry a bit less about needing the opponent at a percent where the true combo is less likely. Its a solid default third hit that always combos adequately out of the any of the first 3 hits due to its homing properties, and is situationally very powerful.
The third upward hit is actually a similar to the second upward hit, with Kyoko swinging her spear in an upward arc from front to back a second time most of the time. As a small caveat, she'll swing from back to front if she uses this out of the second upward hit instead for the purpose of making the animation a little neater due to where her spear ends after the second hit. The thing that makes this a bit more interesting is Kyoko will hop backwards a bit during this move, and also extend the spear out so that at the apex of the swing the spear reaches up 1.25 Ganondorf heights above her head. This spaces Kyoko back a bit for the rest of the dancing blade combo or any follow ups she commits too after this move. The spear deals 5% and knockback that pops opponents up lightly on the handle, or 8% at the tip with knockback that scales pretty hard, killing at 130% but being not knocking the foe much further at low percents. The tipper hit will combo out of the tipper hit of the second upwards hit, while the second forward hit will just whiff and the second downward hit will hit with the sourspot. This is the least conditional way to kill foes out of your Side Special, only requiring you hit with the spear tip on the first hit, but it doesn't kill especially early and it still requires you to sweetspot it. That said, if you go down second up third, it sets up pretty nicely if you just want to try and string into your aerials out of this. Lastly, if there's a wall in front of you, the forward second hit actually will set up for this, sounds pretty situational and like not the best use of a wall, but its worth keeping in mind for the fourth upward hit.
The third downward hit has Kyoko stab forward with her spear three times rapidly along the ground, each time increasing the length of the spear. This deals 2 hits of 1.5% at the handle and 2% at the tip, followed by a third of 3% at the handle and 6% at the tip. The first two hits don't have their knockback depend that much on the tip vs handle hitboxes, each having enough knockback to push the opponent forward about 0.45 Battlefield platforms, which is a tiny bit more than the spear extends each time (0.4 battlefield platforms). The tip of the spear's size is exaggerated a bit more with each successive stab, so you won't accidentally knock the foe out of your range with this with the tipper hitbox, but it gives you a small portion of the handle hitbox that will actually chain successfully into the next tipper hitboxes of the second/third hits. The handle third hit deals low mostly horizontal knockback that doesn't amount to much other than spacing the foe a bit further away from Kyoko, but the tipper hit actually deals greatly heightened hitstun. This unfortunately does not set up into your fourth hits especially well due to their weird hitboxes, but what it can let you do is set up your Up Special or Neutral Special. Its not a true combo, but the window the foe has to get out of the way is extremely small, giving Kyoko the chance to mix it up with a few of her other options to basically always get an advantage out of this, and Up Special combined with this move allows you to switch around positions on the stage exceptionally well provided you got the tipper on the first strike to go into the down hit and then this. Neutral Special, instead, provides pressure even if the foe is missed by the spear itself and kills pretty early provided its charged, and you can fake out the foe's dodges by further charging it. The forward hit can sometimes chain into it via a wall too, at a slightly closer range than the Up Tilt's sweetspot, so it gives a different option for if you used the forward second hit into a wall. As a final note this shield pokes foes really easily, always doing so by the third hit and easily doing so on the first or second hit if the foe has taken even chip shield damage, so this is a very useful move to go into against a blocking foe.
For the fourth and final hit, Kyoko's spear starts breaks into chain link segments out of the third hit as she lashes it forward in a slight arc in front of her, the ground shaking slightly from the impact if it hits the ground as this final hit covers a huge range of 1.65 battlefield platforms. This is unfortunately too laggy to true combo out of anything, barring the third down hit's sweetspot, which will always hit with the sourspot of this hitbox. That said, this is the one sourspot in this move with actual power behind it, dealing 6% and diagonal knockback that KOs at 175% which isn't terribly impressive but if you consider the move's range and ability to be used in the air its an acceptable result. If you hit with the sweetspot spearhead at the end of the move, you'll instead get 11% and a hitbox that kills at 95%, but that's not happening unless you have a very well positioned wall. That said, the spearhead is at least big enough to at least give you a bit of wiggle room on the exact positioning, exaggerated slightly on this version of the move. At specific percentages and ranges, you can actually land this move out of the third forward hit, which due to its variable power you won't get entirely consistent results for but chaining from second forward to third forward to fourth forward will specifically give the foe a very small window to dodge the fourth hit at 85%-110%, which makes this something the foe very much has to fear in those ranges. While they can dodge it, predicting their attempt too can allow Kyoko to go for something else. As an aside, while shielding this move is a good option to avoid it if you still end up on the ground after the first 3 hits, but if they're hit by the sweetspot that actually deals an absurd amount of shield damage and quite a bit of shield stun, almost enough to break it in one hit, so be careful reacting like that.
The fourth hit's upward variant instead has the spear break into segments and then Kyoko has it lash upwards at a 20 degree diagonal forward away from directly above her, dealing 5% on the body of the spear and weakly bumping the foe upward again. This is a fair bit faster than the forward fourth hit, actually true comboing out of the upward third hit, except for the part that due to only covering a specific angle that will stop working after about 50%. The good news is the sweetspot here is the strongest KO move Kyoko has here, dealing 14% and knockkback that KOs at 60%. This is insanely good, but you're only going to pull it off if you specifically second hit a foe into a wall with the forward version, third hit the foe upward at maximum range, and then they have to be between 60% and 85%. This is a really specific hit to ever land, but on the other hand you're killing the opponent in the 45%-70% range where you're factoring in the damage before this move out of a frame 10 move, and Kyoko's gameplan is all about positioning yourself well in relation to the opponent and your wall. So while situational, this is your big reward, and the nice thing is as mentioned there are a lot of other semi-specific ranges where certain combinations of Side Special hits will leave a pretty solid end result with a wall, so if you don't get the exact range for this right you still have plenty of other potential success cases.
The final version of the fourth hit has Kyoko's chain spear get tossed forward in a similar animation to the forward hit at first, before the tip curls backwards and then the chain segments further extend out into a vortex of whirling chain links, turning into a red blur at the end of the spear that covers an area 0.5 battlefield platforms wide, starting a distance 1.3 battlefield platforms from Kyoko. This has much better coverage than the forward version but suffers from similar, albeit not identical lag, slightly faster to allow it to do wall combos slightly easier. The chain slamming down before the tornado of spear parts deals 4% and considerably weaker diagonal knockback than the forward variant, but the whirlwind deals rapid hits of 1% that add up to 12% and a final hit that deals knockback TOWARD Kyoko that KOs at 170%. Like the forward variant, its not a true combo out of anything Side Special does, but what it does do is catch out non-perfectly timed dodges with its somewhat longer duration and as such encourage the foe to shield, while also having slightly different timing than the forward variation to further make avoiding one move or the other a pain. This gives Kyoko a pretty powerful 50/50 tool, one she can potentially mix up her other long range options to remind foes how terrifying she is at this range. The most exciting thing about this move is the result. Knocking the foe back toward you opens all kinds of possibilities, like getting a foe stuck in a wall behind you to pull off a flashy and exotic finisher. Or you bring them back in and because they failed to avoid this move, you get to go for yet another Side Special chain, or just a combo of standards and aerials. Even your smashes and Neutral Special, or slightly charged Neutral Special, can be landed out of this sometimes. This is an exceptional reward if you aren't at the KO range you're looking for, but you do to have to time it right and not just get shielded, as this move does pretty poorly on shields. At least you're far away when it ends. Also if you whiff this one, the extra duration means the potential punishment you could eat will be a lot worse.
Standards
Jab - Red Combo
Kyoko starts off her jab combo with a low kick with her left leg, hitting foes surprisingly close to the ground and dealing 2%. It comes out quite fast, on Frame 3, but has the downside of having shorter range than her spear moves. It is nice that it hits low though, partially because it can shield poke if the foe's shield has taken a decent amount of chip damage and partially because Kyoko's actually a bit lacking for close range low hitting options, so this at least helps. While this has enough end lag if you cancel out of it you'll just be in frame neutral, obviously what you'll want to do is instead go into the second hit.
Kyoko's second hit has her rapidly stab up and down, in a manner visually similar to Captain Falcon's Jab albeit carrying a spear. She only does it for a short burst though, dealing 8 hits of 0.5% that add up to 4%, pushing the foe back slightly while she does so. Like the first hit, if you cancel out of this here you won't be at enough of a frame advantage to true combo into anything, but you will be at a slight one, and the foe will be at tipper range of your spear in front of you, so you'll definently be at an advantage.
The final hit has Kyoko slide slightly forward and stab as she goes, the spear pointed slightly upward as she does so. This does 5% on the body and 6% at the tip of the spear, and sends the foe diagonally mostly forward with knockback that kills at 170%. You won't really get combos off this most of the time, like the other Jab hits, but it will space the foe decently far away and given how fast the first hit of Jab comes out, this is not a bad end result, and if landing actual kill moves has been going poorly enough this one can kill at the ledge in an emergency. One thing that's pretty nice here is this is one of the best ways to use a wall, because the knockback is high enough the foe will get stuck in it for quite a bit, actually allowing you to combo extend into quite a few things out of a move that comes out incredibly fast, at higher percents even allowing for you to get a kill confirm. So this is one of the best ways to capitalize on a wall's existence in your set, even if it doesn't link into your other moves terribly well otherwise.
Forward Tilt - Stab/Reel
Kyoko stabs forward in front of her with her spear in a very basic melee move, having good reach for a melee move and also coming out quite fast. She leans forward just a bit in this move to give it a bit more reach, but this is at the cost of ending lag that makes it worse for combos than you'd hope. The hilt of the spear deals 5% and weak horizontal knockback that will never kill, but starts at a slightly more respectable base value than you'd expect to make it not horrible for putting the foe at spear point range. The spear point deals 9% and better knockback, which will space the opponent to about a battlefield platform-1.5 battlefield platforms in the 10%-70% range before scaling to the point its not as good at putting the foe in Kyoko's long range pressure zone. It overall serves the purpose of being a great spacer, but unfortunately doesn't really set up a lot of combos. It at least sets up nicely for Nair/Jab with the sourspot.
While this is good as your basic spacer, there's a trick to it that gives it just a bit more versatility than just that. This move has a follow up where Kyoko actually has the spear break into segments and launch forward from where the move ends, but the spear point seems to just go around foes as it travels through the background instead. No, we're not about to pull some MYM11-12 level garbage here though, this is actually just so the spear can instead go around opponents and, if they're in range of the hitbox, wrap around their body and reel them toward Kyoko. This deals another 5% and pulls the opponent about 0.35 battlefield platforms of width toward Kyoko, and leaves her at a slight frame advantage. This looks like a grab but it won't go through shields, even if the way the foe is pulled toward Kyoko doesn't quite look like normal knockback with the chain wrapped around their body. It comes out fairly quickly after the base attack, and actually leaves Kyoko with a bit less end lag than the other version as the spear is already retracting back to its default state at the end of the move and Kyoko has reset her footing.
This allows this move to serve double duty as a spacer. The second hit comes out fast enough that while its a little on the predictable side, you can hit foes with it even if you didn't hit the first hit, and the first hit will combo into it until around 40% at the tip and at any range on the hilt. Of course, comboing into this on the hilt will frequently end up with the foe right back in your face, which you don't really want, but Kyoko is at least at a slight frame advantage. More importantly, this move allows you to just mess with the foe's spacing in a bit smaller increments, which if you're aiming for specific positioning in regards to a wall is incredibly useful. Its also not a bad way to transfer long range pressure into some closer range brawling, being faster and more convenient for this purpose than the fourth down hit of the Side Special. Its a lot less powerful, though, and because you do have to go through the first hit to get to this move the lag will add up to the point foes can definently get out of the way of this if you're trying to reel them in from afar. While the end result is nothing to write home about, this does catch out dodges sometimes at close range, which is a handy thing to have access to.
Up Tilt - Overhead Strike
Kyoko swings the spear up over her head, stopping a bit behind her. She then pulls her spear back to her side for the ending lag in a very quick motion, actually making this move quite fast on both ends. The tip of the spear deals 9% and weak upward knockback that eventually scales to kill at 235%, while the handle deals 6% and diagonal upward knockback that actually starts a bit higher than the upward hit but scales worse to not kill at any remotely relevant percent. This move comes out fast and ends fast, and serves as one of Kyoko's best grounded close range options for the most part. However, one thing worth looking out for is that its backwards coverage is pretty lackluster, so while it can hit a foe from behind Kyoko they can weave around it pretty easily. This means Kyoko needs to be careful of cross-ups, though you can still certainly land this move if the foe is behind you if you space yourself at the right angle from them, and for what its worth your Nair is a very good coverage tool.
The combo applications of this move depend on where you hit with it. The sourspot basically only combos into Nair with any consistency, but it will do so up until around 85% on middleweights, so if nothing else it has a pretty safe follow up. The upwards hitbox is much better, comboing into itself or Side Special at very low percents, and can also link into Up Smash at slightly higher percents and Uair/Nair for a bit longer than that. The problem is this move will lose its combo utility around 50% with the sweetspot, rather just spacing the foe upward, but it still serves its purpose as a juggler. Either hit will at least do decent work as a combo starter though, and it serves as a good tool to throw out in neutral or even when you're on the back foot if the foe mistimes something due to its general speed and safety.
Down Tilt - Low Lash
Kyoko's spear quickly separates into segments as she sweeps it low along the ground in front of her. This is an animation a bit similar to Ike's Down Tilt, but given much greater reach by the segmented spear. This is pretty quick to come out and has pretty enormous range for its speed, reaching nearly a full battlefield platform forward. The trade off for this is that the end lag isn't great, and the power is generally pretty weak. If you hit with the chain segments, all you're doing is popping the foe up for 5% and weak upward knockback that is barely above a flinch until about 40%. This makes this move actually pretty garbage at most ranges at low percentages, where the foe will actually be at a minor frame advantage on hit. Once the knockback has scaled a bit this stops being as much of a problem, as it will put Kyoko into a frame neutral or advantageous position that sort of sets up aerial combos at lower percents than you'd expect, though the true combos you get out of this move are basically non-existent barring some corner cases. Its not exciting to hit with this sourspot, but at percentages in the 70%+ range it leads into your aerial game pretty well if the opponent doesn't pull off some good predictions.
Up very close to Kyoko, there's actually a slightly better hitbox that deals 8% and diagonal knockback that while not comboing into anything or KOing at any relevant time, is safe on hit at all percentages. The fact that it will never combo means the short range in front of Kyoko where this hitbox hits is actually a bit worse than the one slightly further out. That said, you'll appreciate having the safety when the foe is at low percents that you otherwise would not have, even if the safe range has about the same reach as Mario's FTilt.
The spear tip itself is actually a pretty decent hitbox, however, dealing 11% and knocking opponents toward Kyoko with low to the ground knockback that KOs at 255%. This is not nearly as powerful of a "knock the foe to you" option as the Side Special's fourth downward hit, partially because of the weaker knockback and partially because of the somewhat annoying ending lag that makes going into laggier options less practical. Still, it can convert into Forward Tilt/Up Tilt easily, as well as your Nair/Side Special/Neutral Special sometimes and at very specific percentages your Up Smash. The slightly shorter range of the tip compared to Kyoko's other long ranged pressure tools is kind of unfortunate, but what this can do is catch out foes rolling closer from Kyoko's long ranged pressure, and provides a fast option to overload the foe's dodges alongside a Neutral Special shockwave for the longer ranged NSpecial. It also gives another place in Kyoko's range that the foe will need to be careful about.
This is a pretty good move to poke a foe with from behind a wall, one of Kyoko's best options in that regard. The tips hitbox can knock a foe into a wall, and while the knockback is not good enough for it to lead to a great use of the wall at lower percents it does slightly expand your combo options, and can lead into a kill confirm pretty easily at around 80%-100% depending on the foe's position relative to the wall. Also if you hit with the sourspot, its a bit better in this situation, as the foe's offensive options are messed up by the wall taking one or two of their hits and as such leaves their tools to punish Kyoko or retake control in the air a fair bit more limited. This isn't as powerful as some things you can do with the wall, but it shores up a lot of this move's weaknesses.
As a final note, this moves usefulness against shields varies pretty wildly. If the foe has a full health shield, you're going into a worryingly large frame disadvantage if you use this on one, but if they've taken even chip damage they will get shield poked. This means this move's viability to just throw out depends on if the foe has already taken shield damage, something to keep in mind as Kyoko's fast options go.
Dash Attack - Serpentine Spear
Kyoko lunges up into the air, holding her spear out below her as she travels in an arc that goes approximately 1.25 battlefield platforms. For the first half of the arc, the spear breaks into its segmented form as the spearhead increases in size, as Kyoko grounds herself on the head of it. The spear then smashes back down in the back half of the arc with Kyoko standing on it, a flare of red energy surrounding her as it impacts the ground. Kyoko goes up about a Ganondorf height into the air at the move's peak, and the spearhead is a bit bigger than Wario when it smashes into the ground. This is one the whole a pretty laggy dash attack, taking a bit for Kyoko to complete her arc through the air and having terrible end lag as she has to step off the spear and revert it to its normal size and shape.
While Kyoko's going upwards with the spear underneath her, Kyoko's body will lightly knock the opponent forward for 4% and knockback that scales very poorly. The spear is a bit better, dealing 7% and dealing upwards diagonal knockback that kills at 250%. These are not hitboxes you want to hit with, because Kyoko will not be canceled out of her dash attack when she hits with them, which means Kyoko will have to go through all the awful ending lag while the foe recovers from their knockback. If you hit with the spear, at least, you're likely to get punished a lot less badly than if you whiffed entirely, and at high percents you might just be completely fine as it'll start sending the foe a good distance away. That said, if Kyoko's body collides with the foe or this move gets outright dodged, you're definently going to take a big hit.
Once Kyoko is actually riding atop the spear, this move gets a lot better, as the power is buffed to dealing 13% and mostly horizontal knockback that KOs at 145%. This knockback has a slightly downward angle to it, which makes it a lot more impressive near a ledge. This is the start of the portion of the move you want to hit with, and its a perfectly acceptable consolation prize if you don't hit with the impact point. Of note, if you have a foe's back to a wall, this gets a lot scarier, as if you have the ranges right you can have both this hit and the final, more powerful hit collide to pile on an additional 13% and get the most powerful hitbox of this move out of the flight path, which as we're going to get to is a pretty impressive reward. You still have to be very careful about throwing this move out, and it'll be a bit predictable that you want too if the wall is there at a foe's back, but the threat being there is absolutely noteworthy.
When Kyoko finally lands on the ground, the sides of the spearhead deal 16% and mostly vertical knockback that KOs at 120%. This is pretty good, but what you really want to hit with is the middle of the spearhead, which will deal a terrifying 23% with purely vertical knockback that kills at 60%, obscenely powerful for a dash attack. That said, this only works at near the exact limits of this move's range, so compared to other slow power dash attacks this one is even harder to pull off. With all that said, Kyoko has a number of ways to pressure foes at long range, with the best one to lead into this move being Neutral Special. Putting the foe off balance with shockwaves on the ground makes avoiding this attack a fair bit harder, and the foe really has to be smart to avoid it, because this move has some notable anti-defense properties. It absolutely obliterates shields on the sweetspot, breaking them outright if they've taken more than a sliver of damage, and the flame around the hitbox indicates it lingering for a few frames to make dodging it surprisingly difficult, especially if the foe's dodges are decayed from other long ranged pressure.
If Kyoko goes off stage with this move, the result is risky yet powerful. Kyoko will basically activate the final hitbox at the same height she'd collide with the ground, except the sweetspot instead becomes a spiking hitbox comparable to Ganondorf's Dair, only actually a little bit stronger. This is obviously absurd, but landing this hitbox is vastly much predictable than said Dair, and it sends Kyoko falling down 2 Ganondorf heights before she exits her fall, reverting her spear back to normal as she gets off it. This can frequently lead into a gimp in the foe's favor if they get out of the way of this attack, but it is worth mentioning the area covered by it is very big and gives Kyoko's already strong ability to ledge guard an even scarier tool than usual.
One nice thing about this move is that in the second half of it with Kyoko riding on her spear, the spearhead is capable of just blocking and powering through incoming attacks. This gives Kyoko the ability to power through projectiles and not eat a fast move while trying to land this attack, meaning once she's reached the halfway point of her travel path, the best way to punish her is just to not get hit, as knocking her out of this move requires you to specifically attack around the spearhead. While the ability to pseudo counter with this by powering through a hitbox will not come up that often, sometimes you will cut through an opponent's aerial attack and send them flying backwards, often putting them at a good offstage angle or sometimes even smacking them into the wall for the ideal hitbox. This adds a secondary purpose to this move beyond just going in off long range pressure in the hopes of pulling off a kill on a good read. All in all this is a very powerful move, but it is a bit miserable at being a dash attack against close ranged opponents, so be aware of that.
Smashes
Forward Smash - Red Vortex Spear
Breaking her spear into segments, Kyoko spins it around herself in a sizeable vortex, covering both sides of her about a Wario width away from Kyoko on each side. It takes a bit for the spear to form into a large enough amount of segments to form the vortex, with this hitbox coming out on Frame 14 and lasting until Frame 28, at which point Kyoko flings the spearhead forward out of the vortex as the actual "forward smash" part of this attack. There is some pretty high end lag as Kyoko needs to return her spear to its default state, and between that and the duration/start lag this move is on the whole quite punishable. It makes up for this by the huge range on the forward hit, going forth 1.3 battlefield platforms, which is the kind of reach that would make the Belmonts envious. Given the move has an FAF of 85 frames though, it better be making up for it in some other departments, and I assure you this move definitely does.
The first thing worth mentioning is the knockback dealt by the vortex, which universally sends opponents forward a set distance forward while dealing 9%-12%. This even includes if you catch foes with the back of this hitbox, offering some rare utility for a Forward Smash in that it actually catches out rolling foes really nicely. The set distance forward is a little over a battlefield platform width, which is the range at which Kyoko's long range moves come into play nicely, and it also means the first hit will line up with the second one rather nicely!
The second hit deals 17%-24% while the spear is flying out and 20%-28% at the tip of the range, killing at 100%-65% for most of the hitbox while the tip of the range kills at 80%-45%. The first hit will usually not combo into the sweetspot unless the foe is right at the tip of the range, on top of another factor. You see, the foe will be out of hitstun if this move hits when it first comes out on Frame 14 by the time the spear comes rocketing after them, giving the foe a chance to shield or dodge. The move obviously takes a pretty hefty chunk out of the opponent's shield, and despite the move's bad ending lag a dodge will put the opponent in a position where Kyoko is actually at a bit of an advantage due to the combination of her range and the foe being in their dodge while she's going through the end lag. This leaves the foe with a window to react and only take the weaker hit if they get hit by it, but its not a bad place for Kyoko to be considering she does quite like being able to keep up long range pressure like this. You basically are transitioning from short range combat to long range combat in a single move here.
There's a bit of a trick here too, if you want to link the first hit into the second one a bit more easily. Kyoko can actually start charging the FSmash again by holding the input before she would throw the spear out forward, pausing her spin as she does so. The power of the second hit is actually affected by the charge of the first hit, so if its fully charged this is only useful for delaying the attack, but you can actually use this to add a bit more charge to the move mid attack in some situations, which lets it serve as an even scarier KO move. More importantly, given the foe is in a very tight situation in terms of dodging this attack, charging the second hit can screw with the opponent's timing, making linking the first and second hits a bit easier.
This move is at its best, however, when its used to punish rolls or approaches. You see, you aren't always going to hit the foe on Frame 14, if they only come into contact with the hitbox at say, Frame 19 or so, they will straight up get comboed into the second hit without question. If the foe is rolling toward Kyoko to get through her ranged pressure or to get behind her, you can turn their invulnerability frames against them by hitting them with this powerful two part combo that they suddenly have no ability to avoid, which is just an exceptionally powerful punish. Its also a nice way to switch from close range to ranged pressure, not as versatile as Side Special in that regard but serving as a decently powerful alternative that discourages rolls nicely, and sometimes works better as a KO move. As a final note, Kyoko is usually at her best trying to hit a foe at melee range or at a specific, a bit over a battlefield platform distance in front of her. While its too slow to be great at it, this is at least capable of covering the space that is normally a pseudo "blind spot" for Kyoko by hitting effectively at basically all ranges in one move.
Up Smash - Spear Vault
In a rather swift motion, Kyoko stabs up directly above her head with her spear, in a move that animates a bit similarly to Marth's Up Smash, but Kyoko spends a bit less time pulling her spear back to stab it upwards, giving the move a bit less force behind it but also a faster startup time. Coming out at frame 9, this stab deals 9%-13% on the hilt of the spear and upwards knockback that only KOs at around 220%-160%, and 15%-21% at the tip with upward knockback that KOs at 130%-85%. Given how fast it comes out, this can be a nice way to end a stock out of nowhere at higher percents with the tip hit, but unfortunately the handle sourspot only has the kind of power you'd expect of a tilt.
This move still has reasonably long ending lag and poor coverage, only hitting straight above Kyoko and only having an especially good hitbox at a fairly specific range above her, so its fast KO move properties are hindered by a those downsides. With that said, its a better move than you might at first think, because it has a fairly useful follow up. If you press the input a second time, Kyoko will jump up and bring her spear from above her into the ground, in a hitbox that deals 8%-12% and weak diagonal knockback that only kills at 275%-200% on the hilt and 11%-15% and diagonal knockback that kills at 200%-130% at the tip. This leaves Kyoko with her spear planted in the ground with her standing atop it, after which she will vault off it in one of three directions, depending on how this move was angled. This follow up combos out of the hilt hitbox at very low percentages and comes out reasonably fast, mitigating the move's ending lag problem to a degree, but because of the inherent mobility associated with the follow up that we're about to get to, its a slightly awkward option to just throw out every time you use Up Smash.
If you angle up, Kyoko will just leap off a Ganondorf height into the air from her point with her spear planted below her on the ground, effectively ending a Ganondorf height above the tip of where the first Up Smash hitbox would end. This can allow you to pursue foes high up from the sweetspot hit to make it a bit more useful at lower percents, and given Kyoko keeps her other jumps after doing this you can actually get a metric ton of vertical height with this move, allowing for a few decent setups involing Nair and Up Special that can lead into a kill with Uair at surprisingly early percentages. While its not the most used direction in this regard, Kyoko can also situationally take advantage of having a lot of distance above the opponent, walling them against the ground with Nair or taking advantage of using Dair/Up Special from above.
The other situational options out of this are if you tilt forward and backward as well as upward, which will cause Kyoko to vault forward at an accelerated speed well beyond her normal max air speed in those directions(about 1.35x faster but rapidly decreasing to her usual maximum). Vaulting backwards sets up Fair out of this and vaulting forward sets up Bair, and it can improve the viability of Nair as a combo move(we'll get to Nair soon I promise, its pretty important) just by virtue of Kyoko continuing to move in that direction at a high speed. In general this lets you weave around platforms and your wall immediately after throwing out two fast hitboxes, and combined with the fact that Kyoko wants a pretty specific kind of spacing the burst mobility this provides can really help with optimizing your positioning in regards to the opponent. With all that said, the fact that Kyoko will get launched off in one of these directions is a bit awkward if you don't want to respace yourself, in which case its better to just take the end lag, but that may not be a very safe option if the first hit whiffed.
Down Smash - Blade and Chain
Breaking her spear into segments, Kyoko begins spinning it around herself like a ball and chain, extending out a massive 1.1 battlefield platforms on each side of her. She will spin the chain around her three times before finally slamming it down in front of her, the spearhead enlarging a bit as she does so. The spearhead is slammed down 0.8 battlefield platforms ahead of Kyoko. This move has notable but not huge starting lag, moderate duration, and massive ending lag, so if you're throwing this move out it is very, very important to know what you're getting yourself into. Considering this is a larger area of coverage than a Belmont FSmash on both sides of you, the commitment is absolutely warranted.
The three spins of the spear deal 4%-6% at the tip and 2%-3% at the chain, with the tip of the spear dealing knockback that sends the foe slightly inward, to exactly the point on the ground the spear would impact with set knockback. The chain will deal a flinching hit that will just lock the opponent in place for subsequent chain hits. This means if you hit the foe with either the edge of the forward range or at exactly the point the spear would slam down, you will definently land the final spear slam hitbox. The spear slam deal 16%-22% and diagonal mostly upward knockback that KOs at 90%-55%, serving as an excellent finisher. Because this move does not come out especially slowly with the worst part of the lag being the ending of the move, this makes it a reasonable long range finisher if you hit with the tip.
What makes this move a bit more than just a long range finisher, something the FSmash generally does better, is two things. One, it comes out a lot faster than the more powerful hit of Forward Smash, so if you're not landing the initial sourspot of that move this is a fair bit easier to land, especially since the lag is now a lot closer to moves like Up Special or Neutral Special, Kyoko's other long range pressure tools. Its easier to land off a read, especially because this move's duration is such that spot dodging it is incredibly hard, and it also covers two separate, so it can actually be kind of annoying to roll around properly as well. Shielding it is probably the best option, but shielding is poor if Kyoko attempts to rush in with the dash attack, and this will deal quite a bit of shield damage thanks to all of the hits linking into each other on shield, at least making it easier to poke through with Down Tilt thanks to the heavy shield damage they took.
This move also serves a purpose of covering two points at once, the edge of the swing which knocks them in wards and the slightly closer point where the spear actually slams down. If you don't hit with either of those hitboxes but still land it far enough away, the massive ending lag becomes way harder for the foe to capitalize on other than say, throwing out a projectile which is usually not nearly as scary as their melee options. If you land it close... you should've probably used a different move. A lot of Kyoko's hitboxes are pretty lackluster outside their optimum range, so covering two optimum points at once while making spot dodging and rolling difficult is a pretty valuable threat to have in your spacing game.
Though, considering this swings behind you, this move actually has four points of coverage rather than two. Now, normally the back spear tip hit would not combo the foe into the spear slam, as the slam will take place in front of you and it will just send the foe in as much as the forward hit would, but behind you instead of in front. That said, if you press any input during the swinging process, you can have the spear slam occur behind Kyoko instead of in front of her at the same distance of 0.8 battlefield platforms behind her. This gives Kyoko a good way to deal with foes a large distance behind her, serving a secondary role to Bair in that regard working a fair bit better against dodges than said move.
Charging this attack actually has a secondary effect, as it boosts the set knockback of the inward hit with the spear tip, and simultaneously causes the slam down to occur closer to Kyoko. Fully charged, she will slam down the spear within 0.2 battlefield platforms of herself, and this means charging the move allows you to tweak where the inner hit would land to further this move's excellent coverage. Obviously charging this already somewhat laggy to start move is a bit predictable, and you don't want to be predictable with a move that you are quite liable to straight up die if you whiff, but it makes the move just that little bit more versatile in terms of covering space and punishing the foe's mistakes.
Aerials
Neutral Aerial - Spear Spin
Kyoko just spins her spear around herself with one hand, covering a complete 360 degree circle around her. This is one of Kyoko's fastest options, and has coverage over her entire body, even having pretty low ending lag, in exchange for not reaching out as far as even some of her more melee ranged weapon attacks usually do. The tip of the spear deals 9% and radial knockback that does slightly vary on where the spear hits the foe, dealing pretty weak knockback while the knockback is a majority upwards or downwards but improving to solid spacing knockback if it hits the foe mostly backward or forward. The hilt deals 6% and the knockback is always forward regardless of what part of the spin you hit with rather than radial, and a bit weaker than the tipped version. This sourspot is actually not terribly easy to hit with, given the spear spin is centered at a point inside Kyoko's hurtbox and the spear is not at all extended out.
The spacing oriented knockback if you hit with the front or back of this hitbox makes it less than exceptional at comboing if you hit from those directions, which is kind of unfortunate. It'd be a great combo starter and probably even chain into itself with lower knockback, but as it stands this is more useful for getting the foe to Kyoko's optimal range. Mind you, that's still a useful property, and because of its fast speed and coverage its actually pretty good at reversing a disadvantage state to suddenly forcing the foe into playing the spacing game with Kyoko again, or converting on any combo opportunity to end with the foe at long range. Also while it won't work at all percentages, there is a percentage range between 30%-60% on midweights where this combos into Fair's sweetspot, which as far as your long range game goes is pretty important.
The upwards and downwards part of the hitbox are way better for combos, as their knockback keeps the foe close enough that you can potentially chain this together multiple times for juggles, or easily go into Uair if the foe's above you. The downward version will link quite well above the stage into your ground game, and depending on Kyoko's prediction of the foes movement can sometimes link into itself a couple times to push foes back toward the ground or the bottom blast zone. The upward hitbox actually links into Side Special pretty nicely if the foe is hit at between a 30-60 degree diagonal, which given Side Special's versatility is potentially quite powerful. One thing worth mentioning is that the better comboing options you have to lead into this, Up Tilt, will not lead into the upward version of the hitbox, so you'll need to sweetspot it at a lower percentage if you actually want to go for the longer combo strings the upward version provides.
The sourspot is generally not great to hit with, if you hit the foe with the sourspot in front of, above, or below Kyoko, the foe will just not be put close enough to combo except at super low percents and not into your long ranged combat zone until fairly high percents. That said, below 20% you can do some more forward oriented combos with this, and that percent is extended quite a bit if you hit with the back hitbox, which due to its position relative to Kyoko makes the forward angled knockback better for combos. This gives an alternate part of the hitbox to link into Side Special with, giving the move additional chances to lead into one of Kyoko's more powerful tools.
As a final note, becuase of the wide variety of angles and knockback distances this move provides, this is one of your best tools for setting up exact positioning for an opponent if you're aiming to do something fancy with a wall requiring exact spacing. The position dependant amount of knockback means Kyoko can get the foe to pretty exact positioning if she predicts the foe's position with this attack, and given its speed that's easier to do when it sounds. Basically if you want to go for something flashy that requires optimized spacing, this move makes that process a fair bit easier, and combined with all of its other utility this is one of Kyoko's absolute most core moves.
Fair- Red Lash
Breaking her spear into chain segments and lashing it forward as she does so, Kyoko performs what is easily her fastest long range attack in the set. Going forward a full 1.2 battlefield platforms, this move comes out on Frame 6, and gives Kyoko an actual true combo out of some of her spacers that doesn't require the wall. The chain link segment of the spear only deals 3% and a flinch, while the tip deals 8% and slight forward knockback, which can actually at low percents link into itself. Yes, this is a combo move that's good enough to serve as an extender too, which is an immensely valuable option for Kyoko to have against a foe at long range. The problem is as most of her other long range moves are a bit on the laggy end, there isn't a lot to combo this move into, and it does lose its ability to string into itself as percentages get higher, at that point more just serving as a way to maintain advantage at a range.
There's a bit of a catch to this move, and its one you should be aware of while using it. The low ending lag it has that lets it combo into itself is not guarunteed, as it will only have that low ending lag if the speartip actually hits the foe. If it does it will catch on their body and allow Kyoko to quickly reset it to its normal state with a bit of hitlag. If you whiff and hit with the sourspot or don't hit at all, Kyoko will instead swing the spear all the way past her before resetting it back to its normal shape, which has actually fairly punishable ending lag. This means sourspotting this attack will outright put you at a frame disadvantage to the foe, which may not be that bad if the foe is further out from you but means you really, really should use Nair instead at closer range. It also makes this move pretty punishable on a whiff, so while its quite good at catching out opponents with its high speed, you actually do need to be a bit careful about when you throw this move out.
One thing that will alievate this problem slightly is that like Down Tilt, there's a close range hitbox that sends the foe with moderate but extremely poor scaling diagonally upward knockback very close to Kyoko, dealing 6%. It doesn't really link into anything of value and doesn't cover anything outside a range much shorter than even her unextended spear has, but it means at the very least if you input Fair on a foe in melee range in front of you, you're not just screwing yourself over.
There is a specific percentage range a bit after when this move combos into itself, specifically around 55%-75% on middleweights, where it can actually combo into Neutral Special's long ranged version. This is your one true combo into that move, and while that's below its center stage KO range, that's not when you want to go for this combo. No, if you use that near the edge or off stage, you can either confirm a kill or send the opponent very close to the blast zone, which is pretty important given Kyoko is actually really good at edgeguarding so if she gets the foe far off stage this can just serve as the finisher. While a bit position dependant and only working at specific percentages, this makes being at Kyoko's long range with her Neutral Special charged up that much scarier than it'd already be. While the window is extremely narrow, on some characters there's a gap of about 5% where the Nair will combo into this string, so if you get to that specific percentage a charged NSpecial can cause the foe to start playing incredibly scared, and if you condition them to be terrified of you that can make it easier to get exact spacing for something else. While harder to land than Nair, an Up Special's upward flick can also chain right into this combo with vastly more consistency than Nair, adding some fear factor to that move as well.
Back Aerial - Reversal Chain
Kyoko's spear separates into chain segments as she swings it behind herself, covering a downright massive arc behind herself starting at about her head's height and going down a considerable distance below her. This comes out with above average lag for an aerial on both ends, but the massive range that exceeds Shulk's Bair makes up for this. The spear tip starts pretty near Kyoko, goes all the way out to max length in a flash before being swung down, basically covering a straight line back from Kyoko and then the edge of the arc. It deals 13% and horizontal knockback that KOs at 135% while initially coming out and then 11% and diagonal slightly upward knockback that kills at 180% while traveling along the arc. The chain deals only 8% and mostly upward knockback that kills at 230%, not really great for combos or kills.
The power is decent provided you hit with the spear head in one form or another, but the power behind this move is its downright ridiculous area denial. Having such immense range where all the hitboxes are at least acceptable to hit with makes this really good at zone denial, and it edgeguards really well as long as you hit with the spearhead in some form. Just try not to hit with the chain if you're going for edgeguards, as that will let the foe just recover over you. Its bad punishability on whiff is at least helped out by the huge coverage, as at long range the foe will have trouble actually capitalizing on the big ending lag. Kyoko's recovery is kind of mediocre, but for what its worth having this kind of range does make gimps actually somewhat feasible, albeit predictable due to this move's lag.
The other primary use of this move is that it really lets you establish some level of stage control just by the sheer coverage it has coming out, and the power of the stronger spearhead hit. Kyoko can control ledges very well with her massive range, this move included in that package, and a wall gives a secondary thing to zone the opponents to if you want an option other than just zoning them to the edge. Of course, its not exactly a perfect tool for this given its lag, but if you're at a decent range from the foe it allows you to make large scale repositioning decisions in the same way Nair and Forward Tilt can force small ones.
This is really the best option you have out of the back hit of Nair, at low percents actually true comboing out of it and past that you can instead use it to zone out the foe or edgeguard them after Nair's back hit. As this is unsurprisingly your only long ranged backwards option, it makes hitting with the sweetspot on backward Nair still solid, even if comboing Nair to this at low percentages is actually not that great a combo since it ends there.
Up Aerial - Extended Stab
Kyoko stabs upwards with her spear, with the spear extending upwards a bit before she retracts it back. This move deals 7% and weak diagonal knockback at the hilt of the spear, but thankfully, because the spear tip extending upwards makes up a good portion of the hitbox as it extends out to double its base length, a large portion of the hitbox is not this lackluster one. The spear tip deals 10% and upward knockback that kills at 175% for most of the hitbox, and 12% and knockback that kills at 160% at the end of its extension. The spear takes about 8 frames to extend out all the way, meaning the hitbox is active for quite a bit longer than average. The downside is the ending lag, which is pretty bad and means while you can certainly combo into this move because of its pretty good start lag, the duration and ending lag make it quite punishable if you whiff it, and it is definitely going to be the end of whatever combo you went for.
This is obviously a pretty good thing to combo Nair's upwards hitbox into, which is one of the easier ways to land this move. If you want a kill confirm off Nair late off a high platform, this works fine, especially considering because of the way the hitbox works it true combos out of Nair a fair bit longer than you might at first thing it would. If "a high platform" is not an option, or you want to go for a somewhat earlier kill off one of the lower platforms, launching the foe with Up Smash and then pursuing them into the air with the follow up is a good way to get the Nair/Uair kill confirm a bit earlier. Its hardly a true combo out of the upward launch Up Smash, but the timing window the foe has to avoid it is pretty small so you'll at least pull this off reasonably often, and you can mix up by just going straight into Uair.
At high percents, this still works pretty well as a follow up out of the Up Smash lunge, as the foe taking greater knockback means they'll be in hitstun just a bit longer and the massive range of this move makes it continue to be close to a combo. If you predict the foe is going to properly dodge it, you can instead go for an Up Special, which also links well into subsequent Uairs by pulling Kyoko to the foe and then booting them even higher into the air, or possibly just flicking them up off the end of the spear to go for a second attempt at a successful Uair read. This is helped by the fact that the move is a bit hard to air dodge due to its longer duration, though the foe can potentially weave around it with a directional air dodge and if the foe is hit by the spear shaft after its extended upward, they only take the weaker hitbox so you probably won't get KOs off this. At least it means you won't be punished, and directional air dodges leave the foe with worse lag than a regular one, so forcing one of those out isn't exactly bad.
Down Aerial - Crash Landing
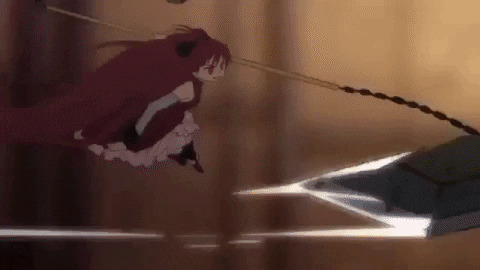
Pointing her spear downwards and slightly forward, Kyoko stabs it downwards as she plunges toward the ground at a slight forward angle. This forward angle is actually a bit dependant on the momentum Kyoko has going into this move, if she's currently moving forward in the air at maximum speed it will actually have her fall forward at a 45 degree angle forward, though she will cancel backwards momentum at the start of this move. Kyoko falls a little bit faster than her fast fall speed during this move, and deals 11% and upwards knockback that KOs at 190% for the first Ganondorf height worth of the fall. After that she actually accelerates for another 2 Ganondorf heights worth of falling, dealing an increased 15% and now downward knockback that spikes very early and KOs off a ground bounce at 125%, You also, obviously, travel considerably faster than Kyoko's fast fall speed during this time. There's a minor forward angle to this downward or upward knockback if Kyoko is moving forward near or at her top air speed before this move starts. Kyoko catches herself after falling the full 3 Ganondorf heights, still with a bit of downward momentum so this can be pretty dangerous to use off stage.
Kyoko cancels out of her fall with relatively low lag if she hits an opponent in the early part of the fall, and while the knockback is too high for combos at most percents she can pull it off at pretty low percentages, going into Nair as you might expect, Uair with little to no forward momentum and Side Special if you have some. If you're past the initial weaker part of the fall however, Kyoko will just plow through opponents and not stop, making it a lot less safe in exchange for more power. The slight forward angle of this downward knockback makes it a bit scarier than most spikes, since the foe does not have to be entirely off stage for this to spike them to their death. This is yet another potential reward for good positioning or another threat to foes near or on edges for Kyoko, serving as powerful stock ender in that position. Just keep in mind the landing lag is kinda bad even if Kyoko hasn't started accelerating, this isn't super quick to come out, and the landing lag and ending lag get a lot worse if Kyoko has reached the accelerated part of the fall.
While this is a small thing, it is worth keeping in mind this move has super armor against attacks that deal 11% or less while Kyoko is in the accelerated part of the fall. This at least provides a little safety to that part of the move, potentially plowing through weaker aerials or recoveries to land this hitbox.
The Up Smash lets Kyoko have additional forward momentum if she uses this move out of the forward variant, which actually triggers some of the accelerated bonuses without requiring Kyoko to descend at all. Instead her forward momentum will increase a bit and she'll gain some downward momentum as she throws out the spear's hitbox. The damage gets buffed up and the knockback becomes angled downwards immediately when used out of the higher speed you can achieve by vaulting off the spear in Up Smash, and you also acquire the super armor. This is obviously a little predictable, given you have to catapult forward off an attack not designed to entirely be used for momentum, but since the knockback is now angled even further than before it can allow for some shockingly early kills, or lead into them via subsequent edgeguarding. Keep in mind that Kyoko suffers the increased ending/landing lag if your using this, so its a rather risky thing to attempt, but it serves as something to mix up whatever other moves you'd use out of your approach as you're flinging towards the foe, like Nair/Side Special, or if the foe is particularly far away, Up Special/Neutral Special/Fair.
You can get an even stronger hitbox if you fall a full Ganondorf height out of Dair used out of Up Smash's added aerial momentum, upgrading to dealing 19%, knockback that kills about 30% earlier than the Dair's accelerated variant usually would, and total super armor, as Kyoko accelerates even further forward and faster downward for those 2 Ganondorf heights of falling. There's a couple problems with this, however. One, you don't get enough height out of the forward lunge of Up Smash to actually pull this off above the ground by default. Instead, you need to jump during the Up Smash's momentum and then use this immediately, which is very predictable, or go off the ledge while you're using this, which is pretty suicidal given how far forward and down you'll be off the edge once that happens. Still, this can be a useful last ditch kill attempt off stage, acting as a pseudo suicide KO, or occasionally cheese out a kill shockingly early onstage off a hard read. The nice thing about this version is its significantly less punishable as Kyoko creates a small explosion of debris around her when she lands on the ground, dealing 8% and diagonal knockback that KOs at 170% that lingers for a moment, making it hard to dodge and covering a sizeable portion of her landing lag. The explosion doesn't cover too far away from Kyoko, but it at least means shorter ranged foes might struggle to punish her.
Grab Game
Grab - Frustrated Grip
Kyoko reaches forward in a surprisingly decent, non-tether grab, having slightly above average range and normal lag for a grab. If she manages to get the foe, she'll hold them in a slightly different position depending on the foe's size. If they're her height or smaller, she'll lift them by their collar or neck, depending on if there's a collar available for her to grab. If the foe is bigger than her, she'll just grab onto their arms and restrain them as her chain spear wraps around their upper body. This is just a visual thing that has no impact on gameplay or her throws.
Pummel - Aggressive Kicks
Kyoko slams her foot into the opponents gut, in a slightly slow pummel that deals 3%, The animation looks slightly different on smaller opponents as she has to bring her leg up pretty high, but it comes out at the same speed regardless. While not an amazing damage racker pummel, it at least does the job.
Forward Throw - Coil Slam
Kyoko's spear suddenly bursts into chain form and wraps around the foe if they're smaller than her, before she tosses the spear back behind her with the foe trapped in its coils for a moment. Larger foes who are already ensnared in the chain spear's coils will have the coils tighten around them, and it takes Kyoko a bit longer to heft them behind her, so the animation length remains the same. This throw is actually chargeable if you continue to hold down the forward input, which we'll get to the exact applications of in a second. You will want to be a bit careful while charging this move, as if the foe mashes out during the charging they will be left behind you, which while not terrible at frame neutral is not really the place you want to leave the foe. This input can be charged up to 1 second.
When the charge is released, Kyoko slams the coiled spear down in front of her, at a distance depending on how long this move was charged. At minimum it will just leave the foe right in front of her while dealing the foe 7%, and at maximum charge it will leave them 1.2 battlefield platforms away and deal 14%. Regardless of charge, the foe will be left in prone at the end of the throw, unless the spear goes off stage. In that case, the part of the chain that is off stage will swing down a maximum distance of about half how far forward the foe was slammed down before releasing the foe with a weak spike and 5% less damage than this would otherwise deal. The chain operates with somewhat realistic physics, so obviously it can't go down further than the length of it that is offstage. The ending lag on this throw is increased a bit if the foe is slammed down off stage, so its not quite as easy to edgeguard the foe as it otherwise would be given your laggy options are a lot less viable. Still, especially given Kyoko's range alots her so much safety and the fact that the foe will be stuck below the ledge, its a pretty advantageous spot for her to be in, especially at higher levels of charge.
There's a wide variety of powerful ways to abuse the fact that Kyoko can leave foes in various ranges with this. If you leave the foe up close, it becomes extremely dangerous for the foe to try and roll behind Kyoko, because you can easily catch them out with a Forward Smash and brutally punish them for their decision. Given the slightly unorthodox amount of coverage Kyoko's UTilt has in front of her and Down Tilt being pretty bad up close, its the better option if the foe stays close, while if the foe rolls away Kyoko can start going for her long range options, albeit at close range the foe rolling away is not something she has amazing response tools for. If the foe is relatively close to Kyoko, Forward Smash can still catch them out rolling toward you and Down Tilt or a Short Hop Fair can catch them rolling away. At more middling ranges, you can catch out the foe rolling either direction with either long ranged moves like Down Smash/Neutral Special that are good at catching rolls or at least hitting with a complimentary projectile hitbox, or if they roll into your face you can go into Forward Tilt/Nair/UTilt. At maximum range, you can instead rush into a foe rolling away from you with Dash Attack or an Up Smash momentum boosted aerial, which are the stronger but riskier options, or just go for a long range Neutral Special and hit the opponent with the further shockwave before trying to get them back to your closer range options, while Down Smash and Down Tilt can be useful to catch out the foe if they try to get closer to you. Get up attacks and just standing up out of prone are pretty immensely risky as they offer less intangibility and are easy for Kyoko to punish no matter where she's left the foe, so all in all this gives you a lot of potentially scary advantage states you can pick and choose from based on charge.
If Kyoko slams a foe into a wall with this move, they'll become embedded in it for a set 15-30 frames based on charge. This is more likely to true combo into something nasty than the prone state ever was, but its harder to use with lagger options because of the ending lag of the throw being enough to prevent you from going into most of your power moves that aren't an already prepped Neutral Special.
Up Throw - Rising Impact
Tossing the opponent from their position lightly above her head, Kyoko rapidly stabs upward and slightly forward for 3 hits that add up to 8%, with the final one dealing upward diagonal knockback that is actually decent at base, but only has the absolute tiniest scaling component so it will not kill until about 800%. This is a pretty basic juggle setup, sending the foe a bit too far to combo into closer options and not true comboing into Uair because of the slight forward angle. That said, its close enough to a true combo with short hop Uair links well enough into Up Smash that as long as you handle your subsequent movements and timings well you're probably going to at least get something out of this, but as a pure combo throw, its not nearly the best Kyoko can be doing.
There is actually a follow up to this move if you press up or A during or at the end of the throw animation, which will have Kyoko actually lunge up about 1.7 Ganondorf heights into the air, with her spear shapeshifting into a coil form with an enlarged spearhead in a similar manner to Dash Attack as she does so. She then crashes down on top of the foe, dealing 12% and upward knockback that kills at 110%(102% when you factor in the previous hits), which is a fantastic kill confirm to have out of a grab especially considering it happens even earlier on higher platforms. There's just the one problem, its not guarunteed, there is enough room for the opponent to potentially get out of the way of this move. If you do whiff, Kyoko takes some surprisingly terrible ending lag, enough for the foe to easily punish her, which is definently not the end result you want out of this throw especially considering Kyoko's low weight and underwhelming recovery.
One thing worth mentioning is that the timing of this follow up actually depends a little bit on at what point the player inputs the follow up input, giving the foe the smallest window to avoid the move if you input it earlier. If you input it later, however, you can catch out a foe's attempt to dodge it, giving you a bit of a mixup. You can also move a bit back and forth while you're falling to make sure you catch the foe's DI. If you want this to kill confirm properly however, using it next to a wall with the minimum delay will trap the opponent just long enough once you reach a little below kill percentages that this will actually just kill confirm, making it quite scary for the foe if Kyoko lands a grab with a wall in front of her, and it will make the hit harder to dodge before kill percents if you want to go for it for the raw damage before then.
At a high enough percent, the foe will be sent too far for a follow up, but honestly if you get the foe to that kind of percentage they should really just be dead already, it only happens around 300% or so.
Down Throw - Double Stab
Slamming the foe against the ground from their current position, be it out of her spear's coils on larger foes or just with her own two hands on smaller ones, Kyoko plants her foot on them to hold them still and stabs twice. Planting her foot on the foe deals 1%, the first stab deals 3%, and the second stab deals 5% and light diagonal forward knockback, with Kyoko having very little end lag out of this throw. The knockback scales pretty slowly, so this move is exceptional for combos. It can go into most of your close range tools, at specific percents even setting up Dair if you want to try for that, and generally serves as an effective way to start a combo out of a grab, while also dealing a solid 9% to start with. Not a very complex throw, but its not a bad thing to fall back on, especially because it can link into things even at mid-high percents even if the combos will not be nearly as effective from the subsequent hits and you won't be able to pull off Dair or Side Special out of this like you would at low percents.
Back Throw - Coil Closer
Tangling the foe in the spear's coils identically to Forward Throw, Kyoko instead swings the foe behind her and lets the spear coils fly forward about 1.4 battlefield platforms, before she grips onto the spear to stop the foe's flight before pulling herself right to them. She then plants her feet into the foe's face, bouncing them off the ground slightly but needing a moment to catch herself afterwards, leaving both parties in frame neutral at the end of this move, with the foe spaced near the edge of Kyoko's close range melee options. This deals 4% with the initital throw, 2% when the chains constrict the foe's flight in place, and 7% when Kyoko kicks them in the face, adding up to 13%, a pretty respectable amount for a throw.
Leaving the foe in frame neutral with Kyoko facing them is not too bad a place to be, as at the very least you're in range to land the tippers of moves like Forward Tilt and Up Tilt now. The real reason you're using this move, however, is that it deals good damage and serves the unique role of simultaneously spacing the foe and Kyoko at the same time. This might not sound like a big deal, but you can get a foe with their back to your wall to lead into some incredibly dangerous combos you can't access without it. This can also put both of you quite close to the edge of the stage, though it will not technically send you off. This is because Kyoko will catch the spear and pull herself to the foe if they reach the edge, though the kick will send the opponent a short distance forward and slightly down a set amount instead of bouncing the foe off the ground if they reach the edge with this. While this isn't quite as good for setting up edgeguards as FThrow because Kyoko will be closer to the foe, but if the ledge is closer behind you than in front of you or you don't have enough percentage to charge, it will do. In general, this is another tool that lets Kyoko "control the stage", this time by giving you the rather unique option to reposition yourself and the foe at the same time.
Final Smash
Kyoko's soul gem flares up with the immense power of the Smash Ball, and she summons forth four giant spears in front of her, each twice as tall as Ganondorf and as wide as Wario. If they hit the foe, the opponent will take the initial hit of 10% and be sent into a cinematic, where Kyoko has surrounded everyone hit by this move with a wall of giant spears. She then forms an absolutely massive serpentine spear below herself, standing on the head as it towers over the characters you've trapped in this final smash. The camera zooms in on Kyoko as her spear is now absolutely flaring with energy, red flares pouring off of it.
The giant spear then dives forward, Kyoko standing on the head as a massive explosion of red and white energy occurs that obscures everything impacted, dealing 35% and obscene upwards knockback that kills at 50%, or more accurately 40% because of the initial 10% dealt by this move. While summoning these massive spears and performing this huge attack actually cost Kyoko her life in canon, it comes at no cost to her in Smash, as the Smash Ball's energy is used up instead of her own.
Up Taunt
Kyoko leans back against her spear as she plants it in the ground, taking a moment to recline with a somewhat smug expression on her face.
Side Taunt
Kyoko just turns forward with an annoyed expression and just says "Could you, like, stop?" This is very useful after you've beaten the same Little Mac 7 times in a row but he just does not know when to quit.
Down Taunt
Kyoko takes out a Taiyaki and bites into it, taking a moment to chew it before returning to battle. This actually heals her, but only by 0.4% over a long duration taunt you can't cancel, so don't expect to get much mileage out of it in battle. The food you get is actually randomly selected from one of three options, an apple, a stick of pocky, or the taiyaki shown above, but the healing is the same regardless.
Victory Pose #1
Twirling her spear behind herself, Kyoko smirks and says "You losers are all at the bottom of the food chain!" if there are multiple opponents, or just "You're at the bottom of the food chain!" to a singluar opponent.
Victory Pose #2
Kyoko is seen walking into view with a bag of apples in her arms, munching on the last bits of a piece of bread in her mouth. She probably did not pay for that, but hunting witches is not a viable source of income, cut the poor girl a break.
Victory Pose #3
Seen dancing on what appears to be some kind of Dance Dance Revolution knockoff arcade game, Kyoko briefly dances along for a moment before the song, a slightly more techno version of the usual victory theme, stops with a grade of "Spectacular" displaying on the screen. As it does so, Kyoko turns to the audience and gives a thumbs up.
Loss Pose
Kyoko just claps as you might expect, though she looks a bit taken off guard to have lost based on her facial expression. If she specifically lost against Sayaka, however, her expression will be a lot happier, as it seems she's proud of Sayaka for actually stepping up and defeating her.
"If you are just living for your own sake, it's all up to you. No hard feelings. No regrets."
1 note
·
View note
Text
FEATURE: Madoka Kaname, From Wallflower to Goddess
Puella Magia Madoka Magica is a modern classic — the mystery of what magical girls are, the picture book animation of the witches by Gekidan Inu Curry, the thrilling soundtrack by Yuki Kaijura. And of course, there are the vivid characters and how we see them bloom and wither as they struggle to find themselves. There's Homura’s determination and Kyouko’s feistiness but what about Madoka herself? When I think of Madoka, I recall her world-shattering wish at the end, but not much else over the course of the series. This is strange for a series protagonist who is usually one of the most dynamic figures in a story. So why is Madoka so much less memorable? After all, aren’t main characters supposed to be active? In honor of Madoka’s recent birthday, it's worth celebrating the fact that there's more than meets the eye to this somewhat unconventional main character.
Madoka starts out having no concept of the world of magical girls, and in the main timeline, does not become one until the end. She can’t participate in the flashy fights against the witches, and she doesn't understand the struggle of what it means to be a magical girl. The majority of the story is Homura trying to prevent her transformation — so she can’t partake in the gorgeously stylized battles against the witches.
Instead, Madoka's struggle comes from within. She has no idea who she is or what she wants. After all, what would someone who has stability in life wish for? While she doesn’t have any exceptional talents, she lives a comfortable, average life. Her home life is good, she has a nice relationship with her family, she is passing school, she has solid friends. Unlike Mami and Kyouko, she hasn’t experienced any personal struggles, and unlike Sayaka, she isn’t close to someone who is greatly suffering. Madoka doesn’t have any struggles that instantly come to mind. But we do learn something about her that reveals a very key part of her personality: she doesn't like herself very much.
Despite her calm and peaceful life, Madoka doesn’t have a very high opinion of herself. While she isn't failing any of her classes, she doesn’t excel in school. She also doesn’t believe she has any particular talents that make her stand out. What Madoka doesn't realize is that she has an incredible sense of kindness that sets her apart from others. Unlike many other protagonists, like Sakura of Cardcaptor Sakura or Usagi of Sailor Moon, Madoka does not have a firm concept of who she is. She has very low self-worth, being hard on herself for being unable to help out even when the situation is beyond her ability. And yet, the story continues to turn, revolving around the choices of others while Madoka is stands still. She berates herself for being passive, for being a coward, all because she isn't in a position to help others the way her friends can. In order to make up for her low sense of self, she instead hyperextends herself while trying to be the ultimate support — which as Homura points out, has its downsides. Madoka always ends up turning herself into a martyr.
Despite any damage it might cause to her, Madoka's selflessness drives her actions through the series. She tries to protect Kyubey for no other reason than that he's in danger. She continues to try to reason with Homura, even when the other girls consider her a lost cause. More than anything else, Madoka wants to do what she thinks is right. The downside of such empathy is that when Madoka does have the power to help, as seen in the worlds Homura resets, she always ends up sacrificing herself. She is willing to die to defeat Walpurgis, she is even able to kill if it means that a situation will be defused. Madoka has this instinct, for better or for worse, but no power to act on it — at least, not until the very end.
Despite not having any powers, Madoka has the greatest potential thanks to fate converging. She can become either the strongest magical girl or the strongest witch who can wish for anything. But by the end, Madoka has seen enough. Very early on, she gave Mami some encouragement, then had to watch her die. She's seen how Sayaka's wish ended up corrupting her and left her cut off from one of the most important people in her life. It's through witnessing the suffering of others that Madoka finally realizes what it is she wishes for. It isn't a selfish wish, the way the others' had been, but a wish born out of her deeply entrenched desire to help others. Her ultimate wish is to help everyone else, to the point that she becomes the ultimate martyr — changing the world even at the cost of her own identity and place in it. While it may be a little difficult to see Madoka as an active protagonist, looking at the series as a whole, we can see that everything has primed her for this point. She has finally become someone who wants something, not for herself but for all the people who have suffered under the unjust system that has tormented people for ages.
Madoka is not the character who boldly asserts themselves at the start. She never becomes the superpowered hero that fights monsters and villains. She doesn't even start out with the desire to change the world, she grows into the role of being the world's savior. And still, the entire series hinges on her and shapes her choice. She may not do any fighting against the witches, but she is the one that everything depends on. She is the protagonist because this is ultimately a story about her growth, the tale of how she came to be, and what brought her to the one decision that rewrote the world.

What do you think about Madoka? Let us know in the comments!
Noelle Ogawa is a contributor to Bubbleblabber and Cup of Moe. She can be found on Twitter @noelleogawa.
Do you love writing? Do you love anime? If you have an idea for a features story, pitch it to Crunchyroll Features!
0 notes
Last Seen Blogs

unconsoled
UNCONSOLED

lycrawinter37
The Love of Kaya 613


markwilliams129
Why Is Everyone
Talking About Mattress Protector Double

jasonlangheine
JASON LANGHEINE