#let's melt some coconut oil and see how it drips
Text

Just the hands and chest for the people who follow me and leave fantastically unhinged tags on things.
#you're lovely thank you#also man but the like footwork I did for this was just silly#so whale oil yeah sure but upon research I'm like okay but specifically sperm whale oil is probably smarter#less smelly and already used in cosmetics#and then I go okay so what's the viscosity of sperm oil#i am not laughing like a school child at all what're you talking about#apparently it's similar to melted coconut oil and I'm like okay#let's melt some coconut oil and see how it drips#and I recognize that's a higher commitment to accuracy than the show itself takes but you know what#that's who I am as a person#anyway thank you for being here#this is probably because I watched disney VHSs as a child and sometimes they had behind the scenes stuff on animation#and I only started trying to animate in october but I have this permanent memory of disney animators talking about filming milk dripping#to get the movement of raindrops falling into a puddle in bambi correct
122 notes
·
View notes
Note
may we have your cupcake recipe? <3
HELL YEAH, thank u anon. i’ll give you vanilla, citrus, spice, and chocolate cupcakes & if you want anything else let me know! this is going to be stream-of-consciousness rather than linear recipe, because unfortunately that is how i bake. if you want a linear recipe, let me know which particular set of pieces you want and i can write it up for you. i’ll even guesstimate times and such.
BEFORE YOU READ FURTHER: this is very long. if you are not into cupcakes, bookmark this for later when you suddenly decide to make cupcakes and keep scrolling. now with new added read more for additional readability <3
making cupcakes takes me about two hours if i’m doing two batches or an hour and a half if i’m doing one. it might take you a little longer the first time because you don’t quite know what order to do things in or how long everything takes. i like to start my fillings first because they take longer to be ready, then turn on my oven, then mix my batter, then make the frosting while cupcakes are baking.
SUPPLIES
you will need: a cupcake tin, cupcake wrappers, at least one large mixing bowl (2 is recommended to avoid a lot of washing dishes between steps), a hand mixer or a lot of elbow grease, spatula, whisk, small bowl, a small grater or microplaner, a piping tip + bag (or just a plastic bag with a hole cut in one corner) and at least one saucepan or small frying pan. measuring spoons/cups are useful but i’ve tried to include thicknesses and alternatives so you can eyeball it if you have to (i usually do, just because i know what i’m looking for lol)
you will also need some of the following (check your specific cupcake type to find out which): a box of cake mix or ingredients to make your own cake mix, cream cheese, condensed milk, butter, powdered sugar, lemons/limes/oranges, chocolate, vanilla extract (real is recommended; i know it’s more expensive but the increase in quality is worth it if you can), lemon extract, heavy cream, pumpkin pie spice (or at least nutmeg + cinnamon), and fruit of your choice.
CUPCAKE
okay so: box mix is fine. it’s good. great, even. as long as you do this: replace the oil with butter. add an extra egg. i don’t care how many eggs it calls for. i know it feels like a lot of eggs. add an egg anyway. add a sprinkle of extra salt. a tsp or so. you’ve already made a good cupcake!
vanilla:
add a tablespoon (about three capfuls, if you don’t have measuring spoons) of REAL vanilla extract if you can afford it (or i really like the vanilla paste that has specks of bean in it. 10/10)
citrus:
one teaspoon (one capful) vanilla extract. two-ish teaspoons of lemon extract. zest of one lemon. zest of one orange (i like blood orange particularly much) or lime. replace 1/2 cup of the water with lemon and lime or orange juice. add about a tbsp of extra sugar.
spice:
two teaspoons pumpkin pie spice (you can see the spice in the batter without it discoloring the batter) + one tablespoon vanilla extract.
chocolate:
it’s already perfect xoxo. JUST KIDDING. add a tablespoon of vanilla extract.
instructions:
these ratios are for 24 cupcakes. take your cupcake pan and line it with cupcake papers. you can grease the top of the pan if you’re anxious, but it shouldn’t be necessary, especially if you have a nonstick pan. then just mix your batter until it’s not particularly lumpy and fill your cupcake papers about a third of the way full. a quarter cup measure is easiest for me to use bc the amount that easily comes out of it is about the right amount & it drips less than a spoon does. then i like to use a spoon to push the batter up the sides a little so it holds the fillings better.
FILLINGS
you can mix and match the hell out of these, honestly. i typically do cheesecake in everything & then fruit in vanilla or citrus cupcakes, specifically apple or cranberry in spice cupcakes, & chocolate in vanilla or chocolate cupcakes.
cheesecake:
one package softened cream cheese + 10 oz (2/3 a 14 oz can) condensed milk. stir on low heat until smooth, then add 2 teaspoons vanilla extract. DON’T add sugar. it’s not supposed to be very sweet.
fruit compote:
literally just half a cup or so of frozen or fresh fruit. i’ve done this with raspberries, strawberries, blueberries, blackberries, cranberries, apples (fresh and cubed is best), and peaches. anything is fair game, honestly. i want to try stewed kumquats and plums at some point. if frozen, add a tiny bit of water. if fresh, add about as much water as you have fruit. squeeze some lemon and lime in there. add sugar to taste. for the apple spice mix, add another teaspoon of vanilla and a teaspoon of pumpkin pie spice.
IMPORTANT: you do NOT want this to be sweet. this is NOT jam. it should be a little tart when you taste it. if it’s not thick enough, slurry a tbsp of cornstarch in a little bit of cold water and stir it in. it should be thick enough to not drip off of a spoon when you turn it upside down.
ganache:
heat a cup of heavy cream on very low heat. i like to do a double boiler: saucepan half-full of water, bowl full of cream in the saucepan. when the cream is warm, stir in most of a package of dark chocolate chips. stir HARD—whisk the shit out of it. DO NOT let any of the water get into the bowl!! you want the ganache to be gloppy when you lift it with a spoon—it has to not soak into the cupcake mix.
instructions:
so you have your 1/3 full cupcake wrappers with the batter spooned a little bit up the sides. using a small kitchen spoon, drop a spoonful of cheesecake into each cupcake. then top that with a spoonful of ganache or a spoonful of fruit compote (or both! it’s your kitchen!). spoon batter over the top and down the sides. fully covered, it should come to just under the top of the cupcake wrapper—i usually have 1/4 to 1/8 of an inch grace.
pop that in the oven according to the box instructions. i usually find that cupcakes with fillings take the longer time listed, rather than the shortest one. when your time goes off, touch the top of a cupcake. if it feels firm (think: ripe plum; you can push on it and it’s soft but it doesn’t cave in), it’s probably done. you can also put a toothpick down one of the sides, rather than the middle. pull your cupcakes out of the oven, put in your second batch, and set these aside to cool.
FROSTINGS
there are two frostings that go well here. i tend to like buttercream for vanilla and citrus and cream cheese for apple spice and chocolate. your mileage may vary. this is where the sweetness comes from, without overwhelming the cupcake!
buttercream:
let two sticks of butter (one unsalted and one salted) soften on your countertop. DON’T melt them. when they’re room temperature and you could mold them with your fingers, put them in a bowl. a mixer is best for this stage, but you can do it with a whisk and spatula if you’re determined, have patience, or can switch out with someone else. whip the butter a little. add five cups of powdered sugar, a cup at a time.
for a vanilla cupcake, add a tablespoon of vanilla extract (or vanilla paste! the specks are SO cool looking!) and use heavy cream to even out the texture until you think it’s pipeable (you’re looking for “holds its shape without being Chunky”). for a citrus cupcake, add a teaspoon of citrus extract and lime juice until it’s pipeable. two sticks of butter is too much, but one stick usually isn’t quite enough, and i prefer to have extra to practice piping with.
cream cheese frosting:
let one package (8oz) of cream cheese soften on your countertop. mix it in a bowl until smooth. add about four cups (3/4 a regular water cup, i think) of powdered sugar—again, we’re looking for “pipeable without being inflexible”. add a tablespoon of vanilla extract/paste and use heavy cream if you need to soften the texture at all.
both of these frostings take coloring very well. something that i personally love is doing a sort of gradient, where i’ll add red to one side and mix it well, yellow to another side and mix it well, make some orange in the middle, and leave some white here and there. then spoon from each section into a piping bag and voila, free beautiful swirls. you can also use a knife to frost your cupcakes, but i think piping is fairly easy to pick up on if you try it a few times, and it makes your cupcakes look that much more professional.
instructions:
make SURE your cupcakes are COOL TO THE TOUCH before you frost them! pop them in the fridge if you’re in a hurry! a single layer of piping should be enough, but decorate if you want. icing sugar is pretty. don’t go too overboard with sprinkles—they make it hard to eat.
voila! cupcakes.
SUBSTITUTIONS
i have made these gluten-free, dairy-free, corn-free, vegan, etc etc. gluten free box mix is fine. your own powdered sugar (powdered sugar + tapioca starch) is great. you can do a coconut milk pudding instead of cheesecake or ganache. you can do baking soda + vinegar instead of baking powder (1/4 tsp bs + 1/2 tsp vinegar per tsp baking powder). if you’re allergic to fruit, i am SO SORRY for you but please try the chocolate ones. you can substitute any extract, any flavor profile, any combination of ingredients. if you’re using a commercial egg substitute, just add an extra 1/4 cup of it. if you’re using flaxseed, just add an extra tablespoon of flaxseed + 3 tablespoons water.
it may not come out exactly the same as the standard ones, but my friends with dietary restrictions still swear by them. i have never brought cupcakes home from a party. i don’t think anyone who’s ever tried one has not gotten a second helping. people who swear they aren’t cupcake people love these cupcakes. (it’s because they aren’t overly sweet or moist or dry and they aren’t one-note, because the fillings add complexity of texture and flavor. there you go, now you know how to describe your new cupcakes to people).
congrats! you’re about to be everyone’s favorite party guest!
#personal#askposting#i apologize in advance for how much is in here ❤️#i’ll try to put a read more on this when i get on a laptop#most of these recipes are not Mine in that i did not solely invent them. however i have altered them & mixed & matched them & etc etc#so they’re yours now
14 notes
·
View notes
Text
Kinktober 8: Wax Play

Masterlist
Kinktober Masterlist
Pairing: Clint Barton X OFC
Warnings: Hot wax, smut, fluff
Summary: Let's just state this doesn't go the way anyone planned. It ends in beautiful chaos and some fluff.
A/N: I was going to be all romantic but this just, I felt we all needed a laugh. So, let me state there is A LOT of caution to use in wax play, certain candles and all that. Do research, I had to because I have never done this personally and burns are no laughing matter, neither is open flame. And I wanted to make this serious play but failed.
Words:+1,200
————
Settling between her spread thighs, Clint brandished the candle and lighter he had picked up less than a few hours ago.
"You're sure," he hummed, looking over thick curves bare before him. Scooting up on his knees, she rolled her hips against him to tease over his free and very alert manhood.
"Yep, time we spiced things up," she smiled, letting out a sigh as he pressed between slick folds to tease before they both paused.
"Ok," he huffed, moving to light the candle that was stated to be specifically for this purpose.
Both had read over precautions of wax play. She had even gone as far as to rub a light sheen of coconut oil over her skin, so it didn't stick while Clint done all he knew to assure it was safe wax, as they put it. He even tested it on himself, it barely burned, it honestly wasn’t his thing, but it could be hers.
Scooting back, he lit the candle and allowed it to begin to melt. It was a votive looking candle but the girl at the shop and the box even said it was safe. Allowing the wax to pool in the top of the candle, he tipped it to allow a drop to fall, careful to keep it at the right height.
He jolted slightly when she done the same, the soft flesh of her thigh tensing against his own. Hastily he looked up and tipped the candle so it wouldn't drip.
"Did it hurt," he was quick to ask, studying her face, he cursed the fact she was worse than Natasha when trying to read his lovers expressions. Not to mention she had a higher threshold of pain than any he had met.
"No, it was just a shock at how warm it was. Keep going," she smiled, lying through her teeth. She had read it could be a bit overwhelming the first time, but for lack of a better word she would get used to it. The sting did have a bit of euphoria behind it.
Nodding, Clint continued, tipping the candle to dribble the rest of the pooled wax over the same thigh but away from the spot he had tested to work his way up her hip. Maybe it was heightened senses, or the fact she didn't have to endure this, she found herself unable to take it as a heavy splash hit the crease between thigh and core.
With a jolt she let out a quiet yelp that had Clint fumbling to put the candle out but spilled wax all over his own hand before doing so. Somehow burning himself in the process but managed to rush her to her feet and to the bathroom to clean the wax off.
Forcing her to sit on the toilet, the archer turned with a cloth in hand to place over the wax, but it had fell off in the chaos. The flesh he had dribbled wax over was pristine and unscathed unlike the hand he held the rag in.
This time was her turn as she took the archers burnt appendage by the wrist to place it under cold water, but it didn't appear that bad. Clint pulled close to her side in the dim room, wrapping his free arm around her waist as she continued to cool the other under the water.
"It did hurt didn't it," he chuckled, nuzzling at her bed fuzzed hair to make her scrunch up and stifle a giggle.
Finally cutting the water off, checking his hand over, and rubbing a thumb over the tattoo that tapered at his wrist. She found the design mesmerizing to say the least when they first began seeing each other. "It felt like one of those aliens carving me to pieces," she admitted quietly.
Though all this had been several years ago, and a divorce ago for Clint, it all stung like fresh wounds. "Yeah," he huffed, free hand trailing up her spine to lace into her hair, tugging her head to lay on his shoulder.
Wrapping his hand in the one worrying over the reddened skin; he gently tugged her back to the bedroom as he sat on the edge of the mattress and pulled her to straddle his hips. Gently he rested his hands on her hips, thumbs rubbing circles over the soft flesh as she relaxed.
Looking up to meet her gaze, Clint couldn’t help but smile, pulling flush as her fingers laced behind his neck, even tugging at the lengthening hair. Leaning down, she placed her forehand to his, the room quiet as he slid a calloused hand over the flesh he had dripped wax on to feel if it held heat, to which it didn't.
Tenderly he massaged over the flesh, tipping his chin up to press his lips to hers for a moment.
"How about some vanilla sex," he laughed across her lips, feeling her settle even closer.
Moving a hand to his chest she thrust him to his back falling with him and giving a smirk at his surprise. "Who said it was vanilla," she tried to pout but the quiet laugh gave her away.
Slowly she moved her hips for erect manhood to glide through wet folds teasingly. Putting more pressure with each pass to tease her delicate nerve as she smirked at him. Sitting up, she was eager to reach between them to wrap her hand in his girth and tease slowly down over him.
"You are in no way vanilla," Clint grunted as he sat up to lace a hand into her hair to pull her lips to his. Tongues fought for dominance, but that was nothing new.
"Good," she gasped, breaking the kiss to lean back slighly as he gripped her hip to urge her faster.
Desperately her hips jerked against his, heated mouth falling to suck a pert bud between teeth to nibble. In moments their bodies were soaked in sweat, a desperate need to find an end was feeding them both. Roughly Clint met her thrust, digging short nails into her flesh the closer he came.
The whimpering falling from her lips made him realize she wouldn’t be far behind the instant he spilled inside her. Grunting out his release, burying sweat soaked forehead into her chest as she moved faster before her own thrust shortened and velvet walls fluttered around his slowly softening manhood.
Wrapping her arms around his shoulders, shivering body falling lax against Clint as he fell back to the mattress. Slowly she slid to straddle his thighs, soft member slipping free as she slipped to his side, laying her head on his shoulder.
"How’s that for vanilla," she panted, looking up as he shifted to meet her gaze.
"Not bad," he laughed, wrapping an arm around her shoulders to pull her close.
Teasingly she ran a hand along his neck, thumb cherishing his cheek as their breathing steadied.
"No more wax," he chuckled across her lips, taking a chaste kiss before pulling away to note the smile in her eyes.
"No, maybe we should explore another kink. Something safe, like a feather," she laughed as they settled into one another.
"A feather can be a weapon," he hummed.
"Anything can be a weapon with us Clint."
"True," he chuckled before it grew quiet once more. The silence a welcome thing between them as they relaxed for the first time that evening.
Tags are OPEN! REBLOGS ALWAYS WELCOMED!
Tags: @ruckystarnes @cruel-kitten@moonfaery @dark-night-sky-99 @gramaeryebard @katstablook @andiyholly @jovanna-shewolf @nickyl316h @aslandia726 @furstinnajoelle @itsbqueenthings @collinsstanharbour @jazzieomega @moonlightprime @bambamwolf87 @tomhardy41 @get-loki @drakonwild @alexakeyloveloki @scorpionchild81 @devilbat @cherrygeek86
#Rucky's Kinktober 2019#clint barton#clint barton x plus size reader#clint barton x reader#clint barton mcu
48 notes
·
View notes
Text
Candle Making Time!
Hey all!
Since we’ve all collectively been told to stay cooped up at home, I decided to try a project that I have been wanting to do for a long time.
Candle Making!
I decided to use beeswax and coconut oil as the base of my candles (and oh boy did I forget just how good beeswax smells <3 )
Now, I did not go out and buy prewaxed wicks, but don’t worry, because it seems like its easy to do. Guess we will see!
(Remember, I have never done this before and I am writing this as I do it. So you get to see exactly how it works out for me as the post progresses. )

The needed supplies:
- plain cotton cord of some kind. Butchers twine would be good!
- the Wax and oil you’re going to use. I used beeswax and coconut oil.
- a double boiler, or like, a pan and a jar or bow. (a bowl or glass measuring cup would have made my life a ton easier!)
- parchment paper- I put a towel under mine just to the heat didn’t mess up my counter
- something to make the candles in. I used two dollar store votive holders
- if you’re like me and used a jar, get some tongs to dip the cord!
- stick of some sort to keep the wicks upright. I used toothpicks because my containers are small
- Color agent, or essential oil, or fragrance oils.
The Measuring
I used an very very approximate measuring of four tablespoons each of wax and oil. I did not measuring it out accurately, and I guess we will see if that comes back to bite me. I did a 50/50 ratio, because why not!
(after having filled the votives, I would recommend using 5TBS/6TBS of each wax.Four gave me just a tiny bit too little to fully fill them.)
I am also going for a natural color, but if it goes well, I might try to color the next batch.

The Melting
Once you get the oil/wax combo together, drop it on the double boiler. Once it is melted, you could add color to it!
If you don’t know what a double boiler is, it is basically this (see below pic) A pot of water that another pot, bowl, or jar sits into. It helps heat up the contents without them getting wet or being directly on the flame!
Everything I have read about candle making says you need to have things at specific temperatures. Now, I do not have a random candy thermometer sitting around just waiting to get ruined by wax. I eyeballed this step because I like to live dangerously.
Once the wax is melted, I let it continue to keep warming for a minute or two.

Wicks
Now, while your wax heats up, measure the wicks out to be taller than your container. You want them to be long enough to wrap around a stick or pen or something to keep them upright. I ended up making mine way too long, but hey, live and learn.
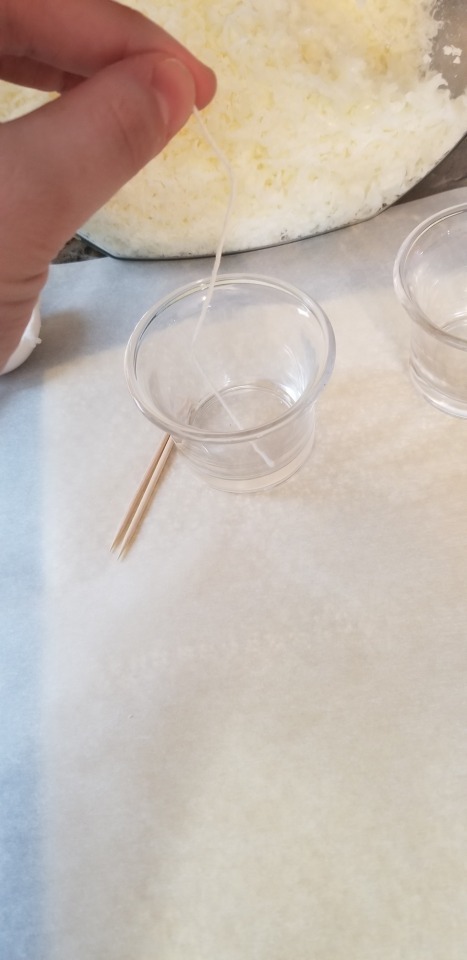
Wicks pt 2
Once your wax is warm enough (I guessed at it), remove it from the pot of water carefully. Please do not burn yourself or hurt yourself from the hot wax, the fire, the bubbling water, or steam. Carefully dip the wicks into the wax and swish it around.
Another method I saw said you should put them in a shallow dish of somesort and let them soak from anywhere to a few minutes to 20min. It’s your choice!
Once you swish them, pull them out and let the drips drop back into the jar. Once it is no longer super hot, gently hold the bottom of the wick and pull them taunt. This will be your chance to make sure the wick is straight.

Wicks pt 3
After you have them straight, lay them out and let them dry. I popped mine into the freezer to make it happen faster because I am impatient. Repeat the wax dip a few more time, letting it build up and soak into the wick. I ended up putting the wax jar back in the double boiler so it didn’t harden. I only dipped mine twice. Again, I am being impatient and excited!

Wicks pt 4
Of course, I forgot to get a picture of this step, but, once the wicks have cooled, wrap them around the stick you have. Make sure you line up the bottom of the wick to the bottom of whatever container you are going to use. You need to wrap it tightly enough that it will stay in place as you pour the wax in, so don’t be afraid to Make Sure it’s on there tightly!
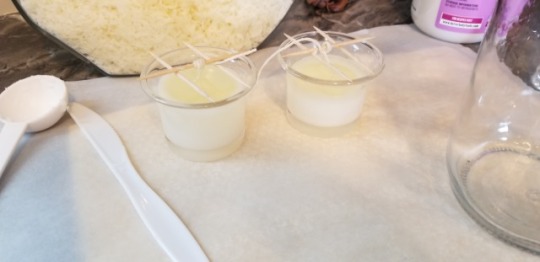
Candles!
Once the wicks are wrapped (see below picture), now its time to add any scent you want into the candle. There are lots of places online where you can find how much of anything you should add in, but I decided to wing it again. Life on the wild side, right?
For 8 TBS of wax/oil, I used 20dr cedarwood, 10dr mandarin, 15dr bergamot. Who knows how this is going to smell, but having the bottles together smelled great! I just hope it is enough for a pleasant scent throw.
After you have the smell good stuff added in, mix it up! I had to use a plastic knife, because I did not have any bamboo sticks I prefer to use for things like this, but it worked well enough.
After you mix the stuff, carefully pour the wax into the container, making sure you keep the wick still. This amount of wax let me mostly fill both of the containers. (what a coincidence! I had no clue how much it would make. Though I would recommend maybe using an additional TBS or two of each wax more than I did.)
Voila! Now you have two candles that need to cool off.
You need to let them sit for a few hours to fully cool before you can use them. Once they harden, make sure you cut the wicks down to about 1/4th of an inch, for optimal burning.
There are different sizes of cords, and if you find yours to be too weak of a flame, you can braid three individual lengths together for a better flame!
More updates to come, once the candles are done!
3 notes
·
View notes
Text
heartbeat. (Ninex) - meggie
A/N: Mia says I’m cheating on HFIG, but I’m just having a lot of feelings after “The View.” or Meggie writes a canon compliant but in no way truthful account of three times Nina and Monet hooked up. The song is “Heartbeat” by Julian Moon.
Wordcount: 1,743
I never thought there was a god ‘til I came across you, yeah
You’re the most perfect combination of molecules
Your fingertips are like lightning and your skin is freckled with gold
And I don’t believe I’ve ever seen something so beautiful
When he looks back on it later, Nina isn’t sure how it started. He knows it was the night of the finale taping, and Monet had been there dripping in sequins the color of champagne, lips painted dark purple like a bruise a few days after forming. When he really considers it, that’s exactly what Monet feels like now - a days old bruise that stings when you push on it, but is so damn tempting that you can’t stop.
They’d taken the obligatory Miss Congeniality pictures, and maybe Monet’s hand had drifted a little too low on the sheer back of Nina’s paper doll dress, but perhaps he didn’t mind too much because Monet’s hands were strong and soft, and there was just enough real champagne in his veins to enhance the effect of Monet’s sequins.
They might have ended up squeezed into a dark back corner of a dressing room at the theatre, hands on hips and waists, lips on necks and collarbones, makeup smeared, wigs knocked askew, condom hastily untucked from Monet’s bra because “if you stay ready, you ain’t gotta get ready.” Thank god Brooke and Vanjie are still (probably) fucking because Nina knows there’s lube in Brooke’s suitcase. Probably there’s lube in everyone’s suitcase, if he’s being honest, but he knows Brooke. Knows where things are likely to be tucked away. And Nina is apparently the only idiot in the entire cast who didn’t think ahead.
So let me hear your heartbeat, I need to know that you’re real
Let me hear your heartbeat, give me something to feel
Let me hear your heartbeat, like a choir of angels
Let me hear your heartbeat, before you I kneel
So all that had happened and maybe it’s got Nina feeling some kind of way about it (about Monet) almost three weeks later when he runs into him again in New York when they’re taping The View.
He and Monet hug it out in the dressing room beforehand and it’s nice, it’s good; it’s hardly awkward at all and why should it be? They’re both adults, consenting adults, and he’s sure that wasn’t the first time either one of them hooked up with another queen after a performance.
It’s a good interview, it is, and they’re all happy with it when they wrap. It’s easy and fun banter with Meghan. Monet and Nina keep the rhythm moving, bringing Adore into the conversation from time to time when they feel she can contribute. Her responses are mature, Adore is mature and Nina’s happy she’s able to show the rest of the world that new part of herself, the part that dreams of winning a Grammy and buying her mother a mansion. (And not just pizza and parties and whatever else Bianca likes to tease her for. Okay, maybe Nina wouldn’t have chosen green hair but it’s Adore’s aesthetic and she looks great, tiny and subdued and grown-up in her chair at the end of the row, cherry red lips smiling broadly.)
Nina can’t help it if he and Monet just dominate the conversation when they’re together; can’t help it if they play off each other, volley back and forth easily, passing jokes and comments between them like they’ve known each other for years.
Then Monet starts leaning into him, grabbing onto his leg. They’ve always been friendly, the two of them both huggers, never hesitating to embrace one another whenever they’re in the same room, even before their hookup. But this is different, this feels… Distinctive. And it doesn’t take an idiot to figure out what’s changed.
They take pictures with Meghan afterwards and maybe Monet’s hand grazes Nina’s, fingertips drifting along his wrist when they’re shuffled into the narrow hallway back to the dressing room to de-drag and head their separate ways. Maybe it sends a jolt of electricity down Nina’s spine. It doesn’t mean anything. They hooked up once. It’s over. It’s fine.
“Bye, guys!” Adore sweeps her stuff into an overly ripped, safety pin decorated denim backpack and waves goodbye to them over her shoulder; she doesn’t de-drag, doesn’t change. Nina guesses that’s just Adore. He’s happy for her. He’s been working for years to make it safe for them to walk down the street in day drag and there she is doing it.
He takes a seat at his station and starts to remove his lipstick, but the deep magenta shade is new, and the makeup wipe isn’t touching it. It’s a great product; it’s not so great for Nina, who doesn’t want magenta lips for the rest of the day.
“Shit,” Nina mutters under his breath and goes back to his makeup case to search for his olive oil. It doesn’t take much of a search for him to realize it isn’t there, forgotten somewhere in the rush of packing and unpacking and living out of suitcases for months at a time. “Shit.”
“What’s up?” Monet asks, spinning around on his bench. Wig off, eyeliner smeared around his brown eyes. Nina thinks he’s never looked more beautiful.
Nina makes a vague circle around his mouth. “My lipstick isn’t budging, and I forgot my olive oil. Like an idiot…” He flops down onto his bench and grabs a fresh makeup wipe, trying once again to remove the lipstick. Maybe it’s getting lighter. Maybe. Maybe it’s just wishful thinking.
Monet purses his lips, reaches into a black bag, and comes up with a jar and a handful of cotton rounds. Then he walks over to Nina and straddles the bench, facing him.
“Coconut oil,” he says simply and with a shrug at Nina’s confused expression. “It’s a solid at room temperature, but when you rub it in… Melts with your body temperature.”
Monet scoops a dollop onto his pinkie and widens his eyes.
“May I?”
Nina nods, breath catching in his throat as Monet reaches over, dabs the substance onto his mouth, rubs it in gently. He feels the solid sink into his lips, can practically feel the lipstick dissolve under the oily sheen that Monet wipes gently away with the cotton rounds. All Nina can focus on are the creases in the corner of Monet’s eyes as he works, the tip of his pink tongue jutting out from between his lips.
It can’t be more than a few minutes, but Nina feels suspended in time, stuck in stop animation as he watches cotton round after cotton round come away from his mouth in lighter and lighter shades of pink. Monet brushes on the coconut oil with the lightest of touches, lets it sit, wipes it away. Steady. Calm. Rhythmic. Nina gets the feeling they’re both enjoying this a little more than they want to admit.
“There,” Monet finally says, running his thumb once over Nina’s lips. “Good as new. And softer than that janky-ass makeup wipe would have left them.”
Maybe Nina’s lips pucker against the flesh of Monet’s thumb because Monet lets it linger on his mouth for a little too long. Maybe that’s how it really starts.
Monet is kissing him again, thumb replaced by lips, hand grasping his neck, their chests pressed flush together. He tastes different than before; less like champagne and bitter regret and more like vanilla and unspoken promises.
“We have to -” Monet gasps against Nina’s neck after a few minutes but not long enough, “- finish getting out of Drag.”
“Uh-huh,” Nina responds a bit drunkenly, though this time his head is decided not spinning with champagne and the whirlwind of finishing a season of Drag Race.
“Then…” Monet pulls back, looks Nina in the eyes, grasps his hands. “My apartment is like 20 minutes from here if you want…?”
“Hell yeah.” Nina manages a little more gusto that time, and they kiss for another ten minutes before Monet finally breaks away and says with a wink that he has to untuck.
Nina’s cheeks are hot, and his heart is racing, but he’s never been so sure.
Yeah. That’s how it starts.
I never thought there was a heaven til I kissed your lips, yeah
I was a lost soul just floating down the River Styx
So bring me back to life and pull me up towards the sky
And I don’t believe I’ve ever seen something so beautiful
Nina’s in Toronto that Thursday and it just so happens that Monet is too. It’s not like they planned it; they did not plan it, but if the scheduling gods are going to keep smiling on them, who are they to deny kismet?
Nina’s doing a show at the Opera House, and Monet is hosting a party at Cabana Pool Bar, and maybe they end up at the same hotel downtown by chance (or maybe Monet’s manager changes the reservation at the last minute after a text from Nina when he sees Monet’s tweet about Toronto. Maybe that’s how it happens. They don’t discuss it).
They don’t talk much at all. It’s late by the time Monet come down to Nina’s room, drunk on adrenaline and the promise of Nina, and they’re on an abbreviated schedule as it is.
Teeth on skin. Hands on waists. Kisses pressed to spines and shoulder blades, hips and kneecaps. They’re softer with each other now, less severe. They take their time tracing lines of muscles and veins under the skin, comparing tattoos and freckles that look like constellations.
It feels different this time. Like they’ve figured out that this isn’t a flash in the pan, one-time hookup backstage after the finale. Like there’s weight. Like there’s meaning.
Nina guesses they should probably talk about it.
But it’s four in the morning, and Monet’s arms are slung loosely across Nina’s chest, legs tangled with his under the thin hotel sheets, breath warm on his throat.
They’ll talk later.
Monet sighs a little in his sleep and Nina’s eyes grow heavy.
He falls asleep to the sound of Monet’s heart beating in time with his own.
Can you hear my heartbeat? I need to know that you’re real
Can you hear my heartbeat? Give me something to feel
Can you hear my heartbeat? Like a choir of angels
Can you hear my heartbeat? Before you I kneel
19 notes
·
View notes
Photo

Hasselback Potatoes
My husband usually cooks on Sundays. On one of those Sundays, he took ham out. I said "You can make the Hasselback Potatoes." He found the recipe on Facebook the night before and I printed it off. Well, we ended up doing it together.
In the article the recipe was from, it said to place the potato on a serving spoon and cut until you hit the spoon.
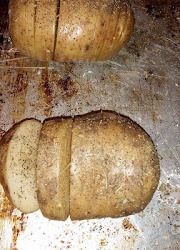
How they looked before baking.

How they looked after the first round in the oven.
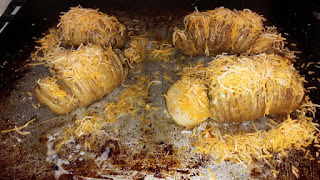
How they looked after adding cheese and putting back in oven.
***Don't mind the pictures. I used my camera on my phone. (I am not a big fan of those cameras.)***
We didn't have fresh herbs but, we used salt, pepper, Italian seasoning, and taco blend cheese. My husband then added sour cream to his after they came out of the oven.
The article also said you could add your extras during the second part of the baking time during the last 5-10 minutes. I, unfortunately, didn't see this the part about adding the extras in the last 5-10 minutes. The shredded cheese was done just a little too much after being put on in the last 40 minutes. We also ended up having to bake them 10 minutes longer. Be sure to adjust cooking time according to size of potatoes.
Before we get to the recipe, let me tell you about Hasselback Potatoes. They originated in Sweden and are that countries version of a baked potato. Also known as the Accordion Potato. This potato dish was first introduced in the 1940s, Hasselbacken in Stockholm, Sweden.
Now, for the recipe as we found at http://www.thekitchn.com/:
Ingredients
4 large potatoes, Yukon Gold, Russet, or Red Bliss
4 tablespoons melted butter, olive oil, duck fat, bacon fat, coconut oil, or a mix
Salt
Pepper
Optional extras: minced fresh herbs, spices, grated cheese, bread crumbs, panko crumbs
Instructions
Heat the oven to 425°F with a rack in the lower-middle position.
Wash and dry the potatoes: Scrub the potatoes clean and pat them dry. You can also peel the potatoes.
Cut slits in the potatoes, leaving the bottom intact: Cut slits into the potato, stopping just before you cut through so that the slices stay connected at the bottom of the potato. Space the slices 1/8-inch to 1/4-inch apart. You can rest the potato in a large serving spoon and use that as a guide for when to stop slicing — slice straight down and when your knife hits the edge of the spoon, stop slicing.
Brush the potatoes with half the fat: Arrange the potatoes in a baking dish. Brush the potatoes all over with butter or other fat, including the bottoms.
Sprinkle with salt and pepper: Sprinkle the potatoes generously with salt and pepper.
Bake 30 minutes, then brush with butter: Bake the potatoes for 30 minutes. At this point, the layers will start separating. Remove the pan from the oven and brush the potatoes again with fat — you can nudge the layers apart if they're still sticking together. Make sure some of the fat drips down into the space between the slices.
Bake another 30 to 40 minutes: Bake for another 30 to 40 minutes, until the potatoes are crispy on the edges and easily pieced in the middles with a paring knife. If you're adding any extras, stuff those into the slits and sprinkle over the top 5 to 10 minutes before the end of cooking. (Total baking time is 60 to 70 minutes for average potatoes; if your potatoes are on the small side or are larger, adjust cooking time accordingly.)
Serve immediately: These potatoes are best straight from the oven while the edges are at their crispiest.
REMEMBER, LIKE, COMMENT, TWEET, PIN AND SHARE!!!
(¯`v´¯)
`*.¸.*´
¸.•´¸.•*¨) ¸.•*¨)
(¸.•´ (¸.•´ .•´ ¸¸.•¨¯`•.•:*¨¨*:•..•:*¨¨*:•..•:*¨¨*:•..•...
┊ ┊ ☆
┊ ★
☆☆✔ Like ✔ “Share” ✔ Comment ✔ Repost ✔Tag ✔Join Whip it Up Recipes https://www.facebook.com/groups/whipitup/
FACEBOOK PAGE - https://www.facebook.com/Whip-It-Up-Recipes-153679348607250/
PINTEREST - https://www.pinterest.com/whipituprecipes/
TWITTER - https://twitter.com/whipituprecipes
Instagram: https://www.instagram.com/whipituprecipes1/
Facebook Group: https://www.facebook.com/groups/whipitup
0 notes
Text
Stocking Your Paleo Pantry
Wondering how to fill your kitchen and pantry with healthy real food so you can cook nourishing meals even during emergencies? Here are my top tips on how to stock a paleo pantry!
I’ve heard from many Nomsters—especially those who are brand-new to Paleo—who’ve read my Paleo 101 overview and want to dive right in, but they don’t know how to prep for the journey. And while I’ve posted about my own home pantry before, I know mine’s got a bit more stuff than most folks need. (I tell myself it’s ’cause I develop recipes for a living now—but to be honest, it’s also because I’m a recovering hoarder.)
Ready? Let’s fill your kitchen with all the good stuff that’s going into your family’s belly!
Stock up on protein!
I’ve said it before: The most sustainable, nourishing, and flavorful animal protein comes from healthy beasts that chow down on whatever nature intended them to eat. When filling up your freezer or fridge, prioritize the purchase of grass-fed (and grass-finished) beef, lamb, and goat, as well as pastured poultry/eggs and sustainable seafood.
Yeah, I know—these items aren’t cheap, but I make it work by buying ground meat and lower-cost braising cuts (e.g., chicken thighs, whole chickens, chuck roast, brisket, beef shanks, Boston butt roast). Plus, I always stock up when there’s a sale.
Emergency Protein!
I also keep “emergency protein” on-hand to ensure quick meals whenever I’m too tired, lazy, or stressed to whip up more complicated recipes. These pre-cooked items include canned seafood, (like wild salmon, sardines, and tuna), hard-boiled eggs, sausages, and organic deli meat. And when I’ve got absolutely nothing in the house, I’ll swing by my local market and buy a salt-and-pepper-seasoned rotisserie chicken that I can serve with a giant green salad. But to be frank, I try to always have stuff in the pantry, ’cause the only way to ensure healthy meals is to be prepared!
Key thing to remember: don’t make perfect the enemy of good. Just do the best you can. (True confession: we have some cans of Spam in the pantry, too.)
Online healthy meat sources
I have personally shopped online at these vendors and highly recommend their meat and seafood:
Belcampo Meat Co.
Five Marys Farm
Thrive Market
US Wellness Meats
Vital Choice Seafood
Fruits and Vegetables!
People wrongly assume that eating Paleo is a MEAT FEST, but I respectfully disagree. Sure—on my dinner plate, you’ll find a palm-sized portion of high-quality protein, but the rest of my plate is overflowing with vegetables. It’s become a Paleo cliché, but I eat more plants than I did when I dabbled in vegetarianism many years ago.
I prioritize purchasing in-season, pesticide-free produce and I make sure my family eats a variety of fruits and veggies. Of course, I have to make sure that I actually eat ’em because there’s nothing worse than pulling open my vegetable crisper and finding melted and moldy produce.
Vegetables and fruit with a longer shelf life:
Winter squash (e.g. butternut, kabocha, spaghetti, and delicata varieties)
Citrus (e.g. oranges, tangerines, lemons, grapefruit, etc.)
Cabbage (e.g. Napa, green, red, and savoy)
Potatoes (store them in a cool, dark place)
Beets
Apples
Onions, shallots, and garlic
Stock your freezer with veggies!
I also stock up on “emergency greens” by stocking my freezer with organic frozen vegetables (e.g. kale, spinach, peas, mixed vegetables, cubed squash, riced cauliflower, etc.). After all, when the veggies are pre-washed, pre-cut, and in my freezer already—I don’t have an excuse not to cook with them.
Healthy Cooking Fats!
Replace the bottles of highly processed, omega-6 dominant vegetable oils on your shelves with healthy cooking fats like ghee, coconut oil, rendered animal fats (e.g., lard, tallow, bacon drippings, and duck fat), avocado oil, algae oil, or extra-virgin olive oil. Remember: fat is not the enemy. You just need to make sure the fats you consume are the right fats. (You can read more about healthy fats in this cooking fat primer by my pal, Diane Sanfilippo!)
Flavor Boosters!
Nobody wants blah food, right? I have certain items on-hand all the time that will magically transform meat and veggies from boring to nomtastic! The number one thing to know is which ingredients naturally boost umami, the fifth taste. I extoll the virtues of umami whenever I can because it truly is the shortcut to deliciousness. You can read about it in both of our cookbooks or listen to this podcast episode to learn more.
Here are the flavor boosters that I stock in my kitchen:
Coconut Aminos: This dark, salty, aged coconut tree sap tastes remarkably similar to soy sauce, but without gluten or soy. I combine it with fish sauce for the perfect seasoning.
Red Boat Fish Sauce: Fish sauce is a staple ingredient in a number of Southeast Asian cultures. It’s literally umami in a bottle. Yes, it smells a little gross, but don’t judge a condiment by it’s nose. A few drops makes every savory dish taste better.
Fresh garlic, ginger, scallions: I do a lot of Chinese cooking so I always make sure I have these three items on hand—the holy trinity of Cantonese cooking.
Fresh herbs: Fresh herbs add brightness and flavor to your meals, so make sure you have plenty on hand. Watch this Periscope video to see how I store fresh herbs so they last up to two weeks.
Dried spices and seasonings: My spice cabinet always contains dried thyme, bay leaves, garlic, and onion. I also have several spice blends that are all-purpose seasonings (e.g. Magic Mushroom Powder or Primal Palate Adobo seasoning)—just sprinkle it on a garbage stir fry and you’re golden!
Assorted vinegars/citrus: Acids are a key component in cooking, and one of the most valuable flavor enhancers in your pantry. A splash of vinegar or a squeeze of fresh lemon or lime juice often adds much-needed tartness and brightness to your finished dishes. Just make sure that your vinegars don’t contain gluten (e.g., malt vinegar) or additives.
Prepared sauces/dressings: It’s always better to make your own sauces and dressings from scratch, but to stay sane, I keep a few bottles of marinara sauce, Thai curry paste, and salsa in the pantry. All feature Paleo-friendly ingredients, and enable me to quickly throw together a meal. (Feeling ambitious? Make your own Paleo-friendly sriracha. I even have a Whole30-compliant version!)
Dried Mushrooms: Add a blast of umami to all your stews and braises by tossing in a few reconstituted dried mushrooms. You can also use them to make the best seasoning blend of all time, Magic Mushroom Powder.
Tomato Paste: Just one spoonful will add depth and umami to your stews and braises.
Bacon: Bacon is delicious, but I use it more as a flavor booster than as the main dish. Make sure the bacon you choose is made with pastured pork and no crazy additives. If you’re on a strict Paleo challenge, avoid bacon with added sugar. My kids go crazy over my Roasted Broccoli & Bacon, because BACON.
I frequently update this Amazon store with my favorite paleo kitchen pantry items, including the stuff I mentioned above!
Drinks
Your mother is 100% correct about water being the best way to hydrate, and I’m not going to disagree with her. You can make your agua fancier by adding sliced fruit or cucumbers (spa water!) or you can guzzle sparkling water. But if you’re craving something different, I recommend kombucha, assorted teas (with no sweetener or dairy), coconut water, or black coffee. Homemade almond milk is also kind of awesome. (Just omit the vanilla extract if you’re on a Whole30.) On chilly mornings, one of my favorite drinks is a warm mug of bone broth, which you can store frozen in convenient portion sizes. Don’t knock it ’til you try it!
Snacks!
After I started eating Paleo, I discovered that I was a lot less hangry, and I didn’t need to snack every couple of hours. Once my body got acclimated to eating real food again and responding to my natural satiety cues, I found that I wasn’t hungry all the time. In fact, when you go Paleo, you’ll probably only reach for nibbles because you’re bored and feeling like chomping on something. If I’m at home and my stomach rumbles ’cause I didn’t quite fill up on my main meal, my snacks tend to be mini versions of meals (like fruit or vegetables + protein + healthy fat).
Packable paleo snacks!
Of course, there will be times when you’ll be travelling or stuck in a Paleo wasteland in between meals (say, at work or school) and you might want to have a little something in your bag to tide you over. My favorites are salted and roasted macadamia nuts, beef jerky, and dark chocolate (85-90% cacao). I don’t
indulge in sweets too often, but when I do, I make sure it’s worth it and I won’t feel terrible afterwards. (Reminder: If you’re doing a strict Paleo challenge, you should avoid even Paleo-fied versions of your favorite treats. Sugar is still sugar, even if it’s in the form of honey or maple syrup.)
Okay, Nomsters—keep well-nourished and stay healthy!
[Originally posted on December 28, 2015. Updated on March 15, 2020.]
Looking for more recipe ideas? Head on over to my Recipe Index. You’ll also find exclusive recipes on my iPhone and iPad app, and in my cookbooks, Nom Nom Paleo: Food for Humans (Andrews McMeel Publishing 2013) and Ready or Not! (Andrews McMeel Publishing 2017)!


The post Stocking Your Paleo Pantry appeared first on Nom Nom Paleo®.
0 notes
Text
Turkey Day Menu 2017: GF and allergy friendly
From http://jenrose.com/turkey-day-menu-2017-gf-and-allergy-friendly/
Courtesy of my sister, who is willing to adapt menus for other allergy issues. Comment here if your needs are different.
First off, we have multiple allergies and food issues. In short:
Me; Militantly gluten free and no strawberries or sulfites due to allergies. Also allergic to crustaceans (lobster, crab, possibly shrimp?), peanuts, hazelnuts, lima beans, oats, banana, and weird issues around standard commercial dairy and eggs, but I do fine with certain local products on eggs and dairy. I also randomly have issues with tomatoes, garlic, onions, some veggies, peppers, but there are meds I can take that help reduce inflammation to tolerate those. Some forms of garlic are better than others. I avoid most soy, refined sugar and mold-type cheeses due to inflammation issues.
My eldest: Allergic to soy, egg, dairy, peanuts and wheat.
My middle: No citric acid or citrates, reacts to wheat in weird ways, same for natamycin
Hubby has texture/taste issues (goes beyond dislike, not an allergy) with visible egg, set gelatin, and most cheese (except pizza.)
Youngest is Intensely picky.
A turkey dinner is actually one of the easiest meals to adapt.
So, within those parameters, here is our menu, according to Sis, with bullet commentary by me.
Turkey: 20 lb Shelton free-range, brined with herbs and spices, salt water, and apple juice or cider with no added citric acid
I don’t usually brine turkeys, but I trust Sis. Dad uses wine on the turkey, I cook at high heat and don’t touch it or baste it or brine it, but I might slip some kind of fat under the skin.
Stuffing: Costco gluten free bread cubes, better than bouillon based broth, herbs and spices, soy/dairy/egg/gluten free sausage, chopped apples & walnuts
I haven’t looked at Costcco’s gluten free bread cubes, but it’s really hard to get bread that everyone can have. Happy Campers is probably the best bet. Elegant Elephant has a sourdough loaf that can also be converted to cubes easily. Middle kiddo and I can both do Franz gluten free. Eldest and I can both do BFree. Bread is very regional, don’t be afraid to investigate. Other good substitutions include riced cauliflower, quinoa, and brown rice. Just substitute those for the bread in your favorite stuffing recipe, and be prepared to either cook the grains in broth and/or adjust the liquid content down.
Sausage: standard breakfast sausage is our usual–use whatever standard breakfast sausages you can tolerate. We use sausage-shaped ones, but loose sausage can also be used. Nuts are optional, sub sunflower seeds if you want the texture but can’t do tree nuts, or omit.
Apples work for us, cranberries and raisins are other options we’ve used in the past.
Better that Bouillon is something we also call “Chicken squishy” (or “beef squishy”) and is well tolerated by all of us. We use the organic low sodium version from Costco. Vegan options exist. Turkey is probably the ideal for this meal.
Potatoes: potatoes, olive oil, salt
I mean, you can do almost anything with potatoes, ranging from just swipe a little oil on the skins and bake, to peel (or not) and boil and mash. Contrary to popular belief, mashed potatoes are fine without milk and butter, especially if they’re going to be buttered later and doused with gravy. Sub chicken broth or veg broth for flavor and texture if you want creamier potatoes, and Earth Balance for butter if you really want them “buttery”.
Pro flavor tip: While I love a peppery olive oil, if you get the “Extra light Napoleon” it tastes very buttery, a la melted butter.
Sweet potatoes*: plain, roasted whole
*actually Garnet or Jewel Yams (which are sweet potatoes, but very orange.)
The neat thing is that sweet potatoes take zero work. Stick them in the oven at whatever temp and roast until squishy.
Once roasted, the skins slip off and they can be sliced or mashed and amended as people like after. One of my favorites involves mashed sweet potatoes with coconut milk, coconut sugar, and spices like ginger and cinnamon. For dairy-and-citrate having people, slice the cooked sweet potatoes and layer with butter, maple syrup, orange and/or lemon zest, orange and/or lemon juice, ginger, nutmeg and paprika.
If you must have them with marshmallows, see my marshmallow recipe. Make the marshmallows with vanilla, not peppermint.
One year we made purple yams, garnet yams, and Japanese sweet potatoes, and mashed them separately and let people pipe them onto their own plates.
This was more work than it was worth given how picky my children are, but a lot of fun for those who both like sweet potatoes and like playing with their food.
Gravy: tapioca or rice flour, better than bouillon based broth, herbs and spices, assorted drippings and giblets
Most of the liquid should come from the turkey, plus the cooking water from any boiled potatoes if you have it, which can be boosted with Better than Bouillon if needed.
Holler if you want to know how we do gravy.
Cranberry sauce: cranberries, sugar and/or honey
I’m lobbying for maple syrup.
Homemade cranberry sauce is the absolute easiest thing. Put cranberries and sweetener in a small pan on the stove. Simmer for 10 minutes. Adjust flavor with more sweet, spices as desired. It really is that easy. It goes from whole berries to sauce sort of all-of-a-sudden. Cook for a minute or two longer to thicken.
Not middle-child safe as cranberries are inherently high in citric acid.
You can make a similar sauce with frozen blueberries.
Applesauce can fill a similar ecological niche on the dinner plate for those who can’t have citric acid.
Green beans: fresh green beans, garlic, mushrooms (I’m hoping for chanterelles), olive oil, salt
Probably using some sort of frozen garlic as I react less badly to frozen garlic than to fresh or dried.
If you can find a safe cream of mushroom soup, use that if you want a more casserole-y thing
Pacific Foods has a yes-dairy-no-gluten condensed cream of mushroom soup.
Adding coconut milk (full fat) to the above would give a similar effect.
This will taste outstanding even if it’s not creamy.
If dairy isn’t a problem, use butter
Add a little wine if you can tolerate it
And the best mushrooms you can get.
Brussels sprouts: Brussels sprouts, uncured bacon
*side-eyes hard*
I hate Brussels sprouts.
But they’re hypoallergenic
I guess
Raw sauerkraut
Plain, lactofermented sauerkraut is delightful and will help with digestion. It also adds a bright acid note to a heavy meal
We buy it. Sonoma Brinery is fantastic, but Trader Joe’s also has a very good version.
Oregon Brineworks Ginger Roots would be fantastic and pretty alongside a turkey dinner.
Vanilla ice cream
Sparkling cider
We watch for added citric acid but lots of brands are fine
Wine
“Well Red” from Trader Joe’s is no-sulfites-detected and passably drinkable
“Our Daily Red” is a cooking wine that is no sulfites detected but kind of awful tasting
If you can find Orleans Hill Zinfandel, it may be the best NSD wine I’ve ever had.
Gluten free pies:
We buy gluten free crusts that everyone can eat. IDK the brand
Where you can’t buy safe crusts, chop sunflower seeds or whatever nuts can be tolerated very fine (not paste) and toast them with a safe butter substitute and press them into the pan a-la crumb crust.
If they’re not staying up, just line the bottom like a cheesecake
Or do a straight up custard
It is possible to substitute gluten free flour for wheat flour 1;1 and palm oil, coconut oil or Earth Balance (we do the soy-free) for the fat, and then follow almost any pie crust recipe. Or google “gluten free pie crust” if you want. We just buy crusts, it’s easier and the texture is more consistently what we want.
Pumpkin (eggs, pumpkin, brown sugar, vanilla, spices)
Note that this is a dairy-free recipe.
It’s basically just exactly the recipe on the Libby’s label but substituting eggs for the dairy
It’s a lot of eggs
It tastes better that way
and sets up VERY well.
Not safe for my eldest
Egg-free pumpkin (tapioca starch, pumpkin, brown sugar, vanilla, spices)
Note that this is corn-free, vegan, soy, egg, dairy and gluten free.
I would use coconut sugar
Apple (apples, brown sugar, spices, rum)
When I make apple pie, I mix the rum (or whiskey, but that’s not necessarily gluten free) with butter, sugar and a little starch to make a “hard sauce” that gets mixed in with the apples
People have gotten tipsy off of my apple pies
We have used booze to stop the apples from browning (it may not work but people think the browning is booze)
(they’re probably right.)
If citric acid is an issue, don’t use lemon in your pie
If it’s not, definitely use lemon in your pie.
Cherry (cherries, tapioca starch, sugar, almond extract)
Use almond flour for the crust if you want to really punch up the cherry almond goodness.
1 note
·
View note
Text
What Wouldn’t You Do for a Homemade Klondike Bar?
[Photographs: Vicky Wasik. Video: Serious Eats Team]
We've all sat through the rhetorical questioning of a television commercial, numb to its effects. Do you happen to have any Grey Poupon? How many licks to get to the center of a Tootsie Pop? Where's the beef? Got milk? Little did I know that one such question would lead me on a journey of self-discovery, and test the limits of my culinary skill: What would you doooooo for a Klondike Bar?
While some may cluck like a chicken or confess to a crime, I found that I would do something else altogether—make it from scratch.
The components of a Klondike bar seem straightforward enough—slabs of plain ice cream, coated in crispy milk chocolate. Yet that simplicity belies a curious complexity: Beneath a whisper-thin and explosively crisp chocolate shell is no ordinary ice cream, but a fluffy filling as light and pure as driven snow.
Those qualities made me think of fior di latte gelato, but as soon as I'd tackled that recipe, I knew it was going to be too rich for this filling. So I tried to lighten things up by using homemade ice milk, only to find it was far too lean. And neither could compare to the cloud-like softness of the inside of a Klondike Bar.
Texturally, the closest I came was with my no-churn vanilla ice cream, which owes its feather-light texture to whole eggs and sugar cooked over a water bath, then whipped until foamy and pale.
After I'd added whipped cream and frozen it overnight, the texture was about as close to that of a Klondike Bar as I'd ever come, but those whole eggs gave it a custard-like flavor and color. Perfect for old-fashioned vanilla ice cream, but not for a supernaturally pale frozen novelty.
This got me thinking: If egg yolks were all that ruined the flavor and color, why not leave them out? With egg whites alone, the sugar-and-water-bath technique would give me something ultra light, fluffy, and mild: Swiss meringue.
Because it's fully cooked, this style of meringue is extremely stable, and perfectly amenable to the addition of soft butter (at which point it becomes Swiss buttercream), so I had a hunch it would do well with whipped cream instead.
In fact, it did a little too well. My trial run of Swiss meringue folded with whipped cream wound up almost comically light, with an excessively soft, Cool Whip–like texture. Perfectly delicious, and Klondike-esque in its simplicity, but much more like whipped cream than ice cream, and not particularly amenable to being sliced into bars.
Fortunately, the fix was as easy as cutting the meringue with a splash of milk.
Aside from contributing a pleasantly milky flavor, the added milk deflated the meringue ever so slightly, giving it a more ice cream–like density, and provided enough water to allow the meringue to freeze hard. Not too hard—just hard enough to slice into bars.
For that, I scraped the "ice cream" into a square cake pan lined with two overhanging sheets of parchment, and spread it flat with an offset spatula.
The recipe can be scaled to accommodate almost any pan, but an eight-inch-square pan will fit into any freezer, and the nine-bar yield is supremely manageable in terms of the logistics of dipping as well as freezer storage. And logistics are indeed key—you'll need a good mise en place and efficient organization so that the dipping process can move along as briskly as possible, given that you'll be coating quick-to-melt ice cream in warm chocolate. There’s no need to rush or move at a breakneck pace, but nor should you dally around.
In that spirit, one piece of equipment that's a huge help in keeping the bars cold is a thick cutting board that's narrow enough to fit in the freezer. When the cutting board is chilled overnight along with the ice cream bars, it provides an ice-cold work surface to keep the bars cold during both the cutting and the dipping phases.
To cut the bars, remove the pan and cutting board from the freezer, and use the parchment flaps to tug out the brick of ice cream. Cover the exposed surface with a sheet of parchment, and flip the whole thing over to peel the parchment off the bottom.
Using a large chef's knife, cut the ice cream into nine squares. If you have a deep-seated need for precision, each bar will be 2.66 inches wide. But, especially given that you'll be in something of a race against the clock, it's okay to eyeball it.
Cover the ice cream bars in plastic to prevent odor absorption, and return them to the freezer. They can sit there for however long it takes to prepare the chocolate coating, but if you plan to leave them in there overnight for convenience, do be sure they're wrapped up nice and tight. Freezers are home to all sorts of stale, funky smells that this mild ice cream can soak up like a sponge.
For those looking to capture a true Klondike Bar flavor, reach for a relatively dark milk chocolate, such as Endangered Species 48% (my personal fave) or Whole Foods 39%.
Both are among my top supermarket picks and have a chocolate flavor that's deep enough to contrast with the filling, but not so potent that it completely overwhelms the delicate milky notes. Dark chocolate works on a technical level, but its flavor is so bold that the flavor of the ice cream is completely lost.
As with stracciatella gelato, I make the coating for homemade Klondike Bars using a combination of chocolate and refined coconut oil. Cutting the milk chocolate with oil lowers its melting point, so it won't sit on your tongue like a waxy lump when frozen; meanwhile, using a saturated fat like coconut oil helps create a crunchy snap.
Unlike the chocolate chips in stracciatella, however, this coating has a higher proportion of oil, for a super-thin, fluid consistency that ensures a light and even coating, rather than one that's heavy and thick.
After it's melted, transfer the chocolate mixture to the smallest bowl you have that can accommodate the ice cream bars—about four inches wide and three inches deep—and cool the mixture until it registers about 80°F (27°C) on a digital thermometer before dipping.
That temperature may sound a little warm, but remember that each ice cream bar will cool it slightly; starting with cooler chocolate will mean it's more inclined to lump and seize. Plus, a cooler coating will form a thicker layer around each bar, and, however tasty that may sound, it'll ruin the delicate snap of a thin chocolate shell.
To dip, use a spatula to drop one bar into the chocolate, then quickly dunk it under and lift it out with a fork.
Let the excess coating drip off, then return the bar to a clean patch of parchment on the chilled cutting board.
Think of it a little like a conveyor belt, with plain bars taken from the bottom and dipped bars placed near the top. As you work, the "naked" bars that remain can be scooted down to make room for the new bars as they're dipped.
Keeping both on the same cutting board means you can pop the board back in the freezer as needed along the way. If you have the freezer space for two separate cutting boards, though, by all means, spread your wings!
Once all the bars have been dipped, return them to the freezer until the chocolate has fully set.
Any leftover chocolate coating can be strained and spread out in a thin sheet to freeze for reuse as DIY chocolate chips for ice cream. Alternatively, re-melt it to use as a sauce for cake and ice cream, or as a dip for fruit like strawberries and sliced bananas.
It's perfectly normal to see a few blowouts here and there in your bars; the chocolate coating contracts as it freezes, which can force a little "eruption" of semi-melted ice cream. Don't sweat it if you notice a few imperfections, but an excess of explosions can indicate working conditions that are too warm.
Once the coating has set, the bars can be wrapped in plain or decorative foil.
This isn't a strictly necessary step, but it provides an extra layer of protection against freezer burn, and the act of unwrapping the bar makes it feel all the more authentic.
Protected by foil wrappers, these DIY Klondike Bars can keep for over a month in the freezer, if tucked inside a zip-top bag. Not that they'll actually last that long—between the super-fluffy ice cream and the snappy chocolate shell, this homemade frozen treat is as irresistible as the original.
This post may contain links to Amazon or other partners; your purchases via these links can benefit Serious Eats. Read more about our affiliate linking policy.
Source: https://www.seriouseats.com/2018/09/homemade-diy-klondike-bars.html
0 notes
Text
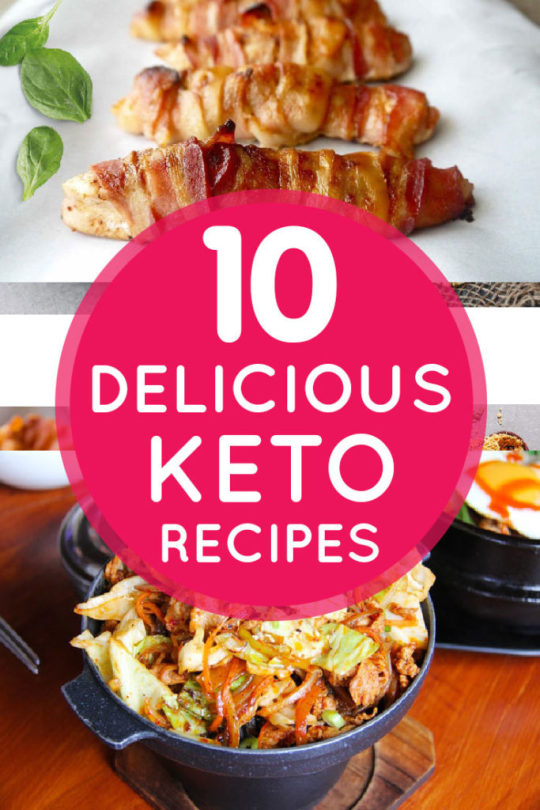
10 Delicious Keto Recipes

Are you searching for an easy to prepare keto recipe meals? Then you have come to the right place. In this post, we will be looking at 10 Delicious Keto recipes selected from hundreds of keto recipes.
What is Keto?
The human body contains certain substance called ketones, which are needed to get rid of excess fat in the body by converting the fats into energy used in the body. See Keto as the means of restricting intake of carbohydrate into the body hence forcing the body system to producing energy needed from body fat and dietary meals.
Delicious Keto Recipes
For those that love to eat foods that are rich in fat such as butters, milk products, margarine as well as cheese, taking advantage of the keto diet plan would be of great value to you as this would mean your body generating energy from body fat already stored.
Furthermore, Keto could be described as a low carb diet plan, which in the long run would lead to weight loss and a healthy living.
Below is list of 10 delicious keto recipes you don't want to miss.
1) Low Carb Steak Stir Fry

Low Carb Steak Stir Fry
INGREDIENTS
One pound of sliced, thin beef sirloin.One small sliced yellow onion.Two cloves of minced garlic.A teaspoon of freshly grated ginger.One tablespoon of olive oil. One small sliced red pepper.Eight ounces of sliced mushrooms.A cup of beef broth.Two tablespoons of soy sauce.Salt as well as pepper as seasonings for taste.
HOW TO MAKE LOW CARB STEAK STIR FRY
We first place a non-sticky skillet pan over medium-high heat, then heat up the olive oil.Next when oil is hot, add both the garlic, beef, as well as ginger and fry all together for about three to four minutes, until the beef looks well browned all through. Note you need to continue to stir all ingredients together as it fries.When once it looks cooked, then season with salt as well as pepper to taste.Next remove skillet pan from the heat, place its content in a bowl and put aside.The next think to do is place the skillet pan back on a medium-high heat and add the rest of the ingredients starting with the red peppers and onion.Allow it to cook for about three to four minutes until browned, then add the beef broth, soy sauce, as well as the earlier cooked beef mixture.Continue to cook and stir until all becomes hot.When cooking is done, serve it in clean serving plates.
NUTRITIONAL CONTENTS
CALORIESPROTEINFATCARBS290 kcal38.5 grams11 grams6 grams
2) Turkey in Creamy Cheese Sauce

Turkey in Creamy Cheese Sauce
INGREDIENTS
2 tablespoons of butter.2 cups of heavy whipping cream.7 ounces of creamy cheese.Salt, pepper seasoning for taste.20 ounces turkey breast. At least 1⁄3 cup of small capers.1 tsp tamari soy sauce
HOW TO MAKE TURKEY IN CREAMY CHEESE SAUCE
First step is to preheat the oven to about 300 degrees.Next place the frying pan over medium-high heat, add butter to melt.When once the butter melts completely, then add the turkey and fry it for about 10mins until appearance changes to golden brown on all sides.After its cooked, remove and place turkey in an oven and bake for another few minutes. When satisfied with the turkey texture, then remove it and place on a plate and cover with an aluminum foil.Now pour the turkey drippings into a saucepan, add rest of the ingredients like the creamy cheese, as well as the heavy whipping cream and stir both mixture thoroughly until properly mixed.Place mixture over medium heat till it boils, then reduce the heat and simmer until the sauce is thickened. Add both salt and pepper seasonings to taste.Place a skillet pan over medium-high heat, melt the rest of the butter. Then add both capers as well as sauté until it becomes crispy.
Finally, serve the cooked turkey alongside the sauce and carpers in a serving dish.
NUTRITIONAL CONTENTS
CALORIESPROTEINFATCARBS309 kcal43 grams24 grams7 grams
3) Wrapped Chicken with Baked Bacon

Wrapped Chicken with Baked Bacon
INGREDIENTS
4 pieces of 1 lb Chicken Breast.2 Cheddar cheese slices.4 Bacon slices.Tablespoon salt to taste
HOW TO MAKE WRAPPED CHICKEN WITH BACKED BACON
Get a bowl with warm water and add some salts to it. Stir and make sure its dissolved completely.Then add the chicken breast deep in water and leave it aside for it to brine for about 8 - 10 mins.Next preheat the oven up to 400 deg, with a lined baking foil sheet.Remove the brined chicken from the salt water and pat till dryOn each piece of chicken, place a piece of cheese and wrapped both items with a slice of baked bacon.Now place each wrapped cheese and chicken on the baking sheet with the cheese side facing up.Allow it to bake between 10 - 15 mins while checking to make sure the chicken is cooked thoroughly.When done, remove from oven and serve immediately while its ts still hot.
NUTRITIONAL CONTENTS
CALORIESPROTEINFATCARBS301 kcal35 grams17 grams1 grams
4) Low Carb Bacon Pancakes
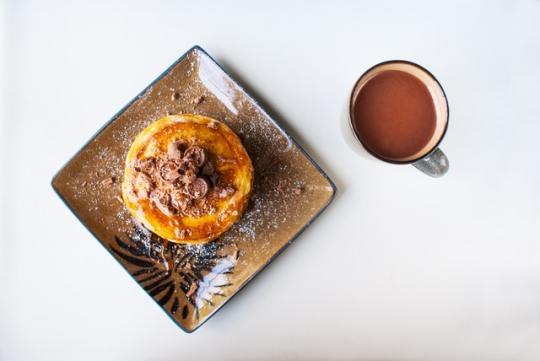
Low Carb Bacon Pancakes
INGREDIENTS
6 bacon slices3 egg whites1/4 coconut flour cup1 tsp granular gelatin2 tsp melted and unsalted butter2 tsp chopped chives1/2 cup of water(Optional) 1/2 cup of fat sour cream for topping
HOW TO MAKE BACON PANCAKES
First place a medium-sized frying pan over medium-high heat, then add the bacon slices and cook thoroughly. Once the bacon is cooked, remove from heat and cut into smaller pieces and set aside.Next crack open the eggs and carefully pour out the egg white into a bowl whilst ensuring the yoke does not get mixed. Either with a whisker or electric mixer, whisk the egg white until it becomes smooth.Now with a separate bowl, add the rest of the ingredients such as the coconut flour, butter, chives, gelatin as well as the bacon into the second bowl. Then add a little amount of water and mix all together.When mixed, then add the egg whites from the first bowl and mix all together until the batter becomes thick.Finally place the frying pan containing the bacon earlier fried over medium-high heat. Once hot, add about 2 tablespoons full of the mixed batter into the frying pan and flatten with a spatula to form pancakes. Cook the pancakes for about 3 minutes on both side then remove from heat. Repeat the same process for the rest of the pancake.
Serve with desired drink and enjoy.
NUTRITIONAL CONTENTS
CALORIESPROTEINFATCARBS323 kcal19 grams23 grams6.1 grams
5) Low Carb Cobb Salad
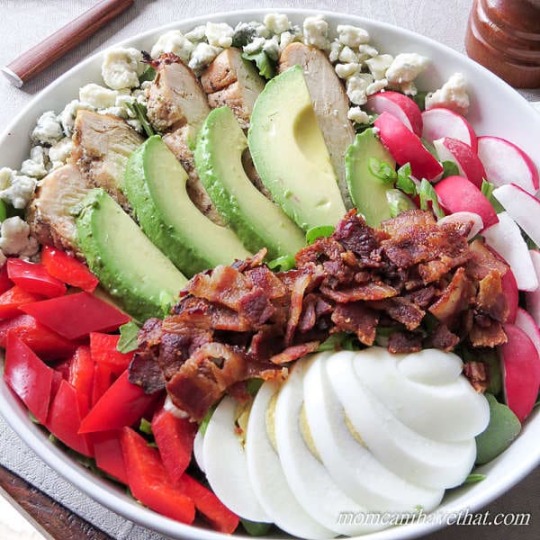
Low Carb Cobb Salad
Keto low Carb Cobb Salad is an easy to prepare, gluten-free healthy low carb keto salad recipe and its full of tasty flavors. This recipe contains arugula and a couple of delicious toppings such as eggs, chicken, avocado, onion, tomato, bacon as well as a blue cheese.
Get how to make a low carb cobb salad recipe here
NUTRITIONAL CONTENTS
CALORIESPROTEINFATCARBS573 kcal32 grams46 grams9 grams
6) Keto Broccoli Chicken Casserole with Cream Cheese and Mozzarella

Keto Broccoli Chicken Casserole with Cream Cheese and Mozzarella
When you are looking for the perfect french casserole dish, then Keto Broccoli Chicken Casserole with Cream Cheese and Mozzarella is what you need to try out. This delicious savory from Eatwell 101 is made with chicken breast, broccoli, cloves garlic, mozzarella cheese, as well as seasoning ingredient to taste.
Get how to make low carb Keto Broccoli Chicken Casserole with Cream Cheese and Mozzarella recipe here
NUTRITIONAL CONTENTS
CALORIESPROTEINFATCARBS335 kcal24 grams22 grams7 grams
7) Shrimp and Sausage Skillet
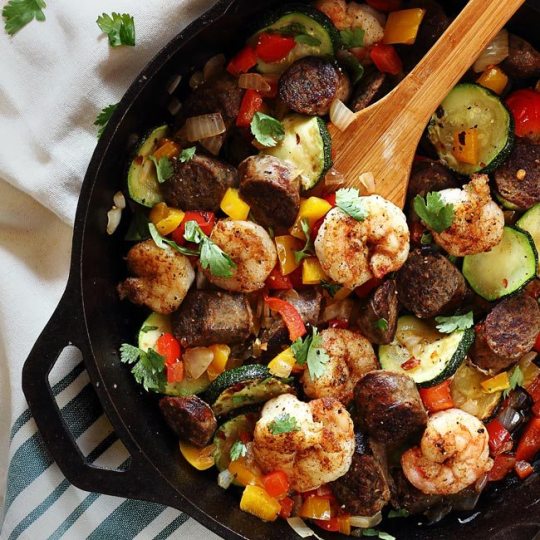
20 Minute Shrimp and Sausage Skillet
If you are looking for a simple delicious paleo, gluten-free dish, then check out this 20 minute Shrimps and Sausage Skillet from Paleonewbie. This delicious meal is made from shrimps, chicken stock, smoked sausages, old bay seasoning, coconut oil and a host of other ingredients to taste. The finished meal looks perfect and exquisite.
Get how to make Shrimp and Sausage Paleo Skillet recipe here
NUTRITIONAL CONTENTS
CALORIESPROTEINFATCARBS320 kcal30grams18 grams9 grams
8) Keto Cashew Chicken Recipe

Easy Keto Cashew Chicken
You don't see that many dish made with cashew to taste, but this one is an exception. Keto Cashew Chicken from Ketoconnect is nothing short of the perfect delicious meal for the entire family. If you do love crunchy dish, then this is one I will recommend you try out.
Cashew nuts according to the US Department of Agriculture (USDA) contains fiber, sugar, protein, high amount of fat, iron, and a host of other nutrients including vitamins.
Get how to make Keto Cashew Chicken recipe here
NUTRITIONAL CONTENTS
CALORIESPROTEINFATCARBS333 kcal22.6 grams24 grams8 grams
9) Keto Egg Roll with Chicken and Cabbage

Keto Egg Roll with Chicken and Cabbage
If you are a fan of egg recipes and you are looking for something with a touch of class and taste, then try out this delicious looking Egg Roll with Chicken and Cabbage from Eatwell101. This dish is super easy to make, and its one of the best low carb, gluten-free and paleo meal out there.
Get how to make Keto Egg Roll with Chicken and Cabbage recipe here
NUTRITIONAL CONTENTS
CALORIESPROTEINFATCARBS201 kcal8 grams11 grams19 grams
10) Keto Cauliflower Fried Rice

Keto Cauliflower Fried Rice
If you love fried rice, you will love this Cauliflower Fried Rice from Detoxinista. Cauliflower rice as well know is low in carbs hence its flavor comes from ingredients added to make this dish. Having the rice fried makes it the mouth-watery dish you don't want to miss.
Get how to make Keto Cauliflower Fried Rice recipe here
NUTRITIONAL CONTENTS
CALORIESPROTEINFATCARBS180 kcal7 grams9 grams20 grams
Let us know what you think of each dish and if you have tried it yourself.
Read the full article
0 notes
Text
4 Levels of Banana Bread: Amateur to Food Scientist | Epicurious
4 Levels of Banana Bread: Amateur to Food Scientist | Epicurious
youtube
[energetic drumbeat]
– Hi, I'm Jon, and I'm a level one chef.
– I'm Gabrielle, and I'm a level two chef.
– I'm Sim.
I'm the dean of bread baking
at the Institute of Culinary Education,
and I've been baking since 1973.
[energetic drumbeat]
– I am a huge fan of banana bread.
This is a very dumbed down version of my grandma's recipe
and just makes me feel warm inside.
– It's one of the only foods that you make
when something is about to go bad.
I'm making this banana bread gluten-free,
but it's gonna taste just as good, if not better.
– This is a more Caribbean-style banana bread.
Pan de Platano, plantains, instead of bananas.
[dramatic soundscape]
[bright chimes]
– First up, we're gonna mash up our bananas.
I traditionally like to use very ripe bananas.
– Toward the end of their life, if you will.
– They're mushy, they're easy to work with.
– Their sugar has, like,
I don't know how to say this scientifically,
but these are sweeter.
– So we're gonna use plantains.
The riper they are, the sweeter the flavor,
just like with regular banana bread.
– Remove the peels up off our bananas.
– And if they have like little brown spots and stuff,
it's okay, that's the point!
They're perfect just the way they are!
– So I'm gonna take the top off and the bottom off.
Cut this in half.
Split down the sides.
And I'm gonna take off my skin.
– They already smell so good.
That's how you know a good, really ripe banana.
– These are just nice and soft
and ready to turn into something beautiful and amazing.
– Let's roast these plantains.
Put a little bit of olive oil on my paper.
Like that, lay these out.
Put a little bit of sugar
and a little bit of butter on top of this.
A little bit of rum, it just sorta gives it a nice flavor.
Don't go crazy.
I'm gonna put these into an oven, 350 degrees,
for about 10, 15 minutes.
– Now I'm just gonna go up and mash them.
Because they're super ripe, I'm just gonna use a whisk.
Could even use a fork if you don't have a whisk.
– But a fork works just great.
– Here are the plantains.
They've now softened up considerably.
They're nice and sorta caramely.
And we're gonna put these in a bowl like this
along with a little bit of butter and that sugar and rum.
Smells fantastic.
Onto the machine now.
And we're gonna start this up.
– Really easy.
– Mash, mash, mash.
This was the best part when I was a kid.
I thought it was so fun that my mom
let me destroy something in the kitchen.
– I wanna get these down to, like, a banana stew.
If there's lumps, that's okay.
– I like to keep it a little bit chunky
so I'm not gonna totally disintegrate all the bananas.
– They're becoming soft and they're becoming mashed.
– So I've got my oven preheating,
and I'm gonna go ahead and grease my loaf pan.
– Pretty simple, I'm just gonna take a little oil.
– Simple cooking spray here.
And gonna really get that.
– Spread it around a little bit.
– Nice and greased.
– Then, I'm going to take my parchment paper.
And this really helps you take it out when it's done.
We don't want it sticking!
– So now for our batter.
We're gonna work with the wet ingredients.
Have my mashed bananas, which look like baby food.
Melted butter.
– I'm going to start with light brown
sugar. – Sugar.
Just gonna mix it all up.
– I'm gonna add in all my honey as well.
I think that the honey creates a little bit more
of like a flavor profile, rather than just regular sugar.
– I'm gonna put a little bit of vanilla in here.
– One egg.
Gorgeous.
Mix this up.
– Put in my coconut oil.
And then I'm gonna put in tahini.
It balances out some of the sweetness.
Then I'm gonna start whisking this together.
– Put a little bit of orange juice in here now,
just to moisten up the batter.
– It's all about the moisture, the moister the better.
– Put the whole orange.
Just gonna leave this for a little while,
let this get really soft and mushed.
Not too many lumps.
– I actually don't mind a little lumps in my banana bread.
– But I like it a little chunky.
I'm going to go ahead and add in my eggs.
Give these a quick whisk before I put in the rest.
Instead of using dairy milk,
I decided to use an almond milk.
And then lastly, we're gonna put in
the crown jewel, the bananas!
And then, it doesn't exactly look pretty
but I wanna try and get this all combined.
– All my wet is in here.
– Just like when you make cookies or a cake,
you start with your sugar and your butter and your base
and then you go ahead and add in your dry ingredients.
It's all fully combined,
still have some nice lumps in there.
For our dry ingredients, have my–
– [All] Flour.
– I wanna sift my gluten-free flour
and then almond meal, sift that in as well,
to just kinda bulk up this recipe a little bit.
I'm going to go ahead and just start combining them
in little batches so that I can make sure
that I'm not leaving anything chunky
and it's all combining really nicely.
– We have.
– [All] Salt.
– Pink Himalayan sea salt.
'Cause we're fancy like that.
– Baking powder. – Baking powder.
Just like with a cake, gonna add
my dry ingredients into my wet ingredients
little by little, to not overwhelm it.
– We're gonna add
baking soda, cinnamon. – Baking soda, cinnamon.
Just adds a little extra something.
– Always hold back on cinnamon, just a little bit.
– And then my vanilla, which I guess is not a dry ingredient
but I forgot to add it otherwise, so.
– Sugar.
I'm using light brown here.
Big fan of nutmeg, which I find
is a little bit more aromatic, also makes you dream.
– Make sure that all the ingredients get fully combined.
I don't wanna see bits of flour.
– I'm sweating.
Baking isn't for the faint of heart.
– Just got some beautiful walnuts here.
Gonna chop these bad boys up.
– I have the most important element, the chocolate chunks,
from actual chocolate bars!
I'm gonna see what two of these bars look like
and maybe we'll do three.
Probably three.
Why not?
– I have these roasted pecans.
Rough chop, nice big pieces.
And in they go.
– You don't have to add in nuts
if you don't like to or you're allergic,
but for me, if I have them, it's a must-add.
– Ooh!
If you've never had the satisfaction
of cutting through a chocolate bar, I highly recommend it.
It's very therapeutic and it smells really, really good.
We're gonna do a third one.
– We're gonna put a little bit of ginger in this.
Crystallized ginger.
Chop it quite small.
This is to taste.
Mix your flour in so that you distribute
the baking powder and the baking soda, which is important.
– Fold the nuts in.
This looks so good!
– Gonna give this a stir before I put it into the pan.
– Here's my mashed.
I'm gonna put one egg in and mix that up a little bit more.
And pour my dry in.
You don't want to overmix
because the gluten will tighten up.
And I'm actually gonna just put
a little bit of starter into my mix,
just to like liven that flavor up a little bit.
– This is done!
Now, I'm going to pour this into my parchment-lined pan.
– [Jon] Could see the lumps of banana.
Nice chunks of walnut.
– All these chunks!
– You could do this in a metal tin,
I sorta like these decorative paper ones.
– Go ahead and give it a little shake.
– Okay, this looks good to me.
– Now to add on a topping.
– And make it look really pretty.
And add some extra flavor.
– Just gonna add on some simple granulated sugar,
right on the top of my batter.
And this'll give it a little bit of crunch.
– I'm going to cut a banana lengthwise.
Place it in here.
It's a little prettier if you put the seed side facing up,
you kinda see the texture of the banana.
– Put some pecans on.
I wouldn't roast these before going on,
just put these on raw.
– And then I'm gonna go ahead and take my sesame seeds
and just do a nice little sprinkling all over the top.
– I like to put some pineapple on there,
just keep that sorta Caribbean theme going.
Not too thin slices, they sorta caramelize up a little bit.
– This is ready to go into the oven now.
– Just going to preheat my oven to 325 degrees.
– 350 degrees Fahrenheit.
– 45 minutes at 350.
– My banana bread is ready.
It's been out of the oven.
Been cooling for a little bit.
– It collapsed a little bit,
but that's what happens sometimes.
– We're gonna turn this stove up.
And we're gonna put a little bit of nappage in there.
Nappage is actually a glaze
that's made from agar agar, which is a seaweed.
We're gonna just do a little bit of water in there.
Okay, we're melting it down, mixing it with the water.
Whilst that's going, let's take these out.
– With this little spatula guy.
– [Gabrielle] Loosen the edges a little bit.
– Give it a nice little shake here.
– Oh yeah!
– Now we're gonna take a little bit of nappage here,
glaze my pineapple there, and I'm even gonna do a drip
on top of my nuts like that.
I tend to put icing sugar on everything,
or confectioner's sugar.
I just like how it looks.
– Mm.
Gorgeous.
– Ooh!
I see the chunks.
– It's not so wet, it's not gummy.
But it's very good to eat.
– And this is my banana bread.
[pleasant music] [dramatic crash]
– And here is my tahini dark chocolate chunk
gluten-free banana bread.
[pleasant music] [dramatic crash]
– Pan de Platano, or Caribbean plantain bread.
[dramatic crash]
[pleasant music]
– Looks pretty good.
– Oh yeah. – Mm.
That's good.
– Super moist, just the way I like it.
Nice and sweet but not too sweet.
– It's got so many chunks in it.
Yay, I'm so happy!
It turned out so good.
– All in all, pretty good result.
Mm.
Pan de Platano.
[dramatic crash]
– Banana bread is a quick bread
that's a popular and delicious way to use overripe bananas.
Let's see what each of our three chefs
did with their recipes.
[dramatic music]
We use bananas as a fruit, but botanically,
they're actually a type of berry.
Although they're distinctive in taste,
bananas share one of the main aromatic compounds
you also find in cloves, called eugenol.
Eugenol is a colorless compound
found in a number of essential oils
and often used in perfumery.
– This smells so good.
– When unripe, bananas are green with a hard flesh
and a very starchy, slightly sour taste.
– These aren't even gonna be that sweet yet.
– As bananas ripen, the flesh becomes soft, smooth and sweet
due to amyl acetate and esters that develop.
If left to become overripe, the peel gets very dark
and the flesh becomes soft and sometimes darkens
due to the browning enzyme called polyphenol oxidase.
Jon and Gabrielle used overripe bananas
because they're mild, sweet and soft.
And very easy to blend into the batter
with a whisk like Jon did, or a fork like Gabrielle did.
This is a great way to use bananas
that are at the end of their life.
– It's really a lovely little lifecycle of a banana.
– [Rose] Sim used plantains
to give his dish a Caribbean flair.
– It's not banana bread, it's not the same.
– Like bananas, plantains are botanically classified
as seedless berries, but are different from bananas
in that they retain their starchiness
even when they're ripe.
So while the plantain's peel may be black,
indicating ripeness, they're still
very dry and starchy inside, with some astringency.
Plantains are lower in sugar than bananas
and usually aren't eaten raw like their banana cousins
due to their high starch content.
[dramatic music]
Jon's batter was classic, simple, and delicious.
He prepared his pan with a cooking spray.
It allows the banana bread to release easily
from the pan once it's cooled.
He used a simple muffin mixing method,
which means he mixed all of his dry ingredients
except the sugar, and separately mixed
the wet ingredients with the white sugar,
and then combined the two with minimal mixing.
– Simple mix with a fork.
– He relied on baking powder as his leavener.
Baking powder for homemade recipes
is really called sodium aluminum sulfate phosphate.
It reacts and produces sulfuric acid
when it's combined with wet ingredients,
and then converts the sulfuric acid to carbon dioxide
when it's heated during baking.
It's the carbon dioxide that leavens the batter
and gives that nice, tender crumb.
Gabrielle prepared her pan with parchment paper
and brushed it with coconut oil.
It's a gluten-free cake, so there's no wheat-based flour.
Instead, Gabrielle uses gluten-free flour.
– If you were to give this to someone
and not tell them it was gluten-free,
no chance they would know.
– Gluten-free flour is a combination of starches
that are pulverized to make the consistency
of all-purpose flour.
It often contains starches from beans, rice, tapioca,
potatoes, sorghum, and cellulose.
Cellulose is a starch derived from indigestible wood
and plant cell walls.
Gabrielle also used brown sugar
instead of white sugar that Jon used.
White sugar adds straight sweetness,
while brown sugar adds more complex mineral caramel flavors
to Gabrielle's banana bread.
She also added tahini, which is made
from ground, toasted sesame seeds,
and adds a nutty, coffee-like flavor to her banana bread.
– I think that that's just kind of the element
that's bringing everything together.
– Sim's Caribbean-inspired banana bread
was started by roasting his plantains
with butter, sugar, and rum.
This softens and sweetens his plantains
which is necessary for this starchy fruit.
Sim also roasted his pecans,
which brought out roasted flavors
and made them darker due to the Maillard reaction.
He used a combination of baking soda and powder
to give extra porosity to his final product.
This is a heavy and dense batter
so it's good to add both.
The orange juice that he added adds a bright citrus note
and acts as the necessary acid
along with molasses on the brown sugar,
and the starter culture.
This starter culture is not needed here,
since there's enough acid from the orange juice
and the brown sugar to make the baking soda react.
– This isn't really important,
but it does make a nice addition.
– Sim added it because it gave a tangy quality
to his banana bread.
[dramatic music]
Jon added chopped walnuts for texture
and a richness that comes from this high-fat nut.
– Something about the nuts and the banana bread
just go really hand in hand.
– Gabrielle added semisweet chocolate
that she chipped from bars.
These misshapen shards of chocolate
melt beautifully in layers.
The chocolate and the tahini are delicious together
and create a unique and sumptuous flavor
in her banana bread.
– The tahini is so subtle.
If you didn't know, you wouldn't think it was in there.
– Sim added candied ginger, giving his banana bread
a warm, spicy sweetness.
It also adds a bit of crunch,
because the sugar is crystallized.
[dramatic music]
Jon keeps it classic with a dusting
of granulated sugar on top.
The temperature of the bread never gets hot enough
to fully melt the crystalline sugar,
so it retains its crunchy structure.
– The sugary topping on top, oh my god, it's so good.
– Gabrielle sliced a banana in half lengthwise
and placed it gently on top of her batter
with white sesame seeds sprinkled on top.
– Doesn't have to be super ripe.
You can use a normal banana for this.
– This gives a hint as to what's in the banana bread.
Sim added sliced pineapple to one loaf,
keeping with his Caribbean theme,
and pecans to the other loaf.
He brushed his garnish with–
– Nappage.
Tastes pretty good.
– Which gives a classic shine and added sweetness.
And finished it with a very light dusting
of powdered sugar.
[dramatic music]
Jon baked his banana bread for an hour
at 325 degrees in a traditional nine by five loaf pan.
This ensures that the center of his dense batter bakes
without burning the outside.
Gabrielle baked her banana bread for 45 minutes
at 350 degrees in a traditional nine by five loaf pan.
She had extra-rich ingredients in her bread
like tahini, honey, almond meal and almond milk,
so she needed the higher temperature
to dehydrate her batter.
Sim baked his in smaller pans
for 35 to 40 minutes at 350 degrees.
Plantains are lower in water and higher in starch
compared to bananas, so they don't require
as long of a cooking time to dry the bread.
– It's not quite as wet as your regular banana bread.
– Banana bread is a treat from start to finish.
Next time you have bananas
that would be better off in a batter,
I hope you'll consider some of our three chefs' ideas
to make it your own.
– Hey Gabrielle.
– Oh, Andy! – Yeah.
– Hey guys. – Come on in!
I would love for you to try this, yes.
– I would love to try it.
– Please do. [laughing].
– Huh? – That's really good.
– Uh huh.
Well, I have a little secret for you.
– What's that?
– It is gluten-free.
– We're not gonna air this, right?
Fine, I'll just finish this.
– Mr. Non Gluten-Free himself.
– This'll be our secret.
'Cause I have an image to maintain
of being anti-gluten-free stuff.
But this is good.
from WordPress http://sweetly.site/4-levels-of-banana-bread-amateur-to-food-scientist-epicurious/
0 notes
Text
What Wouldn’t You Do for a Homemade Klondike Bar?
[Photographs: Vicky Wasik. Video: Serious Eats Team]
We've all sat through the rhetorical questioning of a television commercial, numb to its effects. Do you happen to have any Grey Poupon? How many licks to get to the center of a Tootsie Pop? Where's the beef? Got milk? Little did I know that one such question would lead me on a journey of self-discovery, and test the limits of my culinary skill: What would you doooooo for a Klondike Bar?
While some may cluck like a chicken or confess to a crime, I found that I would do something else altogether—make it from scratch.
The components of a Klondike bar seem straightforward enough—slabs of plain ice cream, coated in crispy milk chocolate. Yet that simplicity belies a curious complexity: Beneath a whisper-thin and explosively crisp chocolate shell is no ordinary ice cream, but a fluffy filling as light and pure as driven snow.
Those qualities made me think of fior di latte gelato, but as soon as I'd tackled that recipe, I knew it was going to be too rich for this filling. So I tried to lighten things up by using homemade ice milk, only to find it was far too lean. And neither could compare to the cloud-like softness of the inside of a Klondike Bar.
Texturally, the closest I came was with my no-churn vanilla ice cream, which owes its feather-light texture to whole eggs and sugar cooked over a water bath, then whipped until foamy and pale.
After I'd added whipped cream and frozen it overnight, the texture was about as close to that of a Klondike Bar as I'd ever come, but those whole eggs gave it a custard-like flavor and color. Perfect for old-fashioned vanilla ice cream, but not for a supernaturally pale frozen novelty.
This got me thinking: If egg yolks were all that ruined the flavor and color, why not leave them out? With egg whites alone, the sugar-and-water-bath technique would give me something ultra light, fluffy, and mild: Swiss meringue.
Because it's fully cooked, this style of meringue is extremely stable, and perfectly amenable to the addition of soft butter (at which point it becomes Swiss buttercream), so I had a hunch it would do well with whipped cream instead.
In fact, it did a little too well. My trial run of Swiss meringue folded with whipped cream wound up almost comically light, with an excessively soft, Cool Whip–like texture. Perfectly delicious, and Klondike-esque in its simplicity, but much more like whipped cream than ice cream, and not particularly amenable to being sliced into bars.
Fortunately, the fix was as easy as cutting the meringue with a splash of milk.
Aside from contributing a pleasantly milky flavor, the added milk deflated the meringue ever so slightly, giving it a more ice cream–like density, and provided enough water to allow the meringue to freeze hard. Not too hard—just hard enough to slice into bars.
For that, I scraped the "ice cream" into a square cake pan lined with two overhanging sheets of parchment, and spread it flat with an offset spatula.
The recipe can be scaled to accommodate almost any pan, but an eight-inch-square pan will fit into any freezer, and the nine-bar yield is supremely manageable in terms of the logistics of dipping as well as freezer storage. And logistics are indeed key—you'll need a good mise en place and efficient organization so that the dipping process can move along as briskly as possible, given that you'll be coating quick-to-melt ice cream in warm chocolate. There’s no need to rush or move at a breakneck pace, but nor should you dally around.
In that spirit, one piece of equipment that's a huge help in keeping the bars cold is a thick cutting board that's narrow enough to fit in the freezer. When the cutting board is chilled overnight along with the ice cream bars, it provides an ice-cold work surface to keep the bars cold during both the cutting and the dipping phases.
To cut the bars, remove the pan and cutting board from the freezer, and use the parchment flaps to tug out the brick of ice cream. Cover the exposed surface with a sheet of parchment, and flip the whole thing over to peel the parchment off the bottom.
Using a large chef's knife, cut the ice cream into nine squares. If you have a deep-seated need for precision, each bar will be 2.66 inches wide. But, especially given that you'll be in something of a race against the clock, it's okay to eyeball it.
Cover the ice cream bars in plastic to prevent odor absorption, and return them to the freezer. They can sit there for however long it takes to prepare the chocolate coating, but if you plan to leave them in there overnight for convenience, do be sure they're wrapped up nice and tight. Freezers are home to all sorts of stale, funky smells that this mild ice cream can soak up like a sponge.
For those looking to capture a true Klondike Bar flavor, reach for a relatively dark milk chocolate, such as Endangered Species 48% (my personal fave) or Whole Foods 39%.
Both are among my top supermarket picks and have a chocolate flavor that's deep enough to contrast with the filling, but not so potent that it completely overwhelms the delicate milky notes. Dark chocolate works on a technical level, but its flavor is so bold that the flavor of the ice cream is completely lost.
As with stracciatella gelato, I make the coating for homemade Klondike Bars using a combination of chocolate and refined coconut oil. Cutting the milk chocolate with oil lowers its melting point, so it won't sit on your tongue like a waxy lump when frozen; meanwhile, using a saturated fat like coconut oil helps create a crunchy snap.
Unlike the chocolate chips in stracciatella, however, this coating has a higher proportion of oil, for a super-thin, fluid consistency that ensures a light and even coating, rather than one that's heavy and thick.
After it's melted, transfer the chocolate mixture to the smallest bowl you have that can accommodate the ice cream bars—about four inches wide and three inches deep—and cool the mixture until it registers about 80°F (27°C) on a digital thermometer before dipping.
That temperature may sound a little warm, but remember that each ice cream bar will cool it slightly; starting with cooler chocolate will mean it's more inclined to lump and seize. Plus, a cooler coating will form a thicker layer around each bar, and, however tasty that may sound, it'll ruin the delicate snap of a thin chocolate shell.
To dip, use a spatula to drop one bar into the chocolate, then quickly dunk it under and lift it out with a fork.
Let the excess coating drip off, then return the bar to a clean patch of parchment on the chilled cutting board.
Think of it a little like a conveyor belt, with plain bars taken from the bottom and dipped bars placed near the top. As you work, the "naked" bars that remain can be scooted down to make room for the new bars as they're dipped.
Keeping both on the same cutting board means you can pop the board back in the freezer as needed along the way. If you have the freezer space for two separate cutting boards, though, by all means, spread your wings!
Once all the bars have been dipped, return them to the freezer until the chocolate has fully set.
Any leftover chocolate coating can be strained and spread out in a thin sheet to freeze for reuse as DIY chocolate chips for ice cream. Alternatively, re-melt it to use as a sauce for cake and ice cream, or as a dip for fruit like strawberries and sliced bananas.
It's perfectly normal to see a few blowouts here and there in your bars; the chocolate coating contracts as it freezes, which can force a little "eruption" of semi-melted ice cream. Don't sweat it if you notice a few imperfections, but an excess of explosions can indicate working conditions that are too warm.
Once the coating has set, the bars can be wrapped in plain or decorative foil.
This isn't a strictly necessary step, but it provides an extra layer of protection against freezer burn, and the act of unwrapping the bar makes it feel all the more authentic.
Protected by foil wrappers, these DIY Klondike Bars can keep for over a month in the freezer, if tucked inside a zip-top bag. Not that they'll actually last that long—between the super-fluffy ice cream and the snappy chocolate shell, this homemade frozen treat is as irresistible as the original.
This post may contain links to Amazon or other partners; your purchases via these links can benefit Serious Eats. Read more about our affiliate linking policy.
Source: https://www.seriouseats.com/2018/09/homemade-diy-klondike-bars.html
0 notes
Last Seen Blogs

prince-dongju
Close Eyes at Night

shanegillis
my politically incorrect babygirl

jeanwalms
jeanwelms

sosouthtx
SoSouth Music Distribion

cursed-byesexual
Nova Arcturus