#khr scan project
Text
Volume 15 scans are here!
You can download them on Mega. Feel free to use these raws for edits and other projects. Credit is not required, but do not claim as your own, and consider letting others know about the project, and/or donating to my Ko-fi.
44 notes
·
View notes
Photo

[ID: Three different versions of the same image of Uni from the manga of Katekyo Hitman Reborn. They improve in quality from left to right, and are labeled “Scanlation”, “Digital”, and “My scan” in that order. /End ID]
I am currently in the initial stages of a project to scan the entirety of KHR at 600 DPI. These would be significantly higher in size and quality compared to any complete collection of the manga. These scans would be released so anyone could access them.
I would also like to use these scans to create new, consistent, high-quality English scanlations, but this is a more far-off dream. However, this collection being accessible to anyone means that it is a project that could be taken on by someone else as well.
This project will cost me non-negligible amounts of money and time. If you are interested in the project and would like to send me a couple bucks towards covering these costs (or just enjoy my occasional content) I have a Ko-fi. Thanks for reading.
159 notes
·
View notes
Text
Volume 12 scans are here!
You can download them on Mega. Feel free to use these raws for edits and other projects. Credit is not required, but do not claim as your own, and consider letting others know about the project, and/or donating to my Ko-fi.
28 notes
·
View notes
Text
Volume 9 HD raws are here!
These scans feature untranslated bonus content (KenKen Interview and Kokuyo/Reader's Corner) that are not featured in the existing scanlations.
You can download them on Mega. Credit is not required, but do not claim as your own, and consider letting others know about the project, and/or donating to my Ko-fi.
42 notes
·
View notes
Text
KHR Scan Project Master List
I am scanning the KHR manga in high quality! You can read more about the project here.
These are unprocessed raws at 600DPI. Here’s a quick tutorial on how to edit them.
They are free to use without credit, but do not claim as your own. Consider donating to my Ko-fi, and letting others know about the project.
Volume 1 (Mega)
Volume 2 (Mega)
Volume 3 (Mega)
Volume 4 (Mega)
Volume 5 (Mega)
Volume 6 (Mega)
Volume 7 (Mega)
Volume 8 (Mega)
Volume 9 (Mega)
Volume 10 (Mega)
Volume 11 (Mega)
Volume 12 (Mega)
Volume 13 (Mega)
Volume 14 (Mega)
Volume 15 (Mega)
Volume 16 (Mega)
Volume 17 in progress
74 notes
·
View notes
Text
Volume 13 scans are here!
You can download them on Mega. Feel free to use these raws for edits and other projects. Credit is not required, but do not claim as your own, and consider letting others know about the project, and/or donating to my Ko-fi.
12 notes
·
View notes
Text
Tutorial: editing manga raws
Disclaimer: This is a tutorial for beginners with no experience using Photoshop for editing manga raws. It is not comprehensive, nor does it detail the only reliable method for achieving a good result. This is just a walkthrough of the method I find to have the best ratio of effort to result quality, according to my own tastes.
Open the file in Photoshop: If you do not own PS, see notes at the end of this post.
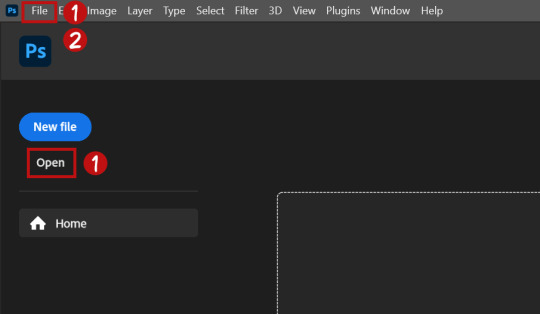
Click "open" on the PS startup menu or under "File" on the top bar of the window.
Click "File" on the top bar of the window, click "Save As" and save in your desired location as a Photoshop Document (.psd).
Regularly save the file with File > Save or with the shortcut CTRL+S/CMD+S while editing so you don't lose your work.
Change image mode: If your file name has "(Index)" after it, you will need to change the image mode to edit it properly.
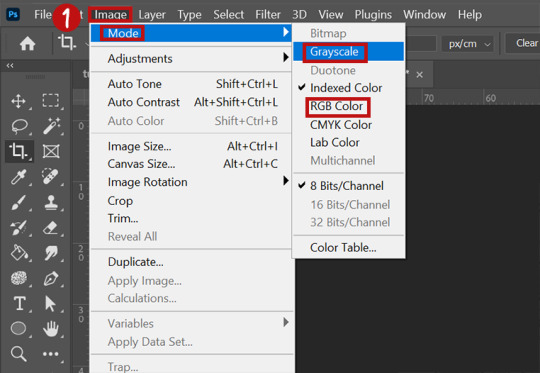
Click "Image" on the top bar, then "Mode". Select "Grayscale" if you are working in B/W, or "RGB" if you plan on working with color. You can change this later, although it can sometimes affect your image in unexpected ways.
Crop (optional): You may want to crop your file down to what you want your final edit to include. You can also do this later if you prefer.
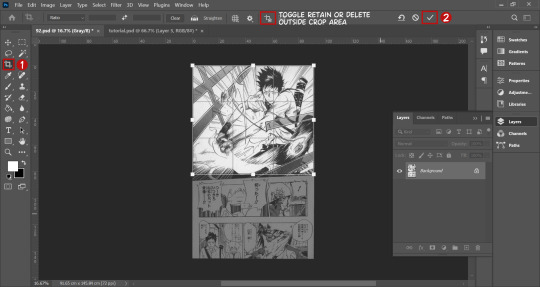
Click the crop icon on the left toolbar and click and drag over the area you want to work with. You can adjust by hovering over the edges of the selection and dragging when the arrows appear. You can rotate the crop by doing this at the corners as well.
Click the check mark on the options bar to confirm.
Be aware of the icon on the options bar which, when selected, permanently deletes the pixels outside of your crop. It is best not to have it on so you can adjust the crop later, but if your computer struggles with running PS, it may be worth using.
Surface blur (optional): Surface blur helps limit the amount of manual cleaning you will have to do by evening out some of the texture of the paper fiber you can see in raw manga.

(Extra optional) resize the image to 2X its current size. Go to "Image" on the top bar, then click "Image Size". Change the width or height to 2X the original value, making sure the "constrain aspect ratio" icon is checked. Hit OK.
Go to "Filter" on the top bar, then "Blur", then "Surface Blur".
Adjust the values on the box that comes up to balance between limiting the amount of texture in flat black and white area with not blurring details together. It will not be the same for every image, but will likely be similar. You can check and uncheck the preview button to compare your adjustment to the original. Hit OK when done.
If you resized the image, repeat the process, this time returning it to its original size.
Leveling

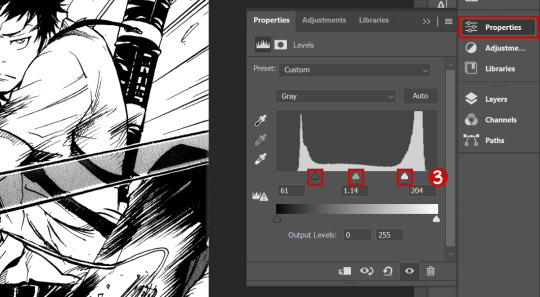
Click the "Layers" panel button on the right of the screen to open it.
On the bottom of the layers panel, click the button that looks like a half-white, half-black circle. Under that menu, click "Levels".
The levels adjustment panel should open, and you should see something that looks like a graph. As you drag the right and left slider on the graph inward, you will notice the blacks and whites getting more intense, respectively. Adjust these too your taste, but be aware that dragging them too far towards the middle can mess with gradation and midtones if they are present. You can adjust the middle slider as well. Play around until you get a look you like.
Sharpening (optional): Sharpening increases the definition of the edges of an image. I personally don't do this a lot of the time because I'm not crazy about the look, but it is a common step for many people, so it is worth knowing about since you may prefer the sharpened look.
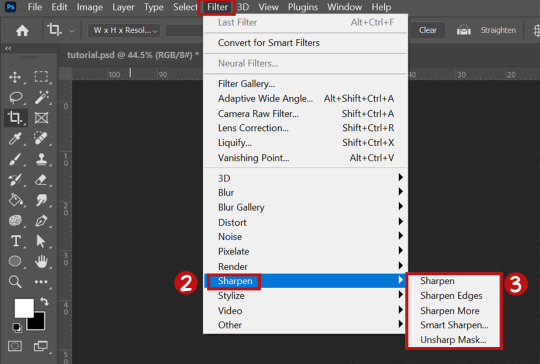
Go back to the "Layers" panel. Make sure the layer that has the image on it is selected.
Go to "Filter" on the top bar, then "Sharpen".
There are a variety of sharpening options underneath sharpen. Try them and see what appeals to you. You can use all of these on one image, and apply them multiple times. If you sharpen too much, just use the CTRL+z/CMD+z shortcut to undo your previous actions.
Spot cleaning: If there's still some visible "dirt" on the image, I quickly clean it up with the brush tool.

On the bottom of the layer panel, click the "+" icon to create a new layer. Make sure you have it selected.
Click the brush tool in the left tool panel.
Size of the brush can be adjusted on the options panel, and the color can be adjusted on the side toolbar.
Just click over spots with a black/white brush to cover them up. You can use the eraser tool in the left panel, or CTRL+z/CMD+z, if you mess up. The eraser won't effect the image itself because your touch-ups are on a separate layer.
Export: When you're all done with a basic manga edit, you can either keep editing if you want to do something more elaborate (not covered in this tutorial) or export your file to a type you can upload on the web.

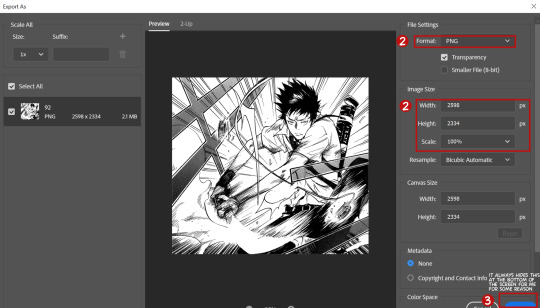
Click "File" on the top bar of the window, then "Export", then "Export As".
You have the option to change the final file type in this window. I recommend a PNG for high quality or a JPG if you want to limit file size. You can also change the size of the exported image here; it is up to you and your needs if you do this.
Click the blue export button and choose where you want to export the final edit.
Additional Notes: Software
Photoshop: I recommend Photoshop for editing, and it is what this tutorial is based around. However, I don't recommend paying for it. Here is how you can get if for free.
(Highly recommended) Enable your VPN if you have one.
Go here.
Type "photoshop" into the search bar on the top right of the screen, and look for the result with the highest "S" value (green text).
Click on the magnet icon next to the file size to torrent the file.
If you don't know how to torrent, here is an external tutorial.
Install the program according to the instructions in the information file and you will be set.
Photopea:
If you aren't comfortable downloading pirated files onto your computer, Photopea has a lot of the same functionality as Photoshop, but in-browser.
I'm not sure how it handles large files, but in terms of functionality it should be able to do anything you would need for edits.
Additional Notes: Space
Raws can take up a lot of space, because ideally they are both large and lossless (meaning they don't lose quality as the files are uploaded, downloaded, etc). Additionally, having few GBs free on your computer can hinder Photoshop's performance when editing said raws. If you don't have a lot of computer space, these are my recommendations:
The cheapest solution is knowing what you want to edit and what volume it is in, so you can download only what you need. This may not work for all raws, because they might all be grouped together in one massive upload, but mine are posted by volume.
The best solution is to buy an external hard drive. I would not encourage you to get one just for this, but this is a useful tool for anyone. Besides helping you free up a ton of storage space, it blows your piracy game wide open, and you can save a crazy amount of your favorite media in a place no one can take it from you. They are not super cheap, but they are well worth the price if you use them. Be sure to get the most out of it. I have this one and it works great.
You can also make use of cloud storage, though I don't really recommend it.
23 notes
·
View notes
Text

You can download these scans on Mega. Feel free to use these raws for edits and other projects. Credit is not required, but do not claim as your own, and consider letting others know about the project, and/or donating to my Ko-fi.
This volume marks the beginning of the Future arc, and features as-of-yet untranslated bonus content, including Kyoko's HaruHaru Interview.
12 notes
·
View notes
Text
Volume 14 scans are here!

You can download them on Mega. Feel free to use these raws for edits and other projects. Credit is not required, but do not claim as your own, and consider letting others know about the project, and/or donating to my Ko-fi.
15 notes
·
View notes
Text
Volume 4 HD raws are here!

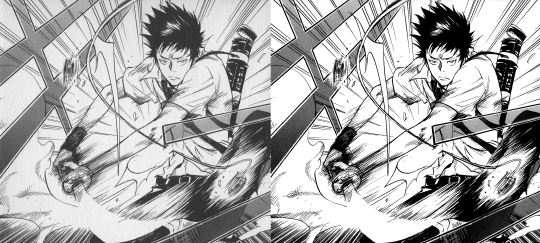
Existing scanlation on the left, edited from these scans on right
You can download them on Mega. Credit is not required, but do not claim as your own, and consider letting others know about the project. My Ko-fi
24 notes
·
View notes
Text
Volume 5 HD raws are here!
You can download them on Mega. Credit is not required, but do not claim as your own, and consider letting others know about the project. My Ko-fi
15 notes
·
View notes
Text
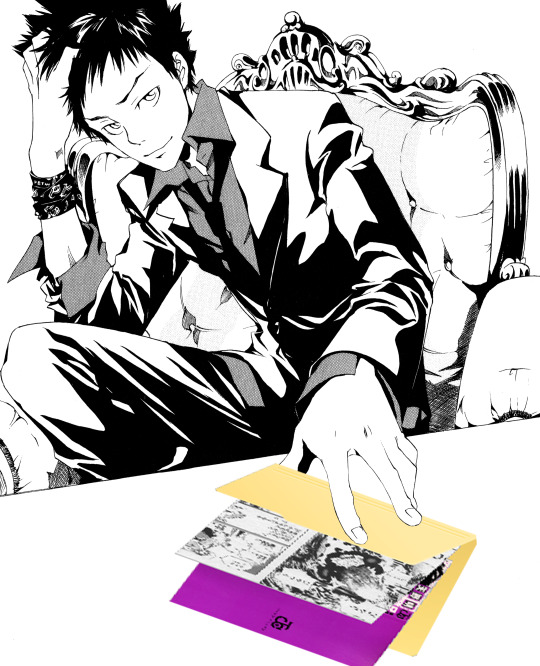
Volume 11 scans are here!
You can download them on Mega. Feel free to use these raws for edits and other projects. Credit is not required, but do not claim as your own, and consider letting others know about the project, and/or donating to my Ko-fi.
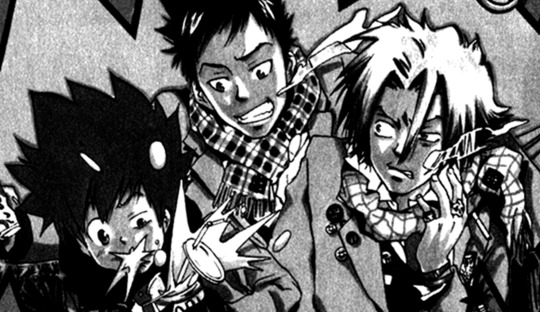
Alongside this volume, I have posted a short tutorial on how to edit these to get an image like the one you see above, just in case anyone inexperienced with editing still wants to make use of these. I'll include it as a link on future raw releases, or in my masterpost or something.
9 notes
·
View notes
Text
Volume 8 HD raws are here!


Left is from the existing scanlations, right is my edit of these scans.
Along with much higher quality all around, these scans feature untranslated bonus content (HaruHaru Interview and Reader's Corner) that are not featured in the existing scanlations.
You can download them on Mega. Credit is not required, but do not claim as your own, and consider letting others know about the project, and/or donating to my Ko-fi.
Since this volume was a bit of a doozy, some notes for anyone who uses these under the cut:
These scans are in index color mode to save space. To work with them in PS, open the desired image then go to Images (in top bar) > Mode > Grayscale or RGB depending on your needs
They are a bit fucked compared to my usual standards, with some dead space on some sides, and particularly the bottom of the images. I am aware of this. This is the unfortunate result of a very poor print; pretty much all of the images are skewed on the page, but I tried to align them for screens as much as possible. It will mean a lot of redrawing or cropping for scanlators regardless, but aligning it this way mitigates extra redrawing that would come of having to fix the alignment after cropping to size, and this should not be an issue for people who just want to make edits. I hope to amend this in the future, but I will have to look into if this is a one-off issue or if all copies of this volume are like this. orz
If you use these, please do consider donating to my Ko-Fi. I am so appreciative of everyone who has given me money to help with this project thus far, but I have yet to even pay off the cost of the manga volumes. Thank you for your consideration.
17 notes
·
View notes
Text
Volume 1 HD raws are here!
You can download them on Mega. Credit is not required, but do not claim as your own, and consider letting others know about the project.
My Ko-fi
Some notes under the cut.
These are raws. This means they will require processing in order to resemble the scanlation-type image above.
Due to the quality of the images, file size is quite high. Zipped file is 1.61GB, unzipped is 3.23GB.
These scans do not include the dust jacket, reason being that they are kind of difficult to work with with my scanner, and can already be found online in high quality. I will scan them eventually, but it is not my priority.
Grayscale images use indexed color. This means that in order to edit them in Photoshop, you should change the color mode to grayscale, or RGB if you want to use color in an edit (Image > Mode > [select mode of choice])
Because there are already decent quality raws for early volumes of the manga, I am not focusing on perfection, but on improving my skills for later volumes that are more in need of new scans. I may go back to these after more pressing volumes are complete.
That said, please let me know if you notice any glaring issues, such as: Dust, hairs, or lint that cannot easily be cleaned in one click, cropping that detracts from the reading experience in a notable way, and page order issues
30 notes
·
View notes
Text
Volume 6 HD raws are here!

You can download them on Mega. Credit is not required, but do not claim as your own, and consider letting others know about the project. My Ko-fi
9 notes
·
View notes
Text
Volume 2 HD raws are here!
You can download them on Mega. Credit is not required, but do not claim as your own, and consider letting others know about the project. My Ko-fi
As before, these are are 600 dpi raws, index color, file size is large so be aware. No dust jacket scans included at the moment. Let me know if you notice any major issues with the scans.
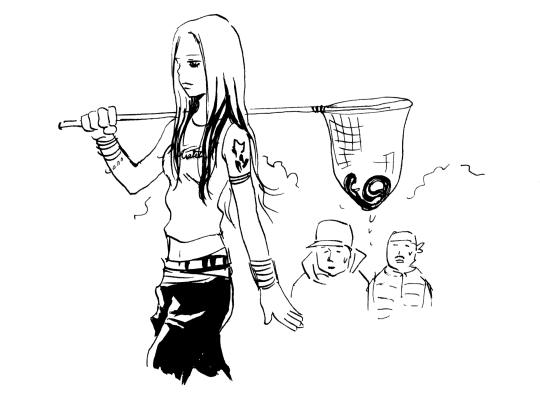
I still don’t have much to make this level of quality exciting to people, since we’re still in a place where the old scans are decent in quality, but here you can see a larger-than-life end of chapter doodle... So that’s something.
18 notes
·
View notes
Last Seen Blogs

yokohogawa
Yoko Hogawa
foxes-can-read
f0x_d0ct0r

mariapronvelro
Untitled

profounddestinyqueen-blog1
Profounddestinyqueen