#keylightful
Text
March 2024 Deal Announcements
Adult Fiction
Ziyad Saadi‘s THREE PARTIES, a tragicomedy pitched as inspired by Virginia Woolf’s MRS. DALLOWAY, in which a gay Palestinian refugee in modern Detroit prepares to throw himself a birthday party that, unbeknownst to the guests, will also double as his coming out party, amid an escalating torrent of romantic, professional, and familial surprises, to David Ross at Hamish Hamilton…

View On WordPress
#All Those Strangers#Allie Levick#Angry Robot#Avon#Ben Alderson#Boy Maybe#Chloe Seager#Christopher Hartland#David R. Slayton#Emma Cleary#Emma Hinds#Erin Cotter#Jennifer Azantian#Keylight#Kristian Nairn#L.D. Lewis#Laura Steven#Lauren Magaziner#Lex Croucher#Mason Deaver#Nicole Ellul#Nona Footz#Pete Knapp#Petra Lord#Piper L. White#Queen of Faces#Realm of Fey#Sam Wachman#Sonora Reyes#Stuti Telidevara
14 notes
·
View notes
Text
Oh i just saw dreamsecretclub dreets
22 notes
·
View notes
Text

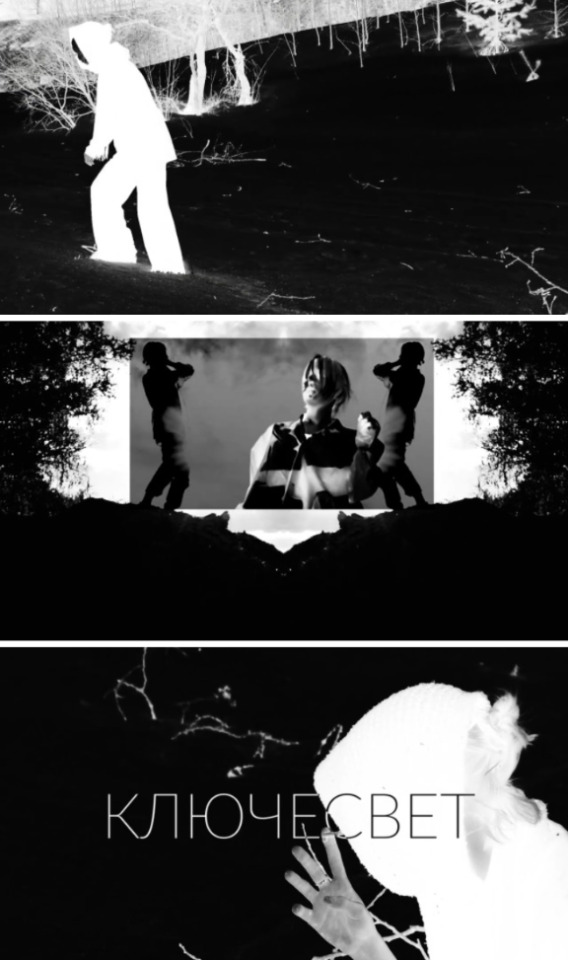
Crossnight/Keylight (2023)
2 notes
·
View notes
Text
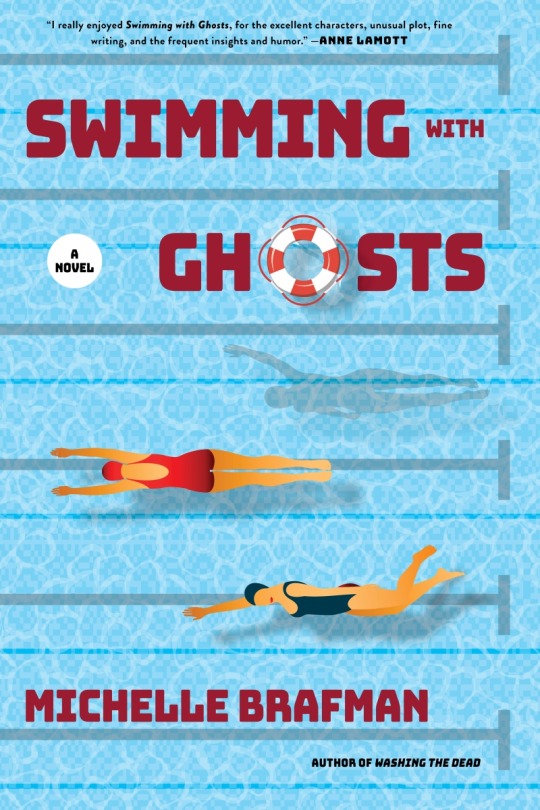
Book Showcase: SWIMMING WITH GHOSTS by Michelle Brafman
Jump in and read an #excerpt from SWIMMING WITH GHOSTS by #MichelleBrafman. #comingsoon #fiction #KeylightBooks #TurnerPublishing #BlankenshipPR
Swimming With Ghosts by Michelle BrafmanISBN: 9781684429547 (Hardcover)ISBN: 9781684429561 (eBook)ISBN: 9781666643220 (Digital Audiobook)ISBN: 9781666643152 (Audiobook on CD)ASIN: B0C31C2QS3 (Audible audiobook)ASIN: B0B8334WK7 (Kindle edition)Page Count: 370Release Date: June 13, 2023Publisher: Keylight Books | Turner PublishingGenre: Fiction
From the acclaimed author of Washing the Dead and…
View On WordPress
#Blankenship Public Relations#Book Excerpt#Book Showcase#fiction#Keylight Books#Michelle Brafman#SWIMMING WITH GHOSTS#Turner Publishing
0 notes
Video
youtube
Mi clon miniatura me vino a visitar para Noche Buena - My miniature clon...
#mcavisuals#mikiicolella#vfx#chromakey#vfxuniverse#videoeffects#keylight#christmas#christmasdecor#christmastree
0 notes
Text
Underrated
Even if my song is underrated
우리 사랑이 이렇게 끝났더라도
let me hold you
like when we were together
You’re always my warm weather
Even If our love is underrated
좋았던 기억들 얼마나 변해있건
Remember when we were together
You’re always my warm weather
시간은 너무빨리 흘러가있어
서로 수많은 약속들을 했었던
나이가 됐지 같은 미래를 꿈 꿨던
그 모습은 도대체 어디있어 why are we done ?
Look what I have been doing
Yeah I’m still tryna change now
Can I prove it to you soon…
View On WordPress
0 notes
Text
After effects remove green screen keylight 1.2

AFTER EFFECTS REMOVE GREEN SCREEN KEYLIGHT 1.2 HOW TO
AFTER EFFECTS REMOVE GREEN SCREEN KEYLIGHT 1.2 PRO
AFTER EFFECTS REMOVE GREEN SCREEN KEYLIGHT 1.2 FREE
in this after effects tutorial, i show you 3 easy steps to get a clean green screen key when working with green screen footage.#GREENSCREEN #Wtfmoment #mediafire #Android even if after effects remove green screen properly using keylight.
AFTER EFFECTS REMOVE GREEN SCREEN KEYLIGHT 1.2 HOW TO
learn the best tips on how to remove green screen in after effects! i also show some advanced tips to help sell the green screen in this after effects tutorial by flomotion you will learn: how to remove green screen: how to set up a basic green screen which hey, everyone in this after effects tutorial we will how to green screen chroma in after effects without using any plugins.
AFTER EFFECTS REMOVE GREEN SCREEN KEYLIGHT 1.2 FREE
bit.ly videvogal15 get free stock video, music, sfx with videvo. visit shop: justinodisho shop get adobe cc: bit.ly 2ekhrif follow me: instagram justinodisho use code: gal15 to get 15% off videvo premium plans. learn how to make a garbage matte around the screen. this should quickly key out a green screen even if the screen is not perfectly lit. we'll go over keying & a bunch of other tips & tricks that will in this brief tutorial, i'll show you how to use a special combo preset in after effects cc for pulling a clean key from green screen a quick and easy fast and clean tutorial on keying out green screen footage in adobe after effects using key light 1.2.
AFTER EFFECTS REMOVE GREEN SCREEN KEYLIGHT 1.2 PRO
Learn how to do green screen removal like a pro in after effects. Green Screen Removal Like A Pro In After Effects Tutorial
0 notes
Text
How to keylight 1.2

How to keylight 1.2 software#
How to keylight 1.2 professional#
Step 24: Now enable the background layer by clicking on the layer section’s Eye button. Once you increase the value of the Spill Range, the whitish color will be removed from the footage. Go to the Spill Range option of this method and increase the value of Spill Range. Step 23: Once you select the Ultra method, the properties of the Ultra Method will be open. Step 22: A whitish color will be visible at the edges of the character and object of the footage. Step 21: Now, when you change the Method of ‘Advance Spill Suppressor from Standard option to Ultra option. Step 20: Adjust the size of the background according to your footage or where you want to place it. Step 19: Now drag this background image from the project panel to the Layer section of this software.
How to keylight 1.2 software#
Pick that background from that folder and drop it in the Project Panel of this software with the help of the mouse button. Changing the background takes your desired background from the folder where you have saved it. Step 18: Now, let us change the background of the footage. Step 17: Once you select the Intermediate Result option, the edge near the character and object of footage becomes fine. Step 16: So take the ‘Intermediate Result’ option in the View option of the parameter of Keylight. Step 15: You can see the blur portion near the edges of the character and object of the footage. For Transparent Background, enable the ‘Toggle Transparency Grid’ option, which is at the bottom of the composition window. Step 14: You can see this effect clearly in the transparent background. Step 13: Because when you select this option, blur edges will come on the objects of footage. Step 12: One thing you should keep in mind that you should never select the ‘Final Result’ option in the View parameter of Keylight. Once you enable it, you will notice the greenish color at the edges of the character, and the object will be removed. Step 11: And enable this option by click on the ‘fx’ button of this option. Step 10:For removing this from the edges of our character and object of footage, go to the ‘Advanced Spill Suppressor option of parameters of Keylight. Step 9: When you zoom out this footage, you can see that there is some green color remains on the edges of the character and another object of our footage. Now click on the Screen color picker and then click on the green color of footage for replacing it with a black color background. Step 8: Now, set the green color in a color box of the Screen Color option of keylight parameters. Step 7: Once you drop this on the footage, a Keylight parameters box will be open in the Effect control section, which is at the left side of the working screen and next to the Project panel. Step 6: Now pick the ‘Keylight spill suppressor’ option from the list of Effects & Presets and drop it on the footage in the composition area. Step 5: Now search for ‘Keylight’ in the search box of the Effects & Presets tab. At the top of the working screen, we have two ribbons first is the Menu bar, and the second is the Toolbar which is used for management and designing of different type of things in this software we have Project Panel at the left side of the working screen, and next to Project Panel we have Effect Control panel, at the center of the screen we have Composition window which shows you the current composition of any project work, at the right side of the working screen we have some parameters such as Effects & Presets tab, Preview tab, Align tab, etc., at the bottom end we have two sections that are Layer section which shows a number of layer of any composition and Timeline section which have all handling points for animating any project in After Effect. How to Use Keylight in After Effects?īefore starting our discussion, let us have a look at the user interface of this software so that we can easily understand the technical terms of this software throughout this article. Here in this article, we will understand key light and analyze its different parameters to better understand this feature of After Effect software. Keylight is one of its good features, which we can define as a method by which you can remove green background from any video footage and replace it with any background by setting parameters of Keylight. We have different types of features available in After Effect software, which helps create unique graphic designs.
How to keylight 1.2 professional#
Introduction to Keylight in After EffectsĪfter Effect is video editing software that video editing professionals widely use for their highly professional work.
0 notes
Text
Keylight 1.2 premiere pro

#Keylight 1.2 premiere pro software#
Low quality deinterlacers leave "stair steppy" edges and are bad for keying. The chroma information is streched across 2 luma lines in the same field, this makes it much worse than progressive for keying. Interlacing has it's own issues with interlaced chroma (separate from Adobe's bug) and is more difficult to key. You'll find yourself choking the matte and losing detail otherwise.Ģ) Don't shoot interlaced, if you do, use a high quality deinterlacer before you key. Keying is exactly when this becomes especially important, where preserving edge detail is paramount. If you recall our previous discussion, there is a nasty interlaced chroma bug that affects Adobe CS4 (AE included) There are still other tips to keep in mind (I'm assuming you're doing this for web) And most people would get at least Photoshop and PP. AE is ~$800-1000 alone, but buying the Production Suite for ~$1200-1300 gets you AE, PP, Illustrator, Encore, Soundbooth, Photoshop, Flash. I agree with fitch that a suite is the best option. Keylight alone is much better than PP's chroma key or color key, but AE has a host of other tools that can help you create better mattes as well. Be warned when looking at plugins as they are also very expensive, with some costing more than After Effects itself! Keylight 1.2 however is bundled with AE CS4. Keylight is a Plugin for After Effects yes.
#Keylight 1.2 premiere pro software#
Otherwise you will always feel like you are 'missing out' on something you feel you should have, because working with video will always reqiure using more than what one single piece of software can offer. If i was giving advice to anyone buying Adobe products i would always suggest the collections. For example some even offer basic motion tracking now. Newer NLE's are now becoming more and more 'universal' at trying to do things that should really be done by other software, this is making people start to expect them to do more than an NLE needs to. They are totally different pieces of software designed to do totally different things. If you want do any sort of real image manupulation then you want a compositor, and for that After Effects is top of my (and most people's) list every time. I personally think that Premiere is a great NLE, but that is what it is, and NLE. You seem to have the issue with Adobe that a lot of people who have one piece of software have.
0 notes
Photo

8am #sunlight #keylight #citylife #morning #sony #a7s3 #fe20mmf18g (at Taipei, Taiwan) https://www.instagram.com/p/ChjN4HqPTFG/?igshid=NGJjMDIxMWI=
0 notes
Note
Hey! I was just wondering how you add in live action props into your animations. I assume you film the prop in front of a greenscreen but I was curious as to the process after that as well :]


Heyo! Its totally case by case. usually i'm just using Keylight in after effects to key out the green, then animate the characters on top of it, and composite it all together. If theres a moving camera then i'll track it in Blender before adding 2d and 3d elements so it all syncs up. Then usually last step is adding lighting to make the different assets look like theyre in the same space. (good tutorial for that here!) Sorry its not a more in depth answer, thats the basics of it though!
266 notes
·
View notes
Note
hi !! i wanted to ask how you get your rim light to show up, mine doesnt show up as much and i dont know what i'm doing wrong )=
Hi! It depends on which cas light you're talking about
In general (ones I used for my Glo lights), you'd want to adjust the falloff value. 0 = wider cover of rim light, higher value = less cover of rim light.
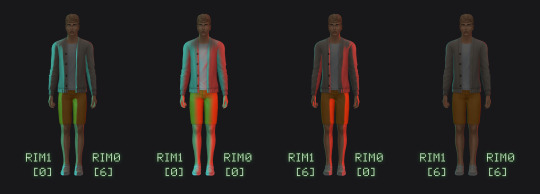
For my TS3 & TS4 cas lighting, I used one of the keylights and adjust its angle so it's coming from the side/behind, just like an actual lighting setup you'd do. This allows me to have the rim light to also appear on the sims heads :) anything above 90 or below -90 will give you that result.
35 notes
·
View notes
Text
Des packs sims qui vous ravie. 3
Ce qui est bien avec les sims c'est que l'on peut leur donné la vie que l'on veut. Dans le mode construction du jeux les sims 4 ,on as pas beaucoup d'objet pour faire de nos sims des streamer (ou streameuse).

Grace a ce pack de cc sims 4 on peut enfin avoir des accessoire de streamer pour nos sims comme des keylight ,des caméras ,des microphone et des ordinateur
lien pour télécharger ce pack :
https://www.patreon.com/posts/32883338?epik=dj0yJnU9UjhqcGJWTk9qcFo3VHR5ek5nM011c1JfdkQ5ZUJKZ1MmcD0wJm49WVlXQzc2S21YZEV2ZVFTN1lGUXBSUSZ0PUFBQUFBR1FiQVJj
#cc sims4#sims4#cc sims 4#sims 4#mod sims4#jeux sims 4 gratuit#streamer#streamer sims#streameuse sims#streameuse sims4#streameuse sims 4#streameur sims 4#sims4 gratuit#mod et cc sims4 cool
51 notes
·
View notes
Text
Eternal Hell
Squidward has had his fair share of being tortured in the bikini bottom and the pain doesn't stop. I used the effect "keylight" to get rid of the green screen from the squid ward running running video. I put it over the backrooms which is an infinitely expanding series of rooms so it only makes sense.
2 notes
·
View notes
Photo


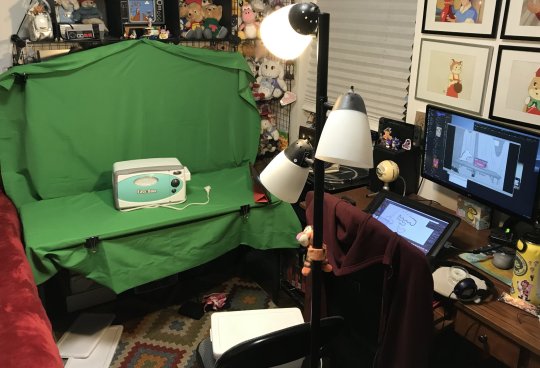
One software that I use in my gif-making process is After Effects. I usually play around with keylight to make them transparent, but lately I’ve been trying to experiment with other keying plugins. I tried using the color range tool and accidently made a creepypasta version of Merry!
31 notes
·
View notes
Video
Green Screen Removal
Using KeyLight Node, Merge Node, Constant Node
2 notes
·
View notes
Last Seen Blogs

the-family-business-83
𝕽𝖆𝖎𝖘𝖊 𝖆 𝕷𝖎𝖑 𝕳𝖊𝖑𝖑

lazyveganbaker
Vegan Food Reviews

movier-7
more than movie

the-serenity-of-night
Book Stuff