#gardenfarming
Text
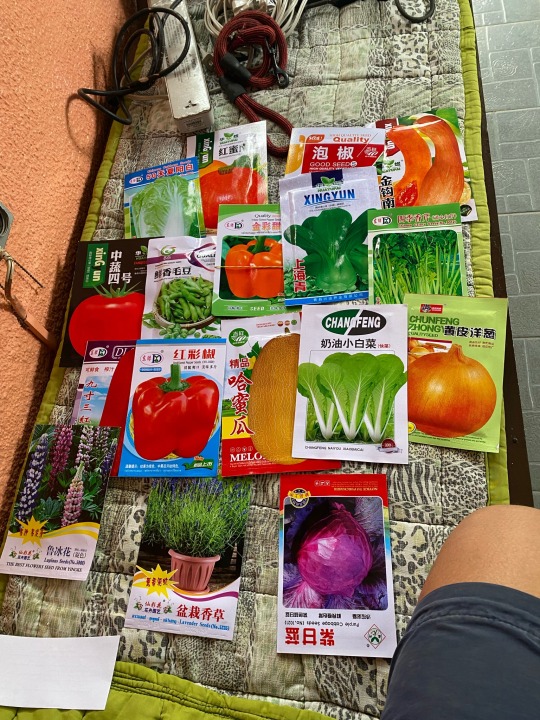
Found out this weekend that a piece of onion (medium sized purple variety) is 15 pesos a piece. Therefor I decided I’d try to grow some vegetables here in our garden. Hope it turns out well.
0 notes
Photo
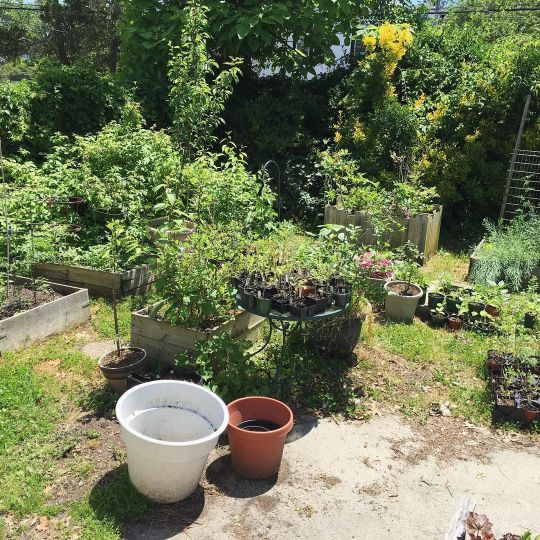
365/148 What the garden looked like at the end of May. #latergram #365photoproject #backyardgarden #homegardener #growyourownfood #homegrown #gardenfarm #asburyparknj https://www.instagram.com/p/Cg4PAzSuKu-/?igshid=NGJjMDIxMWI=
#latergram#365photoproject#backyardgarden#homegardener#growyourownfood#homegrown#gardenfarm#asburyparknj
0 notes
Photo
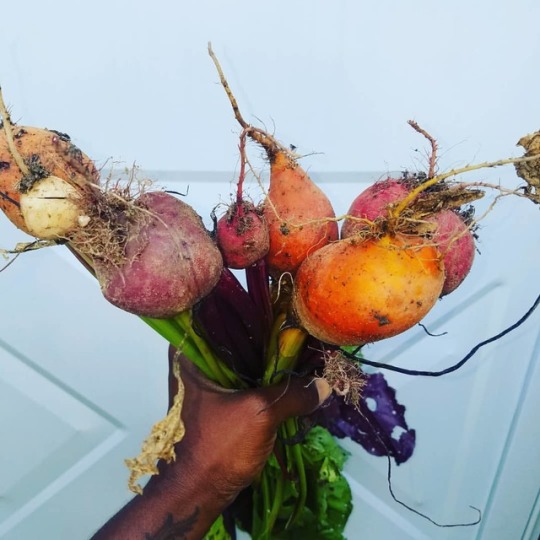
Rainbow beets from the garden! This crop takes about 60 days to mature. I can't wait to pickle these and eat as a yummy snack. #CultivatingSustainableMinds #garden #backyardgarden #homegrown #howmygardengrows #eatyourveggies #myheartbeet #eatbeets #gardenfresh #gardenfarming #urbangarden (at Maryland) https://www.instagram.com/p/BmgtsxuA9hn/?igshid=1akg1orb60pat
#cultivatingsustainableminds#garden#backyardgarden#homegrown#howmygardengrows#eatyourveggies#myheartbeet#eatbeets#gardenfresh#gardenfarming#urbangarden
0 notes
Photo
Posted @withregram • @garedenfarms A first for us this week: irrigation! It was more than a bit confusing at first but we made a call to @dubois_agrinovation and they talked us through the whole set up. Amazing experience. We are very excited to see what changes this will bring to our crops and our soil! A huge bonus is that we will end up using less water compared to our old sprinkler system. #irrigation #gardenfarm #farms #veggie #water #help #conserve https://www.instagram.com/p/CNvozQ8FeB-/?igshid=1lysmqya5q72i
0 notes
Photo
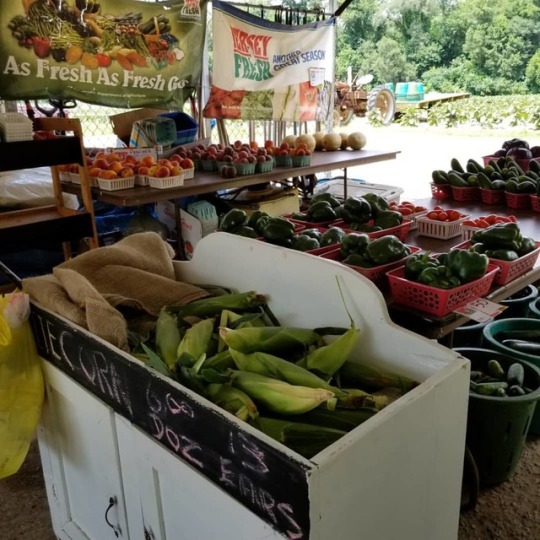
summer corn from Jersey is a must if you're in their hood #jerseyfresh #roadsidefarmstand #roadside #freshpicked #gardenfarm (at Sorbello's Farm Market) https://www.instagram.com/p/BzjFKtOnnhu/?igshid=7son9p77bwc6
0 notes
Photo
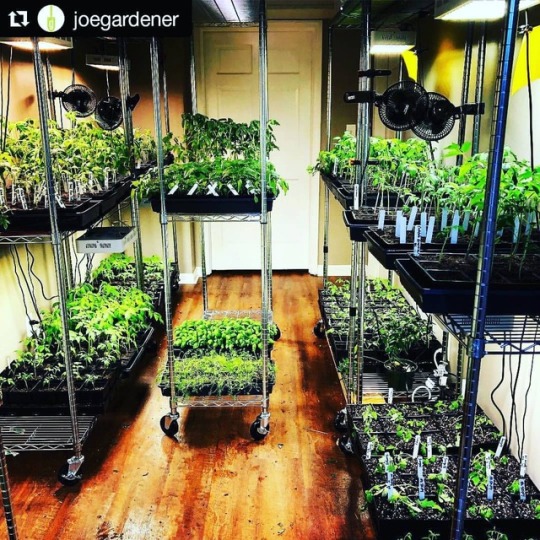
Super pumped about what @joegardener is doing in his seed starting room. Looks stunning with the wood floors! #Repost @joegardener ・・・ It’s not a greenhouse but this little room just outside my office kicks butt when it comes to seed-starting time. So many more seedlings to transplant with one month to go before planting outside. . .. . #organicgarden #vegetablegardening #vegetablegarden #raisedbeds #raisedbedgardening #raisedbedgarden #growwhatyoueat #joegardener #gardenfarm #gardening #composting #foodgarden #growfood #gardeningpodcast #gardenpodcast #gardeningtvshow #GGWTV #gardeningtips #gardentips #instagardeners #instagardenlovers #compost #urbangardening #iamajoegardener #seeds #seedstarting #startingseeds #growlights #LEDgrowlights https://www.instagram.com/p/BvGalKsl88O/?utm_source=ig_tumblr_share&igshid=1p5u0aeaxecdl
#repost#organicgarden#vegetablegardening#vegetablegarden#raisedbeds#raisedbedgardening#raisedbedgarden#growwhatyoueat#joegardener#gardenfarm#gardening#composting#foodgarden#growfood#gardeningpodcast#gardenpodcast#gardeningtvshow#ggwtv#gardeningtips#gardentips#instagardeners#instagardenlovers#compost#urbangardening#iamajoegardener#seeds#seedstarting#startingseeds#growlights#ledgrowlights
0 notes
Photo

I’m pretty sure “this” is my favorite time of the year for gardening season. (But don’t quote me on that cuz I’ve said it in other seasons as well 🤷♂️). But...there is no denying the freshness of the season. So many young plants at various stages of early growth. The air is cool, the plants are happy and all is right with the garden so far. This is always a milestone moment in the garden when I finally plant my tomatoes and insert my sturdy cages around them that will provide their protection and support for the rest of the season. Here’s to spring and my wishes to you for a successful gardening season as well, wherever you are. . .. . #organicgarden #vegetablegardening #vegetablegarden #raisedbeds #raisedbedgardening #raisedbedgarden #growwhatyoueat #joegardener #gardenfarm #gardening #composting #foodgarden #growfood #gardeningpodcast #gardenpodcast #gardeningtvshow #GGWTV #gardeningtips #gardentips #instagardeners #instagardenlovers #compost #urbangardening #iamajoegardener #seeds #seedstarting #startingseeds #growlights #gardenfarmgrown #tomatocages via @joegardener
0 notes
Photo
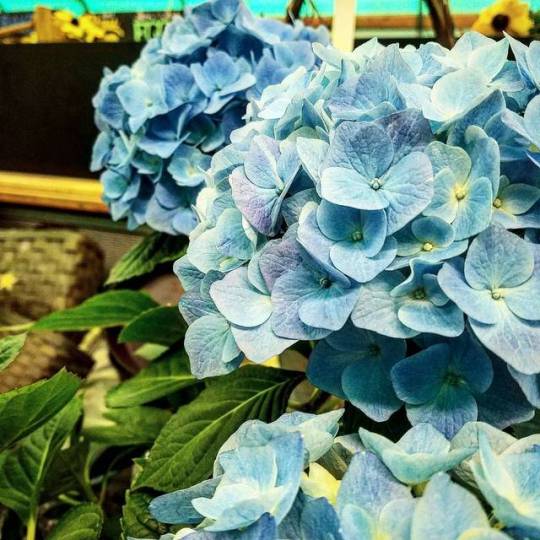
#springflowers #springtime #theseflowerstho #gardenfarms (at Bloom Hill Farm)
0 notes
Photo
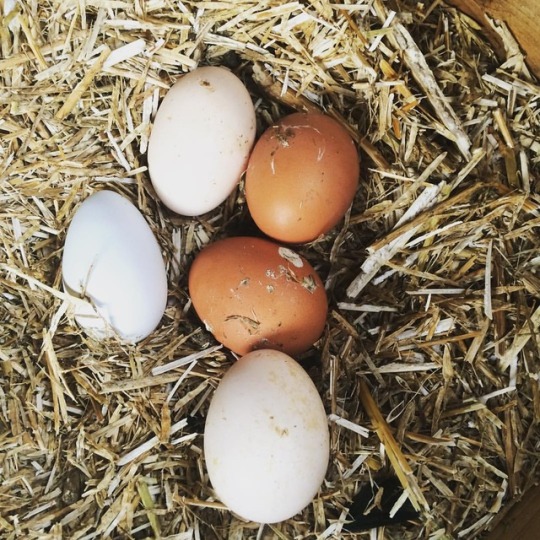
Well that's breakfast sorted! Thanks girls ❤️🐔 #protein #backyardchickens #hens #farmerslife #organic #fresheggs #breakfast #gardenfarm #leanin15 #lovesweatfitness
#lovesweatfitness#farmerslife#backyardchickens#leanin15#fresheggs#gardenfarm#protein#hens#breakfast#organic
0 notes
Text
From @joegardener - A great day in the garden. Way overdue for a little TLC wit...
https://helixma.com/?p=10589&utm_source=SocialAutoPoster&utm_medium=Social&utm_campaign=Tumblr
From @joegardener - A great day in the garden. Way overdue for a little TLC wit... - https://helixma.com/?p=10589&utm_source=SocialAutoPoster&utm_medium=Social&utm_campaign=Tumblr - #compost #composting #fallvegetables #foodgarden #garden #GardenActivist #gardenfarm #gardening #gardeningtips #gardentips #growfood #growwhatyoueat #instagardeners #instagardenlovers #organicgarden #organicgardening #raisedbedgarden #raisedbedgardening #urbangardening #vegetablegarden #vegetablegardening
0 notes
Photo
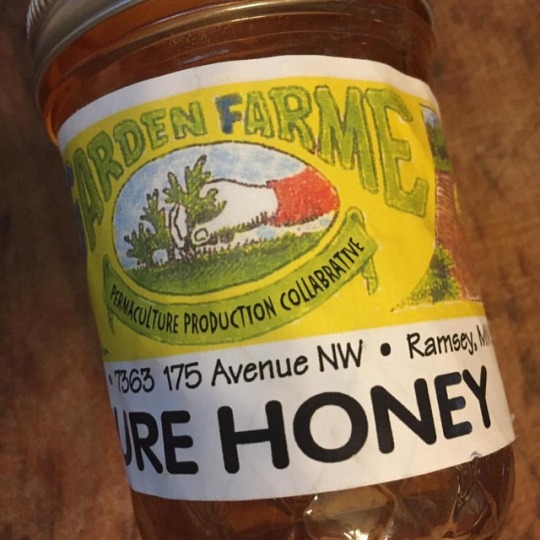
Lucky bragging me! I got a gift of honey from @gardenfarme in Ramsey Minnesota! Thank you so much!
0 notes
Photo
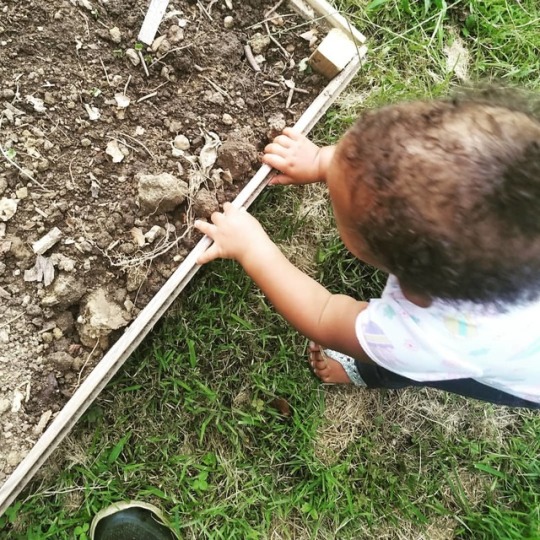
The #inspector came to check on these #radishes LOL she approved! Radish is a fast growing #rootcrop. In about 3 to 4 days #seedlings emerge and in about a month (30 days) they are ready to eat, can or #ferment. #CultivatingSustainableMinds #garden #backyardgarden #homegrown #howmygardengrows #eatyourveggies #goddaughter #MarylandFarm #urbanfarming #gardenfarming #urbangarden (at Maryland) https://www.instagram.com/p/BmgWxyhg_Hk/?igshid=1kl60bkjzrjw9
#inspector#radishes#rootcrop#seedlings#ferment#cultivatingsustainableminds#garden#backyardgarden#homegrown#howmygardengrows#eatyourveggies#goddaughter#marylandfarm#urbanfarming#gardenfarming#urbangarden
0 notes
Photo
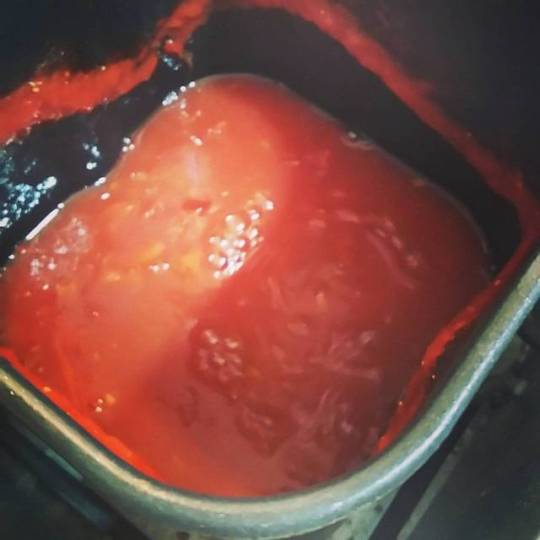
トマトピューレにするには、ちょっと瑞瑞し過ぎるな(笑) ピザ用自家製トマトソース作製中 ハーブは、何入れようかな? #DIY #earthoven #fermentation #urbanpermaculture #cooking #gardenfarm #gardening #pizza
1 note
·
View note
Photo
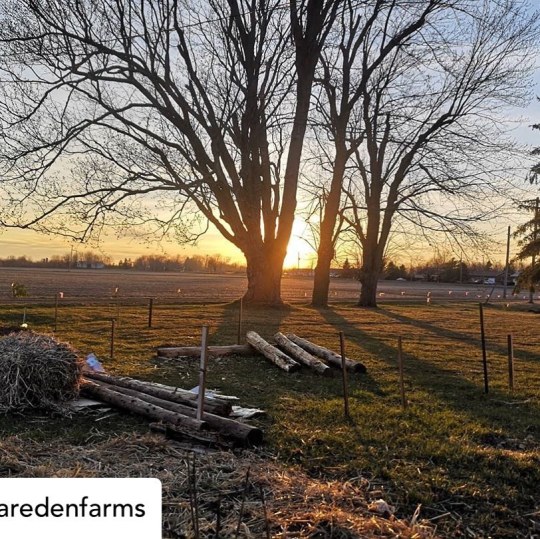
Posted @withregram • @garedenfarms Our newest garden patch. It will be a three year process to make this last family garden plot pop but we will begin by building soil, reducing weed competition and planting a few easy crops this year. We hope to share this process with you! If you have any tips, please share!!! More information is always good! #garden #transformation #grasstogarden #growyourown #veggies #food #local #gardenfarm #permaculture #soil https://www.instagram.com/p/B_muDKNjkkG/?igshid=ru3kgmvoyy9n
0 notes
Photo

#strawberry #nose #fruit #travel (at 軽井沢 いちご狩り農園 karuizawa gardenfarm)
0 notes
Text
Raised Bed Gardening | Best Soil Recipe| joe gardener®
The GardenFarm raised beds in all their producing glory.
In this podcast, we continue our discussion on raised bed gardening. In case you missed it: I had invited my email group to send me any questions they hoped I would answer on the topic of raised bed gardening. I received a huge response, many from folks who plan to start raised bed gardening for the first time this season. If you would like to join the conversation and contribute to future topics, click the red “Get Free Updates” button at the top of this page.
You're reading: Raised Bed Gardening | Best Soil Recipe| joe gardener®
Last week, I covered benefits and drawback of raised bed gardening as well as site selection, layout planning, material selection, and site preparation. It was rich with information learned through my many years of raised bed garden experience (also detailed last week) and a lot of research. If you haven’t checked out last week’s podcast, I strongly recommend you start there.
Building healthy growing medium is a process that starts with the right foundation “recipe” and quality ingredients.
This podcast explores some recommendations for the bed construction, but especially, the construction of the soil. Yes – good, healthy soil needs to be constructed, but it’s easy to do. Let’s get started.
Building Your Raised Garden Beds
As mentioned in Part 1 of this series, it’s best if your space is fairly level. How level depends on the materials you are using. Concrete blocks, for instance, are pretty unforgiving in structural soundness on uneven surfaces. If using a metal trough, the trough itself will need to be level, or you can level the soil surface inside the trough.
If you can’t dig, use wood supports, stone retaining walls, etc. – depending on the grade with which you are working.
Regardless – when all is said and done, you need to end up with a level soil surface. Why? Primarily, the movement of water. Whether during a rainstorm or when you’re irrigating the bed, that level surface will prevent erosion – protecting tender plant roots, keeping nutrients where you want them, and preventing the need for extra maintenance.
If using wood, I really recommend that you use all-weather wood screws (at least 3” long) rather than nails. Screws are more forgiving if you make a mistake or if – for any reason – you need to remove the board. They also provide better overall stability.
To prevent splitting wood boards, I also recommend pre-drilling the holes for your screws. For those of you new to the DIY world, small drill bits are available at any home improvement or hardware store to fit your power hand drill. Drill bits are inexpensive and will make quick work of the job.
Before adding raised bed garden soil mixture, I like to break up the ground surface underneath to give roots all the growing room they want, even when it’s deeper than my beds alone provide.
The moist soil and plant material being held will put pressure on your bed side walls. Depending on bed length and the material you are using, it may be wise to add some wall support. To prevent those walls from bowing out, I recommend adding a 2”x4” or some other center post, driven securely into the ground and placed against the wall on the interior of the bed. (It helps to cut the bottom end of the 2”x4” stake into a point to make it easier to drive it into the ground).
Since wood has the potential to bow or warp, note the direction of the grain at the end of each board. Over time, boards will warp in the direction of the grain, so position the boards with the grain pattern pointing in, toward where the soil will be. By placing each board facing inward, the ends won’t pull away from each other but toward each other instead.
Consider using mortar if you are building with concrete blocks, bricks or stone. It’s certainly not a necessity, but it will add to the longevity of your bed structure. If you don’t use mortar to adhere your concrete blocks together, I recommend using rebar, which can be driven down through the hollow cores or using some other method of staking to better hold up to the bed pressure.
If you are building on top of your native, non-contaminated soil; break up the ground surface before adding soil to the bed structure. The healthy raised bed soil will infiltrate and improve the health of that subsurface over time, and regardless of how high you are building, it doesn’t hurt to offer your plant’s roots the opportunity to reach down even deeper.
For those of you building on hardscape or over contaminated soil, don’t feel like you are missing out on not being able to break up the surface. Having that subsurface available for root growth isn’t a necessity, by any means.
Additional Structure Considerations: If you are dealing with gophers or other subterranean root-chompers, these burrowing pests are best prevented during the raised bed construction phase. Consider adding a layer of chicken wire or other metal mesh to the bottom of your raised beds. The most durable option is galvanized hardware cloth with ½” or 1” squares. Stainless steel hardware cloth reportedly lasts even longer than galvanized.
Burrowing rodents are crafty creatures, so extend your mesh barrier up, alongside the sidewalls of your bed structure. Picture a sort of basket along the bottom of the bed. Be sure to attach the edges very thoroughly to the side walls.
You may also want to go a step further and start with a layer of hardware cloth underneath your raised bed structure, extending into the ground outside your bed borders. Yes, this can be a lot of work, but you’ll only get one shot at this preventative measure, without having to deconstruct your raised beds down the road.
I’ll dive more into pest control in Part 3 of this series, but obviously, your best opportunity to prevent pests from getting through the bottom of your beds is while the beds are empty.
Add hardware cloth to the base of your raised bed structure to protect your crops from gopher, vole, mole and other burrowing critter damage.
Regardless of the size you are building, the depth you are creating, or the material you are using; I don’t recommend weed cloth.
You might think it’s a neat and tidy improvement to place that clean, black weed cloth at the base of your garden bed. Weed mat – regardless of material – provides no benefit and will hamper drainage as the pores eventually clog.
If you are trying to block the growth of weeds or any other undesirables in your garden spot, weed cloth is just not necessary. The depth of the soil you will be adding will smother most, if not all, undesirable growth. What little does make it to the surface can be easily pulled out. This little bit of maintenance will be well worth having soil that drains properly.
The only time I would consider an exception to this rule and risk drainage loss is when fighting Bermuda grass. Check out Part 1 of this series for details.
Garden Comfort & Accessibility: If you are building your bed at a height which will allow you to sit and tend to the garden, consider incorporating a flat ledge area on which to perch. Having 6-8” to sit on is particularly important if you have back issues or other health considerations.
I will cover more on design considerations for adaptive gardening in Part Three of this series
Now – on to the best part, the soil!
Why is Soil Health so Important?
The soil is the anchor in which you secure and feed your plants. The soil, itself, doesn’t really feed the plants in the commonly-understood sense. Instead, the soil is the environment that promotes a healthy ecosystem below the surface – that can facilitate (or hinder) the ability for air, water and nutrients to be utilized by plants and their roots at an optimal level.
As gardeners, we can engineer raised bed soil to maintain proper hydration and create an environment that sustains a myriad of life, called the soil food web.
A healthy soil food web is busy with billions of microscopic organisms as well as larger creatures, like earthworms, all working together. Healthy soil promotes the processes of nutrient development and delivery (to plants).
In other words: Don’t feed the plants. Feed the soil so it can feed the plants.
Even back in the days on set for the DIY Network series (+61404532026) Fresh From the Garden, I was already perfecting my raised bed soil recipe. Here, I’m adding composted cow manure. Just underneath you can see the granite dust from mineralized soil. After three years, 52 episodes and 52 crops, I never had a failure.
A soil food web is complex, so building that healthy ecosystem doesn’t mean a trip to the home improvement store, buying lots of bags of garden soil to fill up all your raised bed space. Sure, you can go that route, but it will be expensive, and it won’t provide you with robust growing medium. You build a healthy growing medium.
Building Your Garden Soil
Over the years, I’ve developed a mixture of elements that has brought me abundant gardening success. The method I describe here isn’t like a recipe for souffle’. I won’t tell you to be sure you add a teaspoon of this or 12 oz. of that. My method is – like my soil – organic. It varies a bit each and every time I follow it. These are estimated percentages that work well for me, but they don’t need to be exact.
I use a mix of organic material to create a diverse blend. As mentioned earlier in this series, your soil is not the area in which I recommend cutting corners cost-wise. One thing I learned early on is that you get what you pay for. Your biggest investment is in your soil. The health of your plants and success of your crop depends on it.
Don’t expect to have the perfect soil straight out of the gate year one. Building great soil is a process over growing seasons. The method I describe for you here will build a healthy soil foundation, from which bountifully-rich soil will develop in seasons to come.
I do recommend that, when you are initially filling your raised beds, mix all the ingredients together. Incorporate it well, so that the elements can be properly introduced to each other. As I get into soil maintenance later, you’ll learn why I don’t mix up established soil, but to “get the party started” – mix and mingle everything well.
The U.S Composting Council encourages all gardeners and growers to “strive for five.” This refers to the goal of making the organic matter in your soil 5% of the total (by weight).
The rough estimate to make that 5% happen is to include organic material of about 30% by volume to the total. All references here are by volume and – again – only approximate. So with that in mind, here’s how I achieve those magic percentages:
50% High-Quality Topsoil: This makes up the bulk of your bed.
Read more: Eight Eggplant Recipes You’ll Love
Purchase topsoil in bulk or bags. If you purchase in bags, buy a trusted brand and look at the ingredients, which will often be regionally-sourced.
If you need over a half pickup truck load, I suggest buying in bulk. Find a reputable landscape supplier by getting referrals. If you don’t know someone to offer a recommendation (or even when you DO get a recommendation), take the time to talk with the supplier. Ask questions as to what goes into making their topsoil. I even go so far as to inspect it by smelling it and giving it the Squeeze Test (okay, I’ve been known to give it a taste test once in awhile, too).
The Squeeze Test is simply taking a handful and squeezing it. It should hold together but, then, break apart easily when you run your finger through it. If it’s sticky or hard to get apart, it’s too heavy. Excessively sandy soil won’t hold together in the first place.
Good topsoil should not be sticky or sandy. It should tend towards the darker side of brown vs. gray or clay in color, and it should smell earthy – not rancid.
Whenever possible, it’s well worth the time to inspect the quality of a supplier’s topsoil before you buy.
Note that I check bagged soil in the same way. I never open a bag. I look for a bag that has already broken open – there’s usually at least one.
If in doubt, look for a mark of certification from some nationally-recognized organization which indicates the soil contains certified compost. With certified compost as an ingredient, you can feel confident that the topsoil will be good quality too. You don’t want to make the same mistake I once did – not checking quality beforehand and then not being home for delivery. I found a pile of fill dirt on my property – not the topsoil I had ordered.
It’s not that uncommon for suppliers to provide fill dirt as “topsoil,” and you don’t want to start your beds with fill dirt.
30% High-Quality Homemade or Certified Compost: Use what you can make, but source the difference from a reputable supplier.
I make a lot of compost at home, but it’s never enough. Therefore, it’s very likely you’ll need to purchase compost beyond what you make as well. Not all compost is created equal.
My suggestion is to do your homework. The supplier may have some printed information regarding their product. If not, take the time to talk with the supplier here too. Ask questions as to what goes into making their compost. Questions like:
Where does their feedstock come from?
What materials do they accept?
What don’t they accept?
How do they make their compost?
Your common sense will help you identify any red flags. Don’t be afraid to walk away from a supplier who can’t provide good answers. Compost is an investment, so choose wisely.
An easy way to play your compost purchase safe is to find a supplier that offers Certified compost, as deemed by the U.S Composting Council. Their website offers some solid advice and a database of composter members. It’s how I buy my bulk compost, and I have never been disappointed.
Quality compost comes from quality ingredients, so vet your supplier. While you might not have a backstage pass to the daily deposits, companies that make and sell compost should have plenty of information to share with you.
It’s no secret that I love compost, but is there such a thing as too much? Actually, yes. Compost is fantastic (I’ve even lept into glorious piles of compost – don’t miss the end of that linked episode), but it doesn’t provide all the complex elements (like minerals) necessary for healthy, balanced soil.
We’re down to the remaining 20% of your raised bed soil volume. What’s next? Think of this 20% as a cocktail, and it’s up to you to concoct your signature mix.
There are many great mediums you can select from and six I consider favorites. Any four of these can be added in increments of about 5% each. You could use 10% of one and 5% of two others, but I like the results from keeping each of these to around a 5% individual rate.
Top Six Organic Materials to Add to Your Topsoil and Compost:
Leaves: Well-aged, shredded leaves are one of my favorite additions. They are free (I’m a frugal guy, so I love that), and they add great bulk. So, what do I mean by well-aged? I shred the leaves, wet them down well and, in six months to a year, they are rotted and ready to be incorporated.
If you don’t have access to plenty of leaves, ask around. I guarantee friends and neighbors will be happy to share their supply.
Mineralized Soil Blend: Here’s another case where finding a good landscape supply company is important. Years ago, I discovered the value of adding soil containing minerals. It made a noticeable difference to the success of everything growing in my garden.
Minerals are the most important ingredients that no one seems to talk much about. You can check out a lot more on mineralizing your soil in my podcast on the subject.
Mineralized soil blend is widely-available and, typically, locally-sourced; so it’s make-up will depend on your area. Here in the Atlanta area, granite is everywhere, so most mineralized soil blends here are made of granite dust. Azomite is another common and great option.
Vermicompost (Worm Castings): I have seen dramatic differences in my garden when I’ve added worm castings (aka worm manure). If you can find this in bag or bulk, buy it. While it’s not readily available, nor is it inexpensive; it’s worth it. Fortunately, a little goes a long way. You won’t need much to make a big difference.
Worm castings are significantly higher in all the primary nutrients your plants need to thrive. In fact, worm castings add five times the nitrogen, seven times the phosphorus and ten times the potassium than ordinary topsoil.
Castings add one more layer of complexity to overall soil makeup. Suffice it to say; this medium is one of my secret weapons to creating highly-productive garden soil.
Adding vermicompost (composted worm manure) to your raised bed gardens will provide another layer of organic richness. It’s been one of my not-so-secret weapons for soil success for years.
Mushroom Compost: This dark brown, pliable organic material isn’t made of mushrooms.
It’s the byproduct of ingredients in which the mushrooms grow – what’s left over after mushrooms have been harvested.
Mushrooms are grown in mixtures of natural materials like hay, gypsum, corn cobs, cottonseed hulls, etc. But by the time that material has been composted, bagged and sold as mushroom compost; it’s light and crumbly. It contains about 3% nitrogen and potassium, a bit of phosphorus and other bonus elements, like magnesium and calcium. Since it’s a neutral pH (6.5-7.0), it won’t have an impact on your soil pH.
Ground Bark: There are many varieties of ground bark from which to choose, but pine is the most commonly available. Although pine bark is slightly acidic, I’ve never found that to have much effect on the overall pH of my garden soil. Be sure to use aged bark for this application. Freshly-chipped wood will rob from rather than benefit your soil during initial decomposition.
Ground bark is a good carbon source. It will break down over time, and its coarse texture provides space for the movement of water and oxygen through your garden beds. Topsoil, compost and most of the other ingredients I’ve listed here are similar in texture. Ground bark brings a diversity of particle size that can really amp up your plant health.
Composted Cow or Poultry Manure: Well-composted animal manure has been a mainstay of organic soil fertility for thousands of years because of the nutrients, organic matter and variability of particulate matter that it adds to complement overall soil make–up. That hasn’t changed. What has changed are farming practices and the resulting risk of manure.
Composted manures added to today’s garden soil can contain synthetic herbicides that are still active, even in well-composted manure. For that reason, I recommend you use cow or poultry manure but not horse manure.
Purchase composted cow or poultry manure by the bag and from a trusted source. If it’s an off-brand or you are buying in bulk, buyer beware. Many people have poisoned their soil with killer compost (including me), by inadvertently adding herbicide–tainted ingredients usually found in horse manure.
I do not add horse manure – anymore – because horses are more likely to consume hay which may have come from fields sprayed (or oversprayed) with persistent herbicide. Persistent herbicide doesn’t break down for several years. It passes through the horse’s digestive system and goes through the composting process without losing any of its killing power. The traces of herbicide (no matter how minute they may be) will kill or severely disrupt the normal growing habits of many garden edibles as effectively after being composted as the day they were manufactured.
There may be a source of horse manure you would really like to use. In that case, you can perform a bioassay test. Perform this simple test before you ever let the manure come into contact with your plants, soil or compost pile. I didn’t perform a bioassay test on the horse manure from my GardenFarm, and I suffered the consequences for four years.
Worm castings are significantly higher in all the primary nutrients your plants need to thrive. This image demonstrates an important visual of how worms break down organic material to create a soil profile that helps bind soil particles in a moisture-rich environment.
Those are the “ingredients” I use. Here are the ingredients I do not use:
Horse Manure: It bears repeating. If tempted to use horse manure, be sure to check out the link for the bioassay test. That little bit of time could save you years of grief.
Peat Moss: This may come as a surprise. Peat moss is, however, not a sustainable material. It takes hundreds of years for peat to develop in peat bogs.
Did you know that peat moss can defeat your soil’s ability to take in moisture? Ironically, it’s often recommended for its water holding ability. It can aid water retention, but once peat moss dries out, it is difficult to re-hydrate. Have you ever watered a dried out container, but the water just rolled off the surface? Often, that’s due to peat moss in the container soil.
Artificial Fillers: Although it may be tempting to take up space with fillers as you first build those raised beds, I advise against them. Although they might save you some initial cost, even organic fillers can be problematic. Over time, they will break down, and the surface of your garden bed will sink, requiring you to add more soil later.
Most importantly, fillers can hinder drainage. That’s counter-intuitive, I know, but the research has proved it. I performed my tests using containers so that you can see it for yourselves. Whether in a small space like containers or a large space like raised beds, the science remains the same.
Fill Dirt: This, too, might be tempting as a cost savings, but it will hinder all your other efforts to build that healthy growing environment.
What is fill dirt? It’s the stuff that lies under the first few inches of dirt on the ground. That first layer of earth is topsoil; and it’s been built up naturally – to varying degree of health – with organic matter, access to light and air, and other good stuff that happens naturally near to the ground surface. Fill dirt is underneath the topsoil and includes none of the inherently good qualities of topsoil.
Some additional materials worth consideration as additives:
Biochar: I’ve heard good things about Biochar. I’ve only recently begun adding it to my garden, so it’s too soon to give you any personal observations. Biochar does have some nutrient value. It’s a pure carbon source that doesn’t break down, but it does help make existing soil nutrients available to plants.
Biochar – a pure carbon source that doesn’t break down but does help make existing soil nutrients available to plants. (Photo: Mark Highland.)
Fire Ash: I recommend against putting any fire ash directly into your garden beds. If your fire ash is all wood-based, it can be a good addition (in a small quantity) to your compost pile. Don’t use charcoal fire ash, as that can include some ingredients that aren’t good for your organic garden.
Mycorrhizae: This fungus is very popular as a soil ingredient in bagged products. Healthy native soil typically has this fungus already (but don’t use your native soil in your beds). Adding mycorrhizae to your soil may provide a benefit. At any rate, it won’t do any harm.
As with containers, raised beds can leach nutrients more quickly; so as a final step, it’s a good idea to add some slow-release, non-synthetic, nitrogen-based fertilizer – like Milorganite – to the mix. It’s like the dash of cocoa powder on a great latte – adding a little extra kick.
Maintaining Healthy Soil
Building that initial raised bed garden environment with quality ingredients will provide you good results the first season. However, those crops you grow will be making non-stop nutrient withdrawals from those beds.
Just like with your bank account, it’s critical to make deposits that keep up with (or better yet exceed) your withdrawals. How do you do that? Amend your soil once or twice each year with organic nutrients (like those I described above) – not synthetic fertilizer. By amending your garden beds, you will see better soil in season two, great soil in season three, amazingly rich soil in season four, and so on.
Good soil is like fine wine; it will get better and better with time.
Before you amend your soil for the first time and about every couple of seasons, I recommend that you get a soil test. You can contact your local county extension office for that, and the tests are pretty inexpensive ($20-30). A soil test will determine the pH levels and deficiencies of your soil to help guide your amendment choices.
The nutrients you provide the soil will be most optimally taken up by your plants when the soil is at a neutral pH. So, it’s important to understand when and how your soil pH is off and how to get it re-balanced.
Living in the Atlanta area, I grow all year round, so I amend my beds at the end of each main season after I’ve cleared the beds of crop materials. In early September – before I plant my winter, cool-weather crops – I topdress with an inch or two of compost. In late March – before I plant my summer crops – I do the same. Since the beds are clear, it’s easy to spread the compost and let it go to work.
Amend your soil once or twice each year with a topdressing of quality compost. An inch or so goes a long way to keeping your soil productive.
Sometimes, I lightly scratch the compost into the bed surfaces, but I usually just lay the compost on top, cover with mulch and walk away. Why? Remember that microbial party we got started when first building the bed soil? Well, all those microorganisms are getting along by now, and they can’t wait to meet more. So, they will naturally and quickly work all the compost back down into the party with the rest of them.
If I were to “disturb the party” by tilling in my compost, I would be doing a disservice to the existing soil food web. I would be:
Breaking up existing networks being utilized for the transfer of nutrients
Disrupting drainage space
Introducing lots of oxygen (which would burn up much of the existing nutrients)
When I’m amending my soil with ingredients other than compost, such as worm castings or mineralized soil; I prefer to add the ingredient(s) to compost and, then, add the mixture to the bed surfaces. On the off-chance something undesirable has made its way into those mediums, compost works as a buffer to help neutralize any potential negative effect.
Rejuvenating Old Garden Beds
Perhaps, you are working with existing raised beds that have been depleted and don’t have all of that microbial action going on. Many of you asked if you should remove the existing soil and start all over. To that I say – no.
Replacing your existing bed soil is laborious, expensive, and time-consuming. Unless the soil has become contaminated somehow, it’s best to revitalize the soil through amendment. You might be surprised at how quickly garden beds, even those that have been neglected for years, can be rejuvenated.
If this is your situation, I still recommend against tilling the soil. Instead – using a pitchfork or a broadfork, stab the garden soil deeply and wobble the fork around to create a little space around the tines. Then, fill those spaces with compost. Here again, I highly recommend you start with a soil test, so you have a better understanding of what you need to “deposit” into those stale beds to get them ready to be available for “withdrawals.”
A broad fork is a good tool to provide deep access for amendment penetration in existing raised beds and bring new life to tired and compacted beds. It’s any gardeners best tool of choice for opening up soil space and a much better option than a tiller for maintaining soil integrity.
Other Garden Bed Maintenance Questions
Are your beds too full to amend? If your bed surface is plumb up to the top of your sidewalls, remove any debris – if possible. If there isn’t any debris to remove, but your bed is filled with organic soil and materials; don’t worry about amending this season. That organic material will break down over the season and should provide at least enough space to amend by the next season.
Read more: Was the ‘forbidden fruit’ in the Garden of Eden really an apple?
Should you add fertilizer when you plant? I received many questions asking if fertilizer should be added to planting holes. Nope. When you build your soil the right way – slowly over time – everything your plants will need will already be in the bed.
If it really makes you feel better to add something at planting time (I can respect that), just add more compost. Adding fertilizer puts you at risk for burning your plants. What you place in the planting hole may be more than the plant can handle, and it will suffer or die rather than thrive and produce.
Mulch and Its Many Benefits
If there is one thing I love almost as much as compost, it’s mulch. I love mulch! Why? It protects the soil from heat, erosion, and pests. What’s more, mulch improves the soil by breaking down slowly over time and adding the resulting nutrients.
Mulching will reduce evaporation and the amount of supplemental water you need to provide. An exposed soilbed – especially in a raised bed – dries out. It can develop a crust that can be resistant to water, and the exposed soil can blow away. Mulch will solve that problem.
A free and ample grass clippings supply kept my $25 Victory Garden Challenge garden mulched.
Did I mention that mulch significantly reduces weeds in the garden bed? Yep – that too. And thanks to the multi-benefit mulch protection from above, the microbial party will remain happier and healthier under the surface.
Also, it just looks nice. We all like our garden to be beautiful to look at – even if we don’t all broadcast our successes and failures on national television.
A one– or two-inch layer of wheat straw, arborist wood chips, shredded bark, grass clippings, composted leaves, etc.- anything natural is okay here. Shredded leaves happen to be my favorite mulch and are just another key to the success of my or any garden.
I recommend against rubber mulch for the same reasons I recommend against using tires as a container (check that out in Part 1 of this series if you missed it.)
Mulch is to soil above ground what compost is for plants below ground. I can’t imagine any garden under my watch without both.
Efficient Irrigation
It’s true – raised beds can dry out more quickly. How quickly depends on the depth and width of the beds as well as the sidewall material and thickness. Good soil and mulch will reduce drying, but good irrigation is also important.
Life is so busy for all of us these days. So, having a good watering system in place will make it much easier to reap abundance in the garden. Myself, I go a step further and take full advantage of some quick, easy and inexpensive tools to automate the irrigation of my beds.
Depending on your set up and spacing; emitter tubing, soaker hoses or a drip system will provide the perfect moisture level. These methods deliver water slowly and directly at the roots of your plants – where that water does the most good!
A side-by-side comparison of plants grown with and without biochar. Clearly, this amendment can benefit plant growth. (Photo: Mark Highland.)
I have all the details on the why’s, when’s and how’s of watering in my upcoming Efficient Watering Resource Guide (stay tuned!) Each of these options are inexpensive, easy to use and available at any home improvement or garden center. If you are on a well, you will appreciate that each of these systems are low-pressure. Here’s a brief rundown:
Soaker Hose: The flexibility of soaker hoses make them great for raised beds. Soaker hoses are porous, allowing the water to seep out slowly along the entire length into the surrounding soil.
Not all soaker hoses are created equal. I love to recycle, but I don’t love to use soaker hose made out of recycled tire rubber. Most soaker hoses are made that way, but I have concerns with chemicals from that recycled rubber leaching into my soil.
I prefer to use food grade, polyurethane hoses from Water Right Inc. They’re lightweight and durable. I need my garden to be television-ready, so I also like that they come in various earthy colors that look good without standing out.
A bonus tip: Place your soaker hose under mulch for extra water efficiency.
Emitter Tubing: There’s quite a bit of technology that goes into these unassuming tubes. Non-porous emitter tubing is similar to porous soaker hose, except it waters with an even pressure from the beginning of the tube to the end of the tube and, often, at every 18”.
Emitter tubes are also flexible and low-pressure (8.5-60psi). They self-flush to prevent clogging and have copper shields around each opening to deter root penetration. At around $20 for a 50’ length (they come in other lengths as well), emitter tubes offer a lot of watering flexibility, since you can also tap into them to add supply tubing to direct water to specific areas.
Emitter tubing is a high-tech, efficient, and affordable choice for watering raised bed or in-ground gardens. (Photo courtesy of Rain Bird®.)
If you’ve ever used soaker hose and had it spray up onto your plant foliage, you’ll be happy to hear that non-porous emitter tubes don’t have that problem (although if you add a layer of mulch, errant water spray won’t occur from soaker hose either).
You may be concerned that the water is dispersed only every 18”, but research has shown that soil capillary action transports water horizontally as well as vertically. That means, water from each emitter will spread across the bed toward the water from other emitters, and any roots in between will receive moisture.
Drip Irrigation Systems: These systems can include drip tape or drip line. Most commonly, drip kits include a lightweight, flexible tube with an emitter at its end so that you can direct water to a certain plant or small area. For most raised beds setups, emitter tube or soaker hose are your better options.
Easy Automation: Each of these watering methods can be easily automated, which gets me back to my original point. We are all busy, so why not automate irrigation? A battery-operated or spring-loaded timer, a quick connect coupler and a quick shut-off valve are all you need.
These accessories are all inexpensive and readily available. By adding them to your watering system, you can completely control the level and timing of water delivery. The process will be automated, so it will happen whether you’re home, stuck in traffic, or on vacation. Your plants will thank you.
Automatic timers are inexpensive and widely available. They are an easy way to simplify getting the right amount of water to your plants. They’ve put my irrigation life on autopilot.
Ode to Hand Watering: I must admit, though, I love watering. Throughout the garden season, I periodically hand water even though my plants are being watered automatically.
Whether it’s because I want to enjoy the therapeutic benefits (I know, not all of you find watering therapeutic), or because I notice a plant looking droopy and needing a little extra help getting through a hot, dry week; I like to turn to my wand attachment.
The wand attachment provides a gentler spray than most other sprayers, and the extension pole makes it easier for me to get that water delivery right down at the base of the plant. Since I don’t have to stoop over to target the base, I’m able to multitask and spend watering time looking over new growth and inspecting the plants for signs of pests or disease. The earlier I can spot those troublemakers, the better.
The Final Resort: I don’t recommend the overhead watering method – using a sprinkler. Delivering water from above the plants increases the evaporation of your water, and the wet plant foliage is at higher risk of disease.
Now before this upsets you sprinkler users, I will share with you that I often watered my Fresh from the Garden beds using a sprinkler. When I did, I made sure to run the sprinkler early in the morning.
Sometimes, overhead watering is your only option. I get it. If that’s the case, just be sure you are watering in the early morning to decrease evaporation and allow your plant foliage the remainder of the day to dry off.
What is Sufficient Moisture? How much should you water your raised garden beds? In the absence of rain, provide an inch of supplemental water per week. Emitter tube or drip emitters will allow you to calculate when you’ve watered an inch because the watering rate is predetermined for you.
Otherwise, there are two easy ways to determine sufficient moisture level:
Tuna Can Test: Place the empty can in the area being watered and, once there’s an inch of water in the can, you know there’s also an inch of water in your soil.
Finger Test: Stick your finger into the soil, down to about the second knuckle. If your finger comes up dirty, there’s enough water in the soil. However, if it comes up dry and relatively clean, the soil is too dry, and it’s time to increase watering levels.
There are still some questions that need answering in Part 3 of this series, so I encourage you to check back next week for all that information. Which questions are being answered? More of the questions submitted by the members of my email group! If you aren’t a member, I encourage you to join the conversation. Joining is easy and fast – just scroll to the top of this page, click the red “Get Free Updates” box, and enter your email address.
You might also be interested in joining my Facebook group. We have some great conversations there, so I hope you’ll join us.
If you haven’t already done so, listen to the podcast recording for this episode. It’s linked at the top of the page and includes some stories and bits and pieces not included here. May I suggest you listen in while you start diagramming out your raised beds and plant locations?
Links & Resources
joegardener Blog: Backyard Composting: A Simple Recipe for Making Great Compost
Podcast episode 028: The Role of Minerals in Making Great Soil
Podcast episode 029: My Five Biggest Gardening Mistakes of All Time (and What I Learned From Them)
Podcast episode 042: Raised Bed Gardening, Pt. 1
Podcast episode 044: Raised Bed Gardening, Pt. 3: Animal Control & More
joegardenerTV: How to Get the Best Drainage for Your Container – Why What You’ve Been Taught is all Wrong
GGW episode 106: Composting-From Grand Scale to Your Backyard
GGW episode 410: Weedless Gardening
Join the joegardener Facebook Group
U.S Composting Council
Milorganite
Water Right Inc.
University of Nebraska-Lincoln Institute of Agriculture and Natural Resources: Cropwatch: Using High-Carbon Char as a Soil Amendment to Improve Soil Properties
CobraHead: Broadfork
Rainbird® – Our podcast episode sponsor and Brand Partner of livingcorner.com.au
Source: https://livingcorner.com.au
Category: Garden
source https://livingcorner.com.au/raised-bed-gardening-best-soil-recipe-joe-gardener/
0 notes
Last Seen Blogs

oliviamarie00
mtf transwoman

gazzialessio
Life after carnism

trik-vetra-blog
poezija i vilinski prah

sic-semper-hominibus
Ⓐlıce

aprampools
Untitled