#but the js file that formats the blog posts see it has like a specific format for text and everything so they look right
Text
Fandom Userscript Cookbook: Five Projects to Get Your Feet Wet
Target audience: This post is dedicated, with love, to all novice, aspiring, occasional, or thwarted coders in fandom. If you did a code bootcamp once and don’t know where to start applying your new skillz, this is for you. If you're pretty good with HTML and CSS but the W3Schools Javascript tutorials have you feeling out of your depth, this is for you. If you can do neat things in Python but don’t know a good entry point for web programming, this is for you. Seasoned programmers looking for small, fun, low-investment hobby projects with useful end results are also welcome to raid this post for ideas.
You will need:
The Tampermonkey browser extension to run and edit userscripts
A handful of example userscripts from greasyfork.org. Just pick a few that look nifty and install them. AO3 Savior is a solid starting point for fandom tinkering.
Your browser dev tools. Hit F12 or right click > Inspect Element to find the stuff on the page you want to tweak and experiment with it. Move over to the Console tab once you’ve got code to test out and debug.
Javascript references and tutorials. W3Schools has loads of both. Mozilla’s JS documentation is top-notch, and I often just keep their reference lists of built-in String and Array functions open in tabs as I code. StackOverflow is useful for questions, but don’t assume the code snippets you find there are always reliable or copypastable.
That’s it. No development environment. No installing node.js or Ruby or Java or two different versions of Python. No build tools, no dependency management, no fucking Docker containers. No command line, even. Just a browser extension, the browser’s built-in dev tools, and reference material. Let’s go.
You might also want:
jQuery and its documentation. If you’re wrestling with a mess of generic spans and divs and sparse, unhelpful use of classes, jQuery selectors are your best bet for finding the element you want before you snap and go on a murderous rampage. jQuery also happens to be the most ubiquitous JS library out there, the essential Swiss army knife for working with Javascript’s... quirks, so experience with it is useful. It gets a bad rap because trying to build a whole house with a Swiss army knife is a fool’s errand, but it’s excellent for the stuff we're about to do.
Git or other source control, if you’ve already got it set up. By all means share your work on Github. Greasy Fork can publish a userscript from a Github repo. It can also publish a userscript from an uploaded text file or some code you pasted into the upload form, so don’t stress about it if you’re using a more informal process.
A text editor. Yes, seriously, this is optional. It’s a question of whether you’d rather code everything right there in Tampermonkey’s live editor, or keep a separate copy to paste into Tampermonkey’s live editor for testing. Are you feeling lucky, punk?
Project #1: Hack on an existing userscript
Install some nifty-looking scripts for websites you visit regularly. Use them. Ponder small additions that would make them even niftier. Take a look at their code in the Tampermonkey editor. (Dashboard > click on the script name.) Try to figure out what each bit is doing.
Then change something, hit save, and refresh the page.
Break it. Make it select the wrong element on the page to modify. Make it blow up with a huge pile of console errors. Add a console.log("I’m a teapot"); in the middle of a loop so it prints fifty times. Savor your power to make the background wizardry of the internet do incredibly dumb shit.
Then try a small improvement. It will probably break again. That's why you've got the live editor and the console, baby--poke it, prod it, and make it log everything it's doing until you've made it work.
Suggested bells and whistles to make the already-excellent AO3 Savior script even fancier:
Enable wildcards on a field that currently requires an exact match. Surely there’s at least one song lyric or Richard Siken quote you never want to see in any part of a fic title ever again, right?
Add some text to the placeholder message. Give it a pretty background color. Change the amount of space it takes up on the page.
Blacklist any work with more than 10 fandoms listed. Then add a line to the AO3 Savior Config script to make the number customizable.
Add a global blacklist of terms that will get a work hidden no matter what field they're in.
Add a list of blacklisted tag combinations. Like "I'm okay with some coffee shop AUs, but the ones that are also tagged as fluff don't interest me, please hide them." Or "Character A/Character B is cute but I don't want to read PWP about them."
Anything else you think of!
Project #2: Good Artists Borrow, Great Artists Fork (DIY blacklisting)
Looking at existing scripts as a model for the boilerplate you'll need, create a script that runs on a site you use regularly that doesn't already have a blacklisting/filtering feature. If you can't think of one, Dreamwidth comments make a good guinea pig. (There's a blacklist script for them out there, but reinventing wheels for fun is how you learn, right? ...right?) Create a simple blacklisting script of your own for that site.
Start small for the site-specific HTML wrangling. Take an array of blacklisted keywords and log any chunk of post/comment text that contains one of them.
Then try to make the post/comment it belongs to disappear.
Then add a placeholder.
Then get fancy with whitelists and matching metadata like usernames/titles/tags as well.
Crib from existing blacklist scripts like AO3 Savior as shamelessly as you feel the need to. If you publish the resulting userscript for others to install (which you should, if it fills an unmet need!), please comment up any substantial chunks of copypasted or closely-reproduced code with credit/a link to the original. If your script basically is the original with some key changes, like our extra-fancy AO3 Savior above, see if there’s a public Git repo you can fork.
Project #3: Make the dread Tumblr beast do a thing
Create a small script that runs on the Tumblr dashboard. Make it find all the posts on the page and log their IDs. Then log whether they're originals or reblogs. Then add a fancy border to the originals. Then add a different fancy border to your own posts. All of this data should be right there in the post HTML, so no need to derive it by looking for "x reblogged y" or source links or whatever--just make liberal use of Inspect Element and the post's data- attributes.
Extra credit: Explore the wildly variable messes that Tumblr's API spews out, and try to recreate XKit's timestamps feature with jQuery AJAX calls. (Post timestamps are one of the few reliable API data points.) Get a zillion bright ideas about what else you could do with the API data. Go through more actual post data to catalogue all the inconsistencies you’d have to catch. Cry as Tumblr kills the dream you dreamed.
Project #4: Make the dread Tumblr beast FIX a thing
Create a script that runs on individual Tumblr blogs (subdomains of tumblr.com). Browse some blogs with various themes until you've found a post with the upside-down reblog-chain bug and a post with reblogs displaying normally. Note the HTML differences between them. Make the script detect and highlight upside-down stacks of blockquotes. Then see if you can make it extract the blockquotes and reassemble them in the correct order. At this point you may be mobbed by friends and acquaintainces who want a fix for this fucking bug, which you can take as an opportunity to bury any lingering doubts about the usefulness of your scripting adventures.
(Note: Upside-down reblogs are the bug du jour as of September 2019. If you stumble upon this post later, please substitute whatever the latest Tumblr fuckery is that you'd like to fix.)
Project #5: Regular expressions are a hard limit
I mentioned up above that Dreamwidth comments are good guinea pigs for user scripting? You know what that means. Kinkmemes. Anon memes too, but kinkmemes (appropriately enough) offer so many opportunities for coding masochism. So here's a little exercise in sadism on my part, for anyone who wants to have fun (or "fun") with regular expressions:
Write a userscript that highlights all the prompts on any given page of a kinkmeme that have been filled.
Specifically, scan all the comment subject lines on the page for anything that looks like the title of a kinkmeme fill, and if you find one, highlight the prompt at the top of its thread. The nice ones will start with "FILL:" or end with "part 1/?" or "3/3 COMPLETE." The less nice ones will be more like "(former) minifill [37a / 50(?)] still haven't thought of a name for this thing" or "title that's just the subject line of the original prompt, Chapter 3." Your job is to catch as many of the weird ones as you can using regular expressions, while keeping false positives to a minimum.
Test it out on a real live kinkmeme, especially one without strict subject-line-formatting policies. I guarantee you, you will be delighted at some of the arcane shit your script manages to catch. And probably astonished at some of the arcane shit you never thought to look for because who the hell would even format a kinkmeme fill like that? Truly, freeform user input is a wonderful and terrible thing.
If that's not enough masochism for you, you could always try to make the script work on LiveJournal kinkmemes too!
64 notes
·
View notes
Text
Destino - Advanced WooCommerce WordPress Theme with Mobile-Specific Layouts
New Post has been published on https://click.atak.co/destino-advanced-woocommerce-wordpress-theme-with-mobile-specific-layouts/
Destino - Advanced WooCommerce WordPress Theme with Mobile-Specific Layouts
DESTINO – HIGHLY CUSTOMIZABLE WOOCOMMERCE WORDPRESS THEME
Latest version 1.4.3: Released on June-09-2018 – See changelogs
Destino is a well-designed eCommerce WordPress Theme that you can use for building an efficient online stores. The theme is extremely customizable with multiple homepage designs, tons of theme options and lots of eCommerce features that make website development an easy task.
In addition, Destino allows you to build unique and advanced layouts for your posts & pages using a drag-n-drop back and front end editors – Visual Composers. It also brings you a lot of features like RTL Layout Support, Stunning Home slideshow by Revolution Slider, Powerful Mega Menu, Color Swatches, Product Quickview, Featuring Product Page, Ajax Cart, Variation Swatches & Photos, Pro Search Box & others.
The One-click Demo Installation can import posts, pages, sliders, widget & data to get a complete eCommerce website look like the demo in a matter of moments.
Easy to build any website that works for you. Choose a layout and color scheme, and customize the header with different images or sliders
Integrating in theme are powerful premium plugins/addons, including Revolution Slider to create beautiful and smooth slider, Visual Composerwhich allows users to drag and drop elements to create page/post with ease.. and other amazing addons.
With Mega Menu, you are free to create amazing things with your website. Moreover, you can set your menu always-on-top when scolling down.
DESTINO BRINGS YOU PREMIUM FEATURES..
Full Feature List
Multi Homepage Layouts
Compatible with WordPress 4.9.x
WooCommerce 3.4.x Ready!
Revolution Slider 5.4.x (advanced page builder)
Visual Composer 5.4.x Ready!
MailChimp For WordPress Version
One Click Import Demo Site – Easiest and fastest way to build your website
Child Theme Included
Compare & Wishlist support
Different Header Styles
Various Shortcodes – Get creative with unlimited combinations of easy-to-use shortcodes and quickly create any type of page you like.
Responsive WordPress Theme
2 Preset Color Styles
Google Fonts Included
Fully integrated with Font Awesome Icon
Built in with HTML5, CSS3 & LESS
Contact Form 7 ready
Easy Customization
Typography – Highly customizable typography settings,
Support menu with Mega and dropdown style
Support primary menu location, widget sidebars
SEO Optimized
Blog Layout Options:
Left Sidebar with Grid view (2-4 columns)
Right Sidebar with Grid view (2-4 columns)
Left Sidebar with List view
Right Sidebar with List view
Post Format Types:
Post Format Image
Post Format Audio
Post Format Gallery
Post Format Video
Multiple portfolio pages: Portfolio Masonry, Portfolio 2-4 columns
Translation – WPML compatible and every line of your content can be translated
RTL Support
Support to add custom CSS/JS
Cross browser compatible – It works fine under modern, major browser (FireFox, Safari, Chrome, IE10+)
Download PSD files worth $12
Free Lifetime Updates
WHAT ARE INCLUDED?
Destino Theme Package
Use this package to install to your current site
PSD Sources
All PSD design themes
Detailed Documentation
Provide all detailed steps to configure theme
Check Out Popular WordPress Themes:
Change Log
------------ VERSION - 1.4.3: Released on Jun-09-2018 ------------ [+] Update WordPress 4.9.6 [+] Update WooCommerece 3.4.2 [+] Update Revolution Slider 5.4.7.4
------------ VERSION - 1.4.2: Released on April-5-2018 ------------ [+] Update WooCommerece 3.3.4 [+] Update Revolution Slider 5.4.7.2 [+] Update Visual Composer 5.4.7
------------ VERSION - 1.4.1: Released on Mar-05-2018 ------------ [+] Update WooCommerece 3.3.3
------------ VERSION - 1.4.0: Released on Feb-13-2018 ------------ [+] Update WooCommerece 3.3.1
------------ VERSION - 1.3.1: Released on October-30-2017 ------------ [+] Update WordPress 4.8.2 [+] Update Visual Composer 5.4.2 [+] Update WooCommerce 3.2.1 [+] Update Revolution Slider 5.4.6.1
------------ VERSION - 1.3.0: Released on August-07-2017 ------------ [+] Update WordPress 4.8.1 [+] Update Visual Composer 5.2.1 [+] New Feature: Variation swatches and images for WooCommerce.
------------ VERSION - 1.2.1: Released on July-14-2017 ------------ [+] Updated WordPress 4.8 [+] Updated WooCommerce 3.1.1 [+] Updated Visual Composer 5.2 [+] Updated Revolution Slider 5.4.5.1 [+] Updated showing SKU, Category and Tag in product detail page
------------ VERSION - 1.2.0: Released on June-02-2017 ------------ [+] Added Mobile layout Style #2
------------ VERSION - 1.1.0: Released on May-24-2017 ------------ [+] Updated Mobile layout Style #1 [+] Updated Featured Video for Product [+] Updated Search Result Layout [+] Updated WordPress 4.7.5 [+] Updated WooCoommerce 3.0.7 [+] Updated Revolution 5.4.3.1
------------ VERSION - 1.0.4: Released on May-16-2017 ------------ [+] Added the new homepage #7 (Watch Store) [#] Fixed error : images in the gallery didn't change to match the variation
------------ VERSION - 1.0.3: Released on May-10-2017 ------------ [+] Added the new homepage #6 [+] Updated WooCommerce 3.0.6 [+] Updated revolution slider 5.4.3.1 [+] Updatde style for search cate
------------ VERSION - 1.0.2: Released on April-25-2017 ------------ [+] Updated WordPress 4.7.4 [+] Updated WooCommerce 3.0.4 [+] Updated Visual Composer 5.4.3
------------ VERSION - 1.0.1: Released on April-21-2017 ------------ [+] Updated WooCommerce 3.0.4 [+] Updated WordPress 4.7.4
------------ VERSION - 1.0.0: Released on April-17-2017 ------------ [+] Initial Release
Other Versions
BUY From ENVATO Marketplace
#Advanced#blog#destino#Digital#digital store#e-commerce#ecommerce#Fashion#mobile#mobile layouts#modern#multipurpose#revolution slider#shopping#specific#theme#unlimited color#vendor#woocommerce#wordpress
1 note
·
View note
Text
An introduction, plus 0-9 review
Part 1: background
The idea behind this blog is to listen to all of the long live emo google drive, a drive containing “emocore” music from the “90’s” (more on this later), and comment the process. I found this archive while browsing some semi-obscure facebook group dedicated to emo music and decided to listen to all of it. I did this in part because I wanted to learn more about music, in part because it seems interesting to not have as much of a filter when listening to music as I’d only ever hear the most popular 90’s emocore otherwise but mostly because why not??
The E-word
(Feel free to skip this section if you already have a solid idea of what the hell “emocore” means)
(The rest of the section is basically just emo 101)
I like trying to categorize things, even though I’m aware that every categorization falls apart when you start really pushing it’s boundaries. I like strange cultural artifacts. Because of this, I am fascinated by emo. Emo is older than most people expect with it’s roots in the 80’s and that has meant several very different things both to different people and in different points in time. The part of emo that most people are familiar with is the one that was commercially successful maybe 10-15 years ago, and that is not even considered to be “real emo” by most people immersed into the subculture.
Emo started as an outgrowth of hardcore music in the 80’s and was pioneered by bands such as Rites of Spring, Moss Icon and Embrace. At the time it was referred to as “emotional hardcore” which was later shortened to “emocore” and finally just “emo”. During the 90’s a different style of emo was developed known as Midwest Emo which was much closer to alternative rock or indie rock while only maintaining some of it’s hardcore roots, with bands such as Sunny Day Real Estate, Mineral, the Promise ring and american football. During the 00’s there was more of an effort by record companies to make money of emo music which lead to more listenable and widely market music being created often closer to pop-punk and sometimes post-hardcore. Notable examples are The red jumpsuit apparatus, My chemical romance, Fall Out Boy, Taking back Sunday, Brand new and Jimmy Eat World. For a lot fans of more underground emo, most or all of these bands are considered fake emo. I’m gonna call it scene emo instead because that is a less loaded term. During the late 00’s, the so-called “emo revival” movement began to make more underground music with a more 90’s midwest sound. Some important revival bands are Snowing, The World is a Beautiful Place and I am no Longer Afraid to Die, Empire! Empire! (I was a lonely estate) and the Hotelier.
Basically, for some reason people consider Orchid, american football and Panic! At the Disco to be part of the same genre. To clear up any confusion, I’m using the word “emocore” to indicate that I’m talking about the more traditional “emotional hardcore” definition of emo. Note that the most common definition that you see in emo communities on the internet, or among more recent bands that call themselves emo is one that includes emocore (although this aspect is somewhat downplayed), 90’s midwest emo, a select few scene emo bands (specifically Brand New, Taking Back Sunday and Jimmy Eat World) as well as emo revival. This is also the kind of emo I am personally most familiar with.
There is however a contingent of people instead use the emocore definition, which you might recognize if you’ve ever seen the infamous real emo copypasta. The author of the long live emo archive, Лобынцев Артем, also seems to use this definition, although they probably actually know what they’re talking about.
“90’s” “emocore”
So some of the music on this drive isn’t actually from the 90’s, there’s also music from the 80’s and the early 2000’s. I’m calling it 90’s emocore because it paints a better picture than just emocore, even if it technically isn’t true. On a similar note, I’m calling it emocore even though there may very well be music that some genre nerd might argue isn’t actually emocore. As previously discussed, emo is a hopelessly broad term so I’m using emocore to give people a better idea of what to expect, not because it’s necessarily 100% accurate.
Part 2: The archive
The entire archive is 83.8 gigabyte which is more than 10% of my harddrive. I’ve spent several hours just downloading files, and I’ve only gotten up to the letter D. In the root of the folder there is a file called “List of folders.txt”. According to it, there are 1671 albums, 69.76 GB (this is presumably just the music without the image files also included? Maybe that’s what I should have called the blog) 12496 songs, and 19:00:26 hours. That’s in the format DD:HH:MM by the way.

This is an absurd amount of music. My plan is to try and finish it within one year, or before 2019/7/20. To do that, I would have to listen to an average of 4.6 albums, 34.22 songs or 1.25 hours a day. We’ll see how that goes.
Part 3: The review: 0-9 (finally!)
So this is the format: The drive is divided in to folders based on the first character of the band name. Every time I finish one such folder I will post a review like part 3 here (don’t worry, I wont spend hundreds of words talking about emo every post). I will talk about my favorite artist under that letter, my favorite band name, my favorite image (as I said, there are images included under some of the bands, mostly of their album covers and such) as well as anything else I find interesting. I might shake up the formula a bit as I go, who knows. Before writing this post I’ve listened to the first folder, titled “0-9”. This is one of the smallest folders in the compilation, despite technically containing ten different characters, with only 160 songs. For comparison, the letter a has 831 songs. A careful start in other words.
Here are all the songs, albums and bands I've been listening to: https://pastebin.com/Xm5b4ZN1
My favorite band
125, Rue Montmartre
youtube
So after all this talk about emocore I ended up picking the maybe least hardcore band, figures. Commenter Kyle Cornwell on Sophies Floarboard says that they’re emocore at least so we’re still good.

125, Rue Montmartre is a German band named after a street address in Paris. They where active between 1998 and 2000 and they released 1 EP, took part in 1 split with Maggat and appeared on 2 compilations. They have a female singer who not only sings but also speaks and whispers. The guitars mostly play short, catchy riffs or arpeggios with some occasional chords during more explosive parts. The bass is comparatively loud and often contributes to the melody of a given song more than the guitars. Their style is clearly closer to the Midwest style of emo with it’s arpeggiod guitars, more indie sound and more melancholy mood. Here are the lyrics to their song Disco Hijack along with it’s English translation, which are very emo:

My favorite band name
30 second motion picture
I didn’t really find any name that was all that interesting under the number category (although I expect to find a lot of good ones down the line) but this is the one that spoke to me the most for whatever reason
My favorite image
This is from 309 chorus’s 1994 demo.

There’s just something really endearing about this grainy picture of this nerdy-looking dude with arm tattoos playing in front of a sign that says “haymarket collective” and has a fist and a circle E. Makes me happy inside.
Expect a new post in maybe two weeks? I’m not sure exactly how long time everything takes yet
1 note
·
View note
Text
WE ARE THE BEST WEBSITE CONTENT DEVELOPMENT COMPANY IN USA AND NODE JS DEVELOPMENT COMPANY IN USA
While more people use the web regularly, the number of people using the web for product and service analysis continues to rise. This means that a company's website is usually the first thing that a target audience interacts with. Along with other critical factors (such as design), quality content development determines that prospective clients have a strong first impression of a Website Content Development Company in USA. First experiences are extremely important in this situation.

Understanding the Importance of Content Development:
If users don't like what they see instantly on your website, there's a fair chance they'll move on to the next platform that offers similar services and products. Furthermore, it is your role as a supportive, authoritative source in your industry that will build trust with those targeted users, and that it is the quality content on your website that will attract them there in the first instance. When used correctly, content development is effective methods that can help businesses excel in the vast world of online marketing.
Content Development:
Begin growing your business by implementing the most effective content marketing strategies. At Arkss Tech, we build content that helps you grow your Node js Development Company in USA and brand in the most effective way.

Increase traffic to your website with this effective marketing tool. Additionally, it boosts the conversion rate, which results in an increase in revenue for your business. You can bring your business up to new heights with Arkss Tech's Content development services.
What Is the Significance of Quality Content Development?
Quality content is professional, well-thought-out, correct spelling and formatted, and flows perfectly, from the most necessary information on your "contact us" page to informative, educational content in your blog posts.
Punctuation and grammar errors are indicators of careless writers. When users come across sloppy content, the business as a whole loses its reputation.
The appearance of written content on any specific webpage is also a significant factor in content development. Website visitors want to know who you are or what you have to say and concisely. They do not want an in-depth study of the business operations.
Additionally, you should avoid providing inadequate information, as this may confuse visitors and leave them in the dark about what your business is all about. If you are confident about your profession, developing an adequate amount of valuable content for your website pages will be simple and easy.
Why Should You Use Arkss Tech Content Development Services?
Arkss Tech content is designed to be scalable. You will note a steady rise in organic traffic to the website due to our content marketing service. The content development process can be customized to your marketing goals. We create content that will help you improve your marketing efforts.
We have a highly qualified team and innovative content developers who can convert complicated concepts into clear and concise language. Our content is smooth and transparent, and it is naturally usable. Our content is more than just a set of words. They are compelling and powerful.
Planning Website Content:
Content planning and development can be a challenging process. If your webpage has a few or one hundred pages, the content you choose to provide is critical to its overall success. The content includes written text and also images, diagrams, and downloadable files.
Assembling the appropriate content for your audiences and connecting with other associates of your company can be challenging. A little strategy and preparation would make this much simpler.
1. Examine Your Current Document
When designing a new website, the first step is to review the existing copy if this is the initial website, research existing materials such as brochures to determine what has been available.
Consider the following three points.
Is the content reliable or up to date?
Is there something that is missing?
Is this information helpful to my readers?
Ascertaining that all is right will ensure that you do not have any outdated pricing or information.
When you first built your site, your company has probably changed, and you would need to provide additional services. By defining a clear and concise objective for each piece of content, you will verify that you provide valuable content for readers.
2. Determine the Audience Objective
Before deciding on the type of content to provide on your site, determine who your website's target audience is. Understanding or identifying your audience will help you to organize the remainder of your content with better clarity.
This also enables you to determine whether or not the information is meaningful or even appropriate. It can be helpful to create primary and even secondary audiences to ensure that all of your visitors and their unique needs are taken into consideration.
3. Make Use of Sitemaps as Blueprints for Copywriting
When comparing the process of designing a website to that of building a house, the sitemap serves as the architect's blueprint. You could design a house with insufficient bathrooms or closets without it.
There are multiple techniques and software suites available for organizing data. Succinct, concise page titles perform better in navigational systems than lengthy sentences. You can rearrange and prioritize your content before you start writing if you take this step first.
4. Work in Collaboration with Others
If you are the sole proprietor of a Website Content Development Company in the USA, you can include others within the analysis and editing process to ensure that copying is perfectly correct and accessible to others.
If you work in a company that relies on support from other stakeholders, several approaches can help minimize this pain. Avoid storing all of your content in a single file, as this prevents simple collaboration. It's convenient to share a document for shared editing with Google Docs.
5. Use Storytelling Rather Than 'Storyselling.'
You can assume that your website is an opportunity for you to "share your story." Rather than that, it should highlight the success stories of those who have derived from your products or services.
Avoid overstating how effective the company is. Rather than that, provide evidence or information. Utilize vocabulary that the target audience is familiar with rather than industry-specific terminology.
Appropriately represent their views by describing your services or products as a solution. Provide concise advantages in the form of bullet points rather than lengthy paragraphs. Making the content more user-centric satisfies users' desires and tells their storyline rather than yours.
6. Create Content for Both Humans and Search Engines
If you know the value of writing your copies for SEO, do not concentrate too much on injecting your key search words that the text becomes unreadable. By adding your words to the website naturally, you make sure that you do not sound like a robot until anyone visits.
Additionally, using "semantic terminology," you can create several synonyms for your primary keywords. This will help you diversify your content while keeping terms that help in your search efforts.
7. Make the Action-Oriented Against Copying
Encourage readers to take action after they've completed your copy. If you want them to contact you to let you know more or purchase a product online, tell them your next move at the end of the copy. By including an email address or a link to your home page, you provide them with a simple way to contact you when your company remains top of mind.
8. Add Visual Appeal to the Copy
Supporting images, diagrams, and charts can be used to break up your text. Most people don't read your entire copy but scan it separately with testimonials and bulleted lists. Additionally, keep your paragraphs brief and divide sections with sub-headings.
Choosing the right typeface plays a major role in the readability of your copy. Most web designers suggest using a sans-serif typeface for body copy, whereas headlines can use a slightly larger serif. These strategies will help ensure that your copy is as attractive as it is functional.
9. Create Deadlines
While editing your website copy using a contents management system like WordPress is simpler than ever, it can be the opponent of achieving and publishing your new website. You'll need to establish specific deadlines to keep your project on track. By segregating content development activities into relevant chunks, you will ensure that tasks are completed on time.
Starting with the main section will help you determine what main differentiators to concentrate on the web and set the tone for the rest of your copy. Set the team's original copy deadlines, schedule feedback for all stakeholders, and decide when to add all copies to the web.
Final Thought:
Blogs are becoming increasingly important for businesses are looking to distinguish themselves from their competitors. A blog needs to be composed of well-written, edited content to achieve the goals for which it is created. Blogs should also be periodically updated to ensure that information is shared continuously from your platform to existing and potential customers. This task may sometimes become too difficult for a business owner or employee to perform. Arkss Tech, a Website Content Development Company in the USA, exists to assist clients who wish to hire a dedicated writer team to generate high-quality content on their behalf.
Content planning does not have to be as time-consuming as it might seem. The method can be made simpler by spending time in pre-planning and strategy.
0 notes
Text
How do you handle http request and response?

Every website on the internet is majorly based on a two-way communication between clients and servers. Here by clients, we mean browsers like Chrome or Safari or any type of computing program or device whereas servers are often computers in the cloud.
This communication between the client and a server is done by a special mechanism of HTTP requests and responses. In this cycle, first a client sends an HTTP request to the web. Here the client is often a web browser. After the web server receives the request, it runs an application to process the request. After the processing, the server returns an HTTP response. This response is basically the output displayed on the browser; it receives this response from the web server. The request that we are talking about is in various formats, for example, HTML page, style sheet, Javascript code or just a simple text. The response will also be similar according to the request, for example, HTML file, CSS file, JPG file, JS file or data in XML or JSON format. This is popularly known as the HTTP response request circle.
In this blog we are going to look at how the HTTP requests and response are handled? We will understand the concept of HTTP Requests before we proceed to HTTP responses. Let’s begin!
What are HTTP Requests?
As mentioned above, if you want to access any resource from the vast array of them present on the internet and hosted on different servers, then your browser needs to send a request to the servers. If this request gets accepted, the browser will display the requested resources on your screen. The underlying format used for the effective communication between a client and a server is HTTP which is an acronym for Hypertext Transfer Protocol. In this cycle of communication, the message that a client sends is known as an HTTP request. These requests are sent with the help of various methods known as HTTP request methods. These methods indicate specific action that has to be performed on a given resource. There are some standard features shared by the various HTTP request methods. Let’s discuss the concept of HTTP Request Methods.
An HTTP request is an action performed on a resource identified by an URL. There are several request methods with each one of them with a specific purpose. These methods should always be written in upper case as they are case-sensitive.
The working of HTTP Requests is simple. As mentioned above, an HTTP request is sent by the server and is submitted to the server. The request is processed and then the server sends a response which contains the status information of the request. It is clear that HTTP requests work as an intermediary between a client or an application and a server.
It is now time we discuss the various types of HTTP Request Methods. The first and probably the most popular request method is the GET method. It retrieves and requests data from a particular computing resource present in a server. In simple terms, this popular HTTP request techniques is used to retrieve information that is identified by the URL.
Another HTTP request method is HEAD. This technique requests a reaction that is similar to that of GET request. However, the only difference is that the HEAD method doesn’t have a message-body in its response. This method is useful in recovering the meta-data without transferring the entire content. HEAD method is commonly used for testing hypertext links for accessibility, validity or recent modification.
POST is another popular HTTP request method. It is used to send data to a server in order to create or update a resource. The information submitted to the server is archived in the request body. One common use of the HTTP POST method is to send user-generated data to a server, for example, uploading a profile photo by a user.
One method similar to POST method is PUT. It is also used for sending data to the server to create or update a resource; however, the difference is that PUT requests are idempotent. Hence, if the same PUT requests are called multiple times then the results will always be the same.
We have covered the basic HTTP request methods generally used in server communication. There are a couple of more methods which we will discuss in the blog ahead. One such request method is DELETE which, as the name suggests, is used to delete resources indicated by the URL. Basically, a DELETE request removes the targeted resource.
A method similar to POST and PUT is the PATCH method. It is used for applying partial changes to the resource. It is also a non-idempotent method however it requires the user to only send the updated username and not the complete user entity.
A HTTP request method used to invoke an application loop-back test along the path to the target resource is the TRACE method. It allows clients to view messages that are being received on the other end of the request chain. This information is used for testing functions.
One last method that we are going to discuss is the CONNECT method which is used to create a network connection to a web server by the client. It basically creates a tunnel to the identifies server. One example of the CONNECT request method is SSL tunnelling.
We discussed the various methods or techniques for http REQUEST. In the segment below, we discussed some similarities and distinctions between various HTTP REQUEST methods.
HTTP PUT and POST Request Methods discussed above are both used to facilitate data transmission between a client and a server. They have similar roles in the response request cycle but there are some differences between them also. For example, the PUT request method is idempotent whereas POST request method is not. Another difference is that PUT request operates as specific but POST operates as abstract.
GET and POST methods can also be compared in order to understand them better. In GET method, the parameters are saved in the browser’s history whereas in the POST method, the parameters aren’t archived. Also, the GET method can be bookmarked but the same cannot be said for the POST method.
With this, we come to an end of our discussion on the concept of HTTP Request and the various methods associated with it. We also took a brief look over the comparison between some similar methods. Now, we will move on to our next section, where we will talk in detail about HTTP response and the concepts that are useful in the response cycle. Let’s begin!
What is HTTP Response?
We learnt in detail about HTTP request, the next step a request is generated involves HTTP Response. It is nothing but a packet containing information sent by the server to the client in response to the request made by the client. HTTP Response basically has the information requested by the Client. In this segment, we are going to discuss the structure of HTTP Response.
The structure of HTTP Response contains a status line, any number of headers or it can also be with no header, a request body in a status line is also optional.
A response status line consists of HTTP protocol version, status code and a reason phrase.
Let’s understand the structure of HTTP response with the help of an example.
We are taking an example where we will see the response section. The first line is called the Status Line. It is written in the following manner – Status Line: HHTP/1.1 200 OK
The status line has the HTTP Protocol Version mentioned as (HTTP/1.1). the next is Status Code defines as 200 and then the Status Message which in this case is OK.
The next section after the status line is the response header. It has zero or more header lines. Generally, the header lines are not zero. Response headers are placed after the status Line and before the Response Body. These headers pass some additional information to the Client.
The HTTP Response Header, for example, a header content-type, contains an application/json header with charset=utf-8. This example signifies that the body of the response will contain a JSON formatted data. This information is given to the client by the server. The response body should be interpreted it as a JSON by the client.
Next is the response body which has the resource data requested by the client. For example, a web development course was requested for the fees data, then the response body will contain the information of fees for the web development course. The response body is variable and can also have other information like syllabus, testimonial, duration and a few more properties of the particular course. The format of the text contained in HTTP Response Body is defined by the Response headers. In the explanation above, when we said resource, we referred to the information requested by a client. In this example, the details corresponding to a course is a resource.
With this, we come to an end of our discussion on the concept of HTTP Response and its structure as well as the request method and its methods.
If you wish to start your journey in web development, we have something very interesting for you. There is a professional web development course that will address all your concerns regarding web development and help you ace your skills. Make sure you check out the course that can be a stepping stone to your dream of becoming a proficient web developer.
One such course that we would like to recommend is Konfinity’s Web Development Course . This course is a well-researched training course developed by experts from IIT DELHI in collaboration with tech companies like Google, Amazon and Microsoft. It is trusted by students and graduates from IIT, DTU, NIT, Amity, DU and more.
We encourage technocrats like you to join the course to master the art of creating web applications by learning the latest technologies, right from basic HTML to advanced and dynamic websites, in just a span of a few months.
Konfinity is a great platform for launching a lucrative tech career. We will get you started by helping you get placed in a high paying job. One amazing thing about our course is that no prior coding experience is required to take up our courses. Start your free trial here .
0 notes
Text
#WDILTW – Creating examples can be hard
This week I was evaluating AWS QLDB. Specifically the verifiable history of changes to determine how to simplify present processes that perform auditing via CDC. This is not the first time I have looked at QLDB so there was nothing that new to learn. What I found was that creating a workable solution with an existing application is hard. Even harder is creating an example to publish in this blog (and the purpose of this post). First some background. Using MySQL as the source of information, how can you leverage QLDB? It’s easy to stream data from MySQL Aurora, and it’s easy to stream data from QLDB, but it not that easy to place real-time data into QLDB. AWS DMS is a good way to move data from a source to a target, previously my work has included MySQL to MySQL, MySQL to Redshift, and MySQL to Kinesis, however there is no QLDB target. Turning the problem upside down, and using QLDB as the source of information, and streaming to MySQL for compatibility seemed a way forward. After setting up the QLDB Ledger and an example table, it was time to populate with existing data. The documented reference example looked very JSON compatible. Side bar, it is actually Amazon Ion a superset of JSON. INSERT INTO Person Now, MySQL offers with the X Protocol. This is something that lefred has evangelized for many years, I have seen presented many times, but finally I had a chance to use. The MySQL Shell JSON output looked ideal. { "ID": 1523, "Name": "Wien", "CountryCode": "AUT", "District": "Wien", "Info": { "Population": 1608144 } } { "ID": 1524, "Name": "Graz", "CountryCode": "AUT", "District": "Steiermark", "Info": { "Population": 240967 } } And now, onto some of the things I learned this week. Using AWS RDS Aurora MySQL is the first stumbling block, X Protocol is not supported. As this was a example, simple, mysqldump some reference data and load it into a MySQL 8 instance, and extract into JSON, so as to potentially emulate a pipeline. Here is my experiences of trying to refactor into a demo to write up. Launch a MySQL Docker container as per my standard notes. Harmless, right? MYSQL_ROOT_PASSWORD="$(date | md5sum | cut -c1-20)#" echo $MYSQL_ROOT_PASSWORD docker run --name=qldb-mysql -p3306:3306 -v mysql-volume:/var/lib/mysql -e MYSQL_ROOT_PASSWORD=$MYSQL_ROOT_PASSWORD -d mysql/mysql-server:latest docker logs qldb-mysql docker exec -it qldb-mysql /bin/bash As it's a quick demo, I shortcut credentials to make using the mysql client easier. NOTE: as I always generate a new password each container, it's included here. # echo "[mysql] user=root password='ab6ea7b0436cbc0c0d49#' > .my.cnf # mysql ERROR 1045 (28000): Access denied for user 'root'@'localhost' (using password: NO) What the? Did I make a mistake, I test manually and check # mysql -u root -p # cat .my.cnf Nothing wrong there. Next check # pwd / bash-4.2# grep root /etc/passwd root:x:0:0:root:/root:/bin/bash operator:x:11:0:operator:/root:/sbin/nologin And there is the first Dockerism. I don't live in Docker, so these 101 learnings would be known. First I really thing using "root" by default is a horrible idea. And when you shell in, you are not dropped into the home directory? Solved, we move on. # mv /.my.cnf /root/.my.cnf Mock and example as quickly as I can think. # mysql mysql> create schema if not exists demo; Query OK, 1 row affected (0.00 sec) mysql> use demo; Database changed mysql> create table sample(id int unsigned not null auto_increment, name varchar(30) not null, location varchar(30) not null, domain varchar(50) null, primary key(id)); Query OK, 0 rows affected (0.03 sec) mysql> show create table sample; mysql> insert into sample values (null,'Demo Row','USA',null), (null,'Row 2','AUS','news.com.au'), (null,'Kiwi','NZ', null); Query OK, 3 rows affected (0.00 sec) Records: 3 Duplicates: 0 Warnings: 0 mysql> select * from sample; +----+----------+----------+-------------+ | id | name | location | domain | +----+----------+----------+-------------+ | 1 | Demo Row | USA | NULL | | 2 | Row 2 | AUS | news.com.au | | 3 | Kiwi | NZ | NULL | +----+----------+----------+-------------+ 3 rows in set (0.00 sec) Cool, now to look at it in Javascript using MySQL Shell. Hurdle 2. # mysqlsh MySQL Shell 8.0.22 Copyright (c) 2016, 2020, Oracle and/or its affiliates. Oracle is a registered trademark of Oracle Corporation and/or its affiliates. Other names may be trademarks of their respective owners. MySQL JS > var session=mysqlx.getSession('root:ab6ea7b0436cbc0c0d49#@localhost') mysqlx.getSession: Argument #1: Invalid URI: Illegal character [#] found at position 25 (ArgumentError) What the, it doesn't like the password format. I'm not a Javascript person, and well this is an example for blogging, which is not what was actually setup, so do it the right way, create a user. # mysql mysql> create user demo@localhost identified by 'qldb'; Query OK, 0 rows affected (0.01 sec) mysql> grant ALL ON sample.* to demo@localhost; Query OK, 0 rows affected, 1 warning (0.01 sec) mysql> SHOW GRANTS FOR demo@localhost; +----------------------------------------------------------+ | Grants for demo@localhost | +----------------------------------------------------------+ | GRANT USAGE ON *.* TO `demo`@`localhost` | | GRANT ALL PRIVILEGES ON `sample`.* TO `demo`@`localhost` | +----------------------------------------------------------+ 2 rows in set (0.00 sec) Back into the MySQL Shell, and hurdle 3. MySQL JS > var session=mysqlx.getSession('demo:qldb@localhost') mysqlx.getSession: Access denied for user 'demo'@'127.0.0.1' (using password: YES) (MySQL Error 1045) Did I create the creds wrong, verify. No my password is correct. # mysql -udemo -pqldb -e "SELECT NOW()" mysql: [Warning] Using a password on the command line interface can be insecure. +---------------------+ | NOW() | +---------------------+ | 2021-03-06 23:15:26 | +---------------------+ I don't have time to debug this, User take 2. mysql> drop user demo@localhost; Query OK, 0 rows affected (0.00 sec) mysql> create user demo@'%' identified by 'qldb'; Query OK, 0 rows affected (0.01 sec) mysql> grant all on demo.* to demo@'%' -> ; Query OK, 0 rows affected (0.00 sec) mysql> show grants; +-- | Grants for root@localhost | +--- | GRANT SELECT, INSERT, UPDATE, DELETE, CREATE, DROP, RELOAD, SHUTDOWN, PROCESS, FILE, REFERENCES, INDEX, ALTER, SHOW DATABASES, SUPER, CREATE TEMPORARY TABLES, LOCK TABLES, EXECUTE, REPLICATION SLAVE, REPLICATION CLIENT, CREATE VIEW, SHOW VIEW, CREATE ROUTINE, ALTER ROUTINE, CREATE USER, EVENT, TRIGGER, CREATE TABLESPACE, CREATE ROLE, DROP ROLE ON *.* TO `root`@`localhost` WITH GRANT OPTION | | GRANT APPLICATION_PASSWORD_ADMIN,AUDIT_ADMIN,BACKUP_ADMIN,BINLOG_ADMIN,BINLOG_ENCRYPTION_ADMIN,CLONE_ADMIN,CONNECTION_ADMIN,ENCRYPTION_KEY_ADMIN,FLUSH_OPTIMIZER_COSTS,FLUSH_STATUS,FLUSH_TABLES,FLUSH_USER_RESOURCES,GROUP_REPLICATION_ADMIN,INNODB_REDO_LOG_ARCHIVE,INNODB_REDO_LOG_ENABLE,PERSIST_RO_VARIABLES_ADMIN,REPLICATION_APPLIER,REPLICATION_SLAVE_ADMIN,RESOURCE_GROUP_ADMIN,RESOURCE_GROUP_USER,ROLE_ADMIN,SERVICE_CONNECTION_ADMIN,SESSION_VARIABLES_ADMIN,SET_USER_ID,SHOW_ROUTINE,SYSTEM_USER,SYSTEM_VARIABLES_ADMIN,TABLE_ENCRYPTION_ADMIN,XA_RECOVER_ADMIN ON *.* TO `root`@`localhost` WITH GRANT OPTION | | GRANT PROXY ON ''@'' TO 'root'@'localhost' WITH GRANT OPTION | +--- 3 rows in set (0.00 sec) mysql> show grants for demo@'%'; +--------------------------------------------------+ | Grants for demo@% | +--------------------------------------------------+ | GRANT USAGE ON *.* TO `demo`@`%` | | GRANT ALL PRIVILEGES ON `demo`.* TO `demo`@`%` | +--------------------------------------------------+ 2 rows in set (0.00 sec) Right, initially I showed grants of not new user, but note to self, I should checkout the MySQL 8 Improved grants. I wonder how RDS MySQL 8 handles these, and how Aurora MySQL 8 will (when it ever drops, that's another story). Third try is a charm, so nice to also see queries with 0.0000 execution granularity. MySQL JS > var session=mysqlx.getSession('demo:qldb@localhost') MySQL JS > var sql='SELECT * FROM demo.sample' MySQL JS > session.sql(sql) +----+----------+----------+-------------+ | id | name | location | domain | +----+----------+----------+-------------+ | 1 | Demo Row | USA | NULL | | 2 | Row 2 | AUS | news.com.au | | 3 | Kiwi | NZ | NULL | +----+----------+----------+-------------+ 3 rows in set (0.0006 sec) Get that now in JSON output. NOTE: There are 3 different JSON formats, this matched what I needed. bash-4.2# mysqlsh MySQL Shell 8.0.22 Copyright (c) 2016, 2020, Oracle and/or its affiliates. Oracle is a registered trademark of Oracle Corporation and/or its affiliates. Other names may be trademarks of their respective owners. Type 'help' or '?' for help; 'quit' to exit. MySQL JS > var session=mysqlx.getSession('demo:qldb@localhost') MySQL JS > var sql='SELECT * FROM demo.sample' MySQL JS > shell.options.set('resultFormat','json/array') MySQL JS > session.sql(sql) [ {"id":1,"name":"Demo Row","location":"USA","domain":null}, {"id":2,"name":"Row 2","location":"AUS","domain":"news.com.au"}, {"id":3,"name":"Kiwi","location":"NZ","domain":null} ] 3 rows in set (0.0006 sec) Ok, that works in interactive interface, I need it scripted. # vi bash: vi: command not found # yum install vi Loaded plugins: ovl http://repo.mysql.com/yum/mysql-connectors-community/el/7/x86_64/repodata/repomd.xml: [Errno 14] HTTP Error 403 - Forbidden Trying other mirror. ... And another downer of Docker containers, other tools or easy ways to install them, again I want to focus on the actual example, and not all this preamble, so # echo "var session=mysqlx.getSession('demo:qldb@localhost') var sql='SELECT * FROM demo.sample' shell.options.set('resultFormat','json/array') session.sql(sql)" > dump.js # mysqlsh What the? Hurdle 4. Did I typo this as well, I check the file, and cut/paste it and get what I expect. # cat dump.js var session=mysqlx.getSession('demo:qldb@localhost') var sql='SELECT * FROM demo.sample' shell.options.set('resultFormat','json/array') session.sql(sql) # mysqlsh MySQL Shell 8.0.22 Copyright (c) 2016, 2020, Oracle and/or its affiliates. Oracle is a registered trademark of Oracle Corporation and/or its affiliates. Other names may be trademarks of their respective owners. Type 'help' or '?' for help; 'quit' to exit. MySQL JS > var session=mysqlx.getSession('demo:qldb@localhost') MySQL JS > var sql='SELECT * FROM demo.sample' MySQL JS > shell.options.set('resultFormat','json/array') MySQL JS > session.sql(sql) [ {"id":1,"name":"Demo Row","location":"USA","domain":null}, {"id":2,"name":"Row 2","location":"AUS","domain":"news.com.au"}, {"id":3,"name":"Kiwi","location":"NZ","domain":null} ] 3 rows in set (0.0022 sec) This is getting crazy. # echo '[ > {"id":1,"name":"Demo Row","location":"USA","domain":null}, > {"id":2,"name":"Row 2","location":"AUS","domain":"news.com.au"}, > {"id":3,"name":"Kiwi","location":"NZ","domain":null} > ]' > sample.json bash-4.2# jq . sample.json bash: jq: command not found Oh the docker!!!!. Switching back to my EC2 instance now. $ echo '[ > {"id":1,"name":"Demo Row","location":"USA","domain":null}, > {"id":2,"name":"Row 2","location":"AUS","domain":"news.com.au"}, > {"id":3,"name":"Kiwi","location":"NZ","domain":null} > ]' > sample.json $ jq . sample.json [ { "id": 1, "name": "Demo Row", "location": "USA", "domain": null }, { "id": 2, "name": "Row 2", "location": "AUS", "domain": "news.com.au" }, { "id": 3, "name": "Kiwi", "location": "NZ", "domain": null } ] I am now way of the time I would like to spend on this weekly post, and it's getting way to long, and I'm nowhere near showing what I actually want. Still we trek on. Boy, this stock EC2 image uses version 1, we need I'm sure V2, and well command does not work!!!! $ aws qldb list-ledgers ERROR: $ aws --version $ curl "https://awscli.amazonaws.com/awscli-exe-linux-x86_64.zip" -o "awscliv2.zip" $ unzip awscliv2.zip $ sudo ./aws/install $ export PATH=/usr/local/bin:$PATH $ aws --version Can I finally get a ledger now. $ aws qldb create-ledger --name demo --tags JIRA=DEMO-5826,Owner=RonaldBradford --permissions-mode ALLOW_ALL --no-deletion-protection { "Name": "demo", "Arn": "arn:aws:qldb:us-east-1:999:ledger/demo", "State": "CREATING", "CreationDateTime": "2021-03-06T22:46:41.760000+00:00", "DeletionProtection": false } $ aws qldb list-ledgers { "Ledgers": [ { "Name": "xx", "State": "ACTIVE", "CreationDateTime": "2021-03-05T20:12:44.611000+00:00" }, { "Name": "demo", "State": "ACTIVE", "CreationDateTime": "2021-03-06T22:46:41.760000+00:00" } ] } $ aws qldb describe-ledger --name demo { "Name": "demo", "Arn": "arn:aws:qldb:us-east-1:999:ledger/demo", "State": "ACTIVE", "CreationDateTime": "2021-03-06T22:46:41.760000+00:00", "DeletionProtection": false } Oh the Python 2, and the lack of user packaging, more crud of getting an example. $ pip install pyqldb==3.1.0 ERROR $ echo "alias python=python3 alias pip=pip3" >> ~/.bash_profile source ~/.bash_profile $ pip --version pip 9.0.3 from /usr/lib/python3.6/site-packages (python 3.6) $ python --version Python 3.6.8 $ pip install pyqldb==3.1.0 ERROR $ sudo pip install pyqldb==3.1.0 Yeah!, after all that, my example code works and data is inserted. $ cat demo.py from pyqldb.config.retry_config import RetryConfig from pyqldb.driver.qldb_driver import QldbDriver # Configure retry limit to 3 retry_config = RetryConfig(retry_limit=3) # Initialize the driver print("Initializing the driver") qldb_driver = QldbDriver("demo", retry_config=retry_config) def create_table(transaction_executor, table): print("Creating table {}".format(table)) transaction_executor.execute_statement("Create TABLE {}".format(table)) def create_index(transaction_executor, table, column): print("Creating index {}.{}".format(table, column)) transaction_executor.execute_statement("CREATE INDEX ON {}({})".format(table,column)) def insert_record(transaction_executor, table, values): print("Inserting into {}".format(table)) transaction_executor.execute_statement("INSERT INTO {} ?".format(table), values) table="sample" column="id" qldb_driver.execute_lambda(lambda executor: create_table(executor, table)) qldb_driver.execute_lambda(lambda executor: create_index(executor, table, column)) record1 = { 'id': "1", 'name': "Demo Row", 'location': "USA", 'domain': "" } qldb_driver.execute_lambda(lambda x: insert_record(x, table, record1)) $ python demo.py Initializing the driver Creating table sample Creating index sample.id Inserting into sample One vets in the AWS Console, but you cannot show that in text in this blog, so goes to find a simple client and there is qldbshell What the? I installed it and it complains about pyqldb.driver.pooled_qldb_driver. I literally used that in the last example. $ pip3 install qldbshell Collecting qldbshell Downloading https://artifactory.lifion.oneadp.com/artifactory/api/pypi/pypi/packages/packages/0f/f7/fe984d797e0882c5e141a4888709ae958eb8c48007a23e94000507439f83/qldbshell-1.2.0.tar.gz (68kB) 100% |████████████████████████████████| 71kB 55.6MB/s Requirement already satisfied: boto3>=1.9.237 in /usr/local/lib/python3.6/site-packages (from qldbshell) Collecting amazon.ion=0.5.0 (from qldbshell) Downloading https://artifactory.lifion.oneadp.com/artifactory/api/pypi/pypi/packages/packages/4e/b7/21b7a7577cc6864d1c93fd710701e4764af6cf0f7be36fae4f9673ae11fc/amazon.ion-0.5.0.tar.gz (178kB) 100% |████████████████████████████████| 184kB 78.7MB/s Requirement already satisfied: prompt_toolkit=3.0.5 in /usr/local/lib/python3.6/site-packages (from qldbshell) Requirement already satisfied: ionhash~=1.1.0 in /usr/local/lib/python3.6/site-packages (from qldbshell) Requirement already satisfied: s3transfer=0.3.0 in /usr/local/lib/python3.6/site-packages (from boto3>=1.9.237->qldbshell) Requirement already satisfied: jmespath=0.7.1 in /usr/local/lib/python3.6/site-packages (from boto3>=1.9.237->qldbshell) Requirement already satisfied: botocore=1.20.21 in /usr/local/lib/python3.6/site-packages (from boto3>=1.9.237->qldbshell) Requirement already satisfied: six in /usr/local/lib/python3.6/site-packages (from amazon.ion=0.5.0->qldbshell) Requirement already satisfied: wcwidth in /usr/local/lib/python3.6/site-packages (from prompt_toolkit=3.0.5->qldbshell) Requirement already satisfied: python-dateutil=2.1 in /usr/local/lib/python3.6/site-packages (from botocore=1.20.21->boto3>=1.9.237->qldbshell) Requirement already satisfied: urllib3=1.25.4 in /usr/local/lib/python3.6/site-packages (from botocore=1.20.21->boto3>=1.9.237->qldbshell) Installing collected packages: amazon.ion, qldbshell Found existing installation: amazon.ion 0.7.0 Uninstalling amazon.ion-0.7.0: Exception: Traceback (most recent call last): File "/usr/lib64/python3.6/shutil.py", line 550, in move os.rename(src, real_dst) PermissionError: [Errno 13] Permission denied: '/usr/local/lib/python3.6/site-packages/amazon.ion-0.7.0-py3.6-nspkg.pth' -> '/tmp/pip-p8j4d45d-uninstall/usr/local/lib/python3.6/site-packages/amazon.ion-0.7.0-py3.6-nspkg.pth' During handling of the above exception, another exception occurred: Traceback (most recent call last): File "/usr/lib/python3.6/site-packages/pip/basecommand.py", line 215, in main status = self.run(options, args) File "/usr/lib/python3.6/site-packages/pip/commands/install.py", line 365, in run strip_file_prefix=options.strip_file_prefix, File "/usr/lib/python3.6/site-packages/pip/req/req_set.py", line 783, in install requirement.uninstall(auto_confirm=True) File "/usr/lib/python3.6/site-packages/pip/req/req_install.py", line 754, in uninstall paths_to_remove.remove(auto_confirm) File "/usr/lib/python3.6/site-packages/pip/req/req_uninstall.py", line 115, in remove renames(path, new_path) File "/usr/lib/python3.6/site-packages/pip/utils/__init__.py", line 267, in renames shutil.move(old, new) File "/usr/lib64/python3.6/shutil.py", line 565, in move os.unlink(src) PermissionError: [Errno 13] Permission denied: '/usr/local/lib/python3.6/site-packages/amazon.ion-0.7.0-py3.6-nspkg.pth' [centos@ip-10-204-101-224] ~ $ sudo pip3 install qldbshell WARNING: Running pip install with root privileges is generally not a good idea. Try `pip3 install --user` instead. Collecting qldbshell Downloading https://artifactory.lifion.oneadp.com/artifactory/api/pypi/pypi/packages/packages/0f/f7/fe984d797e0882c5e141a4888709ae958eb8c48007a23e94000507439f83/qldbshell-1.2.0.tar.gz (68kB) 100% |████████████████████████████████| 71kB 49.8MB/s Requirement already satisfied: boto3>=1.9.237 in /usr/local/lib/python3.6/site-packages (from qldbshell) Collecting amazon.ion=0.5.0 (from qldbshell) Downloading https://artifactory.lifion.oneadp.com/artifactory/api/pypi/pypi/packages/packages/4e/b7/21b7a7577cc6864d1c93fd710701e4764af6cf0f7be36fae4f9673ae11fc/amazon.ion-0.5.0.tar.gz (178kB) 100% |████████████████████████████████| 184kB 27.7MB/s Requirement already satisfied: prompt_toolkit=3.0.5 in /usr/local/lib/python3.6/site-packages (from qldbshell) Requirement already satisfied: ionhash~=1.1.0 in /usr/local/lib/python3.6/site-packages (from qldbshell) Requirement already satisfied: botocore=1.20.21 in /usr/local/lib/python3.6/site-packages (from boto3>=1.9.237->qldbshell) Requirement already satisfied: jmespath=0.7.1 in /usr/local/lib/python3.6/site-packages (from boto3>=1.9.237->qldbshell) Requirement already satisfied: s3transfer=0.3.0 in /usr/local/lib/python3.6/site-packages (from boto3>=1.9.237->qldbshell) Requirement already satisfied: six in /usr/local/lib/python3.6/site-packages (from amazon.ion=0.5.0->qldbshell) Requirement already satisfied: wcwidth in /usr/local/lib/python3.6/site-packages (from prompt_toolkit=3.0.5->qldbshell) Requirement already satisfied: python-dateutil=2.1 in /usr/local/lib/python3.6/site-packages (from botocore=1.20.21->boto3>=1.9.237->qldbshell) Requirement already satisfied: urllib3=1.25.4 in /usr/local/lib/python3.6/site-packages (from botocore=1.20.21->boto3>=1.9.237->qldbshell) Installing collected packages: amazon.ion, qldbshell Found existing installation: amazon.ion 0.7.0 Uninstalling amazon.ion-0.7.0: Successfully uninstalled amazon.ion-0.7.0 Running setup.py install for amazon.ion ... done Running setup.py install for qldbshell ... done Successfully installed amazon.ion-0.5.0 qldbshell-1.2.0 $ sudo pip3 install qldbshell $ qldbshell Traceback (most recent call last): File "/usr/local/bin/qldbshell", line 11, in load_entry_point('qldbshell==1.2.0', 'console_scripts', 'qldbshell')() File "/usr/lib/python3.6/site-packages/pkg_resources/__init__.py", line 476, in load_entry_point return get_distribution(dist).load_entry_point(group, name) File "/usr/lib/python3.6/site-packages/pkg_resources/__init__.py", line 2700, in load_entry_point return ep.load() File "/usr/lib/python3.6/site-packages/pkg_resources/__init__.py", line 2318, in load return self.resolve() File "/usr/lib/python3.6/site-packages/pkg_resources/__init__.py", line 2324, in resolve module = __import__(self.module_name, fromlist=['__name__'], level=0) File "/usr/local/lib/python3.6/site-packages/qldbshell/__main__.py", line 25, in from pyqldb.driver.pooled_qldb_driver import PooledQldbDriver ModuleNotFoundError: No module named 'pyqldb.driver.pooled_qldb_driver' $ pip list qldbshell DEPRECATION: The default format will switch to columns in the future. You can use --format=(legacy|columns) (or define a format=(legacy|columns) in your pip.conf under the [list] section) to disable this warning. amazon.ion (0.5.0) boto3 (1.17.21) botocore (1.20.21) ionhash (1.1.0) jmespath (0.10.0) pip (9.0.3) prompt-toolkit (3.0.16) pyqldb (3.1.0) python-dateutil (2.8.1) qldbshell (1.2.0) s3transfer (0.3.4) setuptools (39.2.0) six (1.15.0) urllib3 (1.26.3) So, uninstalled and re-installed and voila, my data. $ qldbshell usage: qldbshell [-h] [-v] [-s QLDB_SESSION_ENDPOINT] [-r REGION] [-p PROFILE] -l LEDGER qldbshell: error: the following arguments are required: -l/--ledger $ qldbshell -l demo Welcome to the Amazon QLDB Shell version 1.2.0 Use 'start' to initiate and interact with a transaction. 'commit' and 'abort' to commit or abort a transaction. Use 'start; statement 1; statement 2; commit; start; statement 3; commit' to create transactions non-interactively. Use 'help' for the help section. All other commands will be interpreted as PartiQL statements until the 'exit' or 'quit' command is issued. qldbshell > qldbshell > SELECT * FROM sample; INFO: { id: "1", name: "Demo Row", location: "USA", domain: "" } INFO: (0.1718s) qldbshell > q WARNING: Error while executing query: An error occurred (BadRequestException) when calling the SendCommand operation: Lexer Error: at line 1, column 1: invalid character at, '' [U+5c]; INFO: (0.1134s) qldbshell > exit Exiting QLDB Shell Right q is a mysqlism of the client, need to rewire myself. Now, I have a ledger, I created an example table, mocked a row of data and verified. Now I can just load my sample data in JSON I created earlier right? Wrong!!! $ cat load.py import json from pyqldb.config.retry_config import RetryConfig from pyqldb.driver.qldb_driver import QldbDriver # Configure retry limit to 3 retry_config = RetryConfig(retry_limit=3) # Initialize the driver print("Initializing the driver") qldb_driver = QldbDriver("demo", retry_config=retry_config) def insert_record(transaction_executor, table, values): print("Inserting into {}".format(table)) transaction_executor.execute_statement("INSERT INTO {} ?".format(table), values) table="sample" with open('sample.json') as f: data=json.load(f) qldb_driver.execute_lambda(lambda x: insert_record(x, table, data)) $ python load.py Traceback (most recent call last): File "load.py", line 2, in from pyqldb.config.retry_config import RetryConfig ModuleNotFoundError: No module named 'pyqldb' [centos@ip-10-204-101-224] ~ Oh sweet, I'd installed that, and used it, and re-installed it. $ pip list | grep pyqldb DEPRECATION: The default format will switch to columns in the future. You can use --format=(legacy|columns) (or define a format=(legacy|columns) in your pip.conf under the [list] section) to disable this warning. [centos@ip-10-204-101-224] ~ $ sudo pip3 install pyqldb WARNING: Running pip install with root privileges is generally not a good idea. Try `pip3 install --user` instead. Collecting pyqldb Downloading https://artifactory.lifion.oneadp.com/artifactory/api/pypi/pypi/packages/packages/5c/b4/9790b1fad87d7df5b863cbf353689db145bd009d31d854d282b31e1c1781/pyqldb-3.1.0.tar.gz Collecting amazon.ion=0.7.0 (from pyqldb) Downloading https://artifactory.lifion.oneadp.com/artifactory/api/pypi/pypi/packages/packages/7d/ac/fd1edee54cefa425c444b51ad00a20e5bc74263a3afbfd4c8743040f8f26/amazon.ion-0.7.0.tar.gz (211kB) 100% |████████████████████████████████| 215kB 24.8MB/s Requirement already satisfied: boto3=1.16.56 in /usr/local/lib/python3.6/site-packages (from pyqldb) Requirement already satisfied: botocore=1.19.56 in /usr/local/lib/python3.6/site-packages (from pyqldb) Requirement already satisfied: ionhash=1.1.0 in /usr/local/lib/python3.6/site-packages (from pyqldb) Requirement already satisfied: six in /usr/local/lib/python3.6/site-packages (from amazon.ion=0.7.0->pyqldb) Requirement already satisfied: s3transfer=0.3.0 in /usr/local/lib/python3.6/site-packages (from boto3=1.16.56->pyqldb) Requirement already satisfied: jmespath=0.7.1 in /usr/local/lib/python3.6/site-packages (from boto3=1.16.56->pyqldb) Requirement already satisfied: python-dateutil=2.1 in /usr/local/lib/python3.6/site-packages (from botocore=1.19.56->pyqldb) Requirement already satisfied: urllib3=1.25.4 in /usr/local/lib/python3.6/site-packages (from botocore=1.19.56->pyqldb) Installing collected packages: amazon.ion, pyqldb Found existing installation: amazon.ion 0.5.0 Uninstalling amazon.ion-0.5.0: Successfully uninstalled amazon.ion-0.5.0 Running setup.py install for amazon.ion ... done Running setup.py install for pyqldb ... done Successfully installed amazon.ion-0.7.0 pyqldb-3.1.0 Load one more time. $ cat load.py import json from pyqldb.config.retry_config import RetryConfig from pyqldb.driver.qldb_driver import QldbDriver # Configure retry limit to 3 retry_config = RetryConfig(retry_limit=3) # Initialize the driver print("Initializing the driver") qldb_driver = QldbDriver("demo", retry_config=retry_config) def insert_record(transaction_executor, table, values): print("Inserting into {}".format(table)) transaction_executor.execute_statement("INSERT INTO {} ?".format(table), values) table="sample" with open('sample.json') as f: data=json.load(f) qldb_driver.execute_lambda(lambda x: insert_record(x, table, data)) $ python load.py Initializing the driver Inserting into sample And done, I've got my JSON extracted MySQL 8 data in QLDB. I go to vett it in the client, and boy, didn't expect yet another package screw up. Clearly, these 2 AWS python packages are incompatible. That's a venv need, but I'm now at double my desired time to show this. $ qldbshell -l demo Traceback (most recent call last): File "/usr/local/bin/qldbshell", line 11, in load_entry_point('qldbshell==1.2.0', 'console_scripts', 'qldbshell')() File "/usr/lib/python3.6/site-packages/pkg_resources/__init__.py", line 476, in load_entry_point return get_distribution(dist).load_entry_point(group, name) File "/usr/lib/python3.6/site-packages/pkg_resources/__init__.py", line 2700, in load_entry_point return ep.load() File "/usr/lib/python3.6/site-packages/pkg_resources/__init__.py", line 2318, in load return self.resolve() File "/usr/lib/python3.6/site-packages/pkg_resources/__init__.py", line 2324, in resolve module = __import__(self.module_name, fromlist=['__name__'], level=0) File "/usr/local/lib/python3.6/site-packages/qldbshell/__main__.py", line 25, in from pyqldb.driver.pooled_qldb_driver import PooledQldbDriver ModuleNotFoundError: No module named 'pyqldb.driver.pooled_qldb_driver' [centos@ip-10-204-101-224] ~ $ pip list | grep qldbshell DEPRECATION: The default format will switch to columns in the future. You can use --format=(legacy|columns) (or define a format=(legacy|columns) in your pip.conf under the [list] section) to disable this warning. qldbshell (1.2.0) $ sudo pip uninstall qldbshell pyqldb $ sudo pip install qldbshell WARNING: Running pip install with root privileges is generally not a good idea. Try `pip3 install --user` instead. Collecting qldbshell Downloading https://artifactory.lifion.oneadp.com/artifactory/api/pypi/pypi/packages/packages/0f/f7/fe984d797e0882c5e141a4888709ae958eb8c48007a23e94000507439f83/qldbshell-1.2.0.tar.gz (68kB) 100% |████████████████████████████████| 71kB 43.4MB/s Requirement already satisfied: boto3>=1.9.237 in /usr/local/lib/python3.6/site-packages (from qldbshell) Requirement already satisfied: amazon.ion=0.5.0 in /usr/local/lib/python3.6/site-packages (from qldbshell) Requirement already satisfied: prompt_toolkit=3.0.5 in /usr/local/lib/python3.6/site-packages (from qldbshell) Requirement already satisfied: ionhash~=1.1.0 in /usr/local/lib/python3.6/site-packages (from qldbshell) Requirement already satisfied: s3transfer=0.3.0 in /usr/local/lib/python3.6/site-packages (from boto3>=1.9.237->qldbshell) Requirement already satisfied: botocore=1.20.21 in /usr/local/lib/python3.6/site-packages (from boto3>=1.9.237->qldbshell) Requirement already satisfied: jmespath=0.7.1 in /usr/local/lib/python3.6/site-packages (from boto3>=1.9.237->qldbshell) Requirement already satisfied: six in /usr/local/lib/python3.6/site-packages (from amazon.ion=0.5.0->qldbshell) Requirement already satisfied: wcwidth in /usr/local/lib/python3.6/site-packages (from prompt_toolkit=3.0.5->qldbshell) Requirement already satisfied: python-dateutil=2.1 in /usr/local/lib/python3.6/site-packages (from botocore=1.20.21->boto3>=1.9.237->qldbshell) Requirement already satisfied: urllib3=1.25.4 in /usr/local/lib/python3.6/site-packages (from botocore=1.20.21->boto3>=1.9.237->qldbshell) Installing collected packages: qldbshell Running setup.py install for qldbshell ... done Successfully installed qldbshell-1.2.0 Can I see my data now $ qldbshell -l demo Welcome to the Amazon QLDB Shell version 1.2.0 Use 'start' to initiate and interact with a transaction. 'commit' and 'abort' to commit or abort a transaction. Use 'start; statement 1; statement 2; commit; start; statement 3; commit' to create transactions non-interactively. Use 'help' for the help section. All other commands will be interpreted as PartiQL statements until the 'exit' or 'quit' command is issued. qldbshell > select * from sample; INFO: { id: 1, name: "Demo Row", location: "USA", domain: null }, { id: 1, name: "Demo Row", location: "USA", domain: null }, { id: "1", name: "Demo Row", location: "USA", domain: "" }, { id: 3, name: "Kiwi", location: "NZ", domain: null }, { id: 2, name: "Row 2", location: "AUS", domain: "news.com.au" }, { id: 3, name: "Kiwi", location: "NZ", domain: null }, { id: 2, name: "Row 2", location: "AUS", domain: "news.com.au" } INFO: (0.0815s) And yes, data, I see it's duplicated, so I must have in between the 10 steps run twice. This does highlight a known limitation of QLDB, no unique constraints. But wait, that data is not really correct, I don't want null. Goes back to the JSON to see the MySQL shell gives that. $ jq . sample.json [ { "id": 1, "name": "Demo Row", "location": "USA", "domain": null }, ... At some point I also got this load error, but by now I've given up documenting how to do something, in order to demonstrate something. NameError: name 'null' is not defined One has to wrap the only nullable column with IFNULL(subdomain,'') as subdomain and redo all those steps again. This is not going to be practical having to wrap all columns in a wider table with IFNULL. However, having exhausted all this time for what was supposed to be a quiet weekend few hours, my post is way to long, and I've learned "Creating examples can be hard".
http://ronaldbradford.com/blog/wdiltw-creating-examples-can-be-hard-2021-03-06/
0 notes
Photo

Underscore.js, React without virtual DOM, and why you should use Svelte
#504 — September 4, 2020
Unsubscribe | Read on the Web
JavaScript Weekly
Underscore.js 1.11.0: The Long Standing Functional Helper Library Goes Modular — “Underscore!?” I hear some of our longer serving readings exclaiming. Yes, it’s still around, still under active development, and still a neat project at a mere 11 years old. As of v1.11.0 every function is now in a separate module which brings treeshaking opportunities to all, but there’s also a monolithic bundle in ES module format for those who prefer that. This article goes into a lot more depth about the new modular aspects.
Jeremy Ashkenas
Mastering the Hard Parts of JavaScript — A currently 17-part blog post series written by someone taking Frontend Masters’ JavaScript: The Hard Parts course and reflecting on the exercises that have helped them learn about callbacks, prototypes, closures, and more.
Ryan Ameri
FusionAuth Now Offers Breached Password Detection and LDAP — FusionAuth is a complete identity and access management tool that saves your team time and resources. Implement complex standards like OAuth, OpenID Connect, and SAML and build out additional login features to meet compliance requirements.
FusionAuth sponsor
How Browsers May Throttle requestAnimationFrame — requestAnimationFrame is a browser API that allows code execution to be triggered before the next available frame on the device display, but it’s not a guarantee and it can be throttled. This post looks at when and why.
Matt Perry
Brahmos: Think React, But Without the VDOM — An intriguing user interface library that supports the modern React API and native templates but with no VDOM.
Brahmos
NativeScript 7.0: Create Native iOS and Android Apps with JS — A signficant step forward for the framework by aligning with modern JS standards and bringing broad consistency across the whole stack. Supports Angular, Vue, and you can even use TypeScript if you prefer.
NativeScript
⚡️ Quick bytes:
🎧 The Real Talk JavaScript podcast interviewed Rich Harris of the Svelte project – well worth a listen if you want to get up to speed with why you should be paying attention to Svelte.
ESLint now has a public roadmap of what they're working on next.
You've got nine more days to develop a game for the current JS13kGames competition, if you're up for it.
VueConfTO (VueConf Toronto) are running a free virtual Vue.js conference this November.
The latest on webpack 5's release plans. Expect a final release in October.
💻 Jobs
Senior JavaScript Developer (Warsaw, Relocation Package) — Open source rich text editor used by millions of users around the world. Strong focus on code quality. Join us.
CKEDITOR
JavaScript Developer at X-Team (Remote) — Join the most energizing community for developers and work on projects for Riot Games, FOX, Sony, Coinbase, and more.
X-Team
Find a Job Through Vettery — Create a profile on Vettery to connect with hiring managers at startups and Fortune 500 companies. It's free for job-seekers.
Vettery
📚 Tutorials, Opinions and Stories
Designing a JavaScript Plugin System — jQuery has plugins. Gatsby, Eleventy, and Vue do, too. Plugins are a common way to extend the functionality of other tools and libraries and you can roll your own plugin approach too.
Bryan Braun
▶ Making WAVs: Understanding, Parsing, and Creating Wave Files — If you’ve not watched any of the Low Level JavaScript videos yet, you’re missing a treat. But this is a good place to start, particularly if the topic of working with a data format at a low level appeals to you.
Low Level JavaScript
Breakpoints and console.log Is the Past, Time Travel Is the Future — 15x faster JavaScript debugging than with breakpoints and console.log.
Wallaby.js sponsor
The New Logical Assignment Operators in JavaScript — Logical assignment operators combine logical operators (e.g. ||) and assignment expressions. They're currently at stage 4.
Hemanth HM
Eight Methods to Search Through JavaScript Arrays
Joel Thoms
TypeScript 4.0: What I’m Most Excited About — Fernando seems particularly enthused about the latest version of TypeScript!
Fernando Doglio
Machine Learning for JavaScript Devs in 10 Minutes — Covers the absolute basics but puts you in a position to move on elsewhere.
Allan Chua
How to Refactor a Shopify Site for JavaScript Performance
Shopify Partners sponsor
'TypeScript is Weakening the JavaScript Ecosystem' — Controversial opinion alert, but we need to balance out the TypeScript love sometime.
Tim Daubenschütz
▶ Why I’m Using Next.js in 2020 — Lee makes the bold claim that he thinks “the future of React is actually Next.js”.
Lee Robinson
Building a Component Library with React and Emotion
Ademola Adegbuyi
Tackling TypeScript: Upgrading from JavaScript — You’ll know Dr. Axel from Deep JavaScript and JavaScript for Impatient Programmers.. well now he’s tackling TypeScript and you can read the first 11 chapters online.
Dr. Axel Rauschmayer
Introducing Modular Underscore — Just in case you missed it in the top feature of this issue ;-)
Julian Gonggrijp
🔧 Code & Tools

CindyJS: A Framework to Create Interactive Math Content for the Web — For visualizing and playing with mathematical concepts with things like mass, springs, fields, trees, etc. Lots of live examples here. The optics simulation is quite neat to play with.
CindyJS Team
Print.js: An Improved Way to Print From Your Apps and Pages — Let’s say you have a PDF file that would be better to print than the current Web page.. Print.js makes it easy to add a button to a page so users can print that PDF directly. You can also print specific elements off of the current page.
Crabbly
AppSignal Is All About Automatic Instrumentation and Ease of Use — AppSignal provides you with automatic instrumentation for Apollo, PostgreSQL, Redis, and Next.js. Try us out for free.
AppSignal sponsor
Volt: A Bootstrap 5 Admin Dashboard Using Only Vanilla JS — See a live preview here. Includes 11 example pages, 100+ components, and some plugins with no dependencies.
Themesberg
Stencil 2.0: A Web Component Compiler for Building Reusable UI Components — Stencil is a toolchain for building reusable, scalable design systems. And while this is version 2.0, there are few breaking changes.
Ionic
NgRx 10 Released: Reactive State for Angular
ngrx
🆕 Quick releases:
Ember 3.21
Terser 5.3 — JS parser, mangler and compressor toolkit.
Cypress 5.1 — Fast, reliable testing for anything that runs in a browser.
jqGrid 5.5 — jQuery grid plugin.
np 6.5 — A better npm publish
underscore 1.11.0 — JS functional helpers library.
by via JavaScript Weekly https://ift.tt/3i0cc0z
0 notes
Text
30 HTML Best Practices for Beginners
The most difficult aspect of running Nettuts+ is accounting for so many different skill levels. If we post too many advanced tutorials, our beginner audience won't benefit. The same holds true for the opposite. We do our best, but always feel free to pipe in if you feel you're being neglected. This site is for you, so speak up! With that said, today's tutorial is specifically for those who are just diving into web development. If you've one year of experience or less, hopefully some of the tips listed here will help you to become better, quicker!
You may also want to check out some of the HTML builders on Envato Market, such as the popular VSBuilder, which lets you generate the HTML and CSS for building your websites automatically by choosing options from a simple interface.
Or you can have your website built from scratch by a professional developer on Envato Studio who knows and follows all the HTML best practices.
Without further ado, let's review 30 best practices to observe when creating your markup.
1: Always Close Your Tags
Back in the day, it wasn't uncommon to see things like this:
1 <li>Some text here.
2 <li>Some new text here.
3 <li>You get the idea.
Notice how the wrapping UL/OL tag was omitted. Additionally, many chose to leave off the closing LI tags as well. By today's standards, this is simply bad practice and should be 100% avoided. Always, always close your tags. Otherwise, you'll encounter validation and glitch issues at every turn.
Better
1 <ul>
2 <li>Some text here. </li>
3 <li>Some new text here. </li>
4 <li>You get the idea. </li>
5 </ul>
2: Declare the Correct DocType

When I was younger, I participated quite a bit in CSS forums. Whenever a user had an issue, before we would look at their situation, they HAD to perform two things first:
Validate the CSS file. Fix any necessary errors.
Add a doctype.
"The DOCTYPE goes before the opening html tag at the top of the page and tells the browser whether the page contains HTML, XHTML, or a mix of both, so that it can correctly interpret the markup."
Most of us choose between four different doctypes when creating new websites.
http://www.w3.org/TR/html4/strict.dtd">
http://www.w3.org/TR/html4/loose.dtd">
http://www.w3.org/TR/xhtml1/DTD/xhtml1-transitional.dtd">
http://www.w3.org/TR/xhtml1/DTD/xhtml1-strict.dtd">
There's a big debate currently going on about the correct choice here. At one point, it was considered to be best practice to use the XHTML Strict version. However, after some research, it was realized that most browsers revert back to regular HTML when interpretting it. For that reason, many have chosen to use HTML 4.01 Strict instead. The bottom line is that any of these will keep you in check. Do some research and make up your own mind.
3: Never Use Inline Styles
When you're hard at work on your markup, sometimes it can be tempting to take the easy route and sneak in a bit of styling.
1 <p style="color: red;">I'm going to make this text red so that it really stands out and makes people take notice! </p>
Sure -- it looks harmless enough. However, this points to an error in your coding practices.
When creating your markup, don't even think about the styling yet. You only begin adding styles once the page has been completely coded.
It's like crossing the streams in Ghostbusters. It's just not a good idea.
-Chris Coyier (in reference to something completely unrelated.)
Instead, finish your markup, and then reference that P tag from your external stylesheet.
Better
1 #someElement > p {
2 color: red;
3 }
4: Place all External CSS Files Within the Head Tag
Technically, you can place stylesheets anywhere you like. However, the HTML specification recommends that they be placed within the document HEAD tag. The primary benefit is that your pages will seemingly load faster.
While researching performance at Yahoo!, we discovered that moving stylesheets to the document HEAD makes pages appear to be loading faster. This is because putting stylesheets in the HEAD allows the page to render progressively.
- ySlow Team
1 <head>
2 <title>My Favorites Kinds of Corn</title>
3 <link rel="stylesheet" type="text/css" media="screen" href="path/to/file.css" />
4 <link rel="stylesheet" type="text/css" media="screen" href="path/to
/anotherFile.css" />
5 </head>
5: Consider Placing Javascript Files at the Bottom
Place JS at bottom
Remember -- the primary goal is to make the page load as quickly as possible for the user. When loading a script, the browser can't continue on until the entire file has been loaded. Thus, the user will have to wait longer before noticing any progress.
If you have JS files whose only purpose is to add functionality -- for example, after a button is clicked -- go ahead and place those files at the bottom, just before the closing body tag. This is absolutely a best practice.
Better
<p>And now you know my favorite kinds of corn. </p>
<script type="text/javascript" src="path/to/file.js"></script>
<script type="text/javascript" src="path/to/anotherFile.js"></script>
</body>
</html>
6: Never Use Inline Javascript. It's not 1996!
Another common practice years ago was to place JS commands directly within tags. This was very common with simple image galleries. Essentially, a "onclick" attribute was appended to the tag. The value would then be equal to some JS procedure. Needless to say, you should never, ever do this. Instead, transfer this code to an external JS file and use "addEventListener/attachEvent" to "listen" for your desired event. Or, if using a framework like jQuery, just use the "click" method.
$('a#moreCornInfoLink').click(function() {
alert('Want to learn more about corn?');
});
7: Validate Continuously
validate continuously
I recently blogged about how the idea of validation has been completely misconstrued by those who don't completely understand its purpose. As I mention in the article, "validation should work for you, not against."
However, especially when first getting started, I highly recommend that you download the Web Developer Toolbar and use the "Validate HTML" and "Validate CSS" options continuously. While CSS is a somewhat easy to language to learn, it can also make you tear your hair out. As you'll find, many times, it's your shabby markup that's causing that strange whitespace issue on the page. Validate, validate, validate.
8: Download Firebug
download firebug
I can't recommend this one enough. Firebug is, without doubt, the best plugin you'll ever use when creating websites. Not only does it provide incredible Javascript debugging, but you'll also learn how to pinpoint which elements are inheriting that extra padding that you were unaware of. Download it!
9: Use Firebug!
use firebug
From my experiences, many users only take advantage of about 20% of Firebug's capabilities. You're truly doing yourself a disservice. Take a couple hours and scour the web for every worthy tutorial you can find on the subject.
Resources
Overview of Firebug
Debug Javascript With Firebug - video tutorial
10: Keep Your Tag Names Lowercase
Technically, you can get away with capitalizing your tag names.
<DIV>
<P>Here's an interesting fact about corn. </P>
</DIV>
Having said that, please don't. It serves no purpose and hurts my eyes -- not to mention the fact that it reminds me of Microsoft Word's html function!
Better
<div>
<p>Here's an interesting fact about corn. </p>
</div>
11: Use H1 - H6 Tags
Admittedly, this is something I tend to slack on. It's best practice to use all six of these tags. If I'm honest, I usually only implement the top four; but I'm working on it! :) For semantic and SEO reasons, force yourself to replace that P tag with an H6 when appropriate.
1
2
<h1>This is a really important corn fact! </h1>
<h6>Small, but still significant corn fact goes here. </h6>
12: If Building a Blog, Save the H1 for the Article Title
h1 saved for title of article
Just this morning, on Twitter, I asked our followers whether they felt it was smartest to place the H1 tag as the logo, or to instead use it as the article's title. Around 80% of the returned tweets were in favor of the latter method.
As with anything, determine what's best for your own website. However, if building a blog, I'd recommend that you save your H1 tags for your article title. For SEO purposes, this is a better practice - in my opinion.
13: Download ySlow
download yslow
Especially in the last few years, the Yahoo team has been doing some really great work in our field. Not too long ago, they released an extension for Firebug called ySlow. When activated, it will analyze the given website and return a "report card" of sorts which details the areas where your site needs improvement. It can be a bit harsh, but it's all for the greater good. I highly recommend it.
14: Wrap Navigation with an Unordered List
Wrap navigation with unordered lists
Each and every website has a navigation section of some sort. While you can definitely get away with formatting it like so:
<div id="nav">
<a href="#">Home </a>
<a href="#">About </a>
<a href="#">Contact </a>
</div>
I'd encourage you not to use this method, for semantic reasons. Your job is to write the best possible code that you're capable of.
Why would we style a list of navigation links with anything other than an unordered LIST?
The UL tag is meant to contain a list of items.
Better
<ul id="nav">
<li><a href="#">Home</a></li>
<li><a href="#">About</a></li>
<li><a href="#">Contact</a></li>
</ul>
15: Learn How to Target IE
You'll undoubtedly find yourself screaming at IE during some point or another. It's actually become a bonding experience for the community. When I read on Twitter how one of my buddies is battling the forces of IE, I just smile and think, "I know how you feel, pal."
The first step, once you've completed your primary CSS file, is to create a unique "ie.css" file. You can then reference it only for IE by using the following code.
<!--[if lt IE 7]>
<link rel="stylesheet" type="text/css" media="screen" href="path/to/ie.css" />
<![endif]-->
This code says, "If the user's browser is Internet Explorer 6 or lower, import this stylesheet. Otherwise, do nothing." If you need to compensate for IE7 as well, simply replace "lt" with "lte" (less than or equal to).
16: Choose a Great Code Editor
choose a great code editor
Whether you're on Windows or a Mac, there are plenty of fantastic code editors that will work wonderfully for you. Personally, I have a Mac and PC side-by-side that I use throughout my day. As a result, I've developed a pretty good knowledge of what's available. Here are my top choices/recommendations in order:
Mac Lovers
Coda
Espresso
TextMate
Aptana
DreamWeaver CS4
PC Lovers
InType
E-Text Editor
Notepad++
Aptana
Dreamweaver CS4
17: Once the Website is Complete, Compress!
Compress
By zipping your CSS and Javascript files, you can reduce the size of each file by a substantial 25% or so. Please don't bother doing this while still in development. However, once the site is, more-or-less, complete, utilize a few online compression programs to save yourself some bandwidth.
Javascript Compression Services
Javascript Compressor
JS Compressor
CSS Compression Services
CSS Optimiser
CSS Compressor
Clean CSS
18: Cut, Cut, Cut
cut cut cut
Looking back on my first website, I must have had a SEVERE case of divitis. Your natural instinct is to safely wrap each paragraph with a div, and then wrap it with one more div for good measure. As you'll quickly learn, this is highly inefficient.
Once you've completed your markup, go over it two more times and find ways to reduce the number of elements on the page. Does that UL really need its own wrapping div? I think not.
Just as the key to writing is to "cut, cut, cut," the same holds true for your markup.
19: All Images Require "Alt" Attributes
It's easy to ignore the necessity for alt attributes within image tags. Nevertheless, it's very important, for accessibility and validation reasons, that you take an extra moment to fill these sections in.
Bad
1
<IMG SRC="cornImage.jpg" />
Better
1
<img src="cornImage.jpg" alt="A corn field I visited." />
20: Stay up Late
I highly doubt that I'm the only one who, at one point while learning, looked up and realized that I was in a pitch-dark room well into the early, early morning. If you've found yourself in a similar situation, rest assured that you've chosen the right field.
The amazing "AHHA" moments, at least for me, always occur late at night. This was the case when I first began to understand exactly what Javascript closures were. It's a great feeling that you need to experience, if you haven't already.
21: View Source
view source
What better way to learn HTML than to copy your heroes? Initially, we're all copiers! Then slowly, you begin to develop your own styles/methods. So visit the websites of those you respect. How did they code this and that section? Learn and copy from them. We all did it, and you should too. (Don't steal the design; just learn from the coding style.)
Notice any cool Javascript effects that you'd like to learn? It's likely that he's using a plugin to accomplish the effect. View the source and search the HEAD tag for the name of the script. Then Google it and implement it into your own site! Yay.
22: Style ALL Elements
This best practice is especially true when designing for clients. Just because you haven't use a blockquote doesn't mean that the client won't. Never use ordered lists? That doesn't mean he won't! Do yourself a service and create a special page specifically to show off the styling of every element: ul, ol, p, h1-h6, blockquotes, etc.
23: Use Twitter
Use Twitter
Lately, I can't turn on the TV without hearing a reference to Twitter; it's really become rather obnoxious. I don't have a desire to listen to Larry King advertise his Twitter account - which we all know he doesn't manually update. Yay for assistants! Also, how many moms signed up for accounts after Oprah's approval? We can only long for the day when it was just a few of us who were aware of the service and its "water cooler" potential.
Initially, the idea behind Twitter was to post "what you were doing." Though this still holds true to a small extent, it's become much more of a networking tool in our industry. If a web dev writer that I admire posts a link to an article he found interesting, you better believe that I'm going to check it out as well - and you should too! This is the reason why sites like Digg are quickly becoming more and more nervous.
Twitter Snippet
If you just signed up, don't forget to follow us: NETTUTS.
24: Learn Photoshop
Learn Photoshop
A recent commenter on Nettuts+ attacked us for posting a few recommendations from Psdtuts+. He argued that Photoshop tutorials have no business on a web development blog. I'm not sure about him, but Photoshop is open pretty much 24/7 on my computer.
In fact, Photoshop may very well become the more important tool you have. Once you've learned HTML and CSS, I would personally recommend that you then learn as many Photoshop techniques as possible.
Visit the Videos section at Psdtuts+
Fork over $25 to sign up for a one-month membership to Lynda.com. Watch every video you can find.
Enjoy the "You Suck at Photoshop" series.
Take a few hours to memorize as many PS keyboard shortcuts as you can.
25: Learn Each HTML Tag
There are literally dozens of HTML tags that you won't come across every day. Nevertheless, that doesn't mean you shouldn't learn them! Are you familiar with the "abbr" tag? What about "cite"? These two alone deserve a spot in your tool-chest. Learn all of them!
By the way, in case you're unfamiliar with the two listed above:
abbr does pretty much what you'd expect. It refers to an abbreviation. "Blvd" could be wrapped in a <abbr> tag because it's an abbreviation for "boulevard".
cite is used to reference the title of some work. For example, if you reference this article on your own blog, you could put "30 HTML Best Practices for Beginners" within a <cite> tag. Note that it shouldn't be used to reference the author of a quote. This is a common misconception.
26: Participate in the Community
Just as sites like ours contributes greatly to further a web developer's knowledge, you should too! Finally figured out how to float your elements correctly? Make a blog posting to teach others how. There will always be those with less experience than you. Not only will you be contributing to the community, but you'll also teach yourself. Ever notice how you don't truly understand something until you're forced to teach it?
27: Use a CSS Reset
This is another area that's been debated to death. CSS resets: to use or not to use; that is the question. If I were to offer my own personal advice, I'd 100% recommend that you create your own reset file. Begin by downloading a popular one, like Eric Meyer's, and then slowly, as you learn more, begin to modify it into your own. If you don't do this, you won't truly understand why your list items are receiving that extra bit of padding when you didn't specify it anywhere in your CSS file. Save yourself the anger and reset everything! This one should get you started.
html, body, div, span,
h1, h2, h3, h4, h5, h6, p, blockquote, pre,
a, abbr, acronym, address, big, cite, code,
img, ins, kbd, q, s, samp,
small, strike, strong,
dl, dt, dd, ol, ul, li,
fieldset, form, label, legend,
table, caption, tbody, tfoot, thead, tr, th, td {
margin: 0;
padding: 0;
border: 0;
outline: 0;
font-size: 100%;
vertical-align: baseline;
background: transparent;
}
body {
line-height: 1;
}
ol, ul {
list-style: none;
}
blockquote, q {
quotes: none;
}
blockquote:before, blockquote:after,
q:before, q:after {
content: '';
content: none;
}
table {
border-collapse: collapse;
border-spacing: 0;
}
28: Line 'em Up!
Line em up
Generally speaking, you should strive to line up your elements as best as possible. Take a look at you favorite designs. Did you notice how each heading, icon, paragraph, and logo lines up with something else on the page? Not doing this is one of the biggest signs of a beginner. Think of it this way: If I ask why you placed an element in that spot, you should be able to give me an exact reason.
Advertisement
29: Slice a PSD
Slice a PSD
Okay, so you've gained a solid grasp of HTML, CSS, and Photoshop. The next step is to convert your first PSD into a working website. Don't worry; it's not as tough as you might think. I can't think of a better way to put your skills to the test. If you need assistance, review these in depth video tutorials that show you exactly how to get the job done.
Slice and Dice that PSD
From PSD to HTML/CSS
30: Don't Use a Framework...Yet
Frameworks, whether they be for Javascript or CSS are fantastic; but please don't use them when first getting started. Though it could be argued that jQuery and Javascript can be learned simultaneously, the same can't be made for CSS. I've personally promoted the 960 CSS Framework, and use it often. Having said that, if you're still in the process of learning CSS -- meaning the first year -- you'll only make yourself more confused if you use one.
CSS frameworks are for experienced developers who want to save themselves a bit of time. They're not for beginners.
Original article source here : https://code.tutsplus.com/tutorials/30-html-best-practices-for-beginners--net-4957
1 note
·
View note
Text
SEMrush Site Audit Tool – 3 Features to Analyze your Website for Errors
Yesterday I talked about 5 ways how you can utilize to make money with SEMrush. Today l am going to talk about SEMrush Site Audit Tool. Site Audit in 2020 is an important part of on-site optimization. SEMrush provides easy way to check your site health with easy tools. Find the common issues boggling your site and fix the important ones.
.

Health score is an important feature of SEMrush tool. SEO of your site can be improved by finding pages with errors, warnings and issues. Fix hreflang mistakes so that different language versions of your site are visible in search engines.
You can find the most serious issues that are causing a “negative mark” on your technical SEO. Fix them and re-audit your site. If your errors, warnings and notices are fixed, they will be available under “comparable” report.
Several other features like security, duplicate content, 404, 503 error codes, broken links, mixed content issues, missing h1 titles, sitemap errors, blocked external resources and many other technical factors can be checked using this tool.
In this post we are going to see the SEMrush site audit tool features and its influence in correcting the mistakes of your site.
Related Topics:
SEMrush Review – What you can do with Display Advertising
Keyword Research Using SEMrush – 3 Intuitive Ways To Improve On-Page SEO
Keyword Analysis using SEMrush, GA and GKP
SEMrush Site Audit settings
1. Domain and limit of pages
You can set the crawl scope which includes the subdomains. The number of checked pages per audit also can be limited. The crawl source like website, sitemaps on site, enter sitemap url, URLs from file can be set.
2. Crawler settings (optional)
The user agent for crawling the site like – SEMrushBot-Desktop, SEMrushBot-Mobile, GoogleBot-Desktop, GoogleBot-Mobile can be set. The crawl delay settings which include minimum delay between pages, or set in robots.txt, 1 URL per 2secs can also be set here.
3. Allow/disallow URLs (optional)
You can allow certain pages or folders to be crawled. You can skip subfolders of the domain if you like.
4. Remove URL parameters (optional)
Certain urls have parameters like /page/ or /tag/ which can be removed from the audit. If you have included any parameters in Google Search Console, then you can add them here.
5. Bypass website restrictions (optional)
You can skip certain site restrictions like bypass disallow in robots.txt and by robots meta tag can be done here. Even though you might not have allowed crawling in robots.txt, that restriction will be bypassed here.
6. Schedule (optional)
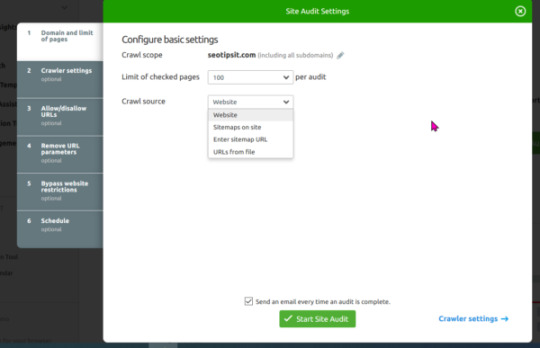
You can also set the audit schedule like a week, day, and once. This will let the SEMrush system audit your site on a specific day of every week.
SEMrush Site Audit Tool – Advantages
Tree of Site Structure graph
Correct broken image alt attributes.
Fix Duplicate content issues
Fix JS and CSS file errors
Validate Sitemap and Robots.txt file
Issues with HrefLang attributes and fix them
Find Broken Canonical URLs and fix them.
Number of pageviews generated for a particular URL over a month’s period.
Number of clicks required to reach a particular page from home pages.
Total number of issues detected on a page which includes errors, warnings and notices.
Whether HTTP status code of 200 is returned or not.
Amount of Text-HTML ratio and make adjustments.
Find Encryption Errors and fix them.
Number of HTTPS pages redirecting to HTTP pages.
Some of the above stats can be got from free Google tools like Analytics and Search Console. But what if you want to do complete audit of your site regarding health, HTTPS, title tags, canonical urls, duplicate content etc, you need to analyze the site errors, warnings and fixes.
Site Audit
SEMrush will give the health score of your site after SITE AUDIT.
This score is based on the amount of issues (for eg the number of internal links that contain nofollow attribute, number of posts having low text-HTML ratio, how many pages having more text within the title tags etc) found to the number of checks performed based on SEMrush rules.
You will also know the number of pages with issues out the total number of crawled pages.
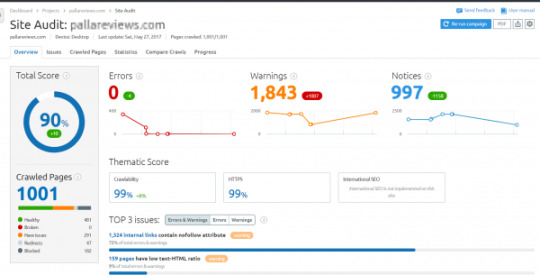
It will also show what is the percentage change in the health score from the previous audit done.
Out of the total crawled pages you can see pages which are –
Healthy
Broken
Have issues
Redirects
Blocked
The Site Audit report shows the total number of errors, warnings, and notices. It also shows whether the crawler type is desktop or mobile. The last updated audit date and number of crawled pages can also be seen here.
Top issues of the site also can be seen in the site audit overview.
These include the number of pages showing
– 4XX status code
– 5XX status code
– number of internal links that are broken
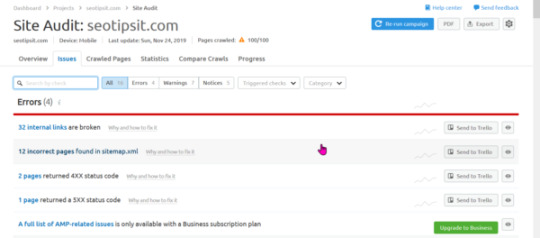
Issues Report
This report will show errors, warnings and notices.
In the Guru plan, the error report shows –
Number of internal links broken
Incorrect pages found in sitemap.xml
Pages that returned 4XX code and 5XX code
Articles without any title tags
Headings with duplicate title tags
Posts that have duplicate content issues
Pages that couldn’t be crawled
DNS resolution issues
Incorrect URL formats
List of internal images that are broken
Pages that have duplicate meta descriptions
Any format errors in robots.txt file
Format errors in sitemap.xml file
Articles that have www resolve issue
Pages that have no viewport tag
Posts that have too large HTML size
AMP pages that have no canonical tag
Issues with hreflang values
Hreflang conflicts with page source code
Issues with incorrect hreflang links
Problems with expiring or expired certificates
URLs using old security protocol
Articles having mixed content
Issues with redirect chains and loops
Broken canonical link errors and issues
Pages that have multiple canonical URLs
Articles that have a meta refresh tag
Issues with broken internal JS and CSS files
sitemap.xml files are too large
pages that have slow load speed
The Business plan will show further issues like –
full list of AMP related issues
A typical warning report will show –
How many HTTPs pages lead to HTTP.
Number of outgoing internal links that contain nofollow attribute
Pages that have duplicate H1 and title tags
Content that have too much text within the title tags
Articles that have low text-HTML ratio
Number of external links that are broken
Pages that have low word count
Number of external images that are broken
Pages that don’t have enough text within title tags
Titles that don’t have H1 heading
Content that don’t have meta descriptions
Pages that have too many on-page links
Temporary redirects
Images that don’t have alt attributes
Pages that have too many parameters in the URLs
HTML pages that contain frames
Web Pages with flash
Number of uncompressed pages
Issues with unminified JS and CSS files
The Notices report will show –
Resources that are formatted as page link
URLs with a permanent redirect
Outgoing external links that contain nofollow attribute
Pages that are blocked from crawling
Pages that have only one incoming internal link
Subdomains that don’t support HSTS
Issues with blocked external resources in robots.txt
Issues with broken external JS and CSS files
Pages that need more than 3 clicks to be reached
Crawled Pages
This will show the Internal LinkRank (ILR). It measures the link juice flow between your website’s pages using a 100 point scale. If a page is linked from high authority pages of your site, than the LinkRank will be high.
This can also be seen in the Search Console report. But it doesn’t give any score.
Statistics
The following are the features of this audit report.
Markup
Crawl Depth
HTTP Status Code
Canonicalization
AMP Links
Sitemap vs Crawled Pages
Incoming Internal Links
HrefLang Usage
Compare Crawls
In this report, you can see the difference between any two audit reports. It will indicate the fixed and new issues. The report shows that number of pages crawled, overall score, total issues, total errors, total warnings and total notices.
Errors
Typical errors like – 5xx, 4xx, duplicate content, duplicate title tags, DNS resolution issue, large HTML page size, missing canonical tags in AMP pages, non-secure pages, certificate expiration before and after the audit.
Warnings
Content that has warnings before and after the audit. These include broken external links, broken external images, long title element, missing meta description, missing ALT attributes, low word count, existence of sitemap.xml, JS and CSS errors etc.
Notices
Comparison of notices feature report can be done. Multiple h1 tags, pages blocked from crawling, URLs with no HSTS support, orphaned sitemap pages, blocked external resources in robots.txt, page crawl depth with more than 3 clicks, permanent redirects etc.
Progress
In this report, we can see the historical chart for audits. You can also create graphical chart based on pages crawled, total issues, total warnings, total errors, total notices, overall score. The legend of the chart can be based on different errors, warnings and notices.
Conclusion
The above reports are helpful to decide whether your site is SEO friendly or not. Once you fix the critical site errors, you can check the progress of your SEO audit. If your health score increases, it means that the changes you make have taken effect.
This is the first step in on-page optimization of your site. You still have to build links, write relevant content, improve domain and page rating, get conversions and clicks. SEMrush site audit tool will give you the loop holes of your blog. To optimize your site for search engine you need to track the progress of your changes.
This can be done by comparison with previous audits. If you have made any fixes, your site should show improvement in ranking and traffic. The main advantage with this site audit tool, is that you can see all the URL reports at one place.
Instead of dwelling into each page for different errors, you can get an overview of all the issues, warnings and necessary changes required. A broad picture of actionable items that needs to be updated, edited or changed can be seen at one place.
Finally, an in-depth audit of your site will give you clear understanding of the drawbacks. A good health score indicates that you have made the right changes to your site.
So in order to sign up please click here.
0 notes
Text
What is Blazor and what is Razor Components?
I've blogged a little about Blazor, showing examples like Compiling C# to WASM with Mono and Blazor then Debugging .NET Source with Remote Debugging in Chrome DevTools as well as very early on asking questions like .NET and WebAssembly - Is this the future of the front-end?
Let's back up and level-set.
What is Blazor?
Blazor is a single-page app framework for building interactive client-side Web apps with .NET. Blazor uses open web standards without plugins or code transpilation. Blazor works in all modern web browsers, including mobile browsers.
You write C# in case of JavaScript, and you can use most of the .NET ecosystem of open source libraries. For the most part, if it's .NET Standard, it'll run in the browser. (Of course if you called a Windows API or a Linux specific API and it didn't exist in the client-side browser S world, it's not gonna work, but you get the idea).
The .NET code runs inside the context of WebAssembly. You're running "a .NET" inside your browser on the client-side with no plugins, no Silverlight, Java, Flash, just open web standards.
WebAssembly is a compact bytecode format optimized for fast download and maximum execution speed.
Here's a great diagram from the Blazor docs.
Here's where it could get a little confusing. Blazor is the client-side hosting model for Razor Components. I can write Razor Components. I can host them on the server or host them on the client with Blazor.
You may have written Razor in the past in .cshtml files, or more recently in .razor files. You can create and share components using Razor - which is a mix of standard C# and standard HTML, and you can host these Razor Components on either the client or the server.
In this diagram from the docs you can see that the Razor Components are running on the Server and SignalR (over Web Sockets, etc) is remoting them and updating the DOM on the client. This doesn't require Web Assembly on the client, the .NET code runs in the .NET Core CLR (Common Language Runtime) and has full compatibility - you can do anything you'd like as you are not longer limited by the browser's sandbox.
Per the docs:
Razor Components decouples component rendering logic from how UI updates are applied. ASP.NET Core Razor Components in .NET Core 3.0 adds support for hosting Razor Components on the server in an ASP.NET Core app. UI updates are handled over a SignalR connection.
Here's the canonical "click a button update some HTML" example.
@page "/counter"
<h1>Counter</h1>
<p>Current count: @currentCount</p>
<button class="btn btn-primary" onclick="@IncrementCount">Click me</button>
@functions {
int currentCount = 0;
void IncrementCount()
{
currentCount++;
}
}
You can see this running entirely in the browser, with the C# .NET code running on the client side. .NET DLLs (assemblies) are downloaded and executed by the CLR that's been compiled into WASM and running entirely in the context of the browser.
Note also that I'm stopped at a BREAKPOINT in C# code, except the code is running in the browser and mapped back into JS/WASM world.
But if I host my app on the server as hosted Razor Components, the C# code runs entirely on the Server-side and the client-side DOM is updated over a SignalR link. Here I've clicked the button on the client side and hit the breakpoint on the server-side in Visual Studio. No there's no POST and no POST-back. This isn't WebForms - It's Razor Components. It's a SPA app written in C#, not JavaScript, and I can change the locations of the running logic, while the UI remains always standard HTML and CSS.
Looking at how Razor Components and now Phoenix LiveView are offering a new way to manage JavaScript-free stateful server-rendered apps has me realizing it’s the best parts of WebForms where the postback is now a persistent websockets tunnel to the backend and only diffs are sent
— Scott Hanselman (@shanselman) March 16, 2019
It's a pretty exciting time on the open web. There's a lot of great work happening in this space and I'm very interesting to see how frameworks like Razor Components/Blazor and Phoenix LiveView change (or don't) how we write apps for the web.
Sponsor: Manage GitHub Pull Requests right from the IDE with the latest JetBrains Rider. An integrated performance profiler on Windows comes to the rescue as well.
© 2018 Scott Hanselman. All rights reserved.


0 notes
Text
New Post has been published on Themesparadise
New Post has been published on https://themesparadise.com/onemall-multipurpose-ecommerce-marketplace-wordpress-theme-mobile-layouts-included/
OneMall - Multipurpose eCommerce & MarketPlace WordPress Theme (Mobile Layouts Included)


OneMall – The Modern & Best WooCommerce Theme with Mobile Layouts for your Multi-Vendors WordPress Site!
NEW FEATURED Added in Latest version 1.3.0 updated on Feb 21, 2018 – See Changelogs

OneMall is a clean, mordern and multi-functional eCommerce & MarketPlace WordPress theme.
With a focus on multi-purpose marketplace sites, it brings you with various cutting-edge features including multi-home page designs, visual page builder, RTL support, responsive layout, mobile layouts, unlimited colors and revolution slider.
In addition, you can create an ideal multivendors by many other amazing features like Ajax Cart/Wishlist/Compare, QuickView Lightbox, Ajax Quick Search, Product Image Zoom/Gallery, Featured Video Thumbnail for Product, Variation Color Swatch and Image for WooCommerce and many other ones.
Especially, with One-Click-Installation, it enables you to easily install your site in a few clicks. Let’s discover amazing features of OneMall now!

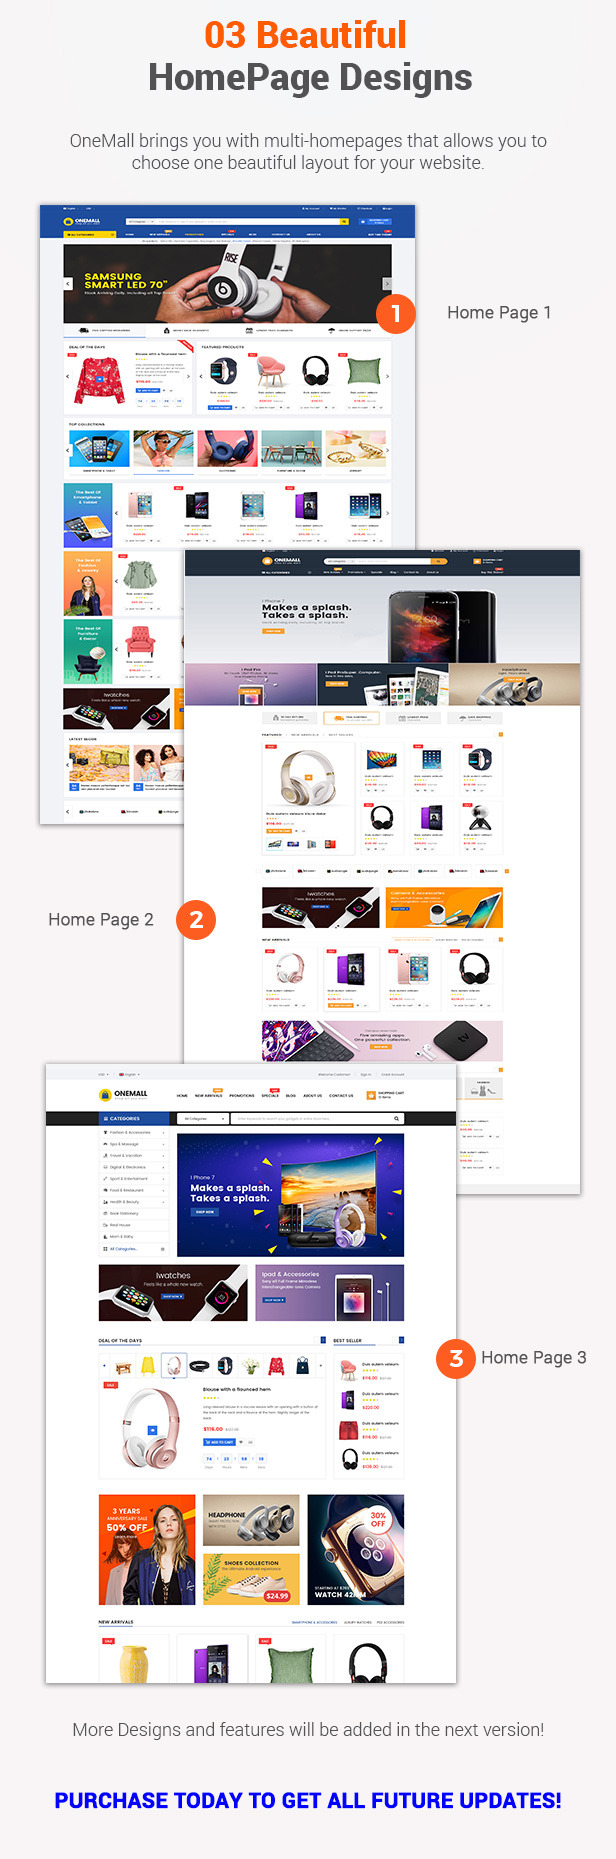
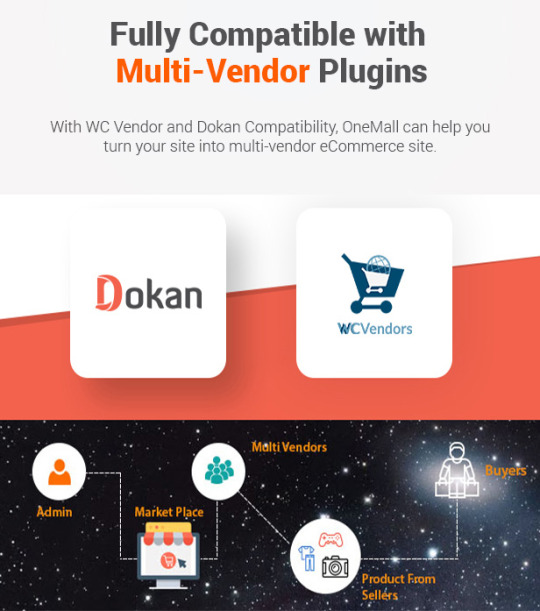


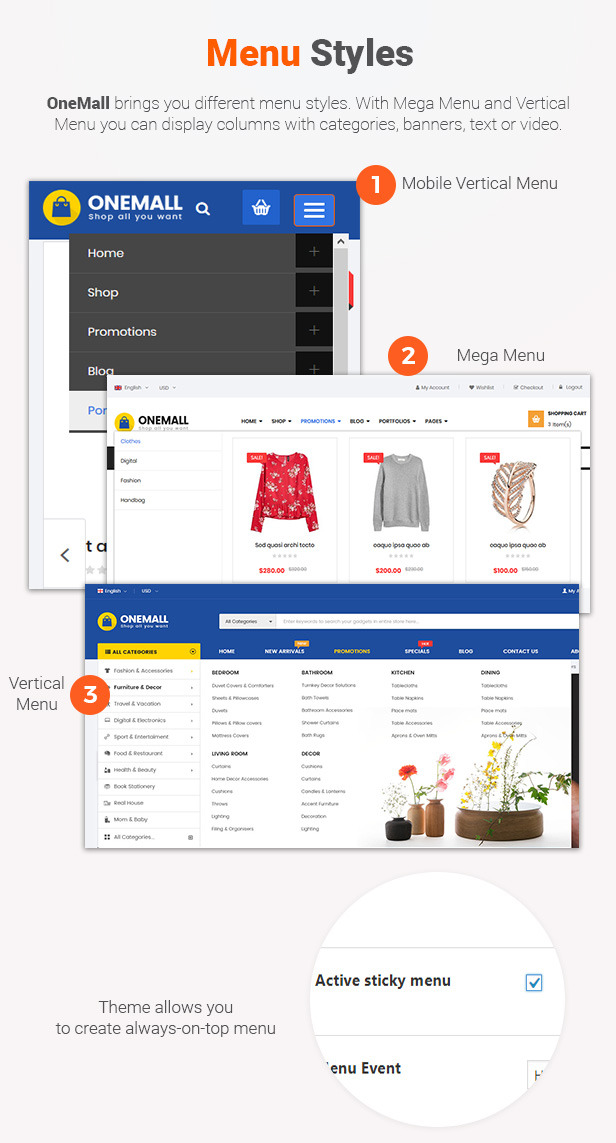

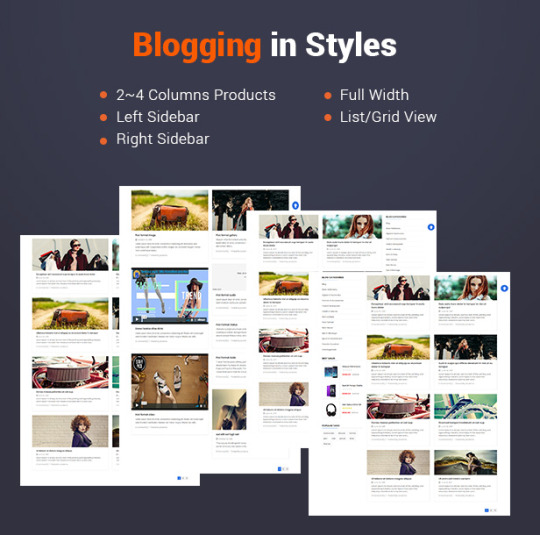
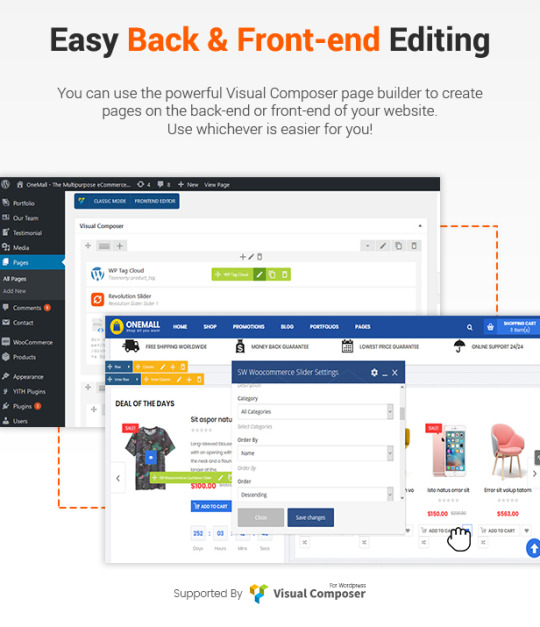
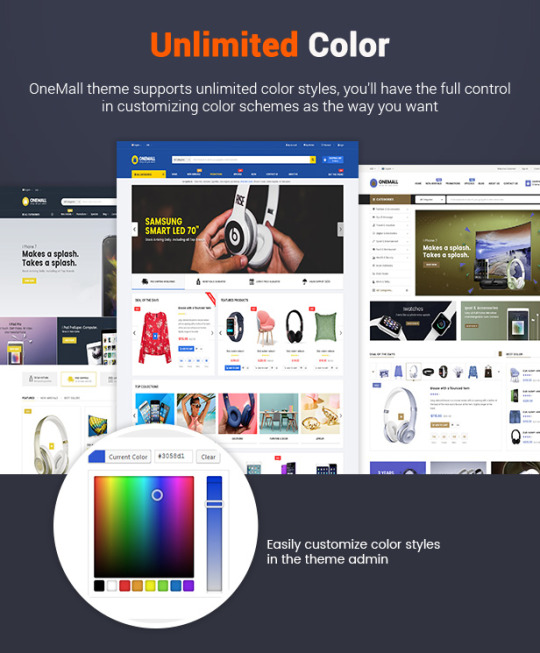
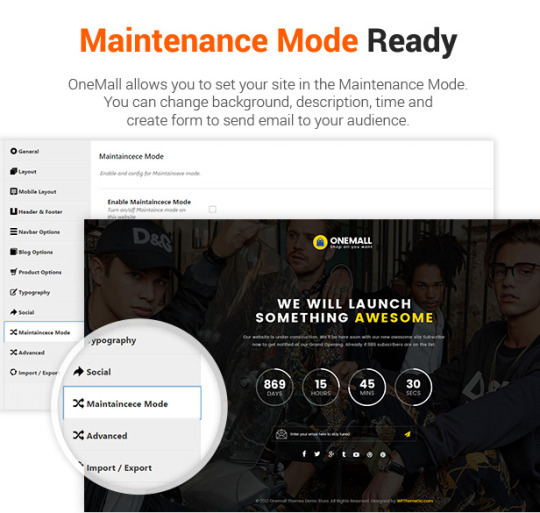
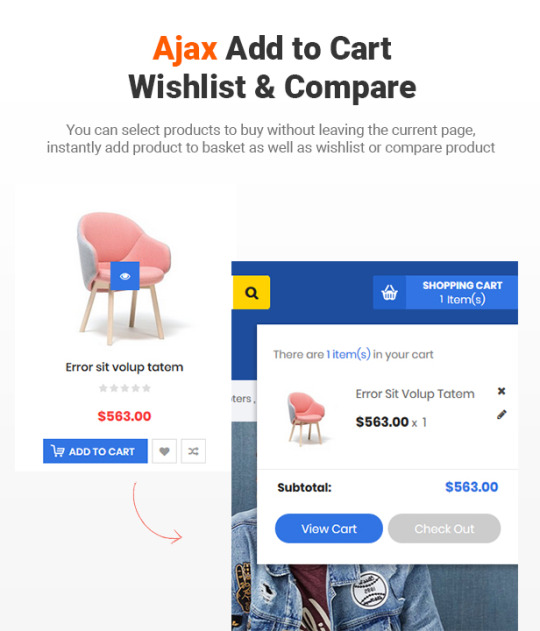
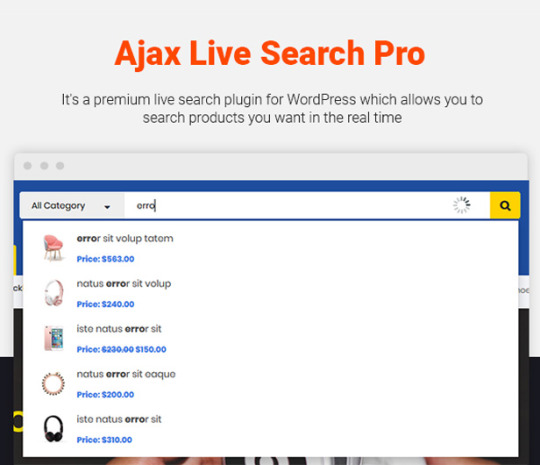
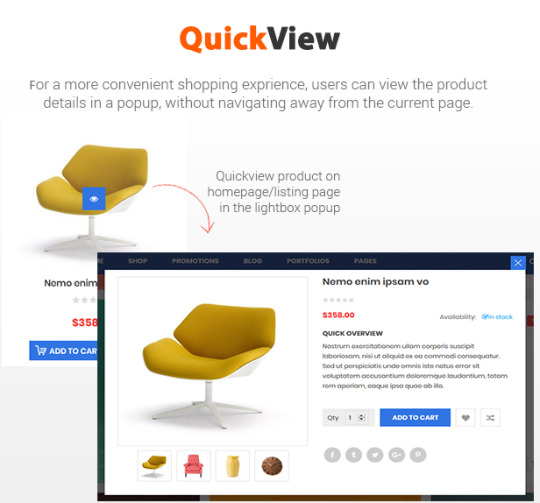


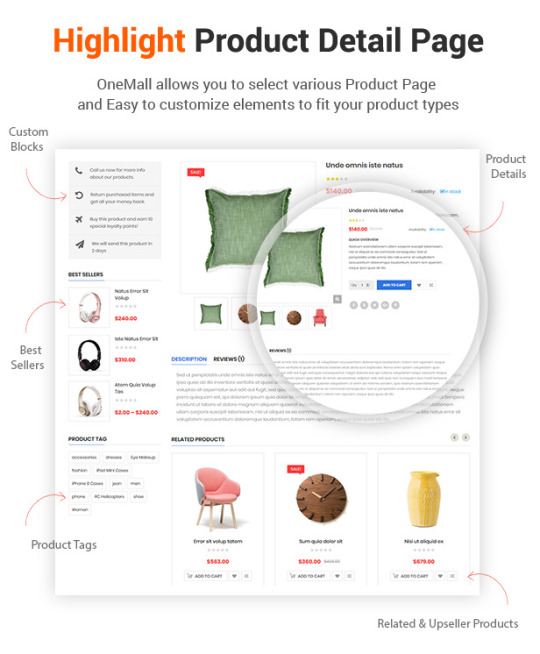
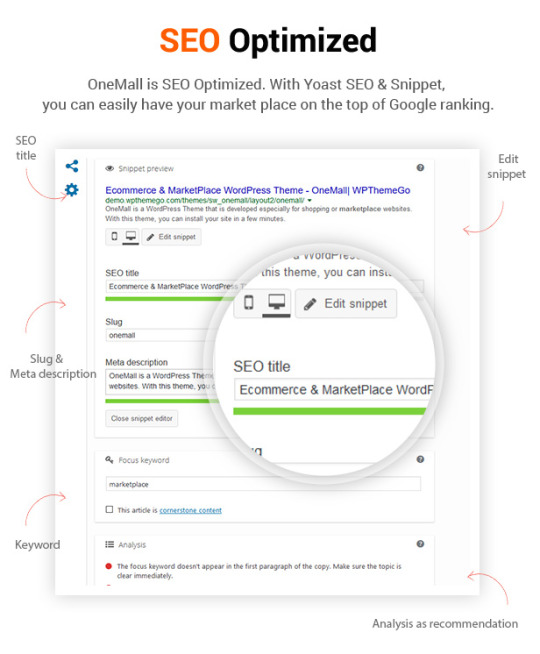

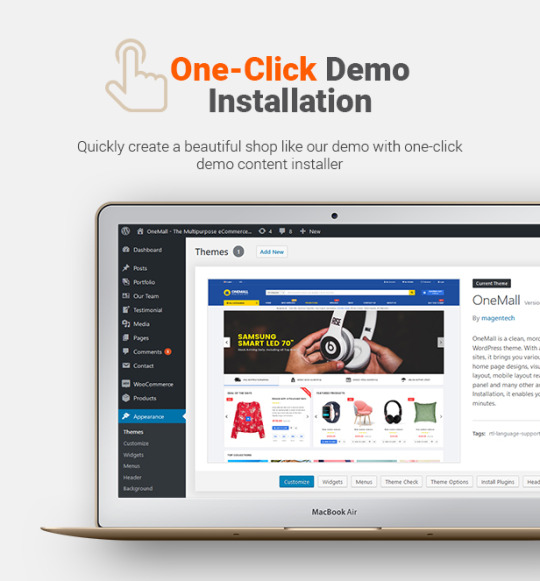


Core Features:
Clean & Valid Code
One-Click to Install & Import Demo
Fully Responsive
Mobile Friendly
Mobile-Specific Designs will be updated soon!
Child Theme Included
Free Lifetime Updates
Weekly/Monthly Updates
Flawless Setup
Highly Customizable
Multi-Homepage Option
Multi-Headers/Footers
Multi-Mobile Layouts
Lots of Prebuilt Pages
Multi-Product Type Support
RTL Layout Support
SEO Optimized
Support WordPress 4.8.x
Support WooCommerce 3.x
PSD Files ($12) Included
Full Feature List
Multi Homepage Layouts
Compatible with WordPress 4.9.x
WooCommerce 3.3.x Ready!
Multi-Mobile Layouts Ready!
Revolution Slider 5.4.x Ready
Visual Composer 5.4.x (advanced page builder) Ready
MailChimp For WordPress
One Click Demo Import – Easiest and fastest way to build your site like demo
Child Theme Included
Compare & Wishlist support
Ajax Live Search Pro
Variation swatch and image for WooCommerce products
Featured Video for Product Gallery
Different Header & Footer Styles
Various Shortcodes – Get creative with unlimited combinations of easy-to-use shortcodes and quickly create any types of page you like.
Responsive WordPress Theme
Google Fonts Included
Fully integrated with Font Awesome Icon
Built in with HTML5, CSS3 & LESS
Contact Form 7 Ready
Easy Customization
Typography – Highly customizable typography settings
Support Menu with Mega Menu, Vertical Menu and Dropdown Style
Support Primary Menu & Vertical Menu location, Sidebar Widgets
SEO Optimized with Yoast SEO Ready!
Blog Layout Options:
Left Sidebar with Grid view (2-4 columns)
Right Sidebar with Grid view (2-4 columns)
Left Sidebar with List view
Right Sidebar with List view
Post Format Types:
Post Format Image
Post Format Audio
Post Format Gallery
Post Format Video
Multiple Portfolio Pages: Portfolio Masonry, Portfolio 2-4 columns
Translation – WPML & Loco Translate compatible and every line of your content can be translated
RTL Support
Support to Add Custom CSS/JS
Cross Browser Compatible – It works fine under modern and major browsers (FireFox, Safari, Chrome, IE10+)
Download PSD Files Worth $12
Free Lifetime Updates
Premium Plugins/Widgets Included For FREE
Revolution Slider Allows users to add images, video, text and select slider styles.
Visual Composer: This is advanced page builder which allows users to drag and drop elements to create page/post with ease.
SW Top Widget: Support 4 features: Search, Category Search, Login và Minicart
WooCommerce Currency Converter: Allow users to convert currency types.
SW Ajax WooCommerce Search: Ajax Live Search products in a real time.
SW WooCommerce Categories Slider: Show list of selected categories
SW WooCommerce Countdown Slider: Show discount products with time setting
SW Best Sale : Show best-selling products in the Slider
SW WooCommerce Tab Slider: Display products on tabs of slider based on criteria: Lastest product, Best-selling product, featured product và top rating product.
SW Featured Product: Displayed Featured Products in the Slider
SW Responsive Post Type: Display posts in the Slider
SW Brand: Display brands in the Slider
MailChimp: Colect mail list, manage and send email.
SW WooCommerce Tab Categories Slider: Allow to show products of category in the Tab.
SW WooCommerce Slider: Show products of categories based on product’s criteria
Instagram Slider: Display 12 latest images from a public Instagram account and 18 images by using hashtag
Ya Tweeter Slider: Display latest tweets from a public Twitter account
WHAT ARE INCLUDED?
Theme Package
Use this package to install to your current site
PSD Sources
Layered and Well-Organized PSD design themes
Detailed Documentation
Provide all detailed steps to configure theme
Change Log
------------ VERSION - 1.4.0: Released on Feb-12-2018 ------------ [+] Update WooCommerece 3.3.1 [+] New Feature: Update Countdown deal in Listing product and single product [+] New Feature: Update feature video in single product [+] New Feature: Update login ajax in poup login [+] New Feature: Update social login [+] New Feature: Update option allow config number of column for sub-categories in listing product [+] New Feature: Update 3 style for single product [+] New Feature: Update option allow to config the position of product thumbnail image in single product [+] New Feature: Update option allow to config sidebar layout for single product
------------ VERSION - 1.3.0: Released on Jan-15-2018 ------------ [+] Update Option show 5/6 columns for shop page (tip: http://prntscr.com/i0iwps) [+] Update Option show product brand at product page (tip: http://prntscr.com/i0ix6k) [+] Update Social Login [+] Update WooCommerce 3.2.6 [+] Updte Visual Composer 5.4.5 [+] Update SW Ajax WooCommerce Search 1.1.3 [#] Fix Bug background color of header style 3 [#] Fix Bug about display in page My Account
------------ VERSION - 1.2.2: Released on Nov-17-2017 ------------ [#] Update WordPress 4.9 [#] Update Visual Composer 5.4.4 [#] Update Revolution Slider 5.4.6.3.1 [#] Bug Fix: Fix bug mobile layout not working
------------ VERSION - 1.2.1: Released on Nov-01-2017 ------------ [#] Update WordPress 4.8.2 [#] Update Visual Composer 5.4.2 [#] Update WooCommerce 3.2.x [#] Update Revolution Slider 5.4.6.2
------------ VERSION - 1.2.0: Released on Oct-06-2017 ------------ [+] Update: 02 Mobile Layouts [+] Improve One Click Install for Demo 2 and 3 [+] Update Revolution Slider 5.4.6.1 [#] Bug Fix: Fix bug Uncheck checkbox in Page Metabox
------------ VERSION - 1.1.0: Released on Sep-28-2017 ------------ [+] Update: 02 new Home Page Designs
------------ VERSION - 1.0.0: Released on Sep-21-2017 ------------ [+] Initial Release
Check Out Popular WordPress Themes:
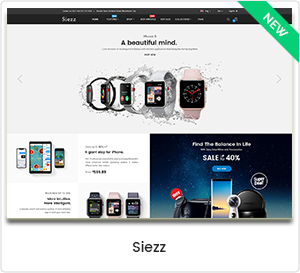


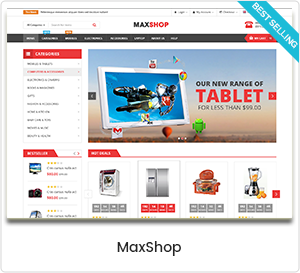


Purchase Now
0 notes
Text
How To Build A Blog With Next And MDX
About The Author
Ibrahima Ndaw is a Full-stack developer and blogger who loves JavaScript and also dabbles in UI/UX design.
More about
Ibrahima
…
In this guide, we will be looking at Next.js, a popular React framework that offers a great developer experience and ships with all of the features you need for production. We will also build a blog, step by step, using Next.js and MDX. Finally, we’ll cover why you would opt for Next.js instead of “vanilla” React and alternatives such as Gatsby.
Next.js is a React framework that enables you to build static and dynamic apps quickly. It is production-ready and supports server-side rendering and static site generation out of the box, making Next.js apps fast and SEO Company-friendly.
In this tutorial, I will first explain what exactly Next.js is and why you’d use it instead of Create React App or Gatsby. Then, I’ll show you how to build a blog on which you can write and render posts using Next.js and MDX.
To get started, you’ll need some experience with React. Knowledge of Next.js would come handy but is not compulsory. This tutorial would benefit those who want to create a blog (personal or organizational) using Next.js or are still searching for what to use.
Let’s dive in.
What Is Next.js?
Next.js is a React framework created and maintained by Vercel. It’s built with React, Node.js, Babel, and Webpack. It is production-ready because it comes with a lot of great features that would usually be set up in a “vanilla” React app.
The Next.js framework can render apps on the server or export them statically. It doesn’t wait for the browser to load the JavaScript in order to show content, which makes Next.js apps SEO Company-friendly and blazing fast.
Why Use Next.js Over Create React App?
Create React App is a handy tool that offers a modern build setup with no configuration and without the hassle of having to set up Webpack, Babel, and so on or having to maintain their dependencies. It’s the recommended way to create React apps nowadays. It has a template for TypeScript and also comes with the React Testing Library.
However, if you want to build a multi-page app, then you’ll need to install an extra library, as if you were rendering a React app on the server. The extra setup could be a problem, and any packages installed could increase the final bundle size of your app.
This is exactly the problem that Next.js is intended to solve. It offers the best developer experience, with all of the things you need for production. It comes with several cool features:
Static exporting (pre-rendering)
Next.js allows you to export your Next.js app at build time to static HTML that runs without a server. It is the recommended way to generate your website because it’s done at build time and not at each request.
Server-side rendering (pre-rendering)
It pre-renders pages to HTML on the server upon every request.
Automatic code splitting
Unlike React, Next.js splits code automatically and only loads the JavaScript needed, which makes the app fast.
File-system-based routing
Next.js uses the file system to enable routing in the app, meaning that every file under the pages directory will be treated automatically as a route.
Hot reloading of code
Next.js relies on React Fast Refresh to hot reload your code, offering a great developer experience.
Styling options
The Next.js framework has built-in support for Styled JSX, CSS modules, Sass, LESS, and more.
Next.js Versus Gatsby
Gatsby is a static site generator built on top of React and GraphQL. It is popular and has a huge ecosystem that provides themes, plugins, recipes, and so on.
Gatsby and Next.js websites are super-fast because they are both rendered either on the server or statically, meaning that the JavaScript code does not wait for the browser to load. Let’s compare them according to the developer experience.
Gatsby is easy to start with, especially if you already know React. However, Gatsby uses GraphQL to query local data and pages. Using Gatsby to build this simple blog might be overkill because GraphQL has a learning curve, and the querying and build time of static pages would be a bit longer. If you built this same blog twice, first with Gatsby and then with Next.js, the one built with Next.js would be much faster at build time because it uses regular JavaScript to query local data and pages.
I hope you take advantage of the power of the Next.js framework and see why it’s so much handier than some alternatives. It’s also a great choice if your website relies heavily on SEO Company because your app will be fast and easy for Google robots to crawl. That’s the reason why we will be using Next.js in this article to build a blog with the MDX library.
Let’s start by setting up a new Next.js app.
Setting Up
There are two ways to create a Next.js app. We can set up a new app manually or use Create Next App. We’ll go for the latter because it’s the recommended way, and it will set up everything automatically for us.
To start a new app, run the following in the command-line interface (CLI):
npx create-next-app
Once the project is initialized, let’s structure the Next.js app as follows:
src ├── components | ├── BlogPost.js | ├── Header.js | ├── HeadPost.js | ├── Layout.js | └── Post.js ├── pages | ├── blog | | ├── post-1 | | | └── index.mdx | | ├── post-2 | | | └── index.mdx | | └── post-3 | | └── index.mdx | ├── index.js | └── \_app.js ├── getAllPosts.js ├── next.config.js ├── package.json ├── README.md └── yarn.lock
As you can see, our project has a simple file structure. There are three things to note:
_app.js allows us to append some content to the App.js component in order to make it global.
getAllPosts.js helps us to retrieve the blog posts from the folder pages/blog. By the way, you can name the file whatever you want.
next.config.js is the configuration file for our Next.js app.
I will come back to each file later and explain what it does. For now, let’s see the MDX package.
Installing the MDX Library
MDX is a format that lets us seamlessly write JSX and import components into our Markdown files. It enables us to write regular Markdown and embed React components in our files as well.
To enable MDX in the app, we need to install the @mdx-js/loader library. To do so, let’s first navigate to the root of the project and then run this command in the CLI:
yarn add @mdx-js/loader
Or, if you’re using npm:
npm install @mdx-js/loader
Next, install @next/mdx, which is a library specific to Next.js. Run this command in the CLI:
yarn add @next/mdx
Or, for npm:
npm install @next/mdx
Great! We are done setting up. Let’s get our hands dirty and code something meaningful.
Configuring the next.config.js File
const withMDX = require("@next/mdx")({ extension: /\.mdx?$/ }); module.exports = withMDX({ pageExtensions: ["js", "jsx", "md", "mdx"] });
Earlier in this tutorial, I said that files under the pages folder would be treated as pages/routes by Next.js at build time. By default, Next.js will just pick files with .js or .jsx extensions. That’s why we need a config file, to add some customizations to the default behavior of Next.js.
The next.config.js file tells the framework that files with .md or .mdx extensions should also be treated as pages/routes at build time because the blog folder that contains the articles lives in the pages directory.
That being said, we can start fetching the blog posts in the next part.
Fetching Blog Posts
One of the reasons why building a blog with Next.js is easy and simple is that you do not need GraphQL or the like to fetch local posts. You can just use regular JavaScript to get the data.
In getAllPosts.js:
function importAll(r) { return r.keys().map((fileName) => ({ link: fileName.substr(1).replace(/\/index\.mdx$/, ""), module: r(fileName) })); } export const posts = importAll( require.context("./pages/blog/", true, /\.mdx$/) );
This file can be intimidating at first. It’s a function that imports all MDX files from the folder pages/blog, and for each post it returns an object with the path of the file, without the extension (/post-1), and the data of the blog post.
With that in place, we can now build the components in order to style and show data in our Next.js app.
Building The Components
In components/Layout.js:
import Head from "next/head"; import Header from "./Header"; export default function Layout({ children, pageTitle, description }) { return ( <> <Head> <meta name="viewport" content="width=device-width, initial-scale=1" /> <meta charSet="utf-8" /> <meta name="Description" content={description}></meta> <title>{pageTitle}</title> </Head> <main> <Header /> <div className="content">{children}</div> </main> </> ); }
Here, we have the Layout component, which we’ll be using as a wrapper for the blog. It receives the meta data to show in the head of the page and the component to be displayed.
In components/Post.js:
import Link from 'next/link' import { HeadPost } from './HeadPost' export const Post = ({ post }) => { const { link, module: { meta }, } = post return ( <article> <HeadPost meta={meta} /> <Link href={'/blog' + link}> <a>Read more →</a> </Link> </article> ) }
This component is responsible for displaying a preview of a blog post. It receives the post object to show as props. Next, we use destructuring to pull out the link of the post and the meta to show from the object. With that, we can now pass the data to the components and handle the routing with the Link component.
In components/BlogPost.js:
import { HeadPost } from './HeadPost' export default function BlogPost({ children, meta}) { return ( <> <HeadPost meta={meta} isBlogPost /> <article>{children}</article> </> ) }
The BlogPost component helps us to render a single article. It receives the post to show and its meta object.
So far, we have covered a lot — but we have no articles to show. Let’s fix that in the next section.
Writing Posts With MDX
import BlogPost from '../../../components/BlogPost' export const meta = { title: 'Introduction to Next.js', description: 'Getting started with the Next framework', date: 'Aug 04, 2020', readTime: 2 } export default ({ children }) => <BlogPost meta={meta}>{children}</BlogPost>; ## My Headline Lorem ipsum dolor sit amet, consectetur adipiscing elit. Quisque maximus pellentesque dolor non egestas. In sed tristique elit. Cras vehicula, nisl vel ultricies gravida, augue nibh laoreet arcu, et tincidunt augue dui non elit. Vestibulum semper posuere magna, quis molestie mauris faucibus ut.
As you can see, we import the BlogPost component, which receives the meta and the body of the post.
The parameter children is the body of the blog post or, to be precise, everything that comes after the meta object. It is the function responsible for rendering the post.
With that change, we can move to the index.js file and display the posts on the home page.
Displaying Posts
import { Post } from "../components/Post"; import { posts } from "../getAllPosts"; export default function IndexPage() { return ( <> {posts.map((post) => ( <Post key={post.link} post={post} /> ))} </> ); }
Here, we start by importing the Post component and the posts fetched from the blog folder. Next, we loop through the array of articles, and for each post, we use the Post component to display it. That being done, we are now able to fetch the posts and display them on the page.
We are almost done. However, the Layout component is still not being used. We can use it here and wrap our components with it. But that won’t affect the articles pages. That’s where the _app.js file comes into play. Let’s use that in the next section.
Using the _app.js File
Here, the underscore symbol (_) is really important. If you omit it, Next.js will treat the file as a page/route.
import Layout from "../components/Layout"; export default function App({ Component, pageProps }) { return ( <Layout pageTitle="Blog" description="My Personal Blog"> <Component {...pageProps} /> </Layout> ); }
Next.js uses the App component to initialize pages. The purpose of this file is to override it and add some global styles to the project. If you have styles or data that need to be shared across the project, put them here.
We can now browse the project folder in the CLI and run the following command to preview the blog in the browser:
yarn dev
Or, in npm:
npm run dev
If you open http://localhost:3000 in the browser, you will be able to see this:
Great! Our blog looks good. We are done building the blog app with Next.js and MDX.
Conclusion
In this tutorial, we walked through Next.js by building a blog using the MDX library. The Next.js framework is a handy tool that makes React apps SEO Company-friendly and fast. It can be used to build static, dynamic JAMstack websites in no time, because it is production-ready and comes with some nice features. Next.js is used widely by big companies, and its performance keeps improving. It’s definitely something to check out for your next project.
You can preview the finished project on CodeSandbox.
Thanks for reading!
Resources
These useful resources will take you beyond the scope of this tutorial.
(ks, ra, al, il)
Website Design & SEO Delray Beach by DBL07.co
Delray Beach SEO
source http://www.scpie.org/how-to-build-a-blog-with-next-and-mdx/
source https://scpie.tumblr.com/post/628812814141784064
0 notes
Text
How To Build A Blog With Next And MDX
About The Author
Ibrahima Ndaw is a Full-stack developer and blogger who loves JavaScript and also dabbles in UI/UX design.
More about
Ibrahima
…
In this guide, we will be looking at Next.js, a popular React framework that offers a great developer experience and ships with all of the features you need for production. We will also build a blog, step by step, using Next.js and MDX. Finally, we’ll cover why you would opt for Next.js instead of “vanilla” React and alternatives such as Gatsby.
Next.js is a React framework that enables you to build static and dynamic apps quickly. It is production-ready and supports server-side rendering and static site generation out of the box, making Next.js apps fast and SEO Company-friendly.
In this tutorial, I will first explain what exactly Next.js is and why you’d use it instead of Create React App or Gatsby. Then, I’ll show you how to build a blog on which you can write and render posts using Next.js and MDX.
To get started, you’ll need some experience with React. Knowledge of Next.js would come handy but is not compulsory. This tutorial would benefit those who want to create a blog (personal or organizational) using Next.js or are still searching for what to use.
Let’s dive in.
What Is Next.js?
Next.js is a React framework created and maintained by Vercel. It’s built with React, Node.js, Babel, and Webpack. It is production-ready because it comes with a lot of great features that would usually be set up in a “vanilla” React app.
The Next.js framework can render apps on the server or export them statically. It doesn’t wait for the browser to load the JavaScript in order to show content, which makes Next.js apps SEO Company-friendly and blazing fast.
Why Use Next.js Over Create React App?
Create React App is a handy tool that offers a modern build setup with no configuration and without the hassle of having to set up Webpack, Babel, and so on or having to maintain their dependencies. It’s the recommended way to create React apps nowadays. It has a template for TypeScript and also comes with the React Testing Library.
However, if you want to build a multi-page app, then you’ll need to install an extra library, as if you were rendering a React app on the server. The extra setup could be a problem, and any packages installed could increase the final bundle size of your app.
This is exactly the problem that Next.js is intended to solve. It offers the best developer experience, with all of the things you need for production. It comes with several cool features:
Static exporting (pre-rendering)
Next.js allows you to export your Next.js app at build time to static HTML that runs without a server. It is the recommended way to generate your website because it’s done at build time and not at each request.
Server-side rendering (pre-rendering)
It pre-renders pages to HTML on the server upon every request.
Automatic code splitting
Unlike React, Next.js splits code automatically and only loads the JavaScript needed, which makes the app fast.
File-system-based routing
Next.js uses the file system to enable routing in the app, meaning that every file under the pages directory will be treated automatically as a route.
Hot reloading of code
Next.js relies on React Fast Refresh to hot reload your code, offering a great developer experience.
Styling options
The Next.js framework has built-in support for Styled JSX, CSS modules, Sass, LESS, and more.
Next.js Versus Gatsby
Gatsby is a static site generator built on top of React and GraphQL. It is popular and has a huge ecosystem that provides themes, plugins, recipes, and so on.
Gatsby and Next.js websites are super-fast because they are both rendered either on the server or statically, meaning that the JavaScript code does not wait for the browser to load. Let’s compare them according to the developer experience.
Gatsby is easy to start with, especially if you already know React. However, Gatsby uses GraphQL to query local data and pages. Using Gatsby to build this simple blog might be overkill because GraphQL has a learning curve, and the querying and build time of static pages would be a bit longer. If you built this same blog twice, first with Gatsby and then with Next.js, the one built with Next.js would be much faster at build time because it uses regular JavaScript to query local data and pages.
I hope you take advantage of the power of the Next.js framework and see why it’s so much handier than some alternatives. It’s also a great choice if your website relies heavily on SEO Company because your app will be fast and easy for Google robots to crawl. That’s the reason why we will be using Next.js in this article to build a blog with the MDX library.
Let’s start by setting up a new Next.js app.
Setting Up
There are two ways to create a Next.js app. We can set up a new app manually or use Create Next App. We’ll go for the latter because it’s the recommended way, and it will set up everything automatically for us.
To start a new app, run the following in the command-line interface (CLI):
npx create-next-app
Once the project is initialized, let’s structure the Next.js app as follows:
src ├── components | ├── BlogPost.js | ├── Header.js | ├── HeadPost.js | ├── Layout.js | └── Post.js ├── pages | ├── blog | | ├── post-1 | | | └── index.mdx | | ├── post-2 | | | └── index.mdx | | └── post-3 | | └── index.mdx | ├── index.js | └── \_app.js ├── getAllPosts.js ├── next.config.js ├── package.json ├── README.md └── yarn.lock
As you can see, our project has a simple file structure. There are three things to note:
_app.js allows us to append some content to the App.js component in order to make it global.
getAllPosts.js helps us to retrieve the blog posts from the folder pages/blog. By the way, you can name the file whatever you want.
next.config.js is the configuration file for our Next.js app.
I will come back to each file later and explain what it does. For now, let’s see the MDX package.
Installing the MDX Library
MDX is a format that lets us seamlessly write JSX and import components into our Markdown files. It enables us to write regular Markdown and embed React components in our files as well.
To enable MDX in the app, we need to install the @mdx-js/loader library. To do so, let’s first navigate to the root of the project and then run this command in the CLI:
yarn add @mdx-js/loader
Or, if you’re using npm:
npm install @mdx-js/loader
Next, install @next/mdx, which is a library specific to Next.js. Run this command in the CLI:
yarn add @next/mdx
Or, for npm:
npm install @next/mdx
Great! We are done setting up. Let’s get our hands dirty and code something meaningful.
Configuring the next.config.js File
const withMDX = require("@next/mdx")({ extension: /\.mdx?$/ }); module.exports = withMDX({ pageExtensions: ["js", "jsx", "md", "mdx"] });
Earlier in this tutorial, I said that files under the pages folder would be treated as pages/routes by Next.js at build time. By default, Next.js will just pick files with .js or .jsx extensions. That’s why we need a config file, to add some customizations to the default behavior of Next.js.
The next.config.js file tells the framework that files with .md or .mdx extensions should also be treated as pages/routes at build time because the blog folder that contains the articles lives in the pages directory.
That being said, we can start fetching the blog posts in the next part.
Fetching Blog Posts
One of the reasons why building a blog with Next.js is easy and simple is that you do not need GraphQL or the like to fetch local posts. You can just use regular JavaScript to get the data.
In getAllPosts.js:
function importAll(r) { return r.keys().map((fileName) => ({ link: fileName.substr(1).replace(/\/index\.mdx$/, ""), module: r(fileName) })); } export const posts = importAll( require.context("./pages/blog/", true, /\.mdx$/) );
This file can be intimidating at first. It’s a function that imports all MDX files from the folder pages/blog, and for each post it returns an object with the path of the file, without the extension (/post-1), and the data of the blog post.
With that in place, we can now build the components in order to style and show data in our Next.js app.
Building The Components
In components/Layout.js:
import Head from "next/head"; import Header from "./Header"; export default function Layout({ children, pageTitle, description }) { return ( <> <Head> <meta name="viewport" content="width=device-width, initial-scale=1" /> <meta charSet="utf-8" /> <meta name="Description" content={description}></meta> <title>{pageTitle}</title> </Head> <main> <Header /> <div className="content">{children}</div> </main> </> ); }
Here, we have the Layout component, which we’ll be using as a wrapper for the blog. It receives the meta data to show in the head of the page and the component to be displayed.
In components/Post.js:
import Link from 'next/link' import { HeadPost } from './HeadPost' export const Post = ({ post }) => { const { link, module: { meta }, } = post return ( <article> <HeadPost meta={meta} /> <Link href={'/blog' + link}> <a>Read more →</a> </Link> </article> ) }
This component is responsible for displaying a preview of a blog post. It receives the post object to show as props. Next, we use destructuring to pull out the link of the post and the meta to show from the object. With that, we can now pass the data to the components and handle the routing with the Link component.
In components/BlogPost.js:
import { HeadPost } from './HeadPost' export default function BlogPost({ children, meta}) { return ( <> <HeadPost meta={meta} isBlogPost /> <article>{children}</article> </> ) }
The BlogPost component helps us to render a single article. It receives the post to show and its meta object.
So far, we have covered a lot — but we have no articles to show. Let’s fix that in the next section.
Writing Posts With MDX
import BlogPost from '../../../components/BlogPost' export const meta = { title: 'Introduction to Next.js', description: 'Getting started with the Next framework', date: 'Aug 04, 2020', readTime: 2 } export default ({ children }) => <BlogPost meta={meta}>{children}</BlogPost>; ## My Headline Lorem ipsum dolor sit amet, consectetur adipiscing elit. Quisque maximus pellentesque dolor non egestas. In sed tristique elit. Cras vehicula, nisl vel ultricies gravida, augue nibh laoreet arcu, et tincidunt augue dui non elit. Vestibulum semper posuere magna, quis molestie mauris faucibus ut.
As you can see, we import the BlogPost component, which receives the meta and the body of the post.
The parameter children is the body of the blog post or, to be precise, everything that comes after the meta object. It is the function responsible for rendering the post.
With that change, we can move to the index.js file and display the posts on the home page.
Displaying Posts
import { Post } from "../components/Post"; import { posts } from "../getAllPosts"; export default function IndexPage() { return ( <> {posts.map((post) => ( <Post key={post.link} post={post} /> ))} </> ); }
Here, we start by importing the Post component and the posts fetched from the blog folder. Next, we loop through the array of articles, and for each post, we use the Post component to display it. That being done, we are now able to fetch the posts and display them on the page.
We are almost done. However, the Layout component is still not being used. We can use it here and wrap our components with it. But that won’t affect the articles pages. That’s where the _app.js file comes into play. Let’s use that in the next section.
Using the _app.js File
Here, the underscore symbol (_) is really important. If you omit it, Next.js will treat the file as a page/route.
import Layout from "../components/Layout"; export default function App({ Component, pageProps }) { return ( <Layout pageTitle="Blog" description="My Personal Blog"> <Component {...pageProps} /> </Layout> ); }
Next.js uses the App component to initialize pages. The purpose of this file is to override it and add some global styles to the project. If you have styles or data that need to be shared across the project, put them here.
We can now browse the project folder in the CLI and run the following command to preview the blog in the browser:
yarn dev
Or, in npm:
npm run dev
If you open http://localhost:3000 in the browser, you will be able to see this:
Great! Our blog looks good. We are done building the blog app with Next.js and MDX.
Conclusion
In this tutorial, we walked through Next.js by building a blog using the MDX library. The Next.js framework is a handy tool that makes React apps SEO Company-friendly and fast. It can be used to build static, dynamic JAMstack websites in no time, because it is production-ready and comes with some nice features. Next.js is used widely by big companies, and its performance keeps improving. It’s definitely something to check out for your next project.
You can preview the finished project on CodeSandbox.
Thanks for reading!
Resources
These useful resources will take you beyond the scope of this tutorial.
(ks, ra, al, il)
Website Design & SEO Delray Beach by DBL07.co
Delray Beach SEO
source http://www.scpie.org/how-to-build-a-blog-with-next-and-mdx/
0 notes
Text
How To Build A Blog With Next And MDX
About The Author
Ibrahima Ndaw is a Full-stack developer and blogger who loves JavaScript and also dabbles in UI/UX design.
More about
Ibrahima
…
In this guide, we will be looking at Next.js, a popular React framework that offers a great developer experience and ships with all of the features you need for production. We will also build a blog, step by step, using Next.js and MDX. Finally, we’ll cover why you would opt for Next.js instead of “vanilla” React and alternatives such as Gatsby.
Next.js is a React framework that enables you to build static and dynamic apps quickly. It is production-ready and supports server-side rendering and static site generation out of the box, making Next.js apps fast and SEO Company-friendly.
In this tutorial, I will first explain what exactly Next.js is and why you’d use it instead of Create React App or Gatsby. Then, I’ll show you how to build a blog on which you can write and render posts using Next.js and MDX.
To get started, you’ll need some experience with React. Knowledge of Next.js would come handy but is not compulsory. This tutorial would benefit those who want to create a blog (personal or organizational) using Next.js or are still searching for what to use.
Let’s dive in.
What Is Next.js?
Next.js is a React framework created and maintained by Vercel. It’s built with React, Node.js, Babel, and Webpack. It is production-ready because it comes with a lot of great features that would usually be set up in a “vanilla” React app.
The Next.js framework can render apps on the server or export them statically. It doesn’t wait for the browser to load the JavaScript in order to show content, which makes Next.js apps SEO Company-friendly and blazing fast.
Why Use Next.js Over Create React App?
Create React App is a handy tool that offers a modern build setup with no configuration and without the hassle of having to set up Webpack, Babel, and so on or having to maintain their dependencies. It’s the recommended way to create React apps nowadays. It has a template for TypeScript and also comes with the React Testing Library.
However, if you want to build a multi-page app, then you’ll need to install an extra library, as if you were rendering a React app on the server. The extra setup could be a problem, and any packages installed could increase the final bundle size of your app.
This is exactly the problem that Next.js is intended to solve. It offers the best developer experience, with all of the things you need for production. It comes with several cool features:
Static exporting (pre-rendering)
Next.js allows you to export your Next.js app at build time to static HTML that runs without a server. It is the recommended way to generate your website because it’s done at build time and not at each request.
Server-side rendering (pre-rendering)
It pre-renders pages to HTML on the server upon every request.
Automatic code splitting
Unlike React, Next.js splits code automatically and only loads the JavaScript needed, which makes the app fast.
File-system-based routing
Next.js uses the file system to enable routing in the app, meaning that every file under the pages directory will be treated automatically as a route.
Hot reloading of code
Next.js relies on React Fast Refresh to hot reload your code, offering a great developer experience.
Styling options
The Next.js framework has built-in support for Styled JSX, CSS modules, Sass, LESS, and more.
Next.js Versus Gatsby
Gatsby is a static site generator built on top of React and GraphQL. It is popular and has a huge ecosystem that provides themes, plugins, recipes, and so on.
Gatsby and Next.js websites are super-fast because they are both rendered either on the server or statically, meaning that the JavaScript code does not wait for the browser to load. Let’s compare them according to the developer experience.
Gatsby is easy to start with, especially if you already know React. However, Gatsby uses GraphQL to query local data and pages. Using Gatsby to build this simple blog might be overkill because GraphQL has a learning curve, and the querying and build time of static pages would be a bit longer. If you built this same blog twice, first with Gatsby and then with Next.js, the one built with Next.js would be much faster at build time because it uses regular JavaScript to query local data and pages.
I hope you take advantage of the power of the Next.js framework and see why it’s so much handier than some alternatives. It’s also a great choice if your website relies heavily on SEO Company because your app will be fast and easy for Google robots to crawl. That’s the reason why we will be using Next.js in this article to build a blog with the MDX library.
Let’s start by setting up a new Next.js app.
Setting Up
There are two ways to create a Next.js app. We can set up a new app manually or use Create Next App. We’ll go for the latter because it’s the recommended way, and it will set up everything automatically for us.
To start a new app, run the following in the command-line interface (CLI):
npx create-next-app
Once the project is initialized, let’s structure the Next.js app as follows:
src
├── components
| ├── BlogPost.js
| ├── Header.js
| ├── HeadPost.js
| ├── Layout.js
| └── Post.js
├── pages
| ├── blog
| | ├── post-1
| | | └── index.mdx
| | ├── post-2
| | | └── index.mdx
| | └── post-3
| | └── index.mdx
| ├── index.js
| └── \_app.js
├── getAllPosts.js
├── next.config.js
├── package.json
├── README.md
└── yarn.lock
As you can see, our project has a simple file structure. There are three things to note:
_app.js allows us to append some content to the App.js component in order to make it global.
getAllPosts.js helps us to retrieve the blog posts from the folder pages/blog. By the way, you can name the file whatever you want.
next.config.js is the configuration file for our Next.js app.
I will come back to each file later and explain what it does. For now, let’s see the MDX package.
Installing the MDX Library
MDX is a format that lets us seamlessly write JSX and import components into our Markdown files. It enables us to write regular Markdown and embed React components in our files as well.
To enable MDX in the app, we need to install the @mdx-js/loader library. To do so, let’s first navigate to the root of the project and then run this command in the CLI:
yarn add @mdx-js/loader
Or, if you’re using npm:
npm install @mdx-js/loader
Next, install @next/mdx, which is a library specific to Next.js. Run this command in the CLI:
yarn add @next/mdx
Or, for npm:
npm install @next/mdx
Great! We are done setting up. Let’s get our hands dirty and code something meaningful.
Configuring the next.config.js File
const withMDX = require("@next/mdx")({ extension: /\.mdx?$/
}); module.exports = withMDX({ pageExtensions: ["js", "jsx", "md", "mdx"]
});
Earlier in this tutorial, I said that files under the pages folder would be treated as pages/routes by Next.js at build time. By default, Next.js will just pick files with .js or .jsx extensions. That’s why we need a config file, to add some customizations to the default behavior of Next.js.
The next.config.js file tells the framework that files with .md or .mdx extensions should also be treated as pages/routes at build time because the blog folder that contains the articles lives in the pages directory.
That being said, we can start fetching the blog posts in the next part.
Fetching Blog Posts
One of the reasons why building a blog with Next.js is easy and simple is that you do not need GraphQL or the like to fetch local posts. You can just use regular JavaScript to get the data.
In getAllPosts.js:
function importAll(r) { return r.keys().map((fileName) => ({ link: fileName.substr(1).replace(/\/index\.mdx$/, ""), module: r(fileName) }));
} export const posts = importAll( require.context("./pages/blog/", true, /\.mdx$/)
);
This file can be intimidating at first. It’s a function that imports all MDX files from the folder pages/blog, and for each post it returns an object with the path of the file, without the extension (/post-1), and the data of the blog post.
With that in place, we can now build the components in order to style and show data in our Next.js app.
Building The Components
In components/Layout.js:
import Head from "next/head";
import Header from "./Header"; export default function Layout({ children, pageTitle, description }) { return ( <> <Head> <meta name="viewport" content="width=device-width, initial-scale=1" /> <meta charSet="utf-8" /> <meta name="Description" content={description}></meta> <title>{pageTitle}</title> </Head> <main> <Header /> <div className="content">{children}</div> </main> </> );
}
Here, we have the Layout component, which we’ll be using as a wrapper for the blog. It receives the meta data to show in the head of the page and the component to be displayed.
In components/Post.js:
import Link from 'next/link'
import { HeadPost } from './HeadPost' export const Post = ({ post }) => { const { link, module: { meta }, } = post return ( <article> <HeadPost meta={meta} /> <Link href={'/blog' + link}> <a>Read more →</a> </Link> </article> )
}
This component is responsible for displaying a preview of a blog post. It receives the post object to show as props. Next, we use destructuring to pull out the link of the post and the meta to show from the object. With that, we can now pass the data to the components and handle the routing with the Link component.
In components/BlogPost.js:
import { HeadPost } from './HeadPost' export default function BlogPost({ children, meta}) { return ( <> <HeadPost meta={meta} isBlogPost /> <article>{children}</article> </> )
}
The BlogPost component helps us to render a single article. It receives the post to show and its meta object.
So far, we have covered a lot — but we have no articles to show. Let’s fix that in the next section.
Writing Posts With MDX
import BlogPost from '../../../components/BlogPost' export const meta = { title: 'Introduction to Next.js', description: 'Getting started with the Next framework', date: 'Aug 04, 2020', readTime: 2
} export default ({ children }) => <BlogPost meta={meta}>{children}</BlogPost>; ## My Headline Lorem ipsum dolor sit amet, consectetur adipiscing elit. Quisque maximus pellentesque dolor non egestas. In sed tristique elit. Cras vehicula, nisl vel ultricies gravida, augue nibh laoreet arcu, et tincidunt augue dui non elit. Vestibulum semper posuere magna, quis molestie mauris faucibus ut.
As you can see, we import the BlogPost component, which receives the meta and the body of the post.
The parameter children is the body of the blog post or, to be precise, everything that comes after the meta object. It is the function responsible for rendering the post.
With that change, we can move to the index.js file and display the posts on the home page.
Displaying Posts
import { Post } from "../components/Post";
import { posts } from "../getAllPosts"; export default function IndexPage() { return ( <> {posts.map((post) => ( <Post key={post.link} post={post} /> ))} </> );
}
Here, we start by importing the Post component and the posts fetched from the blog folder. Next, we loop through the array of articles, and for each post, we use the Post component to display it. That being done, we are now able to fetch the posts and display them on the page.
We are almost done. However, the Layout component is still not being used. We can use it here and wrap our components with it. But that won’t affect the articles pages. That’s where the _app.js file comes into play. Let’s use that in the next section.
Using the _app.js File
Here, the underscore symbol (_) is really important. If you omit it, Next.js will treat the file as a page/route.
import Layout from "../components/Layout"; export default function App({ Component, pageProps }) { return ( <Layout pageTitle="Blog" description="My Personal Blog"> <Component {...pageProps} /> </Layout> );
}
Next.js uses the App component to initialize pages. The purpose of this file is to override it and add some global styles to the project. If you have styles or data that need to be shared across the project, put them here.
We can now browse the project folder in the CLI and run the following command to preview the blog in the browser:
yarn dev
Or, in npm:
npm run dev
If you open http://localhost:3000 in the browser, you will be able to see this:
Great! Our blog looks good. We are done building the blog app with Next.js and MDX.
Conclusion
In this tutorial, we walked through Next.js by building a blog using the MDX library. The Next.js framework is a handy tool that makes React apps SEO Company-friendly and fast. It can be used to build static, dynamic JAMstack websites in no time, because it is production-ready and comes with some nice features. Next.js is used widely by big companies, and its performance keeps improving. It’s definitely something to check out for your next project.
You can preview the finished project on CodeSandbox.
Thanks for reading!
Resources
These useful resources will take you beyond the scope of this tutorial.
(ks, ra, al, il)
Website Design & SEO Delray Beach by DBL07.co
Delray Beach SEO
source http://www.scpie.org/how-to-build-a-blog-with-next-and-mdx/
source https://scpie1.blogspot.com/2020/09/how-to-build-blog-with-next-and-mdx.html
0 notes
Text
Practice GraphQL Queries With the State of JavaScript API
Learning how to build GraphQL APIs can be quite challenging. But you can learn how to use GraphQL APIs in 10 minutes! And it so happens I've got the perfect API for that: the brand new, fresh-of-the-VS-Code State of JavaScript GraphQL API.
The State of JavaScript survey is an annual survey of the JavaScript landscape. We've been doing it for four years now, and the most recent edition reached over 20,000 developers.
We've always relied on Gatsby to build our showcase site, but until this year, we were feeding our data to Gatsby in the form of static YAML files generated through some kind of arcane magic known to mere mortals as "ElasticSearch."
But since Gatsby poops out all the data sources it eats as GraphQL anyway, we though we might as well skip the middleman and feed it GraphQL directly! Yes I know, this metaphor is getting grosser by the second and I already regret it. My point is: we built an internal GraphQL API for our data, and now we're making it available to everybody so that you too can easily exploit out dataset!
"But wait," you say. "I've spent all my life studying the blade which has left me no time to learn GraphQL!" Not to worry: that's where this article comes in.
What is GraphQL?
At its core, GraphQL is a syntax that lets you specify what data you want to receive from an API. Note that I said API, and not database. Unlike SQL, a GraphQL query does not go to your database directly but to your GraphQL API endpoint which, in turn, can connect to a database or any other data source.
The big advantage of GraphQL over older paradigms like REST is that it lets you ask for what you want. For example:
query { user(id: "foo123") { name } }
Would get you a user object with a single name field. Also need the email? Just do:
query { user(id: "foo123") { name email } }
As you can see, the user field in this example supports an id argument. And now we come to the coolest feature of GraphQL, nesting:
query { user(id: "foo123") { name email posts { title body } } }
Here, we're saying that we want to find the user's posts, and load their title and body. The nice thing about GraphQL is that our API layer can do the work of figuring out how to fetch that extra information in that specific format since we're not talking to the database directly, even if it's not stored in a nested format inside our actual database.
Sebastian Scholl does a wonderful job explaining GraphQL as if you were meeting it for the first time at a cocktail mixer.
Introducing GraphiQL
Building our first query with GraphiQL, the IDE for GraphQL
GraphiQL (note the "i" in there) is the most common GraphQL IDE out there, and it's the tool we'll use to explore the State of JavaScript API. You can launch it right now at graphiql.stateofjs.com and it'll automatically connect to our endpoint (which is api.stateofjs.com/graphql). The UI consists of three main elements: the Explorer panel, the Query Builder and the Results panels. We'll later add the Docs panels to that but let's keep it simple for now.
The Explorer tab is part of a turbo-boosted version of GraphiQL developed and maintained by OneGraph. Much thanks to them for helping us integrate it. Be sure to check out their example repo if you want to deploy your own GraphiQL instance.
Don't worry, I'm not going to make you write any code just yet. Instead, let's start from an existing GraphQL query, such as the one corresponding to developer experience with React over the past four years.
Remember how I said we were using GraphQL internally to build our site? Not only are we exposing the API, we're also exposing the queries themselves. Click the little "Export" button, copy the query in the "GraphQL" tab, paste it inside GraphiQL's query builder window, and click the "Play" button.
Source URL
The GraphQL tab in the modal that triggers when clicking Export.
If everything went according to plan, you should see your data appear in the Results panel. Let's take a moment to analyze the query.
query react_experienceQuery { survey(survey: js) { tool(id: react) { id entity { homepage name github { url } } experience { allYears { year total completion { count percentage } awarenessInterestSatisfaction { awareness interest satisfaction } buckets { id count percentage } } } } } }
First comes the query keyword which defines the start of our GraphQL query, along with the query's name, react_experienceQuery. Query names are optional in GraphQL, but can be useful for debugging purposes.
We then have our first field, survey, which takes a survey argument. (We also have a State of CSS survey so we needed to specify the survey in question.) We then have a tool field which takes an id argument. And everything after that is related to the API results for that specific tool. entity gives you information on the specific tool selected (e.g. React) while experience contains the actual statistical data.
Now, rather than keep going through all those fields here, I'm going to teach you a little trick: Command + click (or Control + click) any of those fields inside GraphiQL, and it will bring up the Docs panel. Congrats, you've just witnessed another one of GraphQL's nifty tricks, self-documentation! You can write documentation directly into your API definition and GraphiQL will in turn make it available to end users.
Changing variables
Let's tweak things a bit: in the Query Builder, replace "react" with "vuejs" and you should notice another cool GraphQL thing: auto-completion. This is quite helpful to avoid making mistakes or to save time! Press "Play" again and you'll get the same data, but for Vue this time.
Using the Explorer
We'll now unlock one more GraphQL power tool: the Explorer. The Explorer is basically a tree of your entire API that not only lets you visualize its structure, but also build queries without writing a single line of code! So, let's try recreating our React query using the explorer this time.
First, let's open a new browser tab and load graphiql.stateofjs.com in it to start fresh. Click the survey node in the Explorer, and under it the tool node, click "Play." The tool's id field should be automatically added to the results and — by the way — this is a good time to change the default argument value ("typescript") to "react."
Next, let's keep drilling down. If you add entity without any subfields, you should see a little squiggly red line underneath it letting you know you need to also specify at least one or more subfields. So, let's add id, name and homepage at a minimum. Another useful trick: you can automatically tell GraphiQL to add all of a field's subfields by option+control-clicking it in the Explorer.
Next up is experience. Keep adding fields and subfields until you get something that approaches the query you initially copied from the State of JavaScript site. Any item you select is instantly reflected inside the Query Builder panel. There you go, you just wrote your first GraphQL query!
Filtering data
You might have noticed a purple filters item under experience. This is actually they key reason why you'd want to use our GraphQL API as opposed to simply browsing our site: any aggregation provided by the API can be filtered by a number of factors, such as the respondent's gender, company size, salary, or country.
Expand filters and select companySize and then eq and range_more_than_1000. You've just calculated React's popularity among large companies! Select range_1 instead and you can now compare it with the same datapoint among freelancers and independent developers.
It's important to note that GraphQL only defines very low-level primitives, such as fields and arguments, so these eq, in, nin, etc., filters are not part of GraphQL itself, but simply arguments we've defined ourselves when setting up the API. This can be a lot of work at first, but it does give you total control over how clients can query your API.
Conclusion
Hopefully you've seen that querying a GraphQL API isn't that big a deal, especially with awesome tools like GraphiQL to help you do it. Now sure, actually integrating GraphQL data into a real-world app is another matter, but this is mostly due to the complexity of handling data transfers between client and server. The GraphQL part itself is actually quite easy!
Whether you're hoping to get started with GraphQL or just learn enough to query our data and come up with some amazing new insights, I hope this guide will have proven useful!
And if you're interested in taking part in our next survey (which should be the State of CSS 2020) then be sure to sign up for our mailing list so you can be notified when we launch it.
State of JavaScript API Reference
You can find more info about the API (including links to the actual endpoint and the GitHub repo) at api.stateofjs.com.
Here's a quick glossary of the terms used inside the State of JS API.
Top-Level Fields
Demographics: Regroups all demographics info such as gender, company size, salary, etc.
Entity: Gives access to more info about a specific "entity" (library, framework, programming language, etc.).
Feature: Usage data for a specific JavaScript or CSS feature.
Features: Same, but across a range of features.
Matrices: Gives access to the data used to populate our cross-referential heatmaps.
Opinion: Opinion data for a specific question (e.g. "Do you think JavaScript is moving in the right direction?").
OtherTools: Data for the "other tools" section (text editors, browsers, bundlers, etc.).
Resources: Data for the "resources" section (sites, blogs, podcasts, etc.).
Tool: Experience data for a specific tool (library, framework, etc.).
Tools: Same, but across a range of tools.
ToolsRankings: Rankings (awareness, interest, satisfaction) across a range of tools.
Common Fields
Completion: Which proportion of survey respondents answered any given question.
Buckets: The array containing the actual data.
Year/allYears: Whether to get the data for a specific survey year; or an array containing all years.
The post Practice GraphQL Queries With the State of JavaScript API appeared first on CSS-Tricks.
via CSS-Tricks https://ift.tt/2S05TOQ
0 notes
Text
RisingStack in 2019 - Achievements, Highlights and Blogposts.
🎄 How was 2019 at RisingStack? 🥳 - you might ask, as a kind reader already did it in a comment under our wrap-up of 2018.
Well, it was an intensive year with a lot of new challenges and major events in the life of our team!
Just to quickly sum it up:
We grew our team to 16! All of our engineers are full-stack in the sense that we can confidently handle front-end, back-end, and operations tasks as well - as you'll see from this year's blogpost collection.
We launched our new website, which communicates what we do and capable of more clearly (I hope at least). 🤞 Also, a new design for the blog is coming as well!
This year ~1.250.000 developers (unique users) visited our blog! 🤩
We just surpassed 5.7 million unique readers in total, who generated almost 12 million pageviews so far in the past 5 years.
We have now more than 220 articles on the site - written by our team exclusively.
We had the honor to participate in JSconf Budapest by providing a workshop for attendees on GraphQL and Apollo. 🎓
We delivered a 10-weeks-long online DevOps training for around 100 developers in partnership with HWSW, Hungary's leading tech newspaper.
We kept on organizing local Node.js meetups here in Budapest, with more than 100 attendees for almost every event this year. 🤓
We had the opportunity to work with huge companies like DHL, Canvas (market leader e-learning platform), and Uniqa (insurance corp.).
We met with fantastic people all over the world. We've been in LA, Sarajevo, Amsterdam, Prague, and Helsinki too. 🍻
We moved to a new office in the heart of Budapest!
🤔 Okay, okay... But what about blogging?
Blogging in 2019
You might have noticed that we did not write as much blogposts this year as we did before.
The reason is simple: Fortunately, we had so many new projects and clients that we had very little time to write about what we love and what we do.
Despite our shrinking time for writing blogposts, I think we still created interesting articles that you might learn a thing or two from.
Here's a quick recap from the blog in 2019. You can use this list to navigate.
Stripe 101 for JavaScript Developers
Generating PDF from HTML with Node & Puppeteer
REST in Peace. Long Live GraphQL!
Case Study: Nameserver Issue Investigation
RisingStack Joins the Cloud Native Node.js Project
A Definitive React-Native Guide for React Developers
Design Systems for React Developers
Node.js v12 - New Features You Shouldn't Miss
Building a D3.js Calendar Heatmap
Golang Tutorial for Node.js Developers
How to Deploy a Ceph Storage to Bare Virtual Machines
Update Now! Node.js 8 is Not Supported from 2020.
Great Content from JSConf Budapest 2019
Get Hooked on Classless React
Stripe 101 for JavaScript Developers
Sample app, detailed guidance & best practices to help you get started with Stripe Payments integration as a JavaScript developer.
At RisingStack, we’ve been working with a client from the US healthcare scene who hired us to create a large-scale webshop they can use to sell their products. During the creation of this Stripe based platform, we spent a lot of time with studying the documentation and figuring out the integration. Not because it is hard, but there's a certain amount of Stripe related knowledge that you'll need to internalize.
Read: Stripe Payments Integration 101 for JavaScript Developers
Generating PDF from HTML with Node & Puppeteer
Learn how you can generate a PDF document from a heavily styled React page using Node.js, Puppeteer, headless Chrome, and Docker.
Background: A few months ago, one of the clients of RisingStack asked us to develop a feature where the user would be able to request a React page in PDF format. That page is basically a report/result for patients with data visualization, containing a lot of SVGs. Furthermore, there were some special requests to manipulate the layout and make some rearrangements of the HTML elements. So the PDF should have different styling and additions compared to the original React page.
As the assignment was a bit more complex than what could have been solved with simple CSS rules, we first explored possible implementations. Essentially we found 3 main solutions we describe in this article.
Read: Generating PDF from HTML with Node.js and Puppeteer
REST in Peace. Long Live GraphQL!
As you might already hear about it, we're the organizers of the Node.js Budapest meetup group with around ~1500 members. During an event in February, Peter Czibik delivered a talk about GrahpQL to an audience of about 120 ppl.
It was a highly informative and fun talk, so I recommend you to check it out!
Case Study: Nameserver Issue Investigation
In the following blogpost, we will walk you through how we chased down a DNS resolution issue for one of our clients. Even though the problem at hand was very specific, you might find the steps we took during the investigation useful.
Also, the tools we used might also prove to be helpful in case you'd face something similar in the future. We will also discuss how the Domain Name System (works), so buckle up!
Read the blogpost here: Case Study: Nameserver Issue Investigation using curl, dig+trace & nslookup
RisingStack Joins the Cloud Native Node.js Project
In March 2019, we announced our collaboration with IBM on the Cloud Native JS project, which aims to provide best practices and tools to build and integrate enterprise-grade Cloud Native Node.js applications.
As a first step of contribution to the project, we released an article on CNJS’s blog - titled “How to Build and Deploy a Cloud Native Node.js App in 15 minutes”. In this article we show how you can turn a simple Hello World Node.js app into a Dockerized application running on Kubernetes with all the best-practices applied - using the tools provided by CNJS in the process.
A Definitive React-Native Guide for React Developers
In this series, we cover the basics of React-Native development, compare some ideas with React, and develop a game together. By the end of this tutorial, you’ll become confident with using the built-in components, styling, storing persisting data, animating the UI, and many more.
Part I: Getting Started with React Native - intro, key concepts & setting up our developer environment
Part II: Building our Home Screen - splitting index.js & styles.js, creating the app header, and so on..
Part III: Creating the Main Game Logic + Grid - creating multiple screens, type checking with prop-types, generating our flex grid
Part IV: Bottom Bar & Responsible Layout - also, making our game pausable and adding a way to lose!
Part V: Sound and Animation + persisting data with React-Native AsyncStorage
Design Systems for React Developers
In this post, we provide a brief introduction to design systems and describe the advantages and use-cases for having one. After that, we show Base Web, the React implementation of the Base Design System which helps you build accessible React applications super quickly.
Node.js v12 - New Features You Shouldn't Miss
Node 12 is in LTS since October, and will be maintained until 2022. Here is a list of changes we consider essential to highlight:
V8 updated to version 7.4
Async stack traces arrived
Faster async/await implementation
New JavaScript language features
Performance tweaks & improvements
Progress on Worker threads, N-API
Default HTTP parser switched to llhttp
New experimental “Diagnostic Reports” feature
Read our deep-dive into Node 12 here.
Building a D3.js Calendar Heatmap
In this article, we take a look at StackOverflow’s usage statistics by creating an interactive calendar heatmap using D3.js!
We go through the process of preparing the input data, creating the chart with D3.js, and doing some deductions based on the result.
Read the full article here Building a D3.js Calendar Heatmap. Also, this article has a previous installment called Building Interactive Bar Charts with JavaScript.
Golang Tutorial for Node.js Developers
In case you are a Node.js developer, (like we are at RisingStack) and you are interested in learning Golang, this blogpost is made for you! Throughout this tutorial series, we'll cover the basics of getting started with the Go language, while building an app and exposing it through a REST, GraphQL and GRPC API together.
In the first part of this golang tutorial series, we’re covering:
Golang Setup
net/http with Go
encoding/json
dependency management
build tooling
Read the Golang for Node developers tutorial here.
How to Deploy a Ceph Storage to Bare Virtual Machines
Ceph is a freely available storage platform that implements object storage on a single distributed computer cluster and provides interfaces for object-, block- and file-level storage. Ceph aims primarily for completely distributed operation without a single point of failure. It manages data replication and is generally quite fault-tolerant. As a result of its design, the system is both self-healing and self-managing.
Ceph has loads of benefits and great features, but the main drawback is that you have to host and manage it yourself. In this post, we're checking out two different approaches of deploying Ceph.
Read the article: Deploying Ceph to Bare Virtual Machines
Update Now! Node.js 8 is Not Supported from 2020.
The Node.js 8.x Maintenance LTS cycle will expire on December 31, 2019 - which means that Node 8 won’t get any more updates, bug fixes or security patches. In this article, we’ll discuss how and why you should move to newer, feature-packed, still supported versions.
We’re also going to pinpoint issues you might face during the migration, and potential steps you can take to ensure that everything goes well.
Read the article about updating Node here.
Great Content from JSConf Budapest 2019
JSConf Budapest is a JSConf family member 2-day non-profit community conference about JavaScript in the beautiful Budapest, Hungary. RisingStack participated in the conf for several years as well as we did this September.
In 2019 we delivered a workshop called "High-Performance Microservices with GraphQL and Apollo" as our contribution to the event.
We also collected content you should check out from the conf. Have fun!
Get Hooked on Classless React
Our last meetup in 2019 was centered around React Hooks. What is a hook?
A Hook is a function provided by React, which lets you hook into React features from your functional component. This is exactly what we need to use functional components instead of classes. Hooks will give you all React features without classes.
Hooks make your code more maintainable, they let you reuse stateful logic, and since you are reusing stateful logic, you can avoid the wrapper hull and the component reimplementation.
Check out the prezentation about React Hooks here.
RisingStack in 2020
We're looking forward to the new year with some interesting plans already lined up for Q1:
We'll keep on extending our team to serve new incoming business.
We have several blogposts series in the making, mainly on DevOps topics.
We'll announce an exciting new event we'll co-organize with partners from the US and Finnland soon, so stay tuned!
We're going to release new training agendas around Node, React & GraphQL, as well as a new training calendar with open trainings for 2020.
How was your 2019?
RisingStack in 2019 - Achievements, Highlights and Blogposts. published first on https://koresolpage.tumblr.com/
0 notes
Last Seen Blogs

pijolice
Untitled

magshiggy
“i’d take the risk for you”

unclefrank40
Untitled

fentyaddicted
FENTYADDICTED

blxckmassserpent
شركة نقل عفش