#adjusting bike brake pads
Link
The adventure starts here! Get your outdoor fix with us. We provide the best tips and tricks on camping, hiking, and other outdoor activities. Learn how to adjust your bike brakes with our easy-to-follow guide. Adjust your brakes and be ready to ride with confidence!
#tighten bike brakes#adjusting bike brake pads#how to adjust bike brake pads#road bicycle brake adjustment
0 notes
Text
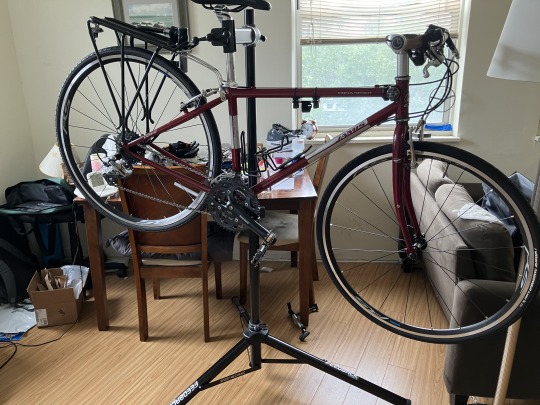
gender euphoria from successfully putting together my new bike vs gender dysphoria from my dad looking over my shoulder and saying we should just send it to a bike shop: fight
#labhrambles#ok2rb#the main issue was the brake pads were too tight and i FIXED it by loosening the brake thing#the adjusting and tightening them#and he was like 'ohhh i dont knowww.... u might not be able to get it back to that same tension.....'#thats the POINT!! it was the WRONG TENSION. we dont WANT it back the same#also i couldnt get the seat tight enough and he seemed annoyed that this one thing required a wrench#when every other hex shaped thing just needed an acoustic screwdriver#AND he was SO DOUBTFUL when i was like 'yes this is the height i want it' 'are u sure' FUCKING YEAH?? ITS *MY* BIKE???#also that i shouldve gotten at least a three speed instead of a single speed. which is fair#i can see why that would be beneficial but also? like ive said fifty times in this assembly process?#this is the bike i WANTED. it looks COOL. im not going fucking MOUNTAIN BIKING im biking around a college campus#its so!!! like i KNOW him being condescending is a him problem and not a gender problem but it still pisses me off#anyway this turned into a rant. my bad not sorry
3 notes
·
View notes
Text
Ghost finds out that you never learned how to ride a bike.
A/N: Thank you for suggesting this, anon. I hope your mother-in-law bought you a bomb-ass bike with a basket at the front and everything.
———————————————————————
“No way.”
“Yes.”
“Not even once?”
“What do you mean ‘not even once’?”
The conversation started when the lieutenant entered your shared office with two fingers bandaged together. Before you could ask what happened, his eyes caught yours, and he instinctively raised his hand, displaying the injury.
He explained that it happened while he and a group of soldiers were repairing one of the barracks. His pinky got caught in a plumping pipe, and because of the noise, they couldn’t hear him yelling at them to stop pushing. So the medic immobilised the fractured pinky by securing it to the ring finger to restrict its range of motion and let it heal.
He reassured you that the damage was minor and nothing to be concerned about, but he appeared defeated by having to bear this for the time being. You wished him a speedy recovery and then addressed the elephant in the room—how would he be able to carry the drill exercise scheduled for tomorrow?
He shrugged and admitted that the exercise had to be cancelled for now. Still, that wouldn’t pose a problem since military procedures are deeply ingrained and not easily forgotten.
“It’s like riding a bike.” He said.
And that’s what struck your current discussion—when you sneered at his analogy and admitted that you wouldn’t know since you never learned how to ride one.
He now stands there, speechless, and looks at you like you’re an alien that just landed on his back porch.
“Did you try and give up, or no one taught you how?”
“Do I look like I give up easily, Lt.?” You ask and shrug with your right shoulder. “No one taught me how to ride one.”
His eyes soften, and he looks out the window.
“Jesus Christ, kid.” He mutters, “Guess we found something else to do for tomorrow.”
“No way.” You state, shaking your head.
“Yes.” He replies and nods.
—————————— >> ———————————
Ghost left you a note on your desk this morning.
It said “warehouse, 10 a.m.” which was both weird and funny, considering how cryptic that message was for the purpose of the meeting.
You approach the warehouse and attempt to open the door, only to find that it’s locked. Suddenly, a sharp “pst!” grabs your attention from nearby, prompting you to follow the voice that’s guiding you behind the building.
There stands Ghost, with a worn-out bike next to him. He’s hugging a helmet with his injured hand and holding pairs of knee, elbow, and wrist pads with the other.
“Where did you find that?” You ask, pointing to the bike.
“In this warehouse; I found it a couple of years ago,” he replies. “I didn’t want to throw it away, so I fixed it and left it there.”
You raise an eyebrow. “You call this ‘fixed’?”
“It may not be a fucking Bianchi, kid, but it gets the job done,” he says and extends the gear towards you. “Put these on,” he orders, “I’ll help you with the knee pads.”
He kneels down, gently tapping your leg, indicating you to lift it.
“Isn’t that a little excessive?” You ask, “All that safety gear?”
He huffs and looks up at you. “Do you want to end up with a fractured pinky like me?”
“No, sir.”
“Lift your leg then.”
He adjusts your helmet and secures the knee pads, ensuring they’re correctly positioned. Then, he inspects the elbow and wrist pads to ensure they’re in the right place. Finally, he gives the saddle a firm slap, indicating you to hop on the bike.
You do as instructed, and he checks the bike, adjusting the seat height, handlebars, and brakes to fit your size. With you gripping the handlebars, he begins the lesson.
“Two things,” he says, raising the corresponding fingers on his uninjured hand. “Balance and coordination.”
“Balance and coordination.” You echo.
He nods, puts his hands behind his back, and paces around the bike.
“We’ll begin with the first one, which happens to be the most challenging, I must warn you,” he explains, “and then progress to the rest.”
“Balance is the hardest one.” You repeat.
“Yes, indeed. First, you’ll have to learn how to balance on that bike. Once you succeed, we’ll synchronise your turning, pedalling, and braking movements. Ready?”
“Not really.”
“Let’s get started then.”
—————————— >> ———————————
He’s right. Balancing that thing is difficult. At first, he instructs you to use your feet to push yourself forward while seated on the bike, gradually progressing to longer strides.
Then he commands you to pedal. He walks next to you, holding one of the handlebars with his uninjured hand and guiding the bike to help with balance. Occasionally, when he feels you have control, he lets go of the handlebar. But every now and then, you waver. And when that happens, he intervenes and puts his hand back on the handlebar.
And this continued until he felt confident that you were ready to give it your first try.
“What if I fall?”
“You will fall.”
“But I don’t want to.”
“You have to,” he insists, “that’s the only way you’ll learn.”
He stands behind you, holding the back of the saddle. He maintains his grip as you pedal, stabilising and guiding the bike. He jogs beside you, encouraging you.
And yes, there were countless falls. But each time, Ghost was there, lifting you up, brushing off the dirt, and urging you to give it another try.
The lesson began at 10 a.m. You have no idea what time it is now. Ghost has been so persistent that he must have also lost track of time.
“Lt,” you call out as you pedal for the hundredth time, “I think it’s time for a break; you must be tired as well.”
No response.
“Lt.?” You repeat.
Silence.
You turn halfway to address him, but he’s nowhere to be found.
Panic sets in, throwing off your balance, and you tumble to the ground once again. This time, he’s no longer there to catch you.
You look back at your starting point—Ghost is standing there with his arms crossed in front of his chest.
You look at the bike and then back at him. Your eyes widen. You point your finger at the bike, then at yourself.
He nods and lifts his hand in the air, giving a thumbs up.
“I did it!” You shout and run towards him, guiding the bike next to you.
“I saw,” he replies, and his eyes crease in joy, “but why didn’t you ride it back?”
“I think I need more practice.” You explain.
“We can continue practising after our break,” he suggests. “Good job, kid; I’m proud of you.”
“It’s all because of you, Lieutenant,” you say, “thank you for everything.”
He chuckles and tilts his head.
“Look,” he says, lifting his injured pinky. “This one needs support from this one to heal,” he explains, pointing to his ring finger.
“So I’m the pinky,” you say, “because you, the ring finger, taught me how to ride a bike.”
He lets out a sigh, shifting his gaze to the ground.
“Depends on who you ask,” he murmurs, “maybe I’m the broken one, and you’re helping me heal.”
———————————————————————
#simon ghost riley x reader#simon ghost riley x gn!reader#simon ghost riley x you#simon ghost riley x y/n#simon riley x y/n#simon riley x you#simon riley x reader#simon riley#simon ghost riley fanfiction#simon ghost riley#simon ghost riley fic#call of duty#modern warfare 2#cod mwii#ghost cod#cod ghost#ghost mw2#ghost mwii#ghost modern warfare#ghost call of duty
2K notes
·
View notes
Text
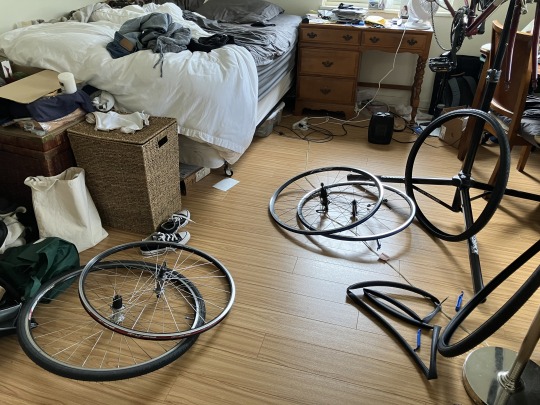
Today I put new wheels on my bike, “rotated” the tires (new tire in front, old tire gets shifted to the back), made the necessary derailleur adjustment, and put on new brake pads. I also want to replace cables and housing, but I’m still waiting for one of the parts for that to get delivered.
It felt good to do some mechanical work again, except now my hands and wrists are sore from using small muscles in weird ways.
6 notes
·
View notes
Text
Electric Bike Maintenance Tips Guide
After riding a electric bicycle for a long time, it is inevitable that there will be some problems, so maintenance is very important. Generally, the maintenance of bicycles is divided into 4 stages.
1. For normal riding use,
2. Short-term (one week or ten days) regular maintenance
3. Mid-term (one or two months) regular maintenance
4. Long-term (six months or one year) regular maintenance
Below we will introduce the knowledge of bicycle maintenance in detail for these 4 periods.
Normal riding use
Although normal riding use seems to have nothing to do with maintenance, it is actually the most important and basic item in bicycle maintenance. Before riding, it is very important to check the condition of the bicycle. It is often forgotten, so before riding a bike, don't forget to do the following checks:
1. Check the height of the seat: especially if you are not riding your own car, you must remember to adjust the seat cushion to the appropriate height before riding.
2. Check the tightness of the screws in each part: check whether the quick release of the front and rear wheels and the seat post is locked, check whether the driver is fixed, and whether other screws are loose.
3. Check the tires: Check whether the tire pressure is sufficient, if not enough, press it to the appropriate pressure, check whether there are cracks on the tire wall, whether the anti-skid tread is too shallow, and replace the tire if necessary.
4. Check the front fork bowl: brake the front brake, shake the car body back and forth, if there is a shaking gap, it means that the front fork bowl must be readjusted.
5. Check the transmission: After starting, try to change the front and rear gears respectively, whether you can smoothly change to each gear, and whether there will be strange noises.
6. Check the brakes: try to pull the front and rear brakes to check whether the brakes can actually stop.
Short-term regular maintenance
Short-term maintenance should be carried out frequently. If you use the bicycle normally, the maintenance at this stage is quite simple, and this maintenance can keep your car in good condition, so it must not be ignored.
Cleaning the car: In addition to keeping your car clean and tidy, it can also effectively prevent the frame from rusting. If you are riding in heavy rain or muddy roads, you should clean the car as soon as possible after riding. Pay attention to the following points:
1. If there is not much sludge on the car body, or it is just dust, you can use a rag to wipe it off, or use a big brush to clean it.
2. Do not use high-pressure water jets to remove the sludge on the car body. Although this method is very efficient, it may force the sewage into the bearing, which will cause damage to the bearing. If there is a lot of sludge on the car body, the sludge should be scrubbed with a brush and soapy water, rinsed with clean water, and finally dried with a cloth. After the car is cleaned, remember to check whether the paint is peeled off, because the steel frame will rust after the paint peels off, while the aluminum alloy or carbon fiber and titanium alloy frame will not rust, and it will only affect the appearance.
3. After washing the car with water, remember to dry the chain and re-oil it.
Check the brake pads: remove the sundries on the brake pads to ensure their braking force. If the wear is serious, they must be replaced with new ones. the
Re-grease the cable tube: If the brake or shifting action is not good, it may be that the friction between the inner and outer cables is too large. Remove the outer cable from the stop tube, apply butter to the inner cable, and then reinstall it. If so, the action still remains If it is not smooth, you can replace the inner and outer line tubes.
Chain oiling: drip lubricating oil on the chain. After about ten minutes, wipe off the oil on the outside of the chain. As long as there is oil on the internal moving part of the chain, the excess lubricating oil on the outside will stick to dust and increase cleaning. trouble, so it's best to wipe it clean. In addition, if you use a spray can type of lubricating oil, remember to wipe off the oil that dripped on other parts after you finish oiling.
Mid-term regular maintenance
Your car has served you well for a while, and now is the time to get some of the more often-overlooked parts checked to keep it in good condition.
Check the chain: the chain will elongate after long-term use, the pitch of the chain is 0.5 inches, measure 24 chains, the length should be 12 inches, if the length has exceeded the normal length by 1/8 inches, the chain should be replaced .
Clean the chain: If there is a lot of sludge inside your chain, then it’s time to clean it. To clean the chain, you can use a chain washer, or remove the chain, find a container, fill it with solvent oil, put it in the chain, and shake it to make it Rinse, and finally take out to dry and oil.
Check the flywheel and the large sprocket: after replacing the chain, if the flywheel has tooth skipping, replace the flywheel. If the teeth of the large sprocket are worn out and the chain is jammed, it should also be replaced. Check the fixing screws of the large sprocket , and must be re-tightened if loose.
Check the wheel rim: Check whether there are tiny cracks near the air nozzle hole and the steel wire hole. If there is a crack, replace the rim as soon as possible, lift the wheel, rotate the wheel, and observe whether the rim will rub against the brake pads. friction, the rim must be readjusted.
Check the steel wire: check whether the steel wire of the front and rear wheels is broken, and replace it if any. After changing the steel wire, the rim must be readjusted. The steel wire on the right side near the rim is loosened, and the left side is locked. If it deviates to the left, the opposite is true. The left and right deflection range of the rim should be less than 2 mm.
Check the handlebar: Check whether the handlebar has deformed in the accident, whether there is a crack in the seat tube locking part, and if so, replace the handlebar.
Check the seat cushion and seat cushion rod: remove the seat cushion rod, check whether there is any deformation or crack, if not, put a thin layer of butter on it and put it back, check whether the seat cushion is damaged, whether the bottom bracket is intact, if there is any problem, Just replace it.
Long-term regular maintenance
Your car has been in use for such a long time, it has been through various conditions, and it is time to do a major inspection of those parts that have been functioning.
Check the hub: remove the front and rear wheels, check if there is any crack near the steel wire hole, if there is any, replace it immediately, turn the hub shaft by hand to see, then shake it up and down, if you feel a gap, or it is very loose, replace the hub shaft Disassemble, clean the internal oil, refill new butter, and reassemble the hub shaft. Remember to adjust the bearings so that the shaft can rotate smoothly, but there will be no gaps for shaking up and down.
Check the Tianxin: take off the chain, grab the crank and shake it left and right. If there is any shaking, tighten the fixing screws. If it still shakes, you must adjust the Tianxin bearing; put your ear on the seat cushion, and rotate the crank. The sound you hear should be The sound of "hu-hu" is very smooth. If you hear rattling or other strange sounds, it means that the bearing is damaged and the center of the sky needs to be replaced.
Check the pedals: Remove the pedals and use a 15mm open-end wrench. Note that the left pedal is left-toothed. Do not disassemble it by mistake. The pedal bearings do not need to be adjusted, but they still need to be checked. If you are using a cassette pedal, Then check whether the mechanism works normally and lubricate with oil.
Check the transmission: Check whether the various moving parts of the transmission shake. If so, it means that the wear of the transmission is quite serious and should be replaced. If not, lubricate the moving parts.
Shock absorber maintenance: The hydraulic shock absorber front fork should be disassembled and replaced with new shock absorber oil. For the form of Unisex, you should check whether the Unisex is cracked or deformed, and replace it if there is any. The maintenance of the shock absorber , should consult the original purchaser.
Check the frame: Check all the paint. If there is rust to the frame perforation, the frame needs to be replaced. If the frame is deformed by impact, it should also be replaced.
Renew all inner and outer cable tubes: All cable tubes have worn out over time and are therefore recommended to be replaced to maintain their performance.
source: https://www.intheairbike.com/blogs/news
2 notes
·
View notes
Text
Exploring the World on Two Wheels: Bike Touring Bags and Gear Essentials
Embarking on a bike touring adventure is a thrilling way to explore the world at a leisurely pace, taking in breathtaking scenery and immersing yourself in diverse cultures. Whether you're planning a weekend getaway or a multi-month expedition, having the right gear is essential for a successful and enjoyable journey. In this guide, we'll explore the essential bike touring bags and gear you need to make the most of your two-wheeled adventure.

Panniers: Panniers are the workhorses of bike touring, providing ample storage space for your gear while distributing weight evenly across your bike. Look for durable, waterproof panniers with multiple compartments for easy organization. Front panniers are ideal for carrying heavier items like tools and spare parts, while rear panniers are perfect for clothing and camping gear.
Handlebar Bags: Handlebar bags offer convenient access to essential items like snacks, maps, and electronics while riding. Choose a handlebar bag that attaches securely to your handlebars and provides sufficient capacity for your needs. Some handlebar bags also convert into a shoulder bag for easy carrying off the bike.
Frame Bags: Frame bags are designed to fit within the triangle of your bike frame, utilizing otherwise unused space for storage. These bags are ideal for carrying bulky items like water bottles, food, and lightweight gear. Look for frame bags with customizable compartments to maximize storage efficiency.
Seat Packs: Seat packs are a popular option for carrying lightweight, bulky items like clothing and sleeping bags. These packs attach to the seat post and saddle rails, keeping your gear stable and secure while riding. Opt for a seat pack with compression straps to minimize bulk and improve aerodynamics.
Rack Trunks: Rack trunks are another convenient option for bike touring, offering additional storage space on top of rear racks. These bags typically feature multiple compartments and pockets for easy organization. Look for a rack trunk with a quick-release mounting system for easy installation and removal.
Tent and Sleeping Gear: Choose a lightweight, compact tent for overnight stays during your bike tour. Look for a tent specifically designed for bike touring, which is typically lighter and more packable than traditional camping tents. Don't forget to pack a sleeping bag, sleeping pad, and camping pillow for a comfortable night's sleep.
Cooking and Food Storage: Pack a portable stove, fuel, and lightweight cookware for preparing meals on the road. Consider dehydrated or freeze-dried meals to minimize weight and bulk. Bring along a compact cooler or insulated food bag for storing perishable items like fruits, vegetables, and dairy products.
Navigation Tools: Ensure you have reliable navigation tools to guide you along your route. Carry a detailed map, along with a compass or GPS device, to help you navigate unfamiliar terrain. Consider downloading offline maps or using a GPS-enabled cycling computer for real-time navigation assistance.
Repair Kit and Tools: Be prepared for mechanical issues by carrying a bike repair kit and essential tools. Include spare tubes, tire levers, a multi-tool, and a portable bike pump to handle common repairs on the road. Familiarize yourself with basic bike maintenance tasks like fixing a flat tire and adjusting brakes and gears.
First Aid Kit and Personal Items: Pack a comprehensive first aid kit with essential supplies for treating minor injuries and emergencies. Include bandages, antiseptic wipes, pain relievers, and any necessary medications. Don't forget personal items like sunscreen, insect repellent, a hat, sunglasses, and a headlamp or flashlight for nighttime visibility.

By equipping yourself with the right bike touring bags and gear, you'll be well-prepared to tackle any adventure on two wheels. Whether you're exploring scenic countryside roads or traversing rugged mountain trails, investing in quality gear will enhance your experience and ensure a safe and enjoyable journey. So pack your bags, saddle up, and get ready to explore the world at your own pace on your trusty bicycle!
0 notes
Text
Ensure Your Kid’s Dreamy Journeys with Safe Rides.
As a parent, you always wish for your child to pedal on joyful journeys. However, when it comes to their safety and security, you may feel underconfident about sending them on solo rides to their schools or daily commutes. But why wonder so much when you can choose from high-quality cycles for kids from Kross Bikes?
As one of the leading brands manufacturing bicycles for kids of all ages, it ensures that beginnings are safe, enjoyable, and memorable. Its offerings are equipped with all the essential features that you need to ascertain for your child’s successful journeys. Read on to discover them.
Safety features
When buying a bicycle for kids, it is essential to ensure their safety. But how do you do that? Simply consider buying bicycles from leading brands that prioritise features such as sturdy frames, reliable brakes, adjustable seats, handlebars, etc. In addition to these features, you can also find accessories with their bicycles, such as helmets, lights, and reflectors, to enhance the safety of your child’s rides.
Quality construction
Ensuring durability and long-lasting service is a goal of top bicycle brands, as they consider delivering journeys that may be cherished forever. Kross Bikes is one of them that you can choose to buy the best cycle for boys or girls.
Ergonomic design
Comfort is another crucial factor in smooth and reliable journeys for both adults and kids. Cycles with ergonomic grips, padded seats, and lightweight frames make the ride comfortable and enjoyable on short and long routes.

Wide range of selection
Every child has a unique vision and aspiration. Some may wish to explore their city streets, while others may pursue their interest in the mountains. Moreover, it is important to buy cycles for your kids according to their age level, such as balance bikes for toddlers and mountain bikes for adventurous teens. By reaching out to one of the best brands for kids' cycles online, includingoffline, you can find the perfect rides for your child's age, needs, and preferences.
Focus on fun and adventure
While safety remains a top priority, it is important to ensure that your kids have fun and adventure with confidence on their high-quality bicycles. Designed with high-quality materials and featuring easy-to-handle features, these bikes help kids keep exploring their dreamy world without brakes or failures on the road.
Final Words!
Leading bicycle brands have a strong reputation in the market for providing high-quality, safe, and enjoyable bikes for enthusiasts of every age. With positive reviews from satisfied customers, they validate their commitment to excellence. Kross Bikes is one of the most renowned brands for kids bicycle, featuring all the essential elements that you look for in your child’s rides.

0 notes
Text
The Essential Guide to ebike Repair: Keeping Your Ride Smooth and Safe
Whether you’re a seasoned eBike enthusiast or a newbie who just purchased their first electric bicycle, this guide is here to help you keep your ride in top shape. eBikes are fantastic machines that offer the convenience of powered assistance with the freedom of cycling. However, like any vehicle, they require regular maintenance and occasional repairs. Let’s dive into the essentials of eBike repair, common issues, and tips to keep your eBike running smoothly and safely.
Why Regular eBike Maintenance Matters
Regular maintenance is crucial for the longevity and performance of your eBike. Keeping your eBike in good condition not only ensures a smooth and enjoyable ride but also prevents minor issues from becoming major problems. A well-maintained eBike is safer, more reliable, and more efficient, giving you peace of mind whether you’re commuting to work or exploring new trails.
Common eBike Issues and How to Fix Them
Battery Problems: The battery is the heart of your eBike. Common issues include decreased range, failure to charge, or unexpected power cuts.Solution:
Check Connections: Ensure that the battery is properly connected and the contacts are clean.
Battery Health: Regularly check the battery health using your eBike’s display or a dedicated battery tester.
Replacement: If the battery no longer holds a charge, it might be time for a replacement. Always use the manufacturer-recommended battery for your model.
Motor Issues: Problems with the motor can manifest as strange noises, lack of power, or complete failure to start.Solution:
Inspect for Obstructions: Check for debris or obstructions in the motor housing.
Firmware Updates: Ensure your motor’s firmware is up-to-date.
Professional Help: Motor repairs can be complex and often require professional diagnosis and repair.
Brake Adjustments: Efficient brakes are essential for your safety. Over time, you might notice decreased braking power or squeaking sounds.Solution:
Brake Pads: Inspect and replace worn brake pads.
Adjustment: Adjust the brake cables or hydraulic system as per the manufacturer’s instructions.
Cleaning: Clean the rotors with isopropyl alcohol to remove any oil or dirt.
Tire and Wheel Maintenance: Flat tires, worn tread, and unbalanced wheels can affect your ride quality and safety.Solution:
Inflation: Regularly check and maintain the recommended tire pressure.
Tread Check: Replace tires with worn-out tread.
Wheel Truing: Ensure wheels are properly trued (aligned). This might require professional help if the wheels are significantly out of alignment.
Electrical Connections: Loose or corroded electrical connections can cause intermittent power issues or failure of electronic components.Solution:
Regular Inspection: Periodically check all connections for signs of wear or corrosion.
Cleaning: Use a contact cleaner to clean corroded connectors.
Securing Connections: Make sure all connectors are securely fastened.
Essential Tools for eBike Repair
Having the right tools can make eBike maintenance and repair much easier. Here are some essentials:
Allen Wrenches: For adjusting various components.
Screwdrivers: Both flathead and Phillips for a range of screws.
Tire Levers: For removing tires.
Multimeter: For diagnosing electrical issues.
Chain Lubricant: To keep the chain running smoothly.
Bike Stand: To hold your eBike steady while you work.
When to Seek Professional Help
While many maintenance tasks can be performed at home, some issues require professional expertise. Complex electrical problems, significant motor issues, or advanced mechanical repairs are best handled by a certified eBike technician. Regular professional check-ups can also help identify potential problems before they become serious.
Preventive Maintenance Tips
Keep It Clean: Regularly clean your eBike to prevent dirt and grime from affecting performance. Use a gentle bike cleaner and avoid spraying water directly into electrical components.
Regular Inspections: Perform routine inspections of the battery, brakes, tires, and electrical connections. Early detection of issues can prevent costly repairs.
Software Updates: Keep your eBike’s firmware updated to benefit from the latest features and improvements.
Proper Storage: Store your eBike in a cool, dry place. Avoid exposing it to extreme temperatures or prolonged moisture.
Taking care of your ebike is essential for ensuring a safe, reliable, and enjoyable riding experience. Regular maintenance, timely repairs, and proper care can significantly extend the life of your eBike and enhance its performance. Whether you’re tackling minor repairs at home or seeking professional help for more complex issues, staying proactive about eBike maintenance will keep you riding smoothly for years to come.
0 notes
Text
Rev Up Your Ride: Upgrading Your Honda Bike's Performance
Are you ready to take your Honda bike to the next level? Whether you're craving more speed, better handling, or enhanced aesthetics, upgrading your bike's performance can transform your riding experience. In this guide, we'll explore various ways to boost your Honda bike's performance and unleash its full potential.

Performance Exhaust Systems
One of the most popular upgrades for Honda bikes is a performance exhaust system. These aftermarket exhausts not only enhance the sound of your bike but also improve exhaust flow, resulting in increased horsepower and torque. Additionally, they are often lighter than stock exhausts, which can improve overall performance and handling.
High-Flow Air Filters
Another simple yet effective upgrade is replacing your bike's stock air filter with a high-flow air filter. These filters allow more air to flow into the engine, improving combustion efficiency and increasing horsepower. They're relatively easy to install and can provide noticeable gains in performance, especially when combined with other upgrades.
ECU Tuning
Modern Honda bikes Honda bikes come equipped with electronic control units (ECUs) that regulate engine performance. By reprogramming the ECU or installing an aftermarket tuning module, you can optimize fuel delivery, ignition timing, and other parameters to maximize performance. ECU tuning can unlock hidden horsepower and improve throttle response, making your bike feel more responsive and powerful.
Suspension Upgrades
Upgrading your bike's suspension can significantly improve handling, stability, and ride comfort. Upgraded fork springs, rear shocks, and adjustable suspension components allow you to fine-tune your bike's suspension to suit your riding style and preferences. Whether you're carving corners on twisty roads or tackling rough terrain off-road, a properly tuned suspension can enhance your bike's performance and confidence-inspiring.
Performance Braking Systems
Enhancing your bike's braking system is essential for both safety and performance. Upgraded brake pads, stainless steel brake lines, and larger brake rotors can provide improved stopping power and better feel at the lever. Whether you're braking hard before a corner or coming to a sudden stop in an emergency situation, a high-performance braking system can inspire confidence and control.
Lightweight Wheels
Reducing unsprung weight is another effective way to improve your bike's performance. Lightweight wheels, made from materials like aluminum or carbon fiber, can reduce rotating mass and improve acceleration, braking, and handling. Upgraded wheels also allow for wider tire options, providing more grip and stability in corners.
Performance Tires
Investing in high-performance tires is crucial for maximizing traction and handling. Choose tires specifically designed for your riding style and conditions, whether you're riding on the street, track, or off-road. High-quality tires offer better grip, cornering stability, and braking performance, allowing you to push your bike to its limits with confidence.
By incorporating these performance upgrades into your Honda bike, you can elevate your riding experience and enjoy enhanced performance, handling, and overall enjoyment on the road or track.
0 notes
Text
Maintaining Your 150cc Motorcycle: A Comprehensive Guide
As the proud owner of a 150cc motorcycle, you know the joy and convenience it brings to your daily commute. However, to keep your trusty two-wheeler running smoothly, it's essential to follow a proper maintenance schedule. In this comprehensive guide, we'll dive into the details of maintaining your 150cc motorcycle, ensuring it serves you well for years to come.
Routine Inspections and Checkups
The foundation of a well-maintained 150cc motorcycle lies in regular inspections and checkups. Aim to inspect your bike at least once a month, or every 500 miles (whichever comes first). During these inspections, pay close attention to the following:
Tires: Check the tire pressure and ensure the tread depth is within the recommended range. Replace tires if they show signs of excessive wear or damage.
Brakes: Inspect the brake pads and discs for any wear or damage. Adjust the brakes as needed to maintain optimal performance.
Suspension: Examine the suspension components, such as the forks and shock absorbers, for any leaks or signs of wear.
Electrical System: Check the battery, lights, and other electrical components to ensure they are functioning correctly.
Fluid Levels: Top up the engine oil, transmission oil, and brake fluid as per the manufacturer's recommendations.
Maintenance Schedule
Adhering to a structured maintenance schedule is crucial for the longevity and performance of your 150cc motorcycle. Here's a general guideline to follow:
Every 500 Miles (or 1 Month)
Perform a comprehensive inspection as outlined in the previous section.
Clean the air filter and replace it if necessary.
Lubricate the chain and check its tension.
Inspect the spark plug and replace it if needed.
Every 3,000 Miles (or 6 Months)
Change the engine oil and filter.
Inspect the valve clearance and adjust it if required.
Check the condition of the battery and clean the terminals if necessary.
Inspect the throttle cable and ensure it's functioning smoothly.
Every 6,000 Miles (or 12 Months)
Replace the transmission oil.
Inspect the brake fluid and replace it if it appears contaminated.
Check the condition of the tires and replace them if the tread depth is below the recommended level.
Inspect the fuel system, including the fuel lines and fuel filter, for any leaks or blockages.
Every 12,000 Miles (or 24 Months)
Replace the spark plug.
Inspect the clutch and adjust it if needed.
Check the condition of the steering bearings and replace them if necessary.
Inspect the entire frame and bodywork for any cracks or damage.
Remember, these are general guidelines, and it's essential to refer to your 150cc motorcycle's owner's manual for the manufacturer's specific maintenance recommendations. Following the recommended schedule will help ensure your bike's optimal performance and longevity.
DIY Maintenance Tips
While some maintenance tasks may require the expertise of a professional mechanic, there are several basic tasks you can perform yourself to keep your 150cc motorcycle in top shape:
Cleaning and Washing: Regularly cleaning your bike not only keeps it looking its best but also helps prevent the buildup of dirt and grime, which can lead to premature wear and tear.
Lubrication: Properly lubricating the chain, cables, and other moving parts is crucial for smooth operation and reduced wear.
Tire Pressure Checks: Keeping your tires inflated to the recommended pressure will improve handling, fuel efficiency, and tire life.
Battery Maintenance: Regularly cleaning the battery terminals and ensuring the battery is properly charged will help prevent issues with the electrical system.
Air Filter Cleaning: Cleaning or replacing the air filter as per the maintenance schedule will improve engine performance and fuel efficiency.
By taking an active role in the maintenance of your 150cc motorcycle, you'll not only extend its lifespan but also enjoy a safer and more reliable riding experience.
Remember, safety should always be your top priority when maintaining and riding your 150cc motorcycle. If you're unsure about any maintenance task or encounter an issue, don't hesitate to consult a professional mechanic.

1 note
·
View note
Text
Introducing Your Child to Electric Dirt Biking Safely
Are you thinking of introducing your child to dirt biking? Many children are interested in exploring the outdoors and experiencing new adventures. However, as a parent, you want to make sure that your child is safe while enjoying their new hobby.
Electric dirt biking is a popular activity for children of all ages. Not only is it fun, but it also teaches your child valuable skills, including balance, coordination, and spatial awareness. Here are some tips to help you introduce your child to electric dirt biking safely.
Key Features of Kids Electric Dirt Bikes
Electric dirt bikes have gained popularity for their unique features, offering a thrilling and eco-friendly off-road riding experience. Here are some key features that distinguish electric dirt bikes from their gas-powered counterparts:
Electric Motor: The primary feature of electric dirt bikes is their electric motor, which replaces the traditional combustion engine found in gas-powered bikes. Electric motors offer instant torque delivery, providing quick acceleration and responsive throttle control.
Zero Emissions: One of the most significant advantages of electric dirt bikes is their environmentally friendly operation. Unlike gas-powered bikes that emit harmful exhaust gases, electric dirt bikes produce zero emissions, helping to reduce air and noise pollution in off-road environments.
Silent Operation: The lack of engine noise enhances the overall riding experience and reduces disturbance to wildlife and nearby residents.
Low Maintenance Cost: Electric dirt bikes have fewer moving parts than gas-powered bikes, resulting in lower maintenance requirements.
Adjustable Power Modes: Many electric dirt bikes come equipped with adjustable power modes or speed settings, allowing riders to customize the performance to suit their skill level and riding conditions.
Choose the Right Electric Dirt Bike
Choosing the right electric dirt bike for kids is essential to ensure your child’s safety and enjoyment. You should choose a bike that matches your child’s age, size, and experience level. A bike that is too small or too big can be dangerous and uncomfortable for your child.
Consider other features, such as hand brakes, adjustable speed control, and suspension. Hand brakes are much easier to use and more effective at stopping than pedal brakes. The adjustable speed control allows you to limit the bike's maximum speed according to your child's ability. The suspension system helps to smooth out bumps and make the ride more comfortable.
Gear Up for Safety
Before your child starts riding, make sure they put on the necessary safety gear. This includes a helmet, knee and elbow pads, gloves, and riding shoes. It is essential to choose high-quality, properly fitting safety gear to ensure maximum protection.
You should make sure your child wears comfortable and weather-appropriate clothing. Loose-fitting clothes or shoes with laces are not suitable for dirt biking, as they can get caught in the chain, pedals, or wheels.
Start Slowly
Begin your child’s dirt biking experience with gentle terrain, such as an empty field or a flat dirt trail. This will allow your child to gain confidence and become comfortable with the bike before tackling more challenging terrain.
Supervise your child closely while they are riding. Encourage them to take breaks, stay hydrated, and never ride beyond their limits.
Follow Good Riding Habits
Teach your child good riding habits, such as keeping both hands on the handlebars, looking ahead, and riding in control. It is important to emphasize safety over speed and fun.
Encourage your child to ride defensively, stay clear of other riders, and always be aware of their surroundings. Make sure your child understands the rules and regulations of dirt biking and follows them while riding.
Get Your Kids Started with Electric Dirt Bikes
Introducing your child to electric dirt biking can be an excellent way to teach them about the outdoors, while also strengthening their skills and abilities. However, it is crucial to prioritize safety when teaching your child how to ride. By following these tips, you can ensure your child has a safe and enjoyable experience while exploring the world of dirt biking.
0 notes
Text
Mastering the Gears: A Comprehensive Guide to Bicycle Mechanic Training

In the crazy world of cycling, bike mechanics serve as unsung heroes behind every smooth or flawless ride. They are those people who maintain the wheels during running and maintain gears and modify brakes of the bicycle. But what thing make difference between skilled and un-skilled person. Come along with us as we explore the journey of bicycle mechanic training.
Introduction to bike mechanics
Mastering Maintenance Essential
Deciphering Brake Systems
Tackling Gear Systems
Exploring advanced Techniques
Practical Experience and Training
Conclusion
1. Introduction to bike mechanics: Bikes are seen simple but they are quite complicated machinery along with their different components.
a) Frame: Frames are the backbone of any bike or cycle. Frame provides structural support and determining its shape, size. Frames can be made up of different materials like steel, aluminum etc.
b) Brakes: Brakes are very essential for stopping the bike.Brakes are of many types i.e disk break, rim brakes, coaster brakes, each have their different mechanism.
c) Gears and Drivetrain: The gears and drivetrain system allow rider to adjust the resistance and speed of pedaling.
d) Accessories: Accessories such as light, racks and water bottle holder can be added from a customized point of view.
2. Mastering Maintenance Essential: After basic introduction one has to become master in maintenance field. Mastering include:
a) Tire and Tube replacement: In this you have to learn art of swingly changing tubes and tires, ensure that rider roll without any hiccups.
b) Chain care and Lubricant: Understanding the significance of proper chain maintenance for proper performance.
3. Deciphering Brake Systems: In this part you have to understand barking maintenance of bike.
a) Caliper Brake Adjustment: Caliper brake adjustment are very important for bicycles, provides necessary power for stopping and ensuring smooth ride. Caliper brake adjustment consist of two main components i.e caliper and brake lever.
b) Disc Brake Maintenance: Navigating the complexity of disc brake systems, from pad replacement to rotor alignment.
4) Tackling Gear Systems: In this part of training you have to understand how an expert person will tackle the gear system of the Bicycle or Cycle:
a) Gear Adjustment and Indexing : Increasing the rider experience by fine-tuning gears that shift from one gear to another gear without any difficulty.
Signs that show adjustment is needed:
Delayed or hesitating shifting
Skipped or jumping gears
Chain droppings
Excessive noise of chain while shifting from one gear to another gear.
b) Cable Replacement: Mastering the dedicate skill of cable replacement to keep gear systems running smoothly.
Steps involved in Cable Replacement
Assessing cable condition
Gathering materials and tools
Removing old cables
Installing new cables
Adjust Cable Tensions
Fine-tuning and testing
5 Exploring Advanced Techniques: Those who are interested in bike mechanics, there always more interested to know advanced techniques. Let's discuss some of the advanced techniques below:
Wheel turning
Suspension systems
Hydraulic brakes bleeding
Bottom Bracket Overhaul
Crafting your Ride
Electronic Shifting Systems
6 Practical Experience and Training: Becoming a best bike mechanic is not just about memorizing techniques from manual or watching tutorial videos- its about learning from experience and honing your skills through practical guidance. Let us discuss what are available techniques for practical to avail full potential:
a) Apprenticeships: One of the most valuable methods to gain practical knowledge is apprenticeships. In this method you have to work alongside experienced people. Apprenticeships provide hands-on practice that simply can't be replicated in a classroom or online setting, allowing you to develop skills. In apprenticeship you have the opportunity to learn from masters, observe their techniques and ask them questions if you have any of them.
b) Internship: Internship is another great opportunity for gaining practical knowledge, Internship allows you to enroll yourself in day-to day activities. WHether you're assisting the repair, conducing maintenance checks provides valuable hands on training that exposes you to a wide range of repair scenario and challenges.
c) DIY Projects: Even though official internships and apprenticeships offer organized learning environments, learning through do-it-yourself initiatives is still beneficial. Whether you're rebuilding a drivetrain, building a bike from the ground up, or doing regular maintenance on your own bike, do-it-yourself projects let you practice and hone your abilities in a practical environment. They also give you the thrill of watching your labors payoff when you turn a pile of components into a machine that works well.
d) Certification Programme: Although hands-on training is necessary to become a skilled bike mechanic, certification programs can offer official recognition of your abilities. Obtaining certificates shows your dedication to quality and might lead to job chances in the sector. Certification programs make sure you're prepared to take on the challenges of working as a bike technician in the real world by combining classroom learning with practical experience.
e) Continiued Journey: The road to becoming a master bike mechanic continues long after apprenticeships, internships, or certification programs are completed. Maintaining current with technological advancements, tools, and procedures, as well as broadening your skill set to take on new problems, require ongoing learning. The pursuit of knowledge is a lifetime endeavor that fosters growth and innovation in the bike mechanic sector, whether one chooses to participate in workshops, seminars, or industry conferences, or one chooses to just maintain curiosity and an open mind.
Conclusion
Becoming a skilled bike mechanic is not about bike repairing, it is about making sure that every rider ride will be smooth, pleasant and enjoyable. Anyone can start their career as a bike mechanic with commitment, training and a passion for information. Thus get ready, push yourself and let love your riding to lead you to success in the field of bike repair education.
1 note
·
View note
Text
How do I prepare for a motorbike MOT?
Preparing your bike for an MOT (Ministry of Transport) test involves guaranteeing that the motorcycle is in good condition and meets the required safety and environmental requirements. Here's a guidelines that can assist you prepare for a motorbike MOT:
1. Check Lights and Indicators:
Verify that each one lights are functioning correctly, including headlights, brake lights, indicators, and hazard lights. Replace any bulbs that are not working.
2. Inspect Brakes:
Check the brake system, including brake pads and discs, for wear. Ensure that the brakes are responsive and effective. If there are any uncommon noises or points with braking, handle them before the MOT.
three. Examine Tires:
Inspect the tires for enough tread depth and general situation. Make sure there aren't any cuts, bulges, or other signs of injury. Check tire pressure and adjust if necessary.
four. Evaluate Steering and Suspension:
Test the steering for clean operation and check for any play. Examine the suspension components for put on and guarantee they are in good situation.
5. Check Exhaust System:
Inspect the exhaust system for leaks, injury, and secure becoming. Make any essential repairs or replacements. Ensure that the bike meets emissions requirements.
6. Verify Mirrors and Reflectors:
Ensure that mirrors are securely hooked up and supply a clear view. Check reflectors for visibility and correct alignment.
7. Inspect Frame and Body:
Examine the general situation of the motorcycle's body and physique. Address https://www.motparagoncoventry.co.uk/ to loose fittings or damaged panels.
eight. Test Horn:
Verify that the horn is functioning properly. Replace it if necessary.
9. Check Seat and Seatbelts (if applicable):
Ensure the stability of the seat and check seatbelts for proper performance if your motorcycle is equipped with them.
10. Examine Windscreen and Wipers (if applicable):
- If your motorcycle has a windscreen and wipers, examine them for proper situation and performance.
eleven. Verify Fuel System:
- Inspect the fuel system, together with gasoline traces and the gas cap, for leaks and proper functioning.
12. Clean and Tidy the Motorcycle:
- Present your bike in a clean and tidy condition. This not solely reflects positively in the course of the MOT take a look at but in addition allows the examiner to inspect parts more simply.
thirteen. Gather Necessary Documents:
- Bring the mandatory documents to the MOT test center, together with the vehicle registration doc (V5C) and the previous MOT certificates (if applicable).
14. Address Any Known Issues:

- If you might be conscious of any points together with your motorcycle, address them earlier than the MOT check. This includes repairing or replacing defective components.
15. Book the MOT Test:
- Schedule your MOT take a look at upfront. Contact a licensed MOT check heart to e-book your appointment.
By thoroughly making ready your bike for the MOT take a look at, you increase the probability of a successful inspection and minimize the danger of failures or further repairs. Regular upkeep and addressing points promptly contribute to the general safety and reliability of your motorbike..
0 notes
Text
How do I prepare for a motorbike MOT?
Preparing your bike for an MOT (Ministry of Transport) take a look at entails making certain that the motorbike is in good condition and meets the mandatory safety and environmental requirements. Here's a guidelines that can assist you put together for a bike MOT:
1. Check Lights and Indicators:
Verify that each one lights are functioning accurately, together with headlights, brake lights, indicators, and hazard lights. Replace any bulbs that aren't working.
2. Inspect Brakes:
Check the brake system, including brake pads and discs, for wear. Ensure that the brakes are responsive and efficient. If there are any unusual noises or issues with braking, tackle them before the MOT.
3. Examine Tires:
Inspect the tires for enough tread depth and total condition. Make positive there are not any cuts, bulges, or other indicators of injury. Check tire stress and adjust if needed.
4. Evaluate Steering and Suspension:
Test the steering for smooth operation and examine for any play. Examine the suspension components for wear and ensure they are in good situation.
5. Check Exhaust System:
Inspect the exhaust system for leaks, harm, and secure becoming. Make any essential repairs or replacements. Ensure that https://www.motparagoncoventry.co.uk/ meets emissions requirements.
6. Verify Mirrors and Reflectors:
Ensure that mirrors are securely connected and provide a clear view. Check reflectors for visibility and correct alignment.
7. Inspect Frame and Body:
Examine the overall situation of the motorbike's body and physique. Address any points similar to free fittings or broken panels.
8. Test Horn:
Verify that the horn is functioning properly. Replace it if needed.
9. Check Seat and Seatbelts (if applicable):
Ensure the stability of the seat and check seatbelts for correct performance in case your motorcycle is provided with them.
10. Examine Windscreen and Wipers (if applicable):
- If your motorcycle has a windscreen and wipers, examine them for correct situation and functionality.
eleven. Verify Fuel System:

- Inspect the gas system, including fuel traces and the gas cap, for leaks and proper functioning.
12. Clean and Tidy the Motorcycle:
- Present your bike in a clean and tidy condition. This not only displays positively during the MOT test but also permits the examiner to examine parts extra easily.
13. Gather Necessary Documents:
- Bring the necessary paperwork to the MOT take a look at middle, including the automobile registration document (V5C) and the previous MOT certificates (if applicable).
14. Address Any Known Issues:
- If you are aware of any issues together with your motorcycle, handle them before the MOT test. This consists of repairing or changing defective parts.
15. Book the MOT Test:
- Schedule your MOT take a look at in advance. Contact an authorized MOT test middle to book your appointment.
By totally preparing your bike for the MOT check, you enhance the likelihood of a profitable inspection and decrease the danger of failures or extra repairs. Regular upkeep and addressing issues promptly contribute to the overall safety and reliability of your bike..
0 notes
Text
When I was younger I would ride around on bikes with failing brakes, not because my parents didn't have the money but because I was afraid of asking my father for help. If I asked my mom, she would ask me to ask him. My father didn't actually know that you had to replace the brake pads on department store bikes and IDK if he was in a good mood to buy new ones. He was likely too proud/cheap to take it to a shop either.
At one point during high school I walked into a bike shop after biking to the book store 7 miles away and the technician adjusted my brakes for free because he was concerned for my safety.
1 note
·
View note
Text
HOW TO PREPARE YOUR BIKE TO THE MARATHON - BOSB

As you gear up for an upcoming bike marathon, How to prepare your bike to the marathon ensuring that your bike is in top-notch condition is crucial for a smooth and successful ride. From basic maintenance to performance upgrades, proper preparation can make all the difference on race day. In this guide, we'll walk you through the essential steps to get your bike marathon-ready.
Assessing Your Bike's Condition
Checking the Frame and Wheels
Before diving into maintenance tasks, give your bike a thorough inspection. Look for any signs of damage or wear on the frame and wheels, such as cracks, dents, or loose spokes. Addressing any structural issues early on can prevent problems during the marathon.
Inspecting Brakes and Gears
Ensure that your brakes are functioning properly and provide adequate stopping power. Check for worn brake pads and replace them if necessary. Similarly, inspect the gears and derailleurs for smooth shifting and make adjustments as needed.
Basic Maintenance and Tune-Up
Cleaning and Lubricating Components
Start by giving your bike a good cleaning to remove dirt, grime, and debris. Pay special attention to the chain, cassette, and derailleur pulleys. Once clean, apply lubricant to moving parts to reduce friction and ensure smooth operation.
Adjusting Brakes and Gears
Take the time to fine-tune your bike's braking and shifting systems. Adjust brake cable tension and pad alignment for optimal performance. Likewise, fine-tune the indexing of your gears to ensure crisp and precise shifting throughout the marathon.
Upgrading and Customizing Your Bike
Choosing the Right Tires
Selecting the appropriate tires for the marathon can significantly impact your performance. Opt for lightweight, puncture-resistant tires with low rolling resistance for smooth, efficient riding. Consider the terrain and weather conditions when choosing tire width and tread pattern.
Installing Performance Enhancements
Upgrade your bike with performance-enhancing components to gain a competitive edge. From aerodynamic handlebars to lightweight carbon fiber accessories, small upgrades can make a big difference in your overall speed and efficiency.
Preparing Yourself for the Marathon
Training and Conditioning
In addition to preparing your bike, focus on your own physical conditioning for the marathon. Incorporate regular training rides into your schedule to build endurance, strength, and stamina. Gradually increase your mileage and intensity leading up to the event.
Nutrition and Hydration
Proper nutrition and hydration are essential for peak performance on race day. Fuel your body with a balanced diet rich in carbohydrates, protein, and healthy fats. Stay hydrated before, during, and after your rides, and consider carrying energy gels or snacks for quick fuel on the go.
Final Preparations and Checklist
Packing Essential Gear
Create a checklist of essential gear and supplies for the marathon. Pack spare tubes, tools, tire levers, and a mini pump for on-the-go repairs. Don't forget to bring sunscreen, sunglasses, and a helmet for sun protection and safety.
Reviewing the Route and Logistics
Familiarize yourself with the marathon route and logistics to avoid any surprises on race day. Know the location of rest stops, aid stations, and emergency services along the course. Plan your transportation to and from the event, and arrive early to allow time for registration and warm-up.
Tips for a Successful Bike Marathon
Pacing Yourself
Maintain a steady pace throughout the marathon to conserve energy and avoid burnout. Start conservatively and gradually increase your speed as you settle into the ride. Listen to your body and adjust your effort level accordingly to avoid hitting the wall.
Staying Focused and Motivated
Stay mentally focused and motivated during the marathon by setting small, How to prepare your bike to the marathon achievable goals along the way. Break the course into segments and reward yourself for reaching milestones. Stay positive and visualize yourself crossing the finish line strong and triumphant.
Conclusion
How to prepare your bike to the marathon for a marathon involves a combination of basic maintenance, performance upgrades, and personal preparation. By following these steps and incorporating proper training and nutrition, you can maximize your chances of success on race day. Remember to stay focused, pace yourself, and enjoy the experience of tackling the marathon course.
FAQs
How far in advance should I start preparing my bike for a marathon?
It's advisable to start preparing your bike at least a few weeks before the marathon to allow time for any necessary repairs or upgrades.
Do I need to hire a professional mechanic to tune up my bike?
While a professional tune-up can be beneficial, many basic maintenance tasks can be performed at home with the right tools and resources.
What should I do if I experience mechanical issues during the marathon?
Carry basic repair tools and supplies with you during the marathon, and familiarize yourself with common mechanical issues and how to address them on the go.
Is it necessary to taper my training leading up to the marathon?
Tapering your training, or gradually reducing your mileage and intensity, can help ensure that you're well-rested and fully recovered for race day.
Are there any specific nutrition strategies I should follow during the marathon?
Focus on consuming easily digestible carbohydrates and staying hydrated throughout the marathon. Experiment with different nutrition products during training to find what works best for you.
Contact Us: +1 (301) 246 2285
Email: [email protected]


#HOW TO PREPARE YOUR BIKE TO THE MARATHON#buy HOW TO PREPARE YOUR BIKE TO THE MARATHON#sale HOW TO PREPARE YOUR BIKE TO THE MARATHON#order HOW TO PREPARE YOUR BIKE TO THE MARATHON#HOW TO PREPARE YOUR BIKE TO THE MARATHON view#bmxoldschoolbikes.com
0 notes
Last Seen Blogs

ftextblr
Sem título

mikekingjr
Me, Inc.

soggybreadgm
Soggy Bread game dev

respectthewolf
Respect the Wolf

miikocc
miiko