#WHEN I TRIED EXPORTING IT FROM CSP ANYTHING EXPORTED FROM THAT FILE SPECIFICALLY TURNED INTO A GHOST FILE
Text

Epel from my recent vid on the clock app
#YOU GUYS HAVE NO IDEA HOW PAINFUL MAKING THAT VIDEO WAS#WHEN I TRIED EXPORTING IT FROM CSP ANYTHING EXPORTED FROM THAT FILE SPECIFICALLY TURNED INTO A GHOST FILE#SO I MADE A NEW FILE AND HAD YO COPY AND PASTE#WHILE I WAS EDITING STUFF TOGETHER IN CAPCUT I REALIZED I FORGOT TO CHANGE THE FPS OF THE NEW FILE SO I HAD TO RE EDIT IT THE THING#and now i have multiple files on my computer that i cant delete because THEY DONT EXIST#twst
376 notes
·
View notes
Text

yeah! here’s everything i found helpful, plus my own notes on stuff i do differently. everything’s geared towards the portrait 3 (since that’s what i have) and print & cut (since that’s what i got the machine for)
i’ve split this into two sections: files & software, for the computer side of things, and troubleshooting & hardware, for the silhouette machine side of things.
files & software
Designing Customized Planner Stickers in Silhouette Studio
i used this one to learn how to use their design software, and it walks through the basics of manipulating cutlines. if you’re like me and just do print & cut with artwork that’s ready to go before it even gets dragged into the design software, the actual work you need to do in the software is minimal, and what you learn here is more than enough.
super important but easy to miss here is the option to turn the color of the cutting line to be transparent. if you’re dragging in your own art files, anything you drag in will automatically have cutting lines traced around it. even if you expand/contract the cutting lines, the original lines will remain. it’s impossible to actually delete them, so all you can do is make them a specific color that you’ll tell the machine not to cut. that “color” can be transparent, and the machine will automatically ignore cutting transparent lines when you get to the send panel.
also important is that they show how to use the “line” tab on the send panel instead of the simple one. i exclusively use the line tab, it lets you choose exactly which line colors to cut, and you can put different cut settings on each line color so that you can cut with multiple settings in the same session (instead of in 2+ sessions, which i think is what’s needed if you tried to do the same thing with cricut).
Print & cut file setup
this is my personal process for file setup, and i’m including it bc i found that i have to deviate from silhouette’s official tutorials for multiple reasons which i’ll mention as they come up
i mainly do die-cut stickers, with that thing where you leave the very edge of the die-cut sticker bare so that the sticker itself is easier to peel:

and for that i cut two lines: one kiss-cut to cut the sticker itself without the backing, and one die-cut to cut through both the sticker and backing. throughout all my files, i color code the kiss-cut to be blue, and the die-cut to be red.
i prefer to prepare my sticker borders before i ever get to silhouette studio, so most of my file setup is done in csp. my file setup looks like this:

silhouette template is a screenshot of a blank silhouette file that i’ve just scaled up to the size of my paper (either letter or a4) at 300 dpi:

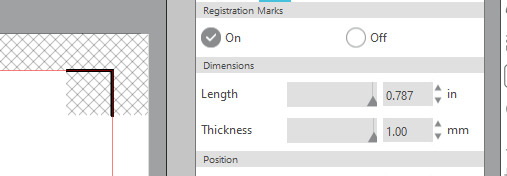
it has print & cut registration marks enabled and adjusted to the thickest setting, and i beefed up my registration marks like this bc i heard it helps the machine read the registration marks. i’ve never print & cut with the marks at default thickness though, so i don’t know if it really makes a difference.
diecut is a folder with a 10px border on it. i turn this border white when i’m exporting the stickers, but when i’m working and arranging the stickers, i keep the border anything but white so that it’s visible.
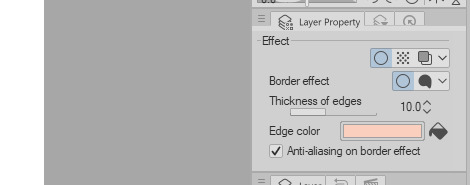
kisscut is a folder with a 25px border on it. i keep this border white even when i’m working with the file, but i’ve turned it blue for these screenshots so that it’s more obvious.

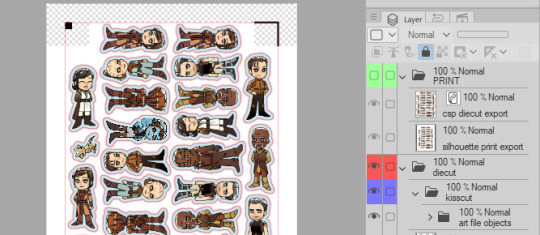
inside the kisscut folder is all my sticker files, represented by the “art file objects” folder. i’ve only put them in a folder to condense them for screenshotting, though--normally the layer setup looks like this:

i import all my sticker art files as file objects so i can transform and resize them without worrying about losing quality with raster files. the file objects link to csp files that i keep in a separate folder, and each of those files contains just the flattened artwork for the sticker. i could link to files that have all the working layers and stuff in them still, but that tends slows csp down, so i try to limit the layers i have in the files i link to.

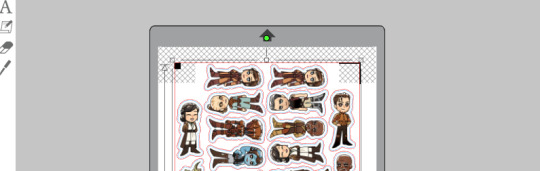
then i scale and arrange all my stickers the way i want them, making sure all my cutlines will be within the red box, and none of my artwork overlaps with the crosshatched area:
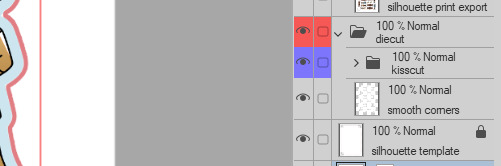
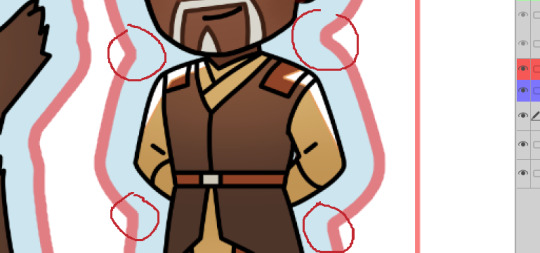
after that, i control+shift+click the diecut folder to select the area of everything in it, and shrink the selection by 10px (the same width of the diecut folder border). i fill that layer with white and put it in the diecut folder, right below the kisscut folder. this is the smooth corners layer:
i do this because there are often sharp corners on my sticker files, which translate to sharp corners on my borders. the silhouette doesn’t do too great with cutting sharp corners; the cut won’t reach all the way through, or it’ll nick the paper, or tear the paper up a bit, etc.

when you shrink/expand a selection, csp has an option to smooth out corners, so i just use it as a little shortcut to smoothing those corners out.

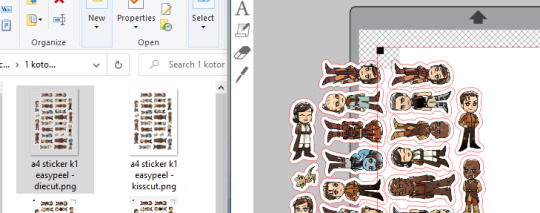
then i can export my files. i make the diecut and kisscut borders white, hide the template background, and export two transparent pngs: one “diecut” png with the diecut border enabled, and one “kisscut” png with the diecut border disabled.
then i drag my png’s into silhouette studio, into a new file with the registration marks prepared as they were in my template. sometimes, even though the png shows up in silhouette studio after dragging, you can’t actually select or move it; when that happens i just drag the file over again, and it kinda refreshes it.
i change my kisscut file’s cutline blue, so that i can give it different cut settings than the diecut:

then i align them! when one file’s borders are clearly scaled up from another file’s borders, the software lets them snap to be centered with each other, so alignment is easy:
edit: to bypass dealing with pdfs entirely, just do this
now at this point, silhouette would have you believe that you can just print from silhouette studio. but printing straight from the software visibly altered the quality of the artwork (and it’s not just me, other people have complained abt the same thing), so i print through csp instead. to do that though i have to align my csp file with the silhouette file perfectly, and since i arranged my silhouette file by hand, i need to get the silhouette file’s alignment into csp somehow. i kinda do it in a roundabout way, but i:
1) click print in silhouette studio, and print to pdf. (since my file is for a4 size paper, not my default letter size paper, i always have to go into the print properties to make sure the pdf is going to be a4 as well).
2) open up the pdf in photoshop and copy the pdf layer. (though if you don’t have an art program you can open pdf’s in, you can also just open the pdf in a browser and screenshot + scale it up to the right size).
3) paste the layer into my csp file, under my print folder. i’ve named it the “silhouette print export” here:
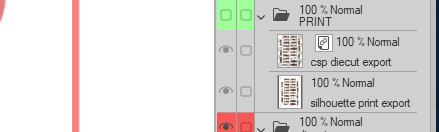
4) import my diecut png as a file object (named the “csp diecut export” here), and manually line the artwork up with the silhouette print layer. it’ll never line up perfectly--the silhouette print is kind of stretched out compared to the crisp original png--but it’s such a small thing that it doesn’t affect the image’s alignment with the cut or anything.
5) print through csp.
there are a couple advantages to doing it in this super roundabout way. because all your silhouette file does is dictate the cut lines, and you now know the exact position of the cut lines, there are a few changes you can make to the image in csp without ever touching silhouette studio again, like create multiple print files that use the same cut file, or adjust your print file for drifting cut lines.
troubleshooting & hardware
Misaligned/drifting cut lines
my machine’s cut lines tend to drift off from my print image at the lower right corner of the page specifically, and apparently it’s a common issue that persists even after calibrating and everything. other people’s workarounds have been to adjust individual cut lines in the problem area to counter the drift, but because it’s easier for me alter my print files than my cut files, i just make little adjustments to my print. this does require “wasting” the first cut you do for that design, since you need to see exactly where the drift is, but it’s a small price to pay for your cuts to be more precise.
Registration issues
the most common issue that comes up with print & cut is that the machine can’t read the registration marks. there’s a whole official help page and video for it that’s very thorough, but the basics of it are that the machine has trouble with glossy/reflective paper in particular, and for that kind of paper you probably want to go over the registration marks with a black pen/sharpie.
the pen fix has worked for me so far, but some people also:
1) printed registration marks onto regular matte paper, cut out the marks, and stuck them on the corners of the page they’re cutting
2) shine a bright light on the registration mark during mark detection
3) move the paper higher on the mat
4) turn off all the lights so that the room is dim
Silhouette Troubleshooting
the very first thing my machine did was malfunction on me lol. this page didn’t help with my specific issue (which i’ll get into after this) BUT it has a few pages that i referred to a LOT:
Firmware Update: the first thing i had to do with my machine (after i got it functioning) was do this update. if you have a portrait 3, you can ONLY do this through silhouette studio, the other manual method is for older machines. this is true for the cameo 4 too i think. if silhouette studio connects with your machine, a little thing will pop up at the send panel with an option to update.
Silhouette Machine Cutting Issues
Calibrating the Silhouette Cutting Machine for Print & Cut Alignment
Cutting Machine Loading Overview & Troubleshooting: a lot of tutorials assume that you already know all the basics about your machine, but i was a complete newbie to the whole cutting machine thing so i didn’t know Anything, and really needed this link that tells you where to align your cutting mat when loading it into the machine. it’s SUCH a basic thing, but it’s not labeled on the machine and isn’t even in the user guide!
Troubleshooting when the machine won’t connect to silhouette studio and the light on the machine’s power button keeps blinking (this was my specific problem that i couldn’t find an answer to anywhere online)
from my testing and observation, i've concluded that if you have this issue, your computer cannot be allowed to interact with any printer while your silhouette machine is plugged in, or silhouette studio will not be able to connect to your machine. printing with ANYTHING that shows up in a print window will interrupt silhouette studio’s connection with your machine, including printing to things that are not real printers, like “print to pdf”.
from all the troubleshooting stuff i read, it seems like part of the reason for this problem is that computers register silhouette machines in the same category as printers. a few solutions the official site suggests for this problem are to fix your drivers or clear your printer queues or stuff like that, but none of that helped me, and i found a workaround. it is:
to avoid the issue: never, ever print while the silhouette machine is connected. i have my silhouette plugged into a separate laptop that’s not connected to any printers, and exclusively interact with my machine through that laptop. if you don’t have an old laptop laying around like i do, this workaround is admittedly pretty excessive, so the other workaround is just to print everything you want to print before you plug your silhouette machine in, and make sure to unplug your silhouette if you want to print again.
to fix the issue when it happens: turn your silhouette off and unplug it from EVERYTHING. nothing should be connected to the machine--this means both the power cable & usb cable have to be unplugged from the machine (and from the computer while you’re at it). then you let the machine sit, untouched, for at least 10 minutes. after 10 minutes, you can plug it back in. some people think that the order that you plug things back in matters; i don’t know about that, but i try to follow a specific order anyway. i follow the order that’s used in the official machine set-up, which is:
1) connect the silhouette to the power supply
2) plug the power cord into an outlet
3) do not connect the usb cable yet
4) turn the silhouette on with the power button
5) open silhouette studio on your computer
6) connect the silhouette to your computer with the usb cable
7) open the send tab in silhouette studio to check that the machine is connected
this has fixed my problem when i’ve had it. if 10 minutes doesn’t work, wait even longer. i have a feeling that the machine has a function to remember the last job it was sent for ~10 minutes after it’s powered off, so it’ll remember that it’s having trouble connecting if you turn it back on too soon. turning it off for an extended time lets it reset.
#i hope this is even remotely helpful!!#tbh most of what i rly needed to get started with the machine was troubleshooting loL so like half of it is just that#ppl say silhouette's design software has a high learning curve you have to watch out for but it's important to remember that#the audience these ppl are saying that to is an audience that doesn't work with vector files or art programs and is starting from square 1#since you have experience with vector stuff already it'll probably be easy for you to pick up the design software & just be a matter of#finding out where each of the tools/functions are#art tips
27 notes
·
View notes
Last Seen Blogs

regalodemivida
No me provoques

anima-jon
Jonathan Rodrigues


hortiicultured
He2iitantly Bloomiing

d347h5c3n3-blog
vintage nerd.