#UnityEngine
Text

67 notes
·
View notes
Text
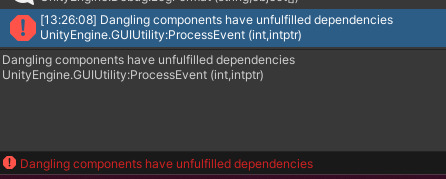
It's so... uh... dystopian to be hear the friendly Nintendo Direct announcer through the lens of the Unity debacle :P

We're making it guys, we are in the future we've been toying with in fiction.
35 notes
·
View notes
Text
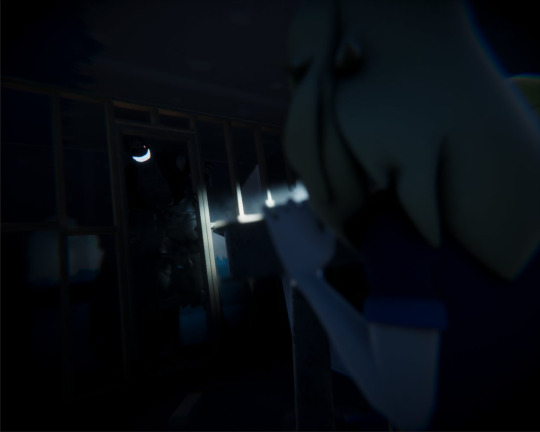
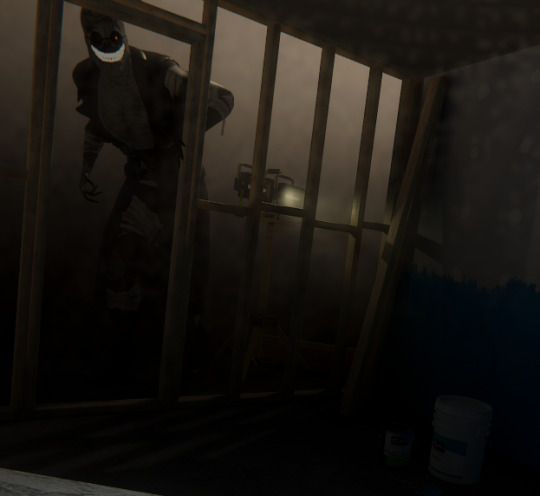
"Run."
Rendered in Unity with the HDRP pipeline Models made by me Background belongs to unity in the HDRP tutorial +earlier version I kind of like
23 notes
·
View notes
Text
On this stormy night, you find shelter, but at what cost? Your time to see my portfolio piece and admire the stormy nature of my project, yay!! In this project, I made a simple and short level design project of the player navigating through a tiny forest on a stormy night who will then find a mysterious cabin to stay in.
This project was designed not to be the next game on the market, but to flex my level design skills with particles, and for the first time to use Tree Creator and wind zone to create trees and wind respectfully. The assets (including the fps controller and one of the trees) are mostly borrowed from the Unity asset store, except for the trees I created (which will be shown one by one later in the video).
WHAT I LEARNED:
· How effectively I can use the Tree Creator to create main roots, growth, leaf frequency and growth, textures, branches, LOD, how effective are they in the wind, size (including leaves), and crankiness of branches of trees
· About how to use the wind zone for the first time and how effective and complex it is to use to enable to blow the trees around like the real-life wind.
· How I can make small particles float around until they reset their starting position to play the particle again.
· How I can shape particles. E.g. the dust flying around and the rain particles falling respectfully.
· Rotating around skyboxes to fit in with the scenes better. · Using code to make a randomized range with an enumerator to flick the lightning (directional light) between 15- 20 seconds.
· How effective using flare lights can be used to get players' attention from a distance,
WHAT I IMPROVED:
· I improved on mixing different terrain textures with each other to make it seamless and blended together as possible.
· I managed to control how high and low the terrain is to distinguish which are hills/mountains and walkable areas.
· Getting a better hang with the lighting and post-fx respectfully.
· Snapping modular pieces such as planks and steel roofs to corners of the little house to reduce z-fighting visuals.
WHAT I COULD HAVE DONE BETTER?:
· For rain particles, I could have added a splash particle when the rainwater collides with the terrain to make it more realistic and alive instead of it going through the ground.
· Not all the trees look exactly what I call “natural” trees, some looked a bit randomized with branches and a little bit blobby, so I will need to practice with the Tree Creator in the future to get better realistic trees.
· I would need to be careful how many leaves and branches are attached to the trees, otherwise, it will increase the polycount in the scene and crash the game.
· I only used a minimum of post fx this time because I thought without the player having a flashlight or lamp posts around, the player would struggle to find their way around if the post fx is too dark. So next time I should have a flashlight or lamp posts for the player to navigate around and use more post fx to enable me to use more of my creative freedom of it.
OVERALL:
Not only was this something a little different and a good exercise to improve my level design skills including sculpting the terrain and creating particles, but to try out new things like using the tree creator to create trees and using the wind zone to control how much wind to blow trees. Next time I may need to practice on the terrain editor and tree creator more to create more unique trees and terrain or just simply create trees and land from modular sets instead all respectfully, but that would depend on the next game I will be making. Overall- good exercise to expand my level design toolbelt.
#soledevoloper#australiangamedevoloper#indiedev#gamedev#gamedevelopment#indiegames#indie#indiegame#indiegamedev#indiegaming#game dev#design#project#walking simulator#fps#level design#unityengine#indie games#AustraliamGameDevoloper#game development#Soledevoloper#pcbuild#firstpersonshooter#designer#game design
5 notes
·
View notes
Text
DEV LOG 1 - Construindo o jogo plataforma Plumbers Paradise na Unity Engine
Aprenda como realizar a criação de um jogo Plumbers Paradise na Unity Engine. Prepare-se para acompanhar o desenvolvimento passo a passo, desde a concepção inicial até os desafios de programação e design. Explore os processos criativo, aprenda técnicas novas técnicas e descubra dicas para desenvolvimento de jogos. Entre no mundo de construção de games e torne-se parte da jornada dessa…
View On WordPress
#Construindojogo#DevLog#JogoDesenvolvimento#Plataforma Plumbers Paradise#Plumbers Paradise#UnityEngine
0 notes
Text
It's #TELLMETHURSDAY! (I know, a bit late) I firmly stand with the indie devs! I also wanna play your game on my channel! Share your links in the comments!
#TELLMETHURSDAY#gamedesign#indiegame#gamedev#indiegamedev#indiedev#indiegames#demo#Unity#unity3d#UnityEngine#unityruntimefee
0 notes
Text

To be fair, I'll probably put some time into learning all three, but Silent Shadow comes first. Been working on asset kits to use in the webcomic because I'm too stubborn (how about dumb?) to buy premade kits.
1 note
·
View note
Text
Btabtablog #2 - Stalling the solution
Todays main lessons are:
Progress isn't always smooth,
Save as often as possible
I sadly, didn't head the second lesson, which lead to the first being re-learnt. In short I didn't save my work before I stopped for the day, and lost several hours of work. However, I knew what to do so recovering my progress wasn't too big of a problem.
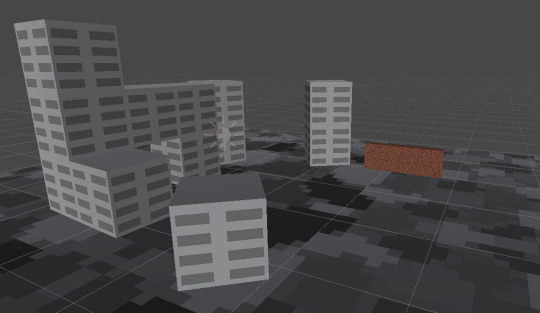
This, meant that I had to remake this, which believe it or not, is the (new) city that I will be using to demo any new things I have to show off.
Presentation
The first thing I have to show off is more for cinematic effects (something I don't usually care about). It took around 3 hours to complete, most of which was writing the code, the rest spent on a mix of setting up the scene for the demo and refactoring the code to make it work better.
Here it is in action. It works via subtracting the difference between the points A and B, creating a percentage variable that controls the cameras position along the path and moving the camera along said path. To be more precise: The percentage is worked out by a position index variable, which increments every frame. This is divided against a user defined variable of path resolution. This result, each frame, is multiplied by the distance between A and B and that is then set as the cameras position.

Here is the code for anyone who is curious (you can of course use it, just credit me for it). I will open source the code for this sometime soon, either that or I'll make it available as a module of some sort on the Unity marketplace (not just this but the rest of the project too).
Checking your "IF"s
share your code, help people, and don't be afraid to get stuff wrong, the amount of stuff I got wrong to then get this right is almost embarrasing. I spent a half an hour or so on the fact that I had an if statement that was "==" instead of "!=" which lead to a segment of code not running, the same segment I was combing through again and again for bugs. So don't be as silly as me and please be sure to check everything, even what you think works.
Have fun and keep it up!
1 note
·
View note
Photo

Diálogos automáticos | Unity 2D Meu primeiro videogame Para mais informações: [email protected] #unity #unity2d #unity3d #unityengine #unitygames #cmaemo #carlosmaemo #gamexplora #meuprimeirovideogame #mozambique #moçambique #mozambiquevideogame https://www.instagram.com/p/CjfCSFpKH9h/?igshid=NGJjMDIxMWI=
#unity#unity2d#unity3d#unityengine#unitygames#cmaemo#carlosmaemo#gamexplora#meuprimeirovideogame#mozambique#moçambique#mozambiquevideogame
0 notes
Text
Hi friends!
Here's a Unity C# script for a generic trigger that allows you to hook up public functions to events in the inspector. It's really simple but super handy for when you want junk to happen as the player passes through a trigger.
Code below:
using System.Collections;
using System.Collections.Generic;
using UnityEngine;
using UnityEngine.Events;
public class GenericTrigger : MonoBehaviour
{
public UnityEvent OnEnter;
public UnityEvent OnStay;
public UnityEvent OnExit;
void OnTriggerEnter(Collider c) { OnEnter.Invoke();}
void OnTriggerStay(Collider c) { OnStay.Invoke(); }
void OnTriggerExit(Collider c) { OnExit.Invoke(); }
#gamedev#game development#game dev#indie games#gamedevelopment#indiedev#indie dev#codeblr#unity#made with unity#unity3d#c sharp#programming#indiegamedev
16 notes
·
View notes
Text
Week 9
this final week was incredibly stressful. as a group we had set a deadline for Sunday for all game making. this would give us monday- Wednesday to finalise our individual essays, blogs, and group presentation.
this deadline was however not met as lace was not ready with the player controls that she had been working on for the previous 2/3 weeks.
I feel as though this work was disproportionately delegated once again as I felt that I had to absorb the workload to ensure the outcome was finished in time. while I was struggling to troubleshoot elements of my own parts of the game, I was dipping into trying to find lace resources to motivate her to keep trying to get the outcome we needed.
I took on combining the projects too to the best of my ability without compromising the functionality of each scene. the most difficult part of this was switching over the sprites and controls. in the end I kept the player element that I had been using as lace's sprites wouldn't spawn into the multiplayer host or client.
due to all of the delays in completing the game, we were unable to have a test run through before the deadline/presentation. this was really frustrating as we had given multiple deadlines that included contingency times to ensure that we would be able to have a run through.
using System;
using Unity.Netcode;
using UnityEngine;
public class PlayerController : NetworkBehaviour
{
[SerializeField] private float speed = 3f;
private Camera _mainCamera;
private Vector3 _mouseInput;
private void Initialize()
{
_mainCamera = Camera.main;
}
public override void OnNetworkSpawn()
{
base.OnNetworkSpawn();
Initialize();
}
private void Update()
{
if (!Application.isFocused) return;
//Movement
_mouseInput.x = Input.mousePosition.x;
_mouseInput.y = Input.mousePosition.y;
_mouseInput.z = _mainCamera.nearClipPlane;
Vector3 mouseWorldCoordinates = _mainCamera.ScreenToWorldPoint(_mouseInput);
transform.position = Vector3.MoveTowards(transform.position,
mouseWorldCoordinates, Time.deltaTime * speed);
//Rotate
if (mouseWorldCoordinates != transform.position)
{
Vector3 targetDirection = mouseWorldCoordinates - transform.position;
transform.up = targetDirection.normalized;
}
}
}
I put the above code from the multiplayer tutorial into my player prefab, for mouse control.
Asked chat got to give me a code that would use WASD or arrows instead of mouse input. This wasn’t right as the character would only go up/ forward in whatever direction it was facing.
After inspecting the code, I removed the few lines to do with the rotation of the character and this fixed my issue so now the input would move the character in the correct direction while remaining in the same view. The movement style reminds me of Mario games where even once the player stops moving the input button, the character continues to slide slightly which is more of a style decision in my opinion rather than a mechanics issue.
using System;
using Unity.Netcode;
using UnityEngine;
public class PlayerController : NetworkBehaviour
{
[SerializeField] private float speed = 3f;
private Camera _mainCamera;
private void Initialize()
{
_mainCamera = Camera.main;
}
public override void OnNetworkSpawn()
{
base.OnNetworkSpawn();
Initialize();
}
private void Update()
{
if (!IsOwner || !Application.isFocused) return;
// Movement using WASD keys or arrow keys
float horizontalInput = Input.GetAxis("Horizontal");
float verticalInput = Input.GetAxis("Vertical");
// Calculate movement direction based on input
Vector3 movementDirection = new Vector3(horizontalInput, verticalInput, 0f);
// Normalize the movement direction to prevent faster diagonal movement
movementDirection.Normalize();
// Convert movement direction from local space to world space
Vector3 moveDirectionWorld = transform.TransformDirection(movementDirection);
// Move the player object
transform.position += moveDirectionWorld * speed * Time.deltaTime;
}
}
The next issue I ran into was trying to have each player being client owned so that when a player moves their character, it moves it on the server so that everyone can see. This took a very long time to figure out where the error was coming from but it ended up being the version of the network manager installed. I changed this to the 1.8 version and this problem was fixed.
I had a 40 minute call with Tony on the Tuesday to see if I could pass the data from the avatar creation to the player prefab section on the network manager inspector within the multiplayer scene.
he sent over a video for me to watch that was a very simple way of storing the character selection.
youtube
the only issue with using this video was without starting the game over again, and maintaining the multiplayer network aspect, it wasn't possible to call on the stored character selection data.
in the end I had to leave this part as unfinished and just select 1 prefab to use as a character sprite for everyone that plays the game. I would like to revisit and hopefully make this aspect of the game possible as it is a major part of the game's interface.
the next step for me was to figure out how we will distribute our game to players in Birmingham and Kyiv. I had the option of distributing the game as a file, optimised for Mac but hopefully functioning on Mac windows and linux or to upload it as a webGL. this took quite a bit of trial and error to ensure the script functioned without errors allowing the project to be exported, and then for the user experience to be identical to what was seen in the "game" window of unity's editor. in the end I pursued both WebGL and application so that we had increased odds of the game working on the day. the cut scene wouldn't work on the webgl format so I attached a link to a google drive linking both the zip file and application. I chose google drive so that the students in Ukraine would also be able to access the files. I then put this link in our spatial portal on the backup video of how the game should run.
ultimately, if the multiplayer aspect to our game works, the brief and clients needs will be met of creating a portal between Birmingham and Kyiv.
0 notes
Text
Welcome to the trans experience
9 notes
·
View notes
Text
Learning Unity - Official "Create with Code" course
Unity has an official, free online course called "Create with Code" that teaches you how to use Unity to create some simple prototype games. Unlike many tutorials on Youtube, these lessons are structured in a way where you are told to "Watch, then do", meaning that you're supposed to pay full attention to the video, and then go off and do what was shown by memory. This is a very effective way to ensure learning as it forces you to retain as much information as possible and truly understand what it is that you're actually doing, as opposed to mindlessly copying a tutorial without spending any time understanding what's actually happening.
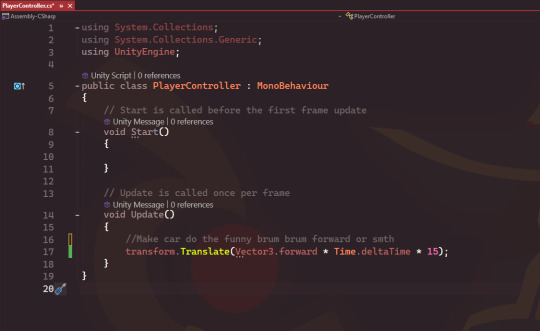
So far I've gotten to lesson 1.3 and have a scene where a car drives down a road, crashing through crates that have physics applied to them. I had to learn a tiny bit of C# to get that to work (emphasis on tiny, as it's basically just a couple lines so far)
To my understanding so far based on both my experience with Unreal Engine, as well as my limited experience in other languages like Python. I believe I can give a mostly-accurate explaination of everything here (Please excuse me if I'm incorrect on a couple bits here as I am still learning these things):
To the best of my understanding:
The first 3 lines are basically calling libraries, System and UnityEngine. These libraries basically just contain a bunch of functions and such that you can call later in the code.
Line 5 is creating a public class, which I guess is sort of like a custom event in Unreal? Maybe it's closer to an exposed variable, though im not 100% sure if this actually counts as a variable or not yet. Though basically it's creating something that can be accessed by anything else, and then inheriting from MonoBehaviour, which is another class that I believe comes from the UnityEngine library.
Line 8 kind of explains itself, it's a function (once again, I believe comes from the UnityEngine library) that is called immediately as the game begins, before the first frame update even happens. Any methods put inside the curly brackets will be executed the instant the game is opened (or at least, the instant the script is activated).
The "void" part to my knowledge basically just means that it doesn't return any values, though I'm not entirely sure what that entails as I've only briefly looked into it so far.
Line 14 is basically the same thing except instead of everything running as soon as the script is activated, it instead runs everything constantly every single frame (so if your game is running at 60fps, everything will execute 60 times every second).
Finally, line 17 is the part I actually wrote (well and 16). The rest of the code so far was there by default when I created the script in Unity. Anyways this basically calls the transform function, then uses a sub-function? (I forgot the proper name) called translate, and then uses Vector3.forward which is the same as typing (0, 0, 1) which would make the object go forward by 1 meter on the Z axis. then it multiplies that by Time.deltaTime, essentially just meaning every second, and then finally it multiplies that by 15. Once it's saved and run, it results in this (No I'm not controlling the vehicle, at the moment it just goes automatically):
0 notes
Video
A short minigame project exercise to kickstart for the new year, This time comes a Frogger clone. I usually prefer not to make game clones, but I decided to do a short exercise to warm up my skills for this year since I'm doing more complex projects later this year and then looking for work as a game tester or game designer.
I did not make these assets, they were provided to me by AwesomeTuts.
What I learned
- to move the player character 1 unity without using delta time.
- Getting The player to move to the starting position without using a vector 3 variable while executing it from another script rather than the player controller script.
What I could've done better
-Even though the background "roads" is not mine, It doesn't look pretty and is uneven with the player moving from unit to unit. So I could have made the roads and grass( safe area) follow unit by unit rather than be uneven which would cause the player to be hit by cars more easily.
Overall
-It was a nice warm-up for the beginning of this year.
#project#designer#nostalgia#arcade#clone#frogger#gamedevelopment#unityengine#indiegames#australiangamedevoloper#indiedev#soledevoloper#cars#projects#indiegame#gamedev#unity3d#mechanictest
6 notes
·
View notes
Text
The Code I ended up using:
using UnityEngine;
public class PlayerController : MonoBehaviour
{
private Animator animator;
private Rigidbody2D rb;
public float speed = 5f;
public float jumpForce = 10f;
private bool isGrounded;
private bool isWalking;
private bool isRunning;
private void Start()
{
animator = GetComponent<Animator>();
rb = GetComponent<Rigidbody2D>();
}
private void Update()
{
// Handle input for movement
float horizontalInput = Input.GetAxis("Horizontal");
isWalking = Mathf.Abs(horizontalInput) > 0.1f;
isRunning = Input.GetKey(KeyCode.LeftShift);
// Set animator parameters based on input
animator.SetBool("Idle", !isWalking);
animator.SetBool("Walk", isWalking && !isRunning);
animator.SetBool("Run", isWalking && isRunning);
// Jumping
if (Input.GetButtonDown("Jump") && isGrounded)
{
animator.SetTrigger("Jump");
rb.AddForce(new Vector2(0f, jumpForce), ForceMode2D.Impulse);
}
// Special move
if (Input.GetButtonDown("SpecialMove"))
{
animator.SetTrigger("SpecialMove");
// Add code for special move behavior here
}
}
private void FixedUpdate()
{
// Check if the player is grounded
isGrounded = Physics2D.OverlapCircle(transform.position, 0.2f, LayerMask.GetMask("Ground"));
}
}
This ended up being my final code, however it was not working because it turns out I didn’t have a movement script included. In Unity, I created completely new parameters from scratch, so I could start over. I added isWalking, isRunning and isGrounded bool parameters, and set Jump and SpecialMove as triggers. Jump was already there, but I created a custom SpecialMove key in Unity Editor. I’m using A & D movement, space to jump and E for special move
0 notes
Text
Youtubeライブでニコ動風コメントを流す方法
UnityでYouTubeライブのコメントをニコニコ動画風に右から左へ流すスクリプトを作成します。このスクリプトは、YouTubeライブからコメントを受け取り、それらを画面上を横断するアニメーションで表示します。UnityでのUI要素とアニメーションの管理について基本的な知識が必要です。
まず、YouTube APIを使用してライブのコメントを取得する必要があります。これにはGoogle APIの使用許可と設定が必要です。ただし、ここではコメントを流す部分のみに焦点を当てて、具体的なYouTube APIの使用方法は省略します。
以下のスクリプトは、UnityのUI Text要素を使用してコメントを表示し、横に流すアニメーションを作成します。このスクリプトは、新たなコメントが受け取られた時に呼び出されることを想定しています。
using UnityEngine;
using…
View On WordPress
0 notes
Last Seen Blogs