#UIDAI login
Link
#how to download aadhar card#Aadhar card download#UIDAI#UIDAI aadhar#UIDAI gov#UIDAI aadhar download#UIDAI aadhar update#UIDAI download#UIDAI login#UIDAI status#UIDAI update#UIDAI aadhar card#how to link pan with aadhar#how to change address in aadhar card
0 notes
Text
PIB Fact Check : प्रत्येक Aadhaar card धारक को केंद्र सरकार देगी 4.78 लाख रुपये! पीआईबी ने अपने खुलासे में क्या कहा, जानिए क्या है सच्चाई, पढ़ें पूरी खबर | ऑनलाइन बुलेटिन डॉट इन
PIB Fact Check : नई दिल्ली | [नेशनल बुलेटिन] | The central government will give Rs 4.78 lakh to each Aadhaar card holder! What did PIB say in its disclosure, know what is the truth, read the full news.
सोशल मीडिया पर एक सन्देश बड़ी तेजी के साथ वायरल हो रहा है. जिसमें दावा किया जा रहा है कि केंद्र की मोदी सरकार देश के सभी Aadhaar card धारकों को 4 लाख 78 हजार रुपये का लोन दे रही है. हम इस खबरे में…

View On WordPress
#Aadhaar card#aadhaar card address change online#aadhaar card address update#aadhaar card application#aadhaar card application status#aadhaar card appointment#aadhaar card check online#aadhaar card correction#aadhaar card download#aadhaar card download online#aadhaar card form pdf#aadhaar card login#aadhaar card number#aadhaar card online#aadhaar card password#aadhaar card phone number change#aadhaar card signature not verified#aadhaar card status#aadhaar card status online#aadhaar card uidai#aadhaar card update#aadhaar card update online#aadhaar card update status#aadhaar card verification#pib fact check in hindi#pib fact check twitter
0 notes
Text
How to update UAN and EPF KYC details Online
UAN stands for Universal Account Number is a 12-digit number given to each EPFO member. This number, which acts as a pivot, connects many Member Identification Numbers (Member Ids) assigned to a single member. Here are few important FAQs on UAN KYC, release by EPFO.1. What is KYC?
Know Your Customer or KYC is a one-time process which helps in identity verification of subscribers by linking UAN with KYC details. The Employees / Employers need to provide KYC details viz., Aadhaar, PAN, Bank etc., for unique identification of the employees enabling seamless online services.2. How can I seed my KYC details with UAN?
o Login to your EPF account at the unified member portal
o Click on the “KYC” option in the “Manage” section o You can select the details (PAN, Bank Account, Aadhar etc) which you want to link with UAN
o Fill in the requisite fields o Now click on the “Save” option
o Your request will be displayed in “KYC Pending for Approval”
o Once employer approves the details the message will be changed to “Digitally approved by the employer”
o Once UIDAI confirms your details, “Verified by UIDAI” is displayed against your Aadhaar.
3. What to do if my employer is not approving KYC?
In case your employer is not approving KYC details, you can directly approach administration or HR department with request. If it is taking more time you can escalate it to higher authority in the organization. If no one is responding to your request you can approach EPF Grievance via http://epfigms.gov.in.
4. How do I know that KYC updated by me is approved by the employer?
The status will be shown against updated KYC document on the same page. The system will also trigger SMS on your register mobile number.5. How can I seed my Bank account details?
o Login to your EPF account at the unified member portal o Enter your bank account number and IFSC code. o The details have to be approved by your employer. o Once approved the bank account gets seeded.6. What can I do if my UAN is not seeded with Aadhaar? Member can himself seed UAN with Aadhaar by visiting member portal. Thereafter the employer must approve the same to complete the linkage. Alternatively, member can ask his employer to link Aadhaar with UAN. The member can use “e-KYC Portal” under Online Service available on home page of EPFO website or e-KYC service under EPFO in UMANG APP to link his/her UAN with Aadhaar without employer’s intervention.7. Can I change my already seeded Bank account number?
Yes. The bank account number can be updated any number of times by following the steps mentioned above. However, the bank account details cannot be changed during pendency of any claim with EPFO.
8. What precautions should I take while seeding Bank account number?
You should seed active bank account to which you are either an individual or joint holder with your spouse. Also ensure that the bank account does not have a deposit cap greater than your withdrawal benefit.
9. I have changed my job. Should I activate my UAN again?
UAN has to be activated only once. You do not have to re-activate it every time you switch jobs.
10. Do I have to pay any fee for UAN registration?
No, UAN registration is free of cost and you do not have to pay any fee to activate it.
Source link
Read the full article
2 notes
·
View notes
Text
Aebas (Aadhar enabled biometric attendance system)
Are you worried about the lingering status of Aadhaar?
Has it been used for the purpose it was intended for
Aadhaar Enabled Biometric Attendance System (AEBAS) is making use of Aadhaar to monitor employee attendance across various government organizations in the country. More and more government organizations are being brought under the umbrella of AEBAS thanks to the wonderful infrastructure built while implementing Aadhaar.

Aadhaar Enabled Biometric Attendance System known in short as AEBAS is a time and attendance marking system based on biometric technology linked with the verification of Aadhaar. The system is particularly aimed at recording employee attendance in various government offices and agencies.
This initiative of the Indian government forms part of the “Digital India” drive. AEBAS is a real- time monitoring system that makes use of Aadhaar generated by the Unique Identification Authority of India (UIDAI). This biometric system makes use of either fingerprint or iris.
Aadhaar number from the Unique Identification Authority of India (UIDAI) is useful in recording employee attendance. This cloud-based system otherwise known as Biometric Attendance System (BAS) takes care of employee attendance in real-time.
Need for AEBAS
Thousands of employees are working across various departments for the Government of India. Tracking the attendance of these employees is an arduous task. However, the presence of employees on time is critical for the success of various activities of the government.
During yesteryears the attendance of this workforce was recorded manually. But monitoring and maintaining the entire database was proving to be difficult. There was also the question of reliability as records were vulnerable to tampering or there could be an entry of faulty data.
Therefore biometric-enabled attendance system was introduced to overcome the above-mentioned shortcomings. This has been proved to be the best real-time solution for marking reliable and accurate information.
Though various government offices have replaced manual entries with electronic attendance recording carried out through smartcards or biometric systems, there was a need for monitoring the attendance through a centralized system. As sharing of attendance data through various levels was cumbersome, the government has come up with an idea to make use of the existing Aadhaar infrastructure which enables to reduce cost while improving overall efficiency.
Aadhaar Enabled Biometric Attendance System or AEBAS formulated by the Government of India is a real-time monitoring system that helps in improving the punctuality and productivity of government employees at large. The Aadhaar number generated by UIDAI ( Unique Identification Authority of India) is utilized in the process of authentication carried out by AEBAS. Cloud-based BAS helps in monitoring the attendance of the employees in real-time.
Best form of authentication
Authentication of employees can be done in two ways. One is an android based (tablet device) while the other is embedded Linux based (biometric device). In the case of tablet-based authentication, the durability of the product is under question. It is not as good as biometric products. Generally built for a single application, in this particular case being attendance, biometric devices serve for a longer period of time.
Some of the other advantages of AEBAS are:
Supports various platforms
Supports centralized functions
Helps in real-time tracking of employee attendance
Time taken for marking the attendance is less
Ease of sending real-time notifications
Helps in accurately track both login and logout to know the exact working time
How it works
The system envisaged enables employees to mark their attendance by presenting his/her biometric credentials in the form of fingerprint/Iris. This will then be authenticated after matching with the biometric attributes that are stored in the database of UIDAI corresponding to the employee’s Aadhaar number.
The entire authentication process as it happens is given below sequentially:
Attendance request originates from the system aimed at the centralized attendance server with fingerprint or iris.
Aadhaar number mapped against the fingerprint is sent to the Aadhaar authentication server.
The authentication response is then received on the centralized attendance server. Following valid authentication, the attendance record is stored on the server.
Client response as to whether the transaction is a success or failure is then obtained from the attendance server.
Sectors influenced by the introduction of AEBAS
AEBAS also has a great impact on various sectors improving overall productivity. The following information provides the impact of AEBAS on critical sectors helping improve the quality of life.
EducationAEBAS has an important role to play to streamline the education system. As we know, without monitoring, the staff (including teachers) behave in a tardy manner. Attendance can be very lean without proper surveillance. It is here that AEBAS comes to our rescue in ensuring proper attendance and maintaining the relevant database. This will not only improve the attendance, but the end result is better education for the children.
HealthcareEven in hospitals, biometric attendance system (BAS) will help resolve the problem of poor attendance. This will have a great impact on the health care sector. Patients will also have better service with no unwarranted absenteeism of the hospital staff.
GovernmentVarious government sectors such as manufacturing, defense, law and order, and power can make good use of the Aadhaar Enabled Biometric Attendance System (AEBAS) in order to improve the overall productivity.
Some of the major developments with regards to AEBAS
Aadhar based biometric attendance is being made mandatory for employees of aided colleges in the state of Haryana from April 1, 2020.
Biometric attendance system (BAS) to become compulsory at all government offices of Jammu &Kashmir by March 31, 2020, in order to guarantee punctuality and accountability.
The union government calls for punctuality in government offices while chiding habitual latecomers.
Centre to implement a biometric system based on Aadhaar, for attendance in all state-owned departments and government organizations in Delhi.
Introduction of biometric attendance at Nirman Bhawan which houses the ministries of (Urban Development and Housing) and (Urban Poverty Alleviation).
The Director of School Education has issued a circular for the implementation of Aadhaar Enabled Biometric Attendance System (AEBAS) for teachers in government and government-aided schools in Chennai.
All government primary and middle schools in the state of Himachal Pradesh will now have Aadhaar-enabled bio-metric attendance (AEBAS) system for teachers as well as staff. The new system will help keep track of the attendance while ensuring punctuality and regularity.
Amidst the outbreak of coronavirus, all central government employees have been exempted from biometric attendance as a precautionary measure till March 31,2020.
Conclusion:
With the central government having decided to put in place Aadhaar Enabled Biometric Attendance System (AEBAS) in various government organizations across the country, it becomes mandatory for the employees of these organizations to rise to the occasion. They must all give up their lackadaisical approach with the “Chaltha hai “ attitude. They should all pull up their socks in making the Digital India drive of the government, a grand success. All of this behooves well in being a citizen of emerging India.
0 notes
Text
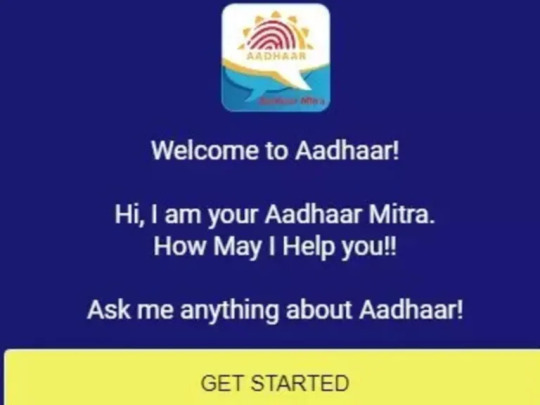
Aadhaar Mitra: UIDAI launches new chatbot "Aadhaar Mitra"
Aadhaar Mitra: UIDAI launches new chatbot “Aadhaar Mitra”
Aadhaar Mitra Portal Login & Registration | Aadhar Mitra What is, how to get Aadhaar related information. UIDAI New Aadhaar Mitra Chatboat Benefits | Aadhaar Mitra App Download
As we all know that Aadhar card is considered to be a very important document, it is impossible to do government and non-government work without Aadhar card, so Aadhar card is used in every work, in such a situation,…
View On WordPress
0 notes
Text
Uidai New E-Learning Portal 2022।अब इस वेबसाइट से ले सकते हैं Aadhar center
Uidai New E-Learning Portal 2022।अब इस वेबसाइट से ले सकते हैं Aadhar center
Uidai New E-Learning Portal 2022 :- Uidai के द्वारा एक नया वेबसाइट पोर्टल लॉन्च किया गया जिसका नाम E-learning Portal है। जिसके अंतर्गत एक सर्टिफिकेट प्रदान किया जाता है जिससे आधार सेंटर लेने में सुविधा होती है।
तो आइए जानते हैं इस पोर्टल के बारे में किस पोर्टल में क्या-क्या सुविधा मिल सकती हैं। इस पोर्टल के माध्यम से आपको एक सर्टिफाइड सर्टिफिकेट दिया जाता है जिसका प्रयोग आधार कार्ड सेंटर लेने में…
View On WordPress
#aadhaar e learning portal#e learning aadhar card#e learning portal uidai#e learning uidai gov in login#e learning uidai gov in login signup#https e learning uidai gov in loginhttps e learning uidai gov in login#uidai e learning#uidai e learning portal login#Uidai New E-Learning Portal 2022
0 notes
Text
Aadhaar Locking Issue - Solved
"Dear Resident you are either trying to lock a locked UID or trying to unlock an unlocked UID."

If you are seeing this message while verifying or unlocking your Aadhaar number, then please read this complete post. I have faced this issue for more than 3 years and I know the pain. More importantly, I’ll tell you the solution of this issue, which you wouldn’t get from any of the self-proclaimed Aadhaar expert on YouTube.
I faced this problem for the first time in 2018 when Maadhaar app on my mobile stopped working. I didn’t care much as this seemed to be a temporary issue to me. But when this issue didn’t get resolved after 2 months, I wrote a review (giving one star) in Google Playstore. They replied back saying that the issue is with my mobile or internet connection. So, I tried with different mobile set and different SIM, but still was not able to open Maadhaar app.
Then I thought that I might have done something wrong, for example I might have mistakenly enabled Aadhaar lock or biometric lock. So, I tried logging into the UIDAI portal using my Aadhaar number. But every time I got “UID is already locked” error.
UIDAI portal has an option of logging in using VID instead on Aadhaar number, if the Aadhaar is locked. So, I retrieved my VID using SMS service (RVID XXXX to 1947, where XXXX is the last 4 digit of Aadhaar). And I was finally able to login to UIDAI portal. I went through all the options available in the portal, but was not able to unlock my Aadhaar. It always gave me this message - "Dear Resident you are either trying to lock a locked UID or trying to unlock an unlocked UID."
This is when I realized that my Aadhaar number somehow has become “corrupted” and it’s neither locked nor unlocked. Since this issue happened for unknown reason, I assumed this would get resolved automatically. Believe it or not, I logged in to UIDAI portal almost in every week for last 2 years just to check if the issue got resolved, but was left disappointed every time. I started searching in google with this error message hoping that someone else might be facing same issue just like me, unfortunately there was none (back in 2019/2020).
Finally, I started calling/emailing UIDAI customer care. I took the screenshots of the issue and shared a document with customer care. But no one from customer care bothered to check the issue and they were sending same reply again and again mentioning the same unlocking steps which I already tried. I couldn’t make them believe that my issue is different and as a result those steps were completely useless to me. In fact, no one from Aadhaar department or UIDAI was aware that such issue is there in their system! Please see below the reply that I always received from UIDAI customer care whenever I contacted them.

I became very agitated and escalated it in “Centralized Public Grievance Redress And Monitoring System” (pgportal.gov.in). But they gave me steps for unlocking biometric! These idiots think that they know everything and they are not even aware of the issues in their own system. Here is the reply from the grievance department. I don't know how these f*ckers managed to bag Govt. jobs 😒

After losing all hope I went back to Google and started searching the error message again. But this time (in November 2021) I was “glad” to found that the issue is happening for others as well. I found some Reddit blogs, Twitter posts, YouTube comments where same issue was reported. Almost all the replies/responses were useless, just like UIDAI customer care. But I noticed couple of replies which suggested that updating Aadhaar in an Enrolment Center might resolve this. I decided to give it a try as I didn’t have any other option left.
I had all the correct information already available in my Aadhaar. So biometric update was the only option me. My home is about 50 km away for Kolkata. I booked an online appointment at a center in Salt Lake Sector V, on 24th January after paying Rs. 100.00/- online (https://appointments.uidai.gov.in/bookappointment.aspx). I carried the print out of the appointment slip and my original Aadhaar card, and visited the center. I entered the building after showing the appointment slip, they gave me a token and asked me to wait. When my turn came, they took me to a desk and took my photo, eye scan and finger print. They told me that it would take 15 days to get the details updated. I didn’t mention anything about my locking issue to them as I was pretty sure that they wouldn’t understand it. The whole process (from entering the building till leaving) took around 20 mins.
The first thing I did after coming back home was to check if I can login to UIDAI using my Aadhaar. But that didn’t work and my Aadhaar was still locked, so I decided to wait for 15 days. But on 30th Jan I tried again and this time it worked. I was able to login to UIDAI using my Aadhaar. I was able to login to Maadhaar App without any issue. After living for more than 3 years with this frustrating issue which created lots of trouble for me (not able to link my PF account with my Aadhaar, failing Aadhaar verification etc.), finally I can confirm that the issue has been resolved. No one from Aadhaar department or UIDAI was able to help as those morons don’t even know about this problem in their own system. UIDAI portal is still showing my old picture, but I’m expecting that to be resolved after 10/15 days 😊
I hope this post helps someone, as I don’t want anyone else to feel helpless and suffer like I did.
#aadhaar lock#locked UID#unlock uid#uidai#Dear Resident you are either trying#you are trying to lock a locked UID#maadhaar#uid locked#maadhaar not opening
2 notes
·
View notes
Text
REFER AND EARN MONEY 💰 ONLINE WORK FROM HOME WITHOUT INVESTMENT
UPSTOX(you can earn Rs300 per referralmillions of rupees money through this platform)📷 UPSTOX is a trading platform and it is stock market related app 📷
And this is very genuine app why it is because of Ratan Tata had invested 💯 Crores of money 💰 on UPSTOX.
📷How to open a demat account01)
Fill the form
Complete the account opening form online and verify your details with OTP.
02)
Upload documents
Scan or take clear photos of your documents. Upload your documents online!
03)
Start trading
After verification, get your client ID, login to your new account & start trading.
Documents to open a demat accountID proof
Aadhaar cardPAN card
Address proof
Aadhaar card / Passport / Voter ID / Driving license
Bank proof
Bank statement / Cheque / Passbook
Note: If your mobile number is not connected to your Aadhaar card, you can visit the UIDAI website. Or, you can download the account opening form, print and courier it to us.
Fast & hassle-free way to open an account!
Simply fill in your details, connect your bank account & upload your documents.
YOU CAN OPEN DEMAT ACCOUNT BY CLICKING BELOW⤵️⤵️⤵️
CLICK THISIf you have any doubts regarding opening the demat account then Just call to this number 91-22-6130-9999 write to us on [email protected] and we will send someone right over.
How to create upstox demat account
2 notes
·
View notes
Text
Apply For E-Aadhar Card: A Step-By-Step Guide
One of the major steps towards India’s digitisation journey has been its effort to provide a unique identification to all citizens through the Aadhar number. The intent behind this exercise was to make Aadhar a residency proof for all Indian citizens. Today, it has not only become a credible residence proof but also a reliable identity proof. Moreover, all governmental and a number of private programmes and utilities such as subsidies are closely connected to it.
It is thus important for all Indian citizens to have an Aadhar card. Obtaining an e-Aadhar card online is easy and can be done without any hassle. The e-Aadhar is a 12-digit alphanumeric identity that is an electronic version of your physical Aadhar card. It contains your personal information such as name, address, date of birth and gender.
Step 1: Documentation and online enrolment
The first step is to arrange all necessary documents required for the application of Aadhar. These include any supported proof of identity, proof of address, proof of date of birth and proof of relationship with the head of the family. Once your documents are ready, you can visit the official UIDAI website and download the enrolment formthat is available online and fill it up as per the instructions.
Step 2: Locate an enrolment centre and book an appointment
The next step is to search for an enrolment centre that is close to your residence. Once you locate the centre, book an appointment online. On the day of the appointment, you need to be present at the centre with the enrolment form and the documents and mentioned above. Once the documentation is approved, your biometric details such as iris scan and fingerprints will be collected at the enrolment centre along with a photograph. Once the details are gathered, you will receive an acknowledgement slip. This carries a 14-digit enrolment number. This becomes your reference number to check the online status of your application.
Step 3: Checking status and downloading your e-Aadhaar card
After a fortnight, enter your enrolment number on the UIDAI website. . Next, you will be asked to provide a Onetime Password (OTP). You will receive the OTP on the mobile number you have provided during the time of application. On entering the OTP, you will know whether your Aadhar number is in process or generated.
Here is the screenshot of UIDAI website, where you have to enter your enrolment number
Updating address and registered mobile number on your Aadhaar card
- You can make corrections or update your Aadhar card, by visiting the UIDAI portal.
- On entering your Aadhar number, you will receive an OTP on your registered mobile number. Login with the OTP to proceed to the next page and select the address option.
Here is the screenshot of UIDAI website, where you have to enter your Aadhaar number
1 note
·
View note
Text
Steps for Aadhar Card Download by Name and Date of Birth
In case you do not remember your Aadhaar number or EID, you can still download e-Aadhaar by entering your name and date of birth. Follow these steps for Aadhar card download:
Step 1: Visit Aadhaar website https://resident.uidai.gov.in/find-uid-eid
Step 2: Enter your full name and either your registered e-mail ID or mobile number and the security code
Step 3: Click the “Send OTP” button
Step 4: Enter the OTP received on your registered mobile number and click on the “Verify OTP” button
Step 5: A message will appear on the screen informing the Aadhaar number is sent to your registered mobile number
Step 6: On Getting your Aadhaar enrolment number on your mobile, visit the e-Aadhaar page on the official UIDAI website
Step 7: Click “I have Aadhaar” option
Step 8: Enter Aadhaar enrolment number, full name, pin code, image captcha
Step 9: Click “Request OTP”
Step 10: An OTP will be sent to your mobile number. Enter this OTP and click “Download Aadhaar” to download Aadhaar
How to Download e-Aadhaar from DigiLocker Account
DigiLocker has collaborated with the UIDAI to make it available to the cardholders on linking the DigiLocker account with Aadhaar. DigiLocker is a cloud-based platform for the issuance, storage, sharing and verification of documents and certificates in digital form which enables the select registered organization to provide electronic or e-copies into ‘digital lockers’ allotted to citizens. Follow below-mentioned steps to download Aadhaar from DigiLocker Account:
Step 1: Login to your DigiLocker account https://digilocker.gov.in/
Step 2: Click on “Sign In” button and enter your 12-digit Aadhaar number
Step 3: Click on ‘Verify’ to get ‘OTP’
Step 4: Enter the OTP received on your mobile number
Step 5: Click ‘Verify OTP’
Step 6: ‘Issued Document’ page appears. Download ‘e-Aadhaar’ using ‘Save’ icon
9 notes
·
View notes
Text
Steps to Download e-Aadhaar through Umang App
For downloading Aadhaar through Umang applicants need to follow the simple process mentioned below::
Step 1: Download and open the Umang App
Step 2: Click “Aadhaar Card” under all services tab
Step 3: Click “View Aadhaar Card From DigiLocker”
Step 4: Login with your DigiLocker Account or Aadhaar number
Step 5: Enter the OTP received on your registered mobile number
Step 6: Click “Verify OTP”
Step 7: Now you can download your aadhaar by clicking on download icon
How to Know Your Aadhaar Number on Mobile
If you want to get your Aadhaar on mobile, you need to follow the below mentioned steps:
Step 1: Visit the official website of UIDAI https://resident.uidai.gov.in/get-aadhaar-no
Step 2: Enter your 14-digit Enrolment ID and the date and time of enrolment mentioned on your acknowledgment slip
Step 3: Enter your registered mobile number, security code
Step 4: Now click the “Send OTP” tab to process further
Step 5: You will receive the 6-digit OTP on your registered number
Step 6: Enter the “OTP” and click the “Submit” button
Step 7: You will receive the Aadhaar number on your registered mobile number as a text message
How to Take e-Aadhaar Card Print after Download
You will have to enter the 8-digit password to open your e-Aadhaar letter. The password consists of first four letters of your name and the year of your birth. After you download your Aadhaar card in the pdf format from UIDAI’s website, you can print your Aadhaar card online.
Points to Remember
You cannot download Aadhaar if your mobile number is not registered with UIDAI.
UIDAI sends OTP to the registered mobile number for authentication before allowing you to download the pdf Aadhaar card.
You cannot download Aadhaar card without OTP.
You can download e-Aadhaar as many times as you want.
Downloaded e-Aadhaar can be used in place of your original Aadhaar card everywhere.
After downloading the online Aadhaar, one can get its print out by entering the password.
6 notes
·
View notes
Text
Aadhar Correction: Change Name, Address, Mobile Number and DOB in Aadhar Card
UPDATE AADHAR CARD: Due to the High volume of Adhar application there are chances of wrong information/Mis-Print on Aadhar Card. To make this correction and get Aadhar Card with our Right Information We need to Update Aadhar Card and This is called Aadhar Card Correction Process.
You can change the following Details in your Aadhar Card:
Name
Address
Date of Birth
Mobile Number
Gender
Aadhar Card Correction – Name, DOB, Address | UIDAI
You can Update your Aadhar Card via ONLINE and OFFLINE. To update your Aadhar Card Via Online Method Follow this Simple steps:
In the First Step Login With your Aadhar Number at SSUP Portal.
Now in Data Update Request select which Detail you want to Update (Name, Address, Mobile Number, Gender or Date of Birth)
After that, You need to Fill up the Correct details on Data Update Request Page.
After Filling all right detail upload your Document like PA Card, Driving Licence, Passport, Election card for Verification Purpose and Submit the Document.
Now Select your closest BPO Service Provider to collect Your Aadhar card after the whole Process.
By This way, You can Update your Aadhar Details Online.
Aadhar Correction Offline
In order to update aadhar card via post. Your aadhar card must be linked with mobile number. Here is the process.
Download the Aadhar Correction Form Online.
Fill the application form.
On top of the, that mention what corrections do want to make?
For Example :
If you want to change Name – Mention “Name Correction”
For the change in DOB – Mention “DOB Correction”.
For the address Change – Mention ” Address Change “.
Now, fill the application form and attach the necessary documents as we shared above
6 notes
·
View notes
Text
How to Download e-Aadhaar from DigiLocker Account
DigiLocker has collaborated with the UIDAI to make it available to the cardholders on linking the DigiLocker account with Aadhaar. DigiLocker is a cloud-based platform for the issuance, storage, sharing and verification of documents and certificates in digital form which enables the select registered organization to provide electronic or e-copies into ‘digital lockers’ allotted to citizens. Follow below-mentioned steps to download Aadhaar from DigiLocker Account:
Step 1: Login to your DigiLocker account https://digilocker.gov.in/
Step 2: Click on “Sign In” button and enter your 12-digit Aadhaar number
Step 3: Click on ‘Verify’ to get ‘OTP’
Step 4: Enter the OTP received on your mobile number
Step 5: Click ‘Verify OTP’
Step 6: ‘Issued Document’ page appears. Download ‘e-Aadhaar’ using ‘Save’ icon
How to Download Masked Aadhaar
Masked Aadhaar card is similar to a regular Aadhaar card. The only difference between the two variants is that your Aadhaar number is partially hidden and only last 4 digits of your Aadhaar number are visible. It is aimed at protecting your Aadhaar number from being disclosed to others. Your masked Aadhaar card is equally valid as your regular e-Aadhaar. Follow the steps mentioned below to download masked Aadhar card:
Step 1: Click on the link https://eaadhaar.uidai.gov.in/
Step 2: Select Aadhaar, VID or Enrolment Number in the “Enter your personal details” section
Step 3: Select “Masked Aadhaar” in the “Select your preference” section and enter other details such as your Aadhaar number, full name, pin code and the security code
Step 4: Click on “Request OTP” to send OTP to the mobile number registered with UIDAI
Step 5: Click on “I Agree” to give consent to UIDAI for authentication using your personal details
Step 6: Click on “Confirm” to send OTP to your registered mobile number
Step 7: Enter the OTP and click on “Download Aadhaar” to download the masked Aadhaar card
6 notes
·
View notes
Text
KYC Norms for Smallcases
KYC for smallcases is very simple with negligible documentation. Financial backers holding Demat and exchanging accounts with the upheld merchants can straightforwardly login utilizing their current qualifications. Smallcase supervisors, as Teji Mandi, require just the Permanent Account Number (PAN), the enrolled portable number, and the date of birth for the charging and the KYC affirmation processes.
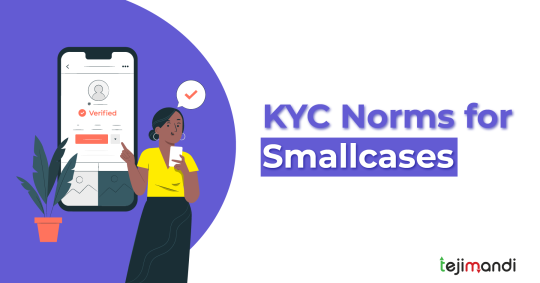
KYC Norms for Smallcases
Smallcases are assortments of value stocks and Exchange Traded Funds (ETFs) in bins. Every bin comprises of stocks painstakingly picked by venture warning specialists lining up with a particular market subject, speculation technique, or moving thought. The essential objective of smallcases is to teach the propensity for portfolio putting resources into individual financial backers.
Know Your Customers (KYC) Documents for Smallcases
KYC for smallcases is very simple with negligible documentation. Financial backers holding Demat and exchanging accounts with the upheld intermediaries can straightforwardly login utilizing their current record. Smallcase chiefs, as Teji Mandi, require just the Permanent Account Number (PAN), the enrolled portable number, and the date of birth for the charging and the KYC affirmation processes.
Investors opening Demat and trading accounts with the supported brokers would need to furnish one document for each type from the following list*.
Identity (ID) Proof:
Aadhaar card issued by the Unique Identification Authority of India (UIDAI)
PAN card (mandatory)
Voter ID
Valid passport
Valid driver’s license
Photo ID cards issued by the departments of the Central and State Governments, or any regulatory body. Read More
Address Proof:
Aadhaar card issued by the UIDAI
Voter ID
Valid passport
Valid driver’s license
Utility bills (telephone, electricity, and Piped Natural Gas bills) not older than 3 months
Bank passbook or account statement not older than 3 months
Registered sale/lease agreement of residence
Maintenance bill issued by registered co-operative housing societies
Read More About – Smallcase Research Blog
0 notes
Text
Are University Transcripts available online? Where to download from?

With the new instructions from the Ministry of Electronics and IT (MeitY), several documents are available and can be downloaded from Digilocker. The ministry has instructed all the institutions, departments, organizations, offices, etc. to accept the documents issued from digilocker. All these documents issued are to be considered accurate and valid. So when all types of documents like driving license, passport, SSC mark sheets, HSC mark sheets, PAN card, etc. are available in Digilocker, is it possible to get the university transcript from there as well? Let’s check.
Last year Ministry of Electronics and IT (MeitY) released a statement that digilocker will serve as the digital storehouse of all the documents and all to be considered an alternative to the original. While there are a number of documents already uploaded by the respective departments, the user has the provision to upload their own documents as well. For example, students can easily get their HSC or SSC mark sheets which are already uploaded by CBSE or their state boards, and also if students already have their university transcripts like Osmania University transcripts, JNTUH transcripts, or any other university transcripts, then they can upload the same in their digilocker account and download it whenever they need it. Currently, the digilocker stores all marksheets and important certificates issued by government departments such as UIDAI, IT departments, etc. And MeitY is focusing on expanding the number of documents that can be downloaded from Digilocker. Also, the ministry has directed all the universities and colleges to update their students’ documents like results and certificates in their digilocker accounts. Therefore students can now easily download their marksheets from their digilocker account by login in via their aadhar number and mobile OTP.
So now when it comes to downloading university transcripts online, only a handful of universities have uploaded their students’ transcripts in digilocker. Transcripts are something that can be considered as a document made to order i.e. not every student needs their Osmania university transcript or JNTUH transcript or any other university transcript and university issues transcript certificates only to the students who apply for it. That also pretty much makes sense. Because the university has a lot of things to manage and spending time on making transcript certificates for every student, who might never need them, seems illogical. Therefore, unlike school and college marksheets which are very much useful, not all university transcripts are available in digilocker. But if you already have your own transcript certificate then you can store them in the digilocker vault without any worry.
If you are wondering where to download your Osmania university transcript or JNTUH transcript from, then we would like to inform you that your transcript will be available to you only when have applied for the same and the application is processed by your university. You can visit your university’s official website to apply for the transcript certificate. Or you can contact transcript certificate providers and they will help you get your university transcripts delivered at your home or directly to the institutions intended. So, we consider you know how to get your transcript and are clear if the transcript can be downloaded or not. For more details, consider reading our blog on various modes of application for university transcripts.
#Osmania University Transcripts#jntuh transcripts#University Transcripts#IQAS Canada#WES for Canada#ECA for Canada#WES Certificate
0 notes
Text
Download Eaadhar | Check Aadhar Card Status & Update Aadhar Card
What is Aadhar Card?
Aadhar Card is Identification Proof of Indian Citizen which Contains Aadhar Holder’s details like Name, Address, Mobile Number, Gender, Date Of Birth, Finger Print Data and his/her Unique Aadhar Number. Day by Day the Importance of Aadhar Card is increasing.
Government is making Aadhar Card Necessary avail many Schemes like LPG Gas Subsidy, Benefits in Awas Yojana, Bank Process etc. So, If you Don’t have your Aadhar Card then We highly recommend you to Enrol for Aadhar Enrolment Process at your Nearest Aadhar Card Kendra. In this Post, You will get Complete Information regarding Aadhar Card and You can Download Eaadhar Card @ uidai.gov.in and also You can Check Aadhar Status and Aadhar Update Status all in Single Place.
Download Eaadhar
Eaadhar is also as equal as Original Aadhar Card. After Aadhar Enrolment Process it will take minimum 3 months or 90 Days to get Original Aadhar Card at home by Post/Offline but UIDAI (Unique Identification Authority of India) has a feature to Download Aadhar Card Soft Copy which is called E AADHAR. You can Get E aadhar once your Aadhar Application will successfully Verify then You can check Aadhar Status.
Aadhar Correction @ SSUP
Now, for example, you have downloaded your E aadhar from above process but sometimes due to the very high amount of application you will get Eaadhar with some Correction means Some of your Aadhar Data is Wrong. In this case, you need to Update your Aadhar Card at SSUP (Aadhar Self-service update Portal) and need to attach some documents as Verification. So, in this Process, we will see the full process of Aadhar Correction.
SSUP – Aadhar Self Service Update Portal
You can update your Aadhar Card at SSUP by 2 way.
Online Aadhar Correction at SSUP
Offline Aadhar Correction at SSUP
Aadhar Correction Online at SSUP
The Process is Simple and Fast. Follow the given steps:
STEP-1 -> LOGIN WITH AADHAR
Open SSUP Aadhar Self Service Update Portal ->
Now as shown in the above image First Enter your Aadhar Number and Text Verification Code and Click on Send OTP. After receiving your OTP you need to click on ENTER TOTP.
In this Step Select Which Aadhar Details you want to Update out of five Details (Name, Gender, DOB, Address, Mobile number, Email ID) and Click on Submit.
STEP-4 -> DOCUMENT UPLOAD
In this step, You need to upload a few Documents as Proof of Address, Proof of Identity, Proof of DOB.
STEP-6 -> NOTE DOWN URN NUMBER
After Successfully submission of Aadhar Update Request at SSUP, you will be given one 14 Digit URN Number to trace and Check Aadhar Update Status. You will also get one SMS of your URN number on your Registered Mobile Number.
2 notes
·
View notes
Last Seen Blogs

indefinableship
Indefinable

wssebastian
talking to.

marchen-und-kindervers-blog
A World of Fairy Tales

pixx-pierogi-blog
dysfuntional

openframe4
The Life of Horne 996