#Mcafeesignin
Text
A SIMPLE WAY TO TURN OFF AUTO-BRIGHTNESS ON IPHONE
The iPhone is one of the best products developed by Apple, a well-known multinational tech firm. Apple is known for designing various great smart gadgets, including iPhone, iPad, Mac computers, and smartwatches. All the smart devices of this tech firm work well to provide their users with the best experience. Using any of the Apple devices is simple for anyone. Also, within all the devices, the company provides its users with a lot of excellent features and options. If you already own an iPhone, iPad, or any Apple device, you might know all about them and the features that come within them. For instance, there is an option on iPhone and iPad that lets you adjust the brightness automatically. This is a great feature that helps users to save the battery on their iOS devices.
Even though the option to automatically adjust the brightness on an iOS device is useful, it uses sensors to adjust the display’s brightness automatically. But for some reason, you might want to turn it off. Do you know how you can turn off the auto-brightness on your iPhone? If you are a new user of this Apple device, you might not know how to do so. And if this is the situation, you must read this full blog.
Turning off auto-brightness on an iPhone
The option to adjust the brightness automatically makes it easier for the users to use their device in various situations without manually changing the settings. Also, the light sensors to adjust the display brightness helps to preserve your device’s battery. But, it’s completely fine if you wish to disable this functionality. There can be multiple reasons why you wish to turn off the auto-brightness on your iOS device. You might find it annoying when your device adjusts the brightness itself. You can turn off the auto-brightness on your iPhone without any difficulty. For this, you will have to go through your device’s settings page. Here we will show you two methods using which you can quickly disable the auto-brightness on your iOS device. So, it’s finally time to get started with the first method.
Instructions to turn off auto-brightness on an iPhone
Here’s how you can turn off the auto-brightness on your iOS device:
First, launch the Settings app on your iPhone. You can launch the app from your home screen.
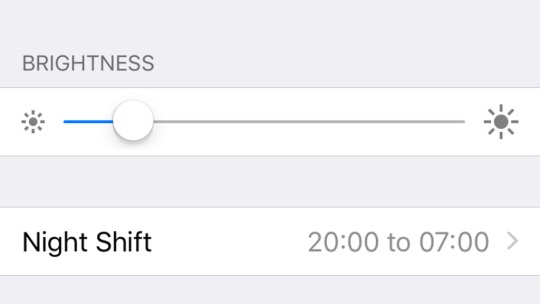
After launching the Settings app, keep scrolling down through your screen and tap the option of “Display and Brightness.”
When you get to the Brightness section, turn off the toggle switch for the option of “True Tone.”
If at any time, you wish to enable True Tone, you will have to navigate to the same area in your device’s settings. And then, tap the toggle button for the option of “True Tone.”
The steps to adjust the brightness in the control center
You can also adjust the brightness on your device from the Control Center. Here’s how to do so:
If you are using the latest iPhone model with a recent iOS version, you will then open the control center by swiping down from the upper-right corner of the screen.
Tap the brightness adjuster icon that looks like a sun icon.
To make the screen brighter, you will have to slide up. And to make the screen dimmer, slide down.
So, this is how you can turn off the auto-brightness on your iOS device. And this is it for now. Try the procedure now if you also own an iPhone, and let us know if you face any difficulties.
Visit: mcafee login
Source:https://ellisinfotechpeoplehelps.wordpress.com/2022/01/06/a-simple-way-to-turn-off-auto-brightness-on-iphone/
1 note
·
View note
Text
Best Screen Recording Software for PC in 2022
Whether you want to record the video of you playing your favorite game or want to show someone something occurring on your screen, the screen recording software tools on the list will help you do the same quickly. We have listed some of the excellent screen recorders for PC. Take a quick glance at these.
ActivePresenter
ActivePresenter is one of the greatest screen recorders with video editing features. It has been appreciated by YouTube creators, tutors, and others who create videos on how to do something on a PC. This great software comes with a number of great features and editing effects that can make your video appear even more attractive. The free version of ActivePresenter is quite great and has no watermark on the screen when it comes to the free version. You can cut, trim, change the video speed, increase or decrease volume, add desired animations, etc. The free version is great. If you want to utilize the advanced video editing features of ActivePresenter, go for the paid plan.
Pros
Record fullscreen.
Basic editing features.
Green screen effect, blue screen effect, audio fade-in, audio fade-out.
Cons
Available in 64-bit only
No cropping feature.

Flashback Express
Flashback Express is an excellent screen recording software. It allows one to record a video screen. It is a free app with several great features and that allow one to record not just screen but sounds too. The free version has a watermark placed on the rendered videos. If you use the screen recording software, you can record screens across multiple monitors. The fantastic feature of the Flashback Express is that it lets you schedule the starting time and end time. Flashback Pro is a paid version of Flashback Express. The free version offers limited features, while the paid version gives access to all the paid features. It allows one to share their videos the YouTube directly. Try out the features of Flashback Express for free and see how great it works!
Pros
Record screen with sounds.
Share video directly to YouTube.
No watermark.
No time limit.
Cons
Limited video output formats are available.
Editing features are not available.
Bandicam
Bandicam is an amazing screen recorder for gamers and tech YouTubers. By using the great screen recorder, you can also record the screen in high resolution. Bandicam can also record the full screen with this amazing screen recording software. The free version of Bandicam is available on the official site of Bandicam. The free version allows only the feature to record a video. The free version will allow a user to record a video of up to just 10 minutes. The thing that some may not like about Bandicam is its watermark on the screen. Try it out and see how good it is.
Pros
Record full screen & game and sounds on your PC.
Record screen in high resolution.
Insert logo to the video.
Cons
Limited Video output formats.
It has no editing features.
Icecream Screen Recorder
Icecream Screen Recorder is an excellent screen recorder that offers several basic video editing features. The paid version includes the features to trim the beginning and end of the recording. It offers limited features in the free version. Icecream Screen Recorder comes with both a free version and paid version. The recording limit is up to 5 minutes. The free version allows one to export to MP4, AVI, and several other formats. Try out the features of the Icecream Screen Recorder.
Pros
It hides the cursor while you record the video.
It allows one to schedule time for recording.
It adds the logo to the video.
Cons
No premium features are available before buying the subscription.
Records sounds and video.
Conclusion
The list of the screen recording software tools for PC in 2022 is mentioned above. Among these best screen recording software of 2022, you can choose the one you like.
Visit: mcafee log in
Source:https://xn--mcfeelogn-11a2l.ijstartuk.com/best-screen-recording-software-for-pc-in-2022/
0 notes
Link
To manage your kids’ digital lives, login to your McAfee user account at mcafee.com/activate and download McAfee Safe Family.
0 notes
Link
Visit the McAfee login portal to sign in to your account and enjoy premium security for all your devices. Sign up for a McAfee account today.
0 notes
Text
HOW TO REMOVE PIN FROM YOUR WINDOWS 11 DEVICE
Windows 11 offers several login options to access your system with the PIN or fingerprint quickly. But some users want to remove the PIN on their Windows 11 systems and ask for some solutions to fix it. If you are also in the same situation, follow the complete method stated below.
Turn off Security Settings to Remove the PIN on Windows 11
If you are unable to turn off Security Settings, you require to pursue the whole procedure explained below:
First, press the Win and I hotkeys simultaneously over the keyboard.
Once you do that, choose the ‘Accounts’ option through the listed tabs inside the navigation panel.
Then, select the ‘Sign-in option’ tab over the right side of the screen.
Check whether the ‘For improved security, only allow Windows Hello sign-in for Microsoft accounts on this device (Recommended)’ section beneath the ‘Additional settings’ is turned on. Switch the toggle to turn it off.
You should shut the Settings application for the modifications to come into effect and later launch it again.
Go to the ‘Pin (Windows Hello)’ and press the ‘Remove’ button.
Thereafter, hit the Remove button.
Now, confirm the ‘Microsoft account password’ and press the OK button to delete the PIN.
Use ‘I forgot my Pin’ Option to Remove the Pin on Windows 11
If you don’t know how to use the ‘I forgot my Pin’ option, then proceed with the effective method stated below:
Reach the Sign-in options page and click on PIN (Windows Hello).
Afterward, select the ‘I forgot my PIN’ option.
You should click on the Continue button over the verification prompt to continue.
Thereafter, insert the ‘Microsoft account password’ for confirmation and select the Sign-in button.
Then, select the email address connected to the account to get a confirmation code.
Now, you need to insert the confirmation code you got and hit the Verify button.
Finally, ignore the two text columns and hit the Cancel button to delete the PIN on Windows 11.

Modify the PIN on Windows 11
If you are trying to modify the PIN on Windows 11, go through the whole procedure stated below:
First, you need to open the Windows Settings app by pressing the Win and I hotkeys over the keyboard.
You should choose the ‘Accounts’ option using the list of the tab in the left side’s navigation panel.
Go to the ‘Sign-in options’ over the right side.
Then, select the ‘PIN (Windows Hello)’ option.
Later, select the ‘Change PIN’ button.
Now, insert the old PIN in the first column and enter a new PIN in the next two columns, and now hit the OK button to apply the changes.
Change the Fingerprint to a Local Password on Windows 11
If you attempt to change fingerprint to a local password on Windows 11, execute the entire method stated below:
Launch the Settings app by holding the Win, and I buttons simultaneously over the keyboard.
After that, select the Accounts option using the vertical ellipsis menu.
After entering the Accounts menu, reach the right-hand side and choose the ‘Family & other users’ option.
Check whether you have any accounts beneath the ‘Other users’ section. In case you use any, delete any of them before going to another fix below.
Navigate to the root Accounts menu, select the ‘Your info’ option using the screen’s right side section.
Move down to the ‘Account Settings’ menu and select the ‘Sign in with a local account instead’ option.
You should select the Next button.
You will be requested to give the fingerprint recently tied to the MS account.
Afterward, insert the username, give a password for the local account, and set up a strong password if you ever forget it.
Lastly, change a local account by selecting the Sign-out and Finish button.
Visit: mcafee login
Source: https://ellisinfotechpeoplehelps.wordpress.com/2022/01/06/how-to-remove-pin-from-your-windows-11-device/
0 notes
Text
How To Capture Screenshots On Your IPad
Taking screenshots on our mobile devices has become an important part of our daily routine. Screenshots can prove to be really useful for anyone. For instance, you came across a perfect picture online or an excellent recipe on a cooking app, and you wish to share it with your friends. And that’s where you can use the feature of capturing screenshots. All the smart devices that you own come with multiple built-in tools, and that also includes the option to capture a shot of your screen. One can easily take screenshots on their mobile devices and computer systems. Also, you can capture the shots of your iPad’s screen. iPad is Apple’s most commonly used and popular device that anyone can use with much ease. It is much simpler to perform any task on an iPad.
iPad includes various excellent features that any of its users can use to have the best experience. You can easily take screenshots on an iPad. Have you just bought a new iPad and want to know how you can take screenshots? Want to see the procedure to do so? If yes, you must take a look at this full post. In the following article, we will provide you with the methods using which you can easily take screenshots on your iPad. So, please make sure you read this blog till the end.
Taking screenshots on an iPad
It is a much easier and simple task for anyone to take screenshots on an iPad. For this, you can use the iPad’s built-in feature. You can also easily share the captured screenshots with anyone. There are multiple methods to capture screenshots on an iPad. You can do so using the home or volume up buttons. Or you can turn on the Assistive Touch functionality for this purpose. Here, we will provide you with both of these techniques. It is much convenient to follow any of these methods as both of them include some simple steps.
Screenshots are undoubtedly a quick and easy way through which one can immediately record on-screen information. And if you wish to start taking screenshots on your iPad, please go through the below-explained procedures.

Instructions to take screenshots on an iPad using the top and home or volume up buttons
Here are the instructions to take screenshots on an iPad using the top and home or volume up button:
First of all, you will locate the Home and Top (power) buttons on your iPad. You will be able to find the Home button located directly below your iPad’s display.
The Top button, on the other hand, will be located in the right-hand corner.
If you own a 2020 iPad Pro, then you will have to find the Volume Up button.
Now, press and hold the Volume up or Top button to take screenshot of the page opened on your iPad.
After a few seconds, release the buttons, after which you will hear a faint shutter noise.
You will also see the animated image of the screenshot that you have captured.
Once captured, the screenshot will be automatically saved to your iPad’s gallery app.
To view the captured screenshot, you will have to launch the Photos app on your device and swipe to the bottom of the screen to view your recently captured screenshot.
The method to take screenshots on an iPad using assistive touch
Go through the steps to take screenshots on your iPad using assistive touch:
To get started, firstly, tap the assistive touch menu button.
Head to Device>More.
Next, tap the Screenshot option, after which your iPad’s screen will flash for a moment and you will also hear a faint shutter noise.
Once captured, your device will automatically save the screenshot to the Photos app.
To view the captured screenshot, you will have to tap the Photos app icon from the home screen. And then swipe to the bottom of the screen to view the screenshot. And that’s it.
So, this is how you can take screenshots on your iPad. Both of the methods are easy to follow, you can try them now. And to know more about iPad features, please get to our official website right away.
Visit: mcafee log in
Source:https://marcowebportal.wordpress.com/2021/12/15/how-to-capture-screenshots-on-your-ipad/
0 notes
Link
Neon Genesis Evangelion is a great anime but surprisingly it is quite controversial as well. No one appears to share one unified judgment on it and even its primary protagonist, Shinji Ikari is just as polarizing. His tantrums have been the butt of jokes and a lot of viewers think that he is just a pathetic cry-baby. Some people believe that he was not the appropriate choice for being the protagonist and many prefer Asuka Langley over him.
0 notes
Link
My Hero Academia’s rise in the anime world can be attributed to many factors. However, one of the most intriguing aspects of the series is its vibrant, and colorful characters. All of them have unique powers and an interesting backstory that helps viewers relate with them in one way or the other. It is therefore Read more about My Hero Academia: Characters Who Deserve an Opportunity to Prove Themselves[…]
0 notes
Last Seen Blogs

0w0whatisthis
Art??????????

candyfloss-esophagus
candy floss esoFAGus

londonclubofsherwood
Batgirl Appreciation Blog

kinglofi
Untitled

atee197
Untitled