#Gummy Stem Blight
Text
Comparative Analysis of Blights: Early Blight, Late Blight, and Gummy Stem Blight
In the field of plant pathology, the ability to differentiate between different diseases is essential for efficient crop management. This article examines the traits that differentiate Early Blight, Late Blight, and Gummy Stem Blight.
Early Blight
Early Blight, caused by the fungus Alternaria solani, is a common disease that affects a wide range of plants, particularly those in the Solanaceae…

View On WordPress
#Agricultural challenges#Agricultural Environment#Agricultural Landscape#Blights#Comparative Analysis#Concentric Ring Pattern#Crop Health#Crop Losses#Crop management#Crop Protection.#Diagnostic Traits#Disease Characteristics#Disease Differentiation#Early Blight#Growers#Gummy Stem Blight#Intervention Strategies#Late Blight#Lesions#Plant Pathology#Prompt Response#Resilient Farming#Timely Identification#V-Shaped Blight Pattern#Visual Indication#Water-Soaked Appearance
0 notes
Text
Why Rotating Vegetables in the Garden is Crucial
Could over a million lives have been saved between 1844 and 1846 by rotating vegetables in the garden?
Several factors contributed to the Great Famine. Irish families lived on small tracts of land owned by the ascendancy class. A third of small holdings could not support families after paying rent. Farmers lived at subsistence level. They grew two heavy-yielding types of potatoes, which thrived in poor soil, and half of Ireland’s population depended on this crop for survival.
Then, late blight struck. It came accidentally from North America, unrecorded in Europe prior to 1844. Fed by unusually damp conditions, it ravaged the fields. Crop loss in 1845 ranged from a third to a half of cultivated acreage. In 1846, more than three-quarters of the harvest perished, including many seed potatoes that would have started a new crop. The first starvation deaths were recorded that year.
Modern farmers recognize the dangers of blight and know that rotating vegetables in the garden is crucial for protecting a harvest. If the Irish had a secondary crop, unrelated to potatoes, and rotated it through the fields, could deaths have been prevented?
An Ancient Concept
The earliest examples of crop rotation were used in the Middle East. They didn’t understand why alternating legumes with cereals resulted in better yields, but they knew it worked. Early Europeans used the two-field system, where one allotment sprouted thick with wheat, rye or oats, while the other lay unplanted. Medieval fiefs added a third field, once again incorporating beans and peas into the rotation, but allowing one field to lay unused didn’t make sense to feudal peasants. Livestock roamed the fallow field, consuming weeds and wheat stubble while fertilizing the ground with manure.
By the 17th century, Charles Townsend of Norfolk County, England, eliminated the fallow field and replaced it with cover crops such as clover and ryegrass, which provided livestock fodder while still replenishing the soil. These cover crops produced richer manure because animals were more nourished.
Take the Stress Out of Finding the Right Small Farm Tractor for You!
Download this FREE Guide right now.
YES! I want this Free Report »
Other advocates encouraged the practice, such as George Washington Carver, who taught southern farmers to rotate other plants with the cotton, which when raised alone, quickly depleted the soil. Adding peanuts and sweet potatoes gave farmers alternative cash crops while increasing yields when cotton was replanted. Discovery of cover crops for gardens eliminated the need for fallow fields in much of the world.
The Green Revolution took hold and a majority of the modern world turned to chemical fertilizers, relieving some of the need for crop rotation. But organic growers still attest to why rotating vegetables in the garden works.
The Science Behind it All
If you planted tomatoes in a raised bed last year and they performed delightfully, sprouting high and dark green while hanging heavy with fruit, should they perform as well this year? Planting tomatoes in the same location, year after year, is a bad idea.
Rotating vegetables in the garden reduces soil erosion, replenishes nutrients, and mitigates pathogens and pests, which attack certain species of plants.
Cover crops like clover help reduce soil erosion and replenish nutrients.
Along with the Great Depression came agricultural tragedy. The Great Plains seemed perfect for growing cereal grains, but farmers didn’t understand the specific ecology. They dug deep with their plows, ripping out native grasses and churning up virgin topsoil. Cotton stripped away nutrients and farmers burned stubble, removing organic vegetation. Soil was left bare during the winter. During fruitful years, wheat and cotton sprouted to hold the soil in place. But drought struck in three waves. The unanchored soil turned to dust, blowing in immense clouds depicted in windswept sepia photographs.
A happier story depicts how rotating vegetables in the garden builds topsoil and prevents erosion. In 1988, a study compared two adjacent farms within Washington state. The organic farm had six inches more topsoil than the conventional operation next door. Both farms had been established 80 years earlier. The organic farm had remained organic, using crop rotation, while the conventional land began administering fertilizers and pesticides. The additional topsoil was attributed to usage of green manure crops rather than relying on chemicals.
Russet potatoes, ready for the kitchen. Photos by Shelley DeDauw
But what about nutrient replacement? High school chemistry explains that. By studying the periodic table, we learn that vitamins and proteins may be created or consumed, but elements cannot. Iron has always been, and will always be, iron. Conventional fertilizers contain nitrogen, phosphorus and potassium, the three most important nutrients to plant growth. But healthy food crops need more than NPK. Tomatoes get blossom end rot without enough calcium. Magnesium helps flowers develop and seeds germinate. Spinach is high in manganese, iron, copper, and zinc, and all elements must come from the soil. If a “heavy feeder,” such as cotton, grows year after year in the same spot, eventually those elements will no longer be available.
Science also explains why crop rotation benefits disease resistance. Late blight was a problem for Ireland. But it would not have been a problem if the tenants had grown sweet potatoes instead. Why? Because potatoes are a nightshade while sweet potatoes belong to the morning glory family. Blight-infested soil is not hazardous to the family Convolvulacaea.
Many other diseases are plant-specific. Sweet potato feathery mottle virus only affects sweet potatoes. Gummy stem blight attacks cucurbits, but not tomatoes or peppers.
Insects and other pests have their favorite foods. Squash bugs also attack cucumbers and melons, though they prefer squash itself. Other pests that love the Cucurbita family include cucumber beetles, spider mites, and melon aphids. They overwinter in garden soil or beneath mulch or rocks. In the spring they emerge to feed again. Though treatment methods range from smashing the bugs to pesticides, the best way to keep these bugs away from crops is to make sure their favorite food isn’t planted in the place they found shelter.
Keep It All in The Family
Do you practice the two-field system or use four fields? Incorporate green manure or legumes? And just when should clover be established?
It’s quite confusing.
But rotating vegetables in the garden doesn’t have to be so scientific. Just remember: keep families moving and don’t split them up.
More from the potato harvest. Rotating sweet potatoes, in the morning glory family, with Russets (pictured), from the nightshade family, will help reduce the odds of disease affecting your crop. Photo by Shelley DeDauw
A simple crop rotation plan for home gardeners involves the Three Families method. Each bed will have one of three families: Solanaceae (nightshades), Fabaceae (peas and beans), and a third family. This family can include Brassicaceae (mustards and broccoli), Apiaceae (carrots and parsley), Alliaceae (onions and garlic), or Cucurbitaceae (squash and melons). Or throw in the family of beets, Swiss chard, and spinach. Perhaps sweet potatoes. Maybe corn. Choose your third family based on what your family will eat, what grows well, and pests or diseases that may have been a problem in previous years.
The nightshade family includes tomatoes, tomatillos and ground cherries, both sweet and hot peppers, eggplant and potatoes. This is probably the most popular family for home gardeners who can’t live without their tomatoes or salsa. But nightshades can be susceptible to a spectrum of diseases such as blight, Fusarium and Verticilium wilt, and leaf curl virus. Some strains are more resistant than others but it’s safest to move all nightshades to a new spot each year. Never use soil from last year’s nightshade location for this year’s seedlings, because this can bring diseases right to a new spot. For this same reason, if you don’t start your own seeds, only accept plants from a reputable nursery or a gardener who purchases new, sterile soil for each year’s seedlings.
Beans, peas, and lentils are nourishing to both humans and the soil. Their most valuable asset to crop rotations is the nitrogen fixing properties. Rhizobia bacteria invade the roots and form nodules, which swell and grow then release the nitrogen when bacteria die. Though most nitrogen produced is used by the legume itself, some leaks out into the soil for use by other plants. Perennial legumes such as clover and alfalfa fix nitrogen through the entire growing season. Most nitrogen is released when roots decompose. Grow legumes for your family, but at the end of the year, do not pull plants up. Clip them off at ground level. The roots will decompose and leave the soil better for next year’s crops.
Healthy soil depends on rotating heavy users behind soil builders. For example, it’s common practice today to rotate corn (heavy user) and soybeans (soil builder). Photo by Shelley DeDauw
The third family is your opportunity to make a nutritional trifecta, try new varieties or avoid horticultural disaster. If squash bugs were a problem last year and your garden area is small, choose carrots and parsnips instead. Perhaps you’ve composted well over the past couple years, just finished up a round of beans, and your soil is ready for a heavy feeder such as corn. Or this is the year just before beans make their round and you need soil that isn’t quite as nitrogen-rich for root crops like sweet potatoes or turnips.
Incorporate companion planting, but remember what family went where. For instance, onions should not be planted with beans but they help peppers and tomatoes. Rotate the onions with the tomatoes, taking advantage of two crops within the same area, and choose carrots as your third family. Group beans with chard, both of which should not be planted beside leeks. Or try a Three Sisters formation, keeping the beans, squash, and corn together while cultivating the nightshades in the second location and cabbage in the third.
Short-season beans, such as bush or pole snap varieties, mature within 60 days. This gives gardeners an opportunity to add another crop within the rotation. Plant snow peas beside the poles or fencing, which will later support beans, snipping old pea plants off at ground level and loosening the soil right next to them for bean seeds. Or grow either lettuce or radishes, which harvest within 30 to 60 days, then till soil again and plant beans with enough time for them to mature before the first frost.
Fertilization and rotating vegetables in the garden
Crop rotation is strategic planting to control which nutrients are pulled from the soil. Most plants do not return nutrients. Adding in compost, manure, and short pasturing cycles puts material back to keep soil from compacting and crusting. Compost brings back depleted elements. Manure contains cellulose-decomposing bacteria and active enzymes, which accelerate the breakdown of organic materials by microorganisms. Pasturing allows animals to loosen dirt, consume weeds, use leftover plant material and fertilize the best soil for crops.
Use these cycles between plantings. Though compost tea and rabbit manure can be sprinkled on growing plants, most other manures are too high in nitrogen to be used within the growing season. Dig compostable material into a garden after harvest, letting it break down through the freezes and thaws prior to spring, or sprinkle finished compost around new seeds. Till horse or cow manure into the soil a month or so prior to planting. Pasturing can be done on rural property by opening a garden gate in the fall to let goats consume remaining crops or by allowing chickens to roam small city gardens during the winter.
Light and Heavy Feeders
Do your crops add to the soil or take away? Knowing which plants are light feeders, heavy feeders, or soil builders can help you plan your schedule for rotating vegetables in the garden.
Heavy Feeders: Crops that deplete the soil and require the most nutrients are best if planted after beans. These are also good choices if you’re worried about soil that might be too fertile for other vegetables. Heavy feeders include corn, brassicas such as broccoli and cauliflower, cantaloupe and honeydew, and alliums such as onions and shallots and large peppers.
Medium Feeders: Though these are mid-range in the garden, they are still considered soil-depleting crops on an agricultural scale. They include squash and cucumbers, most melons, nightshades, and radishes.
Light Feeders: These vegetables, which take the least nutrients from gardens, still consume more than cereal grains. Root vegetables such as beets and carrots, leafy greens like Swiss chard, collards, arugula and most herbs are light feeders.
Soil Builders: Also known as pulses, legumes include alfalfa, clover, lentils, beans and soybeans, peas, lupins, peanuts, carob and tamarind. Other soil builders include natural prairie and meadow grass.
Have you noticed increased yields and disease resistance by rotating vegetables in the garden?
Marissa Ames writes from Reno, Nevada, where she maintains Ames Family Farm on 1/8 of an urban acre. You can read more of her stories, how-tos and gardening tips at www.countrysidenetwork.com.
Originally published in Countryside July/August 2016 and regularly vetted for accuracy.
Why Rotating Vegetables in the Garden is Crucial was originally posted by All About Chickens
0 notes
Photo
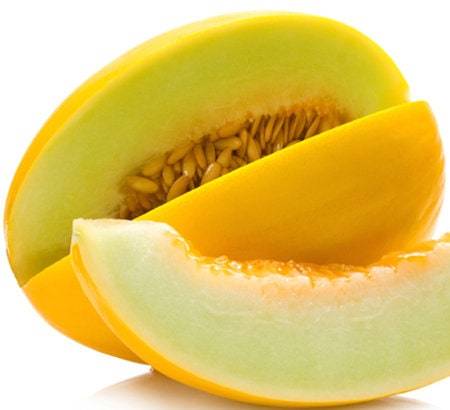
Golden Juan Canary super sweet Melon seeds Organic HEIRLOOM Non-GMO B25 The Juan Canary Melon is an old heirloom football-shaped melon with a canary yellow rind and a creamy, white to green flesh. This 4-5 pound melon has a delicious sugar-sweet taste that is perfect for summer picnics! This variety will keep well in full sun. The Canary melon or winter melon is a large, bright-yellow elongated melon with a pale green to white inner flesh. This melon has a distinctively sweet flavor that is slightly tangier than a honeydew melon. The flesh looks like that of a pear but is softer. When ripe, the rind has a slightly waxy feel. You may have seen canary melons in the grocery store and wondered what they taste like. Popular in Asia and Europe, these bright yellow melons have a smooth rind that protects the sweet, pale green to white flesh. 'Tweety' produces 4–6 lb. juicy, sweet, crisp fruits with undertones of cantaloupe and tropical fruit. Stores well after harvest. Plants are resistant to Fusarium wilt (1, 2), gummy stem blight, and Alternaria. Golden canary is a medium-sized melon with vibrantly yellow skin and an elongated shape. This melon will deepen in color and wrinkle slightly as it ripens. Canary melons have an ivory flesh with hints of green that is soft, succulent, and incredibly sweet with a refreshingly acidic aftertaste. These melons are reminiscent of golden honeydew with tropical notes of banana, mango, and golden pineapple. Count: ~25 Germination: 21 Days Days to Maturity: 75 days Height At Maturity: Vine Sun/Shade: Full Sun Spacing After Thinning: 4-5 feet Germination Rate: 98% Zones: 3,4,5,6,7,8,9 Melons provide a sweet and colorful addition to summer meals, and they can be grown in the home garden. In addition to the typical cantaloupe and honeydew melons, gardeners can grow other varieties such as banana melons. Before Planting: A light, well-drained soil with a pH of 7.0 and a southern exposure is ideal. Good soil moisture is important in the early stages of growth and during pollination when fruits are set. Planting: For direct seeding, sow 1-2 weeks after the last frost when soil is warm, above 70°F, 3 seeds every 18″, 1/2″ deep, thinning to 1 plant/spot. Space rows 6′ apart. For transplanting, sow indoors in 3 weeks before the last frost and transplant outside. Plant 2-3 seeds per pot, about 1/4″ deep. Keep temperature 80-90°F until germination. Handle young plants carefully and never let the soil dry out. Grow seedlings at 75°F. Reduce water and temperature for a week to harden seedlings. When the weather is frost-free, warm, and settled, transplant 2-3′ apart in rows 6′ apart or thin to 1 plant/pot or cell with scissors and transplant 18″ apart. Even hardened melon seedlings are tender. Do not disturb roots when transplanting, and water thoroughly. Watering: Melons need a steady supply of water, and soil needs to be damped but not flooded, approximately 1 inch a week. Fertilizer: Prior to planting, mix aged manure and compost into the soil. Melons are heavy feeders, so fertilize at planting and throughout the growing season with a 5-5-5 or 10-10-10 granular fertilizer. Do not let the granules come in contact with the plant. Days to Maturity: A ripe melon should be very easy to remove from the vine. For a cantaloupe, the netting pattern on the melon becomes more visible and a crack appears at the base of the stem when it was ripe. For a honeydew, the color becomes creamy. Most melon varieties are ready for harvest when the gray-green color begins to change to pale yellow and when a light tug separates the fruit from the vine. Some melon types, like honeydew, Charentais, canary, Spanish, and Crenshaw are overripe by the time the stem can be tugged from the fruit. (See each variety for days to maturity) Harvesting: Melons must be cut from the vine. All melons should be stored at 90% relative humidity. Store ripe melons at 40-45°F for 7-14 days. Harvesting at the right time is very important with melons. Fruits should be picked when fully ripe. Commercial growers harvest before melons are ripe, forcing them to ripen off the vine. However, the last few days of ripening on the vine put a lot of sugars into the melon; bottom line is that melons taste significantly better when vine-ripened. How do you know when melons are ripe? Canary melons should be firm, smooth to the touch, and have a bright yellow color with no hint of green. The stem area should be slightly soft, and the fruit will have a delicate scent. Fruits may ripen off the vine a little, but never develop peak flavor if harvested too early. Tips: Cut off watering 1 week before harvest. This will give a more flavorful, concentrated melon. Overwatering before harvest can cause a bland taste. http://springsofeden.myshopify.com/products/golden-juan-canary-super-sweet-melon-seeds-organic-heirloom-non-gmo-b25
#Vegetable seeds#Heirloom melons#Non-GMO Seeds#organic seeds#Cantalopue Seeds#Fruit Seeds#Melon Seeds#Canary Melon#honeydew#kajari melon#Juane Canary Melon#Juan Canary Melon#Golden Canary
1 note
·
View note
Last Seen Blogs

littleicky7
Sideblog


woobenflargen
Al McWhiggin

eslweasel
in your dr e a m s

green-and-grass
Untitled